Crochet tops have a way of feeling both creative and stylish at the same time. They can be casual enough for everyday wear, yet polished enough to look like something you would find in a boutique display. That is part of what makes them such a rewarding project: with the right stitch pattern, fit, and finishing details, a handmade top can feel elevated, wearable, and completely unique.
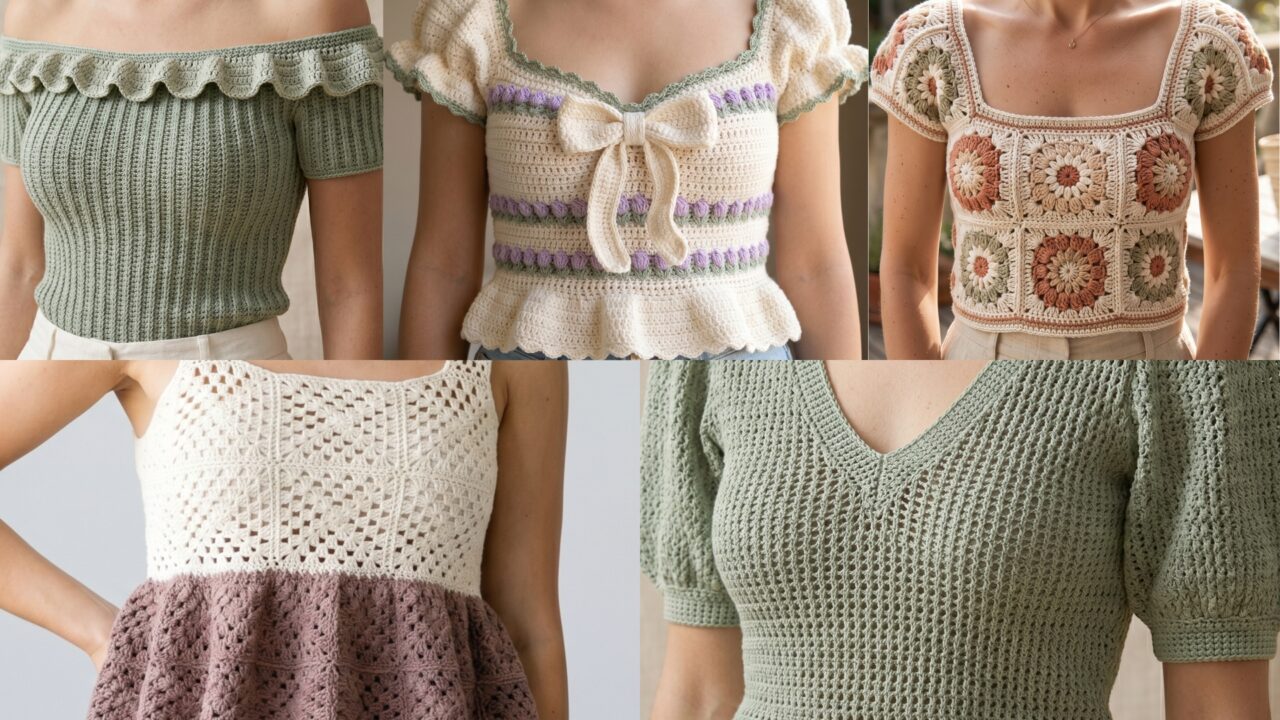
What makes boutique-style crochet tops especially appealing is the balance between structure and softness. A granny square top can feel artistic and modern. A milkmaid top can feel feminine and romantic. An off-the-shoulder ruffle top adds a flattering, dressed-up look. A V-neck puff sleeve top feels chic and refined. A peplum top brings in shape and movement. Each one has a different mood, but all of them can become beautiful wardrobe pieces when made with care.
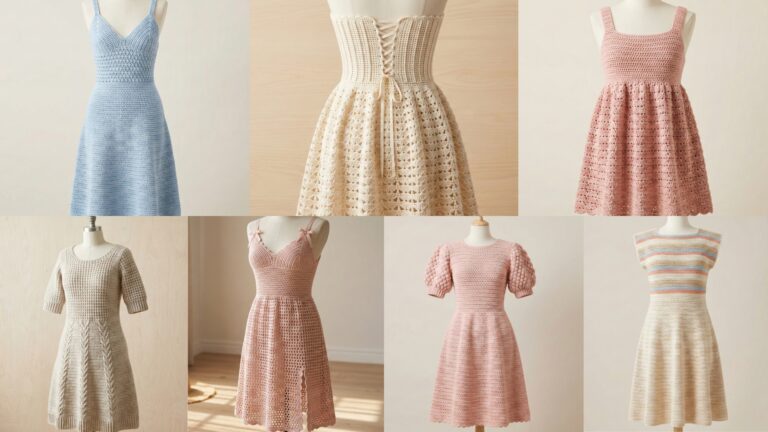
In this post, you will find five crochet top patterns that look boutique-made, with detailed step-by-step guidance and practical tips to help you get a polished result. Whether you are making a top for summer outings, layering, special occasions, or just because you love creating wearable pieces, these patterns are a wonderful place to begin.
1. Crochet African Flower Granny Square Top Pattern
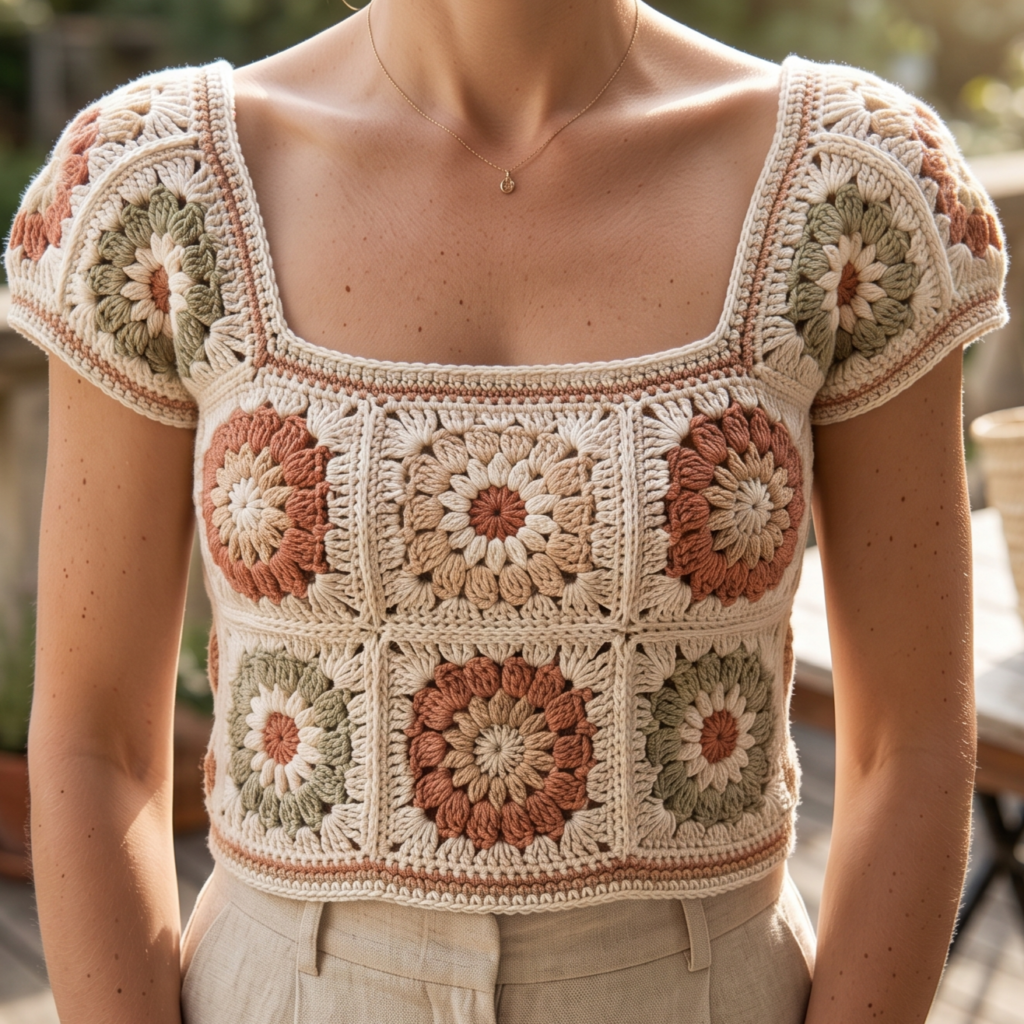
The African flower granny square top is a classic example of how motif-based crochet can feel both artistic and fashion-forward. The flower motif gives the top a vibrant handmade look, while the repeated square construction creates structure and visual interest. It is especially lovely if you want a top that feels colorful, textured, and one of a kind.
Step-by-step guide
Step 1: Choose your color palette
Start by selecting colors that complement each other well. African flower motifs often look beautiful in a mix of soft neutrals, earthy shades, or bold contrast colors. Decide whether you want the top to feel playful, boho, or more understated and elegant.
The color palette sets the overall mood of the top.
Step 2: Crochet the African flower motifs
Begin by making individual flower squares. These motifs usually start in the center and grow outward in rounds, forming a flower-like shape inside a square frame. Keep your tension consistent so each motif stays the same size.
Uniform motifs make assembly much easier.
Step 3: Make enough squares for the top
Depending on your size and style, you will need enough motifs for the front, back, and possibly sleeves or straps. Lay them out as you go so you can visualize the shape of the top before joining everything together.
Planning the layout helps the top fit properly.
Step 4: Join the motifs into panels
Sew or crochet the motifs together to form front and back panels. Make sure the motifs line up neatly and the seams are secure. A clean join will make the top look much more polished and boutique-like.
The joining stage creates the garment structure.
Step 5: Shape the neckline and armholes
Once the panels are assembled, shape the neckline and armholes. This is where the top begins to feel like a wearable garment instead of a flat patchwork piece. Keep the shaping smooth and balanced so the top sits comfortably on the body.
Good shaping makes the top flattering and wearable.
Step 6: Add straps or sleeves
Depending on your style, you can add simple straps, short sleeves, or leave it sleeveless. Thin straps give the top a light summer feel, while short sleeves can make it feel slightly more structured. Keep the style consistent with your chosen aesthetic.
The finishing style changes the whole look.
Step 7: Finish the edges
Add a clean border around the neckline, armholes, and hem. This helps frame the floral motifs and makes the top look more complete. A simple edging often works best because it lets the motifs remain the focus.
Step 8: Block the top
Blocking is especially helpful for motif garments because it evens out the squares and improves the overall drape. Shape the top carefully while it dries so it lays nicely on the body.
Helpful tips
This top looks especially beautiful in colorful boho combinations or soft vintage tones. If you want a more boutique feel, keep the joins neat and the edges simple so the floral motifs do the work.
2. Crochet Tulip Stitch Milkmaid Top Pattern
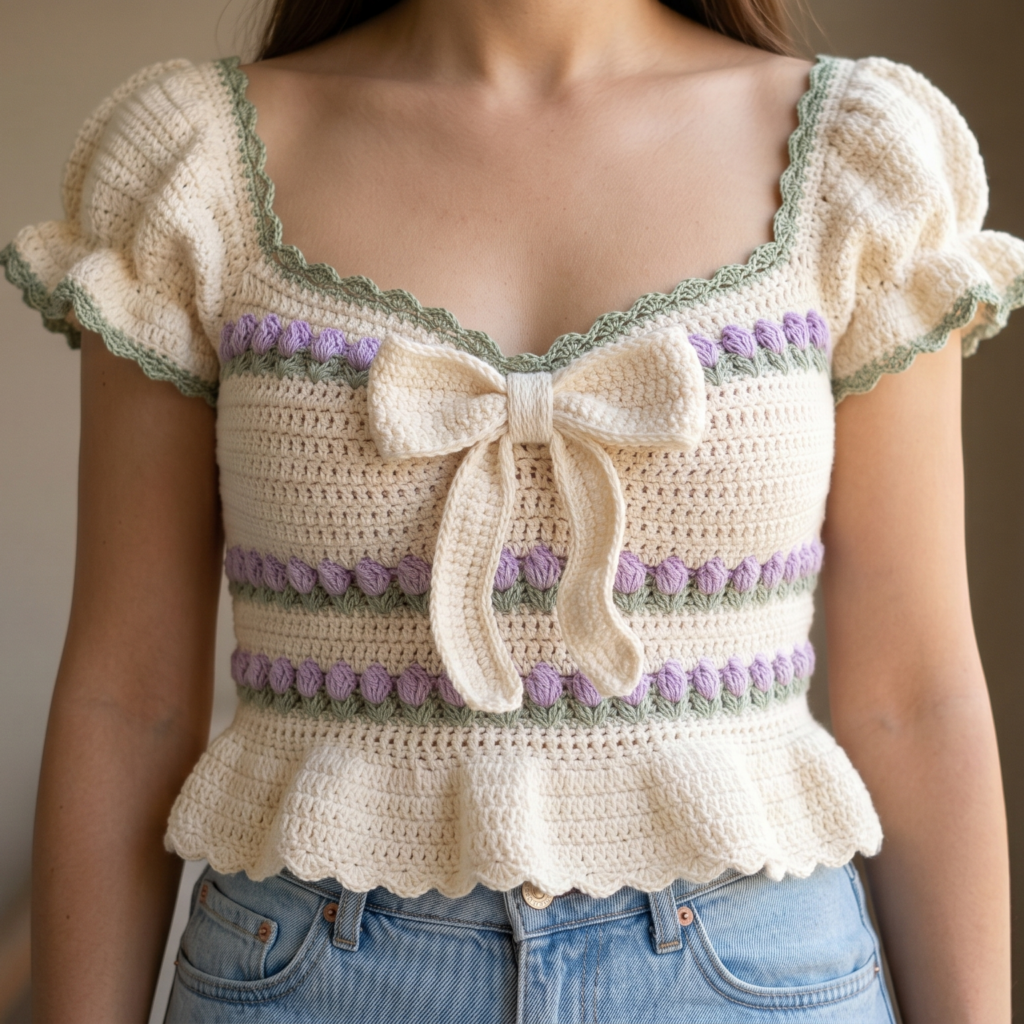
The tulip stitch milkmaid top is soft, romantic, and very flattering. The milkmaid silhouette gives it a feminine shape, while the tulip stitch adds lovely texture that feels sweet and delicate. It is a great choice if you want a top that looks elegant but still feels handmade and comfortable.
Step-by-step guide
Step 1: Pick a soft, feminine yarn
Choose a yarn that feels light and smooth against the skin. Cotton blends or soft acrylics work beautifully for this design. Pastels, cream, blush, or muted floral tones are perfect if you want the milkmaid style to feel soft and boutique-inspired.
A gentle yarn enhances the romantic shape.
Step 2: Measure the bust and torso
Since milkmaid tops are fitted through the upper body, accurate measurements matter. Measure around the bust, underbust, and torso length so the top will sit securely and comfortably. This ensures the top stays flattering without feeling too tight.
A well-measured fit makes the top wearable.
Step 3: Crochet the bodice base
Begin with the bodice section using a stitch that creates structure. The top should hold its shape around the bust and underbust, so a dense base is helpful. Keep the rows even and neat so the tulip stitch can sit beautifully on top.
The bodice supports the overall shape.
Step 4: Work the tulip stitch
Add the tulip stitch pattern across the bodice or lower section. The stitch should create a floral-like texture with gentle raised details. Keep the pattern balanced so the texture looks delicate rather than crowded.
The tulip stitch gives the top its charm.
Step 5: Shape the neckline
Milkmaid tops often have a sweetheart or gently curved neckline. Shape this area carefully so it frames the upper body beautifully. The neckline is one of the most important details because it gives the top its romantic style.
A flattering neckline makes the whole piece feel boutique-made.
Step 6: Add sleeves or shoulder ties
You can create short puff sleeves, cap sleeves, or slim shoulder ties depending on the look you want. Shoulder ties are especially pretty for a milkmaid top because they enhance the soft, feminine vibe.
The shoulder finish defines the style.
Step 7: Finish the hem and edges
Add a neat border around the neckline, sleeves, and hem. A gentle scallop or clean edge can give the top a polished look. Make sure the finishing is symmetrical so the top appears intentional and refined.
Step 8: Block for shape
Blocking helps the tulip stitch open and the neckline settle correctly. It also makes the top look smoother and more polished once worn.
Helpful tips
This top is lovely in cream, pale pink, or soft lavender. If you want a more modern version, try a neutral tone with subtle texture. The milkmaid silhouette already feels special, so a simple finish can make it look very high-end.
3. Ribbed Off-the-Shoulder Crochet Top with Ruffle Trim Pattern
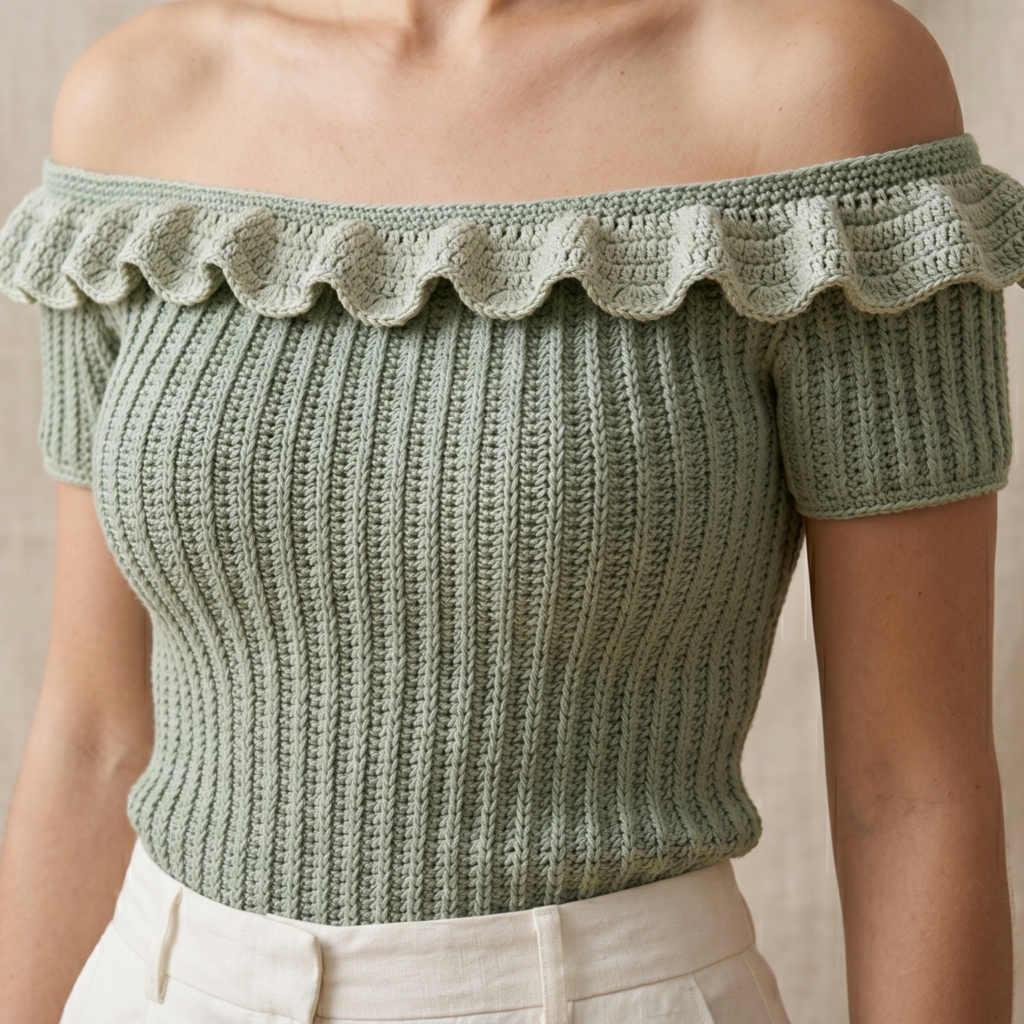
This off-the-shoulder top feels trendy, flattering, and a little dressy. The ribbed texture gives the top structure and stretch, while the ruffle trim adds a soft feminine finish. It is a great choice if you want something that looks chic and polished enough for outings or summer evenings.
Step-by-step guide
Step 1: Choose a stretchy yarn
Because the top needs to fit close to the body, choose yarn with good stretch and recovery. Cotton blends or light acrylics often work well. A yarn that is too stiff will make the off-the-shoulder fit less comfortable.
The yarn needs to support both stretch and shape.
Step 2: Measure the upper body
Measure the bust, shoulders, and torso length carefully. Off-the-shoulder tops rely on fit, so it is important to know where the top will sit and how much ease you need. Make sure the neckline will rest comfortably below the shoulders.
A good fit keeps the top in place.
Step 3: Crochet the ribbed body
Start with a ribbed stitch pattern that creates vertical texture and allows for stretch. Ribbing gives the top a fitted, boutique-like look while still keeping it comfortable. Keep the rows even so the ribbing looks smooth.
The ribbing is what gives structure.
Step 4: Shape the off-the-shoulder neckline
Create the neckline so it sits lower on the shoulders. This can be done by adjusting the top edge and leaving enough space for it to drape naturally. The neckline should feel soft and secure, not tight.
The neckline is the main style feature.
Step 5: Add the ruffle trim
At the top edge, crochet a ruffle border using increased stitches or a shell-style repeat. The ruffle should be soft and full enough to frame the shoulders without overwhelming the top. Keep it balanced so the shape stays flattering.
The ruffle makes the top feel boutique-ready.
Step 6: Finish the sleeves or upper edge
If your design includes short sleeves or sleeve cuffs, finish them neatly so they match the neckline style. A consistent trim helps the top feel cohesive and polished.
Step 7: Add the hem
Work a clean edge at the bottom of the top so it sits smoothly against the body. The hem should be tidy and balanced with the ribbing above.
Step 8: Block gently
A light block can help the ribbing settle and the ruffle fall nicely. It will also make the neckline look smoother and more refined.
Helpful tips
This top looks especially lovely in soft neutrals, blush, or deep summer tones like olive or navy. If you want a more dramatic boutique look, choose a richer color and keep the ruffle trim neat and full.
4. Chic V-neck Puff Sleeve Hollow Knit Top Pattern
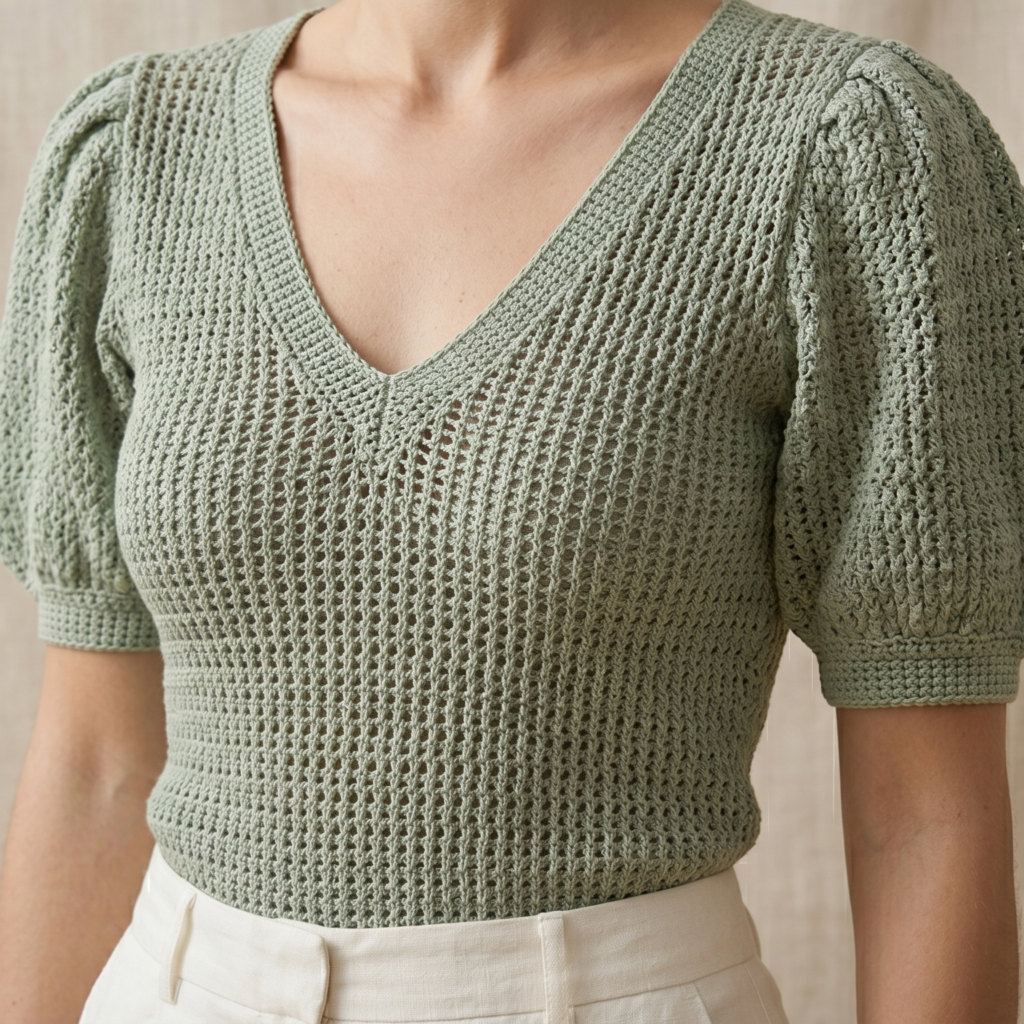
The chic V-neck puff sleeve top feels modern, elegant, and a little fashion-editor chic. The V-neck flatters the neckline, the puff sleeves add volume and softness, and the hollow knit texture keeps the top light and breathable. It is a great pattern if you want a top that feels stylish enough for dressing up.
Step-by-step guide
Step 1: Pick a light breathable yarn
Choose a yarn that drapes well and feels comfortable against the skin. Since the top includes hollow texture and puff sleeves, the fabric should not feel too heavy. Cotton blends and light acrylics are often ideal.
The yarn helps create the airy boutique look.
Step 2: Measure bust, shoulder, and sleeve length
This top depends on fit, especially around the V-neck and sleeves. Measure carefully so the neckline sits well and the sleeves puff in the right place. The shoulders should be balanced so the top feels polished.
Good measurements help create a flattering shape.
Step 3: Crochet the body
Work the body of the top in a hollow knit-style stitch or open texture that still holds structure. Keep the stitch repeat even so the fabric feels intentional and stylish. The body should be fitted enough to flatter but open enough to remain breathable.
The hollow texture makes the top feel modern.
Step 4: Shape the V-neck
Create a clean V-neck opening at the front. This neckline should be smooth and centered so it frames the upper body beautifully. The V-shape is a major part of the top’s elegant look.
The neckline gives the top its polished style.
Step 5: Crochet the puff sleeves
Make the sleeves with a little extra fullness at the upper arm or shoulder. The puff should feel soft and round, not heavy. Taper the sleeves at the wrist or opening if you want them to feel more refined.
The puff sleeves add boutique-style volume.
Step 6: Join sleeves and body
Attach the sleeves securely and make sure the seams are neat. A polished seam is especially important in a top like this because the puff sleeve shape draws attention. Keep the joins clean and balanced.
Step 7: Add borders
Finish the neckline, sleeves, and hem with neat borders. A simple edge will help the puff sleeves and V-neck stand out without making the top too busy.
Step 8: Block carefully
Blocking can help the V-neck settle, the sleeves shape correctly, and the hollow texture open nicely. It makes a big difference in how refined the final top looks.
Helpful tips
This top looks beautiful in cream, sage, soft beige, or muted rose. If you want a more dramatic boutique feel, choose a deep jewel tone and keep the sleeves slightly fuller. The balance of texture and shape makes this pattern feel especially elevated.
5. Crochet Granny Stitch Peplum Top Pattern
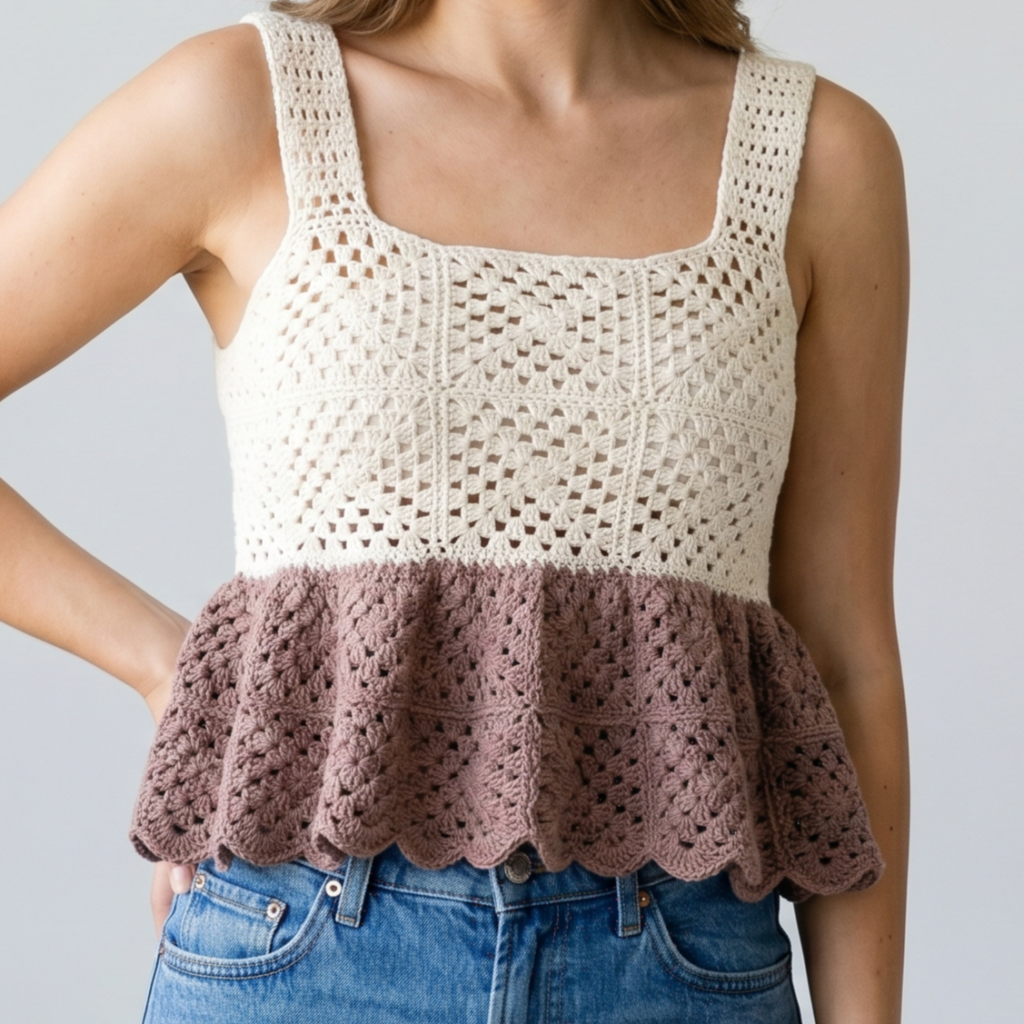
The granny stitch peplum top is playful, flattering, and full of movement. The peplum shape creates a soft flare at the waist, while the granny stitch adds that beloved handmade texture. This is a great pattern if you want something that feels casual, feminine, and boutique-inspired at the same time.
Step-by-step guide
Step 1: Choose a yarn with good drape
Pick yarn that is soft and light enough to let the peplum flare gracefully. Cotton blends or soft acrylic yarns work well. Since the peplum shape is meant to move, the yarn should feel fluid rather than stiff.
The yarn helps the flare fall nicely.
Step 2: Measure bust and waist
The peplum top needs to fit through the bust and upper waist before flaring out. Take accurate measurements so the top is fitted where it should be and loose where the flare begins. This balance is key to a flattering shape.
A proper fit makes the peplum work beautifully.
Step 3: Crochet the bodice
Start with a fitted bodice that hugs the upper body comfortably. Use a stitch pattern that feels sturdy enough to support the flare below. Keep the bodice neat and even so the peplum starts smoothly.
The bodice creates the structured top half.
Step 4: Add the granny stitch section
Work the granny stitch pattern across the lower bodice or into the peplum. The clusters should be evenly spaced so the texture remains balanced. Granny stitch adds a timeless handmade feel that pairs beautifully with the peplum silhouette.
The granny stitch gives the top its charm.
Step 5: Create the peplum flare
As you move into the lower section, increase the fabric so it flares softly at the waist. The peplum should feel light and flowing rather than too wide. A gradual flare looks the most flattering and boutique-like.
The flare defines the silhouette.
Step 6: Shape the straps or sleeves
Choose whether you want the top sleeveless, short-sleeved, or with tiny straps. Keep the upper shape balanced so the peplum has room to stand out. The upper section should feel neat and comfortable.
Step 7: Add clean borders
Finish the neckline, armholes or sleeves, and hem with a clean edge. The borders help the peplum shape feel intentional and polished. A neat finish is especially important here because the flare is the focal point.
Step 8: Block gently
Blocking helps the peplum flare open naturally and improves the overall drape. It also makes the granny stitch texture look smoother and more refined.
Helpful tips
This top is lovely in soft neutrals, pastels, or even a cheerful single color that lets the stitch texture shine. If you want a more boutique feel, keep the bodice fitted and the flare soft and balanced. The result is a top that feels playful but still elegant.
Conclusion
Crochet tops are some of the most satisfying garments to make because they let you blend creativity with wearability. A well-made top can feel personal, stylish, and surprisingly polished, especially when you pay attention to fit, stitch texture, and finishing details. That is what gives a handmade piece its boutique-like quality.
These five crochet top patterns each offer a different look. The African flower granny square top feels artistic and colorful. The tulip stitch milkmaid top is soft and romantic. The ribbed off-the-shoulder ruffle top is trendy and flattering. The chic V-neck puff sleeve hollow knit top feels elegant and modern. The granny stitch peplum top is playful and feminine. Together, they show how much style you can create with crochet while still keeping the process enjoyable and creative.
Whether you are making a top for warm weather, special outings, or simply to expand your handmade wardrobe, these patterns are a wonderful place to start. With the right yarn, careful shaping, and neat finishing, your crochet top can look beautifully boutique-made and become a piece you will love wearing again and again.