Crochet granny squares are one of the most loved motifs in the crochet world because they are simple, versatile, and endlessly customizable. A single square can become a blanket, bag panel, cardigan piece, pillow cover, tote front, wall hanging, or even a decorative accent on its own. That is part of the magic of granny squares: they are small enough to be approachable, but creative enough to feel fresh every time you make one.
What makes modern granny squares especially exciting is how much style you can create with a familiar shape. By changing the stitch pattern, color placement, or texture, a classic square can suddenly feel soft and floral, graphic and geometric, airy and delicate, or bold and contemporary. That means you can still enjoy the comfort of a timeless crochet motif while giving it a completely updated look.
In this post, you will find five modern crochet granny square patterns with a fresh feel. Each one includes detailed step-by-step guidance, practical notes, and finishing tips so you can make squares that look polished and are easy to join into bigger projects. Whether you are making one square for practice or planning a whole set for a blanket or bag, these ideas are a beautiful place to begin.
Quick Notes
Project type: Crochet granny squares
Best for: Blankets, bags, cardigans, cushions, home decor, and motif projects
Skill level: Beginner to intermediate, depending on stitch detail
Hook size: Usually 2.5 mm to 5.0 mm depending on yarn weight and desired structure
Yarn weight: Cotton, cotton blends, DK, or light worsted yarn
Best yarn choice: Cotton yarn for crisp stitch definition and easy blocking
Finished size: Customizable square size depending on the project
Time to complete: 20 minutes to 2 hours per square depending on detail
Helpful stitches: Magic ring, chain, slip stitch, single crochet, half double crochet, double crochet, treble crochet, increases, shell stitches, color changes, granny clusters, motif shaping
Common Materials
Most granny squares use the same basic supplies.
- Yarn in your chosen colors
- Crochet hook suited to the yarn
- Yarn needle
- Scissors
- Stitch markers, optional
- Blocking mats or pins, optional
- Measuring tape
For granny squares, yarn choice matters a lot because stitch definition is part of the appeal. Cotton yarn is especially useful because it keeps edges crisp and helps motifs block neatly. If you are planning to join many squares into one project, try to use yarn with a consistent thickness so all of your squares match well.
1. Crochet Butterfly Granny Square Pattern
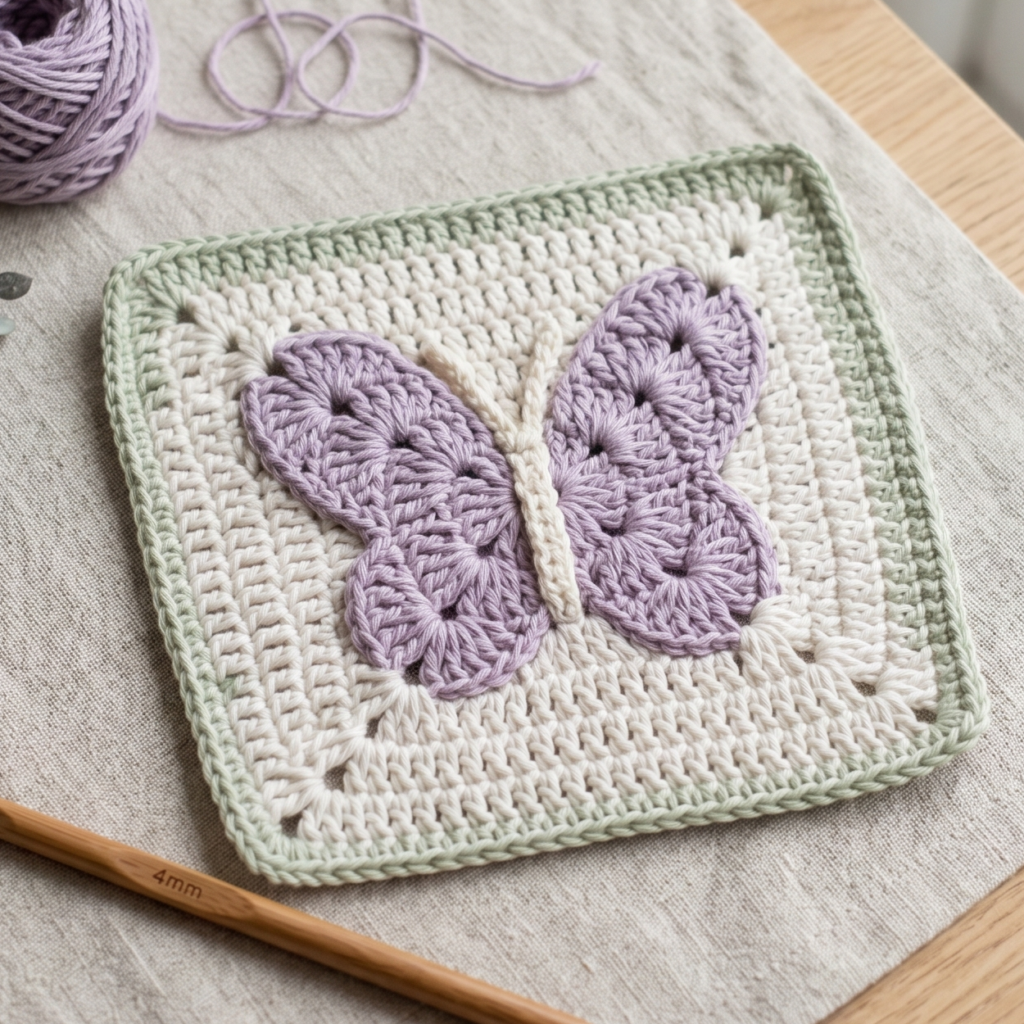
A butterfly granny square feels cheerful, delicate, and full of movement. It adds a soft whimsical look to the traditional square shape, which makes it perfect for spring projects, baby blankets, bags, or colorful home decor. The butterfly motif can be subtle or bold depending on your color choices, giving you a lot of room to personalize the design.
Step-by-step guide
Step 1: Choose your butterfly colors
Start by selecting colors for the butterfly body, wings, and border. You can use realistic butterfly shades like lavender, orange, black, and cream, or choose pastel and playful tones for a softer modern look. The butterfly will stand out best when the wings contrast clearly with the background.
The color palette helps define the butterfly’s style.
Step 2: Start the center motif
Begin with a magic ring or small center circle. This will become the core of the butterfly motif. Keep the center compact and neat so the butterfly appears balanced when the square grows around it.
A tidy center gives the square structure.
Step 3: Build the butterfly wings
Crochet the wings using petal-like or fan-like sections that extend outward from the center. Keep both sides symmetrical so the butterfly feels intentional and well-shaped. The wings should be visible but not so large that they overpower the square.
The wings are the main feature of the design.
Step 4: Add the butterfly body
Create a small narrow body down the center using a line of stitches or a separate appliqué piece. The body should anchor the wings and make the motif read clearly as a butterfly. Keep it simple so the square stays balanced.
The body gives the butterfly its definition.
Step 5: Turn the motif into a square
Once the butterfly is formed, begin adding corner spaces around it. Use granny-style increases or chain corners to shape the motif into a square. This step frames the butterfly and turns it into a usable square for larger projects.
The corners give the design its square shape.
Step 6: Expand with outer rounds
Keep working around the butterfly until the square reaches the size you want. You can keep the border solid or add alternating colors for a more modern look. A simple outer frame often works best because it lets the motif remain the focus.
Step 7: Check symmetry
Lay the square flat and make sure the butterfly sits centered. Adjust the stitches or border if one wing feels larger than the other. A balanced motif will look more polished and professional.
Step 8: Block the square
Block the finished square so the wings open evenly and the corners sit sharp. This is especially helpful if the butterfly wings curve a little from the stitch pattern.
Helpful tips
This square looks beautiful in pastel gradients, soft neutrals, or bright garden colors. If you want a modern version, use only two or three tones and keep the border clean. Butterfly granny squares are especially lovely in baby items, spring blankets, and decorative pillow fronts.
2. Crochet Block Stitch Granny Square Pattern
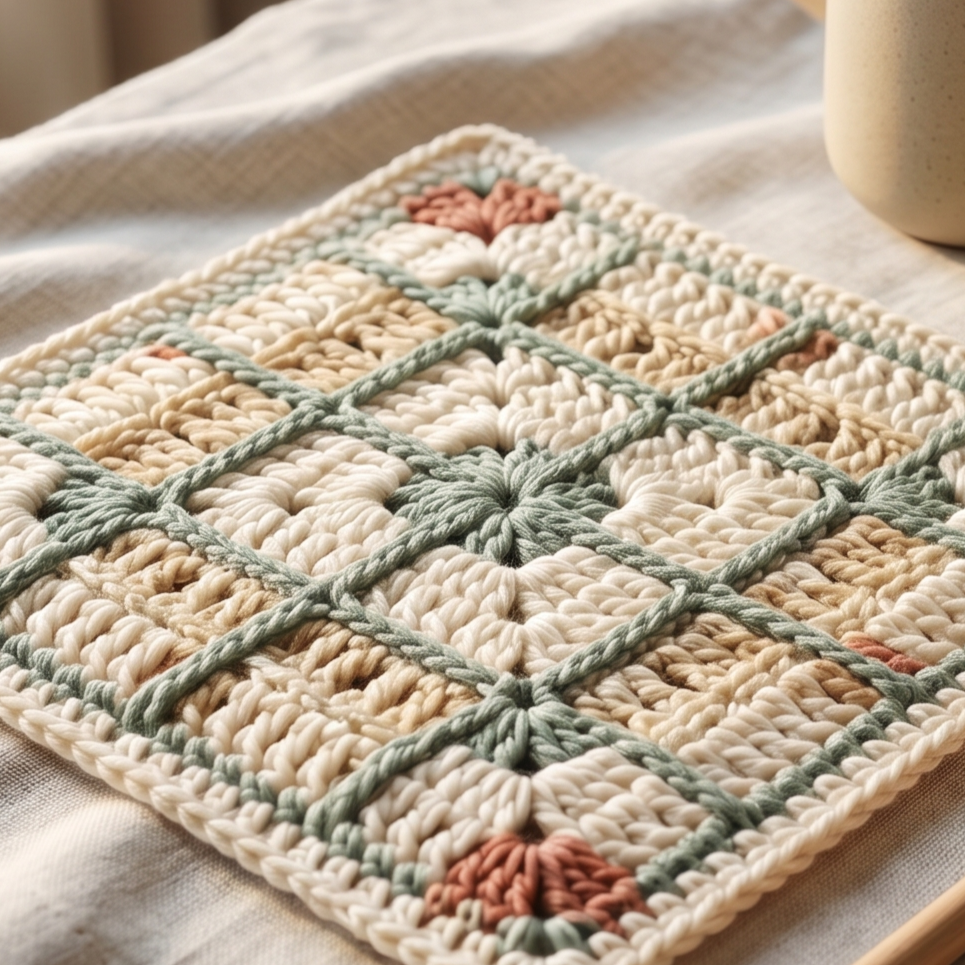
A block stitch granny square has a clean, graphic feel that makes it perfect for modern crochet projects. The stitch pattern creates little stacked block shapes that feel neat and contemporary while still keeping the classic granny square format. It is a great choice if you want a square that looks organized and stylish.
Step-by-step guide
Step 1: Pick a color plan
Choose two or more colors that work well together. Block stitch squares look especially nice with strong contrast, but they can also be subtle and tonal. Decide whether you want a bold modern square or a calm coordinated one.
The color arrangement sets the whole mood.
Step 2: Begin with a center round
Start with a magic ring and make a small base circle. Keep the center neat and compact so the block pattern can grow evenly around it. The center does not need to be large because the structure develops in the following rounds.
A small center keeps the design balanced.
Step 3: Crochet the first block row
Work the block stitch repeat around the center. The pattern usually uses chain spaces and grouped stitches to create the block-like effect. Keep the repeat even so the blocks appear clean and consistent.
The block structure is the main visual feature.
Step 4: Add corner spaces
As the square grows, create corners using chain spaces or grouped stitches. Corners are important because they transform the circular or rounded block pattern into a true square. Make sure each corner is placed evenly so the shape remains symmetrical.
The corners define the square.
Step 5: Repeat the block rows
Continue adding rows of block stitches around the center. Keep the stitches aligned so the square feels orderly and modern. The repeating structure will begin to form a lovely textured pattern with a clean finish.
Repetition creates the graphic look.
Step 6: Change colors neatly
If you are using multiple colors, switch yarn cleanly at the end of a round or row. This helps the blocks remain crisp and easy to read. Strong color changes can make the square feel bold and fashionable.
Step 7: Shape the edges
Watch the outer edges to make sure they stay straight. If the square begins to curve or tilt, check your stitch count. A clean edge will make joining much easier later.
Step 8: Block the square
Blocking helps the blocks lay evenly and sharpens the corners. This step is especially helpful for modern designs because it makes the geometry look more precise.
Helpful tips
Block stitch granny squares are excellent for stash-busting because they look wonderful in contrast colors. If you want a minimal modern style, use neutral tones such as cream, taupe, and gray. For something more lively, combine bright colors with a bold border.
3. Crochet Four Petal Flower Granny Square Pattern
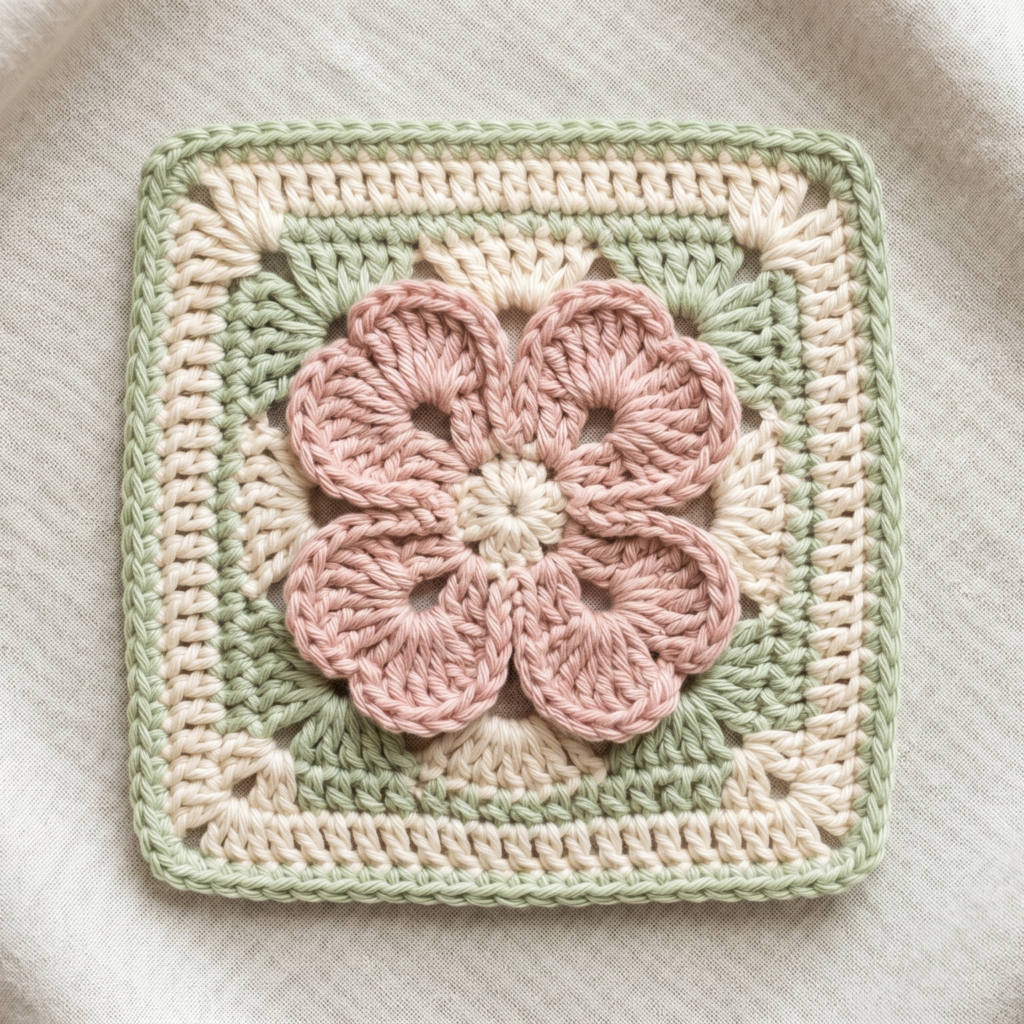
A four petal flower granny square feels sweet, fresh, and modern all at once. The four-petal motif gives the square a floral charm without feeling overly traditional or busy. It is a beautiful design for projects that need a soft, decorative touch while still feeling clean and versatile.
Step-by-step guide
Step 1: Choose gentle flower colors
Pick a color for the flower petals and another for the center and square border. Soft pinks, creams, lilacs, and sage greens all work beautifully. The flower becomes the focal point, so the colors should feel fresh and balanced.
The colors help the flower stand out.
Step 2: Start the flower center
Begin with a magic ring or small center circle. This forms the middle of the flower and gives the motif a neat starting point. Keep the center small so the petals remain the focus.
A tidy center creates a polished look.
Step 3: Crochet the four petals
Work four petal shapes around the center. Each petal should be similar in size and shape so the square feels balanced. Keep the petal edges smooth and rounded for a soft floral appearance.
The petals are what give the square its name.
Step 4: Add a background round
After the flower is complete, crochet a round around it to define the shape and create space for the square corners. This helps frame the flower and prepares the motif for the granny square structure.
The background round makes the motif easier to square off.
Step 5: Form the square corners
Add corners using chain spaces or cluster sections. Make sure each corner appears in the same position so the square grows evenly. The flower should remain centered and visible inside the square.
The corners turn the flower into a usable square.
Step 6: Expand the square
Continue adding outer rounds until the square reaches the size you want. You can use the same color as the border or switch to a second shade for contrast. A soft neutral outer round often looks especially modern.
Step 7: Keep the flower centered
As the square grows, check that the petals remain centered and flat. If the motif shifts, gently adjust your tension or border placement. The flower should stay balanced inside the square frame.
Step 8: Block for shape
Blocking helps the petals open nicely and keeps the square edges straight. This is especially useful if the flower rounds create any slight curl or wave.
Helpful tips
This square is especially lovely in soft spring tones, but it also looks beautiful in muted modern palettes. If you want a more contemporary feel, choose one soft petal color and a strong solid border. Four petal flower squares are ideal for blankets, bags, and cheerful cushion panels.
4. Crochet Tulip Stitch Granny Square Pattern
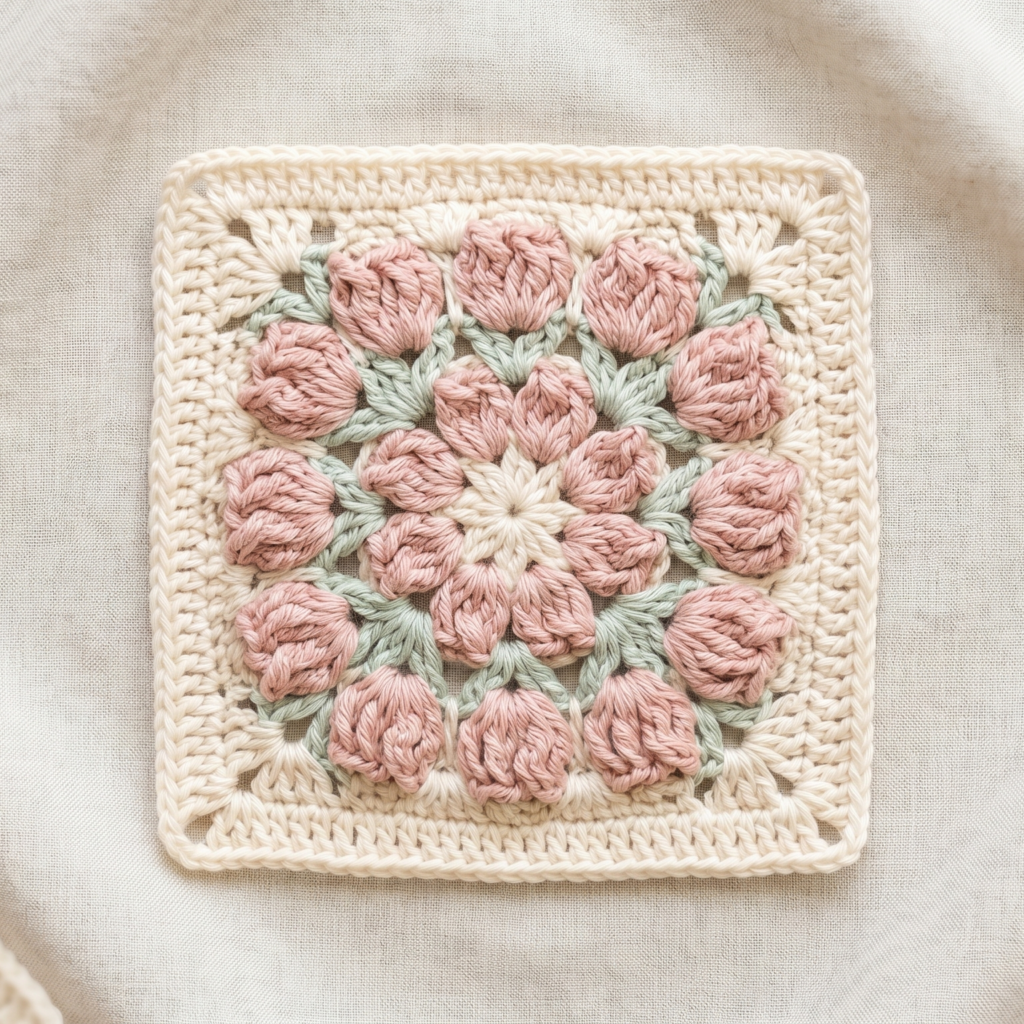
A tulip stitch granny square brings a soft floral texture to the traditional square shape. The tulip stitch is decorative without being overly complicated, which makes it a lovely choice for modern blankets, accessories, and home decor pieces. It creates a fresh, gentle look that still feels practical and easy to combine with other squares.
Step-by-step guide
Step 1: Pick a tulip-inspired palette
Choose colors that feel floral and fresh. Soft pink, lilac, cream, mint, or pale yellow can all work beautifully. Since tulip stitch often has a raised petal-like effect, a clear contrast between rounds can make the texture stand out.
The palette helps the texture feel more defined.
Step 2: Crochet a compact center
Start with a small circular center or ring. Keep it neat and tight so the tulip stitch can build outward smoothly. A tidy center gives the motif a strong foundation.
The center supports the floral texture.
Step 3: Work the tulip stitch repeat
Begin the tulip stitch pattern around the center. This stitch often uses layered clusters or petal-like groups that create a soft raised texture. Keep the repeat consistent so the tulip effect is clear and even.
The tulip stitch is the star of the square.
Step 4: Add square shaping
Once the tulip texture is established, create corner spaces to shape the motif into a square. The corners should be added in the same places on each side so the square remains balanced and flat.
The corners turn the motif into a granny square.
Step 5: Build outer rounds
Keep adding rounds around the tulip center until the square reaches the desired size. You can continue with the same stitch pattern or simplify the outer border for a cleaner finish. A plain outer border often helps the tulip texture stand out more.
Step 6: Check stitch alignment
Make sure the tulip rows remain even and the corners are clearly defined. If the square starts to curve, adjust your tension or stitch count. A well-aligned pattern will look more refined.
Step 7: Finish with a border
A simple border can frame the tulip texture beautifully. If you want a softer look, choose a border color that matches one of the inner shades. If you want the motif to stand out more, use a contrasting color.
Step 8: Block the square
Blocking is very helpful for tulip stitch because it opens the floral texture and sharpens the square’s shape. It gives the motif a more finished appearance.
Helpful tips
Tulip stitch squares are lovely in spring-inspired color palettes, but they also work well in soft modern neutrals. If you want the square to feel more current, keep the border simple and let the stitch texture do the talking.
5. Crochet Solstice Granny Square Pattern
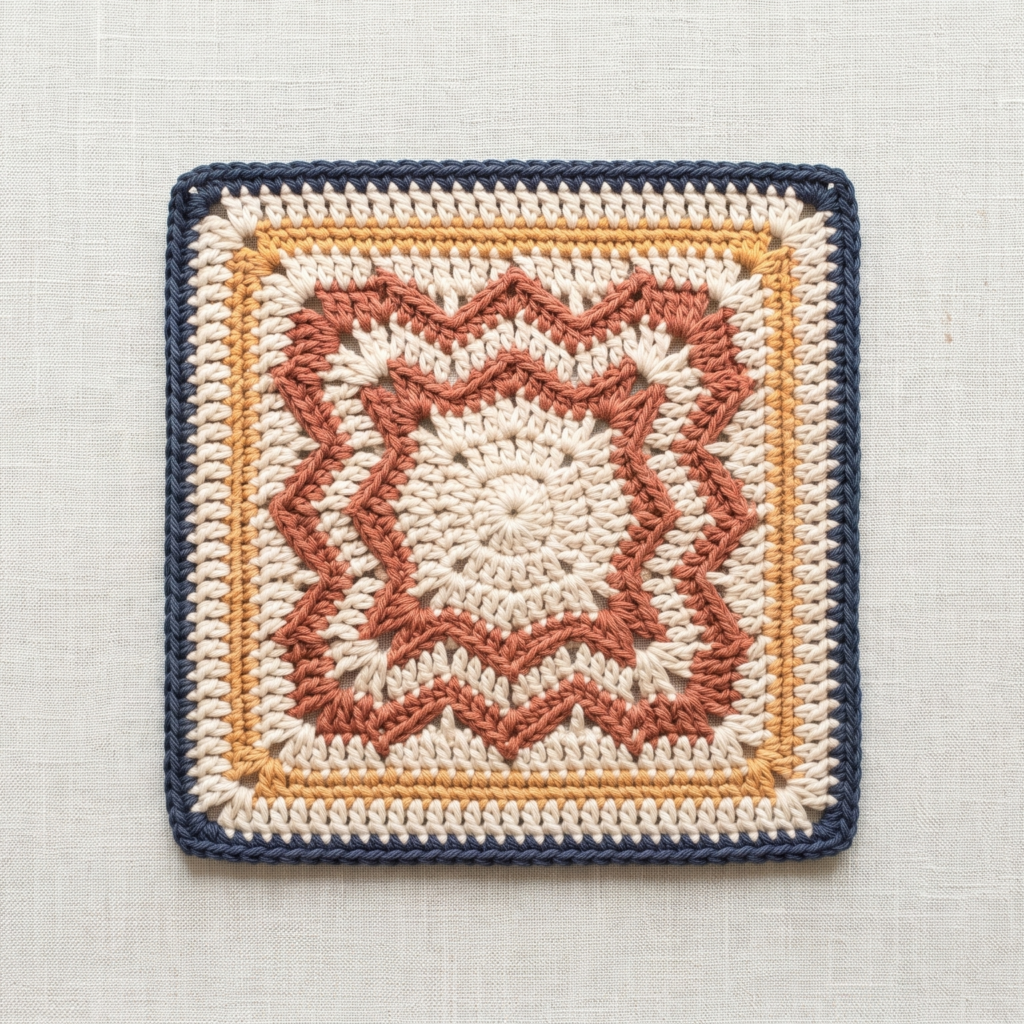
A solstice granny square feels bold, warm, and modern. It often uses radiant shapes, layered rounds, or structured color placement that gives it a sun-like or celestial feel. This square is perfect if you want something with a strong visual impact that still fits beautifully into a larger project.
Step-by-step guide
Step 1: Choose radiant colors
Pick colors that feel sunlit, earthy, or celestial. Gold, rust, cream, deep blue, terracotta, and amber all work beautifully. The solstice style often looks best when the palette feels rich and intentional.
The colors help set the celestial mood.
Step 2: Start the central motif
Begin with a magic ring or solid center that will become the heart of the square. Keep the center tight and balanced, since the surrounding rounds will radiate outward from it. The center can be round or slightly textured depending on the look you want.
A strong center anchors the design.
Step 3: Build radiating rounds
Crochet rounds that extend outward from the center in a sunburst or layered pattern. The stitches should feel evenly spaced so the design radiates clearly. This gives the square its solstice-inspired energy.
The radiating rounds create the visual effect.
Step 4: Shape the square
As the motif expands, begin adding corners so the shape becomes square. Make sure the corners are aligned evenly and the sides stay balanced. The transition from circle to square should feel smooth.
The square framing makes the motif usable.
Step 5: Add layered detail
You can include small layered rows, contrast colors, or subtle texture changes to make the square feel more modern. Keep the details organized so the square feels bold but not crowded.
Layering creates depth and interest.
Step 6: Expand until complete
Continue the outer rounds until the square reaches the size you want. A solstice square often looks especially good when it has a strong border that frames the center motif clearly. Keep your edges straight and even as you work.
Step 7: Check the geometry
Lay the square flat and make sure the center is well balanced with the corners. If the design leans, lightly adjust your tension or choose a slightly cleaner border for the next square in the set.
Step 8: Block carefully
Blocking is very helpful for solstice-inspired motifs because it sharpens the shape and makes the radiating pattern stand out. It gives the whole square a polished, finished look.
Helpful tips
Solstice granny squares are beautiful in warm earthy palettes, but they can also look stunning in deep jewel tones. If you want a more contemporary look, choose a limited color palette and keep the outer border simple and strong.
Conclusion
Modern granny squares are one of the best ways to refresh a classic crochet motif. They keep the familiar charm of the granny square while giving you room to explore texture, color, and shape in new ways. That makes them especially rewarding for crocheters who want to make something useful and stylish at the same time.
These five patterns each bring a different look. The butterfly granny square feels soft and whimsical. The block stitch square is graphic and structured. The four petal flower square is fresh and floral. The tulip stitch square brings delicate texture. The solstice square feels bold and radiant. Together, they show how versatile a granny square can be when you approach it with a modern eye.
Whether you are making a single square for practice or planning a full project with many motifs, these designs give you plenty of inspiration to work with. With the right yarn, careful stitching, and neat blocking, your crochet granny squares can look polished, fresh, and ready to become part of something beautiful.