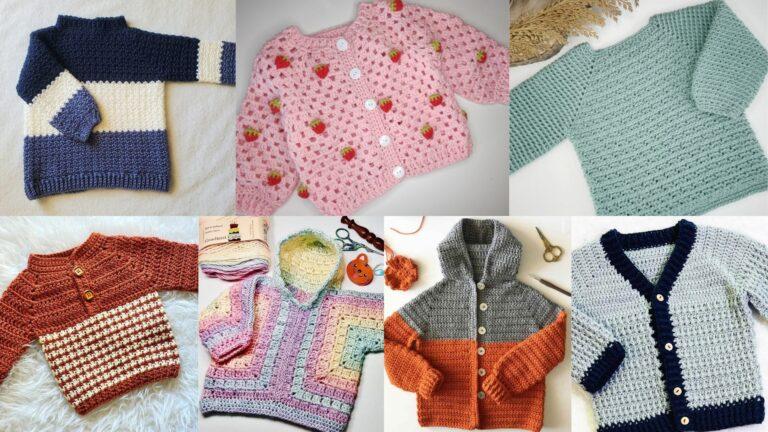
A crochet cardigan is one of the most useful pieces you can make because it works across seasons, styles, and occasions. It can be light enough for spring mornings, cozy enough for chilly evenings, and stylish enough to wear as part of an everyday outfit. That balance of comfort and versatility is what makes cardigans such a favorite project for crocheters. They are practical, but they also give you plenty of room to express your style through texture, shaping, buttons, sleeves, and color.
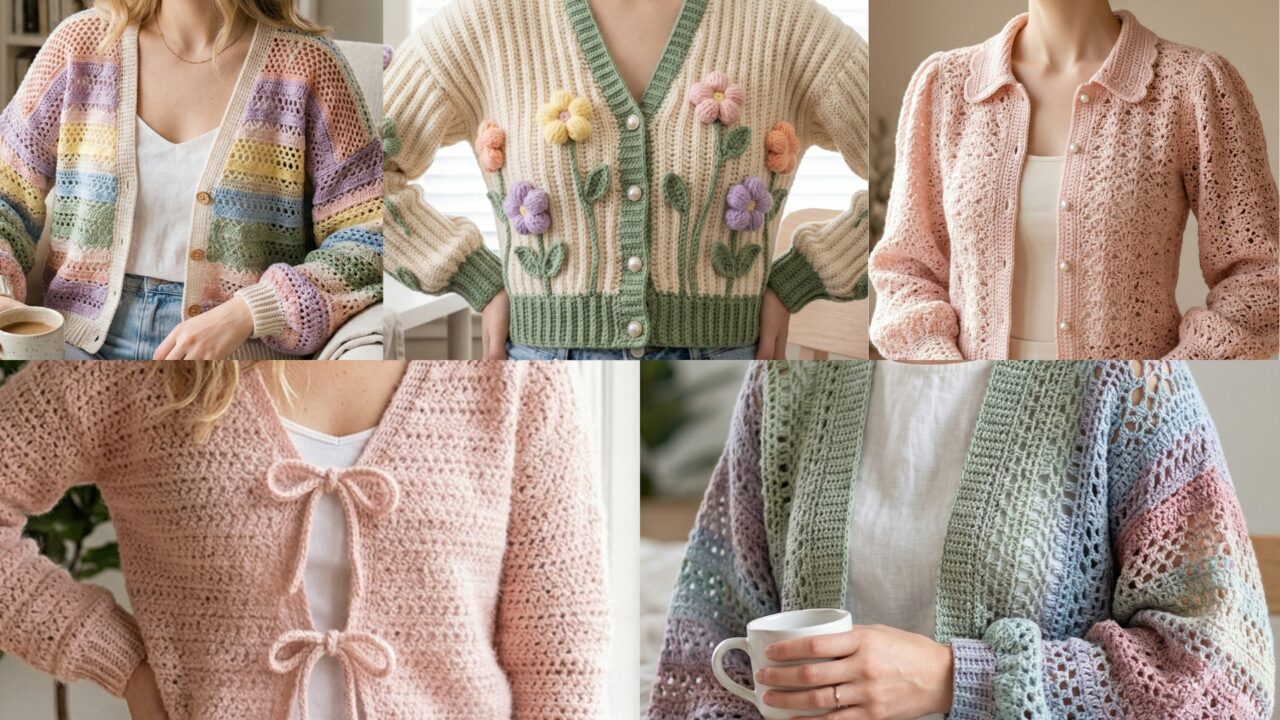
What makes crochet cardigans especially rewarding is that each design can feel completely different even when the construction is similar. One cardigan may look soft and romantic with lace and puff sleeves. Another may feel relaxed and airy with a cocoon shape. A striped cardigan can feel playful and casual, while a floral buttoned cardigan brings in a sweet handmade charm. That means you can make one for every season, every mood, and every wardrobe need.
In this post, you will find five crochet cardigan ideas with detailed step-by-step guidance, helpful notes, and practical finishing tips. Each design is written to be easy to follow while still giving you enough detail to help you create a cardigan that looks polished, feels comfortable, and becomes a piece you will want to wear again and again.
Quick Notes
Project type: Crochet cardigans
Best for: Everyday wear, layering, gifts, handmade wardrobes, and all-season style
Skill level: Beginner to intermediate, depending on shaping and detail
Hook size: Usually 4.0 mm to 6.0 mm depending on yarn weight and drape
Yarn weight: DK, worsted, sport, or light bulky yarn
Best yarn choice: Soft cotton blends, acrylic blends, or light wool blends with good drape
Finished size: Customizable to fit, usually relaxed or slightly oversized
Time to complete: Several days to a few weeks depending on size and stitch detail
Helpful stitches: Chain, slip stitch, single crochet, half double crochet, double crochet, granny stitch, lace stitches, post stitches, increases, decreases, seaming, ribbing, button bands, motif joining
Common Materials
Most crochet cardigans use a similar set of supplies.
- Yarn in your chosen colors
- Crochet hook suited to the yarn
- Yarn needle
- Scissors
- Stitch markers
- Measuring tape
- Buttons or closures
- Optional blocking tools
- Optional row counter
For cardigans, yarn choice matters a lot because the fabric needs to drape well while still holding shape. A yarn that is too stiff can feel heavy, while one that is too loose may stretch out over time. A soft yarn with a little structure usually gives the best balance for a wearable cardigan.
1. Crochet Lilian 2 Row Repeat Bow Tie Cardigan Pattern
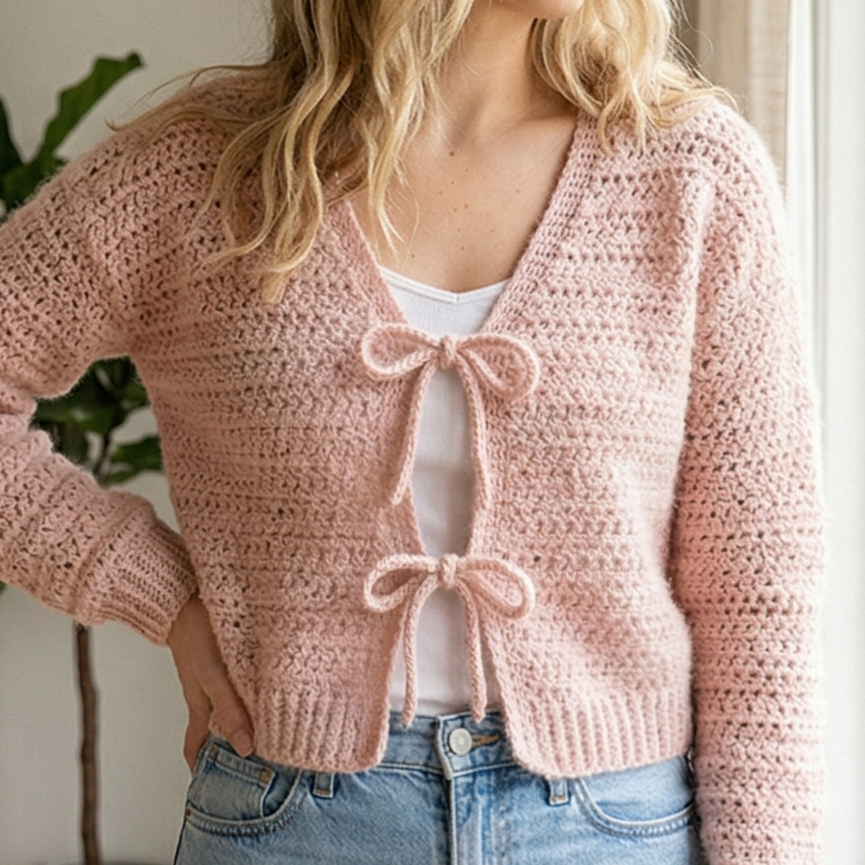
The Lilian 2 row repeat bow tie cardigan is a lovely choice if you enjoy simple repeats that still create a beautiful result. The bow tie detail makes it feel feminine and soft, while the two-row repeat keeps the stitchwork approachable and relaxing. This is the kind of cardigan that feels elegant without being overly complicated.
Step-by-step guide
Step 1: Choose a soft yarn and color
Start with a yarn that has good drape and feels gentle on the skin. A soft pastel, a warm neutral, or a gentle dusty tone can work beautifully for this design. Since the cardigan has a bow tie detail, a color that feels delicate and wearable will complement the shape nicely.
The yarn should support the cardigan’s soft look.
Step 2: Take your measurements
Measure the bust, shoulder width, sleeve length, and desired cardigan length. Since the cardigan is meant to be worn open or loosely tied, it should have enough ease to feel comfortable. This is especially important if you want the bow tie to sit neatly at the front.
A good fit helps the cardigan drape beautifully.
Step 3: Work the two-row repeat
Begin with the cardigan body and follow the two-row repeat pattern. Keep your stitches even and steady so the texture remains consistent from row to row. A simple repeat is one of the reasons this cardigan is so enjoyable to make because it gives structure without feeling repetitive in a boring way.
The repeat is what creates the fabric’s rhythm.
Step 4: Shape the front panels and back
Once the body reaches the right size, shape the front panels and back section. Keep the front opening balanced so the cardigan sits well when tied. If you are making panels, be sure they align cleanly at the shoulders and side seams.
The shaping determines how the cardigan hangs.
Step 5: Crochet the sleeves
Make the sleeves in the same repeat or a simpler matching stitch. The sleeves should feel slightly relaxed so they match the cardigan’s soft style. Add shaping as needed at the wrist if you want a neater finish.
The sleeves help tie the whole garment together.
Step 6: Add the bow tie front
Crochet or attach the bow tie at the front opening. This can be a narrow tie that closes the cardigan or a decorative bow attached at the waistline. Make sure it is centered and secure so it looks intentional rather than floppy.
The bow tie is the signature detail.
Step 7: Finish the edges
Add borders along the front opening, cuffs, and hem. A clean edge helps the cardigan look polished and finished. If you want the bow detail to stand out more, keep the borders simple and smooth.
Step 8: Block lightly
A light block can help the stitches settle and improve the drape. This is especially helpful for a cardigan with ties because it helps the front panels sit evenly.
Helpful tips
This cardigan looks especially lovely in blush, cream, lilac, or soft sage. If you want a more everyday version, choose a neutral tone and let the bow detail do the work. The two-row repeat makes it a very approachable project for someone who wants a pretty cardigan without a complicated stitch count.
2. Crochet Lacy Collared Puffy Sleeves Buttoned Cardigan Pattern
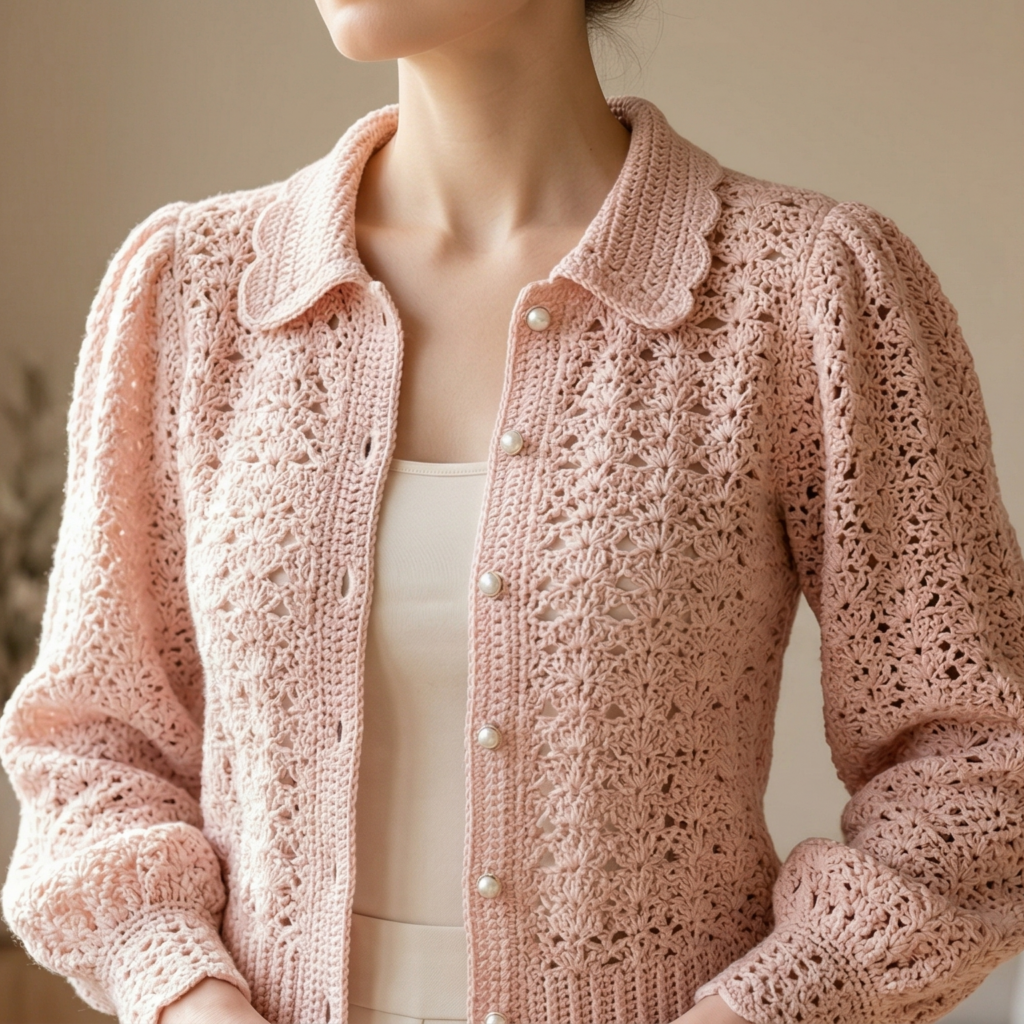
This cardigan has a romantic and refined look thanks to its lacy texture, collared neckline, puffy sleeves, and buttoned front. It feels dressy enough for special outfits but still comfortable enough for everyday layering. It is ideal if you want a cardigan that feels feminine and polished.
Step-by-step guide
Step 1: Select a lightweight yarn
Because this design includes lace and puff sleeves, a yarn with good drape is important. Choose a soft cotton blend or light acrylic that will allow the lace to open up without becoming too stiff. A light, elegant yarn will help the cardigan feel graceful.
The yarn choice is especially important for lace.
Step 2: Measure for a comfortable fit
Take measurements for the bust, waist, shoulders, and sleeves. Because the cardigan has a collar and buttons, the front opening should sit comfortably without pulling. The sleeves should also have enough room for the puff shape to sit nicely.
Good measurements help the cardigan feel tailored.
Step 3: Create the lace body
Work the body using a lace stitch pattern that gives the cardigan a delicate texture. Openwork rows, shell stitches, or simple lace repeats can all work well. Keep the stitch pattern even so the cardigan looks balanced and the lace does not become too loose.
The lace body is the main visual feature.
Step 4: Shape the collar
After the body is complete, add a collar around the neckline. This may be a folded collar, a shaped lace collar, or a simple decorative edging that creates the appearance of a collar. Keep it soft and structured enough to frame the face.
The collar gives the cardigan a vintage-inspired finish.
Step 5: Crochet the puffy sleeves
Make the sleeves with gentle increases so they become fuller near the upper arm. The puff should feel soft and rounded, not bulky. If needed, taper the sleeves at the wrist so they close more neatly and feel comfortable.
The puff sleeves add elegance and character.
Step 6: Add button bands
Crochet sturdy front bands where the buttons will go. These bands should be reinforced enough to support closures without stretching too much. Keep the edges neat and even so the buttons align properly.
A strong button band keeps the cardigan functional.
Step 7: Attach buttons
Choose buttons that suit the romantic style of the cardigan. Small pearl-like buttons, soft neutral buttons, or vintage-style buttons all work beautifully. Place them evenly so the front closes smoothly.
The buttons complete the polished look.
Step 8: Finish and block
Block the cardigan gently so the lace opens and the collar sits well. This step is especially helpful for ensuring the sleeves and front edges lie neatly. A blocked lace cardigan always looks more refined.
Helpful tips
This cardigan looks especially beautiful in ivory, blush, dusty rose, or soft gray. If you want it to feel more romantic, choose pearl-style buttons. If you want a more everyday version, use a soft neutral yarn and keep the collar simple.
3. Crochet Whimsi Striped Lace Cardigan Pattern
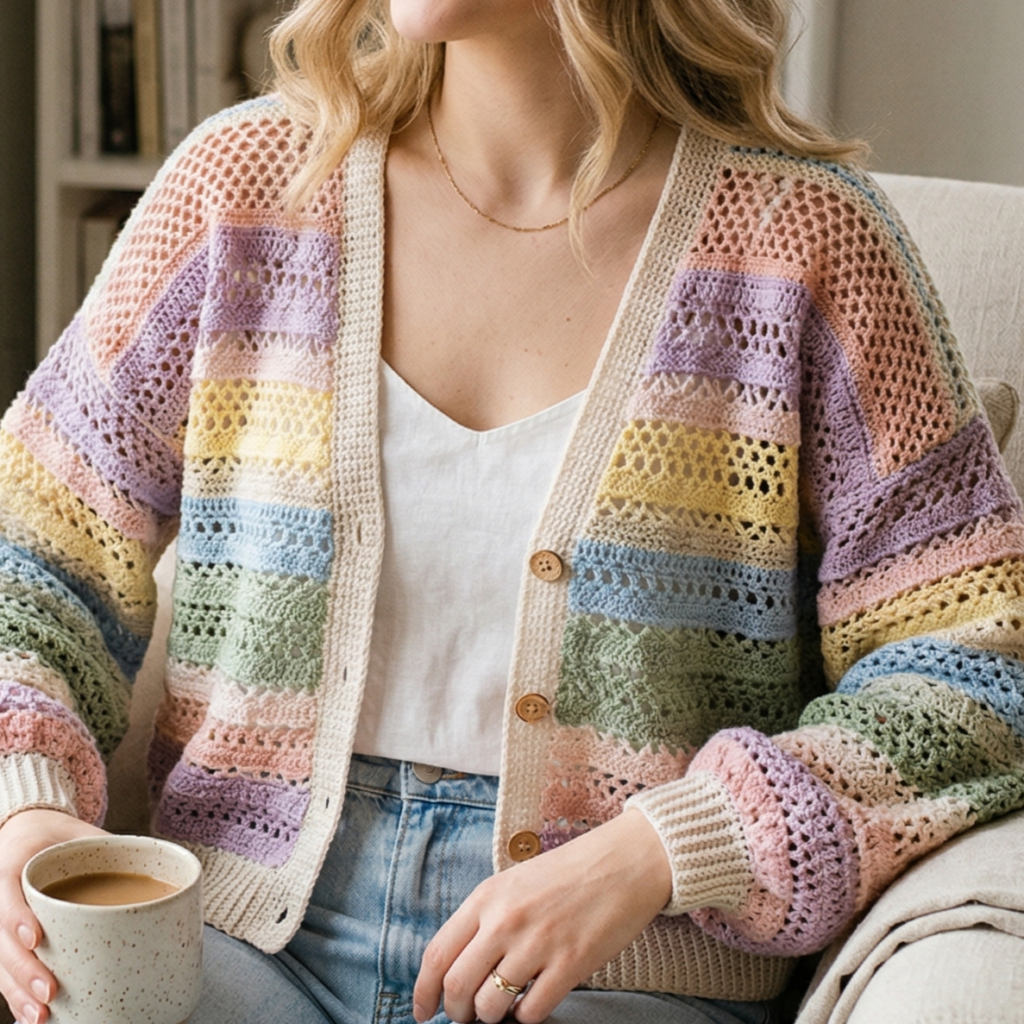
The Whimsi striped lace cardigan is cheerful, light, and full of personality. The striped design keeps it playful, while the lace adds softness and a touch of delicacy. This is a great cardigan if you want something fun and wearable that still feels airy and elegant.
Step-by-step guide
Step 1: Plan the stripe colors
Choose a palette that feels light, whimsical, and coordinated. You can use soft pastels, earth tones, or a mix of cheerful shades depending on your style. Because the cardigan has lace elements, the stripes should feel harmonious rather than too harsh.
The colors define the whimsical feel.
Step 2: Choose the lace repeat
Decide which lace pattern you want to use between the stripes. It can be a simple openwork row, a shell repeat, or a delicate mesh. The lace should be light enough to feel airy but clear enough to show up between color changes.
The lace adds softness to the stripes.
Step 3: Work the body panels
Crochet the front, back, and sleeves using the chosen striped lace repeat. Keep the stripe spacing consistent if you want a balanced look. The lace rows should appear evenly across the body so the cardigan stays polished.
The body is where the color play shines.
Step 4: Keep the stripe transitions neat
When changing colors, carry yarn cleanly and join colors neatly. Because stripes draw attention, sloppy joins can interrupt the look. Clean color changes make the cardigan feel more finished and intentional.
Clean transitions are especially important in striped garments.
Step 5: Shape the cardigan
Add shaping around the shoulders, armholes, and neckline as needed. Since lace can be slightly open, be sure the fit remains comfortable. The cardigan should have enough ease to layer well but still maintain its shape.
Step 6: Crochet the sleeves
Work the sleeves in the same striped lace repeat or a simplified version if you want a lighter finish. Keep the sleeves balanced with the body so the cardigan feels cohesive. A gentle taper at the wrist can help the sleeves stay neat.
Step 7: Finish with a soft border
Use a clean border around the front opening, hem, cuffs, and neckline. A simple border helps frame the striped lace without making it look too busy. Keep it subtle so the stripes remain the star.
Step 8: Block lightly
A light block will help the lace open and the stripes sit evenly. This is especially helpful if the yarn has any curling or the lace rows need a little shaping.
Helpful tips
This cardigan looks lovely in pastel rainbow stripes, soft neutrals, or faded earthy shades. If you want a more playful look, use a brighter palette. If you want a more understated everyday cardigan, keep the stripes muted and the lace delicate.
4. Crochet Airy Cocoon Cardigan Pattern
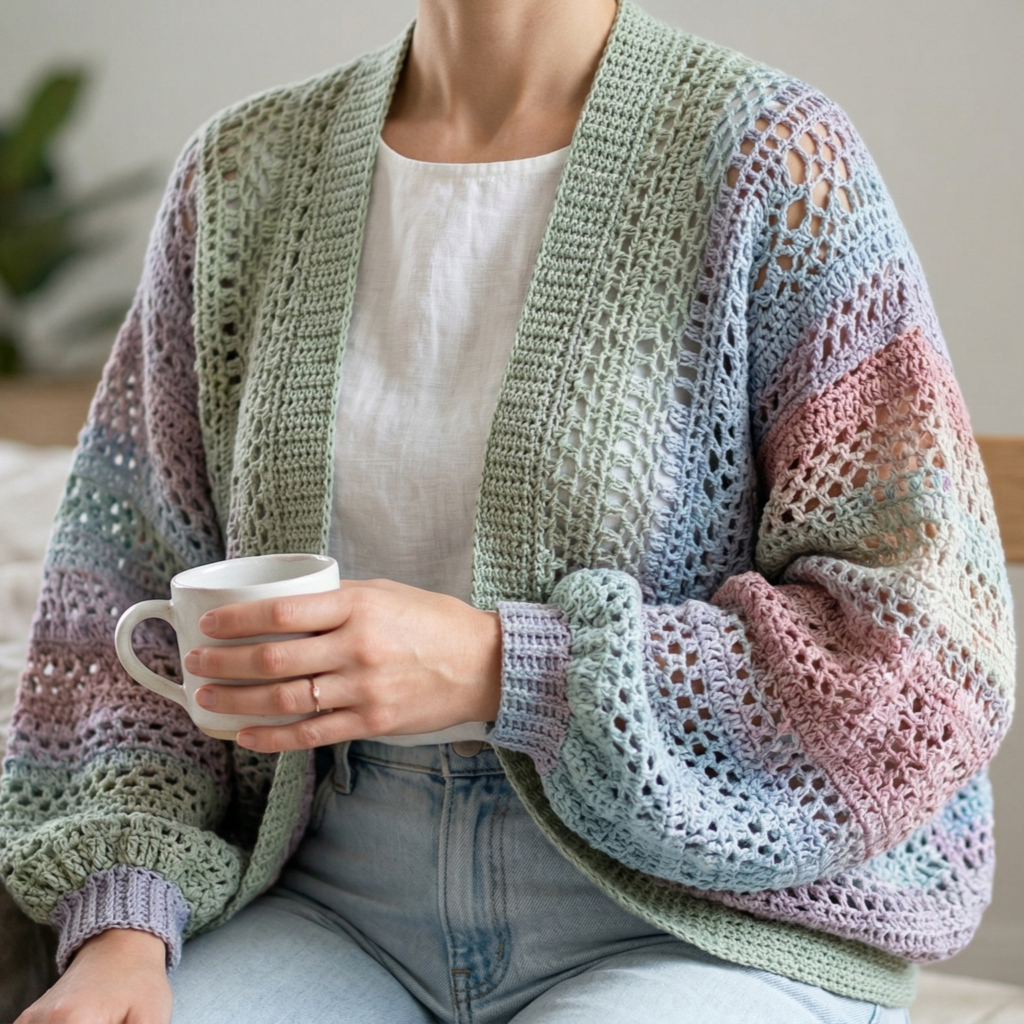
The airy cocoon cardigan is relaxed, modern, and incredibly comfortable. Its soft oversized shape makes it easy to layer, while the airy fabric keeps it from feeling too heavy. This is the perfect cardigan if you want something cozy but lightweight enough to wear across different seasons.
Step-by-step guide
Step 1: Decide on the cocoon shape
The cocoon cardigan usually has a relaxed, rounded silhouette with roomy drape. Decide how oversized you want it to be and how long you want the front panels to hang. The shape should feel soft and effortless.
The silhouette is what makes the cardigan cozy.
Step 2: Choose a light yarn
Pick a yarn that has enough softness and drape to keep the cocoon shape from feeling heavy. Cotton blends, bamboo blends, or lightweight wool blends can all work very well. The goal is airy comfort.
The yarn should feel soft and easy to layer.
Step 3: Crochet the body panels
Work the body in wide, even sections that allow the cardigan to drape naturally. The fabric should be loose enough to feel airy but not so open that it loses structure. This is a good place for simple stitches that create a flowing texture.
The body needs to move gently around the body.
Step 4: Shape the rounded front
A cocoon cardigan often has a more rounded or softly curved front shape. Adjust the panels or add shaping so the front falls naturally. The shape should feel cozy and slightly oversized without becoming shapeless.
The rounded front creates the cocoon effect.
Step 5: Add sleeves
The sleeves should be roomy and relaxed, matching the overall silhouette. Keep them soft and comfortable, with enough space for layering but not so much that they feel bulky. Tapering at the wrist can help give the sleeves structure.
The sleeves should support the relaxed fit.
Step 6: Finish the opening and edges
A simple border along the front opening and hem helps the cardigan feel finished. Because the cocoon shape is already visually strong, you do not need a lot of decoration. Clean edges work beautifully here.
Step 7: Block for drape
Blocking is especially useful for cocoon cardigans because it helps the fabric settle into its rounded shape. Lay it flat and shape it carefully so the drape feels smooth and balanced.
Helpful tips
This cardigan looks beautiful in soft neutrals, stone shades, misty blues, or warm oatmeal tones. If you want a version that works year-round, use a medium-weight yarn with nice drape and keep the stitching simple. The airy silhouette makes it easy to wear over many outfits.
5. Crochet Blooming Flower Cozy Buttoned Cardigan Pattern
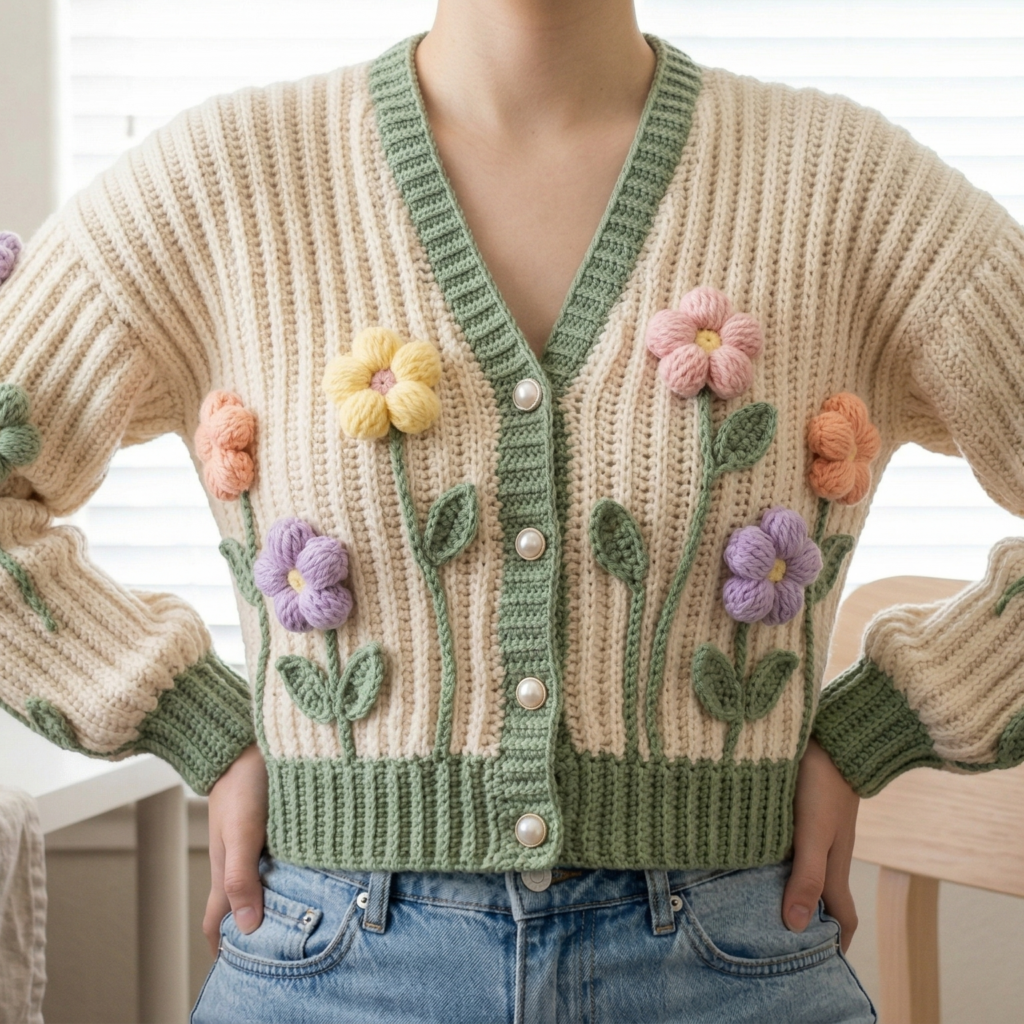
The Blooming Flower cozy buttoned cardigan feels cheerful, charming, and full of handmade personality. Floral motifs or flower-inspired details give it a sweet and welcoming look, while the buttoned front makes it practical and easy to wear. It is a lovely cardigan if you want something that feels cozy with a little extra joy.
Step-by-step guide
Step 1: Choose your floral palette
Start by picking colors that feel blooming and fresh. You can use one main color with flower accents or combine several shades that mimic petals and leaves. Soft spring colors work beautifully, but richer tones can also create a lovely floral feel.
The palette gives the cardigan its blooming character.
Step 2: Decide on the flower placement
Think about where the flowers will go. They can be part of the yoke, scattered across the body, or used as a border detail. Decide whether you want a subtle floral touch or a more decorative cardigan with repeated motifs.
The placement shapes the whole look.
Step 3: Crochet the body
Make the cardigan body using a simple stitch base that supports the floral details. Keep the fabric even and comfortable so it can hold the motifs without becoming too heavy. The flowers should add charm, not bulk.
A simple base helps the flowers shine.
Step 4: Crochet the flower motifs
Make the flowers separately if needed. Use petal stitches, layered rounds, or tiny blossoms depending on the style you want. Keep the flowers fairly small so they sit neatly on the cardigan and do not overpower the garment.
The flowers are the signature feature of the design.
Step 5: Attach the flowers
Sew the flowers onto the cardigan carefully and evenly. You can cluster them near the hem, cuffs, or front edges, or place them more sparsely for a softer effect. Make sure each one is attached securely.
The floral placement should feel intentional.
Step 6: Add sleeves and shaping
Work the sleeves so they match the cardigan body. If you want the cardigan to feel even cozier, give the sleeves a slightly relaxed shape. Keep the floral details balanced across the garment so the cardigan feels cohesive.
Step 7: Crochet button bands
Add sturdy button bands to the front edges. Because this cardigan is decorative, the buttons should feel like part of the design. Choose buttons that complement the flower motif without competing with it.
Step 8: Finish and block
Block the cardigan lightly so the flowers sit flat and the body lays evenly. This helps the motifs look polished and makes the button bands easier to align.
Helpful tips
This cardigan looks especially beautiful in soft spring shades like cream, sage, blush, lavender, or butter yellow. If you want a more subtle floral piece, keep the flowers tonal. If you want a more playful look, use contrasting flower colors for a brighter blooming effect.
Conclusion
Crochet cardigans are one of the most rewarding garments you can make because they are useful, wearable, and deeply personal. They can become part of your everyday style or special pieces you keep reaching for because they feel comfortable and handmade. The best cardigan patterns are the ones that balance style with practicality, and that is exactly what these five designs do.
The Lilian bow tie cardigan feels soft and graceful. The lacy collared cardigan with puffy sleeves feels romantic and polished. The Whimsi striped lace cardigan brings playful movement and lightness. The airy cocoon cardigan is relaxed and comfortable across seasons. The blooming flower buttoned cardigan adds cheerful handmade charm. Together, they show how much variety you can create with crochet, even when working within the same garment shape.
A handmade cardigan has a way of becoming a favorite piece because it carries both style and intention. With the right yarn, thoughtful shaping, and neat finishing, these cardigan patterns can become wardrobe staples you reach for all year long.