Crochet baby blankets are some of the most cherished projects you can make because they combine softness, comfort, and sentiment in one beautiful piece. A handmade baby blanket is more than just something warm to wrap around a little one. It is a keepsake, a thoughtful gift, and often a piece that gets saved for years because it carries so much love in every stitch. That is what makes baby blankets such a meaningful crochet project: they are practical enough to use every day, but special enough to become part of family memories.
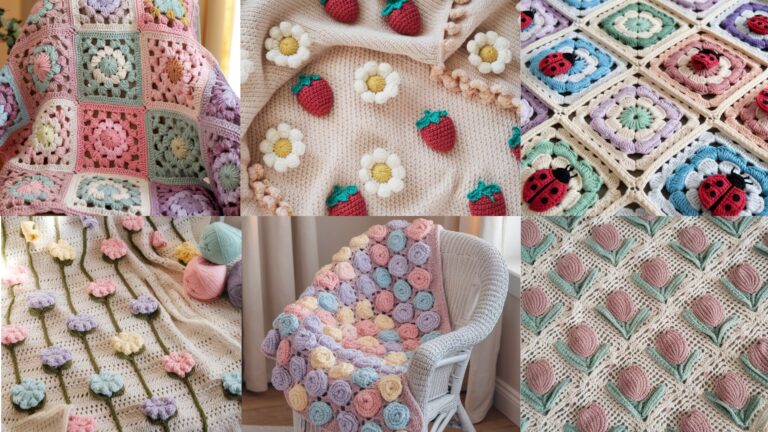
What makes crochet baby blankets especially enjoyable is the variety you can create with just a few basic stitches. A ripple blanket can feel classic and soothing. A cluster V stitch blanket brings lovely texture and drape. Heart motifs make a blanket feel sweet and sentimental. Scalloped lines create a soft decorative finish. A mosaic knit-inspired blanket adds modern style while staying cozy and baby-friendly. Each design has its own personality, but all of them are perfect for making something soft, beautiful, and lasting.
In this post, you will find five must-try crochet baby blanket patterns with clear step-by-step guidance, useful notes, and practical finishing tips. These designs are written to be easy to follow while still giving you enough detail to create a blanket that looks polished and feels lovingly handmade. Whether you are making a gift for a newborn, preparing a keepsake for a special occasion, or simply enjoying a soothing blanket project, these ideas are a wonderful place to begin.
Quick Notes
Project type: Crochet baby blankets
Best for: Baby gifts, keepsakes, nursery decor, showers, christenings, and everyday snuggles
Skill level: Beginner to intermediate, depending on stitch detail
Hook size: Usually 3.5 mm to 5.5 mm, depending on yarn weight and desired softness
Yarn weight: Baby yarn, DK, sport weight, or soft cotton blends
Best yarn choice: Soft acrylic, cotton blends, or baby-safe yarns with gentle texture and good washability
Finished size: Customizable, often crib, stroller, or lap blanket size
Time to complete: Several hours to a few days depending on size and stitch pattern
Helpful stitches: Chain, single crochet, half double crochet, double crochet, treble crochet, increases, decreases, cluster stitches, V stitches, ripple, mosaic, shell stitch, edging, color changes
Common Materials
Most baby blankets use a similar set of supplies.
- Yarn in your chosen colors
- Crochet hook suited to the yarn
- Yarn needle
- Scissors
- Stitch markers
- Measuring tape
- Blocking tools, optional
- Soft ribbon for gifting, optional
For baby blankets, yarn choice matters a great deal. The blanket should feel soft against delicate skin and hold up well to repeated washing. Baby-safe yarns, soft acrylics, and cotton blends are excellent choices because they are cozy, durable, and easy to care for. A gentle texture is usually best so the blanket feels comfortable without scratching.
1. Crochet Granny Ripple Baby Blanket Pattern
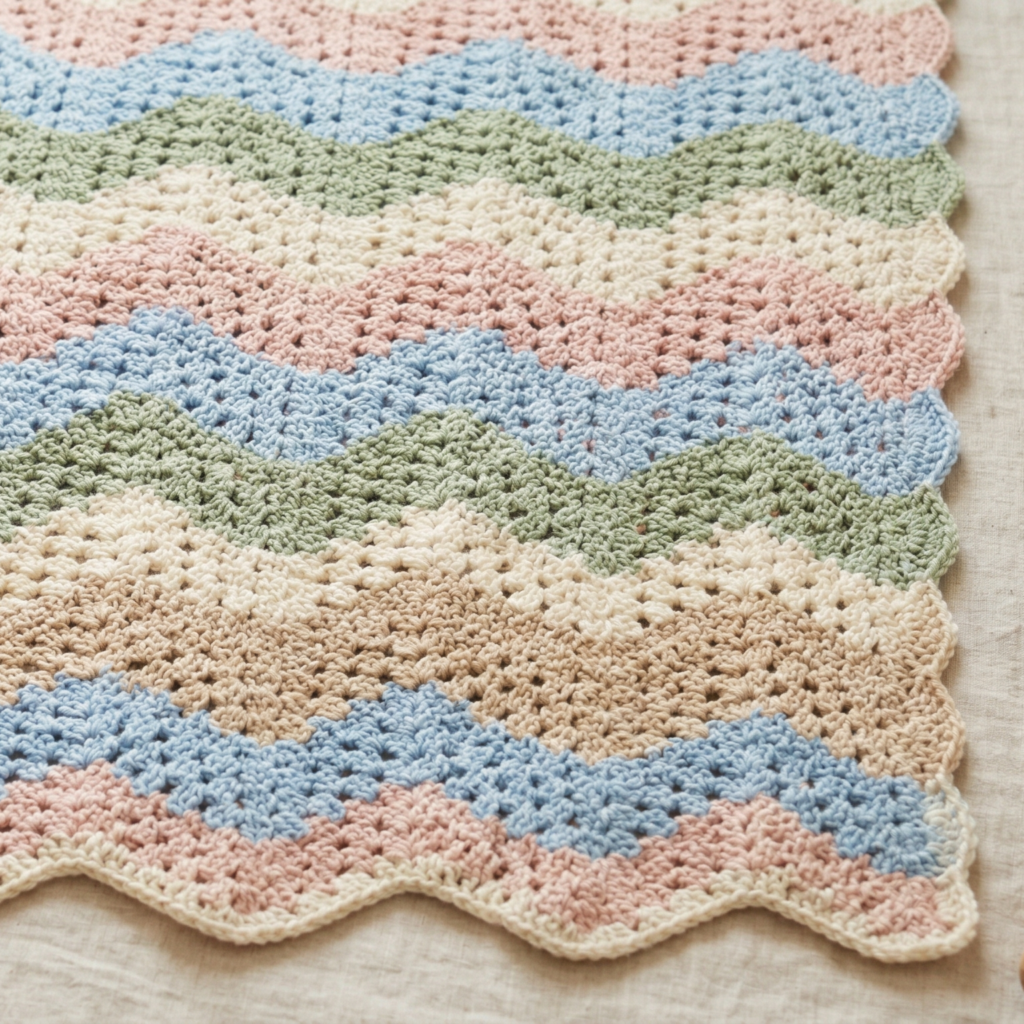
A granny ripple baby blanket combines two beloved crochet ideas: the nostalgic look of granny-style stitches and the graceful movement of a ripple pattern. The result is a blanket that feels classic, textured, and soothing. It is a beautiful choice for anyone who wants a baby blanket that looks detailed without being overly complicated.
Step-by-step guide
Step 1: Choose a soft color palette
Start by selecting baby-friendly colors that complement each other. Gentle pastels, creamy neutrals, or soft two-tone combinations work especially well. A ripple pattern looks beautiful when the colors flow together, so choose shades that feel calm and coordinated.
The color palette sets the mood of the blanket.
Step 2: Decide on the blanket size
Before beginning, decide whether you want a stroller blanket, crib blanket, or larger keepsake size. This helps you estimate how many repeats you will need. Since ripple blankets naturally grow with the pattern, it is helpful to know your final goal before starting.
A clear size plan keeps the project manageable.
Step 3: Start the foundation chain
Chain the length needed for the blanket width, making sure the count works with the ripple repeat. Keep the chain loose enough so the edge does not pull inward. A relaxed foundation makes the first row easier to work and helps the blanket lie flat.
A smooth foundation supports the ripple pattern.
Step 4: Build the first ripple row
Begin the ripple stitch repeat. This usually involves sections of increases and decreases that create the wave-like shape. Keep your stitch count even and follow the pattern carefully so the ripples rise and dip evenly across the blanket.
The ripple structure is what gives the blanket its shape.
Step 5: Add granny-style texture
Once the ripple base is in place, build the blanket with granny-style cluster sections or small shell-like groupings. This adds a soft classic texture to the waves and makes the blanket feel warm and visually interesting. Keep the clusters balanced so the design remains smooth.
The granny texture adds charm and softness.
Step 6: Repeat the color sequence
Continue changing colors in a repeating sequence if desired. This is one of the reasons the blanket looks so beautiful. Gentle transitions between colors help the ripple motion stand out, especially when the shades are soft and baby-friendly.
Color repetition makes the pattern feel cohesive.
Step 7: Watch the edges
Ripple patterns can sometimes stretch or curl at the edges if the tension changes. Keep an eye on both sides as you work and adjust if needed. The blanket should remain rectangular or evenly shaped, especially if you are making a keepsake piece.
A tidy edge keeps the blanket polished.
Step 8: Finish with a soft border
Add a simple border around the blanket to frame the ripples. A single crochet or shell-like edge works beautifully. The border helps the blanket look complete and can also soften any uneven edges from the ripple shaping.
Step 9: Block lightly if needed
A light block can help the ripples settle and the blanket lay flat. This step is especially helpful if the yarn has a little curl or the edges feel wavy in an uneven way.
Helpful tips
This pattern looks especially lovely in pastel ombré, neutral rainbow, or gentle baby blue and cream combinations. If you want a more timeless look, use just two colors. If you want a sweeter, more playful effect, alternate several soft baby shades.
2. Crochet Cluster V Stitch Baby Blanket Pattern
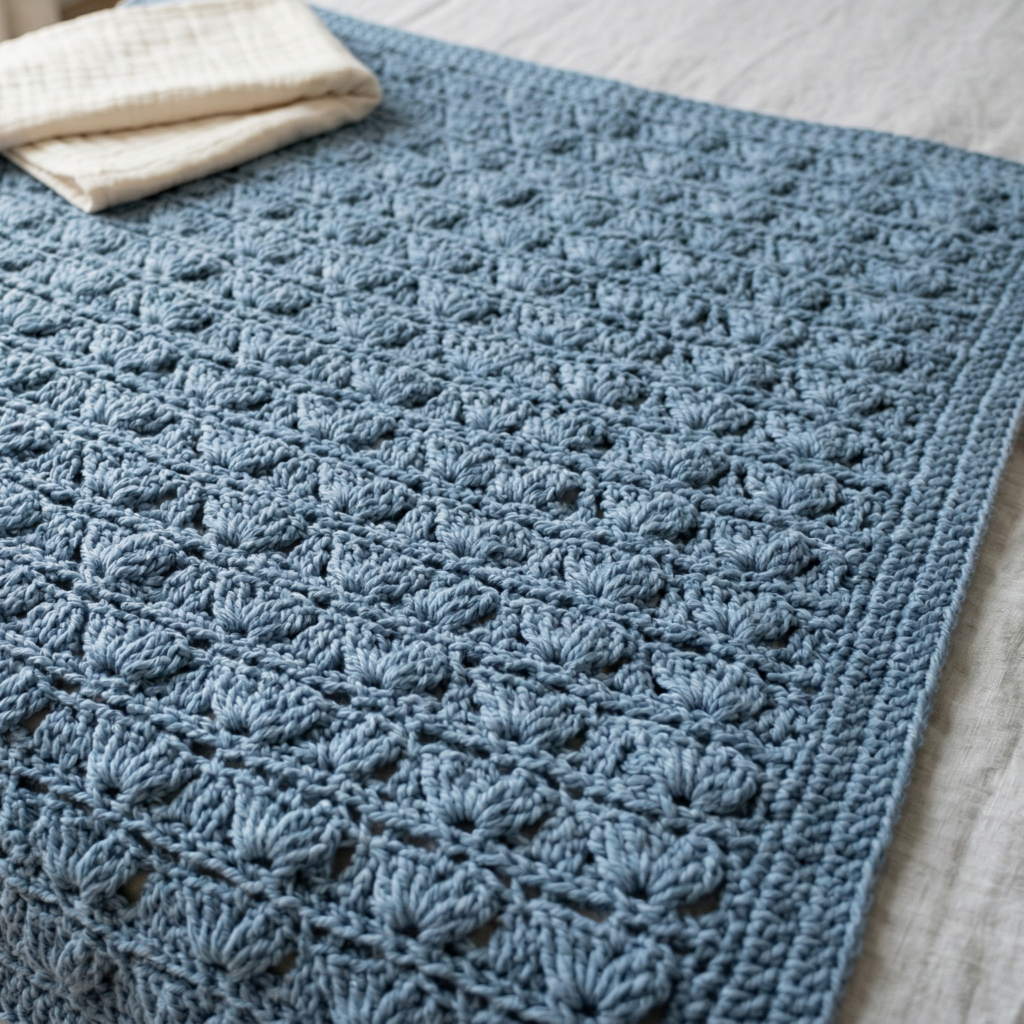
A cluster V stitch baby blanket is soft, airy, and full of lovely texture. The stitch creates a delicate open pattern that still feels cozy and substantial, which makes it perfect for a baby blanket. It is a great option if you want something that looks elegant but remains beginner-friendly once you learn the repeat.
Step-by-step guide
Step 1: Pick a soft yarn
Choose yarn that feels gentle and comfortable. Because the cluster V stitch has open spaces, the yarn should still be soft enough to create a plush and baby-safe finish. Light baby yarn or soft cotton blends are excellent.
The yarn helps define the stitch texture.
Step 2: Chain the foundation
Make a chain long enough to match the desired blanket width. Be sure the chain count fits the V-stitch repeat. A foundation that is too tight can make the blanket curl, so keep the chain loose and even.
A flexible start makes the rest easier.
Step 3: Learn the cluster V stitch
The cluster V stitch combines grouped stitches in a way that forms a repeating V shape with textured clusters. Work the first rows carefully and watch how the pattern opens and closes. Once you understand the rhythm, it becomes very soothing to repeat.
The V shape is the heart of the design.
Step 4: Keep the clusters consistent
As you continue, make sure the clusters stay even in height and width. This helps the texture look balanced and neat. If some clusters are taller or shorter than others, the fabric can lose its clean appearance.
Consistency keeps the blanket looking polished.
Step 5: Repeat across the blanket
Keep working the cluster V stitch row by row. The open texture will create a lovely drape while still feeling warm enough for a baby blanket. It is a beautiful stitch for blankets that need softness and visual interest without too much bulk.
The repeat creates a calm, flowing texture.
Step 6: Add gentle color changes
This pattern looks especially lovely with subtle color blocks or alternating rows of coordinating shades. If you want a nursery-ready blanket, try soft pink and cream, pale blue and white, or sage and ivory. The stitch can also be beautiful in a single color if you want a quieter look.
Step 7: Check width and length as you go
Because the stitch is slightly open, it is easy to lose track of the blanket’s proportions. Lay it flat now and then to make sure the shape stays even. The blanket should remain soft and balanced across the whole piece.
Step 8: Finish with a simple border
A clean border helps the openwork feel more finished. A few rounds of single crochet or half double crochet can frame the design and keep the edges from stretching.
Helpful tips
Cluster V stitch blankets are beautiful in yarn that has a smooth, soft finish. If you want the stitch definition to stand out, use a lighter color. If you want a more modern look, try deeper muted tones such as dusty blue, taupe, or sage.
3. Crochet Hearts-A Plenty Soft Baby Blanket Patter
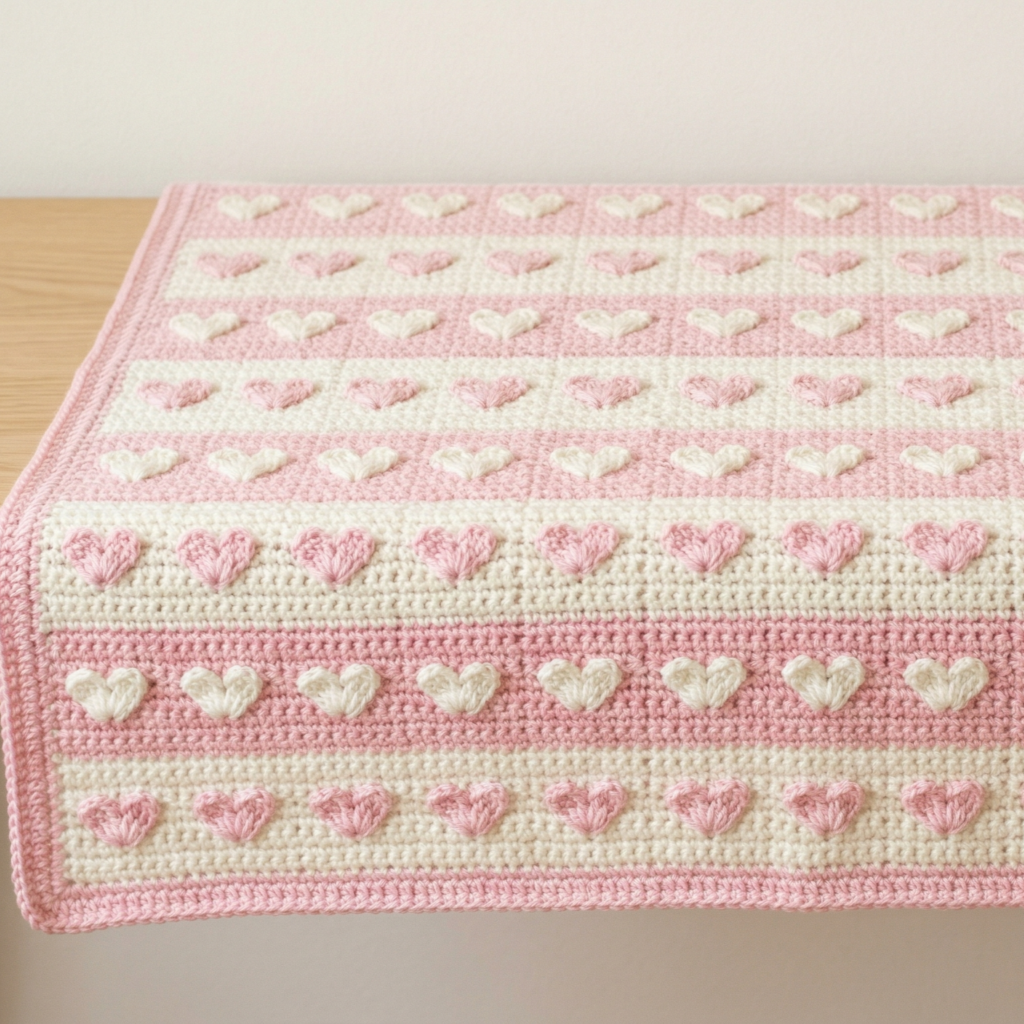
A hearts-a-plenty baby blanket is sweet, sentimental, and perfect for a keepsake gift. The heart motifs give the blanket a loving, tender feel that makes it especially meaningful for babies and families. This design is ideal if you want a blanket that feels charming and heartfelt from the very first stitch.
Step-by-step guide
Step 1: Choose loving colors
Pick colors that feel soft and affectionate. Pink, cream, blush, lavender, baby blue, and pale gray all work beautifully. Hearts are naturally romantic and sweet, so the colors should feel gentle and warm.
A soft palette makes the heart motifs shine.
Step 2: Decide on the heart placement
Think about whether you want the hearts scattered across the blanket, arranged in rows, or placed as a border pattern. A repeating arrangement usually looks the most polished, while scattered hearts feel playful and whimsical.
Placement gives the blanket its personality.
Step 3: Crochet the base fabric
Make a sturdy base using a simple stitch such as single crochet, half double crochet, or double crochet. This base will support the heart motifs and give the blanket a comfortable feel. Keep the fabric soft and even.
A smooth base helps the heart details stand out.
Step 4: Crochet or appliqué the hearts
Make small hearts separately or use a heart motif pattern that can be joined directly into the blanket. Keep them the same size so the design feels balanced. If you are sewing hearts on later, place them carefully so the spacing looks intentional.
The hearts are the main decorative feature.
Step 5: Attach the hearts securely
Sew the hearts onto the blanket using matching yarn or thread. Make sure the stitches are hidden as much as possible so the blanket front looks neat. Secure each heart well so it can withstand washing and use.
Strong attachment keeps the blanket durable.
Step 6: Add rows or borders between motifs
If you are arranging the hearts across the blanket, use simple rows or spaces between them so they do not crowd each other. That spacing keeps the hearts visible and gives the blanket a clean layout.
Spacing helps the pattern feel orderly.
Step 7: Continue until the blanket is complete
Repeat the motif layout or blanket rows until you reach the desired size. Check that the heart placement remains even and visually balanced. The final piece should feel soft, lovely, and tidy.
Step 8: Finish with a border
A simple border around the whole blanket will frame the heart design and make the edges feel clean. This also helps the blanket look like a finished keepsake rather than just a motif piece.
Helpful tips
This blanket makes a beautiful gift for a baby shower, newborn celebration, or family keepsake. If you want a very sweet look, use pink hearts on a cream background. If you want something a little more modern, try soft gray hearts with blush accents.
4. Crochet Sweet Lines Scallop Baby Blanket Pattern
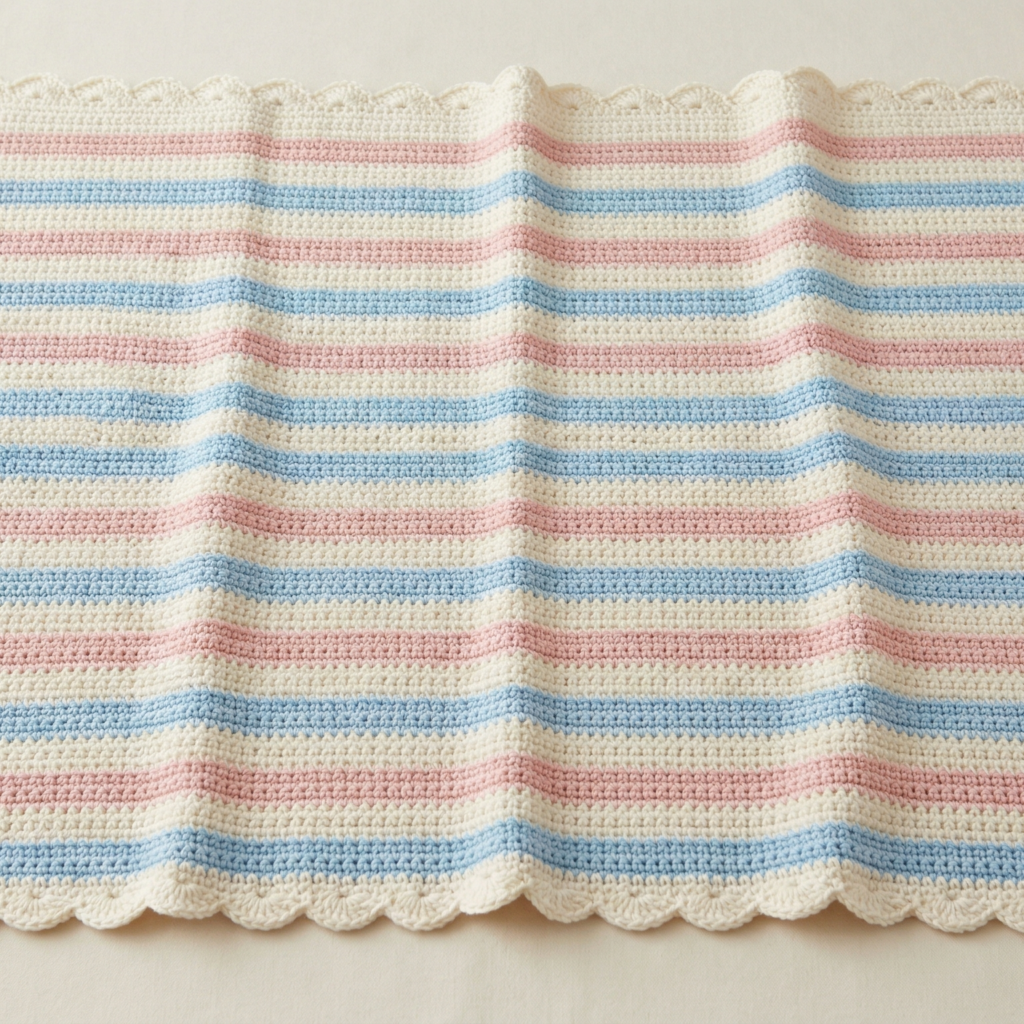
A sweet lines scallop baby blanket is graceful, soft, and visually soothing. The linework gives the blanket structure, while the scalloped finish adds a gentle decorative touch. It is a lovely choice if you want a blanket that feels delicate and polished without being overly ornate.
Step-by-step guide
Step 1: Choose a soft line palette
Pick colors that work well in stripes or gentle lines. Soft neutrals, baby blue, blush, ivory, and pale sage all make beautiful combinations. The lines should feel calm and sweet so the scallop edge can shine.
Color choice gives the blanket a soft personality.
Step 2: Start the foundation chain
Chain the blanket width, making sure the count fits the stitch repeat. Keep the chain loose and even so the blanket does not pull. This is especially important for striped patterns because straightness matters.
A tidy foundation helps the lines stay straight.
Step 3: Work the line pattern
Crochet the rows in a neat stripe or line pattern, changing colors in a gentle sequence if desired. Keep the row height and stitch count consistent so the lines remain crisp. The design should feel orderly and calm.
The stripes are the backbone of the blanket.
Step 4: Maintain smooth edges
Check the sides often so the lines stay even and the blanket does not twist. If the edge begins to wave, adjust your tension or stitch count. Smooth sides are essential for a polished striped blanket.
Step 5: Add a scallop row
Once the main body is complete, crochet a scalloped edge around the blanket. The scallops should be even and soft, like a gentle frame around the design. They add just enough decoration without overwhelming the lines.
The scallop edge is the signature finish.
Step 6: Make the edge symmetrical
Be sure the scallops are consistent all the way around. If one side seems fuller than another, adjust it before finishing. A balanced border makes the blanket look elegant and professionally made.
Step 7: Finish and block
A light block helps the scallops settle into shape and the lines lay flat. This step can really improve the final appearance of the blanket, especially if your yarn has any natural curl.
Helpful tips
This pattern is especially lovely in pastel stripes or soft tonal lines. If you want a more classic look, use cream and pale blue or blush and ivory. The scallops add a sweet finishing touch that makes the blanket feel special enough for a keepsake.
5. Crochet Easy Mosaic Knit Baby Blanket Pattern
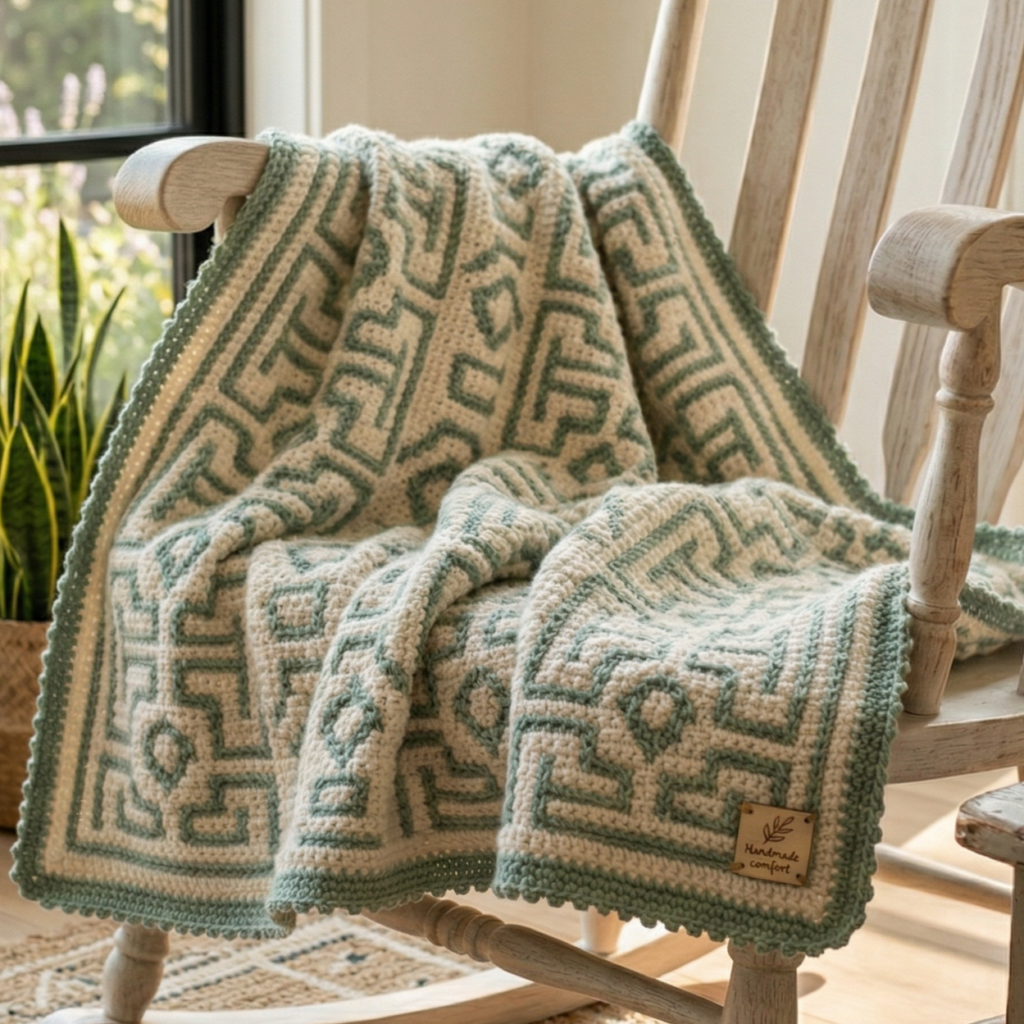
A mosaic knit baby blanket is modern, beautiful, and eye-catching. The mosaic effect creates a geometric texture that looks far more complex than it is, which makes it a great choice if you want a statement blanket that still feels baby-friendly and cozy. This pattern is ideal for crocheters who want something stylish with a more structured appearance.
Step-by-step guide
Step 1: Choose two coordinating colors
Mosaic patterns usually look best with two colors that contrast enough to show the design clearly. Try a soft neutral and a pastel, or two shades with good but gentle contrast. The colors should make the geometric pattern easy to see without feeling too bold for a baby blanket.
Color contrast is what makes mosaic beautiful.
Step 2: Make the foundation row
Start with a simple and even foundation chain. Since mosaic patterns often depend on specific stitch placement, it is important to count carefully from the beginning. Make sure the first row is straight and balanced.
A clean foundation supports the geometric design.
Step 3: Work the first mosaic rows
Begin the mosaic pattern using the stitch sequence that creates the woven or knit-like appearance. Each row should follow the chart or repeat closely, so the visual effect builds correctly. Take your time the first few rows until the pattern becomes familiar.
The mosaic repeat is the heart of the blanket.
Step 4: Keep the tension even
Because mosaic crochet relies on layered-looking stitches, consistency matters a lot. Keep the tension steady so the pattern remains crisp. If the fabric becomes too tight, the blanket may stiffen, so watch for that as you work.
Step 5: Repeat the pattern across the blanket
Continue the mosaic rows until the blanket reaches the size you want. The design will begin to look more impressive as the pattern grows. It is very satisfying to see the geometric motif develop row by row.
Step 6: Check the edges and alignment
Make sure the sides stay straight and the design remains centered. Mosaic patterns can sometimes shift visually if the count is off, so regular checking is helpful. A neat alignment makes the final blanket feel much more polished.
Step 7: Add a border
Use a simple border to frame the mosaic pattern. A plain border helps the geometric design stand out and keeps the blanket from feeling too busy. Choose a color that matches one of the main shades for a cohesive finish.
Step 8: Block lightly if needed
A gentle block can help the pattern open and sit flat. This is especially useful if the mosaic texture feels stiff or slightly curled after finishing.
Helpful tips
This blanket looks beautiful in soft modern color palettes such as cream and sage, dusty blue and white, or taupe and blush. If you want the pattern to feel more contemporary, choose two muted shades with clear contrast. The mosaic look is perfect for a keepsake blanket that feels stylish and memorable.
Conclusion
Crochet baby blankets are some of the most meaningful projects you can make because they combine practical comfort with deep sentimental value. A baby blanket is not just something warm and soft. It is often the kind of item that becomes part of family memories, baby photos, nursery decor, and cherished keepsakes that are saved long after the baby has grown. That is what makes these blankets so special.
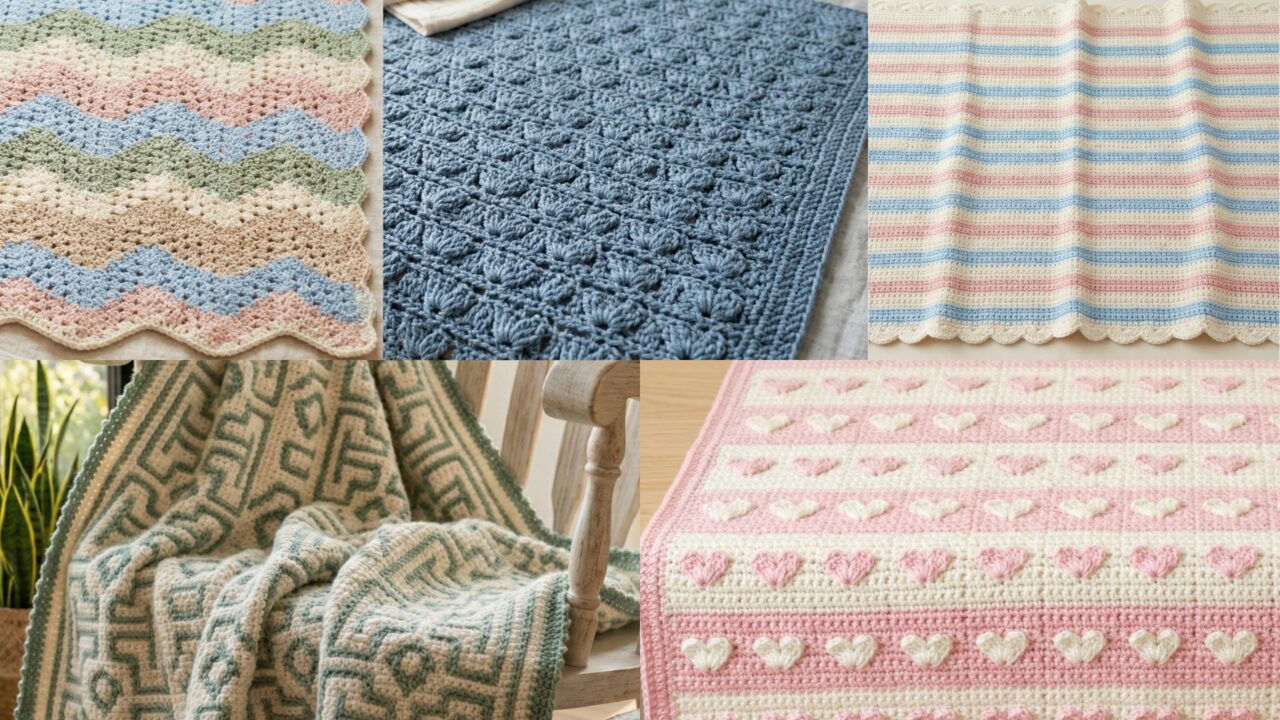
These five patterns each offer something different. The granny ripple baby blanket feels classic and soothing. The cluster V stitch baby blanket is soft and airy. The hearts-a-plenty blanket is sentimental and sweet. The sweet lines scallop blanket is elegant and gentle. The easy mosaic knit baby blanket is modern and eye-catching. Together, they show how much beauty can be created with just a few thoughtful stitches and a little color planning.
Whether you are making a gift for a baby shower, welcoming a new little one, or creating a keepsake that will be treasured for years, these patterns are a wonderful place to start. With soft yarn, careful stitching, and a loving finish, your crochet baby blanket can become a beautiful piece that carries warmth and meaning in every row.