Crochet hats are one of the easiest ways to add style to a summer outfit without feeling weighed down. When the weather gets warm, you want accessories that are light, airy, and comfortable, but still cute enough to feel like part of your look. That is exactly where crochet summer hats shine. They give you shade, texture, and personality while still letting your head breathe, especially when you choose open stitches, cotton yarn, and relaxed shaping.
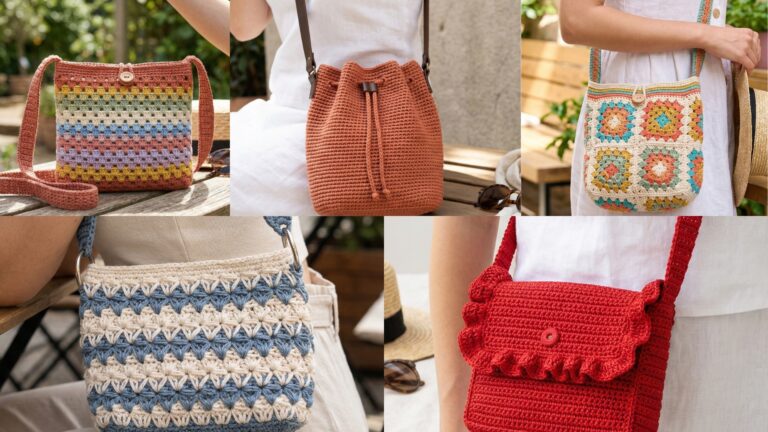
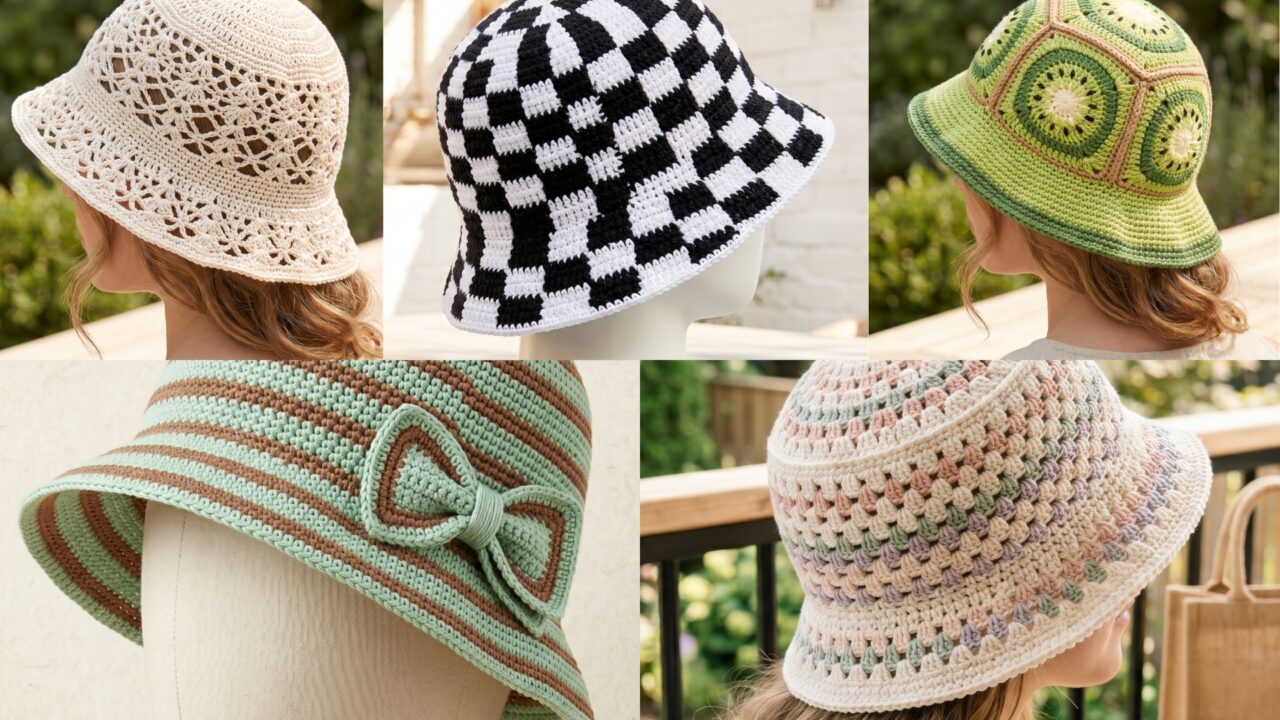
What makes summer crochet hats so enjoyable is how many different styles you can create with simple stitches. A granny stitch bucket hat feels casual and nostalgic. A lace bucket hat looks delicate and elegant. A kiwi-inspired granny square bucket hat is playful and colorful. A brimmed summer hat with a bow adds a pretty feminine touch. A checkered bucket hat feels trendy and bold. Each one has its own personality, but all of them are wearable, fun to make, and perfect for sunny days, beach walks, festivals, and everyday summer outfits.
In this post, you will find five breathable crochet hat patterns with detailed step-by-step guidance, helpful notes, and finishing tips. These designs are written to be easy to follow while still giving you enough detail to create hats that are comfortable, stylish, and practical for summer wear. If you enjoy projects that blend fashion and function, these hat ideas are a wonderful place to start.
Quick Notes
Project type: Crochet summer hats
Best for: Beach wear, festivals, vacations, everyday summer outfits, and gifts
Skill level: Beginner to intermediate, depending on shaping and stitch detail
Hook size: Usually 2.5 mm to 5.0 mm, depending on yarn weight and desired drape
Yarn weight: Cotton, cotton blends, lightweight acrylic, or raffia-style yarn
Best yarn choice: Cotton yarn for breathability and structure
Finished size: Customizable to head circumference
Time to complete: A few hours to a couple of days per hat
Helpful stitches: Chain, slip stitch, single crochet, half double crochet, double crochet, granny stitch, shell stitch, color changes, increases, brim shaping, blocking
Common Materials
Most summer hats can be made with the same basic supplies.
- Cotton yarn or other breathable yarn
- Crochet hook suited to the yarn
- Yarn needle
- Scissors
- Stitch markers
- Measuring tape
- Blocking tools or a hat form, optional
- Ribbon or bow material, optional
For summer hats, yarn choice matters a lot. Breathability is the key, so cotton is usually the best option because it is light, comfortable, and holds shape well. If you want a softer drape, a cotton blend can also work beautifully. The goal is to create a hat that gives shade without feeling too hot or heavy.
1. Crochet Granny Stitch Bucket Hat Pattern
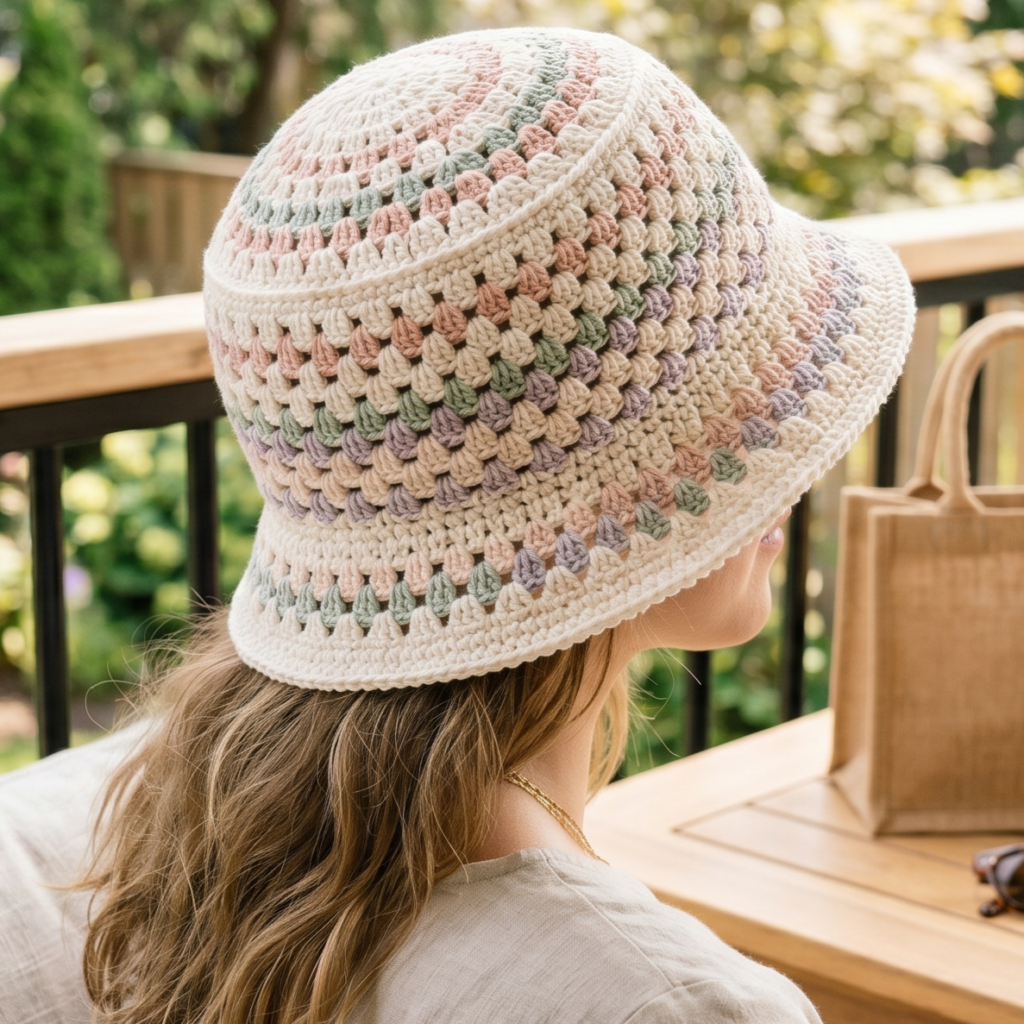
A granny stitch bucket hat is a classic summer favorite because it is light, easy to style, and full of handmade charm. The open structure of granny stitches makes it breathable, while the bucket shape keeps it trendy and practical. This is a great beginner-friendly pattern if you want something stylish without complicated shaping.
Step-by-step guide
Step 1: Measure the head
Before you begin, measure the circumference of the head where the hat will sit. You will also want to measure from the top of the head to the point where you want the brim to begin. A bucket hat should fit comfortably without being too tight.
A good fit is important for comfort and shape.
Step 2: Crochet the crown
Start with a magic ring and work the crown in rounds, increasing evenly until it reaches the desired width. The crown should sit flat and round before you begin shaping the sides. Keep the stitches consistent so the hat grows evenly.
The crown is the foundation of the hat.
Step 3: Begin the bucket sides
Once the crown is wide enough, stop increasing and work even rounds to create the sides of the bucket hat. This is the section that gives the hat its soft downward shape. Make sure the sides are tall enough to fit comfortably on the head.
The sides help form the bucket silhouette.
Step 4: Add the granny stitch pattern
Begin working the granny stitch repeat around the hat. Keep the clusters even so the texture looks balanced. The open granny stitch creates a light and airy surface that is perfect for summer.
The granny stitch is the signature texture.
Step 5: Continue until the side section is the right height
Work the body of the hat until it reaches the point where you want the brim to start. Check the fit as you go, especially if you want the hat to sit deeper or higher on the head. A well-measured side section will make the brim easier to shape later.
Step 6: Shape the brim
Add increases gradually to create the bucket brim. You can keep it short for a subtle look or make it wider for more sun protection. A softly flared brim looks especially cute and wearable.
The brim adds function and style.
Step 7: Finish the edge
Add a clean border around the brim. A single crochet round can help keep the brim neat and sturdy. If you want a slightly more decorative finish, you can add a subtle shell or picot edge.
Step 8: Block the hat
Blocking is very helpful for bucket hats because it helps the shape settle and the brim sit nicely. Lightly steam or shape the hat on a form so the crown and brim look balanced.
Helpful tips
This hat looks especially lovely in cheerful solid colors or soft stripes. If you want a more classic summer look, choose cream, tan, or pastel shades. If you want something playful, use bright color blocks or rainbow granny stitch rows.
2. Crochet Lace Bucket Hat Pattern
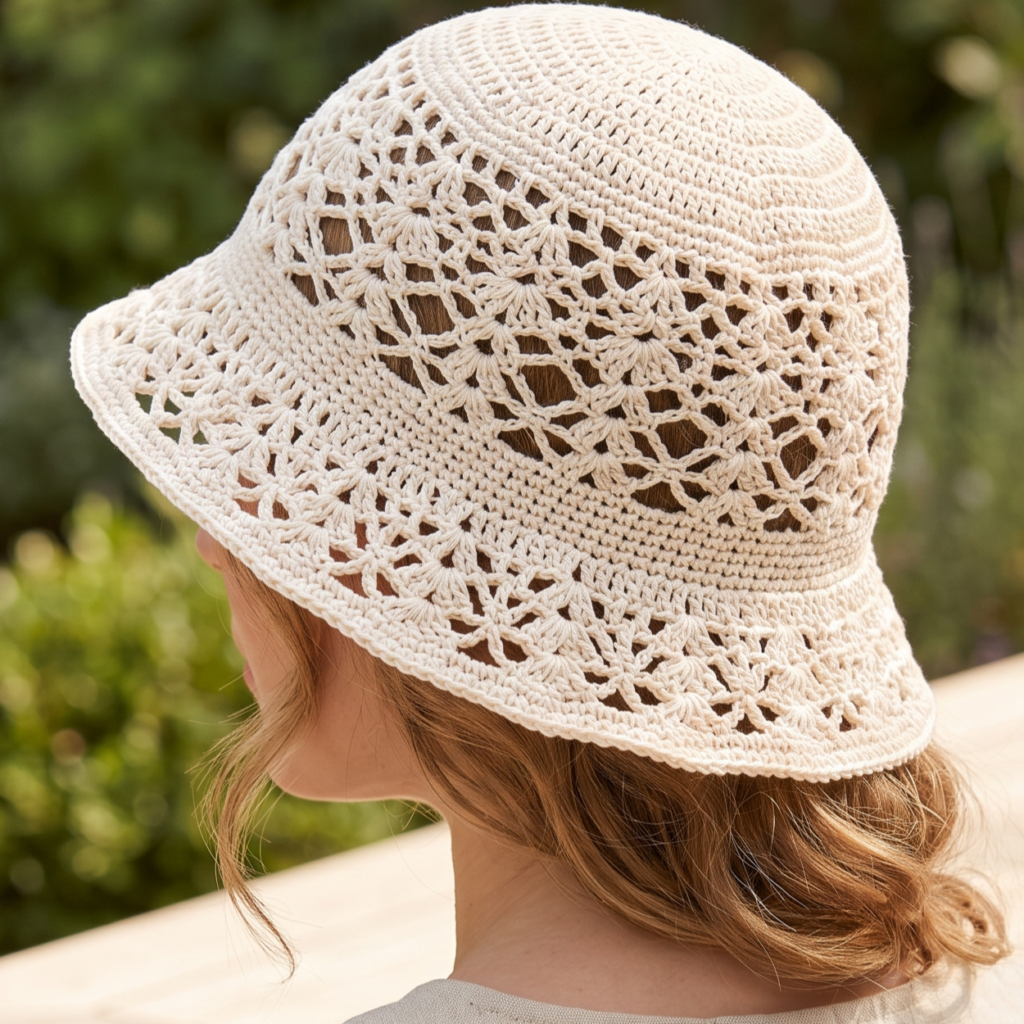
A lace bucket hat feels delicate, airy, and beautifully feminine. The openwork design makes it ideal for warm days because it allows air to flow while still offering a bit of shade. It is a lovely choice if you want a summer hat that feels elegant rather than casual.
Step-by-step guide
Step 1: Choose a light yarn
Pick a lightweight cotton yarn or cotton blend that works well with lace stitches. The yarn should feel soft and breathable while still holding the shape of the hat. Light colors often look especially pretty in lace because they show the stitch texture well.
The yarn should support an airy finish.
Step 2: Measure the head and brim length
Take your head measurement and decide how much brim you want. A lace bucket hat usually looks best when the brim is not too wide, so the openwork remains delicate and wearable. Decide how much sun coverage you want before starting.
A clear size plan helps the shape stay elegant.
Step 3: Crochet the crown
Start with a round crown using even increases. Keep the stitches smooth and flat so the top of the hat sits comfortably on the head. The crown should form a clean circle before the lace begins.
The crown gives the hat structure.
Step 4: Start the lace body
Once the crown is complete, work the lace stitch pattern around the sides. This may involve chain spaces, shells, or open cluster stitches. Keep the stitch repeat consistent so the lace looks neat and balanced all the way around.
The lace body is the main visual feature.
Step 5: Maintain even tension
Because lace can stretch more than denser stitches, pay close attention to tension. The hat should feel airy but not loose. If the lace becomes too open, the hat may lose shape. A slightly smaller hook can help keep everything tidy.
Step 6: Add the brim
Work a brim using the lace repeat or a slightly denser stitch if you want the edge to hold its shape better. A brim that is only gently flared gives the hat a delicate and elegant look. You can also add a small increase round for a wider brim.
The brim adds style and sun protection.
Step 7: Finish with a clean edge
A simple border around the brim helps frame the lace and keep the edge neat. Keep the finishing understated so the openwork remains the focus. A tidy border also helps the brim sit more evenly.
Step 8: Block carefully
Blocking is especially important for lace hats. Shape the crown and brim while the hat dries so the lace opens beautifully and the overall silhouette looks polished.
Helpful tips
Lace bucket hats are beautiful in soft neutrals, ivory, blush, and pale blue. If you want a more romantic summer look, choose a light pastel yarn and keep the brim slightly smaller. This is an especially lovely choice for outdoor lunches, picnics, or beachwear.
3. Crochet Kiwi Inspired Granny Square Bucket Hat Pattern
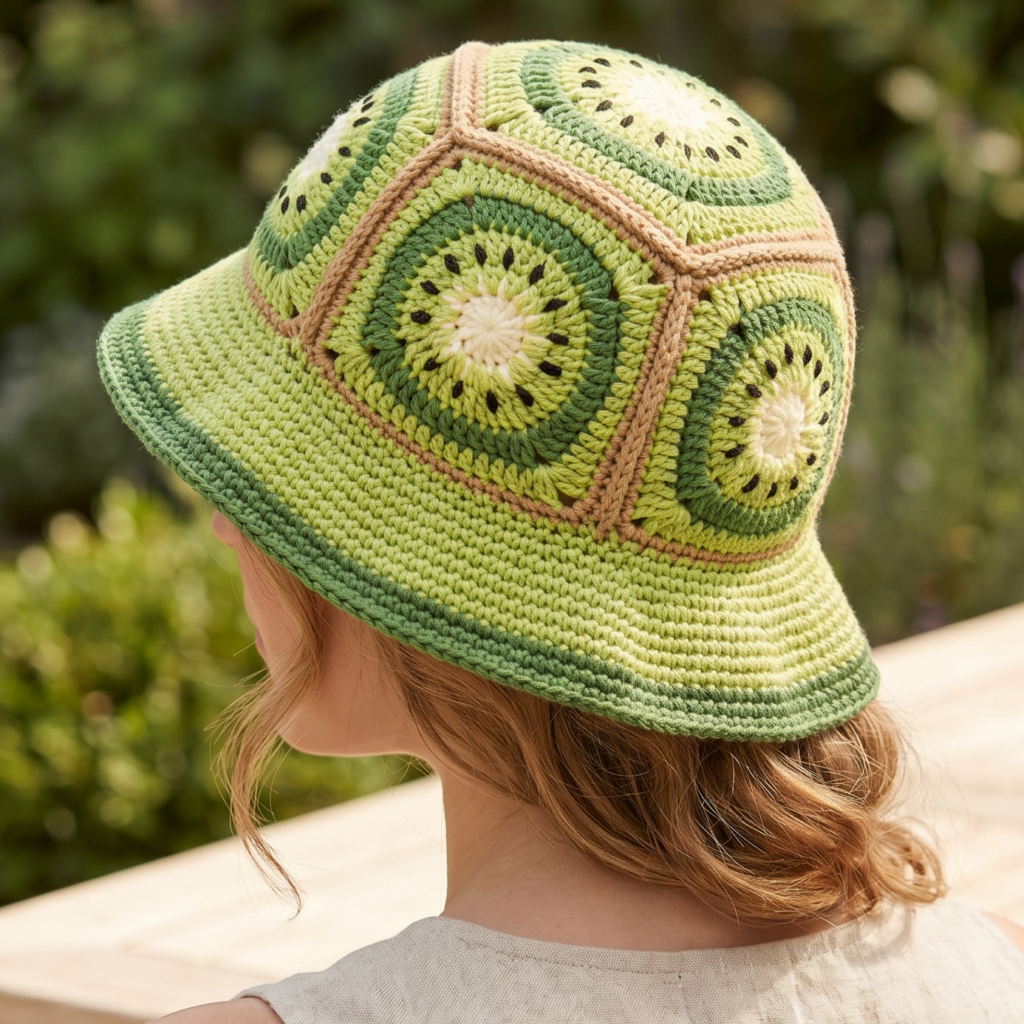
A kiwi-inspired granny square bucket hat is fun, fresh, and full of personality. The fruit theme gives it a cheerful, summery vibe, while the granny square construction makes it playful and creative. This hat is perfect if you want something unique and eye-catching.
Step-by-step guide
Step 1: Plan the kiwi color palette
Choose shades that resemble a kiwi fruit: green, light green, white, black, and perhaps a touch of brown or tan. The contrast between the center, ring, and seed details is what makes the design instantly recognizable.
The colors are what make the kiwi theme shine.
Step 2: Crochet the granny square motif
Begin by making one or more granny squares using your chosen kiwi colors. The center should reflect the seed area, while the outer rounds should resemble the fruit flesh and skin. Keep the square neat so it can be shaped into a hat.
The granny square gives the hat its creative structure.
Step 3: Add seed details
Use black yarn or embroidery to create tiny seed-like accents across the square. Keep them evenly spaced so the motif resembles kiwi slices without becoming too crowded. The seeds are a small detail, but they are essential to the theme.
The seed details make the motif playful.
Step 4: Build the crown
Join your granny squares or motif pieces to form the crown of the hat. Make sure the layout is even and balanced so the top sits comfortably on the head. If using multiple squares, arrange them before joining to get the best shape.
The crown is where the motif becomes wearable.
Step 5: Shape the bucket sides
Once the crown is complete, continue with rounds that create the sides of the hat. Keep the structure smooth so the motif remains visible without losing the bucket silhouette. A simple stitch can help balance the decorative square.
The sides help transition from motif to hat.
Step 6: Add the brim
Work the brim with a gentle flare. The brim can stay simple so the kiwi motif remains the focus. If you want, use a contrasting green edge to echo the kiwi skin and frame the hat nicely.
The brim completes the summer look.
Step 7: Join and finish neatly
Make sure the seams between granny squares are secure and tidy. Weave in all ends carefully so the hat feels comfortable and well-made. If needed, line the inside for extra structure.
Step 8: Block the hat
Lightly block the finished hat so the squares and brim settle into shape. This helps the motif sit evenly and makes the whole piece look more polished.
Helpful tips
This hat is a wonderful conversation starter and a playful craft fair item. If you want it to stand out even more, use a slightly brighter green or a more stylized seed pattern. It is a great choice for summer markets or for anyone who loves fruit-inspired accessories.
4. Crochet Brimmed Summer Hat with a Bow Pattern
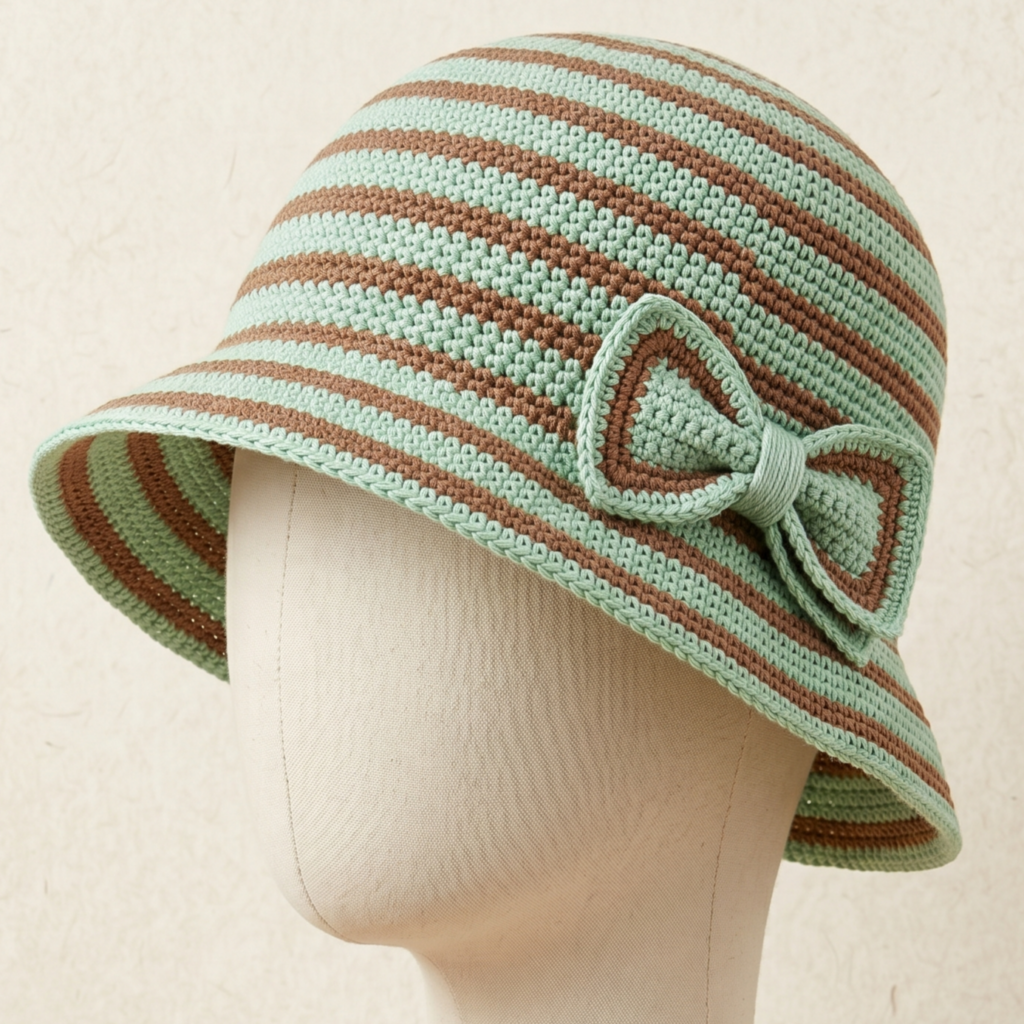
A brimmed summer hat with a bow feels soft, pretty, and very wearable. The brim offers shade and practical coverage, while the bow adds a charming feminine detail. This is a beautiful choice if you want a hat that feels polished enough for everyday outfits and special summer occasions.
Step-by-step guide
Step 1: Choose a soft summer yarn
Select a breathable yarn in a color that feels light and seasonal. Cream, beige, blush, sky blue, and pale green are all lovely options. The yarn should feel comfortable under the sun and hold the brim’s shape well.
A good yarn keeps the hat wearable.
Step 2: Measure the head and brim width
Take the head measurement and decide how wide you want the brim to be. A wider brim gives more sun protection, while a moderate brim feels more casual. The crown and brim should work together proportionally.
A balanced shape makes the hat more flattering.
Step 3: Crochet the crown
Begin with a round crown using even increases. Make sure the top sits flat and comfortable. The crown should be sturdy enough to support the brim that will come later.
The crown creates the hat’s base shape.
Step 4: Work the side section
Crochet even rounds without increases to create the body of the hat. This section helps the hat sit properly on the head. Keep the stitches neat and consistent so the transition into the brim is smooth.
The body gives the hat its fit.
Step 5: Shape the brim
Add increases gradually to form the brim. The brim should be wide enough to create shade but still soft enough to wear comfortably. If you want a more elegant style, make the brim slightly curved rather than stiff.
The brim is the main practical feature.
Step 6: Crochet the bow
Make a separate bow piece using a small rectangle or shaped strip. Fold and stitch it into a bow shape. Keep it proportional to the hat so it looks decorative but not oversized.
The bow adds feminine charm.
Step 7: Attach the bow
Place the bow on the side or center front of the hat, depending on the style you want. Sew it firmly so it stays in place. A side bow often feels especially stylish and wearable.
Step 8: Finish and block
Add a neat edge around the brim and lightly block the hat if necessary. Blocking helps the brim sit more evenly and allows the bow to look more polished when attached.
Helpful tips
This hat looks beautiful in solid colors with a contrasting bow, but it can also be lovely in tonal shades. If you want a more classic summer look, keep the bow simple and the brim moderate. This is a great option for beach trips, garden parties, and everyday wear.
5. Crochet Checkered Bucket Hat Pattern
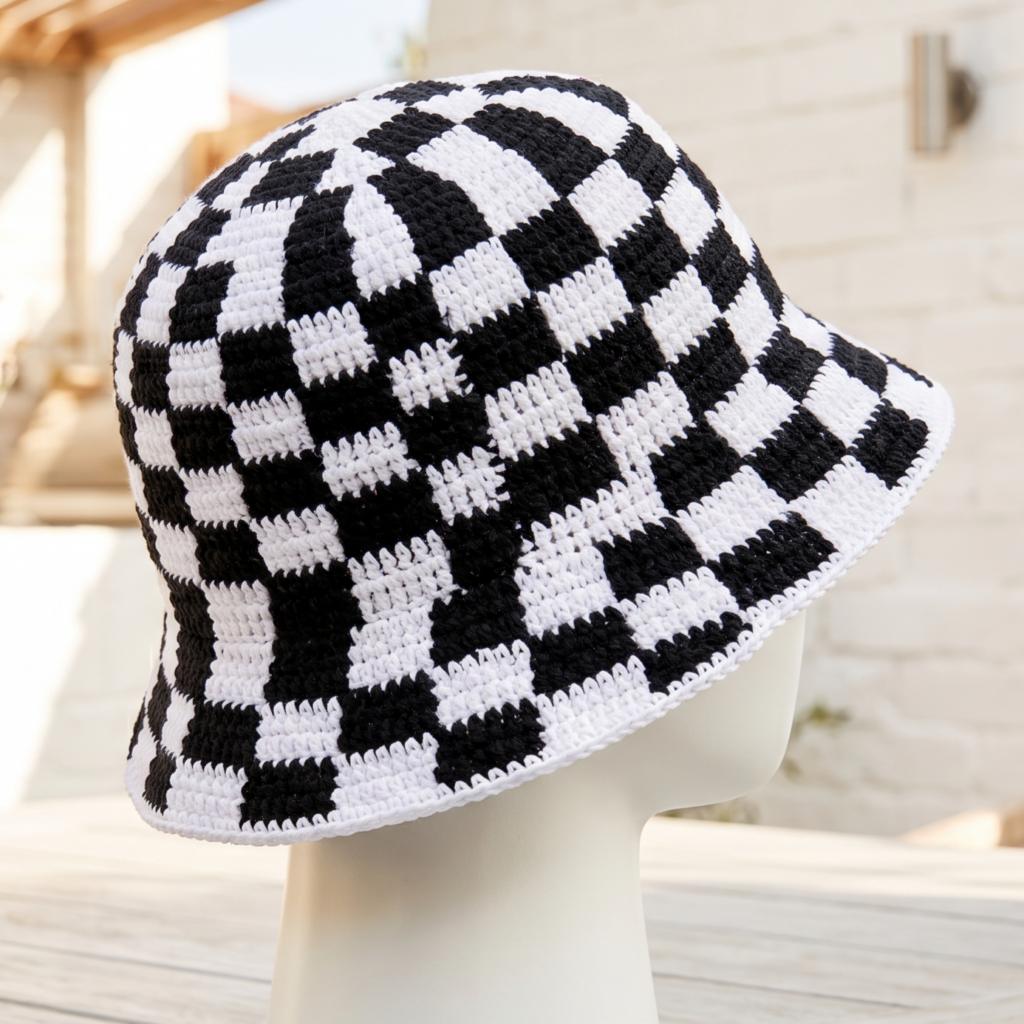
A checkered bucket hat is trendy, bold, and a little retro. The checkered pattern makes it instantly stylish, while the bucket shape keeps it practical and fun to wear. This is a great pattern if you want something modern that still feels handmade and wearable all summer long.
Step-by-step guide
Step 1: Pick your checkered colors
Choose two colors that contrast clearly. Classic combinations like black and white, cream and brown, or pink and cream all work well. A strong contrast helps the checkered pattern stand out clearly.
The color pairing is the heart of the design.
Step 2: Crochet the crown
Start with the crown using even increases until it reaches the width you need. Keep the crown smooth and flat because it will serve as the base for the checkered pattern. Accuracy here helps the whole hat fit better.
A clean crown gives the hat structure.
Step 3: Begin the checkered pattern
Work the checkered design using color changes or a tapestry-style method. Keep the squares even in size so the pattern stays readable. This is the main decorative element, so take your time with the first few rows until the rhythm feels natural.
The checks give the hat its trendy look.
Step 4: Continue through the side section
Keep the checkered pattern going around the body of the hat. Watch your tension carefully during color changes so the fabric remains smooth. The side section should feel balanced and not pull too tightly.
The sides help showcase the pattern.
Step 5: Shape the brim
Add the brim in the same checkered pattern or use a simplified version if you want the edge to be less busy. A gently flared brim will give the hat a stylish finish and make the pattern feel complete.
The brim frames the checkered design.
Step 6: Keep the edges neat
Because checkered patterns rely on visual alignment, a straight edge matters a lot. Make sure the bottom edge of the brim is tidy and even. If needed, add a border to finish the edge neatly.
Step 7: Block the hat
Blocking can help the checks sit evenly and improve the shape of the brim. It also helps the hat feel more polished and ready to wear.
Helpful tips
This hat looks especially stylish in bold, high-contrast colors, but soft neutral checks can also look beautiful. If you want a more fashion-forward version, try pastel checks or a two-tone palette with a soft brim. This is a fun piece for festivals, beach days, or everyday summer styling.
Conclusion
Crochet summer hats are a wonderful way to combine style, shade, and creativity in one project. They are practical enough to wear on warm days, but fun enough to become standout accessories that complete an outfit. That balance of usefulness and personality is what makes them such a rewarding crochet project.
These five hat patterns each bring something different. The granny stitch bucket hat feels relaxed and classic. The lace bucket hat is airy and elegant. The kiwi-inspired granny square hat is playful and bold. The brimmed summer hat with a bow feels polished and feminine. The checkered bucket hat is trendy and eye-catching. Together, they show how much variety you can create with the same basic hat shape.
Whether you are making a hat for yourself, a gift, or a summer market table, these patterns are a lovely place to start. With the right yarn, a comfortable fit, and a neat finish, your crochet hat can become a favorite piece for sunny days all season long.