Crochet fingerless mittens are one of the most rewarding small wearables you can make because they are practical, stylish, and beginner-friendly all at once. They keep your hands warm while still letting your fingers move freely, which makes them perfect for chilly mornings, working on your phone, typing, walking outside, or layering with winter outfits. They are also a wonderful project for anyone who wants to practice shaping without committing to a full glove pattern.
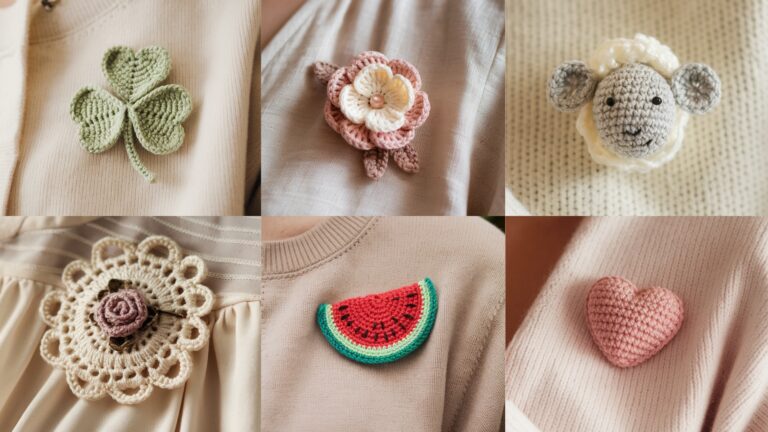
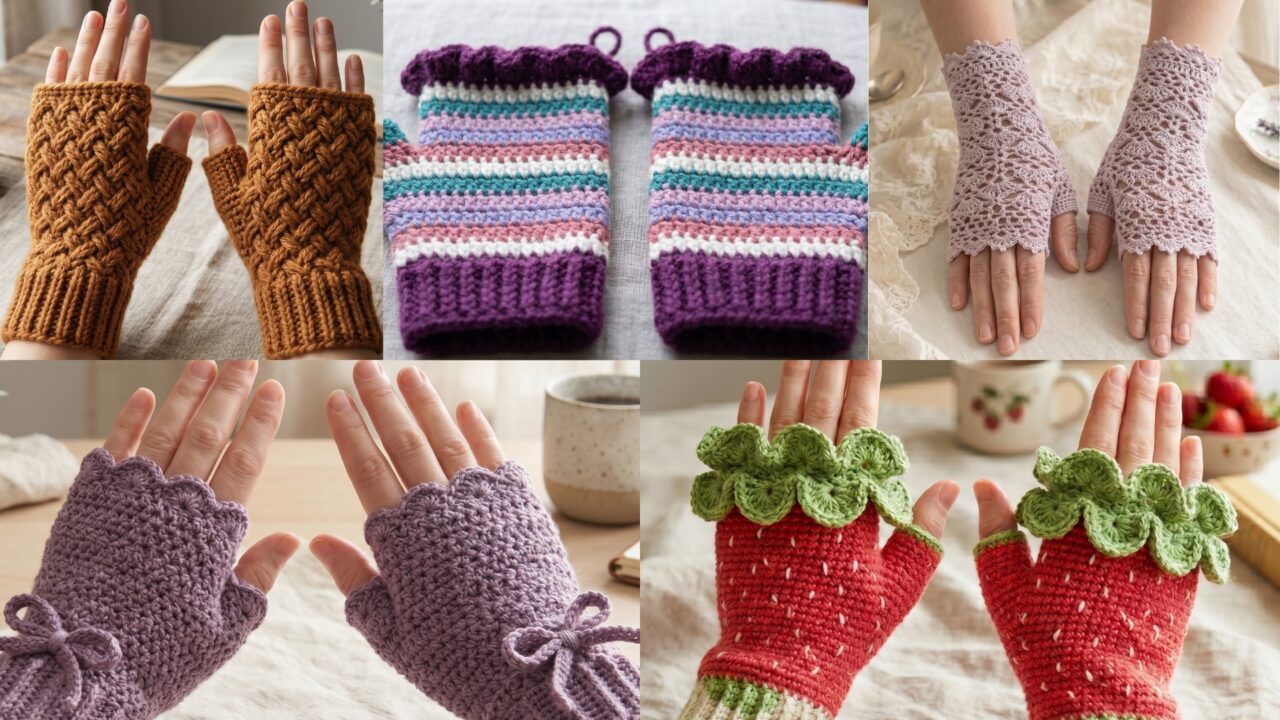
What makes fingerless mittens especially appealing is how much personality you can add to a simple shape. A ruffled striped mitten can feel playful and sweet. A scalloped edge mitten with a bow brings in a soft feminine look. A wheat stitch mitten feels textured and cozy. A strawberry inspired ruffle mitten adds a cute seasonal twist. A Victorian lace mitten feels elegant and timeless. Each one has its own character, but all of them are wearable, giftable, and great for beginners who want a project that looks impressive without being too difficult.
In this post, you will find five easy crochet fingerless mitten patterns with detailed step-by-step guidance, practical notes, and finishing tips. These designs are written to be easy to follow while still giving you enough detail to create mittens that fit well, look polished, and feel comfortable to wear.
Quick Notes
Project type: Crochet fingerless mittens
Best for: Fall and winter wear, gifts, craft fairs, and handmade accessories
Skill level: Beginner to intermediate
Hook size: Usually 3.0 mm to 5.0 mm depending on yarn weight and desired fit
Yarn weight: DK, sport, worsted, or lightweight wool blend
Best yarn choice: Wool blends, soft acrylic, or cotton blends depending on warmth and stretch
Finished size: Customizable to hand and wrist measurements
Time to complete: A few hours or less per pair
Helpful stitches: Chain, slip stitch, single crochet, half double crochet, double crochet, shell stitch, lace stitches, wheat stitch, increases, decreases, ribbing, and edging
Common Materials
Most fingerless mittens can be made with the same basic supplies.
- Yarn in your chosen colors
- Crochet hook suited to the yarn
- Yarn needle
- Scissors
- Stitch markers
- Measuring tape
- Buttons or bows, optional
- Stitch markers for thumb opening if needed
For mittens, yarn choice matters because the piece should be warm enough to be useful, but not so thick that it feels stiff. A soft yarn with a little stretch usually works best. Wool blends are great for warmth, while cotton blends can be useful if you want a lighter mitten for transitional weather.
1. Crochet Fingerless Ruffle Mittens with Stripes Pattern
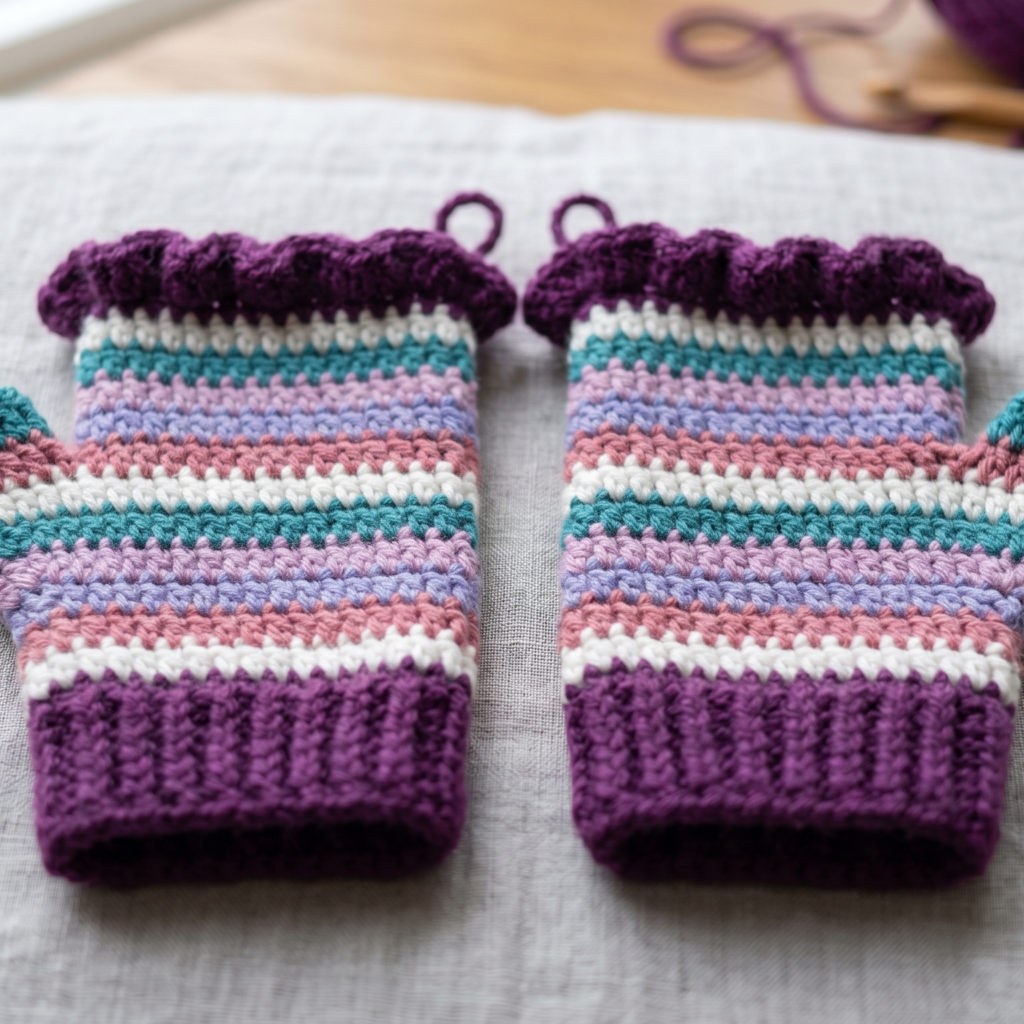
Fingerless ruffle mittens with stripes feel playful, cozy, and full of personality. The stripes keep the design simple and easy to customize, while the ruffled edge adds a soft decorative finish. This is a great pattern if you want something fun and beginner-friendly that still looks polished.
Step-by-step guide
Step 1: Choose your stripe colors
Pick two or more colors that work well together. You can go with soft pastels, bold contrast stripes, or seasonal shades like cream and burgundy. The stripe pattern will be the main visual feature, so choose colors you enjoy looking at.
The colors give the mittens their personality.
Step 2: Measure your hand and wrist
Before beginning, measure the circumference of your wrist, the width across your palm, and the length from wrist to the base of your fingers. Fingerless mittens need to fit snugly so they stay warm and comfortable.
A proper fit makes the mittens easy to wear.
Step 3: Crochet the cuff
Start with a ribbed or stretchy cuff that wraps around the wrist. This keeps the mittens secure and helps prevent slipping. A snug cuff is especially important for fingerless mittens because they are worn without full finger coverage.
The cuff gives the mittens structure.
Step 4: Work the striped body
Once the cuff is complete, begin crocheting the main mitten body in stripes. Keep the color changes neat and consistent so the stripes look even. The mitten should cover the back of the hand and the palm while still leaving the fingers free.
The stripes are the main decorative feature.
Step 5: Shape the thumb opening
If your mitten design includes a thumb hole, leave a small opening at the correct point while crocheting the body. Be sure to measure carefully so the opening falls in a comfortable place. It should be easy to wear without feeling too tight or too loose.
A good thumb opening improves the fit.
Step 6: Add the ruffle edge
At the top of the mitten, crochet a ruffled border using increases or shell-like stitches. This creates a soft feminine finish and balances the striped body. Keep the ruffle even all the way around.
The ruffle makes the mittens feel playful and pretty.
Step 7: Finish the thumb edge
If needed, add a neat border around the thumb opening. This helps the opening hold its shape and keeps the mitten feeling polished. A simple single crochet or slip stitch edge works well.
Step 8: Weave in ends and check the fit
Secure all yarn ends carefully and test the mitten on your hand. Make sure the cuff is snug, the thumb opening is comfortable, and the ruffle sits evenly.
Helpful tips
These mittens look especially cute in soft pastel stripes, but they also work beautifully in holiday colors or earth tones. If you want a more modern look, keep the ruffle subtle and use only two coordinated colors. They make excellent gifts because the style is cheerful but still wearable.
2. Crochet Scallop Edge Fingerless Mittens with Bow Pattern
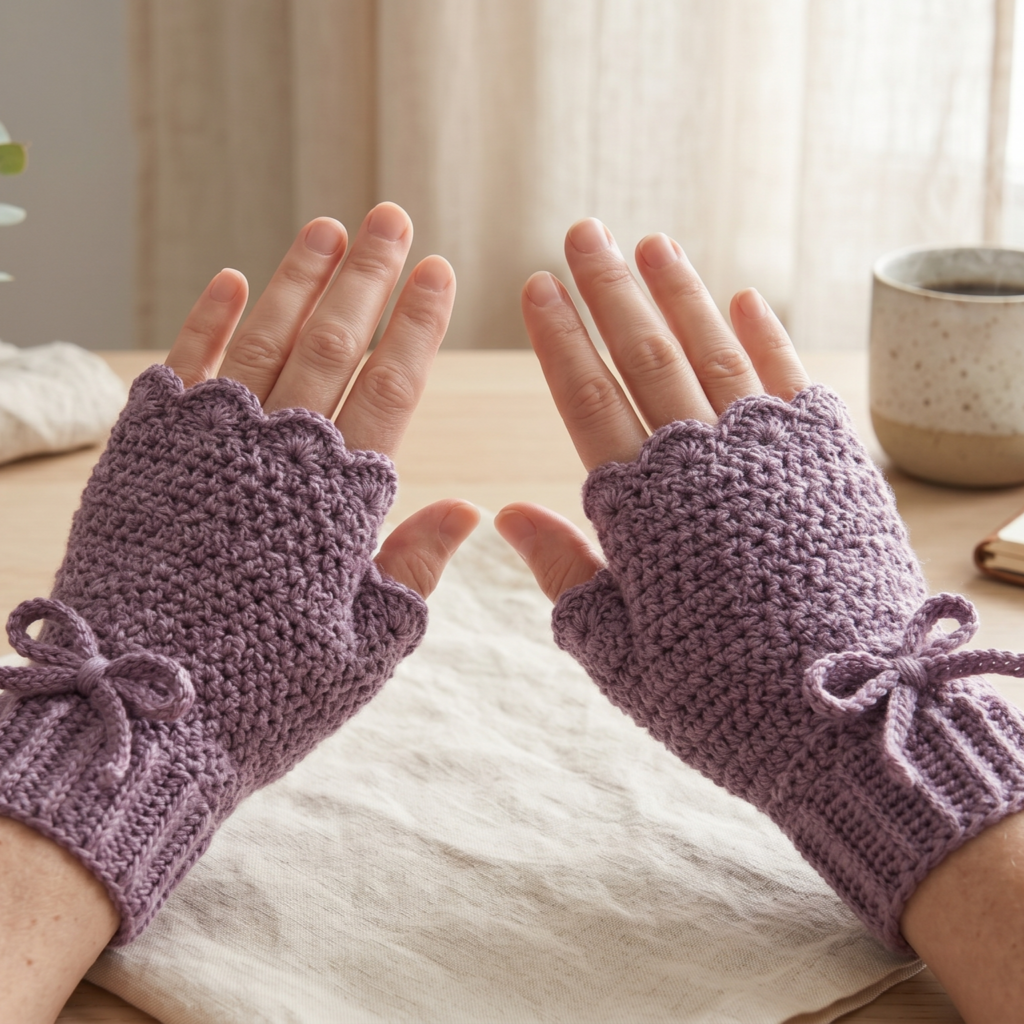
Scallop edge fingerless mittens with a bow feel sweet, delicate, and feminine. The scalloped edge gives the mittens a polished handmade look, and the bow adds just the right amount of charm. This pattern is wonderful if you like accessories that feel soft and elegant.
Step-by-step guide
Step 1: Select a soft yarn
Choose a yarn that feels comfortable against the skin and holds its shape well. Soft pink, cream, lavender, or pale gray all work beautifully for this style. Since the scallop and bow details are delicate, a solid color often looks best.
The yarn supports the elegant style.
Step 2: Measure the hand and wrist
Take measurements for wrist circumference, hand width, and mitten length. Scalloped mittens should fit comfortably without being too bulky. The design is pretty, but the fit still needs to be practical.
Good measurements help the mitten sit well.
Step 3: Crochet the base cuff
Start with a snug cuff using ribbing or a stretchy stitch. The cuff should hold the mitten in place while still feeling comfortable. This is the foundation of the mitten and should fit smoothly around the wrist.
The cuff keeps the mitten secure.
Step 4: Build the mitten body
Work upward from the cuff to create the body of the mitten. Keep the stitch pattern simple and even so the scallop edge can stand out later. The mitten should cover the hand neatly while leaving the fingers free.
A smooth body supports the decorative edge.
Step 5: Create the thumb opening
Leave an opening where the thumb needs to pass through or shape the mitten with a thumb gap as you crochet. Be careful with placement so the mitten sits naturally when worn.
The thumb opening improves comfort.
Step 6: Add the scallop edge
Crochet a scalloped border around the top opening and possibly around the thumb opening as well. Use evenly spaced shell stitches or fan stitches to create the soft rounded edge. The scallop should feel delicate and balanced.
The scallops are the signature detail.
Step 7: Attach the bow
Crochet a small bow separately or use a ready-made decorative bow if preferred. Sew it onto the mitten near the top or side, depending on the look you want. A centered bow feels classic, while a side bow feels more playful.
The bow adds a charming accent.
Step 8: Finish neatly
Weave in all yarn ends and inspect the scallop shape. Make sure the bow is sewn securely and the mitten stretches comfortably. A neat finish will make the whole piece feel more refined.
Helpful tips
These mittens look beautiful in soft monochrome colors, but they can also be sweet in contrasting bow and mitten colors. If you want a more elegant version, keep the bow small and the scallops delicate. They are lovely for gifts or dressy winter outfits.
3. Crochet Wheat Stitch Fingerless Mittens Pattern
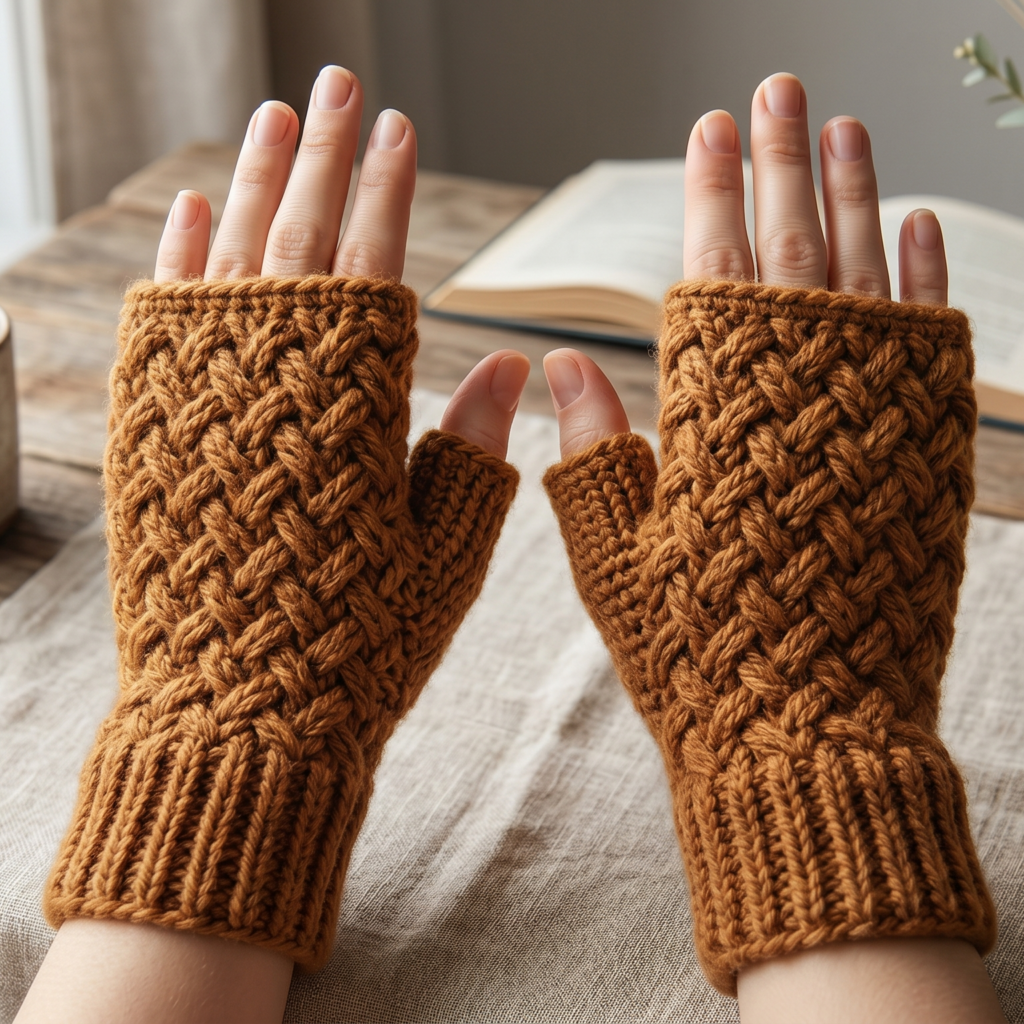
Wheat stitch fingerless mittens feel warm, textured, and classic. The stitch gives the mittens a cozy woven appearance that looks more advanced than it really is. This is a great choice if you want a practical mitten with a rich handmade texture.
Step-by-step guide
Step 1: Pick a warm, textured-friendly yarn
Choose a yarn that shows stitch definition clearly. Wool blends, soft acrylic, and cotton blends can all work well. Earth tones, cream, caramel, and muted jewel shades are especially beautiful with wheat stitch.
The yarn helps the texture stand out.
Step 2: Measure your hand
Measure the wrist, palm width, and mitten length before beginning. Wheat stitch creates a denser fabric, so it is important to make sure the mittens are not too tight. They should feel warm but still flexible.
A good fit keeps the mittens comfortable.
Step 3: Crochet the cuff
Start with a ribbed cuff that fits snugly around the wrist. This helps keep the mittens in place and adds a clean finish at the bottom. The cuff should feel stretchy and supportive.
The cuff anchors the mitten.
Step 4: Work the wheat stitch body
Begin crocheting the main mitten body in wheat stitch. Keep the stitch repeat even so the woven texture stays balanced. The stitch creates a beautiful textured surface that feels cozy and visually rich.
The wheat stitch is the main design feature.
Step 5: Shape the thumb opening
If the design includes a thumb hole, leave an opening at the right point. Make sure the placement is comfortable and wide enough for easy movement. Because the stitch is textured, count carefully as you shape.
A well-placed thumb opening improves usability.
Step 6: Continue upward
Work the mitten body until it reaches the desired height. The top should cover the back of the hand comfortably without getting in the way of finger movement. Keep the stitch pattern consistent all the way up.
Step 7: Finish the top edge
Add a clean border along the top opening. A simple edging helps the textured body feel finished and keeps the top from stretching too much. A narrow ribbed or single crochet border works well.
Step 8: Weave in ends and shape
Secure all loose yarn ends and check the fit. The finished mittens should feel warm, sturdy, and nicely textured. If needed, lightly block them so the stitches lie evenly.
Helpful tips
Wheat stitch mittens look especially lovely in solid earthy colors like tan, olive, rust, or soft gray. If you want a more classic winter look, choose cream or charcoal. They are ideal for everyday wear because they feel both simple and elevated.
4. Crochet Strawberry Inspired Ruffle Fingerless Mittens Pattern
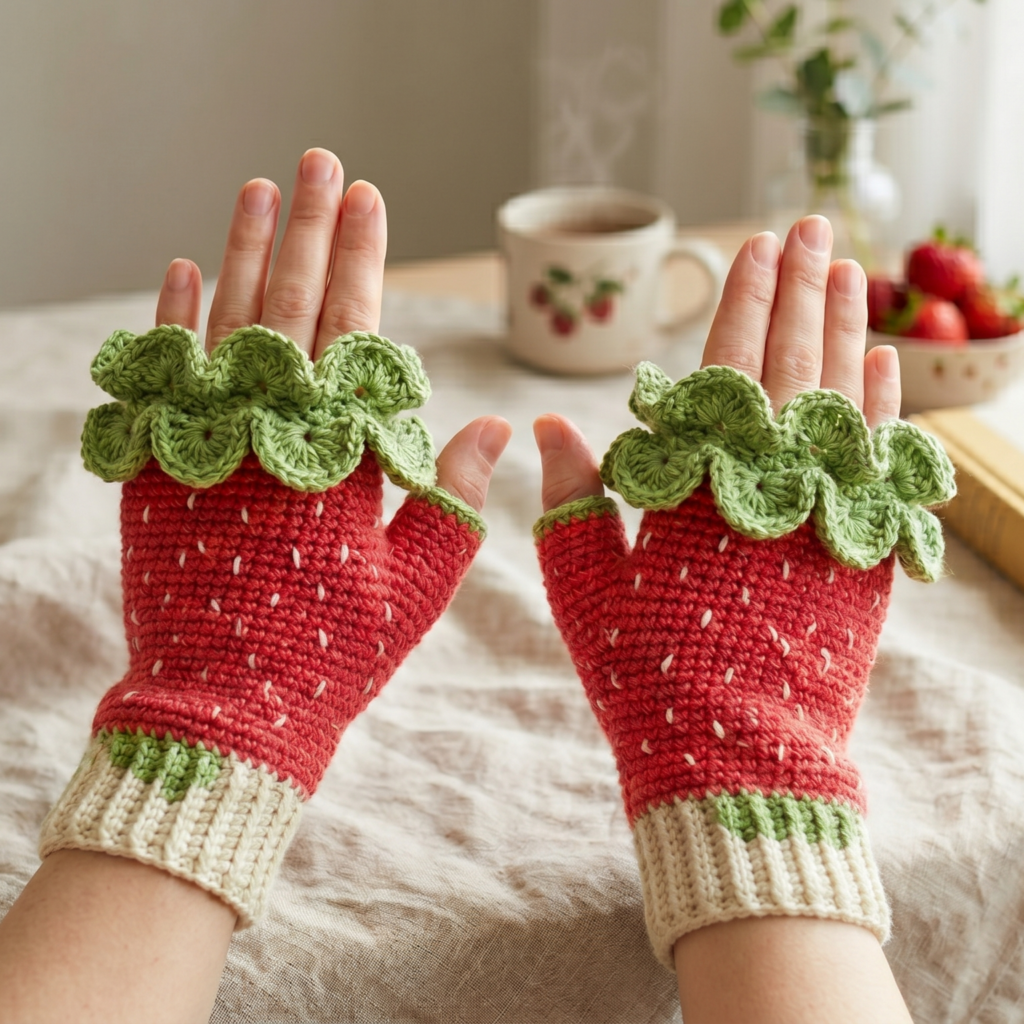
Strawberry inspired ruffle fingerless mittens feel cute, playful, and full of personality. The strawberry theme gives them a cheerful look, while the ruffle adds a sweet feminine touch. This is a lovely pattern if you want a whimsical mitten that stands out.
Step-by-step guide
Step 1: Choose strawberry colors
Pick a strawberry-inspired palette such as red, pink, green, and cream. You can make the mitten body red or pink, add green accents for the leafy detail, and use white or yellow for small strawberry seed touches. The color palette should feel fruity and fun.
The colors define the strawberry theme.
Step 2: Measure the hand and wrist
Take measurements of the wrist and hand so the mittens fit comfortably. Since this design has decorative ruffles, it is important that the base fit stays snug and practical. Keep the mitten body balanced so the ruffle does not overwhelm it.
A good fit keeps the mittens wearable.
Step 3: Crochet the cuff
Start with a stretchy cuff around the wrist. This will keep the mittens in place and provide a neat base for the design. Use a simple ribbed pattern so the fun strawberry details can shine later.
The cuff provides a stable base.
Step 4: Build the mitten body
Crochet the hand portion in the strawberry color. Keep the body smooth and even so the decorative details show well. You can add tiny embroidered seeds or small surface stitches if you want the mitten to feel more fruit-inspired.
The body carries the main color.
Step 5: Shape the thumb opening
If your mitten design includes a thumb hole, leave a comfortable opening at the right point. Make sure the fit feels good and the mitten still looks balanced when worn.
The thumb opening improves function.
Step 6: Add the leafy ruffle
At the top of the mitten, crochet a ruffled edge in green or a complementary color to resemble strawberry leaves. Use shell-like or scalloped stitches to create the leafy effect. This is the feature that gives the mittens their playful charm.
The leafy ruffle is the signature detail.
Step 7: Add seed details
If desired, embroider tiny seed stitches onto the mitten body. Keep them small and evenly spaced so the design feels cute and recognizable without becoming too busy.
The seeds make the strawberry theme clearer.
Step 8: Finish the edges
Secure the top and thumb opening with neat edging if needed. Weave in all yarn ends carefully and make sure the ruffle sits evenly.
Helpful tips
These mittens look adorable in red and green, but pink and sage can also feel sweet and modern. If you want a softer version, keep the seed details minimal and the ruffle slightly smaller. They are fun gift items because they feel whimsical and seasonal.
5. Crochet Victorian Lace Fingerless Mittens Pattern

Victorian lace fingerless mittens feel elegant, timeless, and delicate. They have a refined look that makes them feel more dressy than everyday mittens, while still being practical. This is a beautiful pattern if you want a mitten that feels romantic and graceful.
Step-by-step guide
Step 1: Choose a fine yarn
Select a yarn that works well with lace stitches and shows detail clearly. Lace weight, fingering, or fine cotton yarn can all work beautifully. Soft colors like ivory, pale pink, lavender, and cream are especially fitting for a Victorian style.
The yarn should highlight the lace.
Step 2: Measure carefully
Victorian lace mittens should fit close to the hand while still feeling comfortable. Measure the wrist, palm, and mitten length carefully before you begin. Because lace can stretch, it is important to get the size right.
Good sizing keeps the lace flattering.
Step 3: Crochet the cuff
Start with a slim cuff that fits neatly around the wrist. A lightly textured cuff or simple ribbing works well. The cuff should feel elegant and secure without taking attention away from the lace.
The cuff gives the mitten structure.
Step 4: Work the lace body
Begin the lace stitch pattern for the hand section. Keep the lace repeat even and balanced so it looks delicate and refined. Openwork stitches or shell patterns can create the Victorian feel beautifully.
The lace body is the central decorative feature.
Step 5: Shape the thumb opening
As you work, leave a thumb opening at the proper point. Because lace is delicate, be careful with stitch count and placement. The opening should feel comfortable and blend smoothly with the overall pattern.
A good thumb opening keeps the mitten practical.
Step 6: Extend the lace pattern
Continue the lace repeat until the mitten reaches the right length. The top edge should feel elegant and lightly decorative. Keep the fabric open enough to feel airy but structured enough to stay in place.
Step 7: Add a refined edge
Finish with a scalloped, picot, or delicate border at the top opening. This gives the mittens a Victorian finishing touch and helps frame the lace pattern beautifully.
The edge gives the mittens their polished style.
Step 8: Block gently
Blocking is especially important for lace mittens because it opens the stitches and helps the shape settle properly. Shape them carefully so the lace looks neat and the mitten keeps its elegant form.
Helpful tips
Victorian lace mittens look especially beautiful in cream, ivory, dusty rose, or soft gray. If you want a more dramatic version, use a slightly deeper jewel tone with the same delicate stitch pattern. They are perfect for dressy outfits or as a thoughtful handmade gift.
Conclusion
Crochet fingerless mittens are one of the best beginner-friendly wearable projects because they are small, practical, and easy to personalize. They let you practice shaping, texture, and edging while creating something useful enough to wear often. That combination of function and creativity is what makes them so rewarding.
These five mitten patterns each bring something different. The ruffled striped mittens feel playful and cozy. The scallop edge mittens with a bow feel soft and feminine. The wheat stitch mittens are warm and textured. The strawberry inspired ruffle mittens are sweet and whimsical. The Victorian lace mittens are elegant and timeless. Together, they show how much style you can create with a simple fingerless mitten shape.
If you want a small crochet project that is satisfying to make and lovely to wear, these fingerless mitten patterns are a beautiful place to start. With the right yarn, a comfortable fit, and a neat finish, your mittens can become favorite handmade accessories for chilly days and thoughtful gifts.