Crochet mug cozies are small projects with a surprisingly big impact. They are quick to make, easy to personalize, and practical enough to use every day, which makes them perfect for handmade gifts. A mug cozy can turn an ordinary cup into something special, add a cozy handmade touch to a coffee corner, and make a thoughtful little present for birthdays, holidays, teacher gifts, or craft fair tables. Because they are small, they are also wonderful for trying out new stitches and textures without committing to a large project.
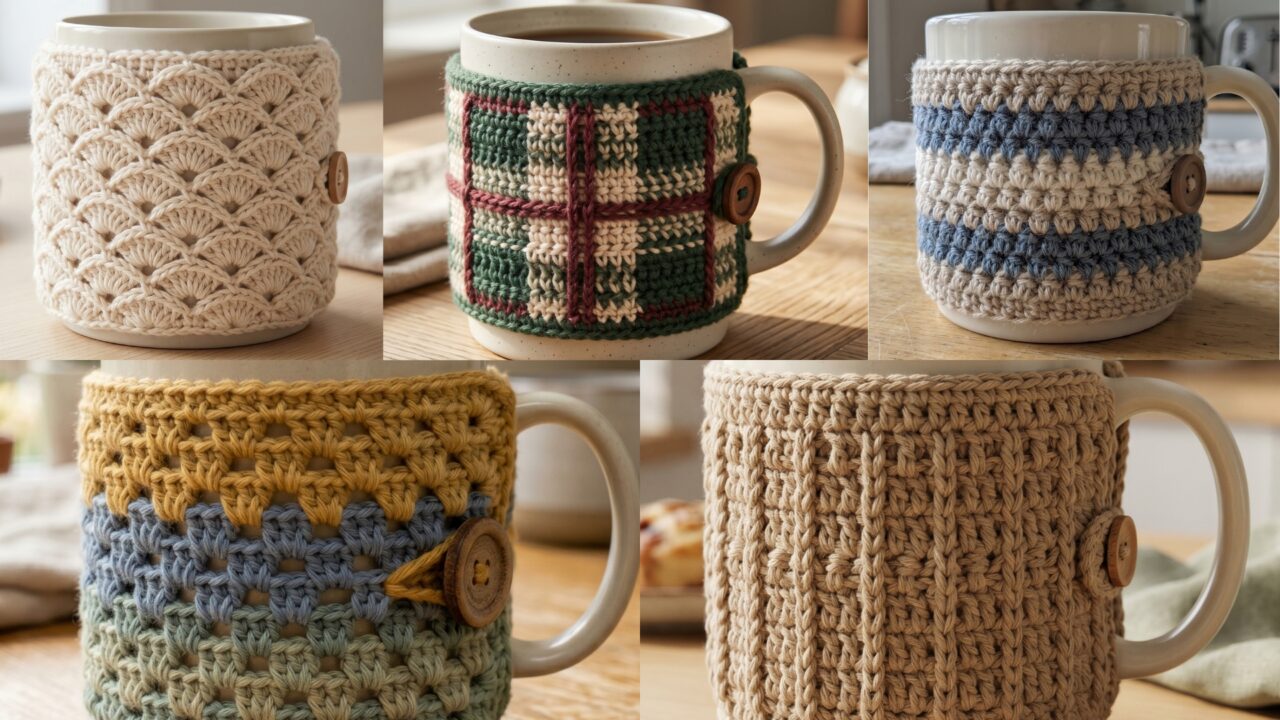
What makes crochet mug cozies especially appealing is how much style you can create from a simple shape. A textured cozy feels rich and tactile. A star stitch striped cozy has that beautiful handcrafted look people notice right away. Granny stitch makes a mug cozy feel cheerful and classic. A scallop edge adds a soft feminine finish. A plaid mug cozy feels modern and stylish. Each one is quick, useful, and fun to customize, which is exactly why these tiny projects are so satisfying.
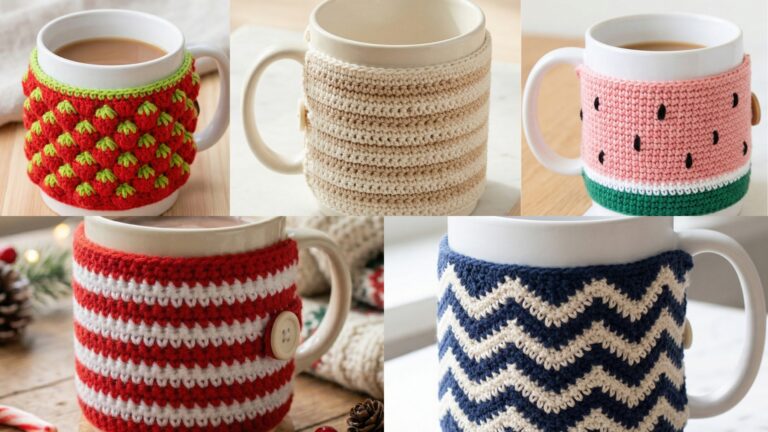
In this post, you will find five cute crochet mug cozy patterns with detailed step-by-step guidance, practical notes, and finishing tips. Each design is written to be easy to follow while still giving you enough detail to create a mug cozy that looks polished, fits well, and makes a lovely handmade gift. If you enjoy small crochet projects that are both pretty and practical, these cozy ideas are a great place to start.
Quick Notes
Project type: Crochet mug cozies
Best for: Handmade gifts, coffee lovers, tea lovers, craft fairs, and everyday use
Skill level: Beginner to intermediate
Hook size: Usually 2.5 mm to 4.0 mm depending on yarn weight and mug size
Yarn weight: Cotton, cotton blends, sport, or lightweight acrylic yarn
Best yarn choice: Cotton yarn for durability and easy washing
Finished size: Fits standard mugs, customizable by mug circumference
Time to complete: About 20 minutes to 1 hour per cozy
Helpful stitches: Chain, slip stitch, single crochet, half double crochet, double crochet, star stitch, shell stitch, granny stitch, color changes, button loops, and edging
Common Materials
Most mug cozies can be made with the same basic supplies.
- Cotton yarn in your chosen colors
- Crochet hook matched to the yarn
- Yarn needle
- Scissors
- Stitch markers
- Button or small closure
- Optional small decorative charms or labels
- A mug to measure around
For mug cozies, yarn choice matters because the cozy should be durable, washable, and comfortable to hold. Cotton is usually the best option because it holds its shape well and feels neat around a mug. A snug but not too tight fit is important so the cozy stays in place and still slides on and off easily.
1. Crochet Textured Mug Cozy Pattern
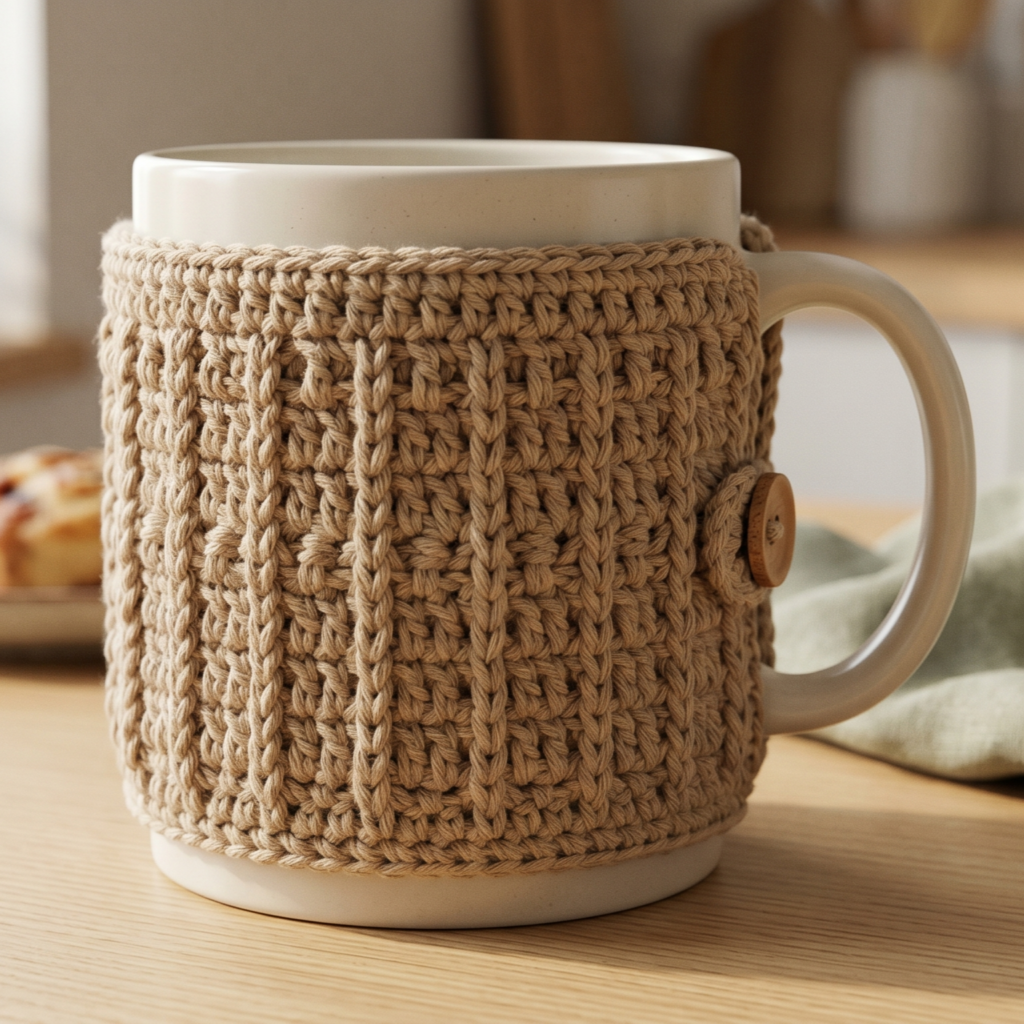
A textured mug cozy feels rich, cozy, and wonderfully tactile. It is a great choice if you want a simple mug cozy with a little extra depth and visual interest. The texture makes it feel handmade in a very satisfying way, while still being practical for everyday use.
Step-by-step guide
Step 1: Choose a sturdy yarn
Start with cotton or a cotton blend in a color that suits the person you are gifting it to. Neutral shades like cream, gray, or tan feel classic, while soft pinks or deep seasonal colors can make the cozy feel more personalized. Because the texture will already stand out, a solid color often works best.
The yarn sets the tone of the cozy.
Step 2: Measure the mug circumference
Wrap your yarn or measuring tape around the mug you want to fit. The cozy should be snug enough to stay in place but not so tight that it becomes hard to put on. Mark the length carefully because a good fit makes the cozy look neater and work better.
A good measurement is the foundation of a proper fit.
Step 3: Crochet the foundation chain
Chain the length needed to wrap around the mug. Make sure the chain is not too tight, because the cozy needs a little flexibility. Check the length against the mug before continuing so you do not have to unravel later.
The foundation chain creates the main wrap.
Step 4: Work the textured stitch pattern
Begin crocheting rows of textured stitches such as front post stitches, raised stitches, or a pattern that creates a dense fabric. Keep the stitches even so the texture looks clean and balanced. The fabric should feel soft but structured.
The texture is the main design feature.
Step 5: Keep the cozy width even
As you work, check that the width stays consistent and covers enough of the mug. You want the cozy to protect your hands from the heat while still fitting neatly around the cup. If the edges start to curl, adjust your tension or stitch count.
Step 6: Add a closure
Attach a button and loop or a small tie closure at one end. This helps the cozy wrap securely around the mug and makes it easy to remove for washing. A button in a matching or contrasting color can add a nice finishing detail.
A closure keeps the cozy functional.
Step 7: Finish the edges
Add a simple border around the top and bottom edges if needed. A clean edge helps the texture feel more polished. If you want a more decorative finish, a narrow picot or slip stitch border can work well.
Step 8: Weave in ends and test the fit
Weave in all ends carefully, then place the cozy around the mug to check the fit. It should stay in place without slipping and feel comfortable to hold. If needed, make slight size adjustments for your next version.
Helpful tips
This cozy looks especially nice in solids because the texture becomes the star. It is a great choice for beginner gift sets because it is simple, practical, and easy to adapt to different mug sizes.
2. Crochet Star Stitch Striped Mug Cozy Pattern
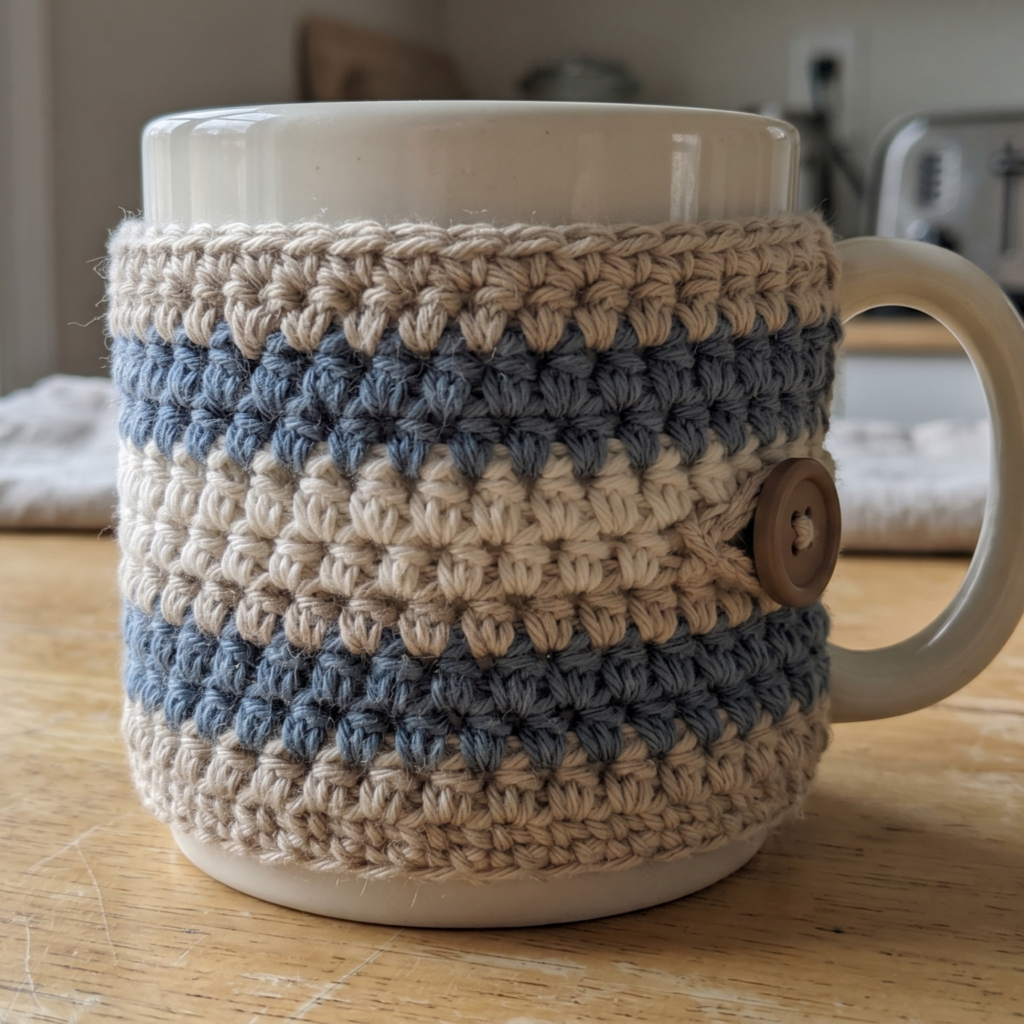
A star stitch striped mug cozy has a beautiful handcrafted look that feels playful and detailed. The star stitch creates a lovely texture, and the stripes make the design feel cheerful and modern. This is a great cozy if you want something a little more eye-catching.
Step-by-step guide
Step 1: Pick two or more stripe colors
Choose colors that work well together. You can go with soft neutrals for a calm look or use brighter colors for something more fun. Since star stitch already has a lot of visual interest, it helps to choose stripes that feel balanced rather than too busy.
The colors shape the overall style.
Step 2: Measure the mug
Take the mug measurement so the cozy wraps around comfortably. Star stitch tends to create a slightly thicker fabric, so sizing matters. Check the wrap length before you begin the stripe sequence.
A proper fit keeps the cozy useful.
Step 3: Start the base row
Create a foundation chain and work the first few rows in a simple stitch to establish the shape. This helps the star stitch sit more neatly once you begin the decorative section. Keep the edges straight and even.
The base row supports the stitch pattern.
Step 4: Work the star stitch repeat
Begin the star stitch pattern using the chosen yarn color. Keep your stitches consistent because star stitch looks best when the points stay even. This stitch creates a lovely texture that resembles tiny stars across the surface.
The star stitch is the focal point.
Step 5: Add the stripe changes
Switch colors at planned intervals to create stripes across the cozy. Keep the transitions neat and secure. You can make wide stripes for a bold look or narrow stripes for a more delicate style.
The stripes make the cozy feel lively.
Step 6: Check alignment
Because the star stitch has a distinct texture, make sure your rows stay aligned and do not tilt. A straight piece will wrap the mug more evenly. If needed, count carefully so both sides remain balanced.
Step 7: Add the closure
Sew on a button and loop or tie closure so the cozy can fasten around the mug. Place it at the end of the wrap so it is easy to secure. Choose a button that complements one of the stripe colors for a polished finish.
Step 8: Finish neatly
Weave in all ends and give the cozy one final look to make sure the stripes line up well. Then test it on the mug to ensure the fit is snug and comfortable.
Helpful tips
This cozy looks especially beautiful in soft blue and cream, pink and white, or seasonal holiday color combinations. It makes a lovely handmade gift because it feels thoughtful and visually interesting without taking too long to complete.
3. Crochet Granny Stitch Mug Cozy Pattern
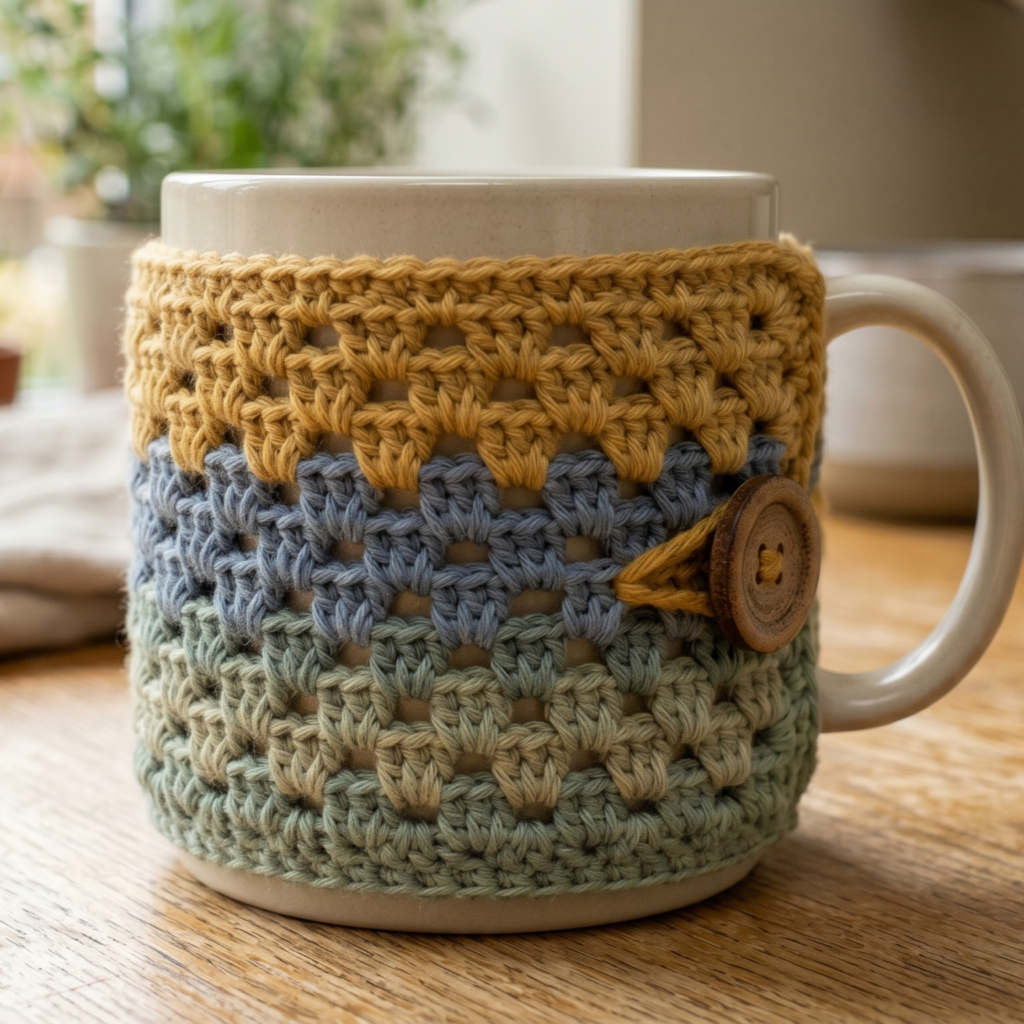
A granny stitch mug cozy is classic, cheerful, and full of charm. The familiar granny texture makes it feel cozy and handmade in the best way. It is also a great beginner-friendly project because the stitch pattern is easy to repeat and very satisfying to work.
Step-by-step guide
Step 1: Select your colors
Choose one or more colors depending on the look you want. A single-color granny stitch cozy feels classic, while color changes create a more playful and vintage-inspired style. Bright colors make it cheerful, while neutrals make it feel clean and modern.
The colors influence the cozy’s personality.
Step 2: Measure the mug
Before starting, wrap a measuring tape or yarn around the mug to determine the needed length. Granny stitch has a little stretch, so keep the fit snug enough for the cozy to stay in place.
The right size is important for daily use.
Step 3: Chain your foundation
Chain enough to fit around the mug. Be careful not to make the chain too tight because you want the cozy to wrap smoothly. Check the length before beginning the stitch pattern.
A good foundation makes the rest easier.
Step 4: Work the granny stitch rows
Crochet the body using granny stitch clusters or small shell-like groupings. Keep the spacing even so the pattern looks balanced. The open texture gives the cozy a light, airy feel while still being decorative.
The granny stitch is the heart of the cozy.
Step 5: Add color changes if desired
If you want a more playful design, switch colors every few rows. Keep the transitions clean and choose colors that look good together. The result can feel very nostalgic and handmade.
Color changes make the cozy more dynamic.
Step 6: Keep the shape rectangular
Make sure the cozy stays straight and even so it wraps around the mug smoothly. If one side starts to curve, adjust the stitch count or tension. A neat rectangle will make fastening much easier.
Step 7: Add a closure
Attach a button and loop, snap, or small tie. The closure should feel secure but simple. A handmade button made from wood or resin can look especially lovely with granny stitch.
Step 8: Edge and finish
Add a simple edging if needed and weave in all loose ends. Place the cozy on the mug to make sure it fits comfortably and the button closes in the right place.
Helpful tips
This cozy is perfect for using up small amounts of yarn and looks beautiful in colorful combinations. It is also a lovely option for matching with a handmade coaster set or tea gift.
4. Crochet Scallop Mug Cozy Pattern

A scallop mug cozy feels soft, elegant, and a little feminine. The scalloped edge adds a sweet decorative detail that makes the cozy feel special without being too complicated. It is a lovely pattern if you want a cozy that feels polished and pretty.
Step-by-step guide
Step 1: Pick a soft, pretty yarn
Choose cotton yarn in a color that feels gentle and cozy. Pink, cream, blush, lavender, or soft blue all work beautifully. Since the scallop edge is the highlight, a solid or simple color often looks best.
The yarn supports the sweet look.
Step 2: Measure the mug circumference
Check the mug size before beginning so the cozy fits properly. Scallop cozies should still wrap snugly around the mug, even though they have a decorative edge. Make sure the wrap length allows for the scallop detail without becoming too bulky.
Step 3: Create the base band
Crochet a slim rectangular band using single crochet or half double crochet. Keep the stitches even so the cozy lays flat. This base will support the scallop edging later.
The band gives the cozy its structure.
Step 4: Add the scallop pattern
Work the scalloped edge along one side or both sides of the cozy. Shell stitches or fan stitches work beautifully here. Keep the scallops evenly spaced so the edge looks neat and balanced.
The scallops are the signature detail.
Step 5: Keep the body smooth
If you are adding scallops only to the top or bottom, keep the center section simple. This lets the decorative edge stand out and makes the cozy look more refined.
Step 6: Add the closure
Sew on a button and loop or another secure closure so the cozy can wrap around the mug. A small decorative button can complement the scallops very nicely and add a charming finishing touch.
Step 7: Finish the edges
Weave in the ends and trim any uneven yarn. If needed, lightly shape the scallops with your fingers or block the cozy so the edges sit nicely and look even.
Step 8: Test on the mug
Wrap the cozy around the mug and check the placement of the closure. It should sit comfortably and the scallops should be visible without pulling the fabric.
Helpful tips
This design looks especially lovely in pastel colors or cream tones. It is a beautiful gift idea for tea lovers, and it can be paired with a mug and tea bag to create a thoughtful little set.
5. Crochet Plaid Mug Cozy Pattern
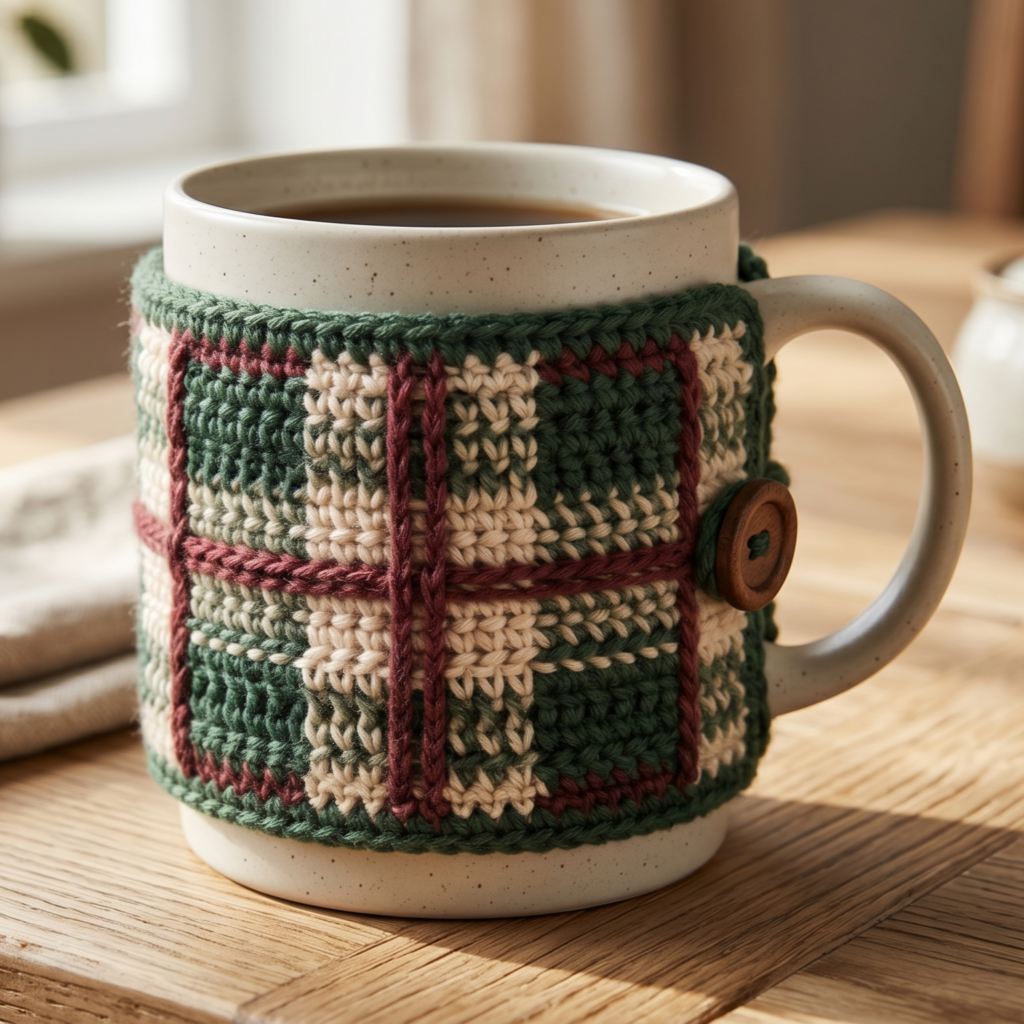
A plaid mug cozy feels modern, cozy, and stylish. The plaid pattern gives it that classic layered look that is perfect for fall, winter, or anyone who loves a more graphic handmade style. It is especially nice if you want a mug cozy that feels seasonal and polished.
Step-by-step guide
Step 1: Choose your plaid colors
Pick two or three yarn colors that create a good plaid effect. Dark green, cream, burgundy, navy, tan, and black all work very well for plaid. The key is choosing colors that contrast enough to show the pattern clearly.
The colors create the plaid look.
Step 2: Measure the mug
Take the mug circumference so the cozy fits properly. Plaid patterns are more visible when the piece is a good fit, so accurate sizing matters. Keep the cozy snug but not too tight.
The right fit helps the pattern stay clear.
Step 3: Crochet the base band
Begin with a foundation chain and work a simple rectangular band. Keep the base clean and even because the plaid effect will be built on top of it. The fabric should be flat and easy to wrap.
The base provides the structure.
Step 4: Add the first color blocks
Work rows or sections in your first color to create the plaid foundation. Keep the rows neat and evenly spaced. This helps set the rhythm for the rest of the design.
The first blocks define the layout.
Step 5: Add the crossing color stripes
Layer in your second and third colors to create the plaid pattern. This can be done with color changes or surface crochet depending on the style you prefer. Keep the stripes straight and balanced so the design reads clearly.
The stripes are what make the plaid pattern stand out.
Step 6: Keep the pattern aligned
Plaid can look messy if the lines are uneven, so check your alignment often. The rows should sit cleanly on the mug cozy and the colors should feel intentional. Careful counting will help the pattern stay tidy.
Step 7: Add the closure
Attach a button and loop so the cozy wraps securely around the mug. Choose a button that fits the plaid aesthetic, such as wood, dark resin, or a simple matte button.
Step 8: Finish and block
Weave in all ends carefully and lightly block if needed so the plaid lines sit neatly. Once finished, test the cozy on the mug and check that the pattern is visible from the front.
Helpful tips
Plaid cozies look especially lovely in warm seasonal colors, but they can also be made in modern monochrome combinations. They make excellent gifts because the pattern feels stylish and thoughtful without being difficult to wear or use.
Conclusion
Crochet mug cozies are one of the sweetest small projects you can make because they are useful, quick, and easy to personalize. They are perfect for handmade gifts, craft fair stock, or simply making your own cup of coffee or tea feel a little more special. A well-made mug cozy combines beauty and practicality in a small, satisfying project.
These five patterns each bring something different. The textured cozy feels rich and tactile. The star stitch striped cozy is detailed and eye-catching. The granny stitch cozy is classic and cheerful. The scallop cozy feels soft and elegant. The plaid cozy is modern and stylish. Together, they show just how much variety you can create from a simple mug wrap.
If you enjoy small crochet projects that are quick to finish and lovely to gift, these mug cozy patterns are a wonderful place to start. With the right yarn, a neat fit, and a simple closure, your crochet mug cozies can become charming handmade pieces that brighten everyday moments.