Crochet vests are one of the most versatile pieces you can make because they sit perfectly between cozy and stylish. They are easy to layer, simple to customize, and wearable across seasons, which makes them a favorite for handmade wardrobes. A vest can be soft and romantic, structured and polished, or relaxed and everyday-friendly depending on the stitch pattern and shaping you choose. That is what makes crochet vests so rewarding: they are practical enough to wear often, but creative enough to feel special every time.
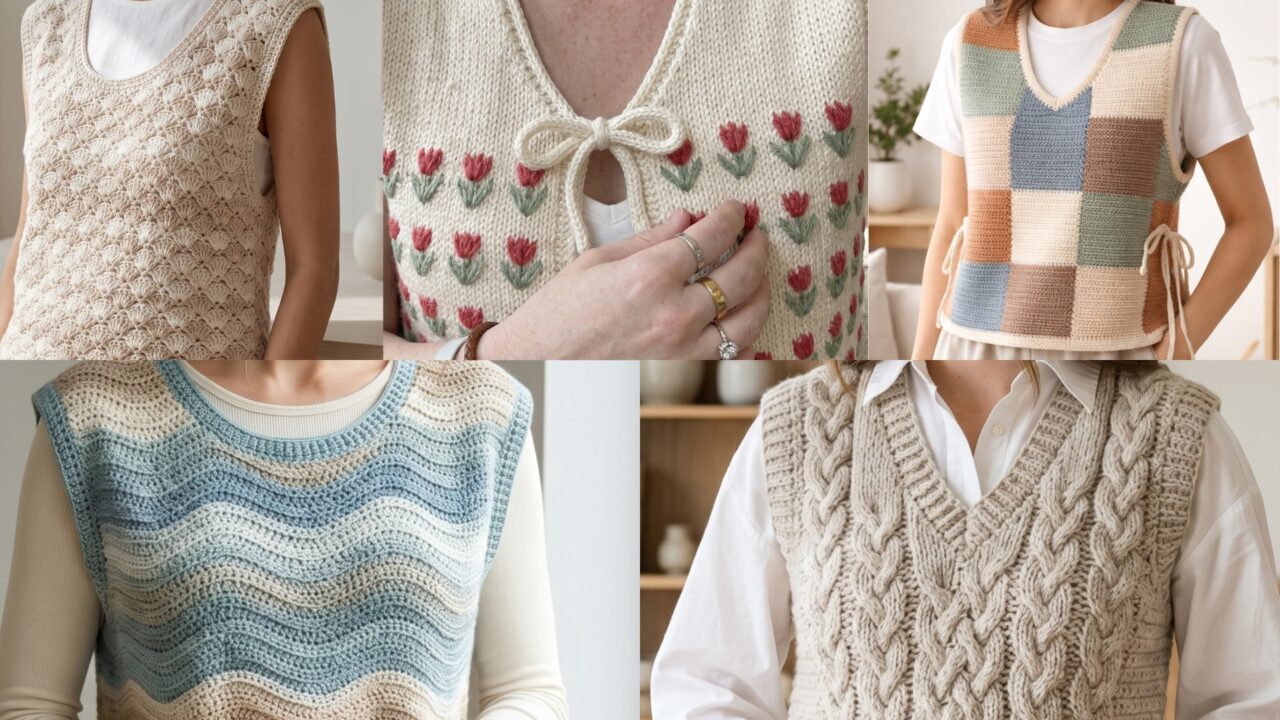
What makes crochet vests especially appealing is how much personality they can carry in such a simple silhouette. A cable sweater vest feels classic and textured. A tie-front rose stitch vest brings in a feminine, decorative look. A patchwork granny square vest feels colorful and artistic. A wavy Sunday vest has a relaxed, easygoing feel. A seashell vest feels soft and coastal. Each design has its own mood, but all of them are the kind of pieces you will want to reach for again and again because they are so easy to style.
In this post, you will find five crochet vest patterns with detailed step-by-step guidance, practical notes, and finishing tips. Each design is written to be easy to follow while still giving you enough detail to create a vest that looks polished, fits beautifully, and works well in a modern wardrobe. If you enjoy making garments that are wearable, flexible, and full of handmade charm, these vest patterns are a wonderful place to begin.
Quick Notes
Project type: Crochet vests
Best for: Layering, handmade fashion, transitional weather, gifts, and wardrobe staples
Skill level: Beginner to intermediate, depending on shaping and stitch detail
Hook size: Usually 3.5 mm to 6.0 mm depending on yarn weight and desired drape
Yarn weight: DK, worsted, light bulky, or sport weight yarn
Best yarn choice: Cotton blends, wool blends, or soft acrylic blends with good drape and structure
Finished size: Customizable to bust, torso, and armhole measurements
Time to complete: Several hours to a few days depending on detail and assembly
Helpful stitches: Chain, slip stitch, single crochet, half double crochet, double crochet, granny stitch, shell stitch, cable stitches, increases, decreases, seaming, ribbing, ties, and edging
Common Materials
Most crochet vests use a similar set of supplies.
- Yarn in your chosen colors
- Crochet hook suited to the yarn
- Yarn needle
- Scissors
- Stitch markers
- Measuring tape
- Buttons or ties, optional
- Blocking tools, optional
- Row counter, optional
For vests, yarn choice matters because the garment needs to drape well while still holding its shape. A yarn that is too stiff can make the vest feel bulky, while a yarn that is too loose may stretch out over time. The best vest yarn usually feels soft, wearable, and slightly structured.
1. Crochet Weave Cable Sweater Vest Pattern
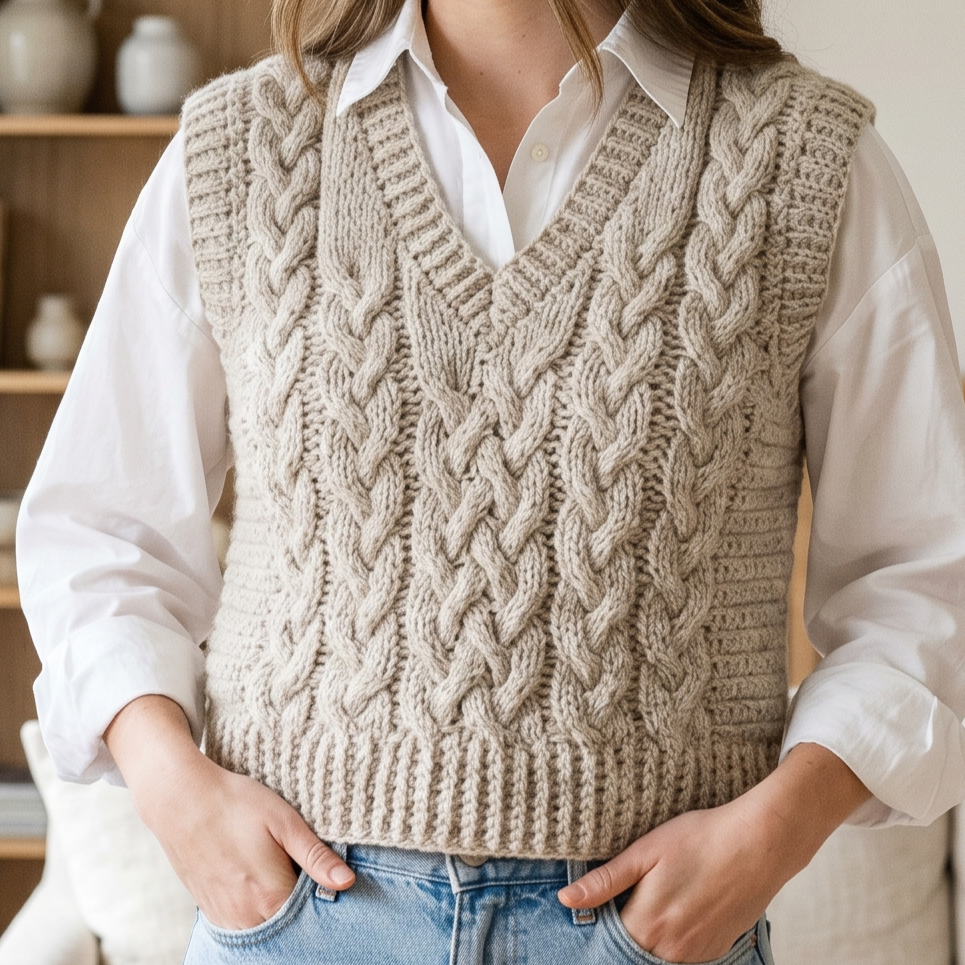
A weave cable sweater vest feels classic, textured, and timeless. The cable-inspired texture gives the vest a refined look that feels a little elevated, while the sleeveless silhouette keeps it modern and easy to layer. It is a beautiful choice if you want a vest that feels polished enough for everyday outfits but still warm and cozy.
Step-by-step guide
Step 1: Choose a structured yarn
Start with a yarn that has enough body to hold cable texture well. Wool blends or cotton blends with good stitch definition work especially nicely. The texture of the yarn should help the weave and cable details stand out.
A structured yarn helps the cable pattern show clearly.
Step 2: Take your measurements
Measure the bust, shoulder width, torso length, and armhole depth. A sweater vest should fit comfortably over tops without feeling tight under the arms. Accurate measurements are especially important for a textured vest because cables can make the fabric slightly denser.
A good fit keeps the vest comfortable and wearable.
Step 3: Crochet the front panel
Begin with the front panel using your chosen cable or weave stitch pattern. Keep the rows consistent so the texture stays even from top to bottom. If the pattern uses repeated crossing stitches, work slowly and keep your stitch count accurate.
The front panel is the focus of the design.
Step 4: Crochet the back panel
Make a matching back panel in the same stitch pattern or a slightly simpler version if you want to save time. Keep both panels the same size so the vest joins smoothly later. A consistent back and front create a clean silhouette.
Matching panels help the vest hang evenly.
Step 5: Shape the neckline and armholes
Once the panels are the right height, shape the neckline and armholes. A vest should sit comfortably across the shoulders and allow easy arm movement. Keep the armholes smooth and even so the vest layers well over shirts or dresses.
Good shaping is key to comfort.
Step 6: Join the shoulders and sides
Sew or crochet the shoulder seams and side seams together, leaving room for the armholes. Keep the seams neat because the cable texture will draw attention to the overall finish. A tidy join helps the vest look more polished and store-bought in the best way.
Step 7: Add ribbed borders
Finish the neckline, armholes, and hem with ribbing or a simple clean border. Ribbing adds structure and helps the vest sit neatly on the body. If you want the vest to feel especially refined, a narrow ribbed edge is a beautiful choice.
The borders complete the sweater-vest look.
Step 8: Block the vest
Blocking helps the cable texture relax and gives the vest a cleaner shape. Shape the vest gently so the cables sit well and the edges lie flat. This step is especially helpful for structured garments like sweater vests.
Helpful tips
This vest looks especially lovely in cream, oatmeal, warm gray, or deep earth tones. If you want a more modern feel, use a neutral color and let the texture do the work. It is a perfect layering piece over collared shirts, long sleeves, or simple tees.
2. Crochet Tie Front Rose Stitch Vest Pattern
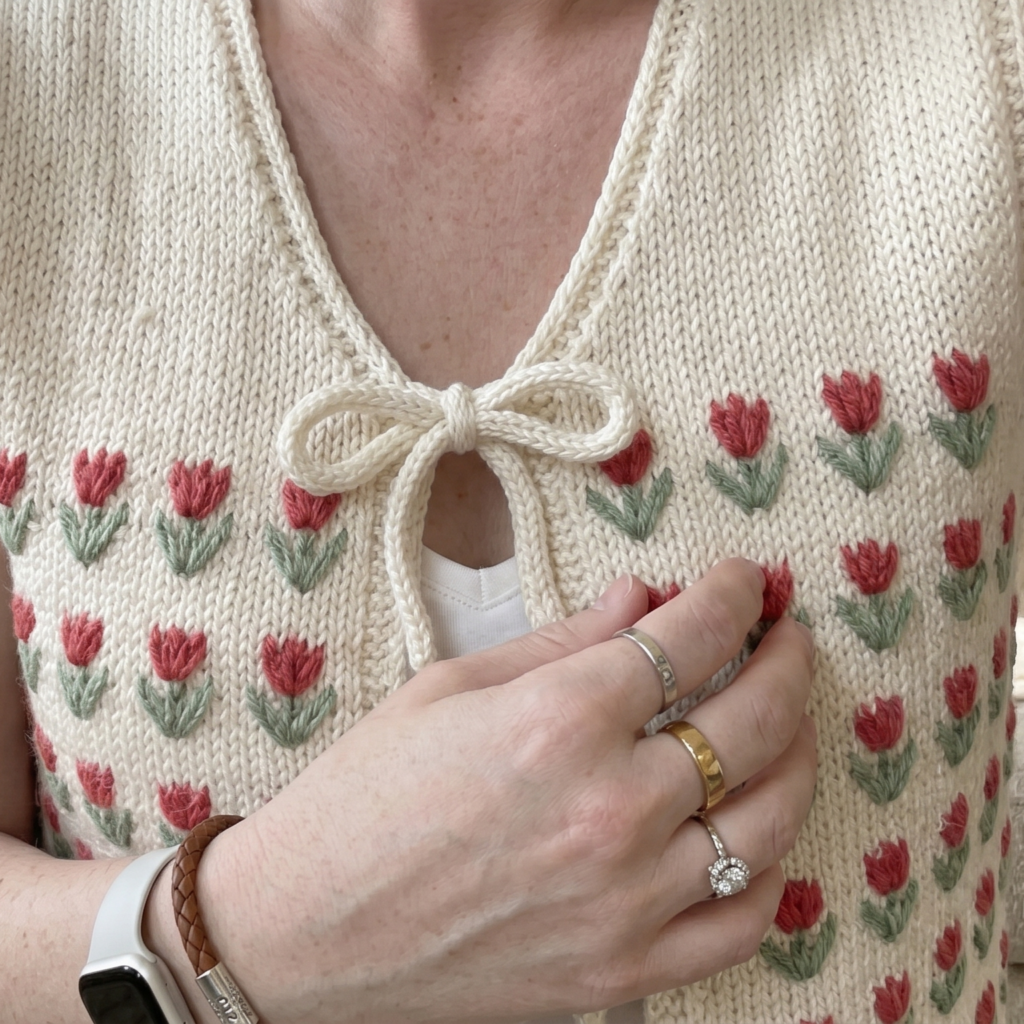
A tie front rose stitch vest feels feminine, delicate, and just a little romantic. The rose stitch adds a beautiful decorative texture, while the tie front makes the vest feel light and flattering. This is a lovely pattern if you want something soft and pretty that still feels wearable every day.
Step-by-step guide
Step 1: Choose a soft, feminine color
Pick a yarn color that supports the floral look of the rose stitch. Blush, cream, dusty pink, soft lavender, or sage all work beautifully. Since the tie-front style feels airy and light, the color should match that soft mood.
A gentle color helps the rose texture stand out.
Step 2: Measure for a flattering fit
Take bust and torso measurements before you begin. Tie-front vests are flexible, but the front panels still need to be shaped correctly so they sit comfortably and close neatly. Decide how low or high you want the front opening to sit.
A good fit makes the tie front more flattering.
Step 3: Crochet the back panel
Start with the back panel using the rose stitch or a similar floral-textured repeat. Keep the stitch pattern even so the floral texture looks balanced. The back panel gives the vest structure and should remain smooth and comfortable.
The back supports the overall fit.
Step 4: Crochet the front panels
Make two front panels that will overlap or tie in the front. Use the same stitch pattern as the back so the vest feels cohesive. Leave enough space for the opening and ties so the front does not sit too tightly.
The front panels create the tie-front shape.
Step 5: Shape the armholes and neckline
As with any vest, shape the armholes and neckline carefully. Since this one ties in the front, the neckline can be a little more open. Make sure the front pieces sit neatly and do not pull when tied.
Step 6: Add tie cords
Crochet or attach long tie cords to the front panels. Make sure they are strong enough to hold the vest closed comfortably. The ties can be simple cords or slightly decorative chains depending on the look you want.
The ties are the key structural detail.
Step 7: Join the shoulders
Sew the shoulder seams neatly so the vest sits properly. Because the front opens, the shoulders need to hold the shape of the piece while leaving the front flexible.
Step 8: Finish the edges
Add a clean border around the armholes, front opening, and hem. A soft edging keeps the rose stitch looking refined and finished. If desired, you can add tiny picots or subtle scallops to enhance the feminine look.
Step 9: Block lightly
A gentle block will help the rose stitch settle and the front pieces lie evenly. It also helps the vest feel more polished when worn.
Helpful tips
This vest looks especially beautiful in blush, ivory, pale lilac, or soft sage. If you want a more romantic boutique look, keep the tie cords slim and the borders delicate. It is a gorgeous layering piece over dresses or fitted tops.
3. Crochet Patchwork Granny Square Vest Pattern
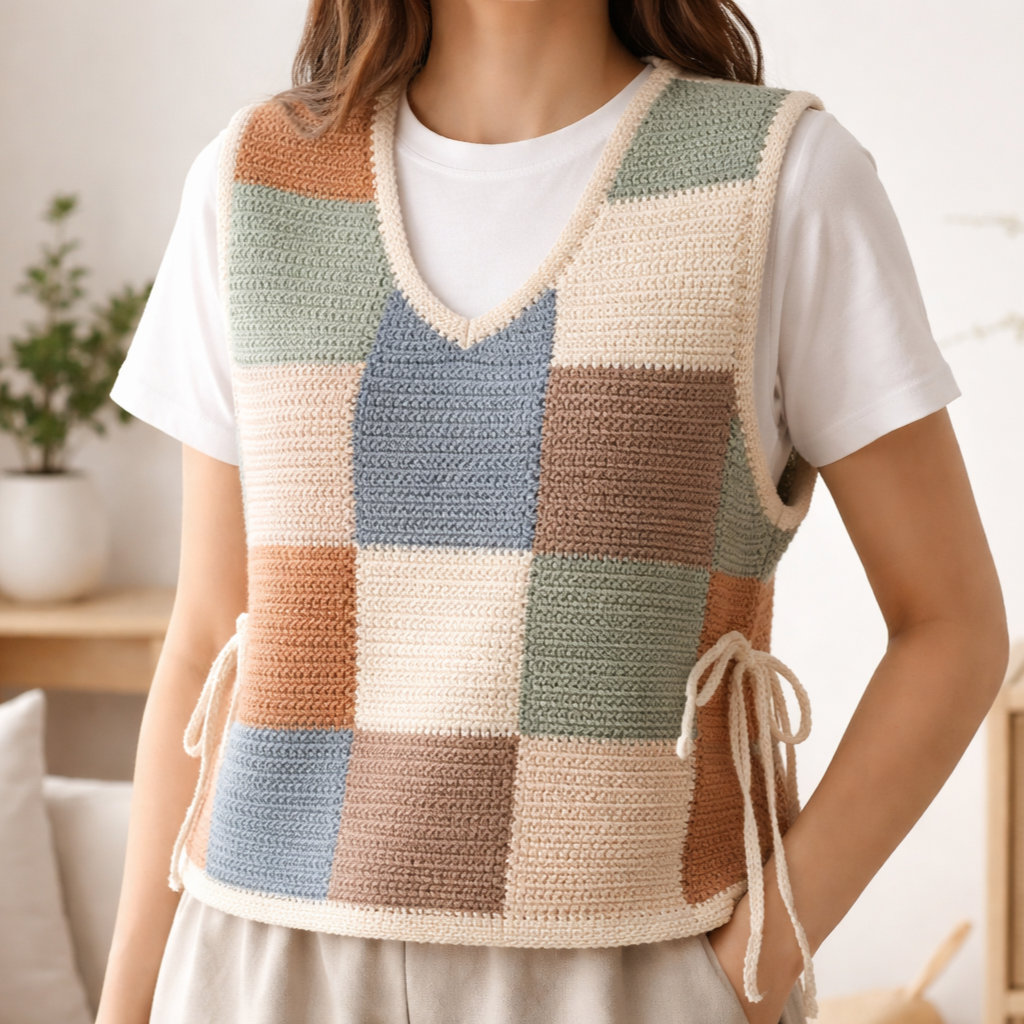
A patchwork granny square vest feels creative, colorful, and full of handmade charm. It is one of the best ways to use up smaller yarn amounts while still making a garment that feels trendy and wearable. Because each square can be a little different, this vest has a wonderfully artistic look.
Step-by-step guide
Step 1: Plan your color story
Before making the squares, decide on your color palette. You can go bold and bright, soft and pastel, or earthy and neutral. A thoughtful palette helps the patchwork feel intentional even when the squares are varied.
A planned color story makes the vest feel cohesive.
Step 2: Crochet the granny squares
Make enough granny squares for the front and back of the vest. Keep each square the same size so they join evenly. If you want a more playful effect, vary the center color while keeping the border consistent.
Consistent square size makes assembly much easier.
Step 3: Arrange the layout
Lay the squares out before joining them so you can see how the vest will look. Decide which squares will form the shoulders, chest, and body. This step is very important for patchwork pieces because placement affects the final fit and style.
A planned layout helps balance the vest.
Step 4: Join the squares
Sew or crochet the squares together carefully. Make sure the seams are neat and the corners align properly. Patchwork garments look best when the joins are tidy and the layout feels deliberate.
Clean joins make the vest feel polished.
Step 5: Shape the armholes and neckline
After the panels are assembled, shape the neckline and armholes. You may need to leave open sections or add shaping rows to make sure the vest fits comfortably. This is where the squares begin to transform into a garment.
Step 6: Make the back panel
Join enough squares to create the back of the vest. Keep the shape symmetrical so it hangs evenly. If needed, add a few border rows to help the back and front match in height.
Step 7: Join the shoulders and sides
Attach the front and back at the shoulders and side seams, leaving armholes open. Check that the vest sits comfortably over the body and does not pull at the corners of the squares.
Step 8: Add border finishing
Border the neckline, armholes, and hem with a simple edging or ribbing. This helps unify the patchwork and gives the vest a more finished, boutique-style appearance.
Step 9: Block the squares and vest
Blocking is especially helpful for granny square garments. It helps each square sit flat and makes the joins cleaner. The vest will look much more polished after a careful block.
Helpful tips
This vest looks especially great in coordinated rainbow tones, earthy autumn shades, or soft pastel combinations. If you want a more modern look, keep the centers and borders consistent and let the patchwork do the visual work. It is a wonderful stash-busting project.
4. Crochet Wavy Sunday Vest Pattern
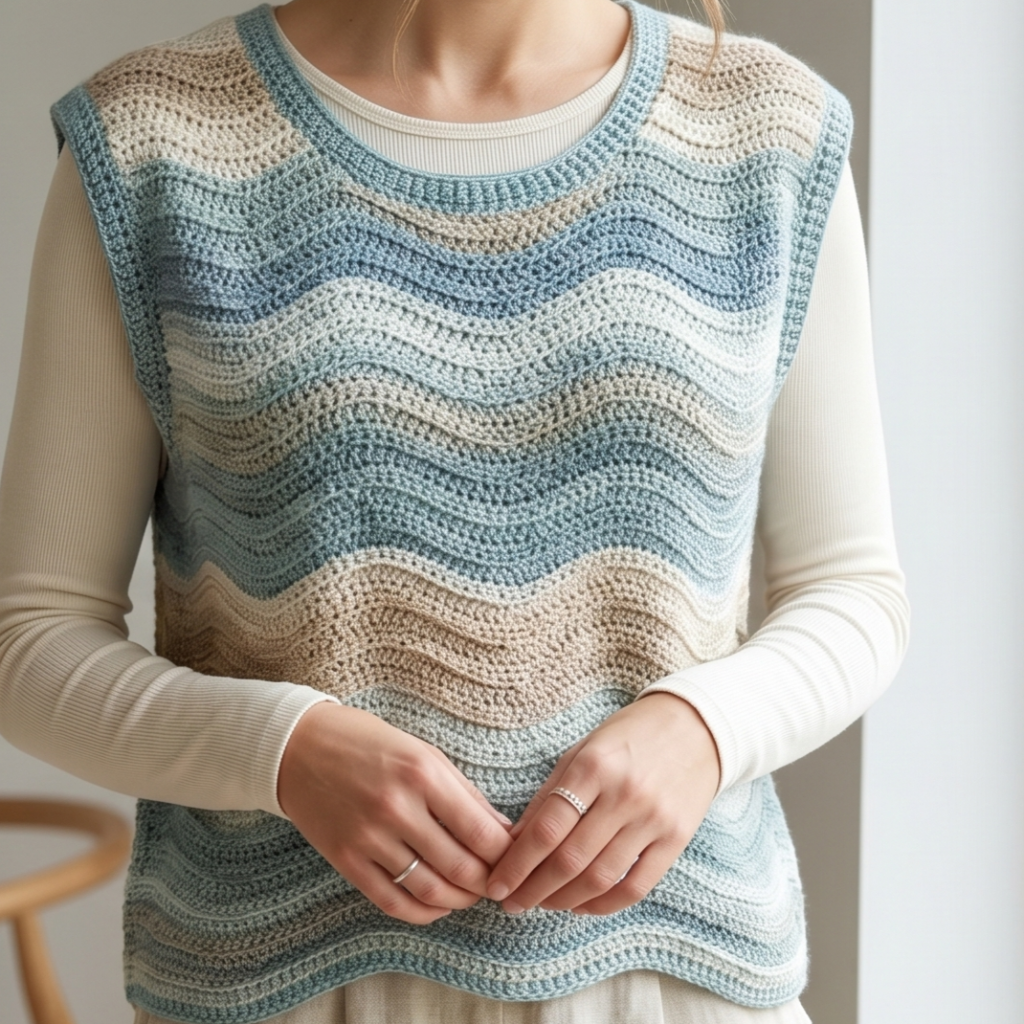
A wavy Sunday vest feels relaxed, easygoing, and wonderfully wearable. The wave stitch gives the vest movement and softness, while the sleeveless shape keeps it versatile. It is a great option if you want a piece that feels casual but still stylish enough to wear on repeat.
Step-by-step guide
Step 1: Choose a soft draping yarn
Pick a yarn that flows nicely and feels comfortable against the skin. Cotton blends, light acrylic, or soft wool blends can all work beautifully for a wavy vest. The yarn should help the waves look smooth and organic.
Soft drape helps the waves stand out.
Step 2: Take your measurements
Measure the bust, torso length, and shoulder width. A Sunday-style vest usually feels a little relaxed, so you can allow some ease. Still, the armholes and shoulders need to fit properly for comfort.
A comfortable fit makes the vest easy to wear.
Step 3: Crochet the front panel
Begin with the front panel using your chosen wave stitch. Keep the waves smooth and even so the pattern looks relaxed and flowing. The front panel should have enough length to give the vest a nice drape.
The wave pattern is the visual focus.
Step 4: Crochet the back panel
Make the back panel in the same stitch or a simpler version if needed. Keep the wave repeats aligned so both panels feel balanced. If you want the vest to look more casual, you can vary the wave direction slightly while keeping the height consistent.
Step 5: Shape the neckline
As the panels grow, shape the neckline so it sits comfortably and flatters the upper body. A soft scoop or shallow V works especially well for a relaxed vest.
Step 6: Shape the armholes
Make sure the armholes are large enough for layering, but not so big that the vest loses structure. The wave stitch can stretch a little, so a clean shape is important.
Step 7: Join the shoulders and sides
Sew the pieces together neatly, keeping the wave pattern aligned where possible. A relaxed vest still looks much better when the seams are carefully finished.
Step 8: Add borders
Finish the neckline, armholes, and hem with a simple border or ribbing. This helps the wavy texture feel intentional and polished. A narrow border can also keep the vest from stretching too much.
Step 9: Block gently
Blocking helps the waves open and settle naturally. Shape the vest gently as it dries so the drape feels smooth and balanced.
Helpful tips
This vest looks lovely in muted blue, cream, soft green, or warm sand shades. If you want a more beachy look, choose faded ocean tones. If you want a cozy everyday version, earthy neutrals work beautifully.
5. Crochet Seashell Vest Pattern
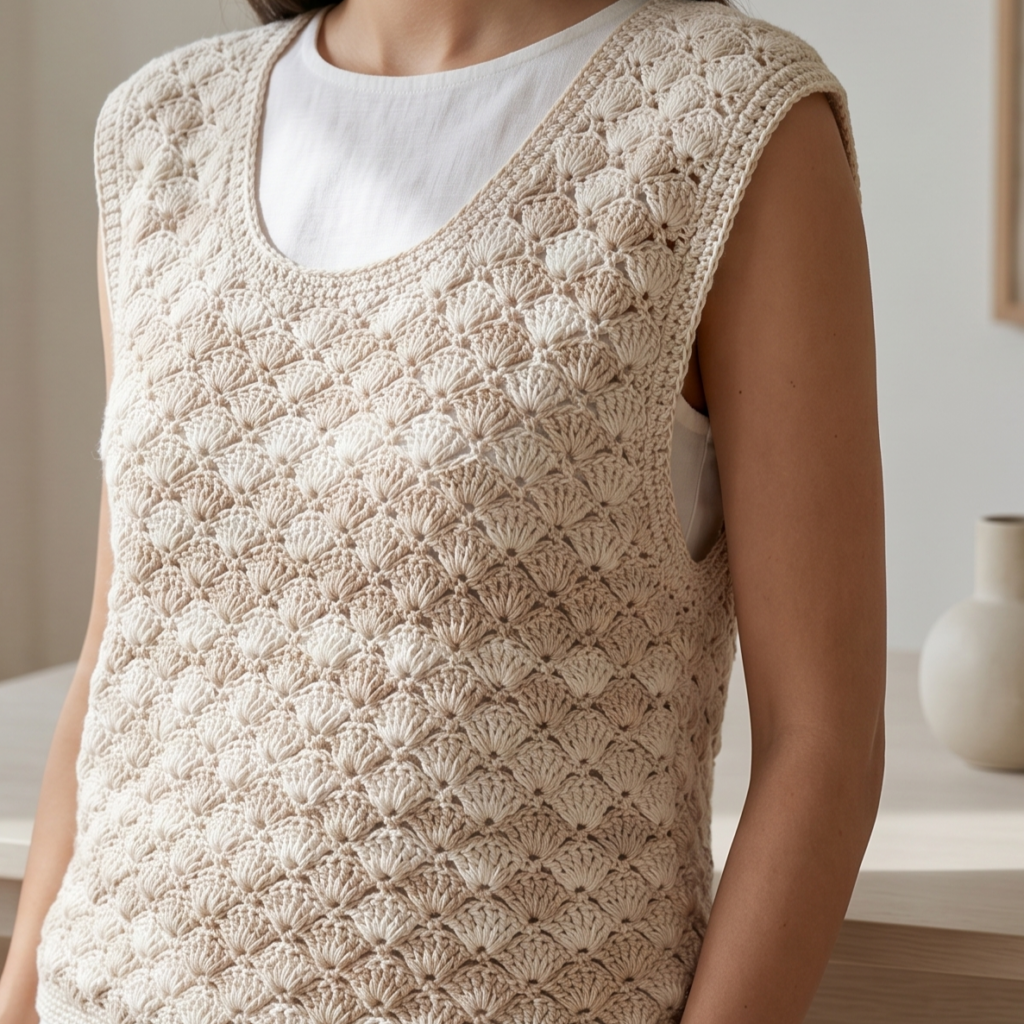
A seashell vest feels soft, feminine, and slightly coastal. The shell stitch gives the garment a beautiful textured surface that is both elegant and easy to wear. This is a lovely choice if you want a vest that feels light, decorative, and perfect for layering over simple outfits.
Step-by-step guide
Step 1: Pick a light, pretty yarn
Choose a yarn that highlights the shell texture well. Cotton blends, soft acrylic, or light wool blends can all work. Pale neutrals, seafoam, blush, or cream are especially lovely for a seashell-inspired vest.
The yarn should help the shell texture shine.
Step 2: Measure for fit
Take measurements for bust, torso length, and armholes. A shell vest can feel delicate, so it is important that it fits comfortably over whatever you plan to wear underneath. Decide whether you want a fitted or slightly loose silhouette.
Good measurements help keep the vest wearable.
Step 3: Crochet the body panels
Work the front and back panels using the shell stitch pattern. Keep the shells even and consistent so the vest feels balanced. The texture should be decorative but still smooth enough to layer comfortably.
The shell stitch is the heart of the vest.
Step 4: Shape the neckline
Create the neckline gradually so it sits well on the body. A soft scoop or shallow V often complements shell stitch very nicely. Keep the shaping simple so the texture remains the main visual feature.
Step 5: Shape the armholes
Make the armholes large enough for comfortable layering, but keep the shape neat. Because shell stitch can feel slightly airy, proper shaping helps the vest keep its form.
Step 6: Join the panels
Sew the shoulders and sides together carefully. Shell stitch looks especially pretty when the seams are neat and the panels align well. Clean joins help the vest look boutique-made.
Step 7: Finish the borders
Add edging around the neckline, armholes, and hem. A simple border works beautifully because the shell texture is already decorative. If you want a slightly more romantic finish, a soft scalloped edging can be lovely.
Step 8: Block the vest
Blocking helps the shells settle into a beautiful rhythm and makes the garment lay flatter. This is especially helpful for light, textured vests.
Helpful tips
This vest looks especially beautiful in cream, sandy beige, pale aqua, or blush. If you want a more coastal feel, choose sea-inspired shades. If you want a more elegant everyday piece, keep the color soft and the borders simple.
Conclusion
Crochet vests are such satisfying pieces to make because they are wearable, versatile, and easy to layer in a modern wardrobe. They can be casual or polished, colorful or neutral, cozy or light depending on the yarn and stitch patterns you choose. That flexibility is what makes them such a rewarding handmade project.
These five vest patterns each bring something different. The weave cable sweater vest feels classic and textured. The tie-front rose stitch vest is feminine and soft. The patchwork granny square vest is colorful and creative. The wavy Sunday vest feels relaxed and easygoing. The seashell vest is delicate and coastal. Together, they show how much personality you can create with a simple sleeveless silhouette.
Whether you are making a vest for transitional weather, layering over dresses and shirts, or adding a stylish handmade piece to your wardrobe, these patterns are a wonderful place to begin. With the right yarn, thoughtful shaping, and neat finishing, your crochet vest can become one of those pieces you truly want to wear on repeat.