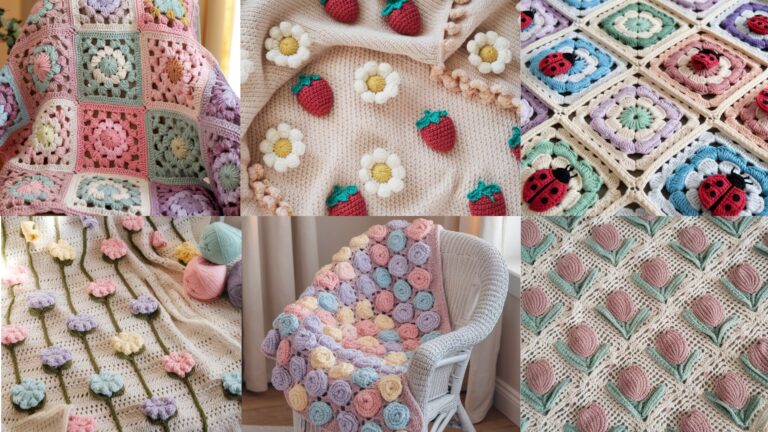
Crochet animal plushies have a special kind of charm that makes them irresistible to both makers and gift recipients. They are soft, cuddly, expressive, and full of personality, which is exactly why amigurumi plush patterns are such a beloved crochet project. Unlike larger crochet pieces that take a lot of time and shaping, plush animals let you create something sweet and meaningful in a relatively manageable way. Every stitch builds character, and every finished plush feels like a tiny handmade friend.
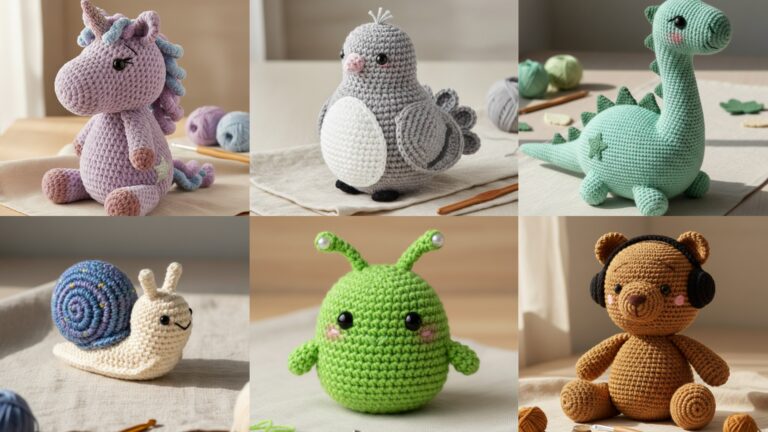
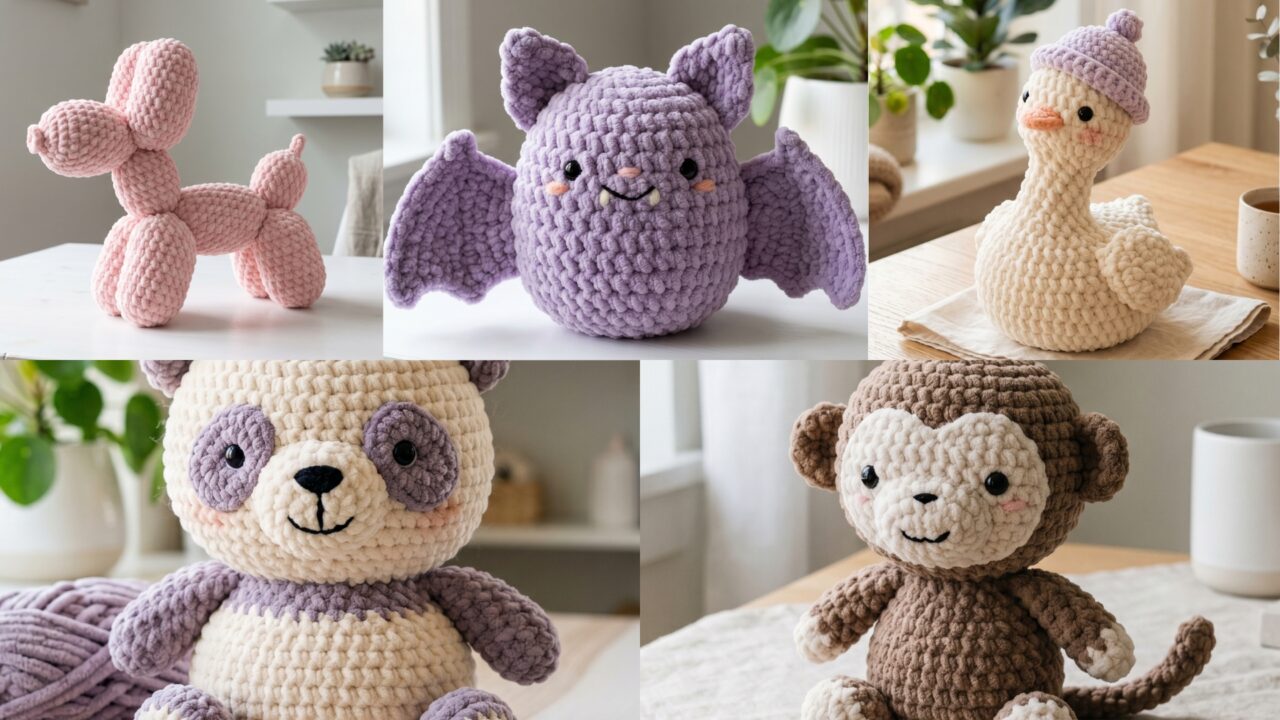
What makes crochet animal amigurumi especially enjoyable is how varied it can be. A bat plush can feel playful and whimsical. A balloon dog plush has a fun, modern look. A pastel panda brings in a gentle, dreamy style. A goose with a hat feels quirky and adorable. A monkey plush adds classic animal charm with lots of expression. Each one is different, but all of them make wonderful handmade gifts for birthdays, baby showers, nursery decor, or just because.
In this post, you will find five soft crochet animal amigurumi plush patterns with detailed step-by-step guidance, helpful notes, and practical finishing tips. These patterns are written to be beginner-friendly in spirit while still giving you enough detail to create plushies that look polished and lovable. If you enjoy making gifts that feel personal and memorable, these animal plush ideas are a lovely place to begin.
Quick Notes
Project type: Crochet amigurumi animal plushies
Best for: Handmade gifts, nursery decor, collectibles, craft fairs, and keepsakes
Skill level: Beginner to intermediate, depending on shaping and assembly
Hook size: Usually 2.0 mm to 3.5 mm depending on yarn weight and desired firmness
Yarn weight: Sport weight, DK, or plush chenille yarn for a softer look
Best yarn choice: Cotton for crisp detail or plush yarn for a cuddly finish
Finished size: Usually small to medium plush size, customizable by yarn and hook
Time to complete: A few hours to a couple of days per plush
Helpful stitches: Magic ring, single crochet, increase, decrease, slip stitch, color changes, stuffing, sewing parts together, embroidery, shaping, and finishing
Common Materials
Most animal amigurumi plush patterns use the same basic supplies.
- Yarn in your chosen colors
- Crochet hook suited to the yarn
- Yarn needle
- Scissors
- Polyester fiberfill stuffing
- Stitch markers
- Safety eyes or embroidery thread
- Optional felt details
- Optional blush or fabric marker for facial accents
- Optional keyring or decorative ribbon
For plushies, yarn choice matters a lot because it changes the final feel of the animal. Cotton yarn gives you clear stitch definition and a neat finish, while plush or chenille yarn creates a softer, more huggable result. Smaller hooks are usually best because they help keep the stuffing from showing through the stitches.
1. Crochet Cute Bat Plush Pattern
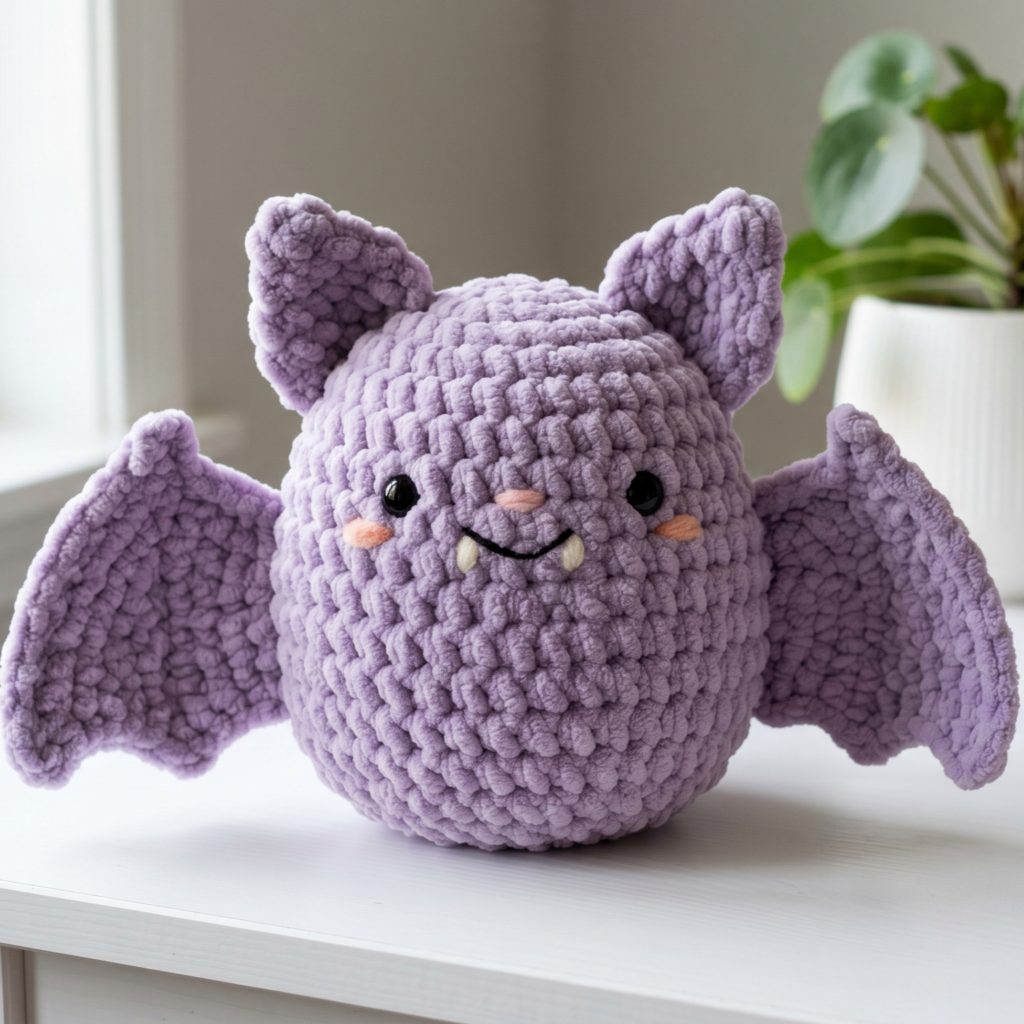
A cute bat plush is playful, a little spooky in the sweetest way, and incredibly fun to make. It is a great pattern if you want something that stands out from more traditional plush animals. With rounded wings, tiny ears, and a sweet face, this little bat becomes an adorable handmade companion.
Step-by-Step Guide
Step 1: Choose your bat colors
Start by picking colors for the body, wings, and optional facial details. Classic black or deep gray gives the bat a traditional look, while pastel purple, dusty pink, or soft blue make it feel more cute and whimsical. The yarn color sets the mood right away.
The color choice defines whether the bat feels spooky or sweet.
Step 2: Crochet the body
Begin with a magic ring and work a small oval or rounded body shape. The body should be plump and compact because the bat needs a soft, plush silhouette. Keep the stitches tight so the stuffing stays hidden and the body holds its shape.
A rounded body gives the bat its cuddly form.
Step 3: Shape the head and face area
As you continue, shape the top of the body so it becomes slightly narrower near the head. This gives the plush a more animal-like appearance and helps the ears sit naturally. If desired, slightly flatten the front area for the face.
The head shape helps the face placement feel balanced.
Step 4: Make the wings
Crochet two bat wings separately. They can be made as simple curved shapes with pointed tips or slightly scalloped edges. Keep them soft and lightweight so they don’t overpower the body. If you want a more dramatic look, make the wings slightly wider at the outer edge.
The wings are the most recognizable bat feature.
Step 5: Crochet the ears
Make two tiny pointed ears and keep them symmetrical. Bat ears are usually small but visible, so make sure they stand up neatly. They can be simple triangles or slightly rounded at the base for a softer look.
The ears add character and personality.
Step 6: Stuff the body
Before closing the body fully, add stuffing gradually. The plush should feel firm enough to hold shape but not overstuffed. For a bat plush, a slightly rounded, squishy body often looks best.
Light stuffing makes the plush feel soft and balanced.
Step 7: Attach the wings and ears
Sew the wings to the sides of the body and the ears to the top. Take your time with placement so the plush looks symmetrical. The wings should sit in a relaxed position, not too high or too low.
Good assembly makes the bat look polished.
Step 8: Add the face
Use safety eyes or embroidery to create a small, sweet face. A tiny smile or blush can make the bat feel extra cute. Keep the facial features simple so the plush stays charming rather than busy.
A small face gives the bat its personality.
Step 9: Finish and shape
Weave in all ends securely, smooth the wings, and adjust the ears if needed. The final bat should feel soft, balanced, and ready to gift or display.
Helpful Tips
This plush looks especially adorable in lavender, gray, black, or pink. If you want it to feel extra whimsical, add tiny embroidered fangs or blushing cheeks. The cuteness comes from the contrast between the bat shape and the soft plush style.
2. Crochet Balloon Dog Plush Pattern
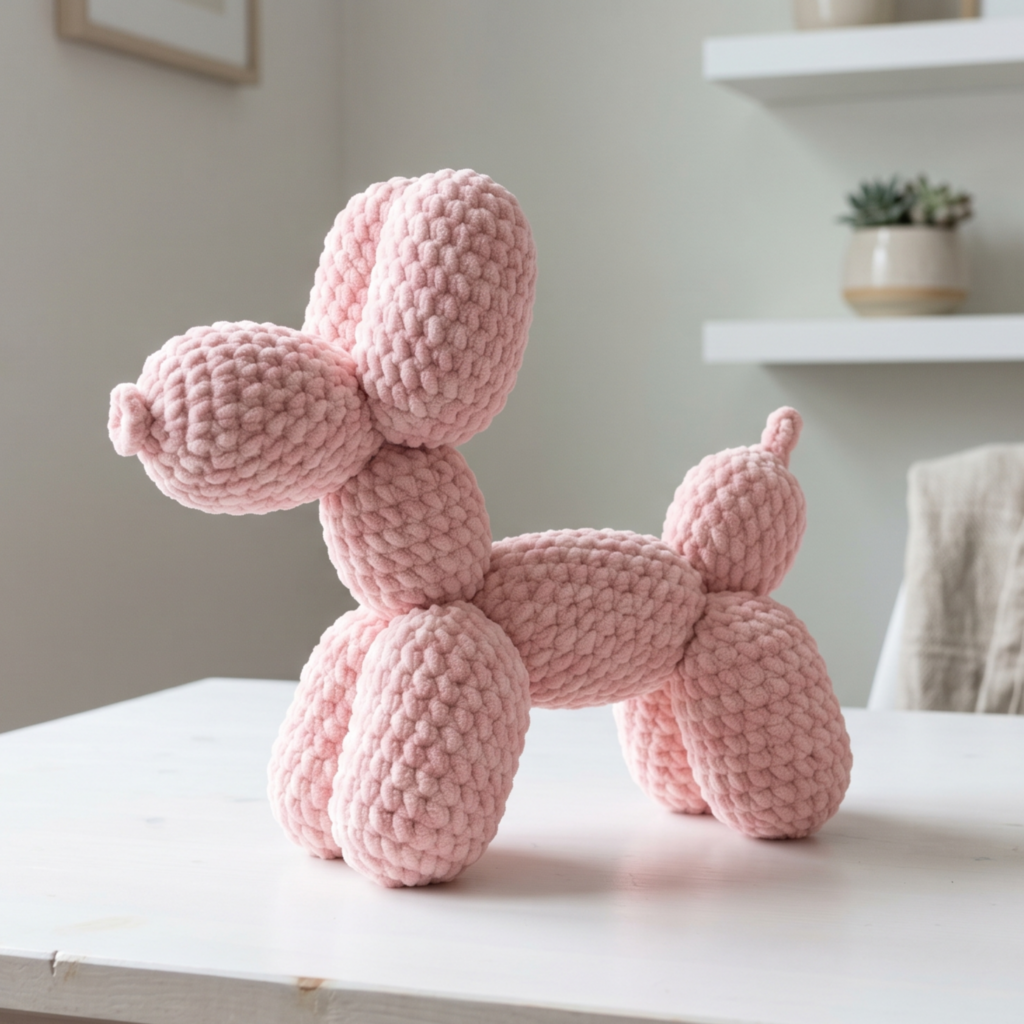
A crochet balloon dog plush is quirky, creative, and instantly eye-catching. It has a fun sculptural shape that feels playful and modern, which makes it a fantastic handmade gift. This plush is especially great if you want something a little different from the usual animal toys.
Step-by-Step Guide
Step 1: Pick a playful color
Choose a bright color that feels like a balloon animal, such as pink, red, pastel blue, yellow, or mint. Since the balloon dog is already a whimsical shape, the color can be simple and bold.
The color helps the toy feel like a balloon sculpture.
Step 2: Plan the shape segments
A balloon dog is made up of rounded sections that resemble twisted balloon parts. Before you begin, picture the head, neck, body, and legs as separate segments. This makes the shaping process easier to manage.
Planning the segments helps the dog feel recognizable.
Step 3: Crochet the head
Begin with a rounded head section using a firm amigurumi base. Keep the shape smooth and compact. The head should feel slightly elongated so it resembles the front section of a balloon animal.
A rounded head gives the plush its playful character.
Step 4: Shape the neck and body
Continue into the neck and body segments, keeping each part slightly rounded and connected. The balloon dog look comes from smooth transitions between shapes. Maintain even tension so the toy looks clean and intentional.
The flowing body shape is the key feature.
Step 5: Add the legs
Crochet four small leg sections or shape them as connected curves depending on the style you prefer. They should be short, rounded, and sturdy enough to support the toy’s shape. Keep them evenly sized for balance.
The legs help the balloon dog read clearly.
Step 6: Add the tail
Create a small curved tail section at the back. It can be tiny and simple, just enough to complete the balloon dog silhouette. This little detail helps the toy feel finished.
The tail completes the shape.
Step 7: Stuff the plush carefully
Since the balloon dog shape is long and segmented, add stuffing gradually so the body stays smooth and even. Make sure each section is full but not hard. The plush should feel firm enough to stand out while staying soft.
Even stuffing is especially important here.
Step 8: Attach facial features
Use small safety eyes or embroidered eyes and a tiny nose or smile. The face should be simple and centered on the head section. Balloon dog plushies often look best when the facial expression is minimal and cheerful.
A tiny face makes the plush more lovable.
Step 9: Finish the seams
Check all joins and shape transitions so the balloon dog looks smooth from head to tail. This plush works best when every segment looks intentional and balanced.
Helpful Tips
This plush is especially fun in bright single colors because it resembles a real balloon animal. If you want it to feel softer and more modern, try pastel shades. It makes a great gift because it feels whimsical and a little unexpected.
3. Crochet Pastel Panda Plush Pattern
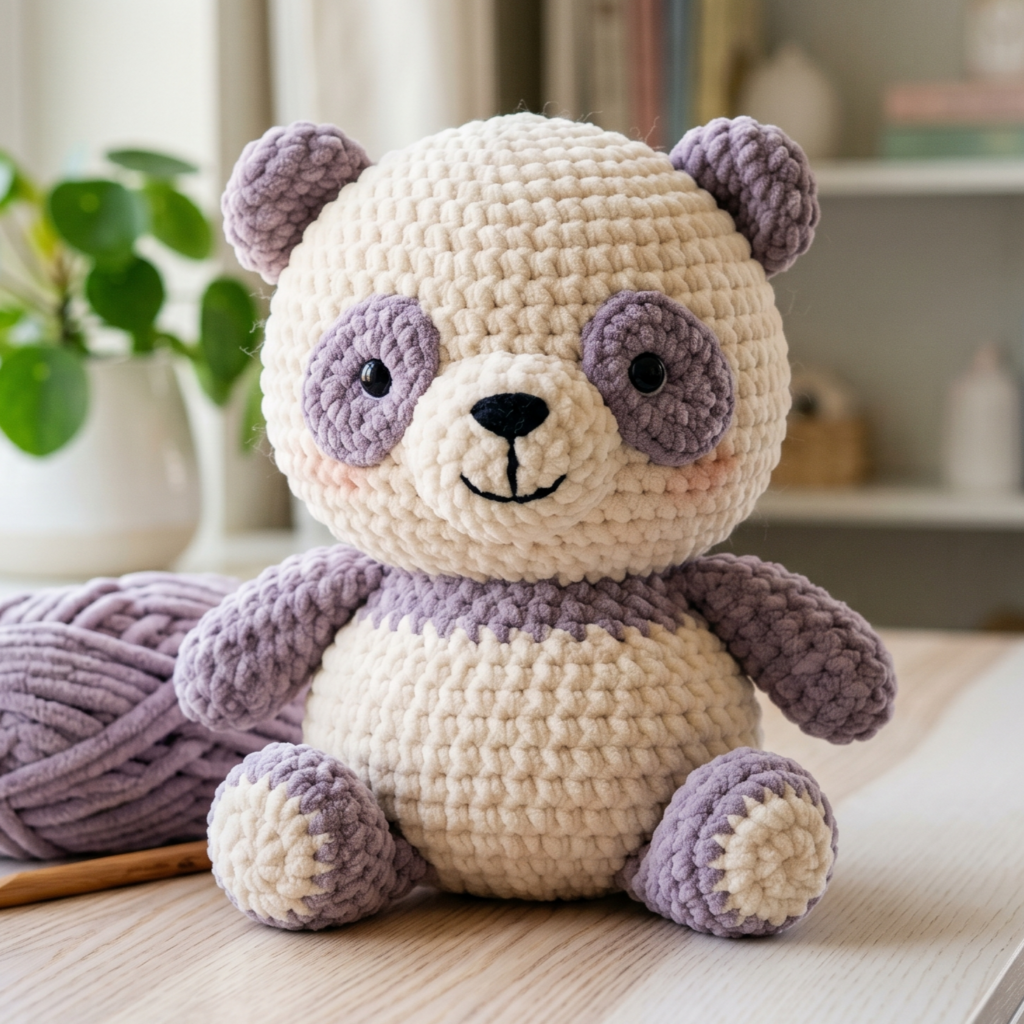
A pastel panda plush is soft, dreamy, and incredibly charming. It takes the classic panda shape and gives it a gentle, modern twist through pastel colors. This makes it perfect for nurseries, gifts, or anyone who loves cute plushies with a softer color palette.
Step-by-Step Guide
Step 1: Choose your pastel palette
Pick one main pastel color, such as blush pink, lavender, mint, or baby blue, and combine it with a neutral like white or cream. The panda should still be recognizable, but the pastel palette makes it feel fresh and sweet.
A gentle palette gives the panda its dreamy look.
Step 2: Crochet the body
Start with a round, compact body using a magic ring. The body should be soft and slightly plump, with a shape that feels huggable and balanced. Keep the stitches tight so the stuffing stays hidden.
The body is the foundation of the plush.
Step 3: Shape the head
Crochet a rounded head that matches the body style. The head should be slightly larger or at least equal in size to the body to create a classic panda look. Keep it smooth and evenly stuffed.
A rounded head helps the face look sweet and expressive.
Step 4: Make the ears and arms
Crochet two small rounded ears and two tiny arms. Panda ears should be soft and simple, not too pointed. The arms can be stubby and cute, resting naturally along the sides of the body.
These pieces make the plush feel complete.
Step 5: Add the eye patches
Use darker yarn or felt to create the panda’s signature eye patches. Since this is a pastel version, you can choose gray, taupe, or a muted version of your main color for the patches. Make them even and symmetrical.
The patches are what make it clearly a panda.
Step 6: Stuff all pieces
Add stuffing to the body and head before closing, and lightly stuff the arms if needed. The plush should feel firm enough to hold shape but still soft in the hands. Keep the ears flatter than the body so they sit neatly.
Balanced stuffing improves the shape.
Step 7: Assemble the panda
Sew the ears onto the head, attach the arms to the body, and join the head and body together carefully. Make sure everything is aligned so the panda looks balanced from the front.
Careful assembly gives the panda its charm.
Step 8: Add facial features
Use embroidery or safety eyes to create the eyes, nose, and mouth. Keep the face soft and gentle, matching the pastel mood. A tiny smile or blushing cheeks can make the plush feel even sweeter.
A small face completes the gentle look.
Step 9: Shape and refine
Smooth the ears, adjust the eye patches, and make sure the head and body sit properly. The pastel panda should look calm, soft, and huggable.
Helpful Tips
This plush is beautiful in blush, lilac, sage, or baby blue with cream accents. If you want to make it extra giftable, add a tiny bow or a small embroidered heart. The pastel style gives the classic panda a fresh and delicate feel.
4. Crochet Goose with a Hat Plush Pattern
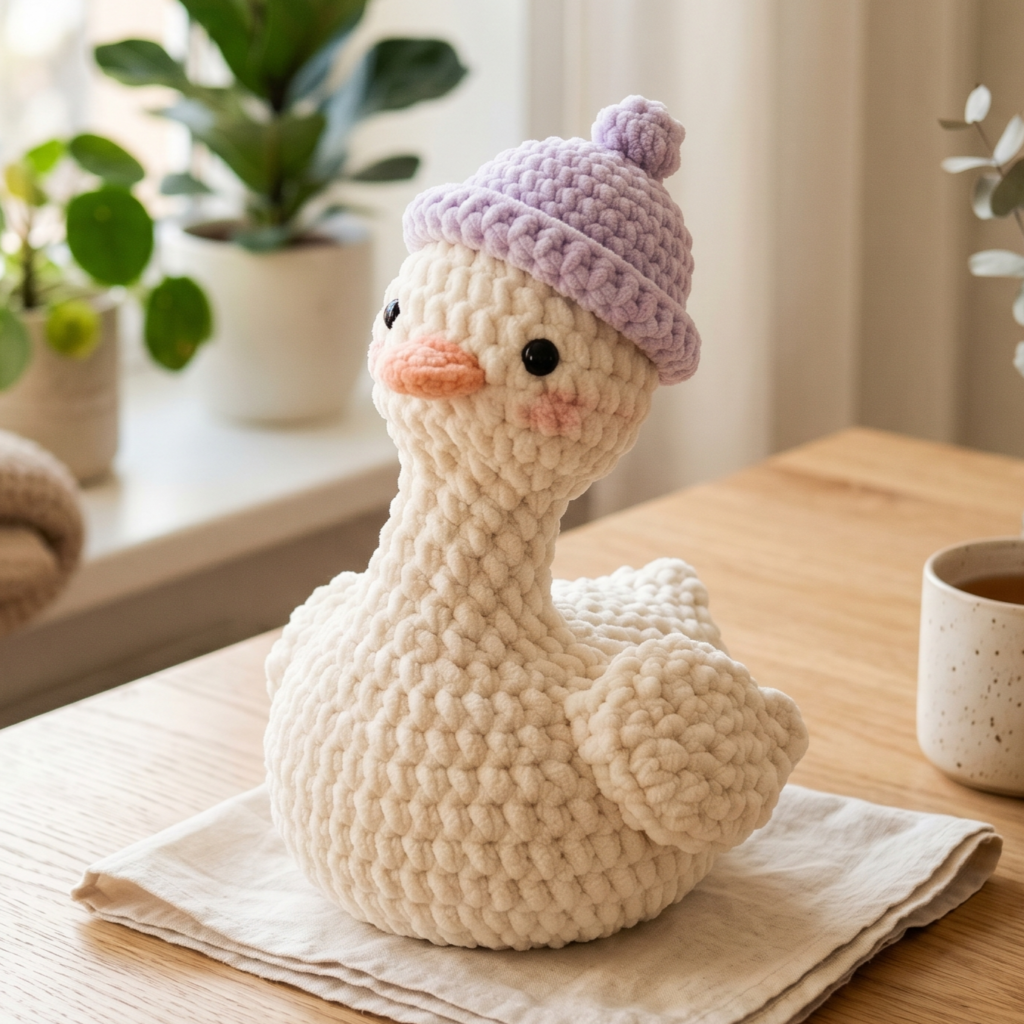
A goose plush with a hat is charming, whimsical, and full of personality. It feels slightly storybook-inspired, which makes it a perfect gift for someone who loves cute and unique handmade toys. The hat detail gives the goose extra character and makes it more memorable.
Step-by-Step Guide
Step 1: Pick your goose colors
Choose a classic white or cream for the goose body, then add a contrasting color for the beak, feet, and hat. A soft pastel hat or a tiny patterned hat can make the plush feel especially adorable.
The color contrast makes the goose lively.
Step 2: Crochet the body
Start with a rounded body shape that feels soft and plump. The goose body should be slightly elongated rather than perfectly round so it has a natural bird-like form. Keep the stitches tight and even.
The body gives the goose its silhouette.
Step 3: Crochet the neck and head
Work a long, gently curved neck and a small rounded head. The neck should be sturdy enough to hold the head upright but still soft and flexible. This is one of the most distinctive parts of the goose shape.
The neck makes the goose instantly recognizable.
Step 4: Make the beak
Crochet a small beak in a contrasting color such as orange, yellow, or soft peach. Keep it short and neat so it matches the plush style. The beak should be attached securely at the center of the face.
The beak brings the goose to life.
Step 5: Crochet the hat
Make a tiny hat separately using a contrasting color or a playful pattern. It can be a simple cap, a tiny sunhat, or a cute little brimmed hat depending on your style. Make sure it fits the goose’s head without overwhelming it.
The hat gives the plush its unique charm.
Step 6: Add wings and feet
Crochet small wings and tiny flat feet. The wings should be soft and rounded, while the feet can be simple and slightly wide for balance. Keep these details small so they do not distract from the neck and hat.
These smaller parts complete the character.
Step 7: Stuff and assemble
Stuff the body and neck gradually, making sure the goose stays balanced and upright. Attach the head, beak, wings, feet, and hat securely. The goose should feel stable enough to sit or stand with support.
Assembly is what gives the goose its storybook charm.
Step 8: Add the face
Use embroidery or tiny safety eyes to create a gentle expression. A soft smile or blush cheeks can add extra sweetness. The face should be simple and friendly.
A small face keeps the goose cute.
Step 9: Final shaping
Adjust the hat and neck so the goose sits nicely. Make sure the body is evenly stuffed and the feet are positioned well. The plush should feel cheerful, quirky, and balanced.
Helpful Tips
This plush is especially adorable in white with a pastel hat, but soft gray or cream can also look lovely. If you want it to feel more playful, choose a patterned hat or add a tiny ribbon. The goose has a very giftable, collectible personality.
5. Crochet Adorable Monkey Plush Pattern
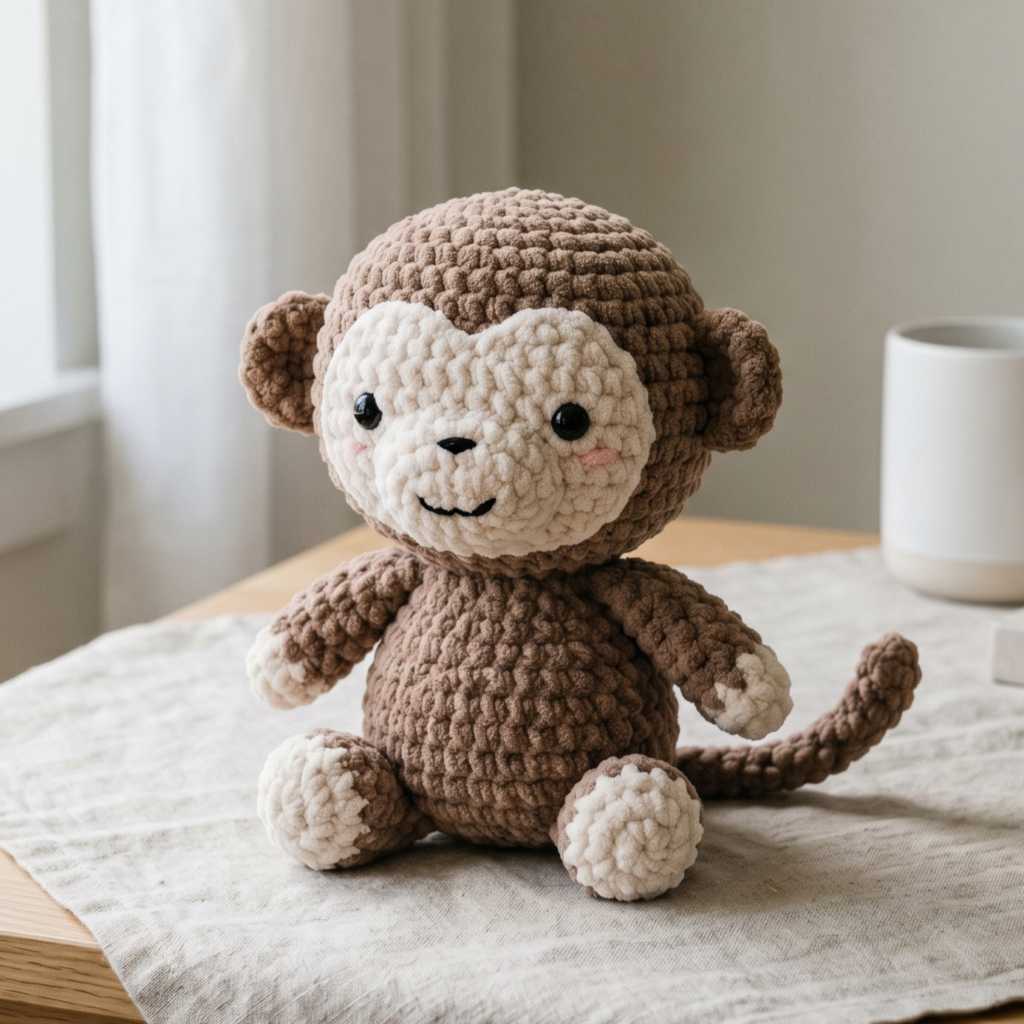
A monkey plush is a classic amigurumi favorite because it is expressive, playful, and full of personality. It is a wonderful pattern for gifts because it appeals to children and adults alike. With a friendly face, long tail, and soft limbs, this monkey plush becomes a lovable handmade companion.
Step-by-Step Guide
Step 1: Choose monkey colors
Select a body color and a face accent color. Brown, tan, cream, and beige are classic choices, but softer pastel versions can also be very cute. The face and ears should contrast enough to show clearly.
A thoughtful color combination gives the monkey its identity.
Step 2: Crochet the body
Start with a rounded body using a magic ring and increase rounds. The body should be compact and slightly oval or rounded to support the rest of the parts. Keep the stitches firm so the stuffing stays concealed.
The body is the plush’s foundation.
Step 3: Crochet the head
Make a larger or matching head with a rounded shape. The monkey’s head is important because it carries most of the facial expression. Keep the stuffing even so the face area stays smooth.
A round head gives the monkey a sweet look.
Step 4: Add the face patch
Crochet a smaller oval or rounded face patch in a lighter color. This patch will frame the nose and mouth area, making the face more expressive and cute. Sew it neatly to the front of the head.
The face patch creates the monkey’s expression area.
Step 5: Crochet the ears, arms, and legs
Make two round ears, two arms, and two legs. The ears should be simple and soft, while the arms and legs can be slightly longer if you want a more playful shape. Keep all parts balanced so the plush feels cohesive.
These parts give the monkey its personality.
Step 6: Add the tail
Crochet a long, thin tail with a slight curve. The tail can be simple, but it helps complete the classic monkey silhouette. Keep it flexible and sturdy enough to hold its shape.
The tail makes the plush more recognizable.
Step 7: Stuff and assemble
Stuff each part lightly or moderately, depending on the shape. Sew the head to the body, attach the face patch, then add the ears, arms, legs, and tail. Be patient with placement so everything looks symmetrical.
Assembly is key to a polished finish.
Step 8: Add the face details
Use embroidery or safety eyes to create the eyes, nose, and mouth. The face should be cheerful and friendly. A tiny smile or blushing cheeks can make the plush extra adorable.
The face completes the monkey’s charm.
Step 9: Refine the shape
Adjust the limbs and tail so they hang naturally. Make sure the monkey sits well or stands with support if desired. The finished plush should look cuddly and expressive.
Helpful Tips
Monkeys look wonderful in classic brown and cream, but pastel monkeys can be especially cute if you want a softer gift style. If you want to make it more playful, add a small bow, heart, or tiny embroidered detail.
Conclusion
Crochet animal amigurumi plushies are such a wonderful way to turn yarn into something full of life, softness, and personality. They are fun to make, lovely to gift, and meaningful in a way that only handmade items can be. Because each plush has its own shape and expression, every finished piece feels like a little character of its own.
These five plush patterns each bring something different. The bat plush feels playful and whimsical. The balloon dog plush is fun and sculptural. The pastel panda is soft and dreamy. The goose with a hat is quirky and charming. The monkey plush is classic and expressive. Together, they show just how much variety you can create with amigurumi while still keeping the process approachable and enjoyable.
Whether you are making one for a child, a friend, a nursery, or your own collection, these soft crochet animal plush patterns offer a beautiful place to start. With the right yarn, careful shaping, and thoughtful finishing, each plush can become a handmade gift that is as special as it is adorable.