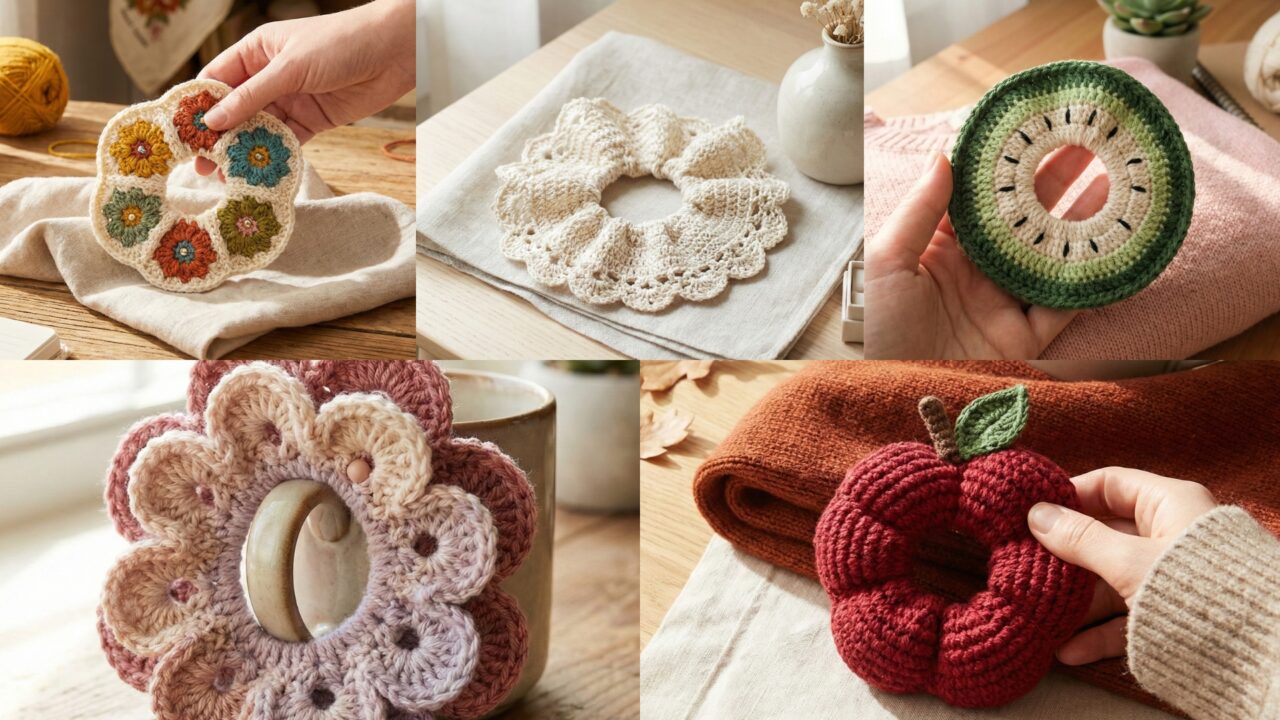
Scrunchies are tiny, fast, delightful projects that make perfect gifts — they’re wearable, washable, and a great way to use pretty yarn. Below you’ll find a warm introduction (materials, measurements, and general assembly tips) and five fully detailed scrunchie patterns with clear step-by-step instructions, variations, and finishing tips: Giant Flower, Apple Inspired, Retro Colorful Floral, Kiwi Inspired, and Elegant Lacy Border. Each pattern is written so you can follow it start-to-finish and customize sizes, colors, or textures.
Quick intro — materials, hook, sizing, and a few basics
Yarn & fiber
- Soft cotton / cotton-blend — great for everyday scrunchies, holds shape, machine-washable.
- DK / light worsted (or sport) — a sweet middle ground for drape + definition.
- Chenille / velvet / plush — ultra-soft, luxurious scrunchies — hides stitch detail so use simpler stitches.
- Acrylic blends — inexpensive and colourful; choose a soft hand for hair comfort.
Hooks & notions
- Hook sizes usually 3.0–5.5 mm depending on yarn. For plush/chenille, use the hook recommended on the yarn label.
- Hair elastic (the inner band) — standard “scrunchie elastics” or a loop of ¼–⅜″ wide elastic. The elastic circumference is typically 7–9 inches depending on the tightness you like.
- Tapestry needle, stitch markers, small amount of stuffing (for apple/kiwi centres if you want puff), optional seed beads or tiny buttons, and small scissors.
Basic construction approaches (choose one)
- Tube around elastic (most common): crochet a short tube that fits snugly around the elastic, sew the tube closed over the elastic, then hide the seam and add decoration (flower, leaves, borders).
- Make motif(s) and attach to pre-made plain scrunchie: crochet flower appliqués or granny motifs, then sew them onto a ready-made basic scrunchie. Fast and customizable.
- Crochet directly over elastic: hold the elastic inside and single-crochet around it so the stitches encase the elastic; secure ends. This is very quick.
Sizing math (practical)
Make a small gauge swatch in the stitch you’ll use and measure stitches per inch (spi) — you’ll need that to size a tube that fits the elastic.
Example (digit by digit):
- Elastic circumference = 8 in.
- Your swatch gauge = 4 sc = 1 in → 4 sc/in.
- Needed stitches to match elastic = 4 × 8 = 32 stitches (foundation round or tube circumference).
Round to nearest multiple if your stitch pattern requires it (e.g., a repeat of 4, 6, etc.).
Abbreviations (US)
- ch = chain
- sc = single crochet
- hdc = half double crochet
- dc = double crochet
- tr = treble (UK = treble)
- sl st = slip stitch
- MR = magic ring
- st(s) = stitch(es)
- rep = repeat
- BLO / FLO = back loop only / front loop only
- inc = increase (2 sts in same st)
1. Crochet Giant Flower Scrunchie Pattern
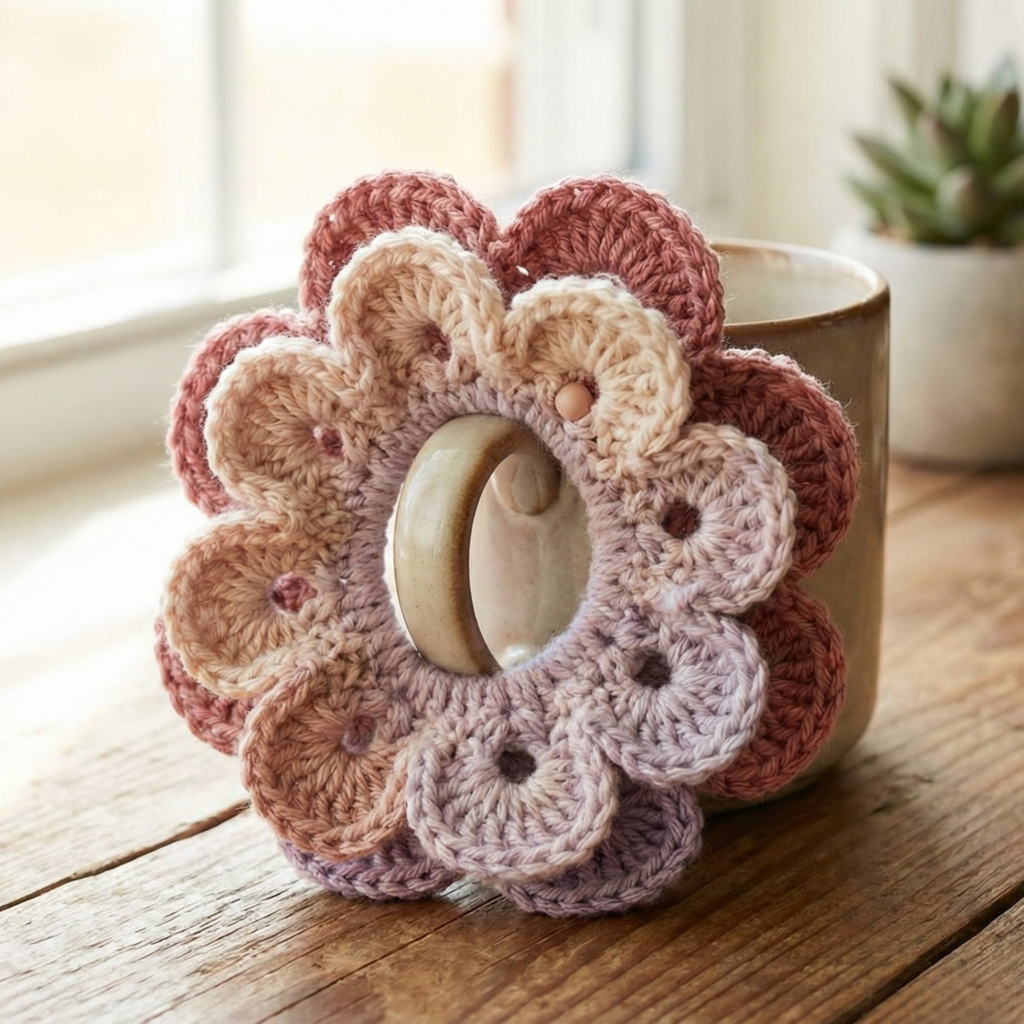
A bold, romantic scrunchie topped with a large layered flower — great for a statement gift.
Skill level: confident beginner → intermediate
Materials (one scrunchie)
- DK cotton or cotton-blend — about 20–40 yd (more if you make large layered petals)
- Hook: 3.5–4.5 mm (match yarn)
- Hair elastic, tapestry needle, optional small button or bead for center
Finished: scrunchie body ~2–3″ wide with a giant flower 3–4″ diameter (adjust by rounds).
Construction overview
- Make a tube that covers the elastic (or crochet directly over elastic).
- Make 2 layered flower rounds (small inner petals + larger outer petals).
- Sew flower to tube, conceal joins, add a decorative center.
Step-by-step
A — Tube (worked in the round)
- Make a foundation to fit your elastic: either chain 32 and join (for sample gauge 4 sc/in & 8″ elastic) or compute from your gauge. Join carefully without twisting.
- R1: sc in each ch around. Join.
- R2–R5: sc in BLO around for a slightly stretchy, foldable band (or fewer rounds if you want a narrower scrunchie). Try it around elastic for fit — it should slide over but be snug.
Option: Hold elastic inside and sc around it (10–14 sc rounds) so elastic is encased as you go.
Finish tube: fold tube in half lengthwise and whipstitch ends closed, sliding elastic inside before closing if not already there.
B — Big layered flower (two layers)
Inner layer (small petals)
- MR, ch2, 10 dc in ring, join (10 dc).
- R2: ch3, sl st into next st around to make 10 arches.
- R3: in each arch work (sc, hdc, 3 dc, hdc, sc) — 10 petals. Fasten off, leaving long tail to sew.
Outer layer (larger petals)
- MR, ch3, 12 dc in ring, join (12 dc).
- R2: ch4, sl st in next st around → 12 larger arches.
- R3: in each arch work (sc, hdc, 5 dc, hdc, sc) for fuller petals. Fasten off.
C — Assembly
- Stack inner flower on top of outer flower, offset petals so they interlock. Sew inner to outer at center with long tail. Secure to top of scrunchie by stitching through the tube base — several passes to anchor firmly.
- Add a small bead or button at the flower center for polish (sew tightly). Weave in ends.
Variations & gifting
- Make the flower in ombré colors, or mix plush yarn for a soft luxe scrunchie.
- Make a pair of matching scrunchies in complementary colors and gift as a set.
2. Crochet Adorable Apple Inspired Scrunchie Pattern
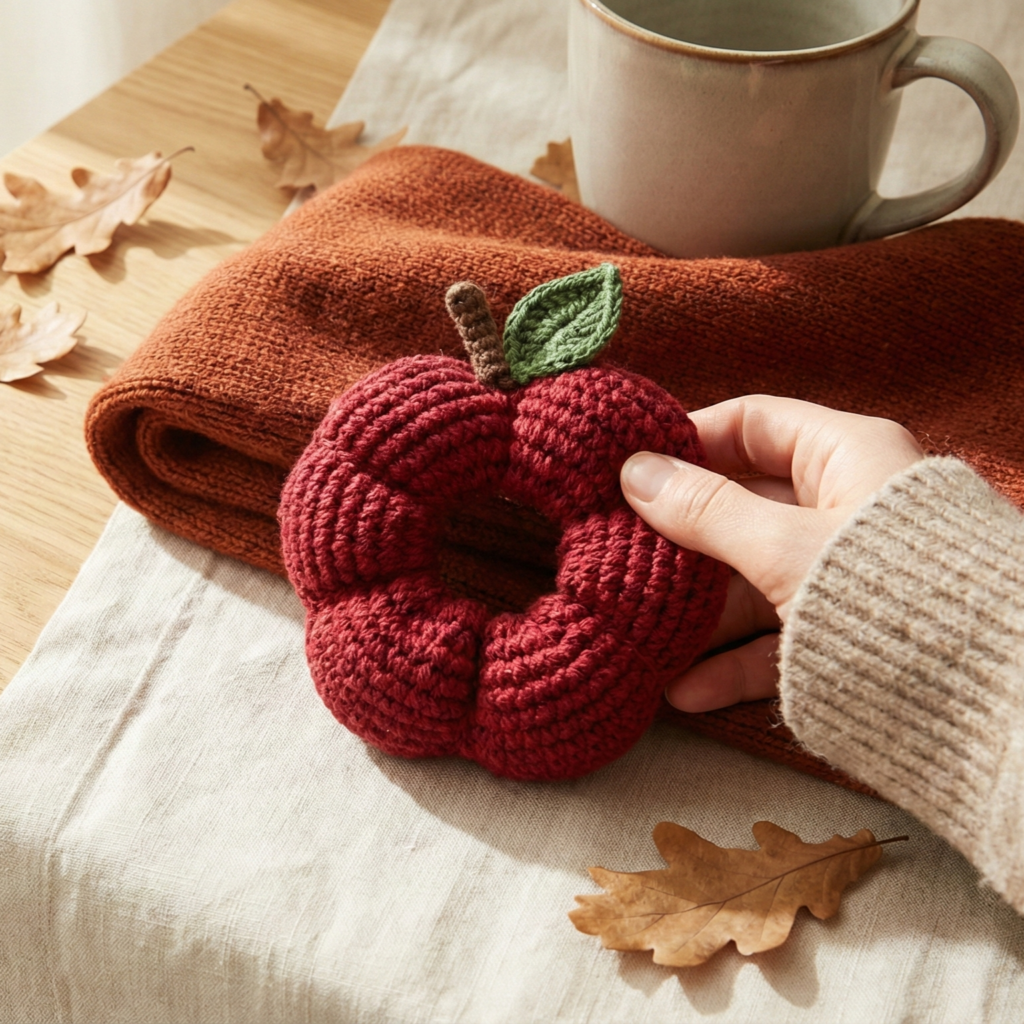
Sweet apple motif with a glossy “puff” center and a tiny leaf — perfect for teachers, fall baskets, or fruity gift sets.
Skill level: intermediate (small shaping + assembly)
Materials (one scrunchie)
- DK cotton in red (main), green (leaf), brown (stem) — small amounts (~10–15 yd each)
- Hook: 3.25–4.0 mm
- Small hair elastic, tapestry needle, tiny bit of stuffing or fiberfill (optional), small brown embroidery thread for seeds, small bead (optional)
Construction overview
Crochet a plain tube for elastic, make a small stuffed puffy apple centre (two circles joined and lightly stuffed) or a flat appliqué, create a tiny leaf and stem, and stitch onto scrunchie.
Step-by-step
A — Tube
Make tube as in pattern #1 but narrower (3–4 rounds sc) so flower/fruit sits visibly.
B — Apple puff (two small circles + joining)
- Circle A (front): MR, ch1, 6 sc in ring (6). R2: inc around (12). R3: sc 1, inc around → 18 sc. Fasten off leaving long tail.
- Circle B (back): repeat Circle A. Do not fasten off the second circle. Place right sides facing out, whipstitch around the edge leaving a 1″ opening, stuff lightly with fiberfill, finish stitching closed. This makes a slightly domed apple.
C — Leaf & stem
- Leaf: ch6, sc in 2nd ch from hook, hdc, dc, hdc, sc — taper back down if you want a small point; fasten off leaving tail to sew.
- Stem: ch4, sc back across (3 sc), fasten and sew at center top.
D — Attach to scrunchie
- Sew apple to the tube, anchoring through several stitches so it won’t come off. Add a few small French-knot seeds (brown embroidery) or tiny black beads (securely stitched) to the apple face for character.
Tips
- For a glossy look, use slightly shiny cotton or mercerized thread for the apple.
- Make many mini apple scrunchies in various fruit colors to sell or gift as a bundle.
3. Crochet Retro Colorful Floral Scrunchie Pattern
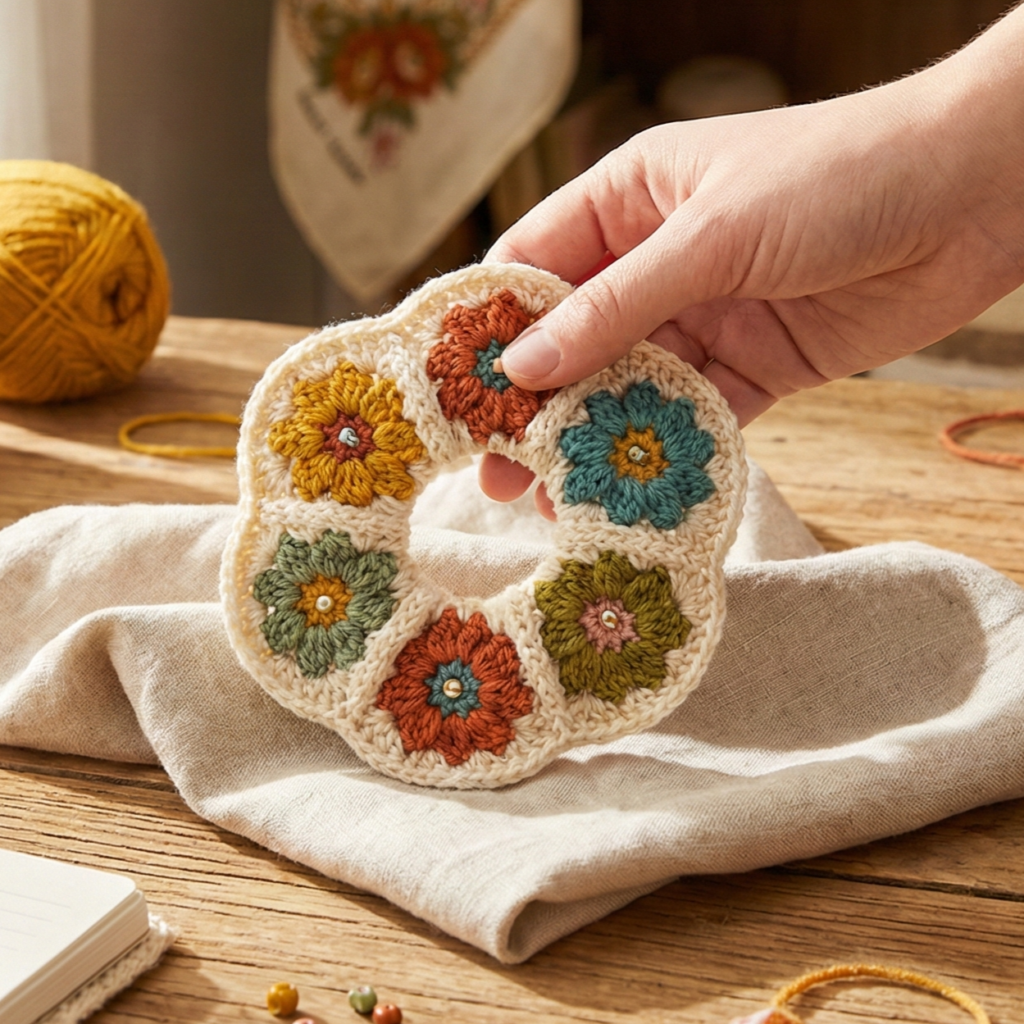
Playful small granny-flower motifs in retro colors stitched onto a base — great for using scraps and making vibrant sets.
Skill level: confident beginner
Materials (one scrunchie)
- DK or worsted scraps (3–5 colors) for flowers, neutral for base — ~30–60 yd depending on number of flowers
- Hook: 3.5–4.5 mm
- Hair elastic, tapestry needle
Construction overview
Make a plain tube to fit elastic, then create small 6-petal granny flowers (or tiny granny squares) and sew or join them around the tube in a ring.
Step-by-step
A — Tube
Make a short sc tube (foundation count per elastic as in intro), 3–4 rounds tall. Close with whipstitch around elastic.
B — Tiny granny flowers (make 6–8)
- MR, ch3, 2 dc, ch2, (3 dc, ch2) ×3 → small granny flower centre.
- Optional: add a round of single-color tiny petals: in each ch2 space work (sc, hdc, 3 dc, hdc, sc) for a petalled look. Make 6–8 flowers depending on size.
C — Join flowers to tube
- Arrange flowers evenly around scrunchie, sew them on with tails. Slightly overlap petals for full coverage.
D — Finish
Weave ends thoroughly. For extra retro flair, add a teeny contrasting center bead to each flower.
Variations
- Use a monochrome palette for a chic retro look.
- Make a rainbow set (one scrunchie per color family) to gift as a colorful bundle.
4. Crochet Handmade Kiwi Inspired Scrunchie Pattern
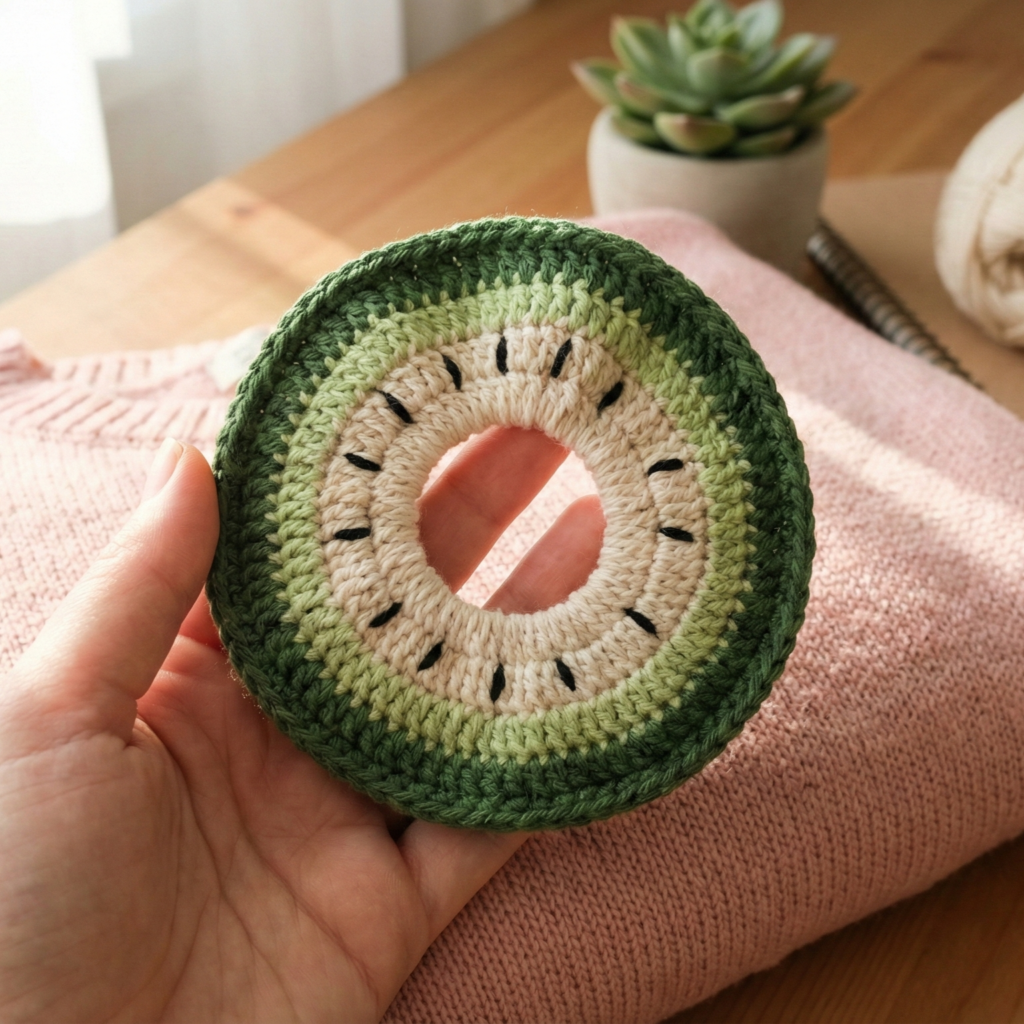
A fresh, zesty scrunchie with a kiwi “slice” appliqué — green rings, lighter center, and embroidered seeds make a cute fruit motif.
Skill level: intermediate (small appliqué + embroidery)
Materials (one scrunchie)
- DK yarn in dark green (outer), light green (middle), cream (center), black embroidery thread for seeds — small amounts each, ~15–25 yd total
- Hook: 3.25–4.0 mm
- Hair elastic, tapestry needle, small amount of stuffing (optional), small black seed beads (optional)
Construction overview
Crochet tube, make a small round kiwi appliqué (3 concentric rounds), embroider seeds, and attach.
Step-by-step
A — Tube
As previous patterns: make tube to cover elastic, 3–4 rounds sc or hdc.
B — Kiwi slice appliqué (worked flat in rounds)
- Center (cream): MR, ch1, 8 sc in MR, sl st to join (8).
- Inner ring (light green): Join light green in any stitch. R2: ch2, 2 dc in next st around to create a slightly larger circle (16 dc). Join.
- Outer ring (dark green): Join dark green, R3: ch2, dc in next 2, 2 dc in next around to expand; join. The outer ring can be 3–4 rounds to reach desired size (approx 1.5–2″ diameter).
C — Seeds
- Embroider small black stitches radiating from center using embroidery thread: make tiny satin stitches or attach teeny black beads (sew on securely). Alternatively do tiny French knots spaced evenly.
D — Assemble
- Sew kiwi appliqué to top of scrunchie in the centre or slightly to one side. Add a small felt backing behind appliqué to help it sit flat and to protect the scrunchie interior.
E — Variation
- Make a “kiwi pair” (two small halves placed opposite each other) for a whimsical look.
5. Crochet Elegant Lacy Border Scrunchie Pattern

A delicate scrunchie with a lacy scalloped border around a simple tube — perfect for bridesmaids and delicate gifts.
Skill level: confident beginner → intermediate
Materials (one scrunchie)
- Fine DK or sport cotton (or lace for more delicacy) — ~20–40 yd
- Hook: 3.0–3.75 mm
- Hair elastic, tapestry needle
Construction overview
Crochet a snug tube. Add a decorative last round of lace: scallops, picots, small shells. The lacy edge flutters when worn.
Step-by-step
A — Tube
Make tube to fit elastic — sample 32 sc foundation & 4–5 rounds sc or hdc in BLO.
B — Lacy edge (worked after tube is closed)
Option A — Scallop shell round:
- With right side out and working around the closed tube top edge, sc in next 2 sts, 5 dc in next st, sc in next 2 sts repeat — this makes little scallops around the circumference.
Option B — Picot embellishment:
- After scallop row, add a picot round on shell peaks: sl st to top of shell, ch3, sl st into first ch (picot), sl st to next peak — gives a delicate pointed edge.
Option C — Small looped lacy ruffle:
- ch5, sl st in next st repeat to create looped garland; in each ch5 loop work (sc, picot, sc) for tiny petals.
C — Finish
Weave in ends. Optionally block lightly to shape shells.
Styling & gifting
- Use white or ivory and a very fine yarn for wedding sets. Tie with a satin ribbon and include a matching hairpin or small card with care instructions.
Finishing & care for all scrunchies
- Weave ends well — small projects show ends if not hidden neatly.
- Secure decorations — sew through the scrunchie tube, not just surface stitches; use several passes for beads and buttons.
- Washing — cotton and acrylic scrunchies are usually machine-washable on gentle; plush yarns may need hand-washing. Always reshape elastic scrunchies while damp. Remove any glued embellishments before washing or avoid glues and sew everything instead.
- Packaging for gifts — present on a small card, slip into a clear cello bag with a ribbon, or assemble 3–5 scrunchies on a cute ring for a gift set.
conclusion
These five scrunchie patterns cover a range of moods — loud & romantic (Giant Flower), sweet & seasonal (Apple and Kiwi), bright & playful (Retro Floral), and understatedly elegant (Lacy Border). They’re small projects with big gifting potential: make sets of three in coordinating colors, or match a scrunchie to a scarf or headband for a charming handmade bundle.