Crochet bookmarks are some of the most enjoyable small projects you can make. They are quick, useful, and perfect for using up leftover yarn while still creating something beautiful and personal. Because they are small, they let you try new stitches, practice shaping, and experiment with color without committing to a large project. That makes them ideal for beginners, but they are also satisfying for experienced crocheters who want a fast and rewarding make.
These five modern crochet bookmark patterns are stylish, practical, and easy to customize. Some are delicate and elegant, some are textured and playful, and others bring in seasonal or nature-inspired details. Whether you are making one for yourself, a gift for a book lover, or a small item to sell at craft fairs, these patterns give you plenty of creative options.
Quick Notes
- Bookmarks should stay slim, flat, and lightweight so they fit easily inside books.
- Cotton yarn usually gives the cleanest stitch definition.
- Most bookmark projects can be finished in a short sitting.
- Blocking can help lace-style bookmarks look sharper and more polished.
- Scrap yarn is perfect for small decorative designs.
- Keep your tension even so the bookmark lies flat.
- Weave in ends securely because bookmarks are handled often.
Common Materials
- Lightweight yarn, cotton yarn, or crochet thread
- Crochet hooks in sizes 1.75 mm to 4 mm, depending on yarn
- Yarn needle
- Scissors
- Stitch markers, optional
- Measuring tape
- Blocking mat and pins, optional
1. Crochet Leaf Branch Bookmark Pattern
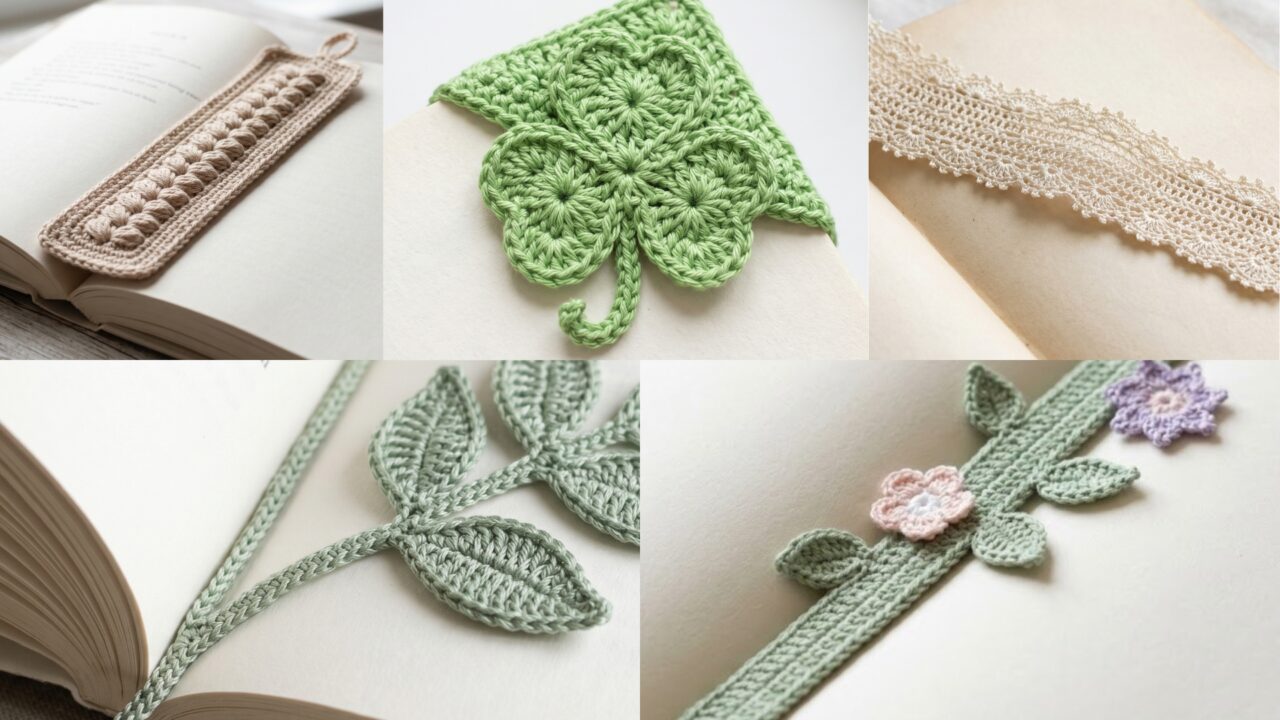
The crochet leaf branch bookmark is a lovely nature-inspired design that feels light, graceful, and elegant. It is a beautiful choice for readers who love botanical details or handmade gifts with a soft, organic look. The leaf and stem structure gives the bookmark a delicate shape that looks more advanced than it really is, making it a great project for crocheters who want something pretty without spending days on it.
Skill Level
Beginner to intermediate
Materials
- Fine or light worsted yarn
- Crochet hook suited to your yarn, usually 2.5 mm to 4 mm
- Yarn needle
- Scissors
- Optional stitch marker
Suggested Size
About 7 to 10 inches long, depending on yarn weight and how long you make the stem
Best Yarn Choices
- Cotton for a crisp, tidy finish
- Mercerized cotton for a more polished look
- Lightweight acrylic for a soft, flexible bookmark
Stitch Ideas Used
- Chain
- Slip stitch
- Single crochet
- Half double crochet
- Double crochet
- Treble crochet, if desired for larger leaves
Step-by-Step Guide
1. Start with the stem
Begin by making a long chain for the bookmark stem. The stem should be long enough to sit comfortably between the pages of a book while still leaving enough room at the top for the decorative leaf branch.
2. Work back along the chain
Once your foundation chain is complete, work stitches back along the chain to create a narrow stem. Single crochet or slip stitch works well here because it keeps the bookmark slim and neat.
3. Create the first leaf
To form the leaf, you will usually work several stitches into one side of the chain or into a small branch point. Increase stitch height in the center of the leaf and then decrease or taper as you move toward the tip. This creates the classic pointed leaf shape.
4. Shape the leaf carefully
A leaf looks best when both sides are balanced. Make one side of the leaf first, then mirror it on the other side. Keep your tension even so the leaf does not curl too much or look uneven.
5. Add more leaves if desired
If you want a fuller branch, repeat the leaf shape along one side of the stem. You can make:
- One large leaf
- Two or three small leaves
- A branching vine with several leaves
This gives you flexibility to make the bookmark delicate or more decorative.
6. Refine the edges
If your leaf edges feel too soft, you can add a round of slip stitch around the leaf to help define the shape. This makes the design look neater and more polished.
7. Finish and weave in ends
Once the branch is complete, cut the yarn and weave in all loose ends securely. Because bookmarks are small and handled often, it is important to fasten the ends well.
Helpful Tips
- Use a smaller hook than you might normally use for your yarn so the bookmark stays firm.
- Block the bookmark lightly if the leaves need more definition.
- Choose a green yarn for a botanical look or use cream, gold, or burgundy for a more elegant style.
- Make the stem slightly longer than you think you need, since it will be tucked inside the book.
Why This Pattern Works So Well
The leaf branch bookmark is pretty without being fussy. It has a refined handmade feel and works beautifully as a gift for book lovers, nature lovers, teachers, or anyone who enjoys soft, elegant details.
2. Crochet Victorian Ribbon Bookmark Pattern
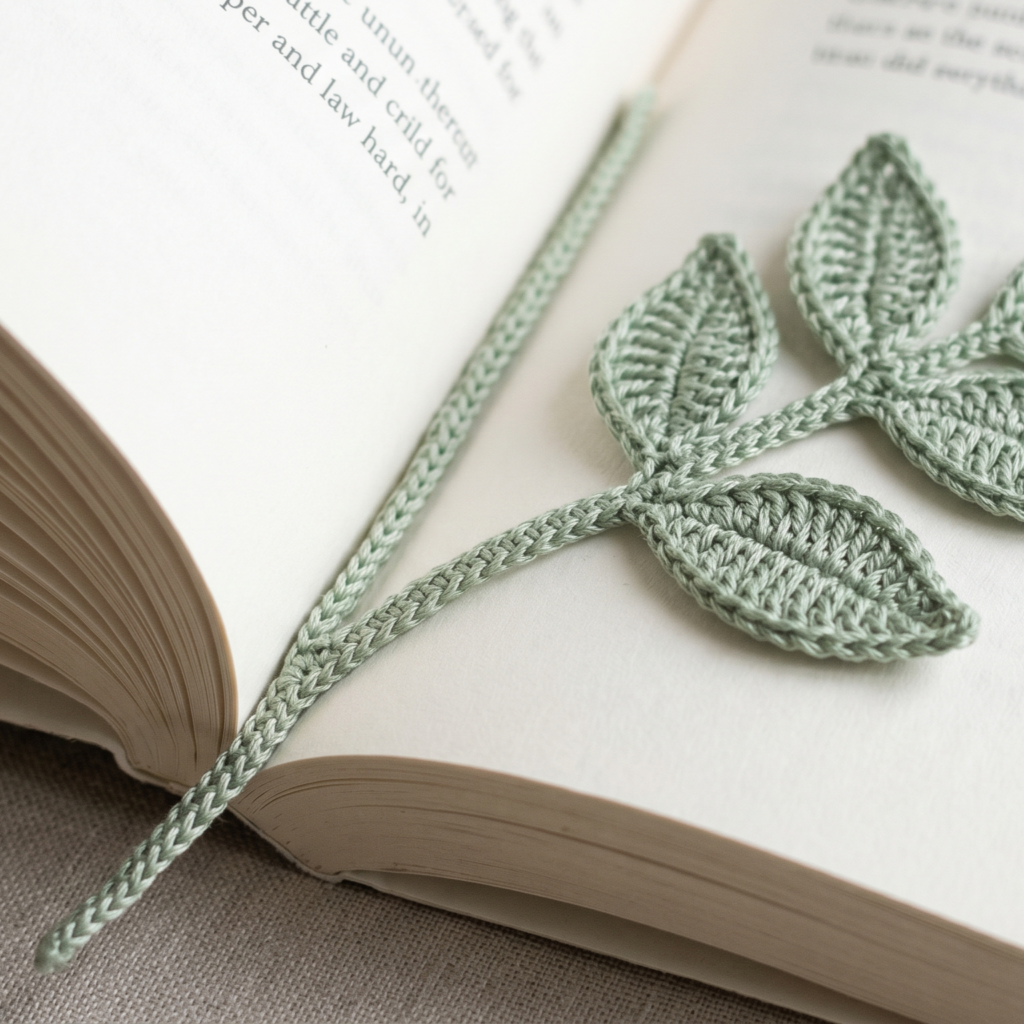
The crochet Victorian ribbon bookmark has a timeless, romantic charm. It often features lace-like stitches, delicate shaping, and a long ribbon-style appearance that feels elegant and classic. This is the kind of bookmark that looks lovely tucked into a vintage novel, a journal, or a gift book. Even though it has a fancy appearance, the structure can be quite simple once broken into steps.
Skill Level
Intermediate
Materials
- Fine crochet thread or lightweight yarn
- Small crochet hook, often 1.75 mm to 3 mm
- Yarn needle
- Scissors
- Optional blocking pins and mat
Suggested Size
About 8 to 12 inches long, depending on how dramatic you want the ribbon effect to be
Best Yarn Choices
- Cotton thread for a crisp vintage look
- Lace-weight yarn for a soft, delicate finish
- Smooth lightweight yarn for a more modern but still elegant version
Stitch Ideas Used
- Chain
- Single crochet
- Half double crochet
- Double crochet
- Shell stitches
- Picot, if desired
- Slip stitch
Step-by-Step Guide
1. Make a long foundation chain
Start with a chain that will become the length of the ribbon. The chain should be long enough to drape beautifully from the top of the book while still sitting flat between the pages.
2. Build the base row
Work back along the chain using a simple stitch pattern such as single crochet, half double crochet, or a lace repeat. This forms the foundation of the ribbon and gives it structure.
3. Add decorative edging
The Victorian style usually comes alive through edging. You can add shells, picots, or small scallops along one or both sides of the ribbon. This gives the bookmark a lace-like appearance.
4. Keep the center neat
A ribbon bookmark should feel elegant and balanced, so try not to make the center too bulky. The goal is a slender shape that can lie smoothly inside a book.
5. Repeat the decorative section
If your pattern includes a repeating lace motif, continue it down the length of the bookmark. This creates a continuous ornamental ribbon effect.
6. Shape the ends
Some ribbon bookmarks end with a pointed tip, a small flower, or a decorative fan. You can keep the ends simple or add a small flourish if you want a more ornate finish.
7. Block the finished piece
Blocking is especially helpful for this pattern. It opens the stitches, straightens the edges, and gives the bookmark a more refined Victorian feel.
Helpful Tips
- Keep your stitches loose enough that the lace does not pucker.
- Use neutral or antique-inspired colors such as ivory, soft rose, dusty blue, or sage.
- If you are making several bookmarks for gifts, this pattern works beautifully in small batches.
- Blocking makes a major difference in the final appearance.
Why This Pattern Works So Well
This bookmark feels elegant, delicate, and timeless. It is perfect for special gifts, keepsake books, and anyone who loves a vintage-inspired handmade accessory.
3. Crochet Puff Stitch Bookmark Pattern
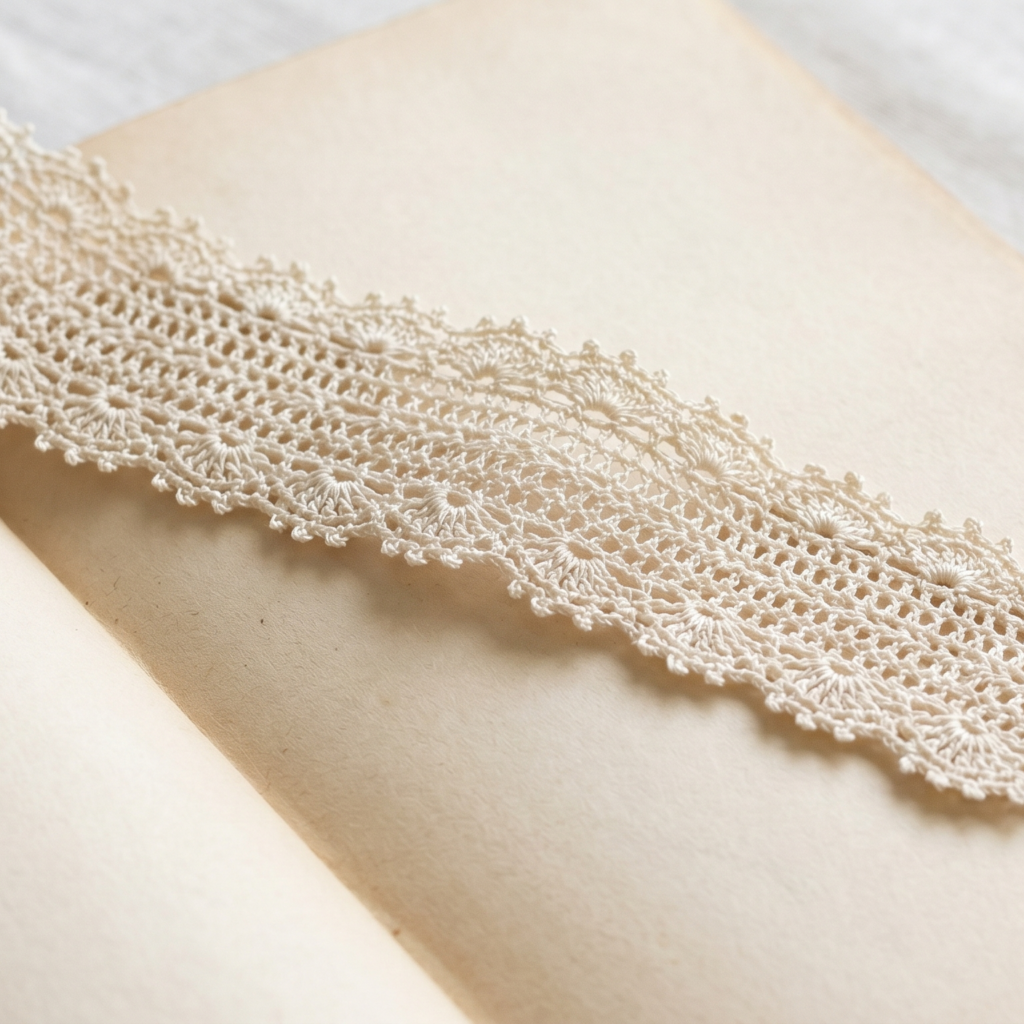
The crochet puff stitch bookmark is soft, textured, and wonderfully tactile. Puff stitches create a raised surface that makes the bookmark feel cozy and decorative at the same time. This pattern is great for adding a little dimension without making the project too complicated. It is also an excellent way to practice texture in a small, low-pressure project.
Skill Level
Beginner to intermediate
Materials
- Lightweight yarn or fine cotton yarn
- Crochet hook matching your yarn
- Yarn needle
- Scissors
Suggested Size
About 6 to 9 inches long and about 1 to 1.5 inches wide
Best Yarn Choices
- Cotton for stitch definition
- Soft acrylic for a comfy feel
- Bamboo blends for a smooth, elegant finish
Stitch Ideas Used
- Chain
- Single crochet
- Puff stitch
- Slip stitch
- Optional border stitches
Step-by-Step Guide
1. Create a narrow foundation
Start with a chain that matches the width you want for the bookmark. Since this is a bookmark, the width should stay slim so it sits neatly between pages.
2. Add the first row of stitches
Work a simple base row of single crochet or half double crochet. This gives the puff stitches something stable to sit on.
3. Work the puff stitch pattern
Puff stitches are made by drawing up loops multiple times in the same stitch space before closing them together. This creates the soft raised texture that defines the bookmark.
4. Keep the spacing even
Even spacing is important so the puff stitches do not crowd together. If they are too close, the bookmark may become too thick. If they are too far apart, the texture may feel uneven.
5. Continue the repeat
Repeat the puff stitch rows or sections until the bookmark reaches the desired length. You can make the texture run down the whole piece or place puff stitches in a decorative strip.
6. Add a finishing edge
A simple border around the bookmark can help define the shape. Single crochet or slip stitch edging works well because it keeps the texture from looking too bulky.
7. Secure the ends
Puff stitch designs often have a slightly thicker body, so be sure to weave in the yarn ends carefully to keep everything neat and durable.
Helpful Tips
- Use a slightly smaller hook if the puff stitches feel too loose.
- Keep your tension consistent so the puff texture stays even.
- Choose one solid color if you want the stitch texture to stand out clearly.
- For a playful look, use a variegated yarn, but for a more modern style, use one clean color.
Why This Pattern Works So Well
The puff stitch bookmark is quick to make but looks richly textured and thoughtfully designed. It is a nice choice when you want a bookmark that feels soft, modern, and handcrafted.
4. Crochet Shamrock Corner Bookmark Pattern
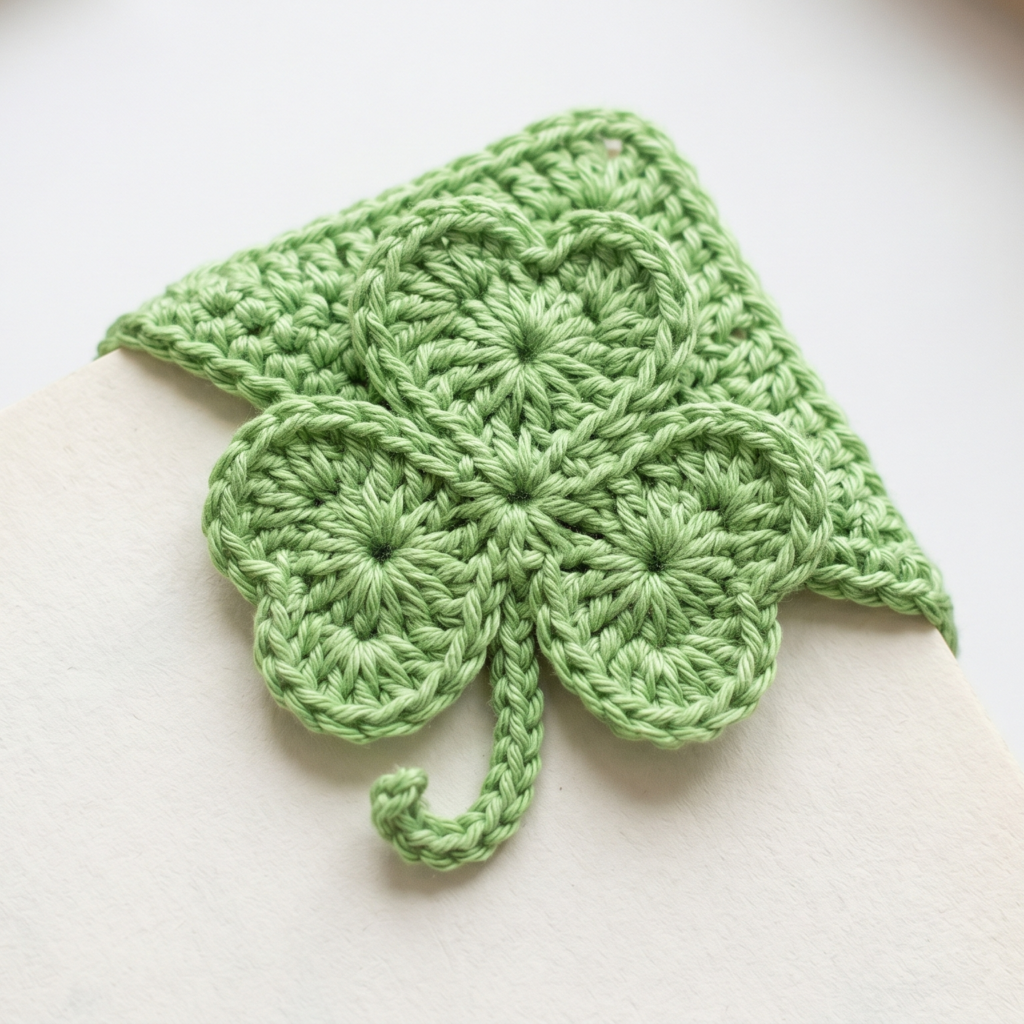
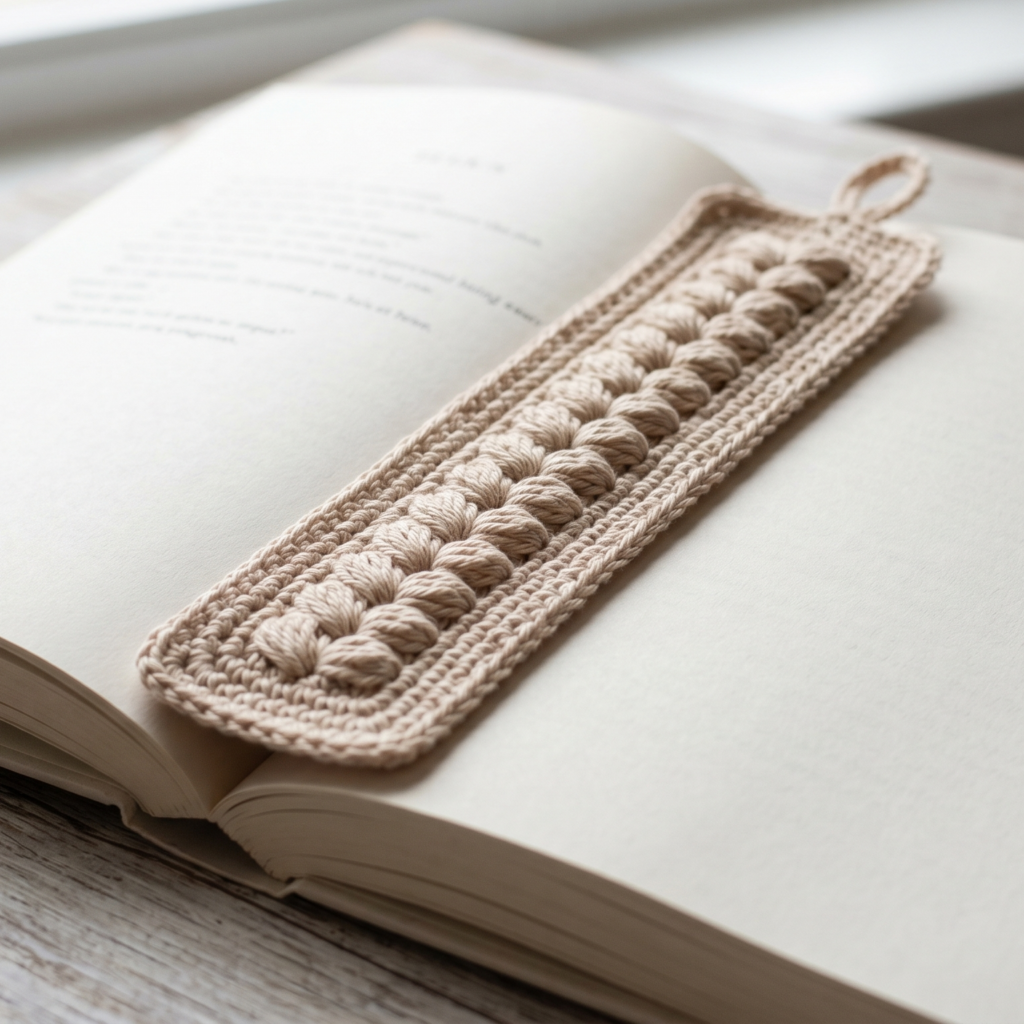
The crochet shamrock corner bookmark is a charming little project with a seasonal or lucky-theme feel. It fits neatly over the corner of a page, which makes it both decorative and practical. The shamrock design gives it a sweet handmade personality and makes it especially fun for gifts, spring projects, or St. Patrick’s Day-themed bookmarks.
Skill Level
Beginner to intermediate
Materials
- Lightweight green yarn or crochet thread
- Small crochet hook
- Yarn needle
- Scissors
Suggested Size
Typically fits over a standard book page corner and measures about 3 to 5 inches across, depending on your pattern
Best Yarn Choices
- Cotton thread for crisp shaping
- Lightweight cotton yarn for a sturdier bookmark
- Green yarn in soft or bright shades for a cheerful effect
Stitch Ideas Used
- Chain
- Slip stitch
- Single crochet
- Double crochet
- Cluster or shell stitches, depending on design
- Magic ring or chain ring for the shamrock center
Step-by-Step Guide
1. Begin with the shamrock center
Many shamrock motifs start from a magic ring or small chain loop. This center becomes the base for the three heart-shaped or leaf-shaped sections of the shamrock.
2. Form the three leaves
Each shamrock leaf is usually made using cluster stitches, shells, or rounded loops that come together into a clover shape. The goal is to create three balanced leaf forms that sit close together.
3. Shape the corner base
Once the shamrock motif is complete, you will work a small triangular or folded corner section so the bookmark can slip over the corner of a page.
4. Add edging if needed
Some designs benefit from a tiny edge around the corner section to help it hold its shape. This can also make the bookmark look more polished.
5. Check the fit
Before finishing, place the bookmark on a book corner to make sure it fits securely but not too tightly. A good corner bookmark should stay in place without bending the page too much.
6. Add the finishing touches
Weave in ends carefully and trim any extra yarn. If you want the shamrock to stand out more, you can lightly block it to help the leaves lie evenly.
Helpful Tips
- Use a firm yarn so the bookmark holds its shape.
- Keep the corner section snug enough to stay on the page but loose enough to slide on easily.
- A darker green gives a classic shamrock look, while a lighter green feels fresh and springlike.
- This is a great project for small amounts of leftover yarn.
Why This Pattern Works So Well
The shamrock corner bookmark is adorable, useful, and quick to finish. It is especially fun for seasonal crafting and makes a sweet handmade gift with a playful personality.
5. Crochet Garden Themed Bookmark Pattern
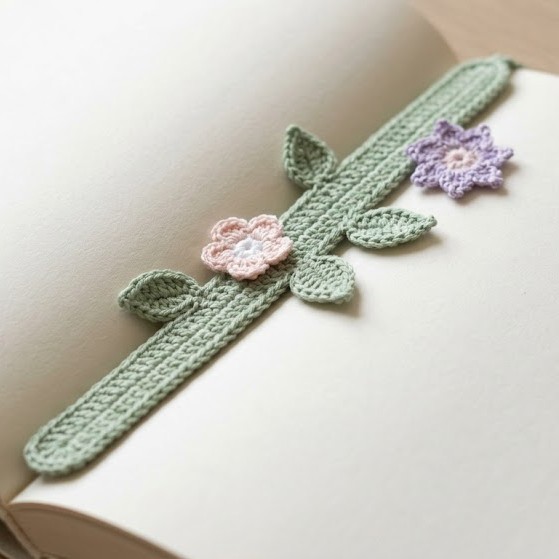
The crochet garden themed bookmark is a lovely project for anyone who enjoys flowers, leaves, vines, and nature-inspired details. This kind of bookmark can be simple and subtle or colorful and whimsical, depending on how you design it. It is a great way to combine decorative elements into one small project that still works beautifully as a real bookmark.
Skill Level
Beginner to intermediate
Materials
- Fine or lightweight yarn in green plus flower colors
- Crochet hook suitable for your yarn
- Yarn needle
- Scissors
- Optional stitch marker
Suggested Size
About 7 to 10 inches long, depending on the number of floral details you include
Best Yarn Choices
- Cotton for clean stitch definition
- Lightweight acrylic for color variety
- Thread for a delicate garden motif
- Small amounts of scrap yarn for flowers and leaves
Stitch Ideas Used
- Chain
- Single crochet
- Double crochet
- Slip stitch
- Picot
- Small flower motifs
- Leaf motifs
Step-by-Step Guide
1. Choose your garden theme
Decide what kind of garden look you want. You might make:
- A vine with tiny leaves
- A floral stem with blossoms
- A row of small flower motifs
- A mixed garden design with leaves and petals
Choosing the theme first helps you plan the colors and length.
2. Create the main bookmark strip
Start with a narrow base chain and work a slim strip that will function as the bookmark itself. This should be simple and flat so it fits easily into a book.
3. Add leaf details
You can attach leaves along one side of the strip or place them at intervals. Leaf shapes can be made with short rows or small cluster-like stitches, depending on the style you prefer.
4. Add flower motifs
Small flowers can be worked separately and stitched onto the bookmark, or added directly as you go. Keep the flowers small so they decorate the piece without making it too bulky.
5. Balance the design
A bookmark should still stay thin enough to function well. If you add too many flowers or leaves, the piece may become too thick. Aim for a delicate balance between decoration and practicality.
6. Finish the top and bottom neatly
Make sure the bookmark has clean edges and a smooth finish. A simple stem or small hanging tassel can also be added, but only if it does not interfere with the bookmark’s use.
7. Weave in all ends securely
Since this pattern may use several small motifs, it is especially important to fasten everything well. Loose ends can make the bookmark look messy and reduce durability.
Helpful Tips
- Use matching or complementary flower colors for a coordinated garden feel.
- Keep the main strip simple so the decorative elements stand out.
- A soft green background with small pink, yellow, or lavender flowers creates a classic garden look.
- This is a wonderful project for leftover yarn bits from larger projects.
Why This Pattern Works So Well
The garden themed bookmark feels cheerful, fresh, and handmade in the best way. It is a perfect little project for spring, for gift-giving, or for adding a bit of nature-inspired beauty to your reading routine.
Conclusion
Crochet bookmarks are small projects, but they can be full of charm, personality, and style. They are quick enough to finish in a short sitting, yet meaningful enough to gift, sell, or keep for yourself. Whether you prefer a graceful leaf branch, a vintage Victorian ribbon, a textured puff stitch design, a lucky shamrock corner, or a cheerful garden theme, each of these bookmarks offers its own unique handmade beauty.
The best part about crochet bookmarks is how easy they are to personalize. You can change the colors, adjust the length, add embellishments, or simplify the stitches to make each design your own. They are also ideal for practicing new techniques without the pressure of a big project.
No matter which pattern you choose first, the joy is in making something useful, beautiful, and completely handmade. A bookmark may be small, but it carries the kind of warmth and care that only crochet can give.