A crochet pullover sweater is one of the most rewarding garments you can make by hand. It is cozy, stylish, and completely customizable, which means you can create something that fits your body, your color taste, and your personal style. Unlike fast fashion sweaters, a handmade pullover carries time, care, and creativity in every stitch. That makes it more than just clothing. It becomes a piece you can wear proudly because you made it yourself.
Crochet pullovers are also a wonderful project for anyone who wants to level up from smaller items and try garment making. They can be relaxed and oversized, fitted and polished, or bold and textured depending on the stitch pattern and construction. Some designs are perfect for layering in cooler weather, while others work beautifully as year-round statement pieces. With the right yarn and a little planning, a pullover sweater can become one of the most versatile items in your wardrobe.
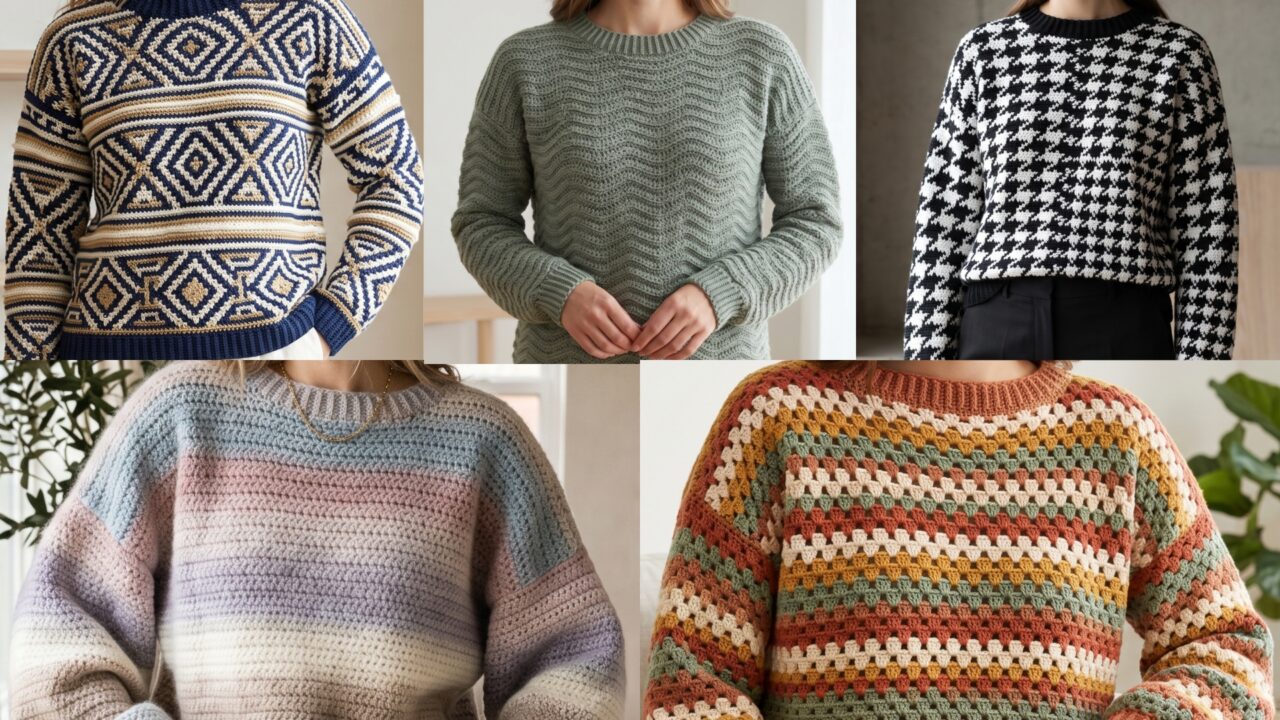
In this collection, you will find five trendy crochet pullover sweater patterns that are stylish, wearable, and fun to make. Each design has its own personality, from striped and colorful to graphic and modern. If you are looking for a handmade garment that feels fresh and fashionable, these patterns are a great place to start.
Quick Notes
- Sweater fit depends on gauge, so make a swatch before starting.
- Choose yarn that is soft, comfortable, and suitable for garments.
- Measure your bust, length, sleeve length, and arm circumference before crocheting.
- Blocking can make sweater pieces lay flatter and fit better.
- Garment sewing or joining matters just as much as the crochet stitches.
- Keep track of row counts so both sleeves and body sections match.
- If you are unsure about size, a slightly relaxed fit is often easier to wear.
Common Materials
Most crochet pullover sweaters can be made with these supplies:
- Yarn in the recommended weight for the pattern
- Crochet hook sized to match your gauge
- Yarn needle
- Scissors
- Stitch markers
- Measuring tape
- Row counter, optional
- Blocking mats and pins, optional
- Sewing needle or extra hook for joining, depending on method
Best Yarn Choices
For sweaters, soft yarn is very important. Common choices include cotton blends, acrylic blends, wool blends, alpaca blends, and bamboo blends. The best yarn is one that feels good against the skin, drapes well, and is easy to care for.
1. Crochet Granny Stripes Pullover Sweater Pattern
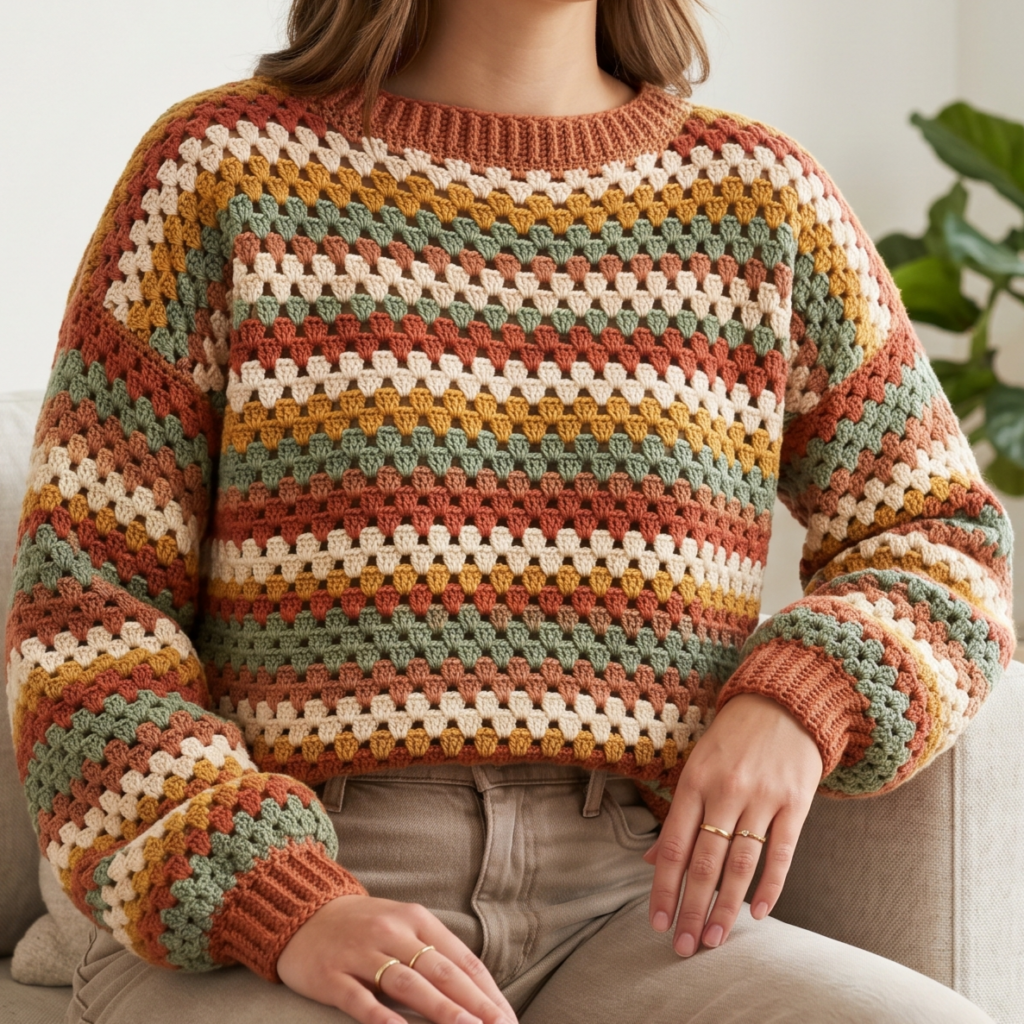
The crochet granny stripes pullover sweater is a colorful, cheerful, and approachable garment that brings classic crochet charm into a modern wearable piece. Granny stripes are easy to recognize and fun to customize, making this sweater a great choice if you love color and texture. The design feels casual and creative, and it works beautifully in both bold and muted palettes.
Skill Level
Beginner to intermediate
Suggested Size
Customizable to fit bust sizes from small to plus size, depending on measurements and gauge
Materials
- Light worsted or worsted weight yarn in multiple colors
- Crochet hook suited to your gauge
- Yarn needle
- Scissors
- Stitch markers
- Measuring tape
Best Yarn Choices
Cotton blends or soft acrylic blends work well because granny stripes need good stitch definition and comfortable drape.
Step-by-Step Guide
1. Make a gauge swatch
Before beginning the sweater, crochet a small swatch using the granny stripe repeat. Wash or block it the same way you plan to care for the sweater. This helps you see how the fabric behaves and whether the stitch pattern creates the right drape.
2. Measure the body pieces
Decide whether you want a relaxed fit, an oversized fit, or a more tailored fit. Measure the bust, shoulder width, body length, and sleeve length. Use those measurements to plan the front, back, and sleeves.
3. Crochet the back panel
Start with the back panel using the granny stripe pattern. Granny stripes are usually made with clusters of stitches separated by chain spaces, which gives the fabric a light and airy look. Keep your row count even so the panel stays rectangular or gently shaped as needed.
4. Crochet the front panel
Make the front panel to match the back. If you want a neckline shape, you can leave a small opening or later create shaping at the shoulders. The front and back should match in width and length unless the design calls for a different neckline depth.
5. Add color changes thoughtfully
Granny stripes look especially beautiful when the colors repeat in a planned sequence. You can use rainbow colors, earthy tones, pastel gradients, or a simple two-color repeat. Keep the color changes neat and consistent so the sweater looks polished.
6. Create the sleeves
Crochet two sleeves using the same granny stripe pattern or a simplified version if you want to reduce bulk. Make sure both sleeves match in length and width. Sleeves can be straight or gently tapered depending on the style you want.
7. Join the sweater pieces
Once all panels are complete, seam the shoulders first, then attach the sleeves, and finally sew the side seams. Take time to line up the stripes so the sweater feels balanced and intentional.
8. Finish the neckline, cuffs, and hem
A simple ribbed or single crochet border can help stabilize the neckline, cuffs, and hem. This gives the sweater a cleaner finish and helps the garment hold its shape.
Helpful Tips
- Choose color combinations that reflect your style, but keep contrast balanced.
- If the fabric feels too open, try a smaller hook.
- Blocking helps granny stripe panels look straighter and more even.
- Weave in ends carefully because striped garments can leave many yarn tails.
Why This Pattern Works Well
The granny stripes pullover feels joyful, handmade, and easy to wear. It is a great way to turn a classic crochet motif into a trendy everyday sweater.
2. Crochet Ripple Crew Pullover Sweater Pattern
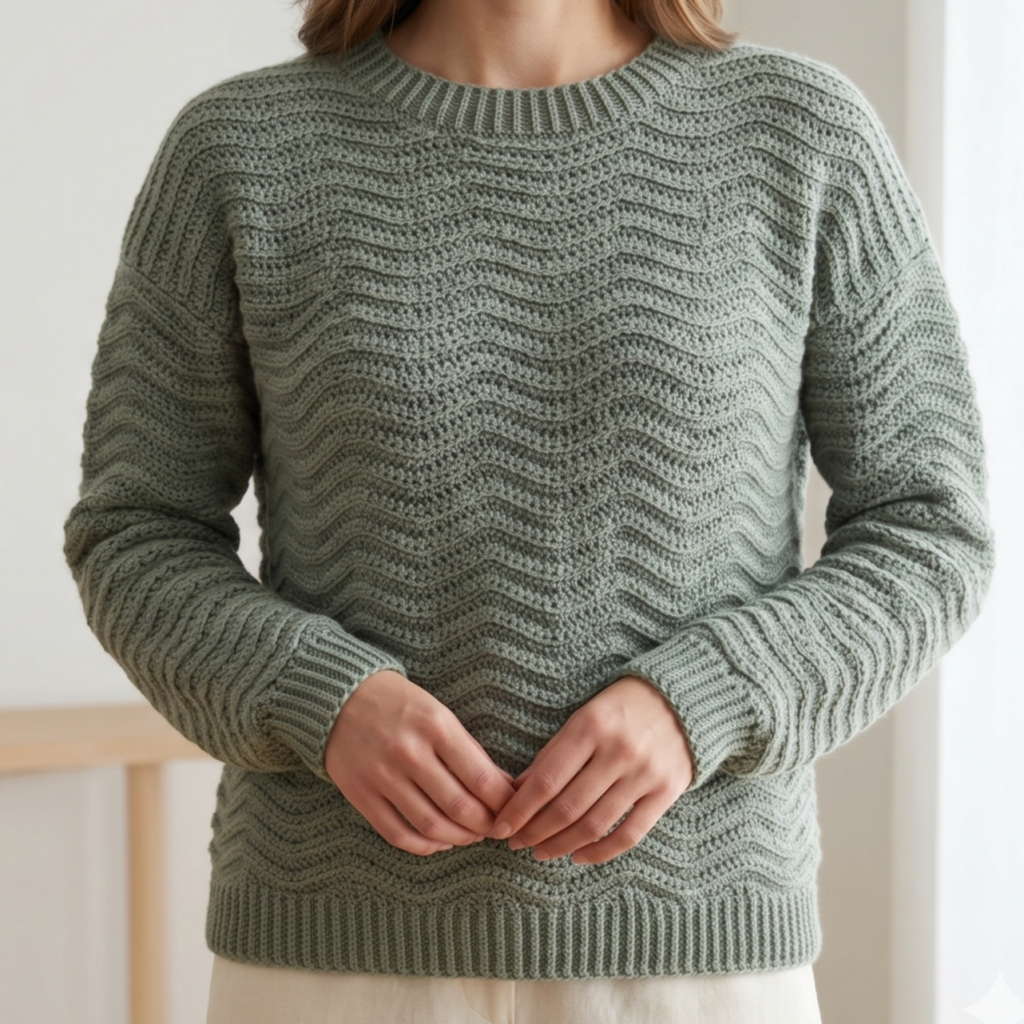
The crochet ripple crew pullover sweater has a modern yet relaxed feel. Ripple patterns create soft waves across the fabric, which gives the sweater movement without making it too busy. The crew neckline keeps the silhouette classic and wearable, making this sweater ideal for layering or wearing on its own.
Skill Level
Intermediate
Suggested Size
Customizable for fitted or relaxed crewneck sizing
Materials
- Medium weight yarn
- Crochet hook matched to your gauge
- Yarn needle
- Scissors
- Stitch markers
- Measuring tape
Best Yarn Choices
A soft yarn with good drape, such as a wool blend or cotton blend, works beautifully with ripple stitch because the waves show well without feeling stiff.
Step-by-Step Guide
1. Plan the ripple repeat
Ripple patterns depend on consistent increases and decreases, so it is important to understand the wave repeat before you begin. Decide how wide you want the ripple sections to be and how bold you want the waves to appear.
2. Make a swatch
Work a small ripple swatch to check your stitch count and wave spacing. This helps you see whether the ripple texture looks too tight, too stretched, or just right for a sweater fabric.
3. Crochet the back panel
Work the back in the ripple pattern, keeping the rows even and the wave repeat consistent. The back panel should lie flat and maintain the same number of ripple sections throughout.
4. Crochet the front panel
Create the front panel to match the back, leaving room for the neckline. If the pattern includes shaping, you may reduce stitches near the top to form the crew neck opening.
5. Shape the neckline
A crew neckline should sit comfortably around the base of the neck without being too tight. You can shape it by leaving a center opening and creating shoulder sections on either side. Join the shoulders later for a smooth finish.
6. Make the sleeves
Crochet sleeves in the ripple pattern or in a simpler coordinating stitch if you want the body to remain the focus. Match the sleeve length and width carefully so both arms fit evenly.
7. Seam the sweater
Join the shoulders first, then attach the sleeves, and finally sew the side seams. Ripple patterns can shift visually if not aligned carefully, so check placement before sewing permanently.
8. Finish the neckline, hem, and cuffs
Add a clean border around the crew neck, hem, and cuffs. Ribbing or a simple single crochet edge works well because it helps the sweater hold its shape.
Helpful Tips
- Keep the ripple repeat consistent so the waves stay even.
- Use markers to track where increases and decreases should happen.
- Soft solid colors show the wave pattern clearly, while variegated yarn can soften it.
- A blocked ripple panel often looks more polished and balanced.
Why This Pattern Works Well
The ripple crew pullover is stylish, smooth, and easy to dress up or down. It offers visual interest through texture while still feeling classic and wearable.
3. Crochet Split Houndstooth Sweater Pullover Pattern
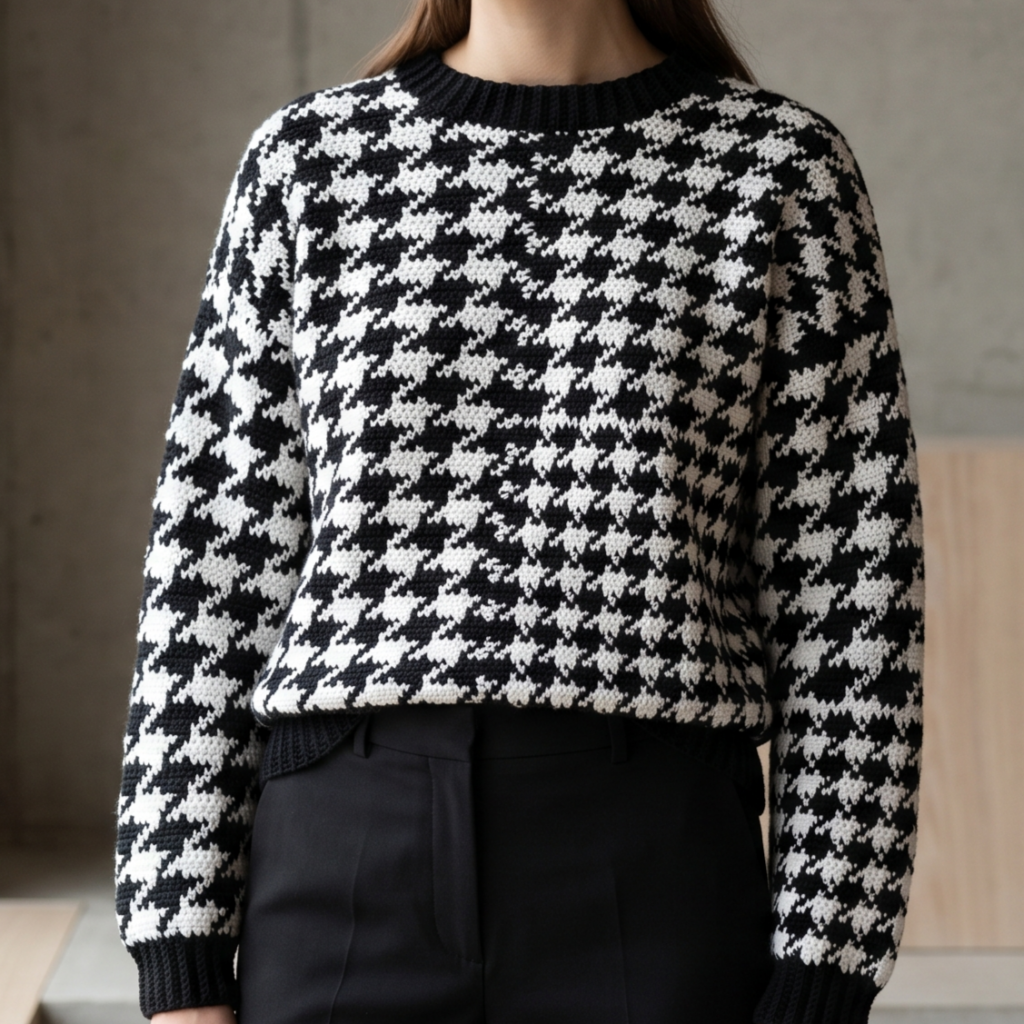
The crochet split houndstooth sweater pullover has a bold, graphic look that feels both trendy and sophisticated. Houndstooth is a timeless pattern, but the split version gives it a fresh handmade twist. This is a great sweater if you want a design that feels fashion-forward and eye-catching.
Skill Level
Intermediate to advanced
Suggested Size
Customizable across standard sweater sizes
Materials
- Two contrasting yarn colors
- Crochet hook suited to your gauge
- Yarn needle
- Scissors
- Stitch markers
- Measuring tape
Best Yarn Choices
A yarn with clear stitch definition is ideal, especially in two strong contrasting colors such as black and white, navy and cream, or charcoal and beige.
Step-by-Step Guide
1. Choose your contrast colors
The houndstooth pattern depends on strong contrast, so choose colors that clearly stand apart from each other. If the contrast is too subtle, the motif may lose its graphic impact.
2. Create a gauge swatch
Because this pattern is visually precise, gauge matters a lot. Crochet a sample swatch and check how the split houndstooth motif appears in your chosen yarn and hook combination.
3. Begin the back panel
Work the back panel using the split houndstooth stitch sequence. This pattern usually alternates colors in a structured way to create the broken check effect. Keep your color changes neat so the design stays crisp.
4. Make the front panel
Repeat the same stitch pattern for the front. If you want a neckline shape, leave a center opening and shape the shoulders accordingly. The split houndstooth motif should line up as closely as possible between panels.
5. Shape the sleeves
Make sleeves using the same pattern or a coordinating plain stitch if you want the sweater to be less busy. Keep the stripe or motif alignment consistent if the sleeves continue the main design.
6. Join the pieces carefully
When seaming, pay attention to the orientation of the pattern. Houndstooth looks best when the motif lines remain clean and organized. Match the shoulders, sleeves, and sides carefully before stitching.
7. Add borders
A simple border around the neckline, cuffs, and hem helps frame the bold pattern. Keep the finish clean so the houndstooth remains the star of the sweater.
8. Block for a sharper look
Blocking is especially helpful for this pattern because it sharpens the edges and helps the stitch design lay flat.
Helpful Tips
- Use yarn with strong stitch definition.
- Keep color changes tidy and consistent.
- Check your motif alignment before joining panels.
- This pattern looks especially striking in a monochrome palette.
Why This Pattern Works Well
The split houndstooth pullover feels modern, tailored, and stylish. It is a strong statement piece that can still be worn in everyday outfits.
4. Crochet Cloudy Stripes Oversized Sweater Pullover Pattern

The crochet cloudy stripes oversized sweater pullover is soft, cozy, and effortlessly relaxed. The oversized fit gives it a laid-back modern feel, while the cloudy stripes create a gentle, dreamy look. This is the kind of sweater that feels comfortable, stylish, and easy to throw on with jeans, leggings, or skirts.
Skill Level
Beginner to intermediate
Suggested Size
Designed with a relaxed oversized fit
Materials
- Soft medium weight or light bulky yarn
- Crochet hook suited to your gauge
- Yarn needle
- Scissors
- Stitch markers
- Measuring tape
Best Yarn Choices
Choose a yarn with a soft hand and good drape. Pastel shades, muted neutrals, or misty tonal colors work especially well for a cloudy effect.
Step-by-Step Guide
1. Decide on the oversized fit
Oversized sweaters look best when they are intentionally roomy rather than simply too large. Measure the desired bust ease, sleeve looseness, and body length before starting. Plan for a soft relaxed silhouette.
2. Choose soft stripe colors
Cloudy stripes usually look best in pale, blended tones such as cream, gray, dusty blue, lilac, taupe, or soft sage. A gentle color palette creates the cloudy effect that gives the sweater its name.
3. Crochet the body panels
Work the front and back panels in a simple stitch pattern that allows the stripes to remain the focus. Keep the stitches even and the fabric soft so the sweater drapes nicely.
4. Add the cloudy stripe sequence
Alternate the colors in a soft, low-contrast way. You can use wider stripes for a bold modern look or narrow stripes for a misty blended effect. The key is to keep the transitions calm and seamless.
5. Make the sleeves
Oversized sweaters often have slightly wider sleeves. Crochet the sleeves with enough room for comfort and movement. You can keep them straight or taper them slightly toward the wrist.
6. Join the sweater
Sew the shoulders, attach the sleeves, and join the side seams. Because the sweater is oversized, check that the seams do not make it feel too stiff. The garment should remain loose and flowy.
7. Finish with soft ribbing
Add a comfortable border around the neckline, cuffs, and hem. A simple ribbed edge helps keep the sweater from looking unfinished while still preserving the relaxed shape.
8. Block lightly
A light block can help the oversized shape relax and improve the drape. Do not stretch it too much, since the fit should remain cozy and soft.
Helpful Tips
- Keep the yarn soft so the sweater feels comfortable against the skin.
- Gentle color contrast creates the cloudy stripe effect best.
- Oversized designs are easier to wear when the sleeves are not too heavy.
- A slightly longer hem works beautifully with this silhouette.
Why This Pattern Works Well
The cloudy stripes oversized pullover feels modern, cozy, and easy to style. It is perfect for casual wear and gives off a soft, effortless handmade look.
5. Crochet Mosaic Ridge Sweater Pullover Pattern
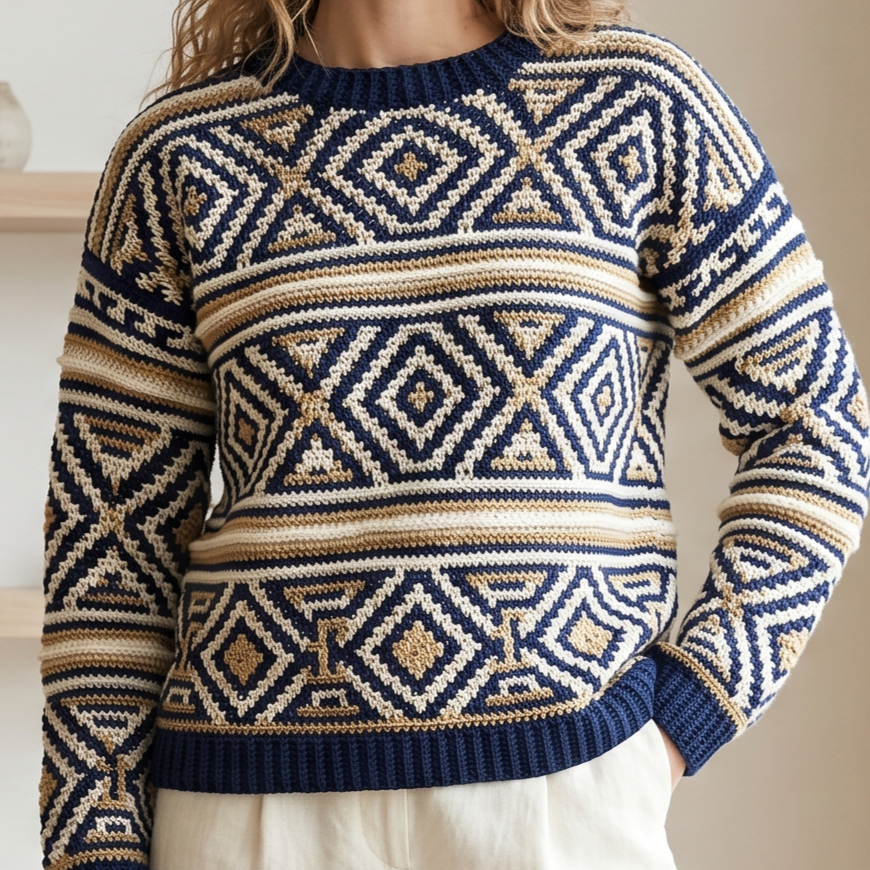
The crochet mosaic ridge sweater pullover has a structured, artistic style that feels elegant and contemporary. Mosaic-inspired crochet often uses color, direction, and stitch texture to create geometric visual effects. The ridge element adds raised detail, making this sweater feel especially rich and tactile.
Skill Level
Intermediate to advanced
Suggested Size
Customizable to fitted or relaxed sweater measurements
Materials
- Two or more yarn colors
- Crochet hook suited to your gauge
- Yarn needle
- Scissors
- Stitch markers
- Measuring tape
Best Yarn Choices
Use yarn that gives clean stitch definition so the ridge and mosaic effects show clearly. Cotton blends and smooth wool blends work well.
Step-by-Step Guide
1. Plan the mosaic layout
Mosaic crochet often depends on a specific visual repeat, so planning is important. Decide whether the design will use diamonds, lines, arrows, or other geometric motifs. Sketching the repeat can help you understand how the design will appear on the sweater.
2. Make a gauge sample
Before beginning the sweater, crochet a small swatch of the mosaic ridge pattern. This helps you check stitch height, fabric firmness, and color placement.
3. Crochet the body panels
Work the back and front panels following the mosaic repeat. Keep track of each row carefully because mosaic patterns often rely on stitch placement and color changes for their visual effect.
4. Build the ridge texture
The ridge sections are what give this pattern its raised appearance. Make sure the textured rows remain consistent so the pattern stays balanced. The raised lines should stand out clearly without making the fabric too stiff.
5. Shape the neckline
When the front panel reaches the appropriate height, shape the neckline by leaving a center opening and creating shoulders on each side. Make sure the mosaic repeat remains aligned as the shape changes.
6. Crochet the sleeves
You can continue the mosaic pattern into the sleeves or simplify them for comfort. If you continue the design, keep your color changes precise so the visual flow remains consistent.
7. Join the pieces
Sew the shoulders, sleeves, and side seams carefully. Mosaic patterns can be striking, so it is worth taking extra time to align the motifs cleanly before joining.
8. Finish the edges
A neat border around the neckline, cuffs, and hem will frame the mosaic design. Keep the finish simple so it does not distract from the textured pattern.
Helpful Tips
- Keep a written row-by-row note so you do not lose track of the mosaic repeat.
- Use stitch markers to help maintain alignment.
- A smooth yarn makes the ridge detail more visible.
- Blocking can improve symmetry and help the sweater lay flat.
Why This Pattern Works Well
The mosaic ridge pullover is bold, stylish, and beautifully detailed. It feels like a wearable piece of textile art while still being practical enough for a modern wardrobe.
Conclusion
Crochet pullover sweaters are some of the most satisfying garments to make because they combine creativity, comfort, and personal style in one project. They take a little more planning than smaller crochet items, but the reward is worth it. A handmade sweater can become a favorite layer in your wardrobe, a thoughtful gift, or a true statement piece that reflects your taste and skill.
These five patterns each offer a different look and feel. The granny stripes pullover brings color and playfulness. The ripple crew sweater offers smooth movement and classic structure. The split houndstooth design gives you bold graphic style. The cloudy stripes oversized sweater feels soft and relaxed. And the mosaic ridge pullover creates a more artistic, textured finish.
The best part about making crochet sweaters is how customizable they are. You can adjust the fit, length, sleeves, colors, and texture to suit your own style and comfort. That flexibility makes every sweater feel unique and personal.
Whether you are making your first garment or your next favorite piece, a crochet pullover is always a meaningful project. Row by row, it grows into something warm, wearable, and handmade with care.