Crochet pillow cases are one of the easiest ways to bring handmade charm into a living space. They can completely change the look of a room without requiring a major makeover, and they offer the perfect balance of style and comfort. A crochet pillow case can make a sofa feel warmer, a bedroom feel more personal, or a reading corner feel more inviting. Best of all, it is a project that lets you combine color, texture, and creativity in a practical way.
What makes crochet pillow cases especially appealing is how versatile they are. You can make them soft and neutral for a calm boho look, bold and geometric for a modern space, or playful and textured for a cozy, lived-in feel. They are also a wonderful project if you want something useful that is still enjoyable to make. Unlike very large crochet projects, pillow covers work up in manageable sections, so you can see steady progress without feeling overwhelmed.
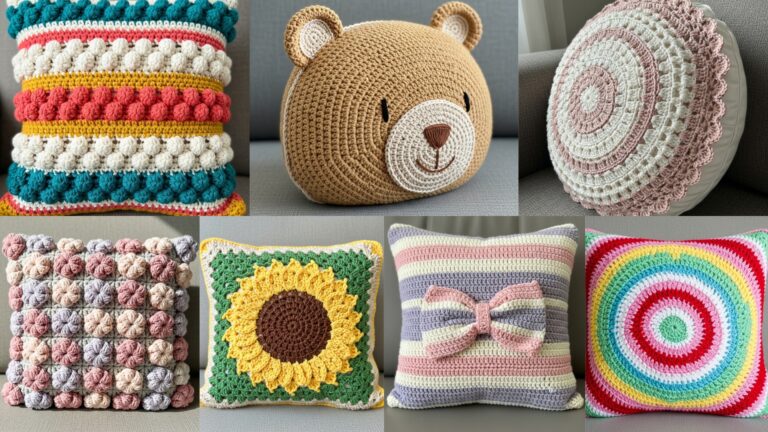
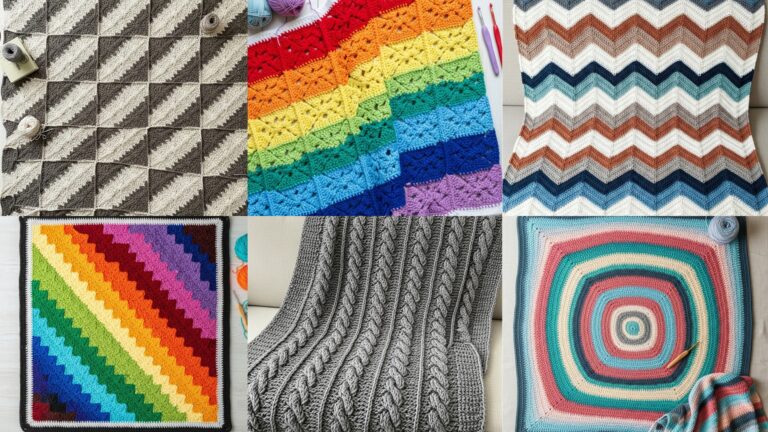
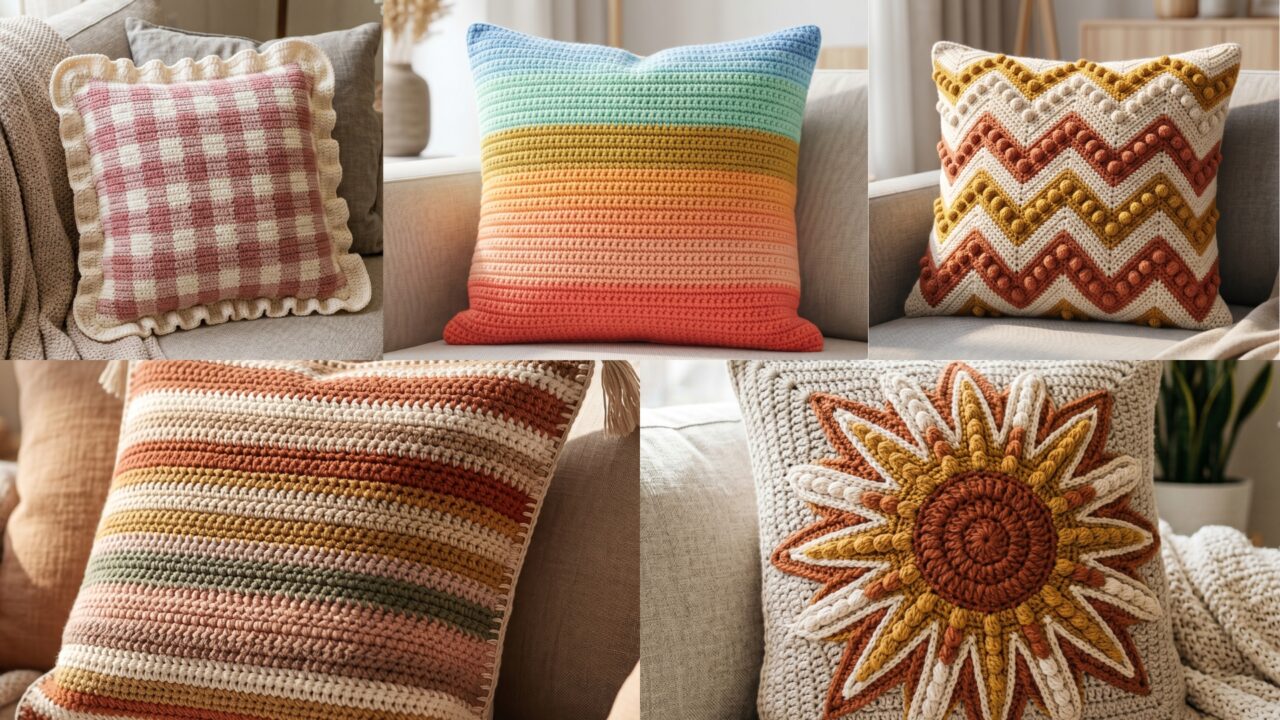
In this post, you will find five trendy crochet pillow case patterns that are perfect for boho and modern homes. Each design includes a clear skill level, materials, suggested size, and a detailed step-by-step guide so you can follow along easily. Whether you want a statement cushion or a subtle accent piece, these pillow cases will help you create something beautiful for your home.
Quick Notes
- Crochet pillow cases should fit snugly so the pillow insert does not shift too much.
- Cotton yarn is often the best choice because it is durable, easy to wash, and holds texture well.
- You can make pillow cases as front-and-back panels or as a single folded piece.
- Blocking helps panels look straighter and makes joining easier.
- A lining is optional, but it can help the cover feel sturdier and more polished.
- Choose colors that match your room or use the pillow case as a statement piece.
- Always measure your pillow insert before starting so the cover fits well.
Common Materials
Most crochet pillow case patterns can be made with these supplies:
- Worsted weight yarn, cotton yarn, or cotton blend yarn
- Crochet hook sized to match your yarn
- Yarn needle
- Scissors
- Stitch markers
- Measuring tape
- Pillow insert or pillow form
- Optional buttons, zipper, or envelope-style back closure
- Optional blocking mats and pins
- Optional fabric lining
Best Yarn Choices
For pillow cases, cotton is a favorite because it is sturdy, breathable, and easy to care for. Acrylic can also work well if you want a softer feel or a wider range of colors. If the pillow will be used often, choose yarn that is machine washable and holds its shape well.
1. Crochet Boho Striped Pillow Case Pattern
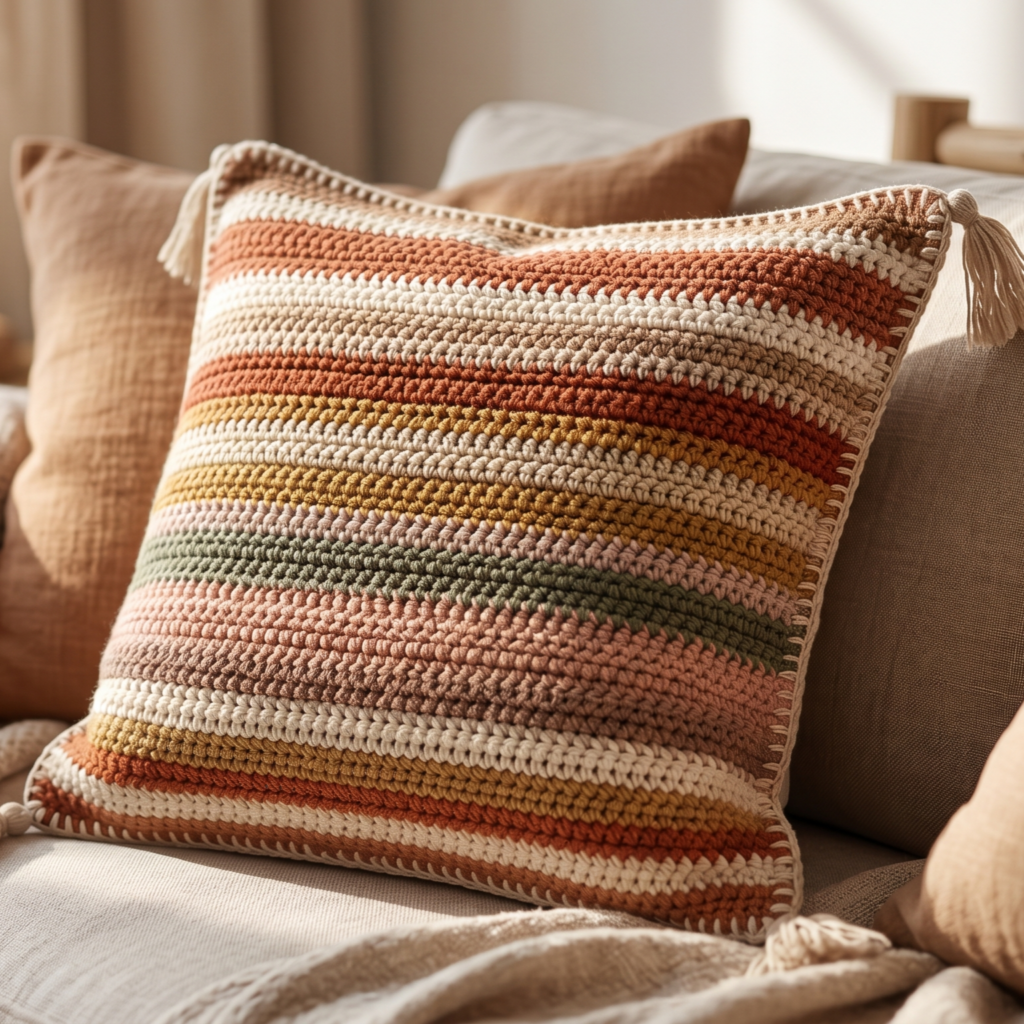
The crochet boho striped pillow case is relaxed, versatile, and effortlessly stylish. Stripes are one of the simplest ways to create a decorative pillow cover, and when paired with boho-inspired colors, they bring warmth and personality to a room. This pattern is perfect if you like earthy tones, layered textures, and a casual handmade look.
Skill Level
Beginner to intermediate
Suggested Size
Fits a standard 18 x 18 inch pillow or 12 x 20 inch lumbar pillow, depending on your starting measurements
Materials
- Worsted weight cotton or cotton blend yarn in 3 to 5 boho-inspired colors
- Crochet hook suited to your yarn
- Yarn needle
- Scissors
- Measuring tape
- Pillow insert
Best Color Choices
Terracotta, cream, beige, rust, mustard, olive, dusty pink, and warm brown all work beautifully for a boho striped look.
Step-by-Step Guide
1. Measure your pillow insert
Before you begin, measure the pillow form you want to cover. Decide whether you want the case to fit snugly or have a slightly relaxed drape. Add a small amount of extra room if your stitches are dense.
2. Choose your stripe layout
Plan how wide each stripe will be. You can make the stripes equal for a clean look or vary the widths for a more relaxed boho feel. Wide neutral stripes with a few narrow accent stripes often look especially stylish.
3. Crochet the first panel
Begin with a foundation chain that matches the width of your pillow. Then work rows of your chosen stitch pattern, changing colors at the stripe intervals. Keep your rows even so the stripes stay straight.
4. Keep your color changes neat
When changing colors, join the new color cleanly at the end of a row. This helps the stripes look crisp and polished. Weave in ends as you go if possible so finishing the pillow case later is easier.
5. Add texture if desired
A boho stripe pillow looks beautiful with simple textured stitches such as half double crochet, single crochet, or alternating front loop and back loop rows. The texture makes the stripes more interesting without making the pattern too complicated.
6. Make the back panel
Create a second panel that matches the first, or make an envelope-style back panel if you want a closure without zippers or buttons. For a cleaner look, use the same stripe pattern on both sides.
7. Join the panels
Place the two panels together with the wrong sides facing inward and join three sides using single crochet, slip stitch, whip stitch, or mattress stitch. Leave one side open so the pillow insert can be added.
8. Insert the pillow and close the opening
Once the insert is inside, close the final side if needed. If you made an envelope back, tuck the flap in neatly. Check the fit and adjust if the case feels too loose.
Helpful Tips
- Use warm, earthy colors to get the full boho effect.
- Block the panels before joining for straighter edges.
- Keep the stripes consistent if you want a more modern look.
- A tassel border or fringe can make the pillow feel even more bohemian.
Why This Pattern Works Well
The boho striped pillow case is easy to customize and looks beautiful in almost any room. It is a great choice if you want something stylish, simple, and relaxing to make.
2. Crochet Bobble-Wobble Zigzag Pillow Case Pattern
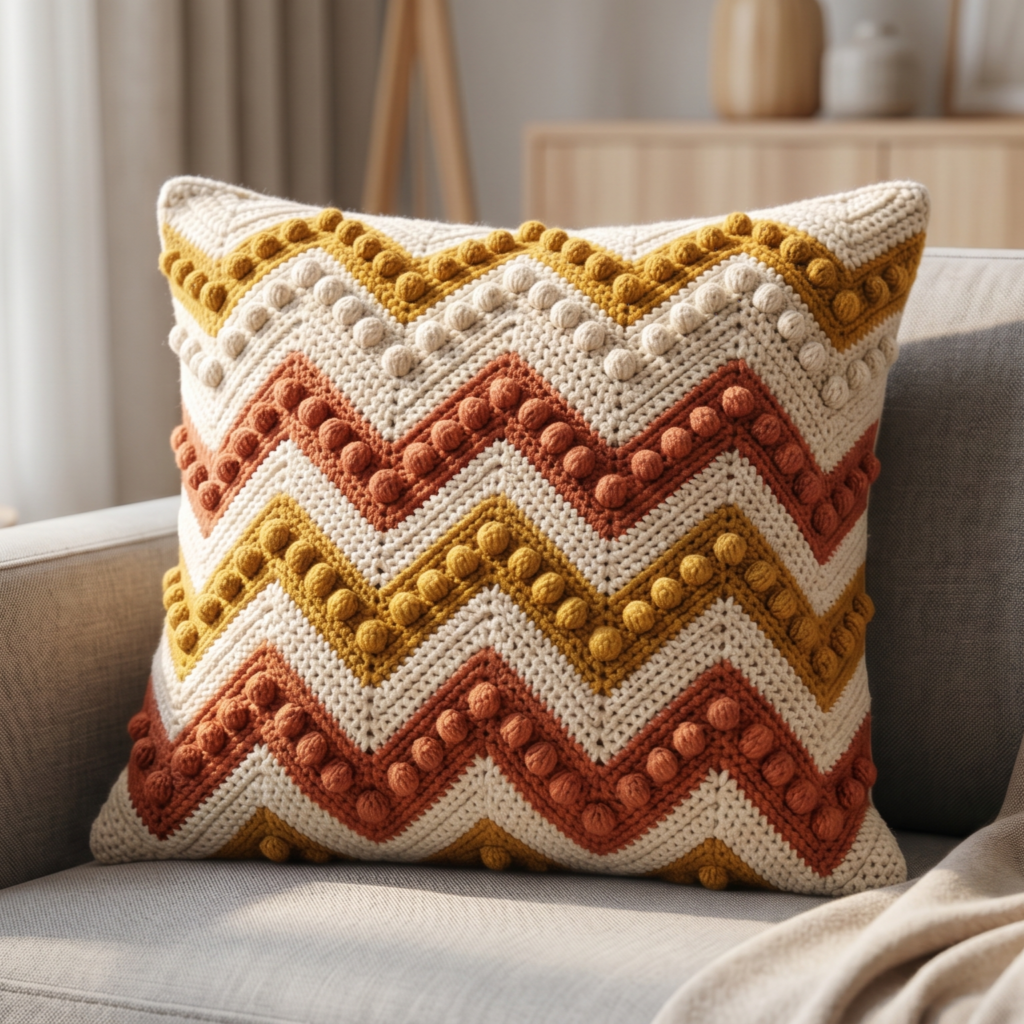
The crochet bobble-wobble zigzag pillow case is playful, textured, and full of movement. The zigzag design gives it a modern graphic look, while bobble stitches add a fun raised texture that makes the pillow stand out. This pattern is ideal if you want a decorative piece with personality and visual interest.
Skill Level
Intermediate
Suggested Size
Fits a standard 16 x 16 inch or 18 x 18 inch pillow
Materials
- Medium weight yarn in 2 to 3 colors
- Crochet hook suitable for your yarn
- Yarn needle
- Scissors
- Measuring tape
- Pillow insert
Step-by-Step Guide
1. Plan your zigzag repeat
Before starting, decide how bold you want the zigzag to appear. A narrower zigzag looks more subtle, while a wider zigzag feels bold and modern. Mark your repeat pattern if needed so you can keep the shape consistent.
2. Create the base panel
Work a flat rectangle using a zigzag stitch pattern or a combination of increases and decreases that forms the chevron shape. Make sure your foundation chain fits the repeat pattern evenly.
3. Add bobble stitches
Place bobble stitches along the peaks, valleys, or middle sections of the zigzag design. The bobbles create a raised texture that adds interest and makes the pattern feel lively. Keep the bobbles evenly spaced for balance.
4. Keep the rows aligned
Zigzag patterns depend on accurate counting. Check your stitch count often so the peaks and valleys stay aligned. Even one mistake can shift the design and make the pattern look uneven.
5. Finish the front panel
Continue working the zigzag and bobble pattern until the panel reaches the height needed for your pillow. Try to keep the edges straight so joining will be easier later.
6. Make the back panel
Create a plain or lightly textured back panel. You can also repeat the zigzag pattern on both sides if you want the whole pillow to be decorative. A plain back often works well if you want the front pattern to stand out.
7. Join the edges
Sew or crochet the panels together around three sides. Leave one side open for the pillow insert. A neat seam helps the pillow keep its shape and gives it a polished look.
8. Add the pillow insert and finish
Put the pillow inside, then close the final seam or use buttons if you prefer an opening. Adjust the corners so the zigzag pattern sits nicely.
Helpful Tips
- Choose colors with enough contrast to highlight the zigzag pattern.
- Keep bobbles moderate in size so the pillow stays comfortable.
- Block the panel if the edges curl.
- Use a firmer yarn if you want the texture to really hold its shape.
Why This Pattern Works Well
This pillow case feels modern, bold, and fun. The bobble texture adds a cozy touch, while the zigzag shape gives it a fresh, trendy style that works well in contemporary homes.
3. Crochet Boho Sunburst Pillow Case Pattern
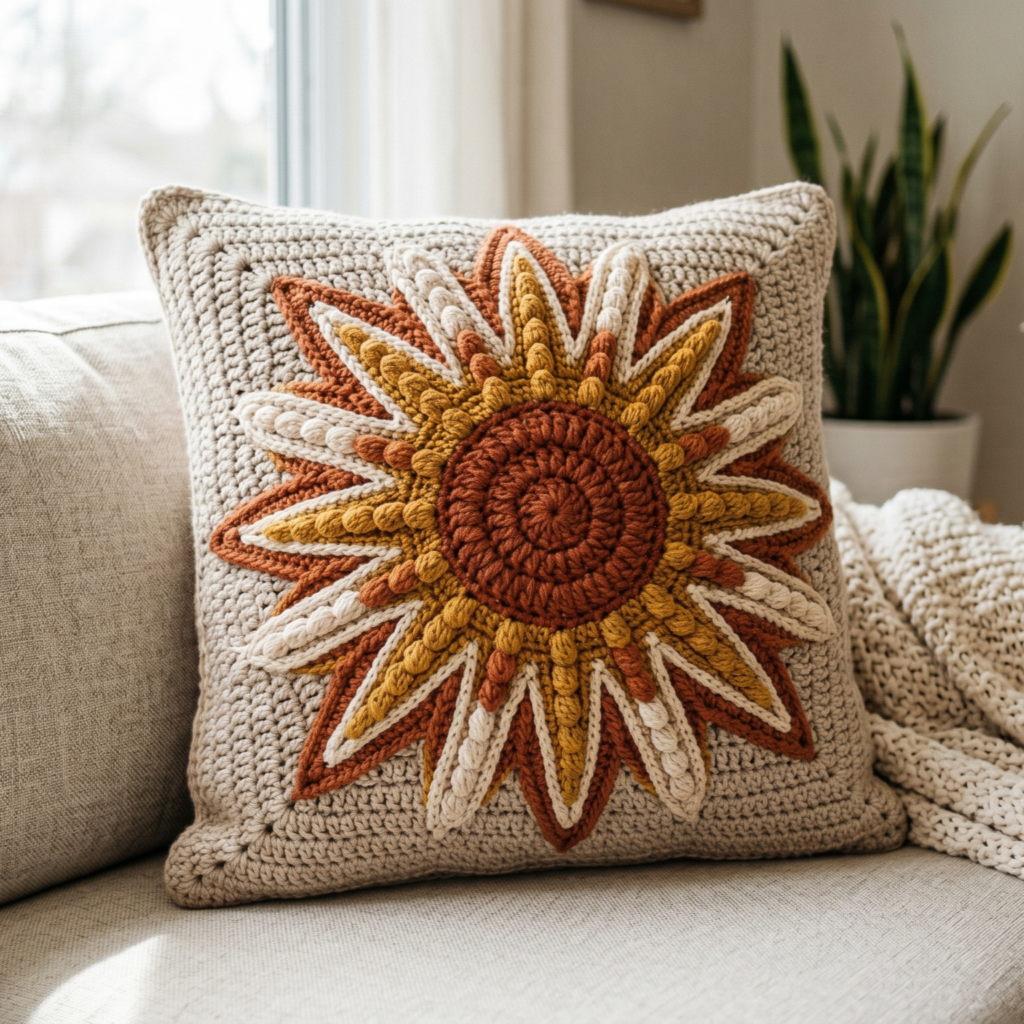
The crochet boho sunburst pillow case is bright, artistic, and full of charm. Sunburst designs are especially beautiful in crochet because they combine shape, texture, and color in a way that feels cheerful and handmade. This pattern is a lovely option if you want a pillow cover that looks like a small piece of textile art.
Skill Level
Intermediate
Suggested Size
Fits an 18 x 18 inch pillow or a round cushion insert
Materials
- Cotton or cotton blend yarn in warm boho colors
- Crochet hook suited to your yarn
- Yarn needle
- Scissors
- Measuring tape
- Pillow insert
Step-by-Step Guide
1. Decide on the sunburst shape
Choose whether you want the sunburst to be centered on a square pillow, or whether you want the whole cover to follow a round or floral-inspired shape. A centered sunburst on a square panel is a classic and versatile option.
2. Start with the center motif
Begin with a small round center using a magic ring or chain ring. This forms the heart of the sunburst. Work several stitches into the center to create a neat, circular base.
3. Add the radiating sections
Build outward with stitches that fan around the center. These sections should look like rays or petals extending from the middle. The shape should stay balanced so the sunburst looks even from every angle.
4. Add color changes
The boho look comes alive when you use layered earthy tones, such as cream, gold, rust, and brown. Change colors gradually or in bands to help the sunburst stand out. Keep the transitions neat so the design feels intentional.
5. Expand the panel
Once the center sunburst is complete, continue crocheting around it to create a square or rectangular pillow front. You can add rounds or rows around the motif to turn it into a full pillow panel.
6. Make the back panel
Work a plain back panel or repeat a simplified version of the sunburst design. A plain back can help balance the detailed front and keep the pillow easier to assemble.
7. Join the pillow case
Sew or crochet the front and back together, leaving one side open. Make sure the joins are even and strong. Since this is a decorative pillow, tidy edges help preserve the beauty of the design.
8. Insert the pillow and shape it
Place the insert inside and smooth the front so the sunburst center sits neatly in the middle. Adjust the corners and seams so the pillow looks balanced.
Helpful Tips
- Warm boho shades create the best sunburst effect.
- Blocking is especially helpful for circular motifs.
- Use a consistent tension so the rays stay evenly spaced.
- A textured stitch in the center can make the design more striking.
Why This Pattern Works Well
The sunburst pillow case feels artistic and cozy at the same time. It is a beautiful way to bring boho warmth into a space while still keeping the look fresh and modern.
4. Crochet Gingham Ruffle Border Pillow Case Pattern
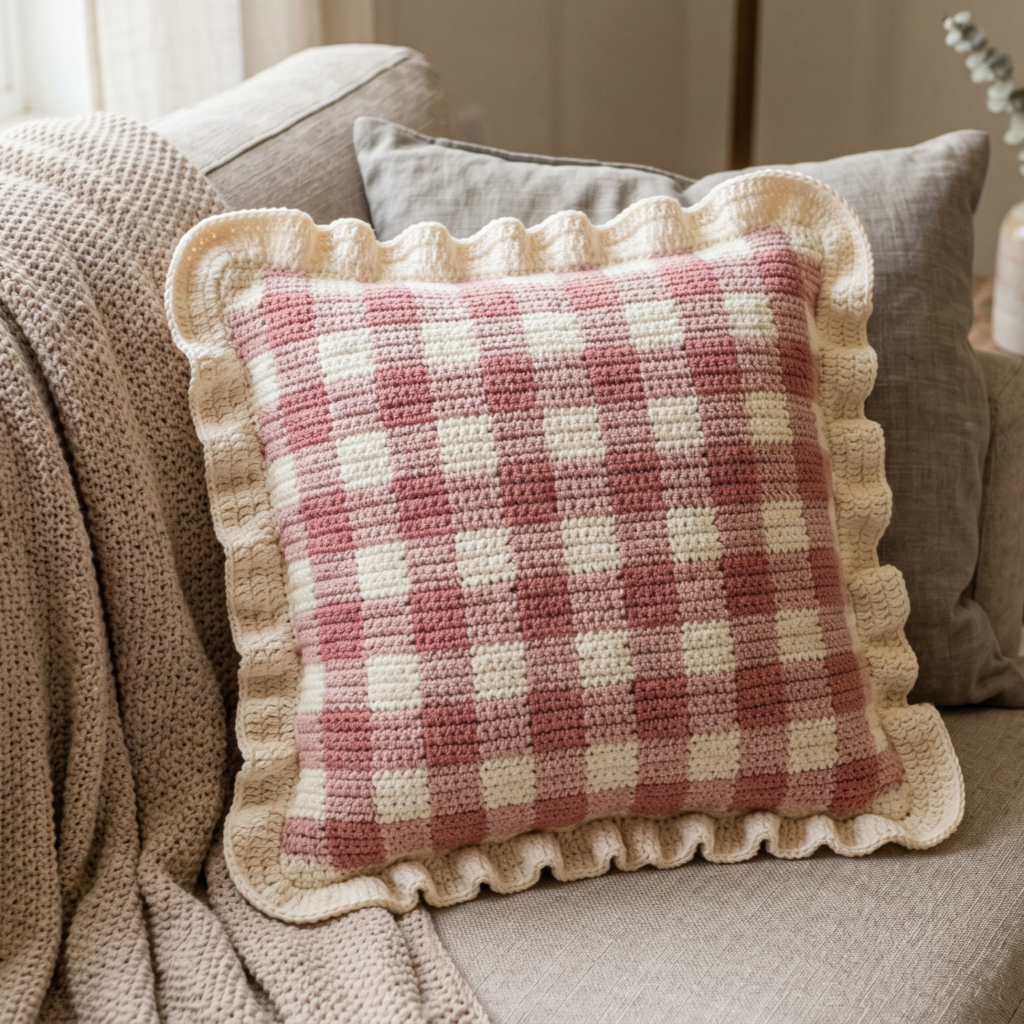
The crochet gingham ruffle border pillow case combines classic charm with a soft decorative finish. Gingham gives the pillow a timeless checkered look, while the ruffle border adds a gentle, feminine touch. This pattern is perfect if you want something sweet, cozy, and a little nostalgic but still stylish enough for a modern home.
Skill Level
Intermediate
Suggested Size
Fits a standard square pillow, usually 16 x 16 or 18 x 18 inches
Materials
- Two or three yarn colors for the gingham pattern
- Matching or complementary yarn for the ruffle border
- Crochet hook suited to your yarn
- Yarn needle
- Scissors
- Measuring tape
- Pillow insert
Step-by-Step Guide
1. Choose your gingham colors
Classic gingham often uses one main color and white or cream. For a softer look, try dusty pink and cream, sage and white, or blue and ivory. The contrast should be clear enough that the check pattern shows well.
2. Crochet the gingham front panel
Work the front panel in a checkerboard-style color layout. This can be done using rows, blocks, or stitch color changes depending on the method you prefer. Keep the squares even so the pattern stays balanced.
3. Keep the edges straight
Gingham looks best when the panel is neat and symmetrical. Count stitches carefully and check that each block matches the next. Straight edges will make adding the ruffle easier later.
4. Make the back panel
You can keep the back simple with one solid color or repeat the gingham if you want a fully patterned pillow. A solid back often works well because it lets the front design shine.
5. Add the ruffle border
The ruffle border is usually made by working extra stitches into the outer edge of the pillow cover. This creates a soft frilled finish around the perimeter. The ruffle can be subtle or full, depending on how much volume you want.
6. Shape the ruffle evenly
Make sure the ruffle is balanced on all sides. If it becomes too gathered in one section, adjust the stitch count. A neat ruffle border should frame the pillow without overwhelming the gingham center.
7. Join the pillow case
Attach the front and back panels, leaving one side open if needed. If the ruffle is already worked into the outer edge, join carefully so the frilled border stays full and attractive.
8. Add the insert and finish
Slip the pillow inside, close the opening, and smooth the ruffle so it falls evenly around the pillow. Make any final adjustments to the corners and edges.
Helpful Tips
- Use a strong color contrast to make the gingham pattern clear.
- Keep the ruffle border soft but not too bulky.
- Block the panel before adding the ruffle for a cleaner finish.
- A white or cream ruffle gives the pillow a classic cottage look.
Why This Pattern Works Well
The gingham ruffle pillow case blends timeless charm with a playful finish. It is a beautiful option for bedrooms, reading nooks, and spaces that need a little softness and personality.
5. Crochet Chromatic Bliss Pillow Case Pattern
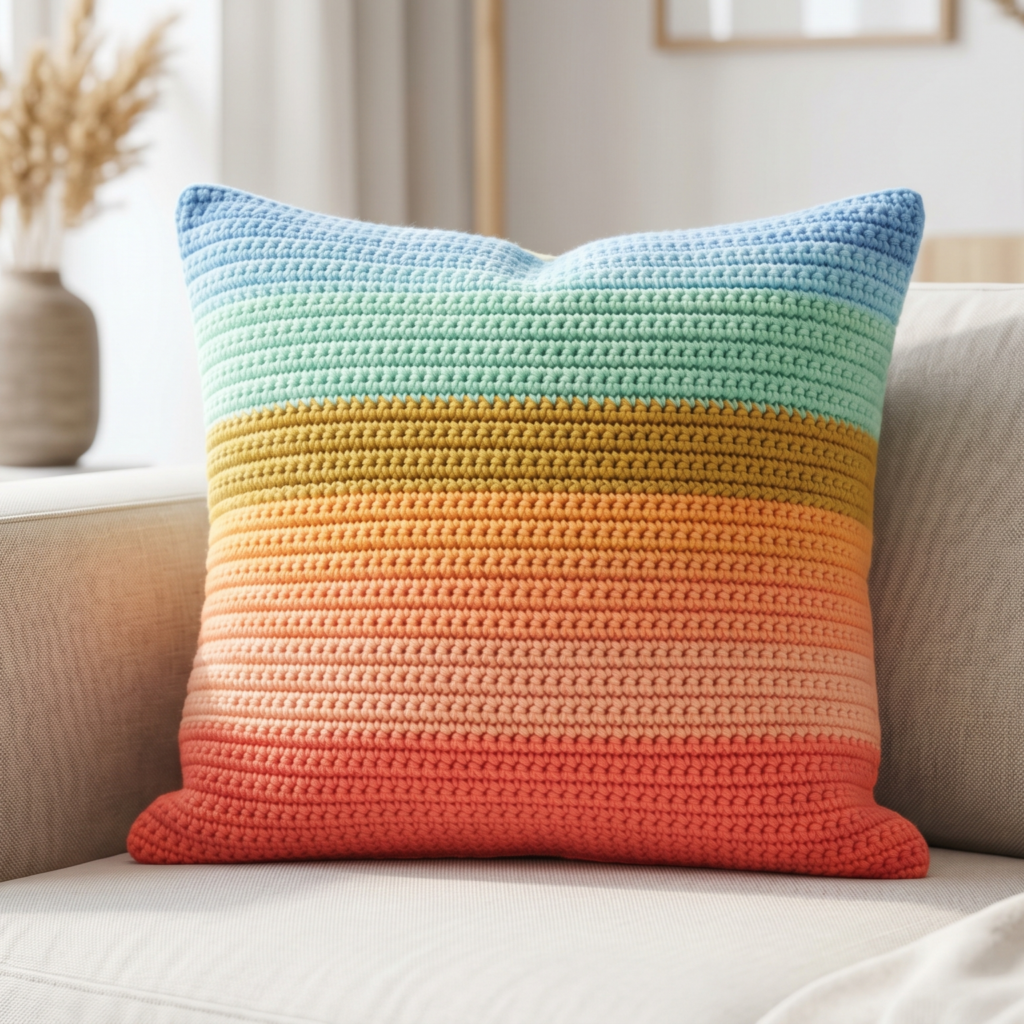
The crochet chromatic bliss pillow case is all about color. This design is vibrant, creative, and full of personality, making it perfect for homes that love bold accents and artistic details. Whether you use a rainbow palette, gradient shades, or carefully selected modern colors, this pillow case brings energy and style to any room.
Skill Level
Intermediate
Suggested Size
Fits a standard square pillow, usually 18 x 18 inches
Materials
- Multiple colors of yarn in coordinated shades
- Crochet hook suited to your yarn
- Yarn needle
- Scissors
- Measuring tape
- Pillow insert
Step-by-Step Guide
1. Plan your color story
Before starting, decide how you want the colors to flow. You might choose a rainbow sequence, a sunset gradient, cool jewel tones, or soft muted shades. Planning ahead will help the finished pillow look cohesive and intentional.
2. Begin the first panel
Work a flat panel using rows or blocks of color. Keep the stitch pattern simple so the color arrangement becomes the main design feature. A plain stitch with smooth color transitions often works best for this style.
3. Change colors with care
Make each color transition cleanly so the pillow looks polished. Fasten off or carry the yarn neatly depending on the method that works best for your pattern. The color changes should feel smooth and deliberate.
4. Keep the rhythm balanced
Chromatic designs look best when the color placement feels even. You can repeat a set sequence, create a gradient, or build a playful patchwork effect. Try to maintain balance so the colors do not crowd one section more than another.
5. Add texture if desired
You can keep the pillow completely smooth or add subtle texture with simple stitch variations. Texture can help the colors stand out even more, especially if you use a mix of light and dark tones.
6. Make the back panel
Choose whether you want a solid back, a simple matching color sequence, or a mirrored version of the front. A plain back often helps keep the focus on the colorful front design.
7. Join the pieces
Sew or crochet the front and back panels together around the edges. Leave one side open for the insert. Use a neat seam so the pillow maintains its shape and the colors remain the center of attention.
8. Insert the pillow and smooth the finish
Place the insert inside and adjust the panel so the colors display evenly. Smooth out any puckering at the edges and check that the case fits well.
Helpful Tips
- A well-planned color palette makes a big difference.
- Use yarns with similar weight and texture for the best results.
- Keep the stitch pattern simple so the colors remain the focus.
- This style works beautifully in modern, artistic, or eclectic rooms.
Why This Pattern Works Well
Chromatic Bliss is bold, joyful, and expressive. It is a great choice if you want a pillow case that feels like a statement piece and adds personality to your home.
Conclusion
Crochet pillow cases are a wonderful way to bring handmade style into your home. They are practical, decorative, and flexible enough to suit many different interiors. Whether your space leans boho, modern, cozy, or colorful, a handmade pillow cover can add just the right finishing touch.
These five patterns each offer something special. The boho striped pillow case brings warmth and texture. The bobble-wobble zigzag design adds playful movement. The boho sunburst pattern creates a bold artistic focal point. The gingham ruffle border pillow case blends charm and softness. The chromatic bliss pillow case celebrates color in a fresh and modern way.
The best part is that each of these patterns can be adjusted to suit your own style. You can change the colors, alter the size, simplify the stitches, or add extra details to make the pillow case feel truly personal. That is what makes crochet such a rewarding craft. It lets you turn something ordinary into something beautiful, useful, and full of character.
A handmade pillow case does more than cover a pillow. It adds warmth, personality, and a sense of care to the room. And with the right pattern, it can become one of your favorite home decor projects to make and display.