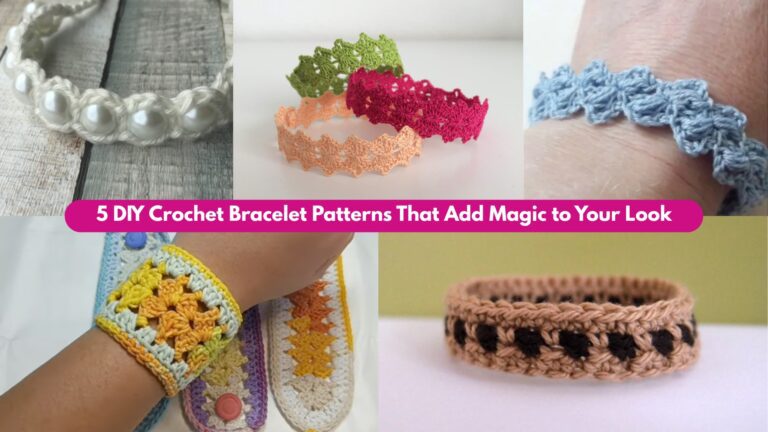
Small, meaningful, and quick to make — crochet bracelets are perfect gifts, friendship tokens, and market-friendly items. This collection includes five wearable designs that span delicate and beaded, to braided textures and wrap styles. Each pattern section below contains: skill level, materials, finished-size guidance, step-by-step instructions, variations, finishing & fastening options, and care. I use US crochet terms throughout.
Before you start, read the quick notes on sizing and tools so every bracelet fits comfortably and stays sturdy.
Quick notes (sizing, abbreviations, and tools)
- Abbreviations: ch = chain, sc = single crochet, hdc = half double crochet, dc = double crochet, tr = treble crochet, sl st = slip stitch, sk = skip, rep = repeat, FLO/BLO = front/back loop only, MR = magic ring, sp = space, st(s) = stitch(es).
- Sizing: Measure the wrist you intend to fit. Standard adult wrist circumferences:
- Small: 6.0–6.5 in (15–16.5 cm)
- Medium: 6.75–7.25 in (17–18.5 cm) — typical women’s fit
- Large: 7.5–8.5 in (19–21.5 cm)
Add 0.25–0.5 in (6–12 mm) ease for comfort and clasp clearance. For a snug friendship bracelet aim for +0.25 in; for wrap styles measure how many wraps you want.
- Tools & notions: tapestry needle, small pair of scissors, jewelry pliers (if using metal closures), jump rings, lobster clasps, small buttons, bracelet findings (magnetic clasp, snap), measuring tape, bead reamer if using large-hole beads.
- Yarn/cord choices: For bracelets choose sturdy materials — cotton crochet thread (size 10) or fingering yarn for delicate lace; mercerized cotton, cord yarn, waxed cotton cord, or fine macramé cord for durability; jewelry nylon or beading thread if you plan to string beads.
- Safety: For little children avoid small removable beads or metal findings that can detach.
1. Crochet Wavelength Bracelet Pattern
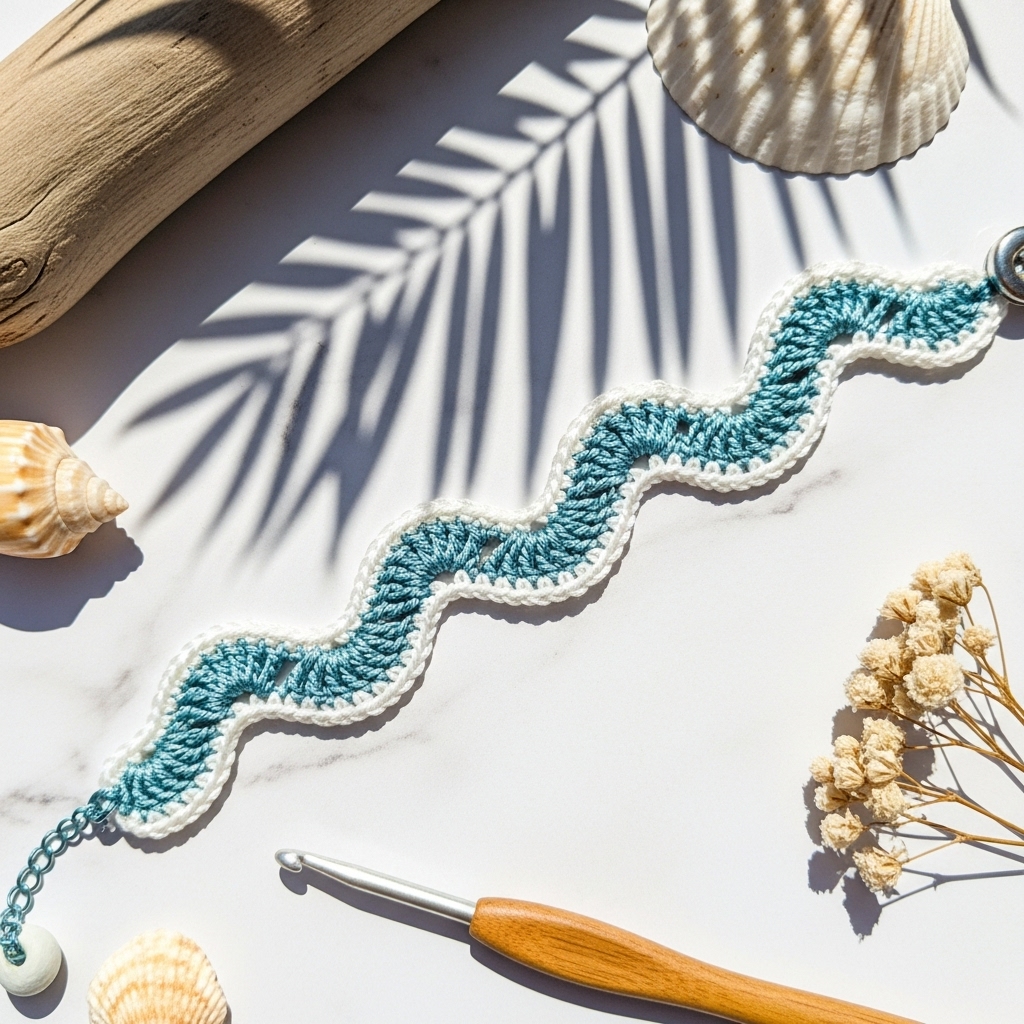
A delicate, undulating wave band that reads like ocean foam. Lightweight, elegant, and perfect in mercerized cotton or ribbon yarn.
Skill level: Confident beginner — basic stitches and pattern repeat.
Materials
- Size 10 mercerized cotton thread (or fingering-weight cotton) — ~10–20 yds depending on width.
- Hook 1.75–2.5 mm for thread, or 2.5–3.5 mm for fingering.
- Small button (6–10 mm) or metal lobster clasp with jump ring.
- Tapestry needle, scissors.
Finished size guidance
- Work bracelet to wrist circumference + 0.25 in ease. For an adult medium wrist 7 in target, aim for ~7.25 in finished length including closure overlap.
Stitch character
- A repeating shell-and-arch motif (small shells create peaks and chain arches create troughs).
Step-by-step
- Measure & foundation
- Measure wrist circumference (e.g., 7 in). Decide on final bracelet length including button overlap (add 0.25 in). If your gauge gives 8 sc = 1 in with your chosen thread/hook, then foundation chain for a base band of 7.25 in = 7.25 × 8 ≈ 58 stitches. The wave repeat below uses a multiple of 6 + 1 — round to the nearest match (for 58, choose 55 or 61). Aim for 61 ch for a comfortable fit and pattern alignment.
- Ch 61 + 1 turning ch.
- Base row — creates firm foundation
- Row 1 (RS): sc in 2nd ch from hook and in each ch across. (61 sc). Turn.
- Wave repeat (3-row repeat yields small waves)
- Row 2: ch 1, sk 2, (5 dc) in next st (shell), sk 2, sc in next st — rep across. End with sc in last st. Turn.
- Row 3: ch1, sc in each st and into shell centers to anchor shells where needed (work sc into the center dc of the shell from previous row where possible). This evens the fabric. Turn.
- Row 4: ch3, sl st into 2nd dc of next shell (creates a small arch), ch3, sc in next st — rep across. This forms an airy trough. Turn.
- Repeat rows 2–4 until bracelet height is 3–4 rows (a narrow band) or 6–8 rows for a cuff-like band. For a delicate band 3 repeats (9 rows) often looks best.
- Edging (optional)
- Work 1 round of sc around the long edges (pick up loops along sides) to tidy edges. For a scalloped finish work sc, ch3, sl st in next sc along peaks to form a tiny decorative edge.
- Closure
- Sew a small button at one end (centered in a peak). On the opposite end create a button loop: ch 8, sl st to base of band, then work 2–3 sc to secure loop base. Test fit over button, adjust chain length for snugness. Alternatively attach a small jump ring and lobster clasp.
Variations
- Make the waves taller: use 7-dc shells instead of 5-dc.
- Use a slightly thicker yarn and larger hook to create a chunkier bracelet that reads as a cuff.
- Embellish the troughs with tiny seed beads — thread beads before crocheting and slide one bead onto the thread before making the sc that anchors the arch.
Finishing & care
- Weave in ends, steam lightly to relax stitches (test thread first). Hand wash gently; lay flat to dry.
2. Crochet Braid Bracelet Pattern

Inspired by braided leather bracelets, this cuff uses interlaced bands made with simple crochet strips and a sewn braid effect. It’s robust and gender-neutral.
Skill level: Confident beginner — straight strips and basic assembly.
Materials
- Cotton yarn (sport or fingering) or waxed cord — about 20–30 yds each of two contrasting colors (for braid contrast). Or use same color for a mono look.
- Hook: 3.0–4.0 mm (appropriate to material). If using cord, you may prefer to stitch by hand.
- Small magnetic clasp or button & loop, tapestry needle, jewelry pliers.
Finished size guidance
- Decide on cuff width (e.g., 0.75–1.25 in). Measure wrist circumference and allow 0.25 in ease. You’ll make three narrow strips to braid; each strip length should be wrist circumference + 0.5 in for overlap and seam allowance.
Construction concept
- Crochet three narrow, flat straps and braid them together. The braid is then seamed at ends and finished with a clasp.
Step-by-step
- Determine strip length
- Wrist circumference (e.g., 7 in) + 0.5 in ≈ 7.5 in target for each strip. If your gauge in sc is 6 sc = 1 in, chain 45 sc approx (7.5 × 6 = 45). Add turning ch.
- Make 3 strips (A, B, C)
- For each strip:
- Ch 46. Row 1: sc in 2nd ch from hook and across (45 sc). Turn.
- Row 2–6: ch1, sc across (work 5–6 rows to make width about ¼–⅜ in depending on yarn). For a narrower strap do 2–3 rows; for a ribbon-like strap do more rows.
- Fasten off leaving a long tail for seaming. Make three identical strips (use same or alternating colors).
- For each strip:
- Block strips if using natural fibers to straighten and set gauge.
- Braid assembly
- Lay strips flat and secure one end (use a binder clip or a small safety pin on a pillow). Braid the three strips like hair: cross right over middle, left over middle, repeat until end. Keep braid flat and even; do not twist strips.
- When finished, overlap braid ends roughly 0.5 in and sew firmly with yarn tail using whipstitch through multiple passes to secure. Repeat for both ends.
- Finishing ends & attaching clasp
- Tidy raw ends by folding the overlapped tails under and sewing them flat so the seam is neat. For a polished jewelry finish wrap a tiny strip of matching leather or suede around each end and glue/sew it down, then screw a small bar or crimp to attach a lobster clasp and jump ring. Alternatively, sew a magnetic clasp into the folded end seam for easy on/off.
Variations
- Make the braid wider by working wider strips (double the rows).
- Add beads along one strip before braiding — slide beads onto yarn before stitching and cover bead with stitches to lock in place.
- Use three different textures (cotton, ribbon yarn, metallic thread) for a mixed-media bracelet.
Finishing & care
- If dyed yarn used, pre-wash strips before assembly to avoid color bleeding. Spot-clean or hand-wash assembled bracelet.
3. Crochet Sienna Beaded Bracelet Pattern
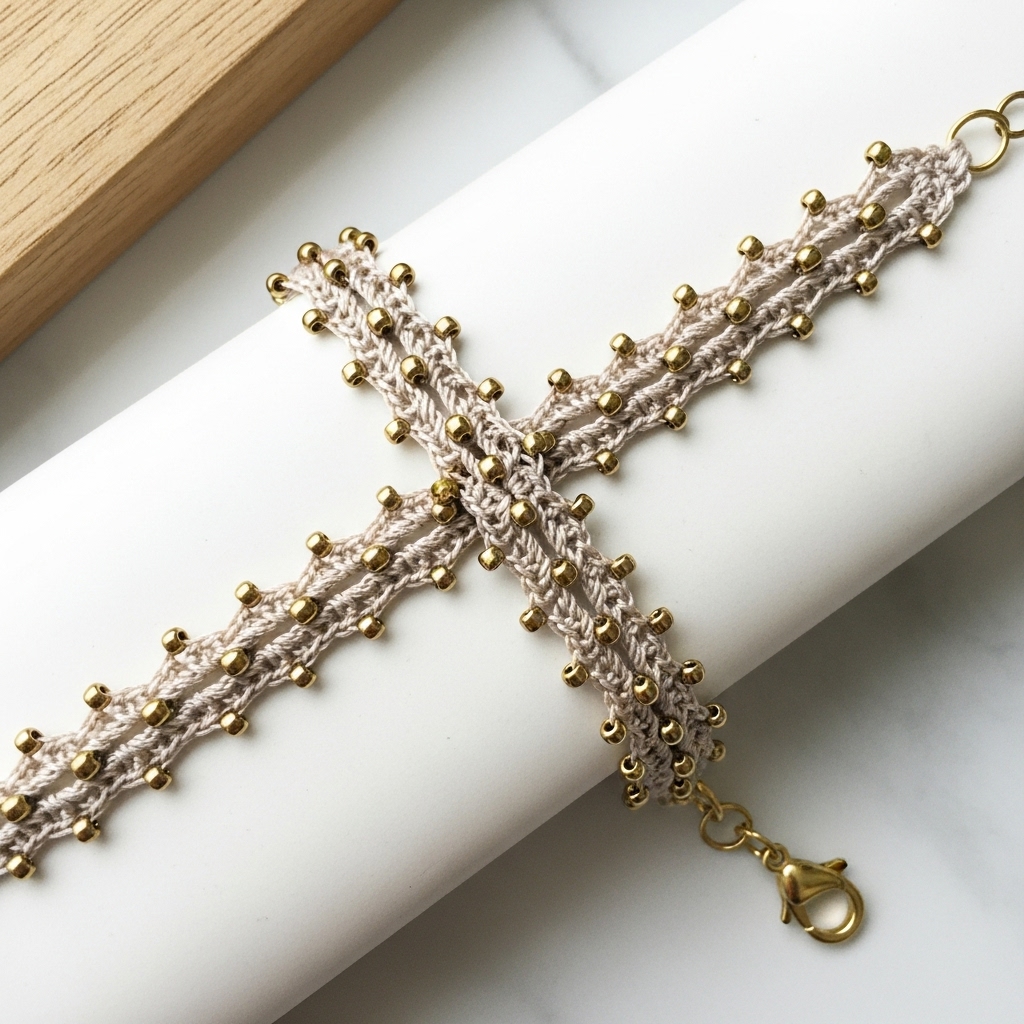
A sophisticated beaded bracelet with spaced glass seed beads and a simple lace band. Looks elegant in gold/bronze beads paired with neutral thread.
Skill level: Intermediate — pre-stringing beads and working them into stitches.
Materials
- Fine mercerized cotton or beading thread (size 10–12) OR crochet steel thread if you prefer delicate look.
- 2–3 mm glass seed beads (size 11/0 or 8/0) — about 30–60 beads depending on length and spacing.
- Hook 1.5–2.0 mm (or suitable for your thread).
- Small clasp (lobster/jewelry clasp) + jump rings, beading needle if needed.
Finished size guidance
- Make length to wrist + 0.25 in. Plan bead placement: e.g., a bead every 6 stitches across the band.
Technique note: Pre-string beads on the thread before beginning. When the pattern calls for a bead, slide it up and incorporate into stitch (commonly used in bead crochet: slide bead up before completing the stitch, so the bead sits on the outside).
Step-by-step
- Pre-string beads
- String all beads onto your yarn/thread before starting. If thread is fine, use a beading needle or a folded thread loop through beads. Slide beads down to the far end, out of the way.
- Foundation & base row
- Ch stitches to match wrist circumference: For delicate thread a higher st/in is typical — calculate stitches per inch (for example, 10 sc = 1 in in thread). If wrist 7 in and 10 sc/in → ch 71 + 1. With beads you may want a multiple for repeat; choose ch 72 for easier math. Ch 72 + 1.
- Row 1 — create a neat base
- Row 1 (RS): sc in 2nd ch and across (72 sc). Turn.
- Row 2 (bead row)
- Row 2: ch1, sc in next 5 sts, (slide 1 bead up, sc in next st so bead is perched on top of sc) — rep across. This spaces beads every 6 stitches. Adjust spacing to preference (e.g., every 4 or every 8 stitches).
- Note: To place a bead so it sits on top, bring bead up to the hook before starting the sc: insert hook into stitch, slide bead up, yarn over and pull through and finish stitch — the bead will snugly sit on the completed stitch exterior.
- Row 3–4 — secure beads
- Work sc rows without beads for 2–3 rows to lock beads in place and create a band of solid fabric surrounding the beaded row.
- Repeat bead row and spacer rows if you want multiple beaded lines (e.g., three beaded rows with alternating offsets gives a laddered beaded look).
- Make bracelet height and finish
- When band reaches desired height (e.g., 0.5–0.75 in for a delicate bracelet), fasten off and weave ends.
- Closure
- Attach jump ring and clasp: fold one end to create a small tab and sew through multiple times; sew a jump ring into that tab using sturdy thread. Attach lobster clasp to opposite end. For an invisible finish use a small crimp bead or jewelry end-cap glued/sewn to end and crimped onto jump ring.
Variations
- Use larger focal beads (faceted glass or semi-precious beads) spaced further apart and accent with seed beads.
- Work a central bead row with plique-à-jour (openwork) on either side for an airy look.
- Use metallic thread to make the background shimmer.
Finishing & care
- Beads add weight; test thread and reinforce ends well. Airtight jewelry polishing cloth will keep metal findings bright; hand wash gently.
4. Crochet Spring Blossom Bracelet Pattern
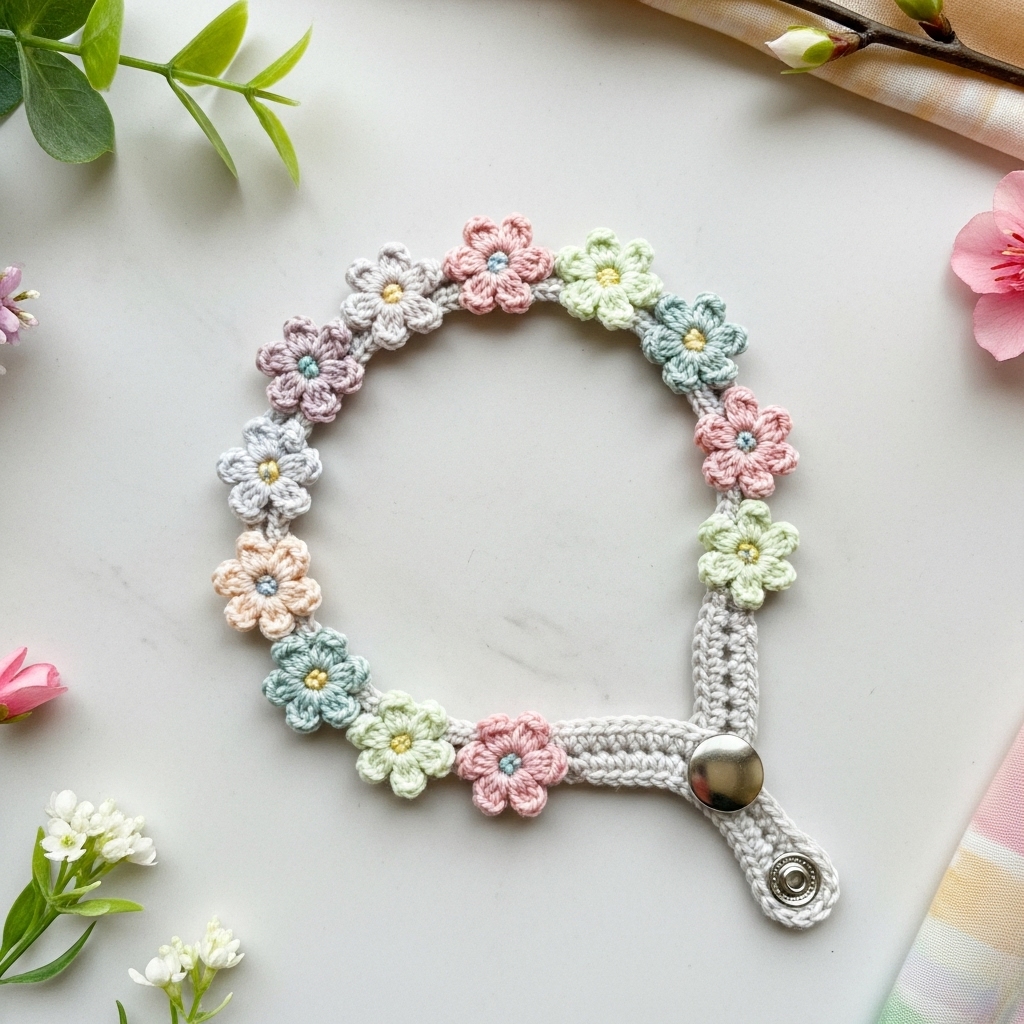
A playful daisy-chain applique bracelet — tiny crocheted flowers stitched onto a soft band. Great for friendship bracelets, kids, and spring gifts.
Skill level: Beginner — small motifs and sewing.
Materials
- Fingering-weight cotton or crochet thread (main band color + 2–3 flower colors).
- Hook 2.5–3.5 mm.
- Small snap button or tiny button & loop.
- Tapestry needle.
Finished size guidance
- Band length = wrist circumference + 0.25 in. Flower diameter ~0.5–0.75 in each; plan spacing to fit 4–8 flowers depending on wrist size.
Flower motif (tiny daisy)
- MR; ch1, 6 sc in ring; sl st to join.
- Petal round: ch3, sl st into next sc repeat 6 times to create 6 loops. In each loop work: sc, hdc, dc, hdc, sc (or sc, sc, hdc, sc, sc for thread if you want smaller petals). Fasten off leaving tail.
Step-by-step
- Band foundation
- Ch to wrist length: If using fingering and hook 3 mm, a typical ch count might be 60 for 7 in wrist (but measure your gauge: count stitches per inch). Ch 61 + 1 turning ch and work sc rows to build a soft band of desired height (2–4 rows for narrow, 6–8 for band with more support).
- Make flowers
- Make 6–8 tiny daisies in assorted colors. Use rapid daisy pattern above — they take less than 5 minutes each when you get comfortable.
- Position & sew flowers
- Pin flowers along the band on right side at even intervals. Using yarn tail, stitch each flower to band through center base. For durability, sew through the band and around petal bases multiple times. For a natural cluster, offset some flowers slightly higher/lower.
- Add centers
- Embroider small French knots in contrasting color for flower centers, or sew a tiny seed bead if the bracelet is for an adult and you want sparkle (avoid beads for kids).
- Closure
- Add a small snap button or tiny button and loop. For snaps, sew one half under the flower cluster on inner side and the other half on opposite band end. For a loop, ch 6 and secure to end of band.
Variations
- Make a vine by adding tiny crocheted leaves (ch 6, sc in 2nd ch, hdc, dc, hdc, sc) sewn between flowers.
- Create a stacked bracelet: three narrow bands with alternating flower colors and secure together on one side with a single clasp for a layered look.
Finishing & care
- Weave ends on inside; hand wash recommended to preserve shape. Press gently after washing.
5. Crochet Chain Wrap Bracelet Pattern
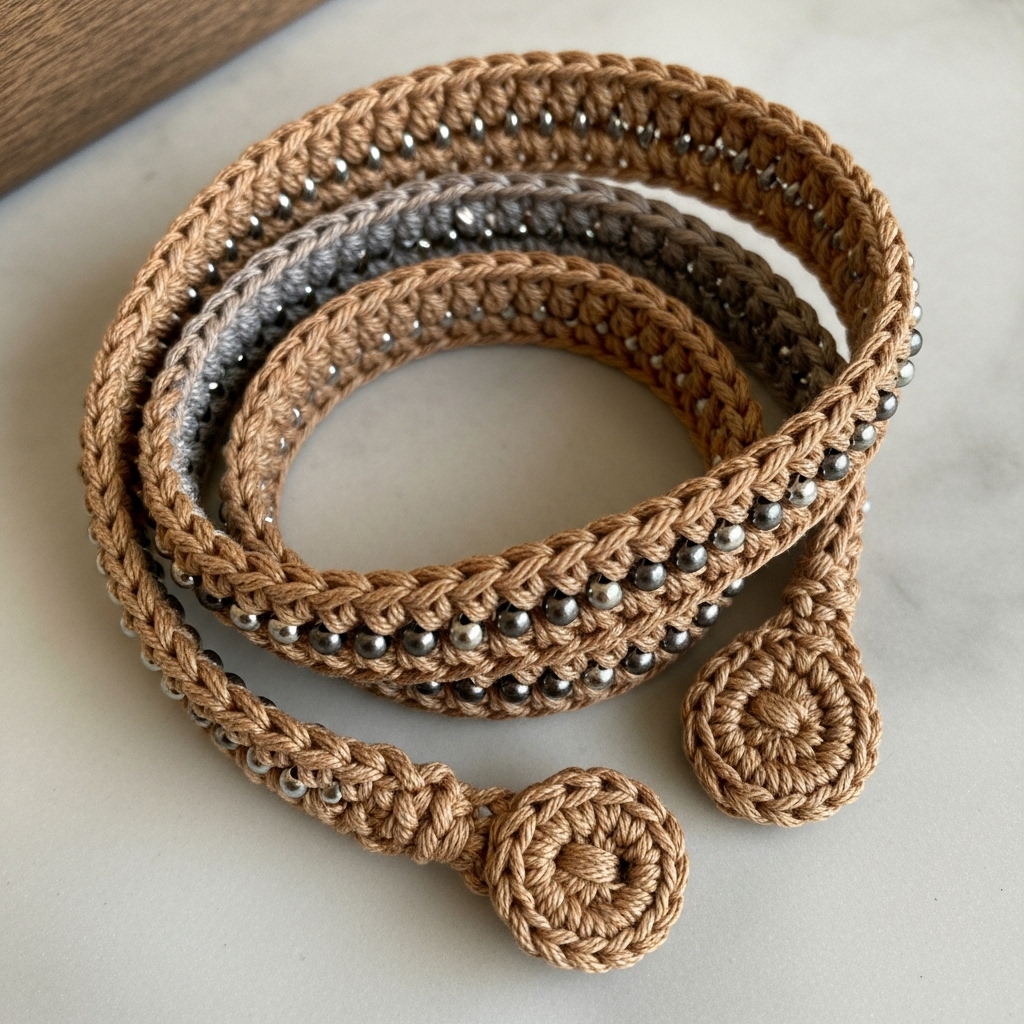
A versatile wrap bracelet that looks like a leather wrap but crocheted. It wraps 2–4 times around the wrist and closes with a button loop, sliding bead, or small toggle. Ideal for boho-chic gifting.
Skill level: Confident beginner — working in the round or flat chain, adding beads optional.
Materials
- Leather-look ribbon yarn, suede cord, or fingering cotton depending on the look. For strong wrap, consider using waxed cotton cord or a corded crochet yarn.
- Hook sized slightly smaller than label so the fabric is firm: 2.5–3.5 mm for thin cord, 4.0–5.0 mm for ribbon yarn.
- 1–2 small buttons (10–14 mm) or a small toggle/clasp, optional spacer beads.
- Tapestry needle, pliers.
Finished size guidance
- Decide how many wraps: e.g., for 3 wraps on a 7 in wrist, final chain length should be 3 × 7 in + overlap ≈ 21.5–22 in including button area. If working in 2 wraps, aim for 15 in approx.
Construction concept
- Work a sturdy crochet cord (i-cord style or single crochet tube), add decorative rows and beads, then finish with a button loop or toggle.
Step-by-step
- Decide wrap length
- Measure wrist circumference × number of wraps, add 0.5–1 in for overlap and button area.
- Make a base cord (two options) Option A — SC flat band (quick):
- Ch chain length needed (e.g., 75 ch for 22 in if 3.5 st/in). Row 1: sc in 2nd ch from hook and across. Row 2–4: sc across to create a robust strip about ¼–¾ in wide for a substantial wrap. Fasten off leaving long tail.
- Make a foundation of 6 ch, join into ring; Round 1: sc 6 into ring (work in continuous rounds for 0.5–0.75 in length to make a small tube), then sl st to close. Continue crocheting in spiral until desired length reached. This creates a rounded cord. For a flat-wrap look, make multiple tubes seamed side by side or work i-cord like cord by chaining small and working back in rows around.
- Add decorative row
- If you made a flat strip, add a top row of picots, shell edges, or beadwork: sc across with bead accents (slide bead onto yarn then sc to lock bead). For a tube, use surface slip-stitching in contrast color to create stripes or faux hardware lines.
- Closure
- Sew button securely at one end (fold slight tab). Make a loop at the other end: ch 6–8 and secure to do-loops, test over button; for toggles use small leather loop. Alternatively, sew a magnetic clasp onto ends (requires metal crimp or tiny sewn tabs for stability).
- If using multiple wraps, a central button or toggle may be used where the wrap crosses; ensure the closure sits flat for comfort.
- Finishing touches
- If desired, add a charm or a cluster of small beads near clasp for personalization. Secure with a few extra wraps of yarn and glue dab to hold.
Variations
- Make a beaded wrap by pre-stringing beads and sliding them onto chain before crocheting. Place beads at intervals (e.g., every 8 stitches) for a delicate dotted look.
- Make a knotted macramé-style closure for an adjustable wrap by using sliding knots on suede cord integrated into the crochet ends.
Finishing & care
- Waxed cords and leather trims: spot-clean only. Cotton wraps may be hand-washed and laid flat.
Conclusion
These five bracelet designs — Wavelength, Braid, Sienna Beaded, Spring Blossom, and Chain Wrap — give you a full palette of friendship-ready projects: delicate and lacy, rugged and braided, sparkly and bead-fed, floral and playful, and versatile wrap styles. They’re fast, make great gifts, and scale easily for children or adults.