October is the perfect time to cozy up with yarn, a mug of something warm, and a stack of spooky-but-sweet projects that will turn any room into a haunted haven. Below you’ll find ten carefully written crochet patterns and project guides—each with materials, clear step-by-step instructions, finishing tips, and variation ideas so you can personalize everything for your space. These patterns span skill levels from Beginner to Intermediate and are written to be easy to follow even if you’re new to some stitches.
Quick notes before you start
- Gauge isn’t critical for most small decor pieces (cozies, coasters, small pumpkins), but for items that nest or attach (like amigurumi pumpkins that need to fit into a wreath), check the stitch counts so parts fit together.
- Use a yarn that suits the use: acrylic or cotton blends are great for long-lasting decor, cotton is easy to wash and blocks nicely, wool will felt slightly and feel cozy.
- Abbreviations used below are standard—if you need translations (US ↔ UK) say the word and I’ll convert.
- Each pattern includes skill level, materials, basic abbreviations, step-by-step, finishing/assembly, and variations.
1. Crochet Halloween Pumpkin Mug Cozy Pattern
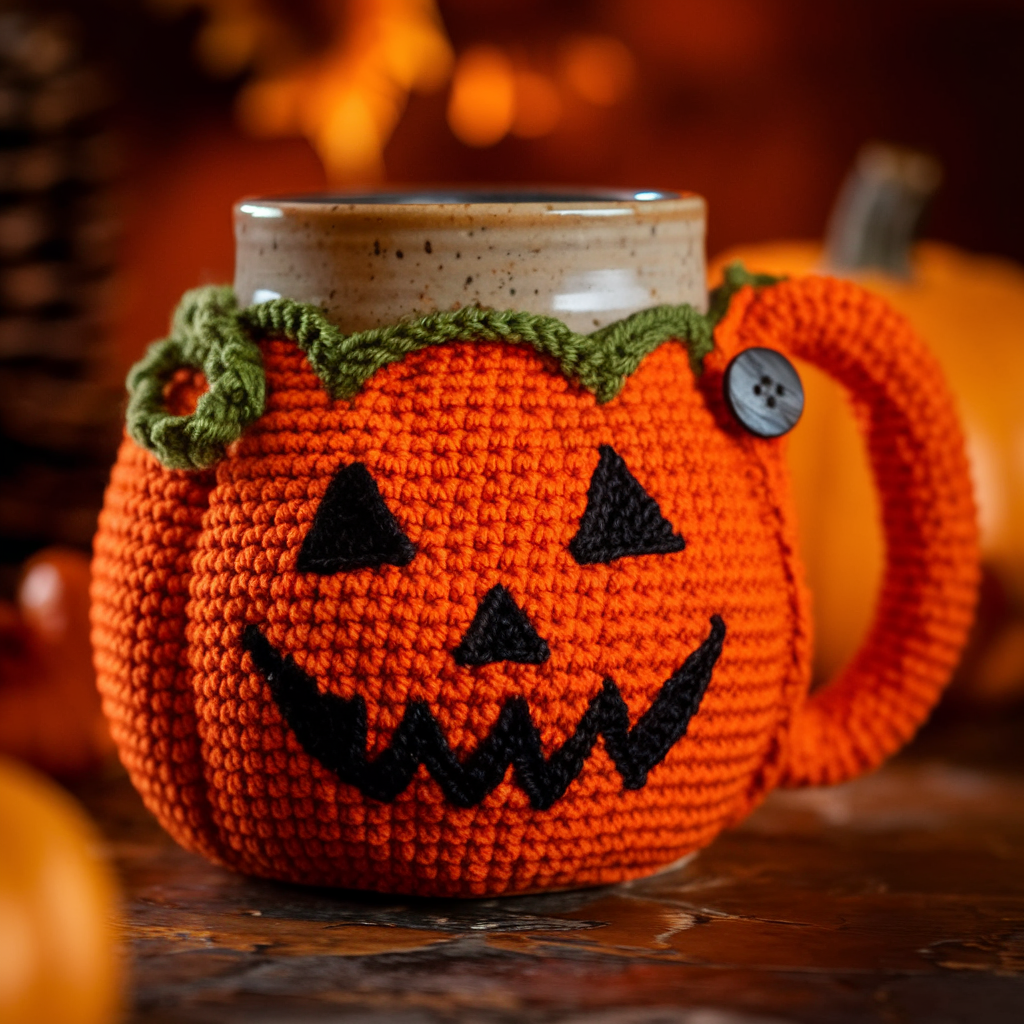
Skill: Beginner – Easy
Finished size: Fits most 10–14 oz mugs (stretchy)
Materials
- Worsted weight yarn (medium/4) — main color: orange (~30–40 yds), contrast (stem/leaf): green/brown (~10 yds)
- Hook: 4.0 mm (G/6) or size to obtain stitch density that stretches to fit mug
- 1 small button (or snap) and tapestry needle
- Scissors
Abbreviations
- ch = chain, sc = single crochet, hdc = half double crochet, sl st = slip stitch, st(s) = stitch(es), sc2tog = single crochet two together (decrease)
Pattern (cozy base)
- Measure: Wrap mug and measure circumference. For a standard 12 oz mug, cast on 42 ch (adjust to match your mug — chain a multiple of 2). Add 1 ch for turning.
- Foundation row: Row 1: Sc in 2nd ch from hook and across. (41 sc) Turn.
- Body: Rows 2–8: Ch 1, sc in each st across. Adjust rows to make cozy tall enough to cover mug midsection (~2.5–3.5 inches). For ribbing effect, alternate hdc and sc rows: Row 2: ch 1, hdc across; Row 3: sc across. Repeat.
- Create buttonhole: On the final row, make a loop two ch long in the middle of one edge: when you reach st 10 (or roughly center), ch 2, skip 2 sts, sc in next st; continue to end. This creates a ch-2 buttonhole. (If using a snap, leave 2 sts open and add snap later.)
Seaming & Pumpkin detail
- Seam: Fold cozy so short edges align and whipstitch or sl st together (use tapestry needle for invisible seam). Leave button sewn to opposite edge.
- Pumpkin ridge texture: Using orange yarn, embroider vertical ridges: run yarn through cozy at top edge and bottom edge and pull gently to create 6–8 vertical ridges; tie off inside. Or make a small pumpkin appliqué (below) and sew it on.
Pumpkin Appliqué (small)
- Ch 2, 6 sc in 2nd ch from hook — join with sl st to first sc. (6 sc)
- Round 2: (Inc) 2 sc in each st around. (12 sc)
- Round 3: Sc in next st, 2 sc in next st around. (18 sc)
- Round 4: Sc around in back loops only to create a slightly cupped shape (18 sc). Stuff very lightly with fiberfill. Run long tail through center pulling to form segments (6–8 segments). Sew stem: ch 4, sl st back into 2nd ch to make short stem; add a small leaf: ch 6, sc in 2nd ch, hdc next, dc next, sl st. Attach to pumpkin and sew pumpkin onto cozy.
Finishing
- Weave in ends; wet-block lightly if using cotton to flatten seams.
- Add button to match the buttonhole. Test on mug.
Variations & tips
- Make a spooky face with duplicate stitch or embroidery.
- Use variegated orange for a rustic pumpkin.
- Make matching coaster or ghost mug tag to pair with cozy.
2. Crochet Pumpkin Garland Pattern
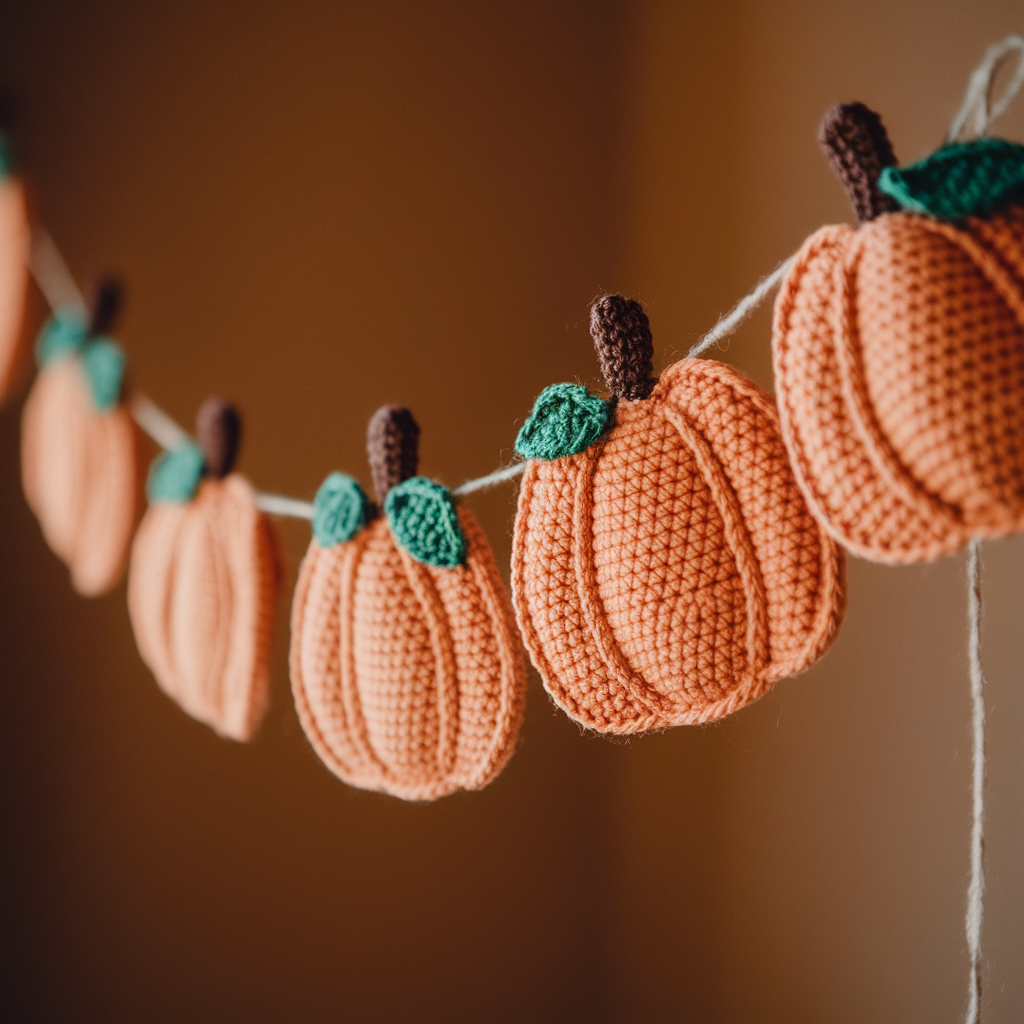
Skill: Beginner – Easy
Finished length: Flexible — make as long as you like (each pumpkin ~2.5–3″ wide)
Materials
- Worsted weight yarn: orange, green, brown, optional black for faces
- Hook: 4.0 mm (G/6)
- Yarn needle, small amount of stuffing for each pumpkin (optional)
- Long chain cord or yarn for garland base (~2–6 meters depending on desired length)
Abbreviations
- BLO = back loop only, FLO = front loop only, sl st, sc, dc, hdc, inc = increase (2 sc in same st), dec = sc2tog.
Pumpkin motif (make X pumpkins)
- Magic ring: 6 sc in MR (6) — or ch 2, 6 sc in 2nd ch from hook. Join.
- (Optional increase round) R2: Inc around (12).
- R3: Sc, inc repeat (18).
- R4–R5: Sc around (18). You can work 2–3 rounds of sc to add height.
- R6: Sc in BLO around to make a slightly ruffled edge (18). Fasten off, leave long tail for sewing.
- Finish: Place a small dab of fiberfill inside (optional), run long tail through center to pull into segments (6–8). Embroider face with black yarn if desired. Add small stem (brown) and leaf (green), attach.
Assembly into garland
- Measure and cut base cord to length. Fold in half to find center and decide spacing (e.g., pumpkins 6–10″ apart).
- Sew pumpkins to cord using long tails and a tapestry needle (or tie on with a loop). Add additional elements: crocheted leaves, ghosts, bats between pumpkins.
- Secure ends with a loop for hanging.
Variations
- Make mini pumpkins for tight bunting or large pumpkins for mantel garland.
- Alternate pumpkins with crochet skull medallions or tiny witch hats.
3. Crochet Ghost in the Mushrooms Wall Hanging Pattern
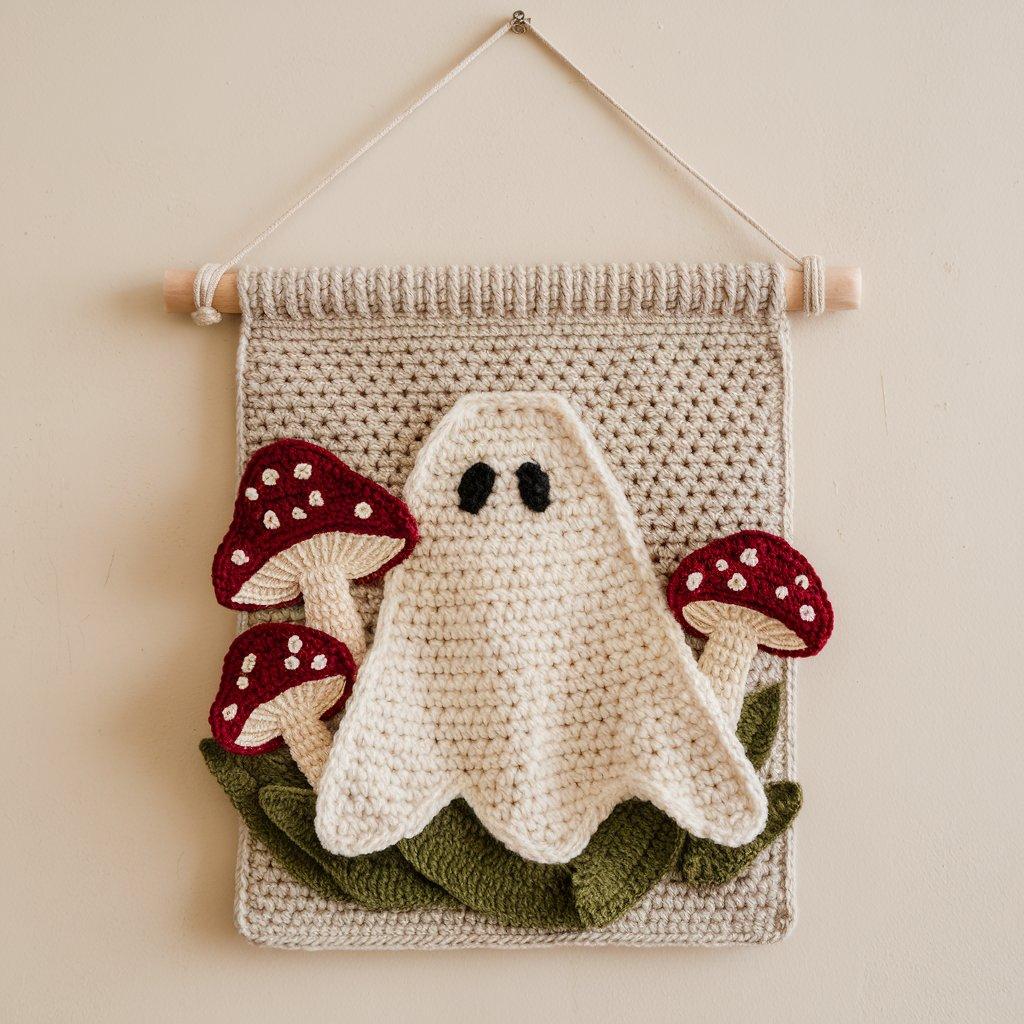
A whimsical wall hanging combining tiny fungal houses with a shy ghost peeking out. Great for a rustic, cottage-horror vibe.
Skill: Intermediate (shaping + simple assembly)
Finished size: ~10″ x 12″ (dependent on hoop/dowel and layout)
Materials
- DK/light worsted yarn for mushrooms (cream/beige for stem, red/earth for cap)
- Worsted or sport for ghost (white), contrast for eyes (black)
- Hook: 3.5 mm for finer mushrooms; 4.0 mm for ghost
- Wooden dowel or small embroidery hoop, cotton cord, tapestry needle, glue (optional)
Mushroom motif (make 3–5 in assorted sizes)
- Stem (beige): Ch 2, 6 sc in 2nd ch (6). R2: sc in BLO around for 2 rounds for a narrow tube (6). R3: sc inc in each st (12). R4–R6: sc around to desired height. Fasten off, leave tail.
- Cap (red): MR, 6 sc in MR (6). R2: inc in each st (12). R3: Sc, inc repeat (18). R4: 2 sc, inc repeat (24). R5: sc around; for ruffled edge do sc, ch 2 in each st for a frill. If you want spotted mushrooms, embroider small white dots on cap later. Join cap to stem with slip stitches.
Mini ghost
- MR, 6 sc in MR (6). R2: inc around (12). R3–R5: sc around, for ghost shape use increasing then taper: R6: sc 2, dec around (9). R7–R9: sc around to create a little dome.
- For ghost body, attach white yarn at bottom edge and work one or two rounds of ch 3, skip 1 st as airy skirt, or alternate shell stitches to create a flowing base. Or work simple scallops: 5 dc in one st, sl st next around. Fasten off, sew on felt eyes or embroider with black yarn. Add a stitched smile.
Assembly
- Arrange mushrooms and ghost along dowel or inside hoop. Use long tails to sew stems/ghost to a background tapestry or to wrap yarn cords around the dowel. If using an embroidery hoop, you can stitch the motifs onto a pre-cut linen or cotton panel.
- Add hanging loop via yarn tied to each end of dowel. Add bead trim or tassels to ends to finish.
Tips
- Block mushroom caps slightly to sit flat.
- Play with scale — super tiny mushrooms create a forest effect; larger ones feel cartoonish and bold.
4. Crochet Tentacle Candy Bowl Pattern
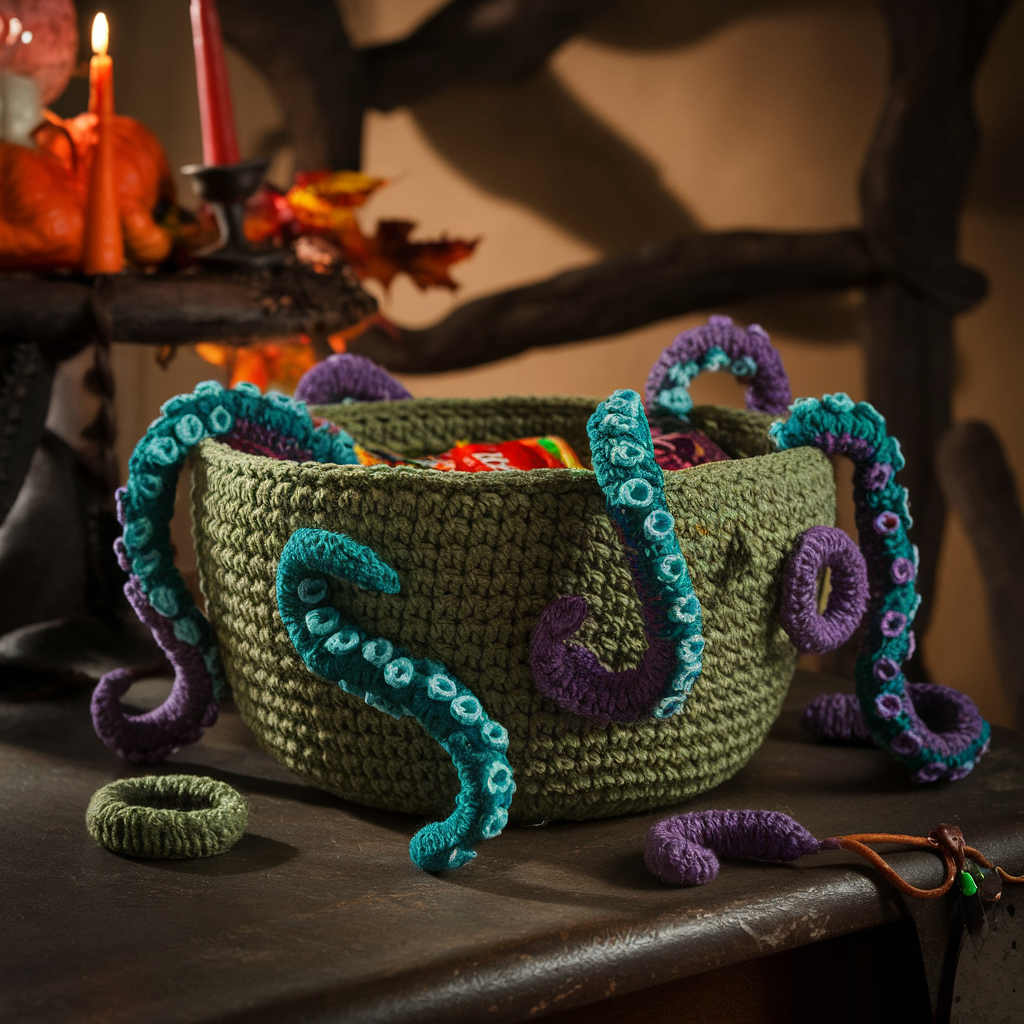
A dramatic candy bowl whose exterior is wrapped in soft tentacles — perfect for Halloween candy and theatrical table decor.
Skill: Intermediate
Finished size: Bowl diameter ~8–9″ (depending on tension)
Materials
- Worsted weight yarn or bulky for more structure (multiple colors: green/teal/purple)
- Hook: 4.5–5.5 mm depending on yarn
- Stiffening spray or diluted fabric stiffener (optional)
- Non-slip suction base or bowl liner (optional for stability)
Bowl base (simple round basket)
- MR, 6 sc in MR (6). R2: inc in each st (12). R3: sc 1, inc repeat (18). R4: sc 2, inc repeat (24). Continue increasing evenly until base reaches ~6–7″ diameter (continue with pattern sc n, inc every X sts to keep flat).
- Once base diameter is reached, Rn: sc around without increases for side height (work 6–10 rounds to create sides). Optionally work 1–2 rounds of hdc to stiffen.
Tentacles (make 8–12)
- Ch 30 (adjust length for desired tentacle droop). R1: 3 sc in 2nd ch from hook, skip 1 ch, sc in next ch across to make curling tentacle. Or for a curly tentacle: in foundation chain, work 3 sc in each chain or repeat sc 2 in each ch to create severe curl — the increased stitches cause the chain to coil.
- To texture tentacle, work into front loops only then switch color for suckers by making small 6 sc in MR (tiny disks) and sewing them on, or use bobble/puff stitches as suckers: along tentacle, ch 1, puff stitch in next st, sl st next.
Attach tentacles
- With bowl inside out, evenly space tentacles and sew firmly to the rim. Reinforce with extra stitching for heavy-held candy.
- Turn right side out. Arrange tentacles to curl outward and downward.
Finishing & stiffening
- If you want the tentacles to stand semi-upright, spray with fabric stiffener or brush on diluted PVA glue inside a plastic-lined bowl to keep shape, then dry overnight.
- Add small felt eyes or embroidery at base of tentacles, or attach a decorative beetle/spider for creepy effect.
Variations
- Make a skull-edged rim by adding chain loops between tentacles and small crocheted skulls or teeth.
- Use metallic yarn for a glint effect.
5. Crochet Ghost Coaster Pattern
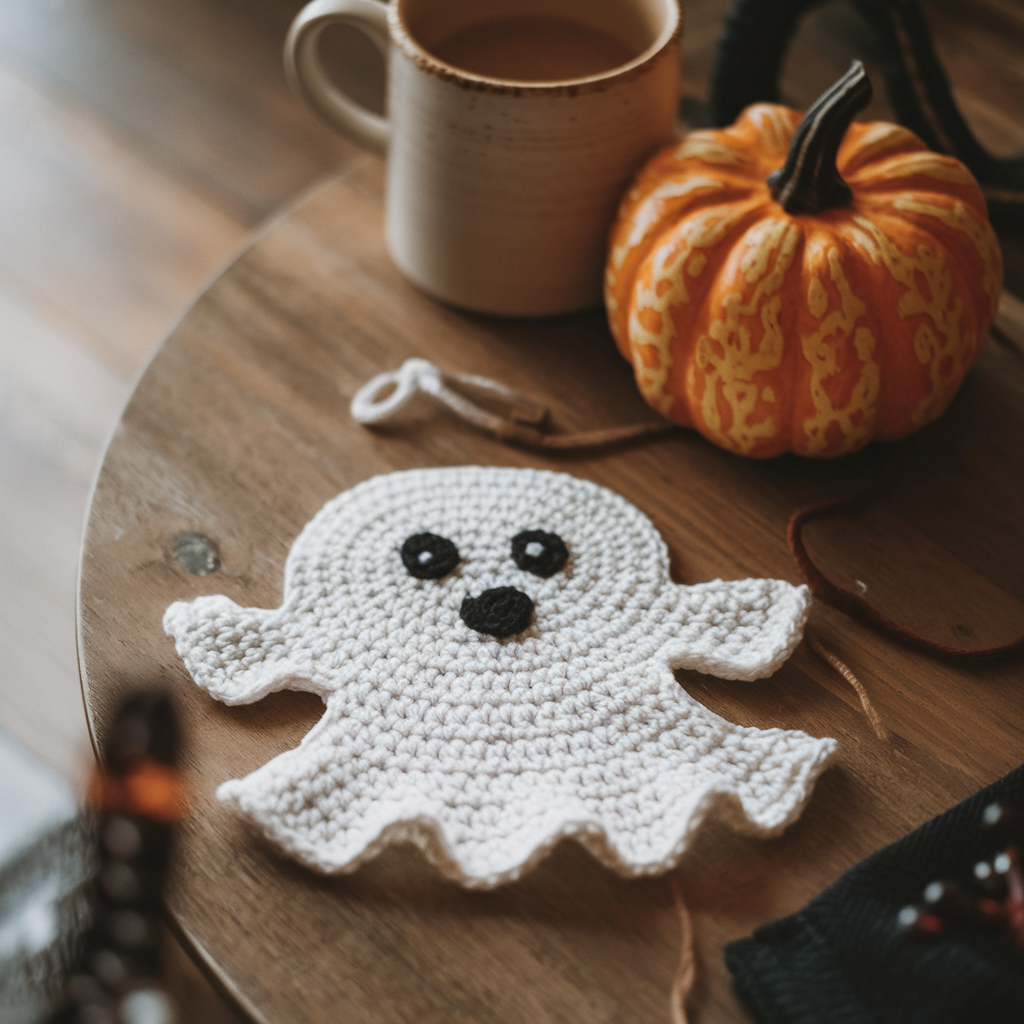
Simple, fast, and kid-friendly—cute ghost coasters to protect your furniture during ghastly gatherings.
Skill: Beginner
Finished size: ~4″ across (adjust with hook/yarn)
Materials
- Worsted weight yarn (white) and small amount black for face
- Hook: 4.0 mm (G/6)
- Tapestry needle, scissors
Pattern
- MR: 6 sc in MR (6) — join.
- R2: inc in each st (12).
- R3: sc 1, inc around (18).
- R4: sc around (18). For a rounded coaster, work R5 sc, R6 sc.
- Ghost hem/skirt: Next round switch to scallop: skip 1 st, 5 dc in next st, skip 1, sl st next around — this creates a wavy hem like a little ghost sheet. Fasten off.
Face
- Embroider eyes and mouth with black yarn (small French knots or satin stitch). Alternatively, cut small circles from felt and glue on for quick faces.
Finishing
- Weave ends and block flat if needed. Add a backing (felt) if you want extra absorbency.
Variations
- Make matching bat or witch hat coasters.
- Use coasters as appliqués on bunting or a placemat.
6. Crochet Halloween Gnome Pattern

Gnomes are an adorable trend in seasonal decor—this Halloween gnome sports a spooky hat and beard.
Skill: Intermediate (amigurumi-style construction)
Finished size: ~7–10″ tall depending on yarn & hook
Materials
- Worsted yarn: body (gray/neutral), hat (black/orange/pattern), beard (cream/white), nose (flesh tone)
- Hook: 3.5–4.0 mm
- Polyfill, tapestry needle, stitch marker, optional wire for hat shaping
Abbreviations
- MR = magic ring, inc, dec (sc2tog), sl st, sc, hdc
Body (cone)
- MR, 6 sc (6). R2: inc around (12). R3: sc 1, inc (18). R4: sc 2, inc (24). R5–R8: sc around (24) — continue until body height ~3–4″. Stuff lightly. Decrease for neck: sc 2, dec around to close top somewhat. Leave an opening to attach nose and hat.
Nose
- MR, 6 sc (6). Stuff slightly. Sew to front center of body seam before attaching beard.
Beard
- Using cream yarn, attach at base of nose and work short rows of loops: ch 6, sl st to next st across a small strip to create long looped beard, or use faux fur yarn to create fluffy beard. For simple beard: make a semi-circle: MR, 12 sc, R2: sc around, fasten off, cut fringe with scissors to create hair.
Hat
- Ch 2, 6 sc in 2nd ch (6). R2: inc (12). R3: sc 1, inc (18). Continue increasing until hat base matches head circumference (~18–22 sc). Work even for tall hat (10–12 rounds) then decrease slightly to create a cone. Add a brim: attach at base and work sc across in BLO to make a neat rim or add a ruffle. Add embellishments: a bat applique, skull button, or embroidery; add wired edge inside brim to shape.
Assembly
- Sew nose in place, attach beard below nose, secure hat over top (it can be removable for storage). Add embellishments, button eyes, or embroidered spectacles. Secure all pieces well.
Finishing
- Add a weighted base (beans inside a sachet) to keep gnome standing if desired.
Variations
- Witch gnome: add broom, hat buckle, striped legs.
- Make a family of gnomes in different sizes.
7. Crochet Witch Hat Pattern
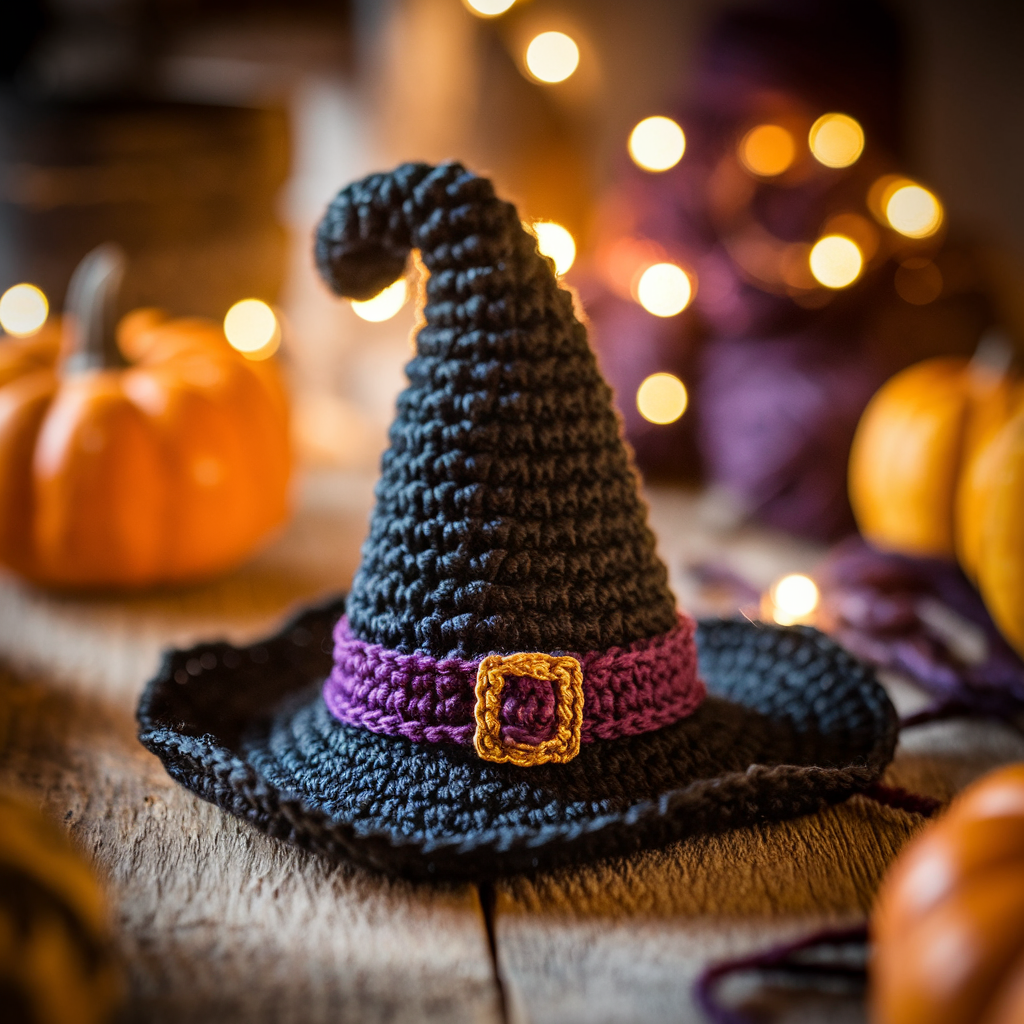
A classic witch hat that works as ornament, gnome accessory, or tree topper.
Skill: Beginner – Intermediate
Finished size: Small ornament 3–4″; adult prop 12–16″ (adjust increases)
Materials
- Worsted or bulky yarn for sturdier hat
- Hook: 4.5 mm–6.0 mm for large hats
- Optional wire or interfacing for brim stiffening
Pattern (small ornament)
- MR, 6 sc (6). R2: inc (12). R3: sc 1, inc (18). R4: sc 2, inc (24). R5–R8: sc around until cone reaches desired height (4–6 rounds for small).
- Brim: Join at base; ch 1, BLO sc around for 1 round. Next round: sc 1, hdc 1, 2 dc in next st repeat to create a flared brim. For stiffer brim, work more rounds and insert thin craft wire into a crochet tube or sew in cardboard circle covered with fabric. Add embellishments: buckle (crochet square + metallic thread), crocheted spider, or feathers.
Finishing
- Block hat to shape. For a wearable hat, line with felt or fabric.
Variations
- Add striped band, ragged edges, or embroider stars.
8. Crochet Halloween Amigurumi Pumpkin Pattern
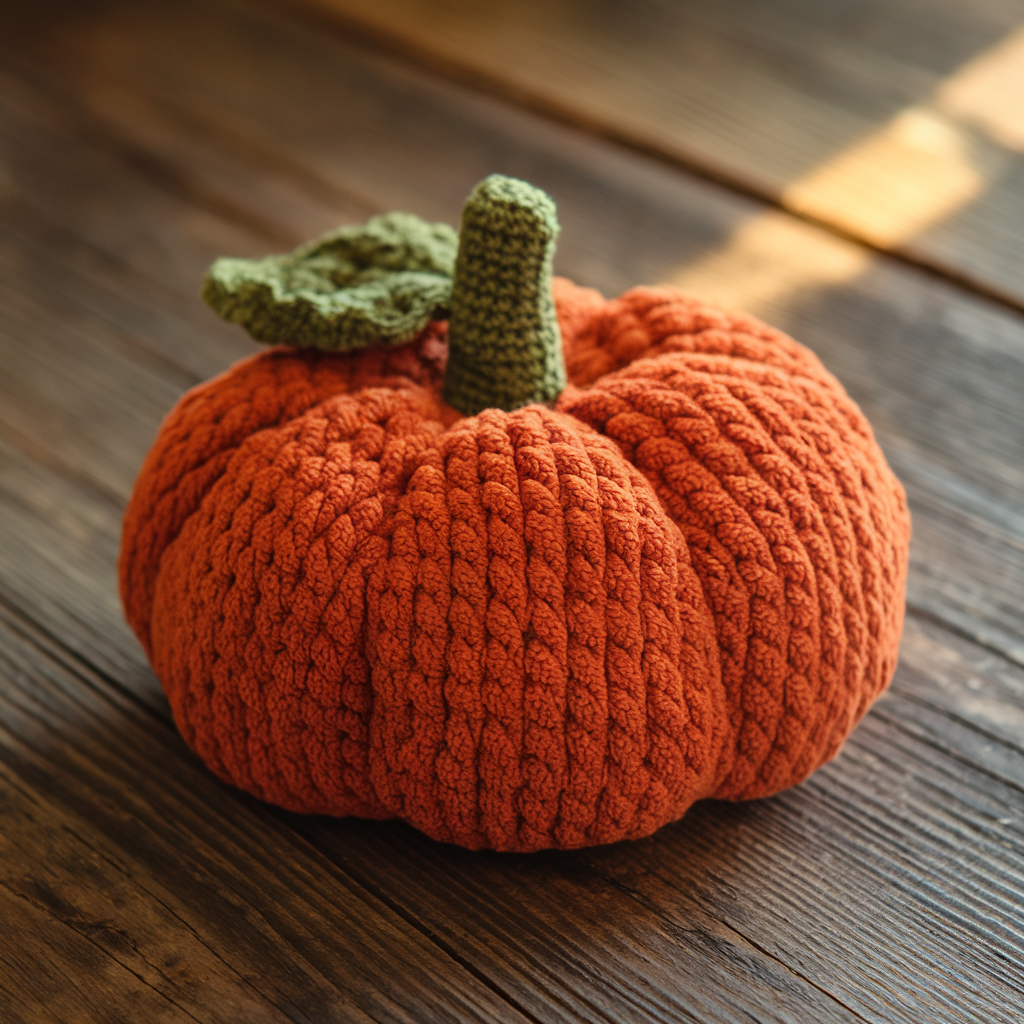
A round, segmented pumpkin you can stuff and display alone or combine into a centerpiece.
Skill: Intermediate (amigurumi)
Finished size: ~5″ across (adjust with hook/yarn)
Materials
- Worsted yarn orange, green/brown for stem, 3.5–4.0 mm hook, safety eyes optional (not needed), polyfill, yarn needle
Pattern (body)
- MR, 6 sc in MR (6). R2: inc in each st (12). R3: sc 1, inc (18). R4: sc 2, inc (24). R5: sc 3, inc (30). Continue increasing until the circle reaches desired width (~40–44 sts for 5″).
- Work even rounds (sc around) for several rounds until pumpkin height ~2–2.5″.
- Decrease rounds: sc 3, dec repeat, then sc 2, dec, sc 1, dec, dec until you have ~8–10 sts. Stuff firmly. Finish closing with dec until barely closed; use yarn needle to stitch remaining opening.
Segmenting (classic pumpkin look)
- Run a long strand of contrasting yarn (or same yarn) from top to bottom through the center of the pumpkin, going through the stuffing, to create grooves. Do this 6–8 times around the pumpkin to make segments—pull evenly to shape and knot securely inside.
Stem
- With brown/green, MR 4 sc, R2: sc in each st (4). R3–R6: sc around to desired stem height. Sew to top center. Add leaf: ch 6, sc in 2nd ch, hdc, dc, tr, sl st; flatten and sew onto stem.
Finishing
- Add embroidery or tiny tag. Optional: insert a small LED tealight for centerpiece use (do not use real flame near yarn).
Variations
- Make stacked pumpkins of different sizes for a tiered display.
- Create a pumpkin family with faces.
9. Crochet Heart Pumpkin Applique Pattern
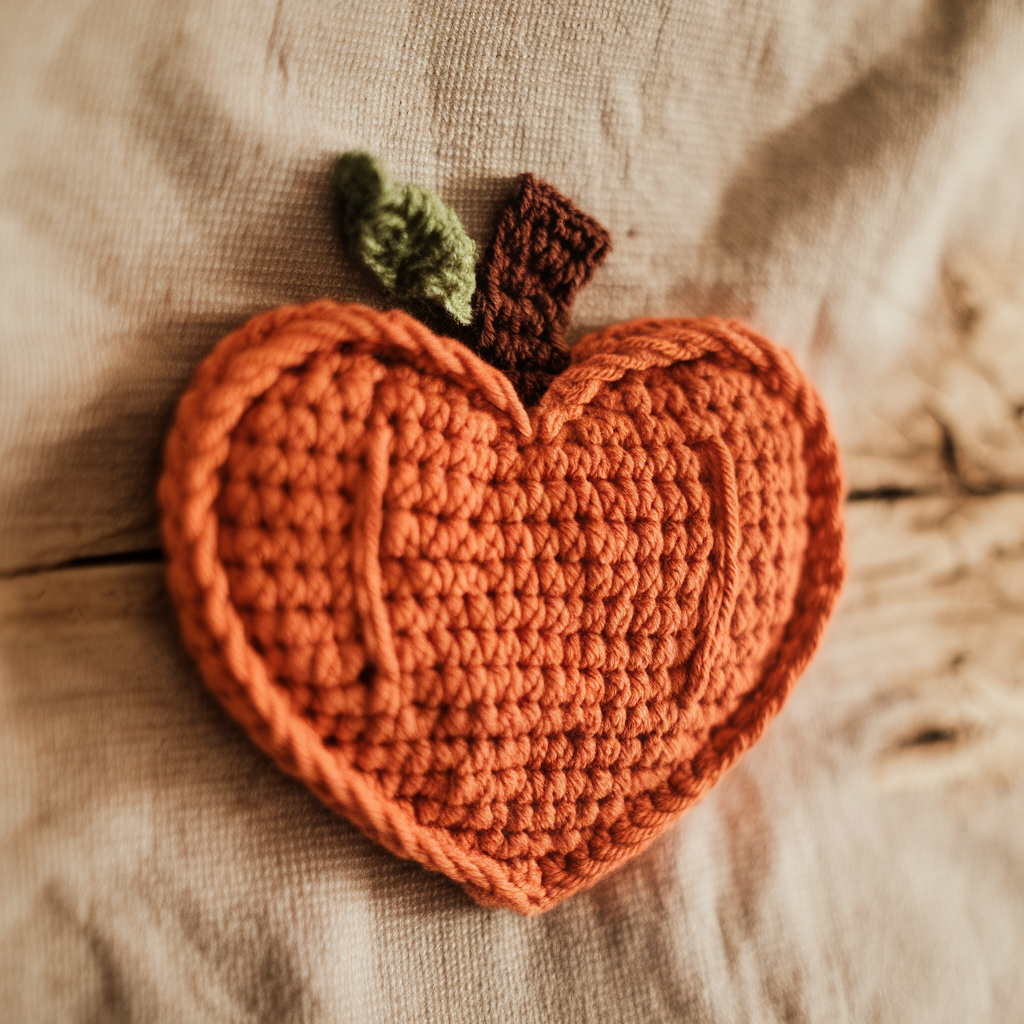
A sweet hybrid: a heart-shaped pumpkin applique—cute on pillows, stockings, or as a tag.
Skill: Beginner – Easy
Finished size: ~2–3″ depending on hook & yarn
Materials
- Worsted weight yarn orange and green, 3.5–4.0 mm hook, tapestry needle
Pattern
- Ch 2, 6 sc in 2nd ch (6). R2: inc each st (12). R3: sc, inc around (18). R4: (work 6 sc, ch 2, sl st in next 6 sc to form the top indent of the heart on both sides) OR shape heart by increasing one side more: divide into two lobes: MR, 8 sc for lobe 1, fasten off, MR 8 sc for lobe 2, join them in middle with short bridge and then work lower triangle rows to form point.
- For a simpler approach: make a round pumpkin (as above) and shape into a heart by folding the top: pinch two opposite top stitches and tuck to create the heart indentation; stitch at back to hold. Add stem & small leaf on top center.
Finishing
- Weave ends; sew onto project. Use fusible interfacing behind fabric projects for stability.
Variations
- Make in different shades (pale blush pumpkins look chic).
10. Crochet Halloween Wreath Pattern
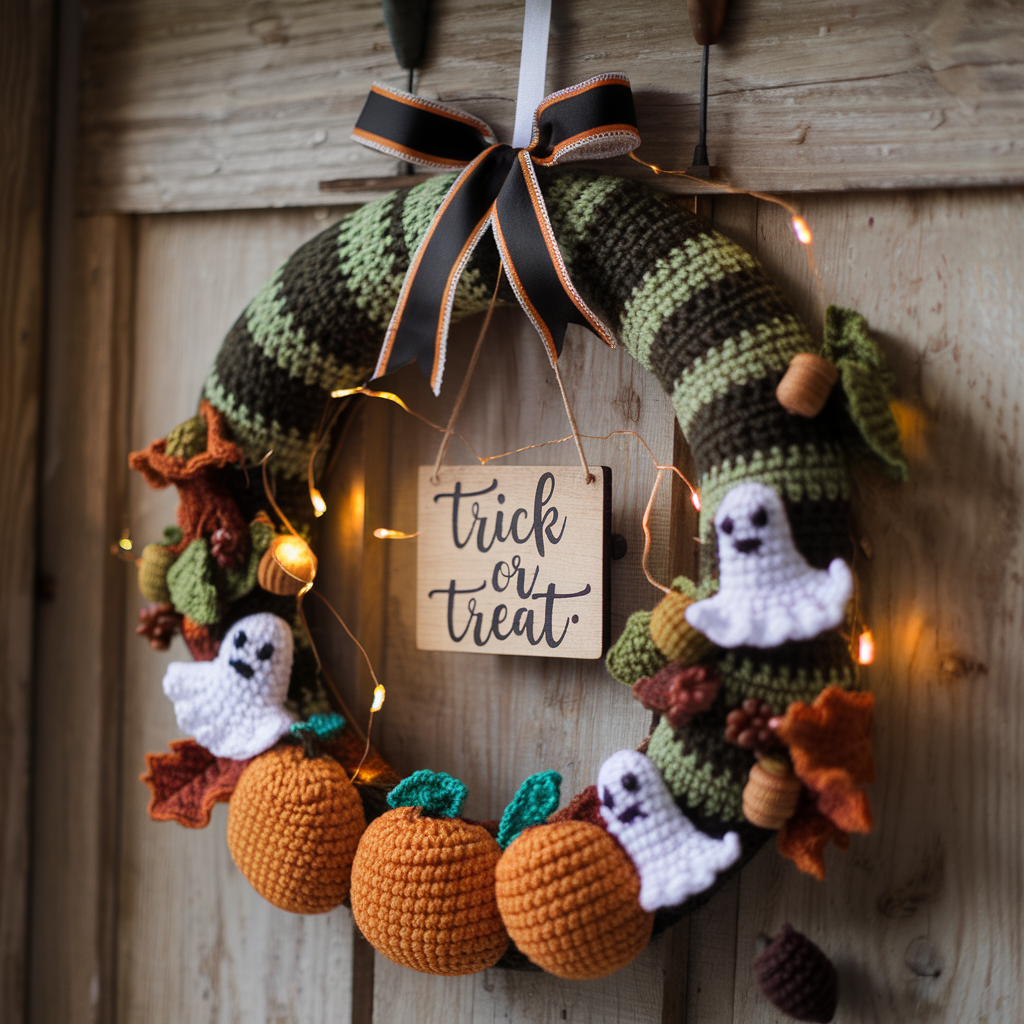
A full wreath to hang on your door—featuring pumpkin, ghost, and leaf motifs.
Skill: Intermediate
Finished size: 12–18″ diameter depending on base
Materials
- Worsted yarn in greens, oranges, black, white, browns
- Wreath base (foam or wire) OR crochet a base circle: ch large chain to form ring or make a flat crocheted circle (see below)
- Hook: 4.0–5.0 mm, hot glue gun (optional), tapestry needle
Base options
- Use foam wreath (wrap yarn or moss) OR crochet base: MR, 6 sc (6), inc rounds until diameter ~8–12″ (remember a flat ring is what you want—don’t add sides).
Motifs to attach
- Small pumpkins (pattern above) — make 4–6 small pumpkins.
- Leaves: ch 10, work 1 sc, 2 hdc, 3 dc, 2 hdc, 1 sc across to make a leaf; sew or glue.
- Ghosts: small coaster ghosts (pattern above) flattened and stitched.
- Berries & acorns: small bobble stitches or tiny cones.
Assembly
- Wrap base with yarn for texture, or add moss/leaves first. Arrange motifs to one side or cluster around bottom third of wreath. Sew or hot glue motifs onto base securely.
- Add ribbon or loop for hanging. Attach a bow or wooden sign: “Trick or Treat”.
Finishing touches
- Add battery LED string lights woven into wreath to make it glow at night. Hide battery pack at back with hot glue or a fabric pouch.
Variations
- Modern: use neutral pumpkins and eucalyptus leaves for chic Halloween.
- Classic spooky: black velvet ribbon, skulls, and deep purple accents.
Conclusion
There you have it: ten crochet projects—from tiny ghost coasters to a dramatic tentacle candy bowl and a show-stopping wreath—each designed to bring handcrafted charm (and a little spook) to your Halloween décor. Pick projects that match your time and skill level: fast coasters and appliqués are great same-day crafts, while pumpkins, gnomes, and wreaths reward a weekend’s attention.
A few final tips:
- Start simple if you’re new to amigurumi or shaping: the pumpkin, cozy, and coaster are fast wins.
- Make multiples—one pumpkin pattern can become a whole harvest with color changes.
- Add lighting and texture (felt, ribbon, beads) to elevate crocheted pieces into multi-sensory decor.
- Safety first: if using items around children or battery tea lights, ensure parts are secured and no small pieces can be swallowed.