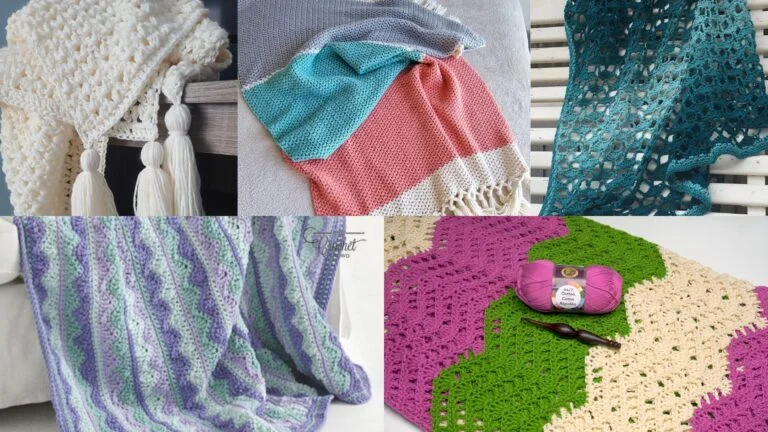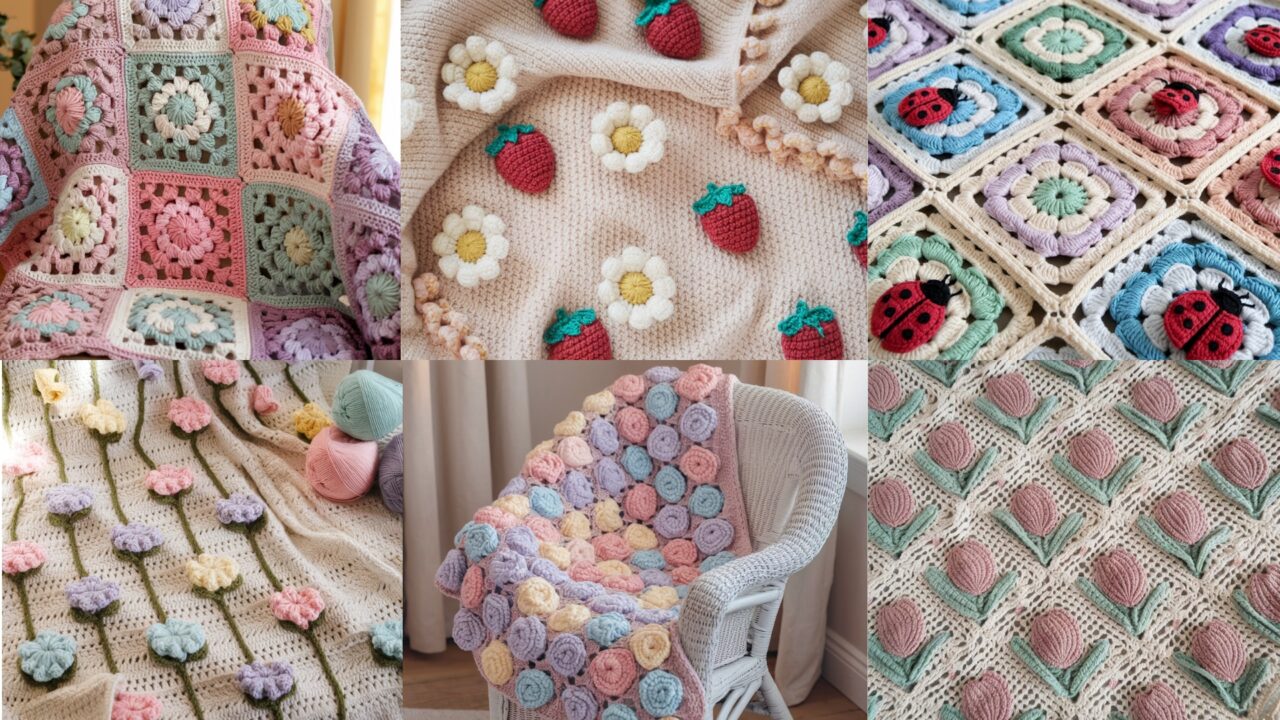
Spring and summer crochet blankets celebrate color, texture, and small floral details — perfect for baby showers, airy throws, or cozy lap blankets. This collection contains six floral blanket patterns covering a variety of styles: playful appliqués, patchwork medallions, puff-flower rows, strawberry & daisy cuteness, vintage baby blooms, and elegant filet tulips. Each pattern includes step-by-step guidance so you (and your readers) can make a polished blanket from start to finish.
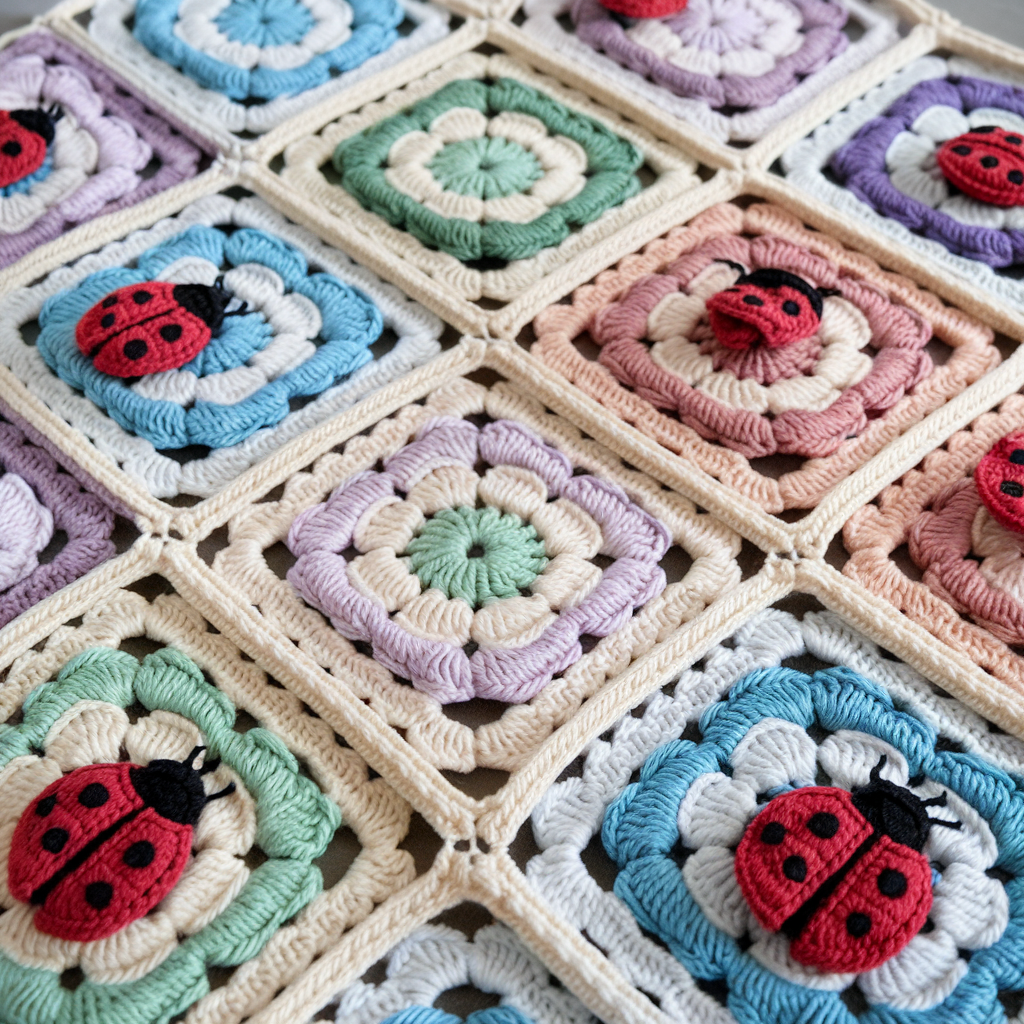
1. Crochet Ladybug & Flower Granny Square Blanket
Skill level: Beginner → Easy-Intermediate
Finished size: approx 36″ × 42″ (6″ squares — 6 across × 7 down = 42 squares)
Yarn & yardage (estimate): MC (background) ~1200–1500 yds; FC (flowers & accents) ~400–600 yds; small black/white for ladybug details 20–40 yds each
Hook: 5.0 mm
Notions: tapestry needle, blocking mats, stitch markers, optional polyfill for ladybug
Abbreviations
ch, sl st, sc, hdc, dc (US), tr, st(s), sk, MR — (standard US terms)
Gauge
One finished granny square ≈ 6″ after blocking. Adjust hook to match gauge.
Notes
- Keep color changes tidy. For fewer ends, use Join-As-You-Go (JAYGO) on the final round.
- Appliqués must be sewn securely for baby blankets.
Flower Granny Square (make 42)
Colors: MC = background, FC1 = flower center, FC2 = petals, FC3 = frame (optional)
Round 1 (center): with FC1
MR, ch 3 (counts as dc), 11 dc in ring. Join. (12 dc) — fasten off FC1.
Round 2 (petals) — flat petals (FC2)
Join FC2. Ch1, sc in next st, ch3, sl st to top of next dc to make a loop petal. Space evenly to make 6 petals. Fasten off FC2.
Petal variation: 6 puff petals — make puff stitches into top of alternating Round 1 dc. Close with ch1 between puffs.
Round 3 (square formation) — MC
Join MC, ch 3 (counts as dc), dc in next 2 sts. Ch2, (dc, dc, dc) in next 3 sts. Repeat around to create 4 corner clusters separated by ch2 spaces. Join.
Round 4 (grow square) — MC or FC3
Ch3, 2 dc in same space, sk next 3 dc, (3 dc) in next corner ch-2; at each corner work (3 dc, ch2, 3 dc). Continue until square ~6″. Fasten off and weave ends.
Ladybug Appliqué (~1″–1.25″)
Body (red): ch2, 6 sc in 2nd ch from hook (6 sc). 2 sc in each st around (12 sc). Sc, 2 sc in next around (18 sc). Fasten off.
Head (black): MR or ch2, 4 sc; fasten off. Sew head to red body. Embroider black spots, add tiny white eye dots. Optionally add a dab of polyfill under the body for subtle dimension. Sew onto square.
Flower Appliqué (flat)
MR, ch1, 8 sc, join. Make 5–6 petal loops: ch3, hdc, sl st back to base for each petal. Sew to square centers or corners.
Assembly — Layout & JAYGO
Arrange as 6 × 7 grid. Alternate pattern/solid squares if desired.
JAYGO method (one side at a time):
Make first square fully. For each subsequent square, work final round until joining side; instead of ch/skip where you’d normally join, sl st to corresponding stitch of the finished neighbor, then continue. Continue attaching squares row-by-row. If JAYGO feels fiddly, seam with mattress stitch (invisible), whip stitch (durable), or sc join for a decorative ridge.
Border (sc + scallop)
Round 1: sc around evenly, 3 sc in each corner.
Round 2: sc in each st around.
Round 3: skip 2 sts, 5 dc in next st, skip 2, sc in next repeat (adjust corner shells). Fasten off.
Finishing & Care
Weave all ends, block lightly. Machine wash/dry as per yarn label; for baby blankets use machine-washable yarn and secure appliqués tightly.
Variation ideas
- Replace ladybugs with bees or butterflies.
- Use gradient yarn for frames for an ombré effect.
Printable summary: Make 42 squares, add appliqués, assemble JAYGO or sew, add 3-round border, block.
2. Crochet Flower Garden Blanket
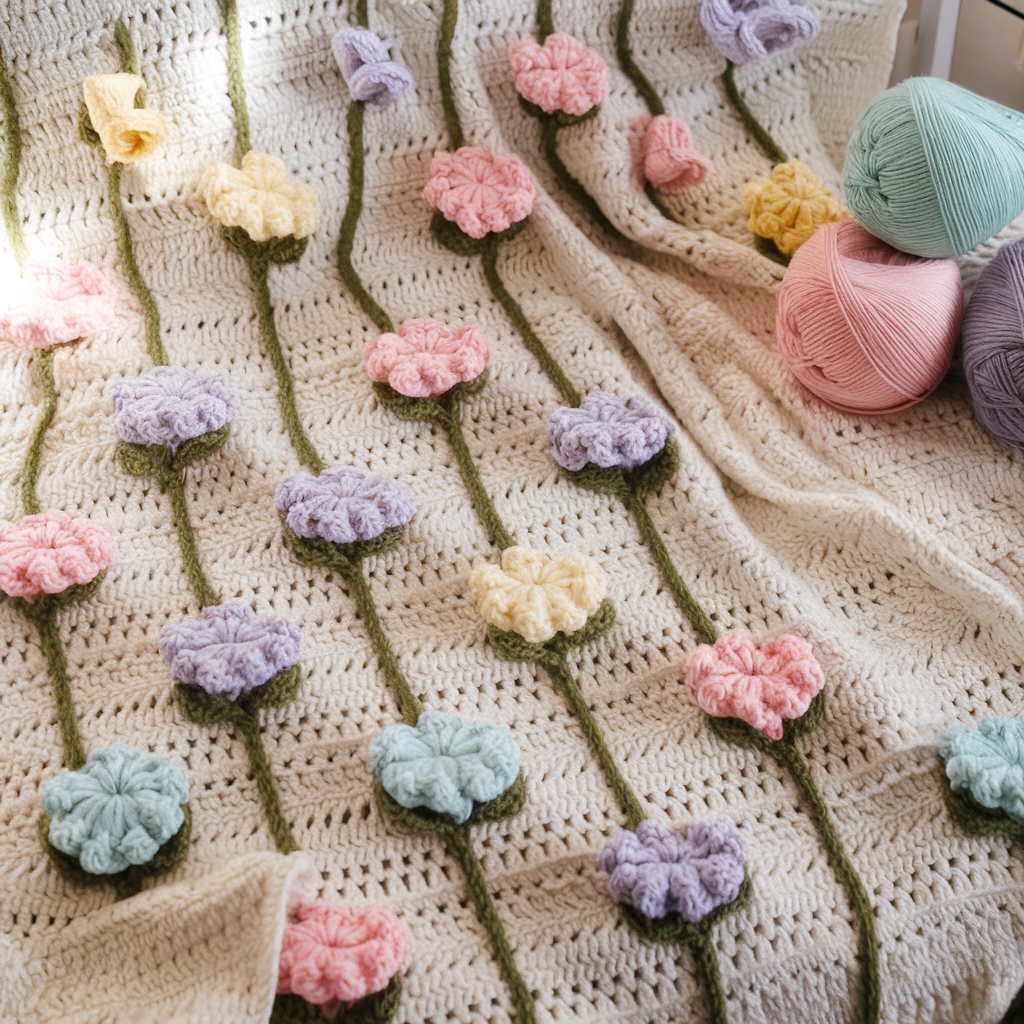
Style: continuous-row garden with puff/bobble flowers in a lacy mesh
Skill level: Easy-Intermediate
Finished size: ~40″ × 50″ (adjust by repeats)
Yarn: DK/light worsted for drape — ~1800–2400 yds
Hook: 4.0 mm
Stitches used
ch, sc, dc, hdc, puff stitch (yarn over, insert hook, pull up loop x4, yarn over and pull through all), bobble, sl st
Notes
- Practice puff tension: too tight = dense, too loose = floppy.
- Mark positions where each flower will be placed (every 7th repeat recommended).
Foundation
Chain multiple of 14 + 2 (e.g., ch 210).
Row 1 (mesh base)
Ch 3, dc in next ch, ch 1, sk 1 ch, dc in next across. Turn.
Row 2 (mesh repeat)
Ch 3, dc in next st, ch 1, sk 1 across. Turn.
Row 3 (flower row)
Ch 1, sc across until you reach a stitch marked for flower center. In that base stitch make 5 puff stitches (yarn over, insert, pull up loop — repeat until 5 loops on hook; yarn over and pull through all; ch1). Sl st into next stitch to anchor. Optionally add a contrasting small center with a single stitch (sc) or a tiny french knot center with embroidery yarn. Continue across placing flower clusters every 7th repeat.
Row 4 (stabilizer)
Ch 1, sc across (stabilizes row). Turn.
Repeat: Mesh, Mesh, Flower row + Stabilizer. Continue until desired length.
Border
Round 1: sc around, 3 sc in corners.
Round 2: choose lacy sc 2, ch2, sk 2 finish, or scallop shells (5 dc shells).
Tips & Variations
- Use 7 puffs for fuller flowers or bobbles for chunkier blooms.
- Use brighter yarn for petals and neutral background for pop.
Finishing
Block lightly, weave ends.
Printable summary: Chain multiple of 14+2; repeat 3-row pattern (mesh, mesh, flower) to length; add two-round border and scallop.
3. Crochet Strawberry Daisy Blanket
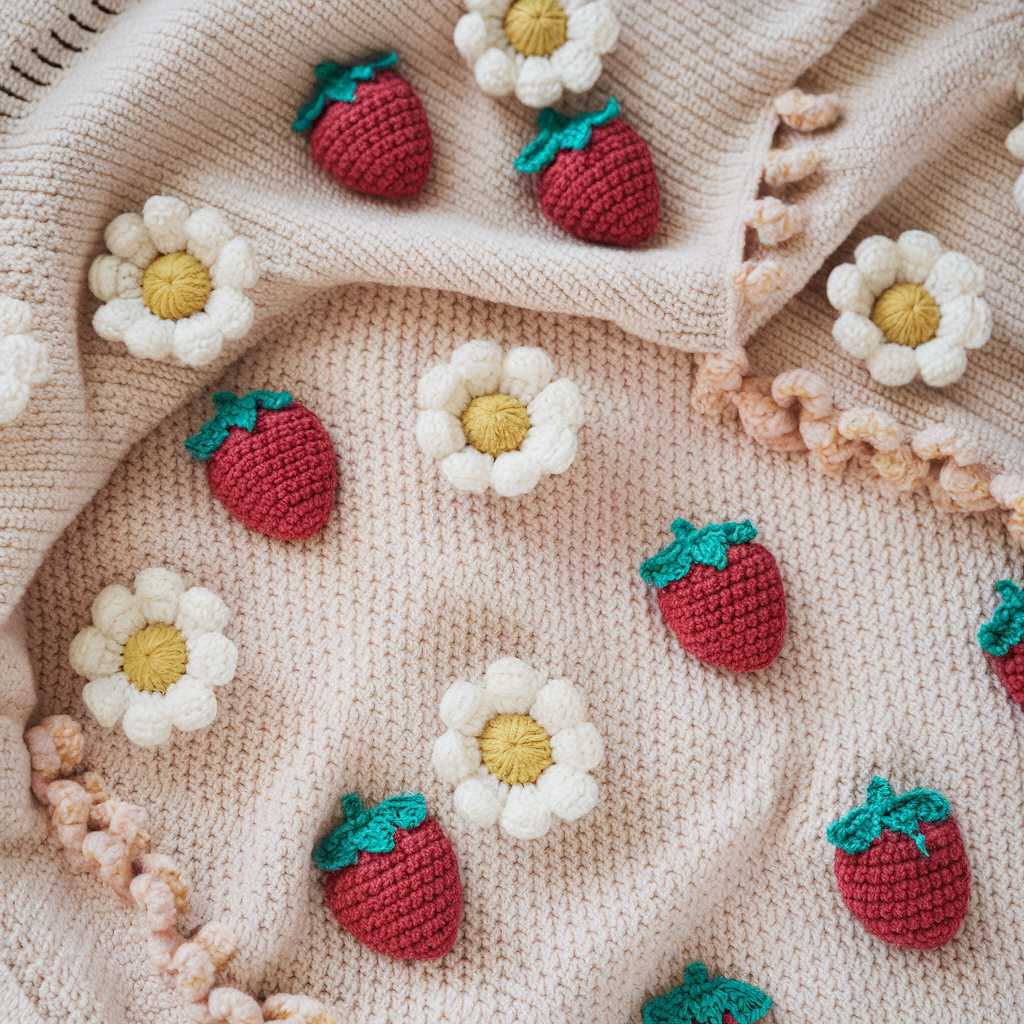
Style: textured linen ground with scattered strawberry & daisy appliqués
Skill level: Easy
Finished sizes: Baby 30″ × 36″ or Lap 40″ × 50″
Yarn: Sport/worsted (cotton/cotton blend recommended)
Hook: 3.5–4.5 mm
Motifs
- Daisy: 5-petal flat daisy with tiny puff/french-knot center
- Strawberry: teardrop applique with embroidered seeds and small green leaves
Background stitch — Linen (moss) stitch
Chain multiple of 12 + 4.
Row A (linen): sk1, sc in next ch, ch1 across. Turn.
Row B: hdc across. Turn.
Alternate Row A and Row B for textured fabric.
Daisy (~1″–1.5″)
MR, ch1, 8 sc into ring, join. For each petal: ch3, hdc, sl st back to base — make 5 petals. Fasten off. Center with tiny yellow puff or french knot.
Strawberry (~1–1.5″)
With red: ch2, 6 sc in 2nd ch from hook (6 sc). Increase on one side to make teardrop shape (2 sc in alternating stitches along one side), then sc back across to taper—shape into rounded triangle. Embroider yellow seeds (french knots) and add 3 small green leaf picots at top (ch3, sl st back). Sew onto blanket.
Layout & Placement
Make body to desired size in linen stitch. Pin appliqués evenly: e.g., daisies in rows staggered and strawberries in between. Sew with small invisible stitches and tack centers securely.
Border
Round 1: sc around. Round 2: shell scallop (5 dc shells). Or reverse sc (crab stitch) for a ropey edge.
Variations
Enlarge motifs for toddler blankets. Use cotton for summer blankets; acrylic for easy care throws.
Care
Cotton may shrink—prewash or machine wash cold/dry low.
Printable summary: Work linen stitch ground to size; make and sew daisies/strawberries; sc around; shell scallop border.
4. Crochet Caron Flower Patch Throw Blanket
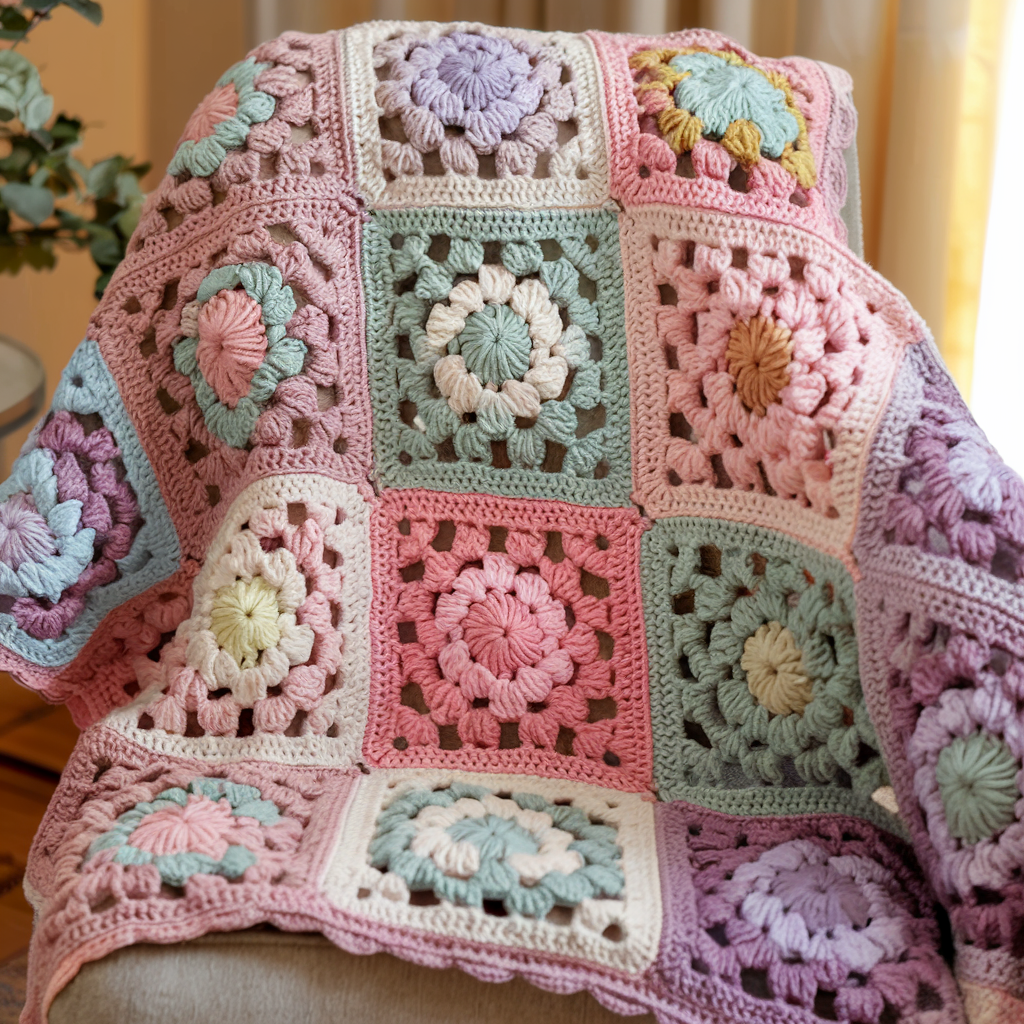
Style: patchwork of flower squares (medallion-in-square), Caron-style inspiration
Skill level: Beginner → Intermediate
Finished size: ~50″ × 60″ (8 × 10 squares of 6″)
Yarn: worsted weight; variegated for flower rounds, solid for background
Hook: 5.0 mm
Flower Patch Square (~6″)
Round 1 (center): MR, ch3, 11 dc in ring; join (12 dc).
Round 2 (petals): with petal color make 6 puff petals in alternating tops of Round 1 dc OR ch loops. Fasten off.
Round 3 (frame): join background color, ch3, 2 dc in each petal gap; at corners work (2 dc, ch2, 2 dc) to form square. Continue until square ~6″.
Make squares
Make required number. Alternate color placement to balance blanket color distribution.
Joining — JAYGO recommended
Make first square fully. For each next square, on final round, when you reach side that should join existing row, sl st into corresponding chains of neighbor (replace ch/skip sequence with sl sts to join). Continue row by row. If you prefer seams, use mattress stitch or whip stitch.
Border
Round 1: sc around. Round 2: 2 rounds of dc for height. Round 3: scallop (5 dc shells). Finish with crab stitch for tidy ropey edge.
Variations
Mix medallion sizes; use different yarn weights for quirky texture. Variegated yarn gives unpredictable but pretty flowers.
Finishing
Block assembled blanket flat to square edges. Weave in ends leftover from JAYGO.
Printable summary: Make medallion squares, assemble JAYGO or seam, finish with three-round border.
5. Crochet Mary Maxim Blooms Baby Blanket
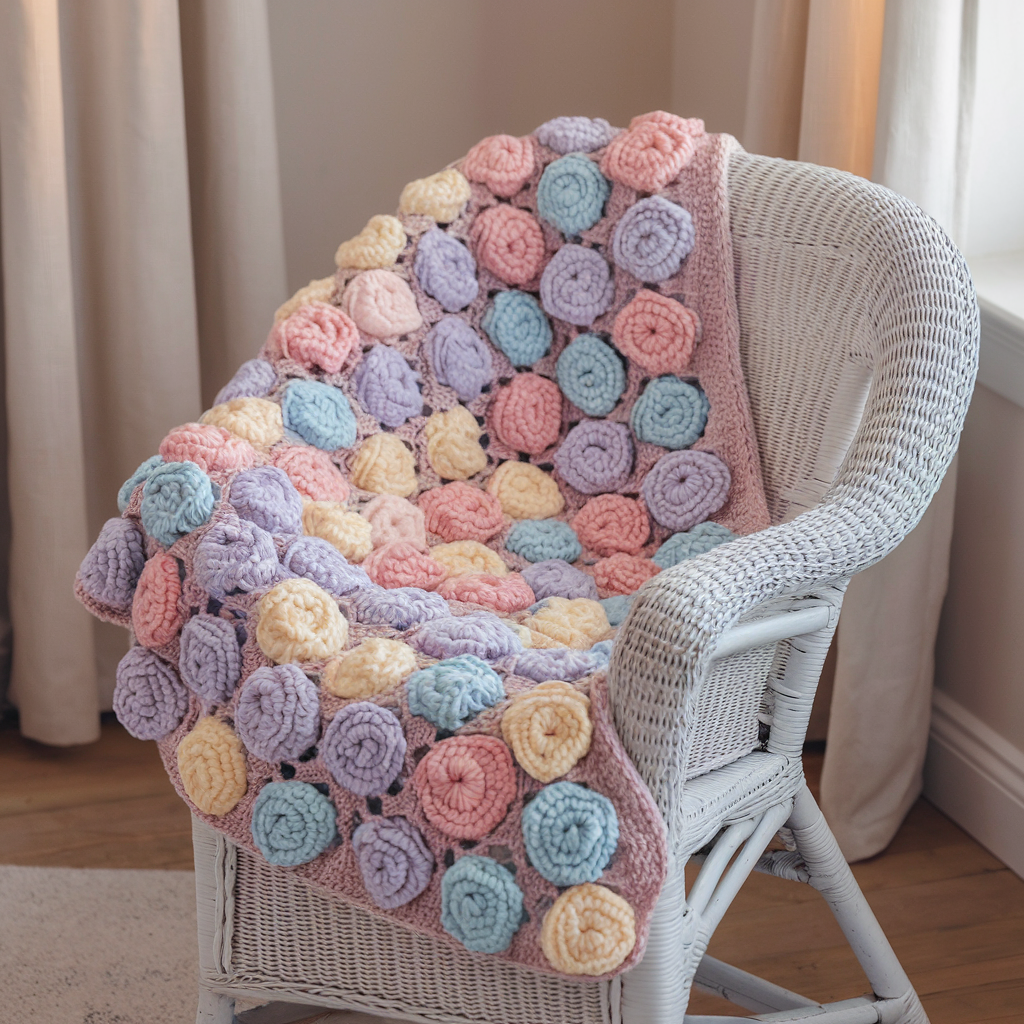
Style: vintage soft baby blanket with clustered blooms spaced on textured background
Skill level: Easy – Intermediate
Finished size: 30″ × 36″ (baby)
Yarn: Baby weight / DK — ~900–1100 yds (soft washable yarn recommended)
Hook: 4.0 mm
Stitches used
ch, sc, hdc, dc, puff, 2-dc cluster, shell
Structure
Blanket alternates a bloom row with three background rows (linen/moss) to keep fabric airy yet warm.
Foundation
Chain multiple of 18 + 4 (for ~30″ width).
Set-up (Row 1)
Dc across as base. Turn.
Bloom row (example)
Ch1, sc across until you reach the bloom anchor st (e.g., 9th st of each 18-st repeat). In that st make 6 puff stitches (yarn over and pull up loop x6, yarn over, pull through all), ch1 to close and sl st to next base stitch. Optionally change to a contrast color for a small center sc.
Background rows (3)
Row A: linen/moss pattern (sk1, sc in next, ch1).
Row B: hdc row across.
Row C: sc across. These rows give soft texture and break the bloom rows.
Repeat
Repeat Bloom row followed by three background rows until desired length.
Border
Round 1: sc around, 3 sc in corners. Round 2: shell border skip 2, 7 dc in next, skip 2, sc in next for plush edge. Optionally finish with crab stitch.
Care
Machine wash gentle and tumble low if yarn allows.
Variations
Neutral background with colorful blooms for modern nursery; alternate bloom height for staggered look.
Printable summary: Alternate bloom and three background rows; add shell border; block and finish.
6. Crochet Tulip Afghan Blanket
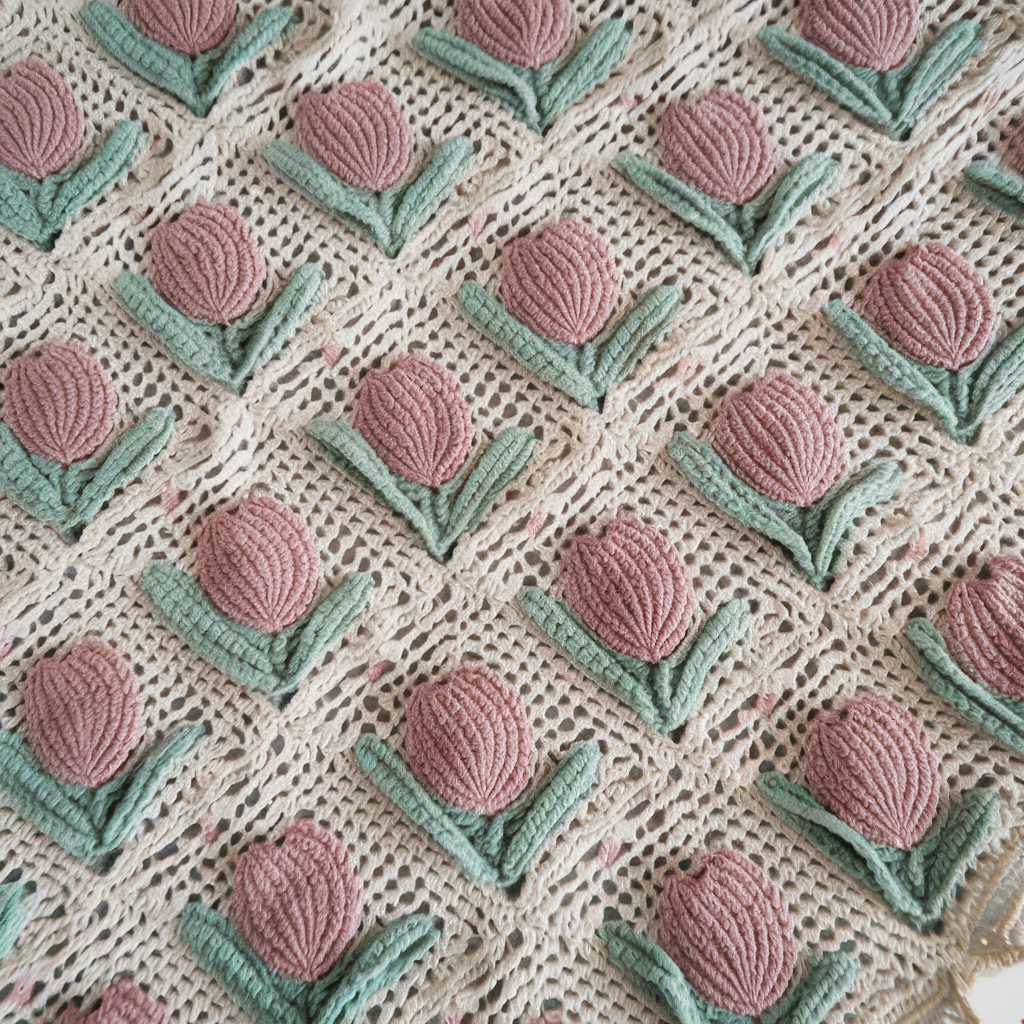
Style: classic tulip motif worked in filet crochet or overlay filet for painterly tulips
Skill level: Intermediate (chart reading/counting recommended)
Finished size: ~50″ × 60″ (repeat motifs horizontally)
Yarn: Sport/DK — ~2000–2600 yds
Hook: 4.0 mm
Filet basics refresher
- Open square = creates mesh hole: work dc into ch-2 space of previous row (no filled dc pair).
- Filled square = solid block: (dc, ch2, dc) placed across the pair of stitches that form one square.
- Each chart square typically corresponds to 1 filled/open square; count squares across and high for motif size.
Planning & Gauge
Each tulip motif here = 10 squares wide × 12 rows high (this is an example motif size — you may scale by adding repeats). Make a swatch to ensure your filet squares are proportional (squares should look square-ish after blocking).
Foundation
Chain multiple of 20 + 6 (this gives room for motif repeats and turning chains). Example: for three tulip repeats across, chain (3 × 20) + 6 = 66 chains.
Working the filet (verbal chart)
Because charts are easier, sketch a 10×12 grid on paper and color the “filled” squares per these verbal directions below. Each row below describes which squares should be filled (F) vs open (O) from left to right for one motif; repeat horizontally for multiple tulips.
Key (per motif, 10 squares wide): number squares 1–10 left→right.
Row mapping (Row 1 is the foundation mesh at the bottom):
- Row 1 (stem base): O O O O O O O O O O (all open)
- Row 2: O O O O O O O O O O
- Row 3 (stem starting): O O O O F O O O O O (single filled near center)
- Row 4 (leaves forming): O O O F F F O O O O
- Row 5 (widen bulb): O F F F F F F O O O
- Row 6 (bulb more filled): F F F F F F F F O O
- Row 7 (bulb top): F F F F F F F F F O
- Row 8 (petal starts): F F F F F F F F F F
- Row 9 (petal shaping): F F F F F F F F F O
- Row10 (petal tip detailing): O F F F F F F F O O
- Row11 (highlight gaps): O O F F F F F O O O
- Row12 (top highlights): O O O F F F O O O O
Note: The mapping above is a simple verbalized tulip motif — adjust filled/open squares for your desired shape. The “F” squares are worked as (dc, ch2, dc) and “O” squares are worked as dc into ch2 spaces from previous row.
How to work a filet row
- Each row begins with ch3 (counts as first dc). For each planned square:
- Open square: dc into the ch2 space of previous row, ch2 (counts as space).
- Filled square: (dc, ch2, dc) in the same ch-2 space (fills the square).
- At the end of the motif row, finish with dc into the top of turning ch where needed. Turn and follow next row pattern.
Example beginning rows (working instructions)
- Foundation: ch (multiples) + 3 for turning. Row 1: dc in 5th ch from hook (counts as dc + ch2 space), ch2, sk 2 ch, dc in next ch across. Turn.
- Row 2: ch3 (counts as dc), for each square position follow O or F rule: if O → dc in ch2 space and ch2; if F → (dc, ch2, dc) in that ch2 space. Continue across. Turn.
- Continue following the verbal mapping above for 12 rows to complete one repeat. Then repeat rows vertically for multiple motif heights.
Overlay filet alternative (surface tulip)
If filet counting feels tedious, work a neutral mesh background (open filet, e.g., a grid of dc + ch2 spaces) and then overlay the tulip shape using tapestry/overlay technique: surface dc, surface slip stitch, or surface crochet to “draw” the tulip on top of the mesh. This allows richer colorwork (shading, gradient yarns for tulip heads) and simpler counting.
Border
Round 1: sc around blanket, 3 sc in corners.
Round 2: sc around evenly to tidy.
Round 3: lacy picot edge: sc 5, ch3 picot, sc 5 spaced to create little points OR scallop shells (7 dc shells) for a bolder edge.
Tips & Variations
- Use stitch markers at motif repeat edges to help counting.
- For painterly effect, use self-striping yarn for tulip heads or overlay with gradient yarn.
- Make a narrow runner with a single row of tulips across for a table runner.
Finishing
Weave ends, block gently to square motifs, and press lightly (follow yarn label).
Printable summary: Work filet mesh; follow 10×12 motif mapping for tulips (fill squares for tulip shape); repeat across width and length; border with sc + scallop/picot; block and finish.
Conclusion
Floral blankets are a joyful way to add seasonal color and texture to your home or to give as heartfelt gifts. This pack gives six distinct approaches:
- Ladybug & Flower granny squares — playful applique patchwork.
- Flower Garden Blanket — continuous row of mesh + puff flowers for airy throws.
- Strawberry Daisy Blanket — textured summer baby blanket with cute appliqués.
- Caron Flower Patch Throw — medallion patchwork for bold, quilt-like effect.
- Mary Maxim Blooms Baby Blanket — vintage soft baby blanket with clustered blooms.
- Tulip Afghan — elegant filet or overlay filet tulips for a refined afghan.
Quick publishing checklist (for each pattern)
- Add a materials table with yarn brands and exact yardages if you test knitting/crocheting with specific yarns.
- Include at least 6–10 photos (close-ups of motifs, in-progress shots, full blanket) for clarity and pinability.
- Add a printable PDF option with a single-page summary, materials list, and pattern license (e.g., “For personal, non-commercial use. Please link back when sharing photos”).
- Consider adding a difficulty/time estimate and finished measurements for multiple sizes (baby, lap, throw, afghan).