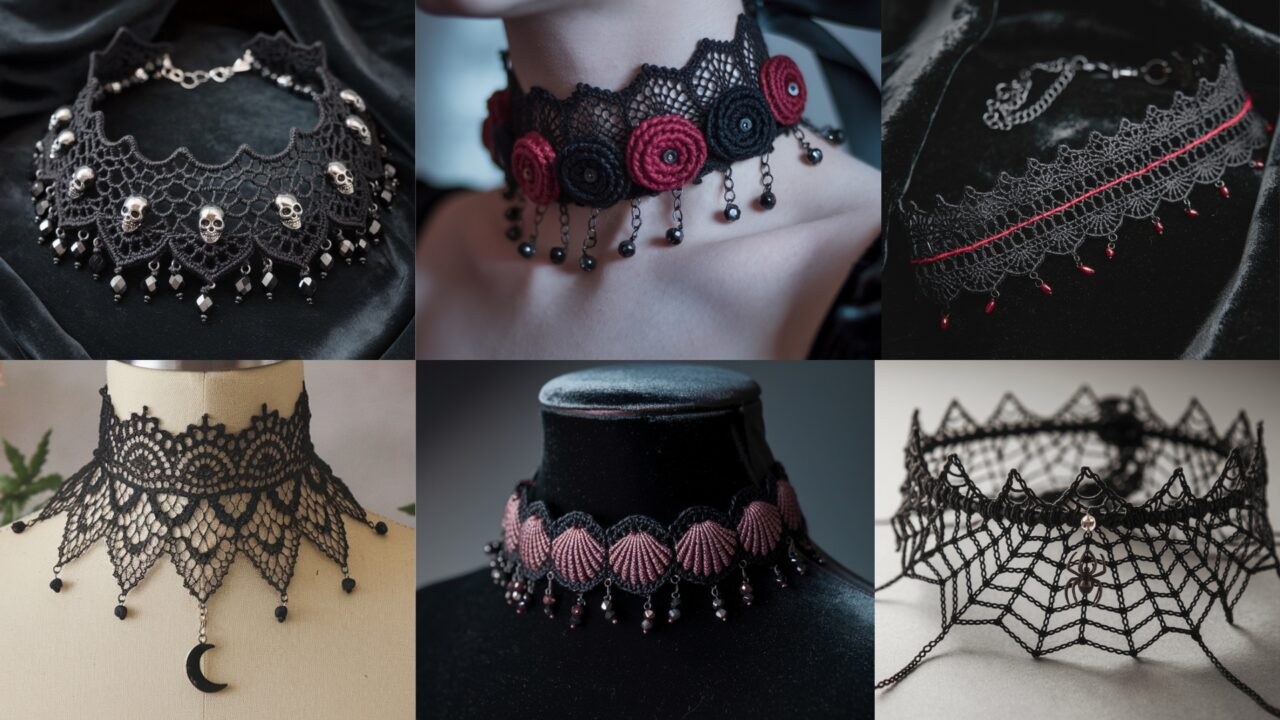
Chokers are tiny fashion tyrants: they either define your whole outfit or disappear into the background. Crochet gives you full control over textures, motifs, and hardware, so the result can be delicate, chunky, spooky, or elegant. These six gothic choker patterns range from minimalist-lace to bead-laden skull glam — perfect for beginners with patience and experienced makers who want a quicker reward.
General rules before you start (do not skip)
- Use cotton, mercerized cotton, or a smooth cotton-blend yarn for crisp stitches and good drape. For sturdier chokers that hold shape, use fingering to DK weight yarn and a correspondingly small hook (2.0–3.5 mm). For a chunkier look, use worsted.
- Measure the neck you’re making the choker for. Chokers usually sit snug at 31–36 cm (12.5–14 in) but people like different fits — give the wearer +1–2 cm for comfort. Add hardware length (chain/closure) into final measurement.
- Use a stitch marker and a tapestry needle. For beadwork, pre-string beads on the yarn if you plan to crochet them in. For heavier beads or metal skulls, sew them on after crocheting.
- Abbreviations (US): ch = chain, sl st = slip stitch, sc = single crochet, hdc = half double crochet, dc = double crochet, tr = treble crochet, picot = ch3 sl st base, sk = skip, st(s) = stitch(es), rep = repeat.
Now dive in.
1. Crochet Just-Got-Stitched-Up Choker Pattern
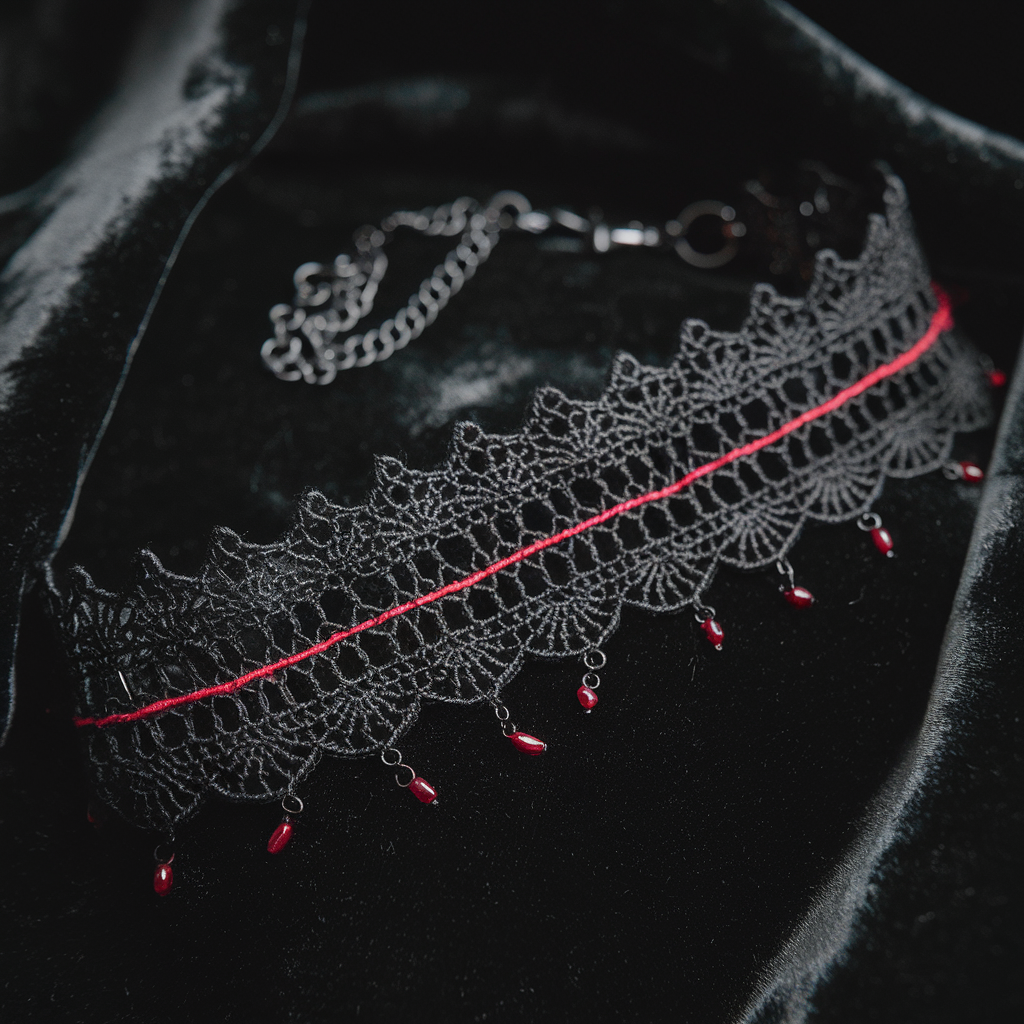
Modern gothic: think stitched motif, laddered holes, little faux-sutures in decorative contrast. Subtle menace.
Skill level: Confident beginner
Finished size: adjustable — base strip length ~32 cm for small + hardware (adjust)
Materials
- Mercerized cotton fingering or DK weight (MC black)
- Contrast thread (CC) — red embroidery cotton or thin yarn for “stitch” detail
- Hook 2.5–3.5 mm depending on yarn
- Tapestry needle, stitch marker, small lobster clasp + 3–4 cm chain (or ribbon)
- Optional tiny red seed beads for accent
Gauge (not critical)
- ~18–22 sc = 4 in in fingering on 2.5–3.0 mm hook. Adjust counts for circumference.
Pattern overview
Make a narrow lace strip with ladder holes; finish edges with picots; add small horizontal “stitches” of red thread — either surface embroidered or crocheted chain slanted across holes.
Step-by-step
Base band
- Ch (measure) to produce a chain that, when joined, is ~2 cm shorter than target neck circumference (we’ll add hardware and a bit of give). Example: for a 32 cm finished choker, chain to make 30 cm circumference in chains. Join careful — don’t twist. Mark beginning.
- Round 1: ch1, sc in each ch around. Join. This makes a firm base.
- Rounds 2–4: ch1, sc in BLO around (back loop only) to create a subtle ridge and flexibility. Join each round.
Ladder lace repeat
4. R5 (lace): ch4, sk 2 sts, sc in next st repeat around. Join. This creates small ladder spaces.
5. R6: ch1, sc in each st and into chain spaces to secure (sc into each ch4 loop across: you’ll make 4 sc into each ch4 loop), join.
6. R7: ch1, sc in next 3 sts, ch3, sk 1 st repeat around. Join. (Creates stagger). Repeat R6–R7 for 2–3 pattern repeats depending on choker width you desire. Two repeats = narrow; three = slightly taller band.
Edge picot (both sides)
7. On final round, work a tiny picot scallop along both top and bottom edges: sc across to edge, ch3, sl st in first ch to make picot, continue sc — this gives a slightly decorative, vampy edge.
Stitch detail
8. With red CC thread, either:
- Surface stitch: Thread needle, bring up through front at one ladder hole edge, make a horizontal straight stitch across to the opposite loop edge and secure; repeat spaced irregularly for “stitches.”
- Crocheted stitch accent: Using CC and small hook, ch6, sl st across a section making a small bar, then secure both ends to create a raised faux-suture.
- Add tiny red seed beads sparingly on a few “stitches” for blood-dot accents — threaded onto CC before sewing so bead slides onto loop easily.
Closure
10. At the back, attach lobster clasp to one end and a 2–3 cm chain to the other for adjustability. Alternatively sew on ribbon ties.
Finish
11. Weave in ends, block lightly by pinning flat and spritzing; let dry.
Styling notes
- Very wearable with black lipstick and a leather jacket. Makes a great subtle Halloween accessory or daily gothic accent.
2. Crochet Stylish Lace Choker Pattern
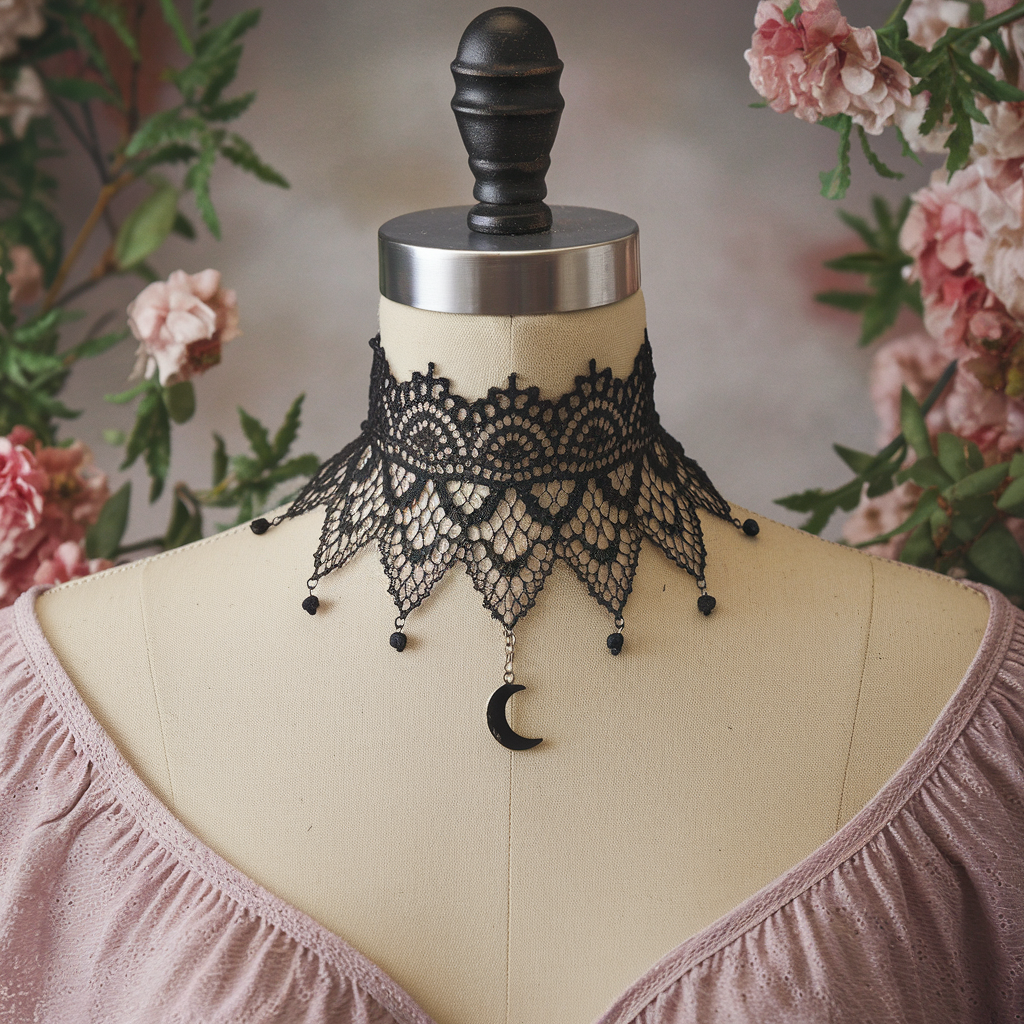
Victorian lace vibe — delicate, elegant, and absolutely gothic when made in black. Works for both formal and casual looks.
Skill level: Intermediate
Materials
- Mercerized cotton lace-weight or fingering (MC black)
- Hook 1.75–2.75 mm depending on desired density
- Tapestry needle, small jump rings, lobster clasp, optional ribbon lining for comfort
Design idea
A narrow lace panel with small scallop arches and a central motif repeat. Ends are finished with tidy picot tabs for button or clasp attachment.
Step-by-step (chart-free written repeat)
Foundation
- Make foundation-ch to desired interior circumference minus hardware (e.g., ch 72 for small; test gauge). Join into ring.
Round 1 (base rail)
2. ch1, sc around, join. This creates base rail for lace.
Lace motif (repeat rounds)
3. R2: ch5, sk 2 sts, sc in next st repeat around; join.
4. R3: sc into each ch5 loop as follows: (sc, hdc, 3 dc, hdc, sc) — this builds small arches (petals). Join.
5. R4: ch1, sc around working into backs of arches for structure; join.
6. Repeat R2–R4 twice to build lace height (you’ll have two rows of arches). For an intricate look, do three repeats.
Top decorative scallop
7. On final pass, create picot scallops: *sc in next 2 sts, ch3, sl st in base of ch3 to form picot, sc in next 2, sk 1 repeat — neat little frilly edge.
Edge finish & hardware
8. At each end of choker (back center), create a small tab: ch4, sc back along chain to base, sl st to join — make 2 tabs (one each side) to sew in jump rings or small buttonhole loops. Attach jump rings and lobster clasp & small chain.
Optional lining
9. For comfort, sew a thin satin ribbon along the inside.
Variation
- Add a tiny charm or pendant in center using a jewelry jump ring — black moon pendant looks good.
Styling
- Elegant with lace blouse, perfect for gothic formal events.
3. Crochet Spider Web Choker Pattern
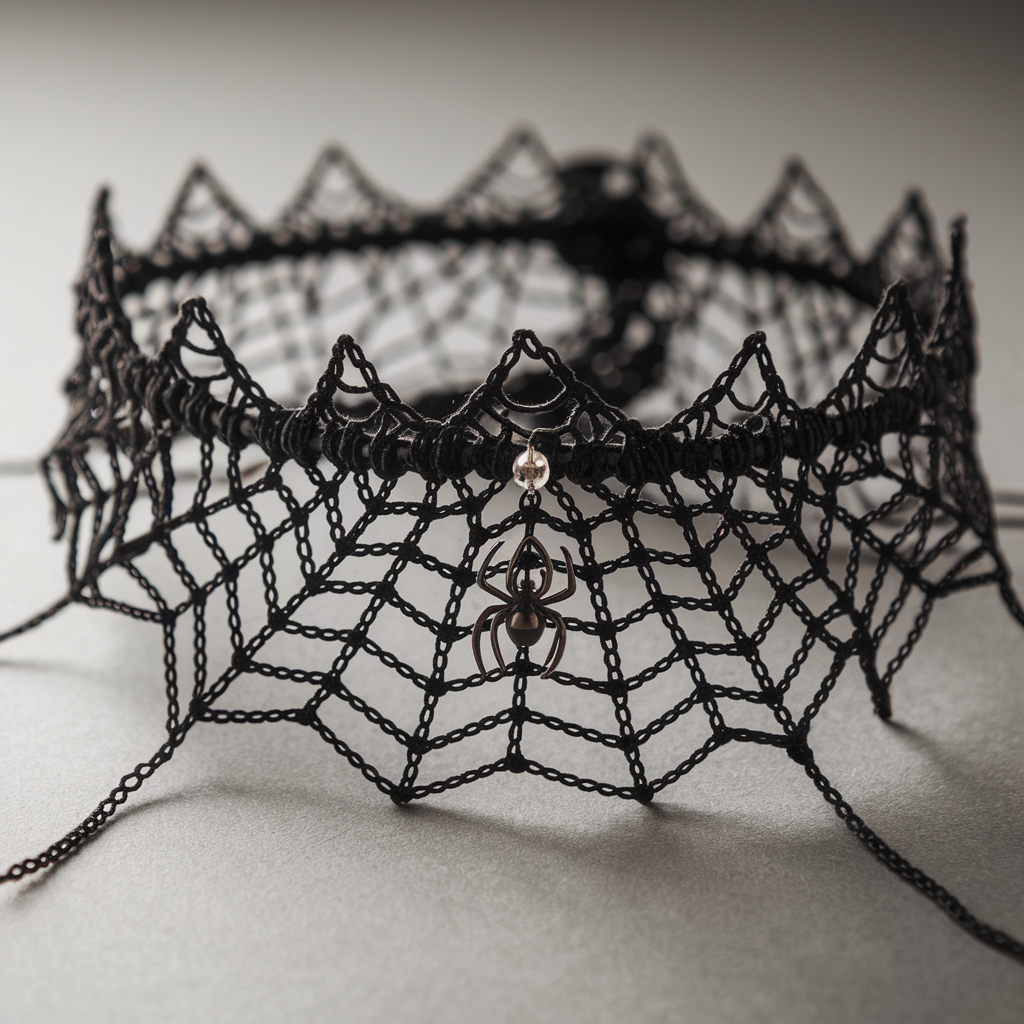
Delicate webbing, slightly aggressive aesthetic — add a small bead “dew” or a tiny metal spider charm for full effect.
Skill level: Intermediate
Materials
- Lace or fingering cotton (black)
- Hook 1.75–2.75 mm
- Small bead(s) for dew (optional), small spider charm, jump ring
- Clasp hardware
Pattern idea
Create a narrow circular band with radial chains that form a web overlay; join a little bead under one web intersection or attach a charm to the center.
Step-by-step
Band base
- Chain to make base ring (measure neck) and join. R1: ch1, sc around; join. R2–R3: sc in BLO for stable base.
Web frame
2. Decide web height: work 3 rounds of mesh for base verticals: R4: ch6, sl st in base at small intervals to form loops around (space loops evenly). These create radial supports for the web.
Create web spiral
3. Attach yarn at central point of loops you want as center (choose one spot as center). Work outward spiral: sl st into loop, ch3, sl st into next loop, ch3 — continue to create a spiraling chain across loops creating web lines. If you prefer stronger web, do ch3 and dc into sl st spots to form visible radial lines.
Weave the web
4. Using a second thread or same yarn, weave across radials with small connecting chains: ch4, sl st over one radial, ch4, sl st next radial forming hexagonal web segments. Continue until you get desired density.
Center & charm
5. Sew a tiny bead at the center as a dew drop, or attach a small spider charm with a jump ring to the central sl st loop.
Finish
6. Weave in ends, block gently to open the web shape. Add clasp or ribbon ties.
Notes
- Be careful — web can snag hair or clothing if too open. Tighten gauge if you want a neater, flatter web.
Styling
- Bold on its own; add a small pendant (black crystal) for an elegant focal point.
4. Crochet Gothic Choker with Skulls and Beads Pattern
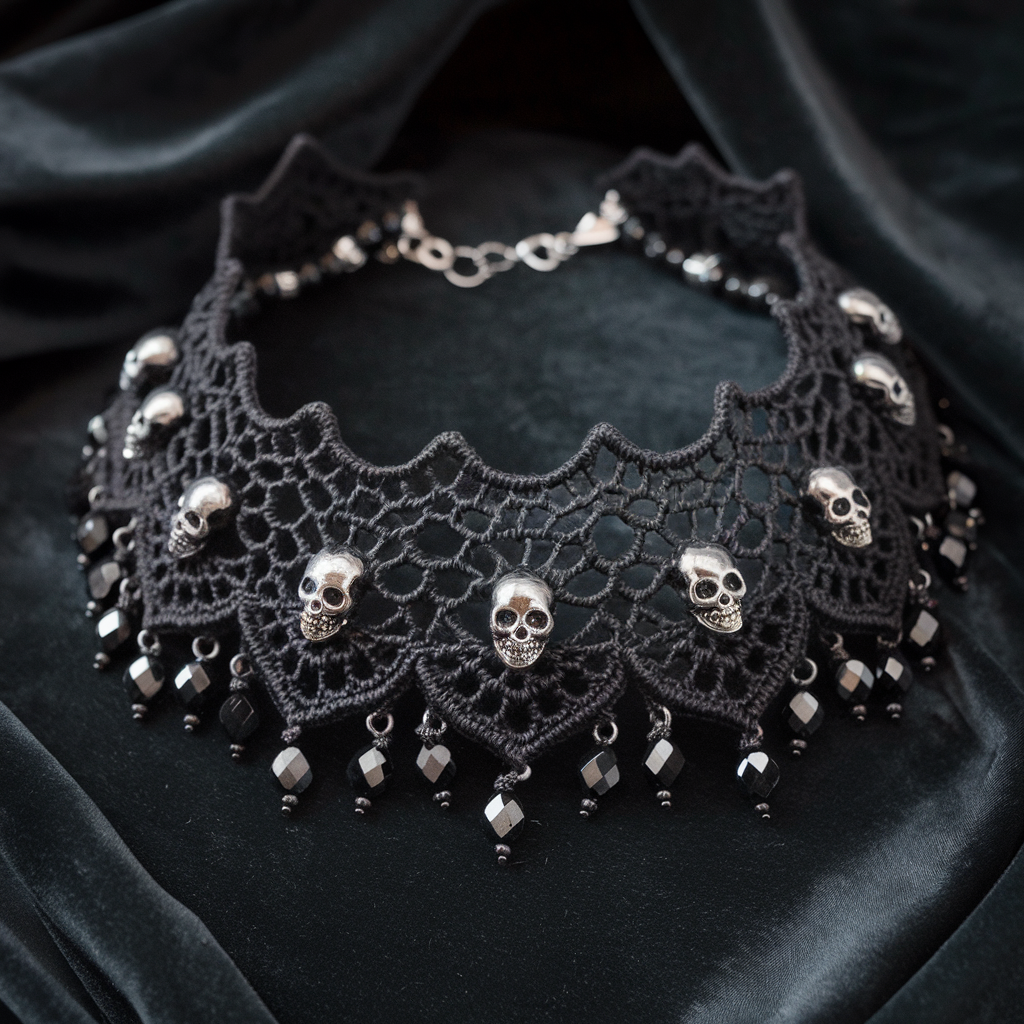
Full glam goth: openwork lace band with sewn-on tiny skull beads and faceted glass or onyx beads. Heavier, statement piece.
Skill level: Intermediate
Materials
- DK weight mercerized cotton or cotton/acrylic (MC black)
- Hook 2.75–3.5 mm
- Small metal skull beads (flat-backed or with holes) — 6–10 depending on choker length
- Faceted black glass beads or hematite seed beads — about 10–20
- Needle, strong beading thread or fine yarn, jump rings, clasp
Method
Crochet an elegant open scallop band that will accept sewn-on skulls at regular intervals; sew beads and skulls securely after crocheting.
Step-by-step
Base
- Chain foundation to neck minus 2 cm (account for clasp). Join. R1: ch1, sc around; join. R2: ch2, hdc in each st around; join.
Scallop motif
2. R3 (scallops): ch5, sk 2, sl st in next st repeat around; join to create looped scallops.
3. R4 (petals): Into each ch5 loop work (sc, hdc, 3 dc, hdc, sc) — gives full scallops. Join.
Reinforcement
4. R5: sc around base of scallops (on the inside) to create a flat underside and stable bead-sewing surface. Join.
Skull placement
5. Mark positions for skull beads across the front (space evenly — e.g., every 3rd scallop). With beading thread, sew skull beads onto the center of selected scallops. If skull beads have two holes, thread through both and secure inside the band so the skull faces outward. For flat-backed skulls, tack with strong glue plus thread sewing for security.
Bead accents
6. Sew small glass beads between skulls along the top of scallops or into the central dc of each scallop for glint. Use two threads through beads and tie knots on inside, hide knots in inner sc round.
Optional chain fringe
7. Add small hanging bead dangles between scallops: string 3–4 hematite or seed beads on thin chain or beading thread and attach to underside of scallop edge; they’ll dangle elegantly.
Closure
8. Use jump rings sewn through last st loops or use a picot tab and attach lobster clasp & chain.
Finish
9. Weave in ends; consider lining with soft black satin strip sewn inside for comfort against skin.
Tips
- Sew beads after wet-blocking the choker so it keeps shape.
- Test skull placement for comfort — metal beads can be sharp if not flattened.
Styling
- This one is statement jewelry. Wear it over high-neck lace or bare collarbones for maximum drama.
5. Crochet Shell Beading Choker Pattern
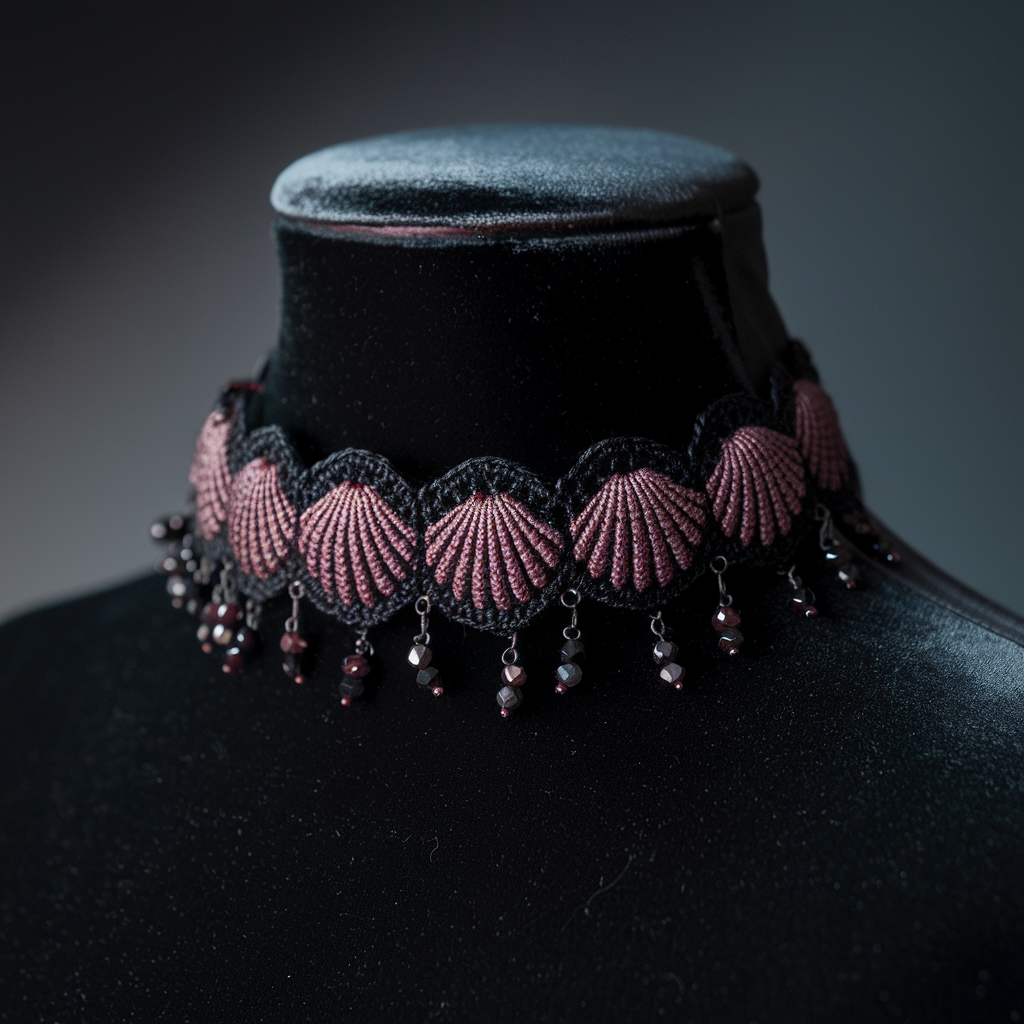
Interpretation: delicate shell-motif choker with beading — think little shell arches threaded with tiny seed beads, very fairy-goth.
Skill level: Confident beginner
Materials
- Fingering or lace-weight yarn (black)
- Hook 1.75–2.75 mm
- Tiny glass seed beads (matte black, hematite, or dark red) pre-strung or that can be threaded into yarn
- Clasp & jump rings
Construction idea
A narrow band of tiny shell motifs (5 dc shells) with a bead sewn into each shell or strung into the stitch when working the shell.
Step-by-step
Pre-string beads
- If you plan to have beads inside shells, string beads onto the yarn before you start (if bead hole allows yarn to pass).
Foundation
2. Chain to circumference minus hardware and join. R1: sc around; join. R2: hdc in BLO for slight rib.
Shell row
3. R3 (shells): ch2, sk 1, 5 dc in next st, ch2, sk 1, sc in next st repeat around. Each 5-dc cluster forms a tiny shell. If tossing beads into shells, slide a bead into the top of each shell as you finish cluster (slip bead in before closing final dc).
Reinforce
4. R4: sc around base and in-between shells to stabilize. If you want shells to fan outward, work R4 in FLO only.
Edge picots
5. Add picots across top for dainty points: sc across to top of shell, ch3, sl st back to base for picot — repeat.
Add bead drop (optional)
6. For a beaded fringe, attach single seed bead drops to center of shells using beading thread, 0.5–1 cm length.
Finish
7. Make small loop tabs at ends and attach clasp.
Styling
- Great against a black velvet choker worn with a lace collar. Soft goth, not funeral-chic.
6. Crochet Rose Choker Pattern
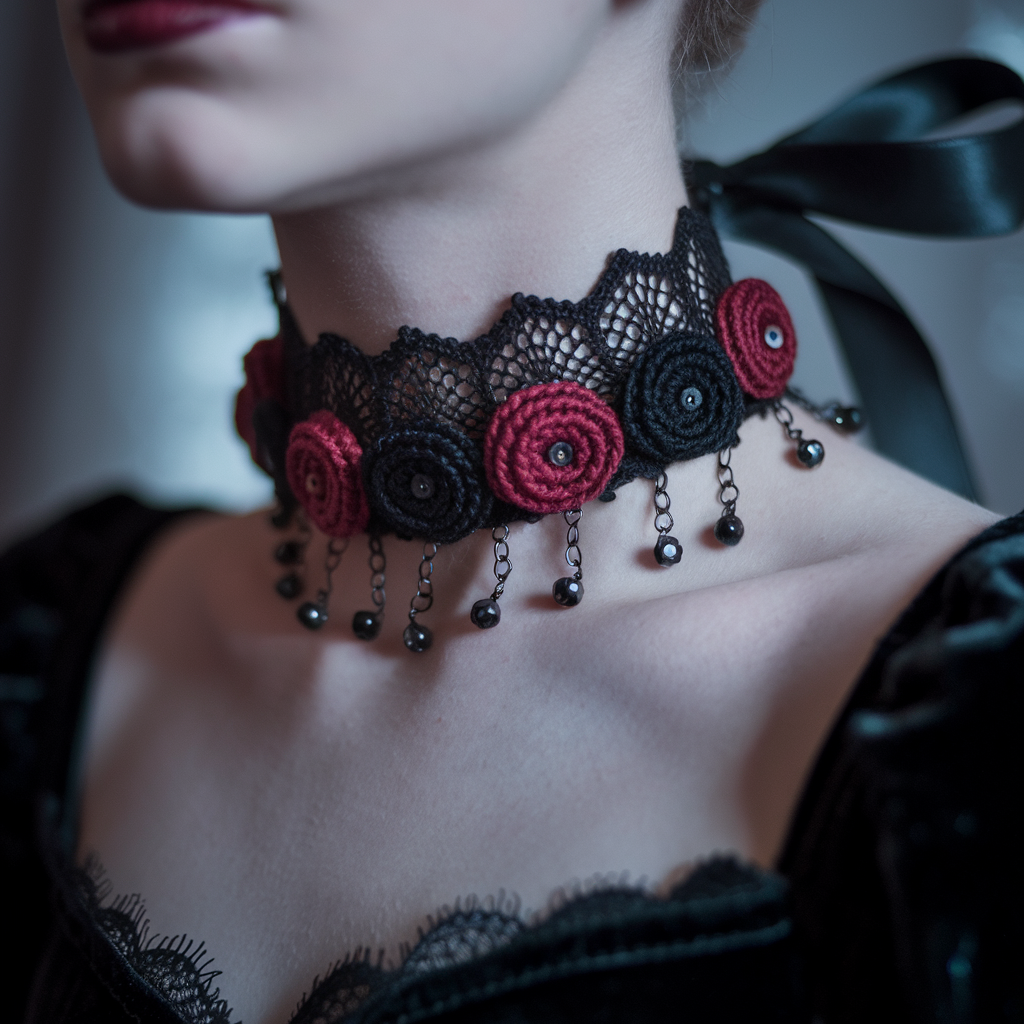
Romantic gothic: tiny crochet roses spaced along a lacy band. Very dramatic and wearable.
Skill level: Confident beginner / intermediate
Materials
- Fingering cotton (MC black) + optional red for roses (or black for monochrome goth)
- Hook 2.0–3.0 mm for roses; 2.5–3.5 mm for band
- Tapestry needle, small flat-backed buttons for rose centers (optional)
Pattern idea
Make small rolled roses (spiral strip method) and a lacy band that the roses are sewn to. Roses are made separately and sewn on.
Step-by-step
Rose (make 6–8 depending on choker length)
- Ch 20 (or 12–16 for smaller rose). R1: sc in 2nd ch from hook, sc across. Fasten and leave long tail. You have a narrow strip.
- Roll strip tightly starting at one end into a spiral, shaping petals as you roll. Stitch base of the spiral through layers using the long tail and secure every 3–4 mm so the rose keeps shape. Tuck tail and weave in. Optionally add a tiny bead or button in center. Repeat for desired number.
Lacy band
3. Chain base to neck circumference and join. R1: sc around; join. R2: ch4, sk 2, sc repeat to make small net. Join. R3: Into ch4 loops work small shell (sc, hdc, 3 dc, hdc, sc) — creates full petals look. Join. Repeat one more row of shells if you want a taller band.
Mount roses
4. Pin roses spaced evenly along the band (front center plus 2–3 on each side depending on taste). Sew roses securely to band with short, sturdy stitches. Reinforce centers so they don’t flop. If you used heavy beads, consider backing the area with a small felt disc for comfort.
Finish
5. Add picot edge or delicate chain trim along bottom if extra flair desired. Add clasp at ends.
Ribbon or closure option
- For adjustable gothic flair, use satin ribbon threaded through the uppermost net holes and tied at back into a neat bow — instantly romantic.
Styling
- Dramatic with velvet or lace choker; works for bridal goth or everyday vampire-chic.
Final finishing tips for all chokers
- Sizing check: Measure the wearer’s neck where the choker will sit. Add 1–2 cm for comfort. If using chain closure, measure band shorter and use chain space for adjustability.
- Comfort: Back fragile beads/metal pieces with a small soft felt disk or satin ribbon if metal rubs skin.
- Reinforcement: Sew heavy beads/skulls on with doubled beading thread and secure knots with a dab of clear jewelry glue to prevent slippage.
- Blocking: Block cotton chokers lightly on a flat surface with pins to open lace patterns — don’t overstretch.
- Hardware: Use stainless steel or plated jump rings/clasps to avoid tarnish. For true gothic aesthetic, antique brass or blackened metal looks good but can oxidize — back with ribbon if needed.
- Care: Hand wash in cold water, lay flat to dry. Beads and metal do not like dishwashers or rough detergent.
Conclusion
You don’t need to be a jewelry wizard to make a choker that turns heads. These six designs give you options: subtle stitched detail (Just-Got-Stitched-Up), Victorian lace, spider-web drama, skull-and-bead statement, dainty shell-bead minimalism, and a romantic rose row. Measure once, choose stable fiber, pre-string beads if you plan to crochet them in, and finish with sturdy hardware. If you want a single place to start: make the lace choker first — it’s forgiving, blocks beautifully, and gives you a quick win.