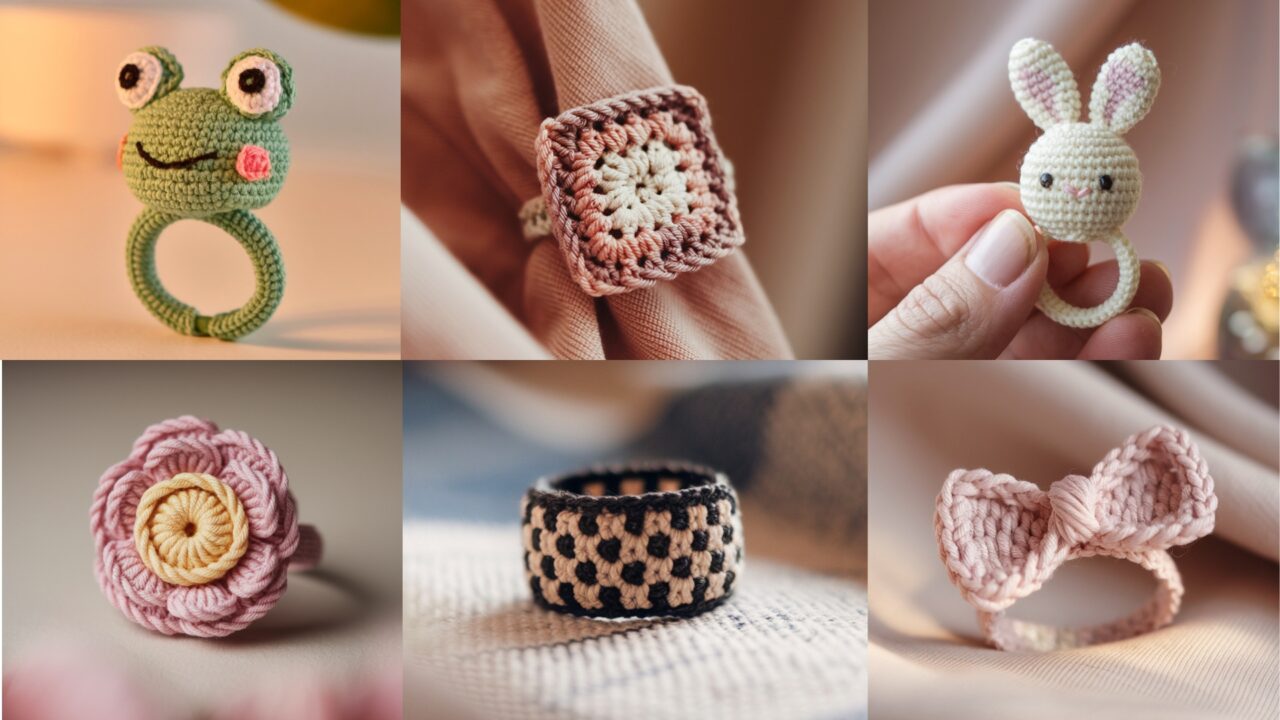
Tiny, quick, and endlessly charming — crochet rings are the perfect beginner-friendly accessory. They’re small so they finish fast, use very little yarn, make great gifts, and are perfect for using scrap yarn. This post contains six approachable crochet ring patterns with very detailed, step-by-step instructions, helpful sizing tips, and finishing ideas for wearing or selling. All patterns use US crochet terms and are written for a basic ring built either around a metal/plastic adjustable ring base or a small elastic loop. If you’re new to amigurumi-style mini-work (tiny magic ring, tight tension), I’ll lead you through it.
Before we start: work a tiny test ring to check size — rings are very sensitive to yarn weight and hook choice. If you’d like, I can convert any one pattern into a printable single-page card.
Quick notes (applies to all patterns)
- Gauge / yarn & hook: Use fingering/sport/DK weight yarn depending on desired thickness. Typical pairing: fingering or sport with a 2.5–3.5 mm hook for delicate rings; DK with 3.5–4.0 mm hook for chunkier rings.
- Ring base options:
- Adjustable metal ring base (recommended): small open metal ring used for jewelry; crochet around it.
- Hair elastic / stretch ring: small 1–1.5″ elastic loop; crochet over it for flexible fit.
- Crochet band only: a crocheted band tied to size (less durable but fully handmade).
- Safety: For toddler/kid rings avoid metal with sharp edges and use yarn only; supervise small children.
- Abbreviations (US): ch = chain; sl st = slip stitch; sc = single crochet; hdc = half double crochet; dc = double crochet; inc = 2 sc in same stitch; dec = sc2tog (invisible decrease); MR = magic ring/circle; st(s) = stitch(es); F/O = fasten off.
- Sizing: A finished ring band should measure ~1.5–2.0″ in circumference for small rings (size adjustable). Make a swatch and measure, or wrap your yarn-covered ring base around a ring mandrel or finger to check fit.
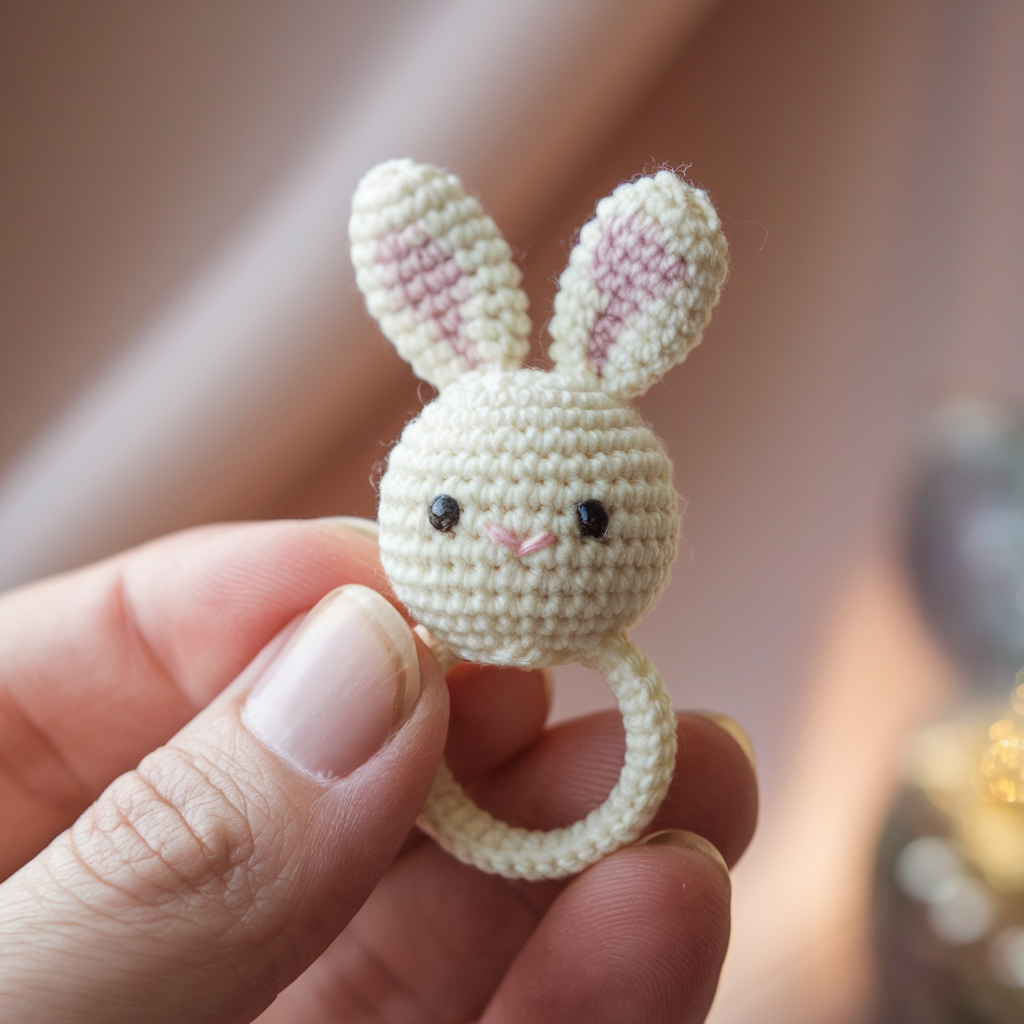
1. Crochet Bunny Ring Pattern
Skill level: Beginner–Easy
Style: Tiny bunny head on a slim band — super cute as a gift or charm.
Materials
- Fingering or sport yarn in main color (bunny) and accent (pink for inner ear).
- Hook: 2.5–3.5 mm.
- Small elastic ring base (1–1.25″ internal circumference) or metal ring base.
- Yarn needle, stitch marker, small amount of stuffing (optional), embroidery thread for face.
Finished size
- Bunny head ~0.6–0.9″ across (depends on yarn); band fits approximate ring sizes — see sizing tips.
Abbreviations & stitches used
- MR, sc, inc, dec, sl st, ch
Step-by-step — head (worked in rounds)
- Magic ring: MR, work 6 sc into ring. (6) — pull tight.
- Round 2: inc in each st around. (12)
- Round 3: sc, inc repeat around. (18)
- Round 4: sc around. (18) — if you want a slightly taller head, work 1–2 more rounds of sc.
- Round 5 (begin shaping): sc, dec repeat around. (12)
- Stuff lightly with a tiny pinch of fiberfill (optional — many tiny rings look best slightly flat).
- Round 6: dec around to close (6). F/O leaving 6–8″ tail for sewing and attaching to band/base. Close hole and weave tail inside.
Ears (make 2)
- MR, 6 sc into ring. (6)
- Inc around (12).
- sc around for 1 rnd (12). F/O leaving tail for sewing. Flatten ear and sew to top sides of head. Option: work one smaller inner ear in pink: MR 4 sc, F/O short tail, sew onto center of ear.
Face
- With a needle and black embroidery thread, stitch two tiny eyes (French knot or small straight stitches) and a small “V” nose with pink or brown thread. Keep features tiny and centered.
Band (two options)
A. Cover a metal ring base:
- With MC yarn attach with sl st to ring base, then sc evenly around the metal ring until it’s fully covered (3–4 rounds). Join and F/O. Sew head to top center using long tail; weave ends.
B. Crochet adjustable elastic band:
- Ch 6 (fit to elastic circumference), join into a ring with sl st, sc 1 round over ring and work 2–3 rows of sc until band width is 4–6 mm. Slip the bunny on top and sew.
Finishing
- Weave in all tails inside band. Trim any stray fuzz. Lightly steam-block (avoid metal) to shape ears.
Variations & tips
- Make sleeping-bunny by embroidering closed eyes.
- Use fuzzy yarn (eyelash) for plush micro-bunny — but reduce hook by 1 size.
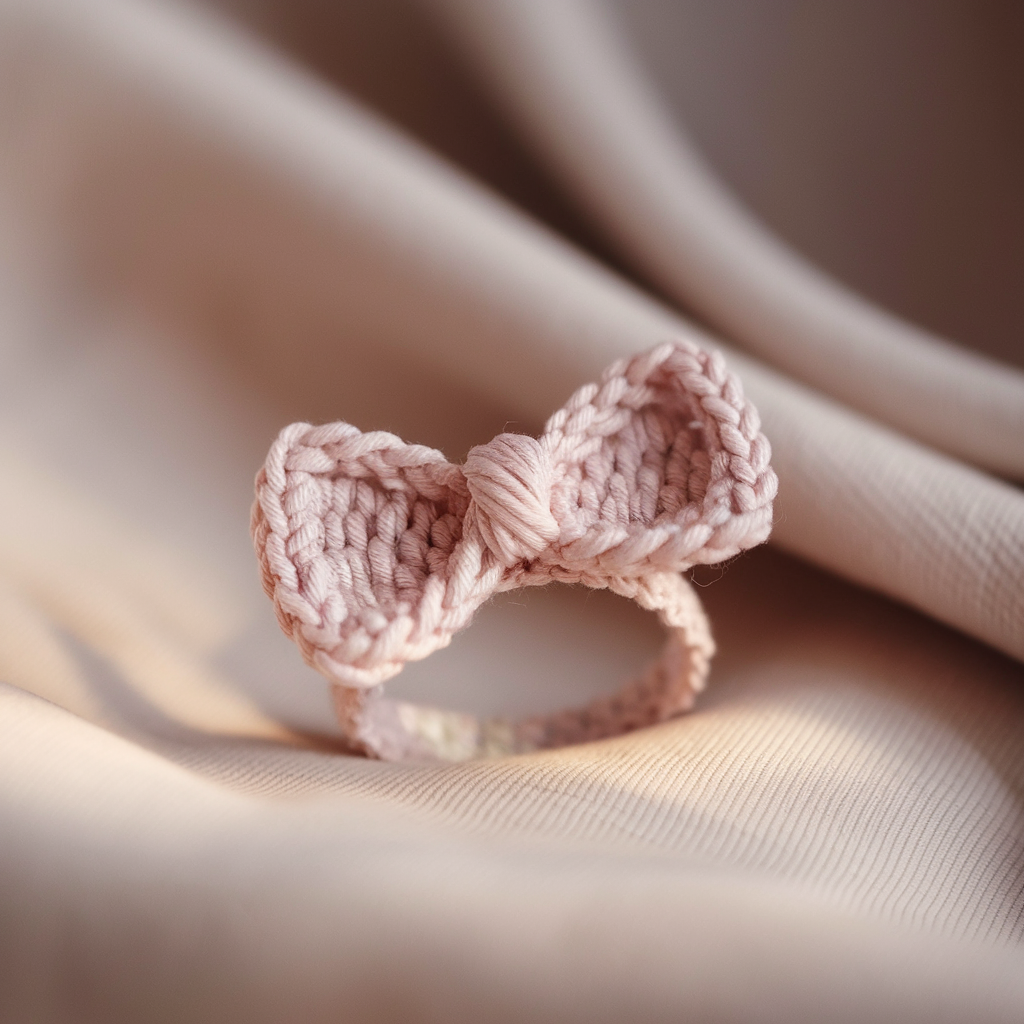
2. Crochet Bow Ring Pattern
Skill level: Beginner
Style: Petite bow on a slim band — classic and versatile.
Materials
- Fingering or DK yarn. Hook 2.5–3.5 mm.
- Ring base or elastic. Yarn needle.
Finished size
- Bow length ~0.75–1″ and band as desired.
Abbreviations
- ch, sc, sl st, hdc
Step-by-step — bow
- Band: Cover ring base as in Bunny pattern (option A) or make crocheted band (option B described above). Leave the band attached or make separately and attach later.
- Make the bow body: Ch 14 (or enough to make desired bow length). Row 1: sc in 2nd ch from hook across (13 sc). Turn. Row 2–4: ch 1, sc across. F/O leaving long tail for wrapping. You now have a small rectangle ~¾–1″ long.
- Shape the bow: Fold rectangle in half widthwise to make the bow shape; pinch the center and wrap the long tail tightly several times around the middle to secure the bow form. Tie off on the back and weave the tail inside. Optionally attach a small contrasting center by making a short ch 6, sc across 2 rows, wrap once and hide tail.
Attach to band
- Sew bow to top center of ring band with hidden stitches. Reinforce with 2–3 passes to keep it secure if the ring will be worn frequently.
Styling ideas
- Use metallic thread for the wrap for a festive look.
- Make a double-layer bow by stacking a smaller rectangle on top before wrapping.
3. Crochet Flower Ring Pattern
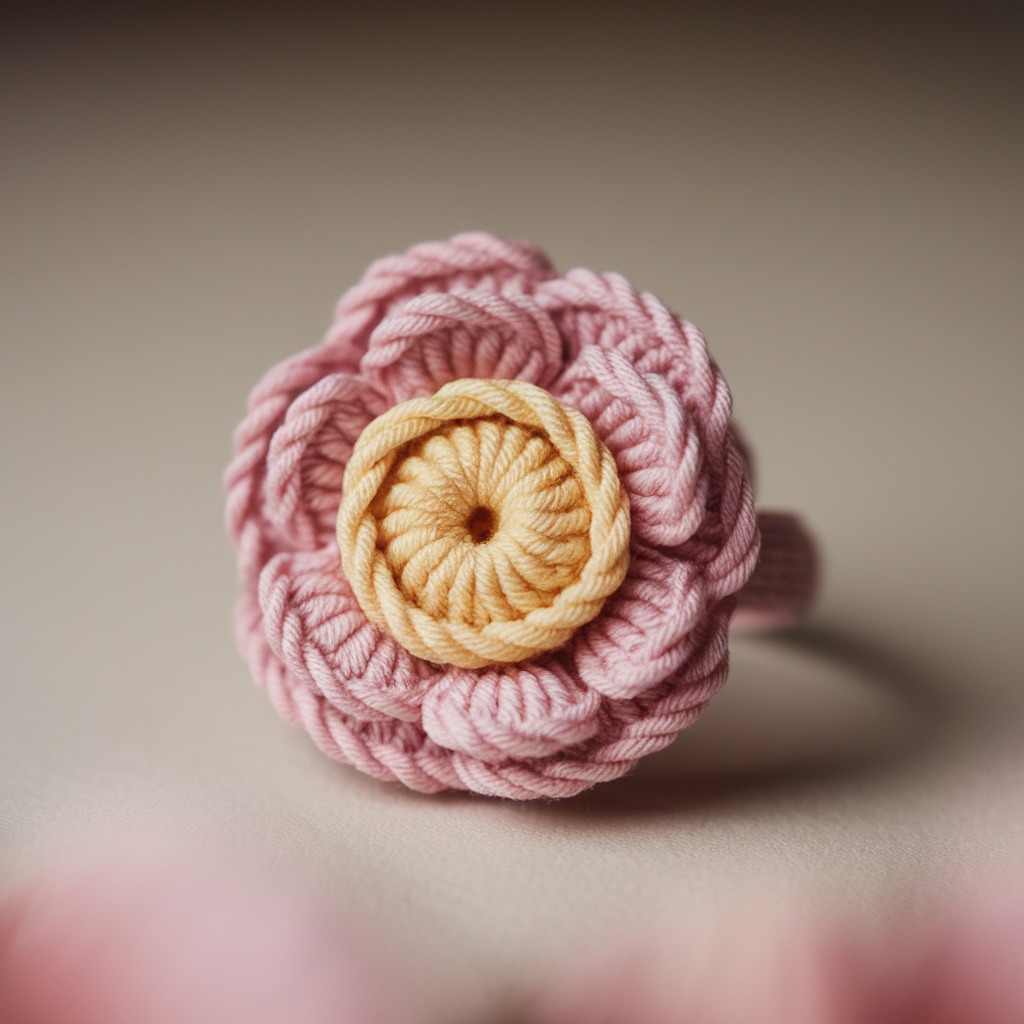
Skill level: Beginner–Easy
Style: Little layered flower; perfect use for bright scrap yarn.
Materials
- Two contrast colors (center + petals). Hook 2.5–3.5 mm. Ring base or elastic. Yarn needle.
Abbreviations
- MR, sl st, ch, sc, hdc, dc
Step-by-step — small layered flower
Center (color A):
- MR, ch 1, 6 sc into ring. Join with sl st. F/O color A leaving tail for sewing.
Petal round (color B):
2. Join color B into any st: ch 2, (hdc, dc, hdc) all in same st, sl st into next st — repeat around to form 6 tiny petals. Join and F/O leaving tail to sew.
Optional second petal layer for 3-D look:
3. Work a second round of petals behind the first: join color B at back loop of initial round and repeat larger petals (ch 3, [dc, tr, dc], sl st). This creates depth.
Attach to band:
- Sew through the underside of the flower and through band base. Hide tails inside the band. For more security on a metal base, stitch several passes capturing the metal under the flower (but avoid sharp edges).
Variation: Add bead or pearl center by sewing a small bead into the flower center for elegance (not for children).
4. Crochet Small Granny Square Ring Pattern
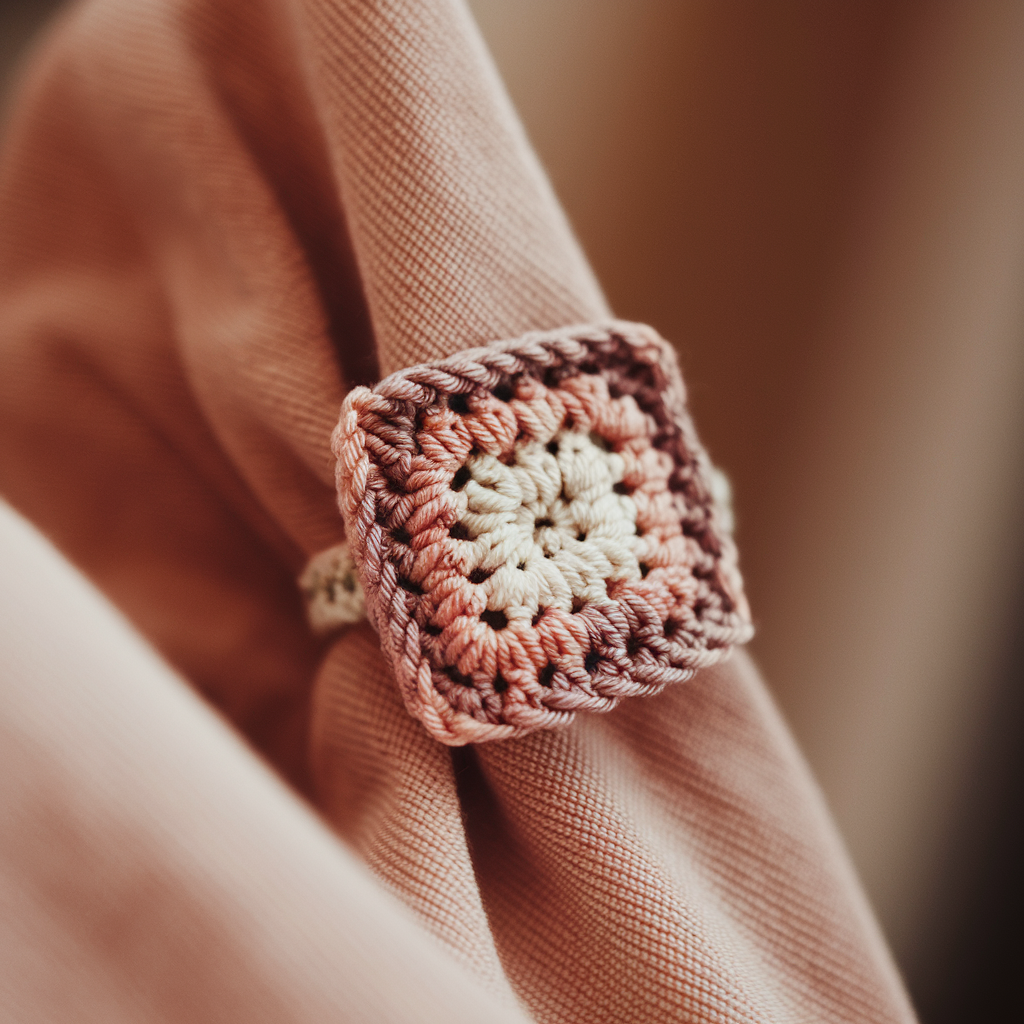
Skill level: Beginner–Easy
Style: Tiny granny square used as ring focal — great for boho stacks.
Materials
- Fingering or sport yarn in 2–3 colors. Hook 2.5–3.5 mm. Ring base or elastic.
Abbreviations
- ch, sl st, dc, tr, sc
Finished size
- Square approx 0.6–0.9″ depending on hook/yarn.
Step-by-step — mini granny square
- Center: MR, ch 3 (counts as dc), work 2 dc into ring, ch 2, 3 dc in ring, ch 2 repeat 3 more times for 4 clusters total. Join to top of ch 3. (4 corner clusters) F/O and weave ends. You have a little granny block.
- Round 2 (optional for bigger square): Join color 2 in any corner space: (3 dc, ch 2, 3 dc) in that corner space = corner; along side between clusters work 3 dc; repeat around. Join and F/O.
- Attach to band: If using a metal ring base, cover the base first (sc rounds) and then sew the granny square onto the top center. Alternatively make the band by chaining and joining into ring and slip-stitching across to the square back and around so the square sits attached from the last round.
Variations
- Make a tiny heart granny by changing center to a small cluster heart; use tonal colors for subtlety.
5. Crochet Mosaic Ring Pattern
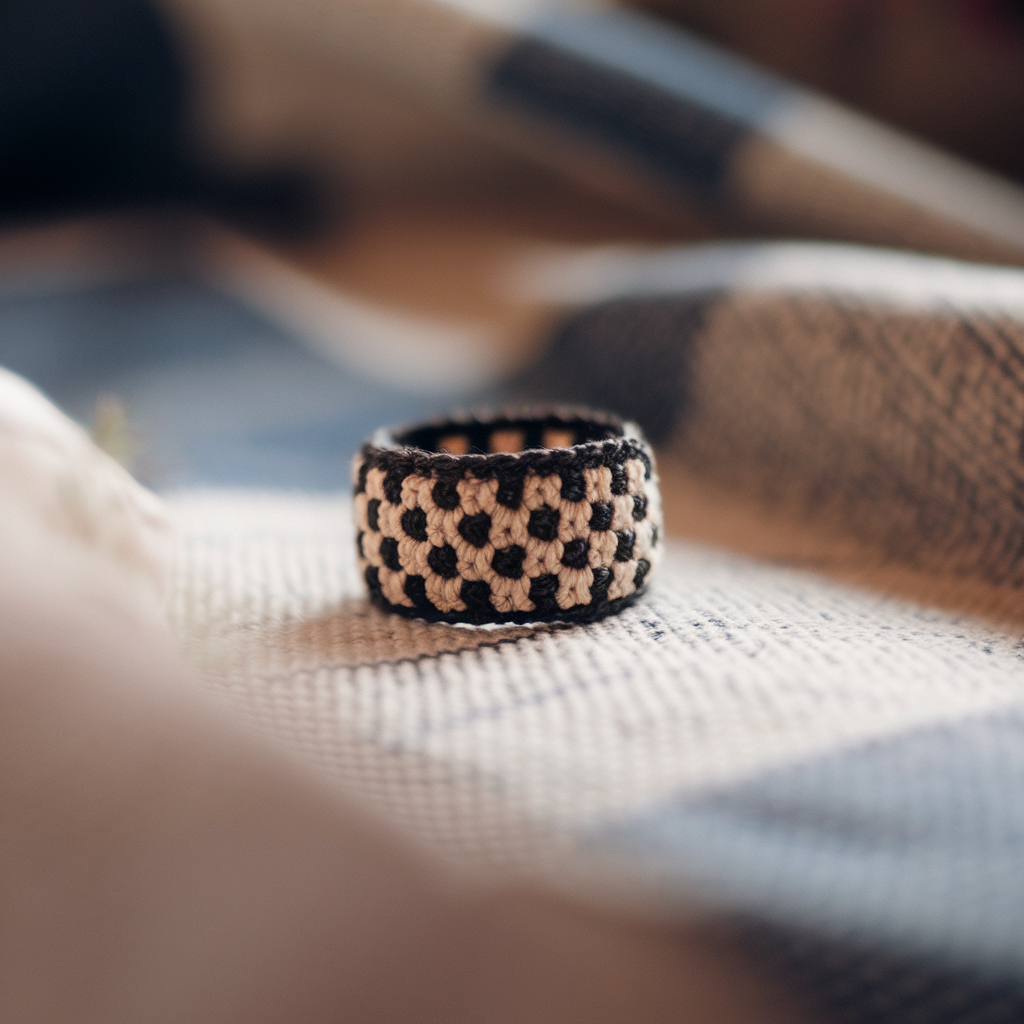
Skill level: Intermediate-Easy (color mosaic technique but on mini scale)
Style: Graphic tiny tile band using two-toned slip-stitch mosaic. Looks elegant and modern.
Materials
- Two contrasting colors (A = background, B = motif). Fingering yarn recommended. Hook 2.5–3.0 mm. Ring base (metal or elastic).
Technique notes
- Mosaic on small rounds uses slip stitches and working into previous round’s stitches. Because rings are tiny, we’ll keep a 2-round mosaic motif.
Step-by-step (mini mosaic tile)
- Make base band: Cover ring base with MC color (A) 1–2 rounds of sc so you have a base for colorwork. Don’t join tightly — keep flat.
- Round 1 (background A): sc around in A if needed to prepare a row of stitches.
- Round 2 (mosaic motif with color B): To create a simple 4-dot motif: sl st in next st with color B, skip 1 stitch in A, sl st in next with B — repeat for evenly spaced motif stitches. For a small checker effect use sl st B, sc A pattern around. Work slowly; the effect appears from contrast.
- Finish: Fasten off and weave ends. The mosaic is subtle on a ring but creates a chic, modern look when using a high-contrast combo (black + cream, navy + gold).
Tips
- Keep the tension consistent; slip-stitch color changes can pull fabric—don’t pull tightly.
- For more graphic patterns, chart a 6–8 stitch repeat before you start and work with stitch markers.
6. Crochet Cute Frog Ring Pattern
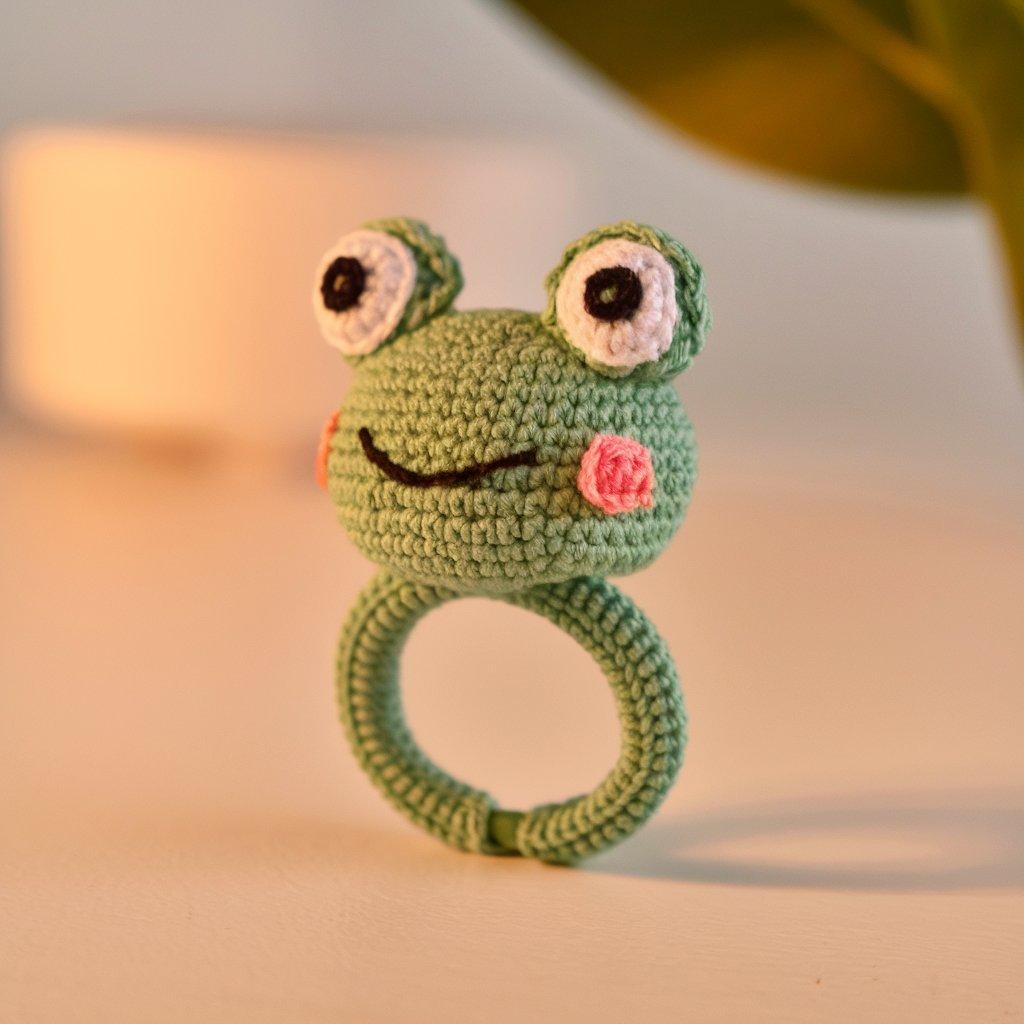
Skill level: Beginner–Easy (tiny shaping + embroidery)
Style: Little frog face with big eyes — playful and adorable.
Materials
- Green (main), white (eyes), black (pupil) yarn in fingering or sport. Hook 2.5–3.0 mm. Ring base or elastic. Yarn needle.
Finished size
- Frog face ~0.7–1.0″ across depending on yarn.
Abbreviations
- MR, sc, inc, dec, sl st, ch
Step-by-step — frog head & eyes
Head:
- MR, 6 sc into ring. (6)
- Inc in each st (12).
- sc, inc around (18).
- sc around 1 rnd (18). F/O leaving tail for attaching to band. Flatten slightly.
Eyes (make 2):
- With white: MR, 6 sc in ring. (6)
- sl st around and F/O leaving tail. Using green, make a small green cap behind the white by joining green and making 6 sc around the outer back loops if you want the bulging look. Attach the white eye to top of frog head with a few sew stitches.
- Embroider tiny black pupils with a small French knot or short stitched dot in the center of each white eye.
Mouth & nostrils:
- With black or darker green yarn, embroider a small curved smile and two tiny nostril dots above mouth.
Band & assembly:
- Sew frog face to the band. Reinforce with extra passes for durability.
Variations
- Add little crocheted blush spots (tiny pink circles) for cuteness.
- Make a tiny leaf behind frog head as a backdrop: ch 6, sc back across, sc 1 row, shape into leaf and sew behind frog.
Finishing Tips for All Rings
- Weave ends neatly: For durability, thread the tail through a tapestry needle and weave through multiple rounds on the inside of band. Knot only if necessary.
- Secure on metal bases: If your ring uses a metal base, sew through the band and slide stitches under the metal edge when possible, then hide tail. This reduces the chance of the piece sliding off.
- Adjust fit: If the ring feels loose, add a round of hdc to band to widen slightly and create friction; if too tight, remove a round or use a slightly larger elastic base.
- Care: Hand-wash gently and reshape; dry flat. Avoid bleach/harsh detergents that fade yarn color.
- Selling tips: Sell rings in sets (3 stackable rings) — buyers love stacks. Offer different colorways and provide a size guide: include an internal circumference measurement or recommend ring size (S, M, L) with finger circumference suggestions.
Troubleshooting & FAQs
- Stuffing shows through? Use tighter tension (smaller hook) or skip stuffing on tiny heads — flatten slightly for a clean look.
- Band twists or gaps on metal rings? Work even scs and check tension; slip-stitch the first round to stabilize before adding more rounds.
- Eyes falling off? Embroider eyes for toddler-safe rings or securely sew/bead with strong thread and hidden back knots.
Conclusion
There you have it — six charming, beginner-friendly crochet ring patterns: Bunny, Bow, Flower, Small Granny Square, Mosaic, and Frog. Each pattern is designed to be quick to make, flexible in materials, and easy to customize for different aesthetics (cute, minimalist, or statement). Rings are wonderful practice projects: they build confidence with magic rings, tight small stitches, tiny shaping, and finishing skills that carry over to amigurumi and jewelry design.