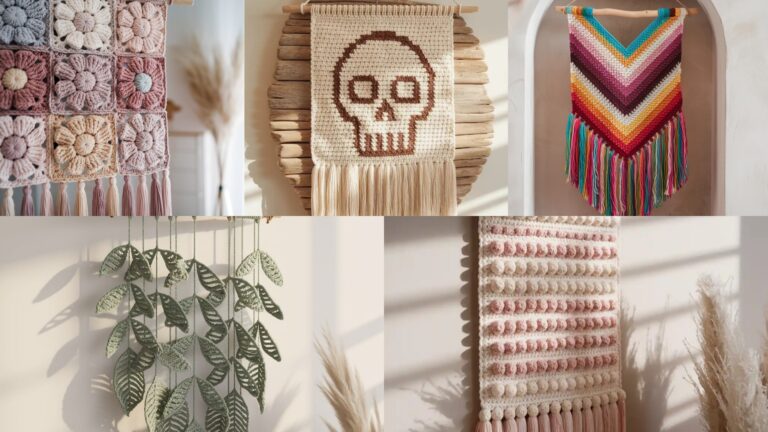
Coasters are the unsung heroes of styling a table — tiny accents that protect surfaces and give a pop of personality to your home. They’re also perfect for stash-busting, fast to make, and wonderful little gifts. In this post you’ll find seven detailed coaster patterns (from festive snowflakes to sunny citrus slices) written so a beginner with basic stitches can follow along — but each pattern also includes ways to step up the design for more experienced makers.
For every coaster I give: Skill level → Finished size → Materials → Gauge notes → Step-by-step instructions → Assembly & finishing → Tips & variations → Care. All patterns use US crochet terms. Abbreviations used: ch, sl st, sc (single crochet), hdc (half double crochet), dc (double crochet), tr (treble), inc = 2 sc in same st, dec = sc2tog, BLO / FLO = back/front loop only, MR = magic ring. Work in continuous rounds unless a round join is explicitly stated.
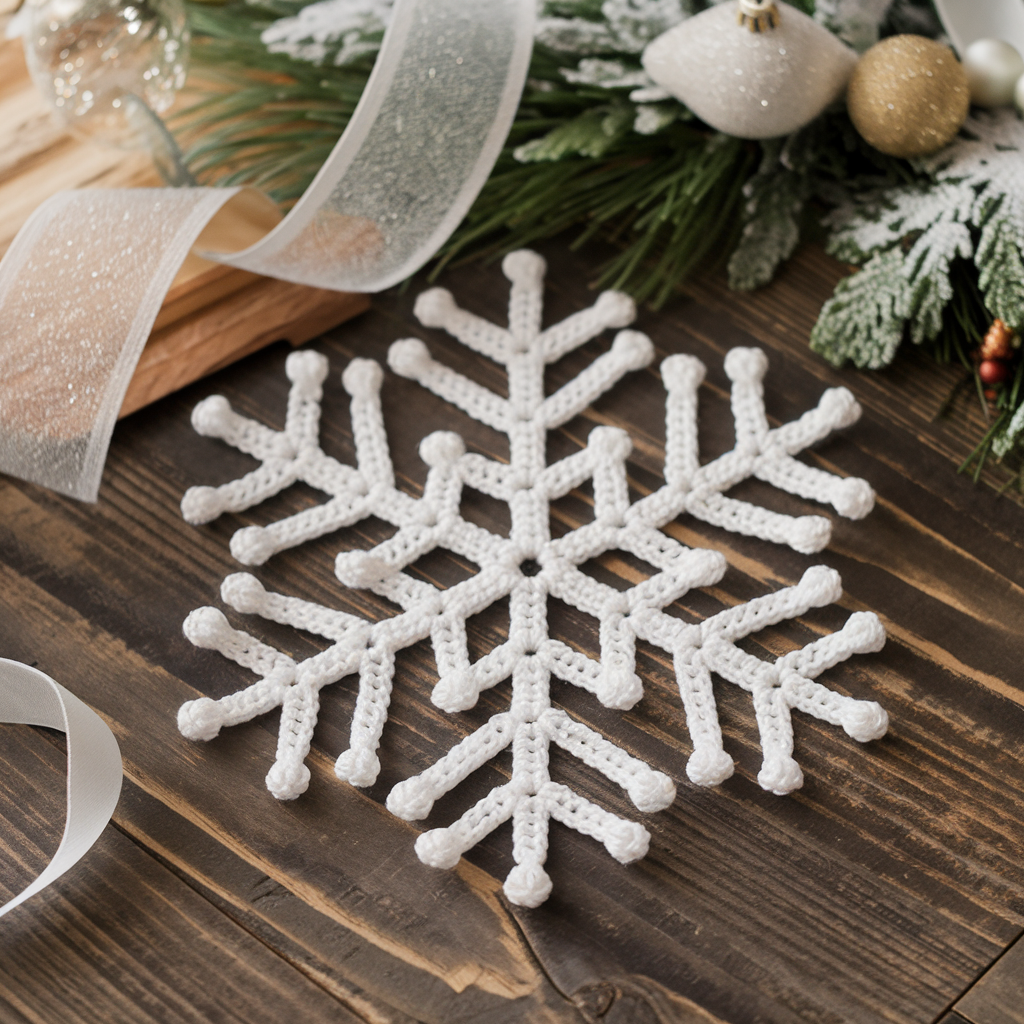
1. Crochet Christmas Snowflake Coaster Pattern
Skill level
Intermediate (lace stitches, picots, shaping)
Finished size
About 4.5 – 5 in (11.5–13 cm) across when worked in size 10 crochet cotton with a 2.5–3.0 mm hook. In worsted cotton & 3.5–4.0 mm hook it will be larger and slightly less delicate (~5.5–6 in).
Materials
- Size 10 crochet thread (or fingering/sport yarn for sturdier coaster) — small amount (10–20 yd)
- Crochet hook: 2.5–3.0 mm for thread; 3.5–4.0 mm for fingering/worsted alternative
- Tapestry needle, blocking pins, blocking mat, small spray bottle
Notes & gauge
Snowflake coasters look best when blocked to open the lace. Gauge is not strict — the pattern is round-based and increases are explicit.
Stitch key (US)
ch, sl st, sc, hdc, dc, tr, picot (ch 3, sl st in first ch)
Step-by-step (worked from center outward)
Round 1 — Magic center
MR, ch 1, 8 sc into ring. Pull tight. Join with sl st to first sc. (8)
Round 2 — Foundation for points
Ch 3 (counts as dc), ch 1, dc into next st — repeat around to make 8 dcs separated by ch-1. Join. (8 dc, 8 ch-1 spaces)
Round 3 — Forming arms
Sl st into first ch-1 space, (sc, ch 3, sc) into same space; sl st to next ch-1 space, repeat around to create 8 small arches. Join.
Round 4 — Arm extension
Work in each arch: sl st into arch, ch 1, sc, ch 2, (dc, tr, dc) in next space to form a taller center spike, ch 2, sc into arch; sl st into next arch to anchor. Repeat for all 8 arms.
Round 5 — Picot tips & lace bridges
At the tip of each arm (top of tr), ch 3 and sl st back into base of chain to make a picot. Then work sl st back to arm base and chain 5 across to the next arm base; secure with sl st — these bridge chains make the snowflake lacy star shape. Repeat around.
Round 6 — Fill & reinforce
Work sc around the interior between arms: sc in the space next to each arm base and 2 sc in the sl st joining bridge chains — this tightens the center and makes the coaster lie flat.
Optional Round 7 — Edge
Work a round of (sc, ch 1) around entire edge and finish with picots spaced evenly for a frosted look.
Assembly & finishing
- Blocking is essential. Soak gently in lukewarm water, pin out to desired size on blocking mat stretching the arms and bridges tautly, then spray or cover with a damp cloth and let dry overnight. This opens the lace and flattens the coaster.
- If you’re using thicker yarn (worsted), you can lightly steam-block — keep iron a few inches away and never press directly.
Tips & variations
- For Christmas sets: work in metallic thread or add a tiny bead at the center before final blocking.
- Make a motif with 6 arms for a different star look by altering the starting stitch counts (e.g., MR 6, etc.).
- Use a size 3.5 mm hook and cotton yarn for coasters meant for mug use — they will be more absorbent and durable.
Care
Hand wash or machine wash in a delicates bag. Reshape while damp. Avoid high heat drying to preserve thread and blocking.
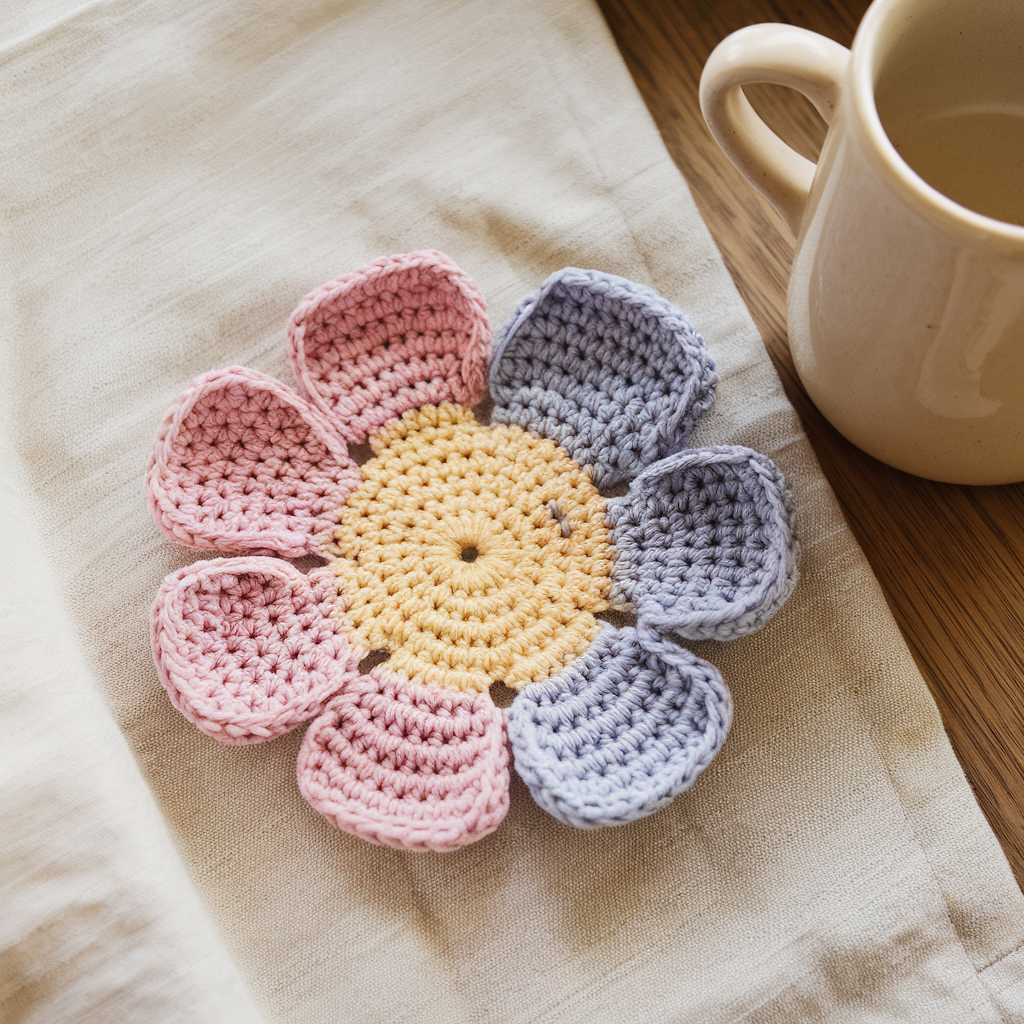
2. Crochet Flower Coaster Pattern
Skill level
Beginner → Easy (classic layered flower)
Finished size
Approximately 4 in (10 cm) across with worsted cotton and a 4.0 mm hook. Use sport/fingering & 3.0–3.5 mm for smaller coasters.
Materials
- #4 cotton yarn (worsted) — two colors (center + petals) ~25–40 yd total
- Crochet hook 3.5–4.0 mm
- Tapestry needle, scissors
Notes
This pattern is forgiving and quick. Works as a decorative coaster or trivet (make several and join for a larger mat).
Step-by-step
Round 1 — Center disk
MR, ch 1, 6 sc into ring. Pull tight. Join. (6)
Round 2 — Expand center
Ch 1, 2 sc in each st around. Join. (12)
Round 3 — Base for petals
Ch 1, sc in next st, ch 3, skip next st — repeat around to make 6 chain loops. Join. (6 loops)
Round 4 — Petals (worked into loops)
In each ch-3 loop work: (sc, hdc, 3 dc, hdc, sc); sl st into next base sc and repeat across. This creates 6 full petals. Fasten off second color if used.
Round 5 — Optional edging
Work a round of sc around the petal bases catching the back of petals to help the flower sit flat. For a lacy border work ch 3, sl st in base between petals.
Assembly & finishing
- Weave in ends neatly on the back.
- For use as a drink coaster, work a firm sc round underneath the petals to make the surface more stable — sc around in front loops and back loops alternatively to flatten.
Tips & variations
- Make smaller petals (3 dc peak) for a tighter flower or larger (5–7 dc) for a rufflier blossom.
- Use two-tone variegated yarn for a soft ombré petal effect.
Care
Machine wash on gentle with cotton yarn; lay flat to dry.
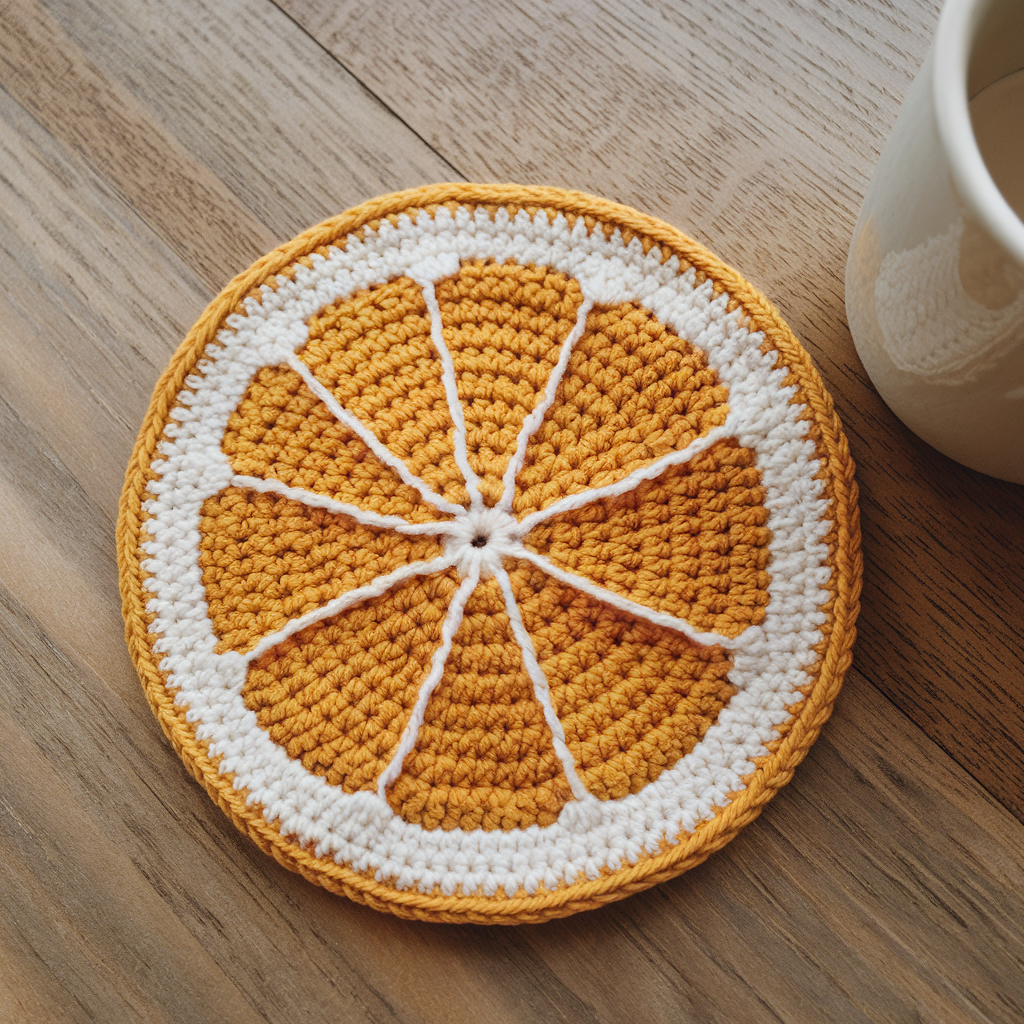
3. Crochet Round Modern Citrus Coaster Pattern
Skill level
Beginner (stripes + simple segmented surface crochet)
Finished size
About 4 in (10 cm) diameter (standard mug coaster). Adjust hook or rounds for larger citrus slices.
Materials
- Cotton yarn in two or three colors: peel color (cream), flesh color (yellow/orange), segment lines (white) — small amounts of each.
- 4.0 mm hook, tapestry needle
Notes
This pattern mimics a citrus slice — worked in concentric rounds, finishing with radial surface crochet to form segment lines.
Step-by-step
Round 1 — Center
MR, ch 1, 6 sc into ring. Pull tight. Join. (6)
Round 2 — Flesh
Ch 1, inc in each st around. Join. (12)
Round 3
Ch 1, sc 1, inc around. Join. (18)
Round 4
Ch 1, sc 2, inc around. Join. (24)
Round 5 — peel transition
Ch 1, sc around in flesh color for one round. Join. (24)
Change to peel color.
Round 6 — peel (thicker)
Ch 1, sc in next 3, inc — repeat around. Join. (30) — this builds a slightly raised peel.
Round 7 — edge finishing
Ch 1, sc around in back loops only for a neat ridge. Join.
Round 8 — segment lines (surface slip-stitch)
With contrasting white (or other segment-color) yarn, use surface slip stitch (or surface crochet) to draw radial lines from the center to the inner edge of the peel. Make 8–10 evenly spaced segments. To do surface slip stitch: insert hook in center front loop from the last round and pull up loop of the contrast color, then lay yarn across surface to next stitch and perform sl st along the surface. Repeat to form radiating lines.
Assembly & finishing
- After adding segment lines, work a final round of sc around the outer peel to hide tails and to stabilize the surface.
- Light blocking will help the coaster lie flat.
Tips & variations
- Add a small embroidered seed cluster at the center (tiny French knots) for realism.
- Use bright neon colors for modern, playful citrus sets.
Care
Cotton coasters: machine wash gentle; reshape while damp.
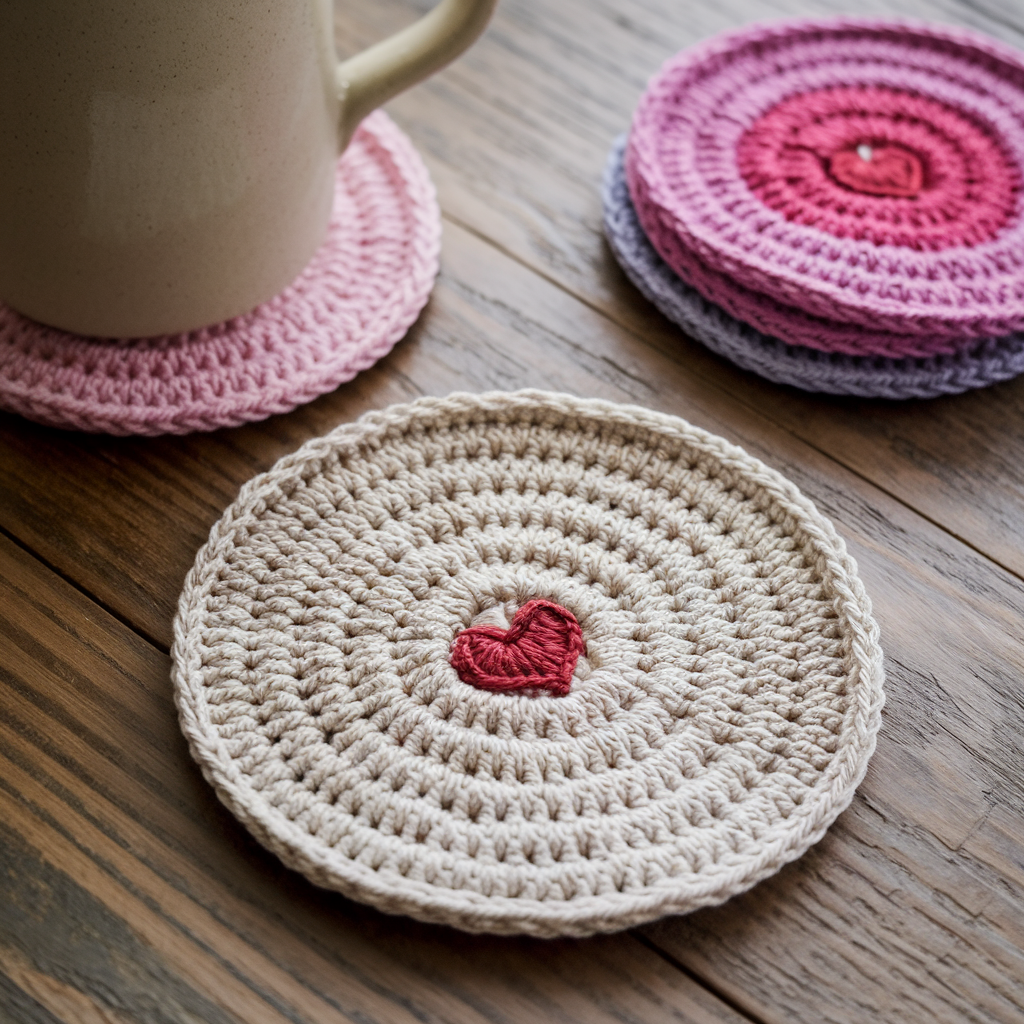
4. Crochet Heart Motif Coaster Pattern
Skill level
Beginner (basic shaping and a heart motif inside a round)
Finished size
About 4.25 in (11 cm) across when worked in worsted cotton with 4.0 mm hook.
Materials
- #4 cotton yarn two colors (background + heart color) ~30 yd total
- 4.0 mm hook, tapestry needle
Notes
You’ll work a circular coaster and add a small heart applique on top (or crochet the heart interlaced on the surface).
Step-by-step
Base round coaster (simple circle)
- MR, ch1, 6 sc in MR (6)
- R2: inc around (12)
- R3: sc 1, inc around (18)
- R4: sc 2, inc around (24)
- R5: sc 3, inc around (30)
- R6–R7: sc around for height (2 rounds). Fasten off.
Heart motif (appliqué)
- With heart color: ch 5, sl st into first ch to make small ring.
- Round 1: ch 1, 6 sc into ring. Join. (6)
- Round 2: ch 3, (3 dc, ch 3, sl st) into next st repeat 3 times to make 3 petal lobes; this forms a heart when shaped and sewn — OR use a compact heart formula:
- Compact heart: ch 4, sc in 2nd ch from hook, sc next, hdc, dc in last; then work down opposite side: dc, hdc, sc, sc; sl st to join and shape into small heart.
- Fasten off and leave tail. Sew heart centered onto coaster using small whipstitches so it sits flat.
Assembly & finishing
- Work a neat sc edging in background color to unify heart and base.
- Optionally add a tiny bead (sewn) to the center of the heart for a little shine.
Tips & variations
- Make a set of hearts in gradient colors for a romantic table display.
- Instead of sewing, granny-square–style hearts can be joined as coasters for a chunky retro look.
Care
Machine wash gentle; air dry to keep heart shape crisp.
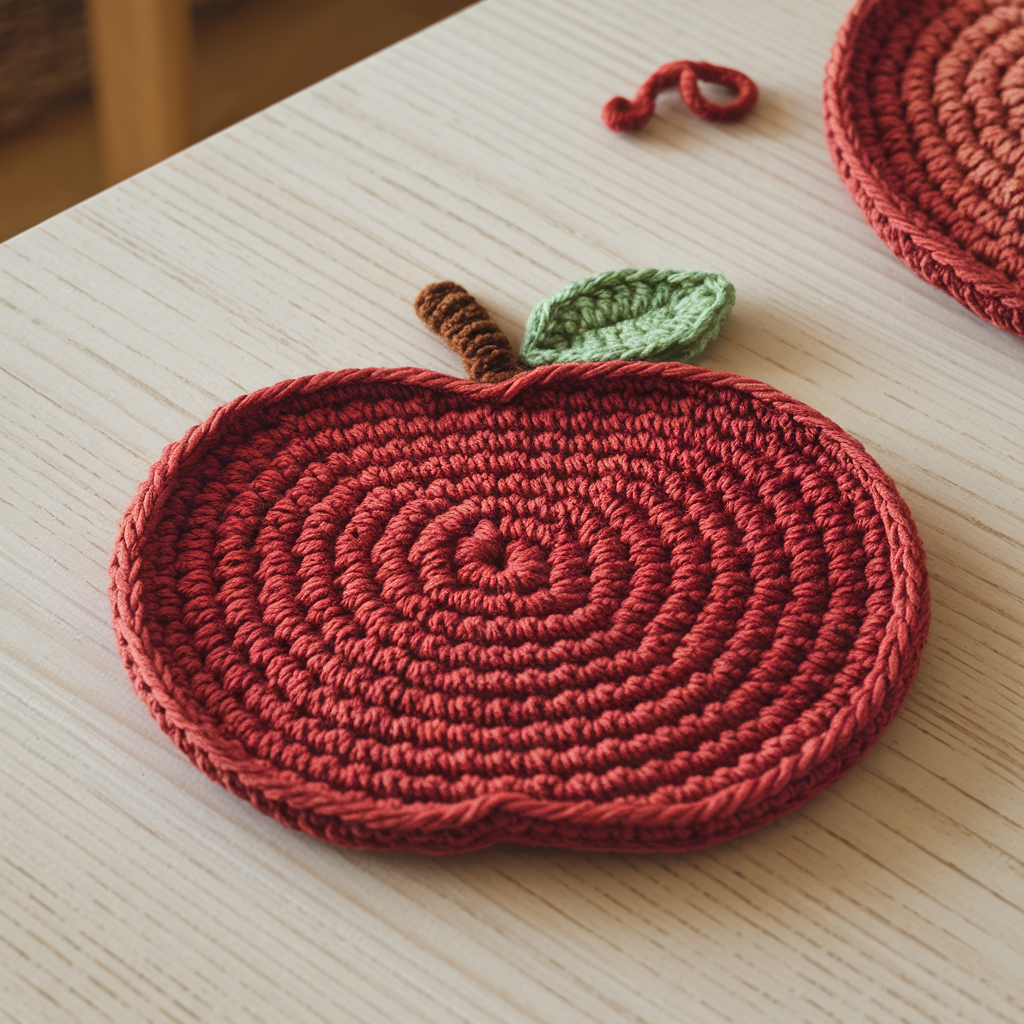
5. Crochet Apple Coaster Pattern
Skill level
Easy → Intermediate (shape shaping + stem & leaf details)
Finished size
Approximately 4–4.5 in (10–11.5 cm) across.
Materials
- Cotton yarn in red (main) ~25 yd; green for leaf ~5 yd; brown for stem ~3 yd
- 3.5–4.0 mm hook, tapestry needle
Notes
This coaster is worked in rounds but shaped into a flattened apple silhouette by working short rounds or by post-stitch shaping.
Step-by-step
Round 1 — center
MR, ch 1, 6 sc into ring. Join. (6)
Round 2 — expand
Ch 1, inc around. (12)
Round 3
Ch 1, sc 1, inc (18)
Round 4
Ch 1, sc 2, inc (24)
Round 5 — start shaping apple lobes
Ch 1, sc in next 8 sts, then work 5 dc into next stitch (this creates the bulge for an apple lobe), sc in next 8 sts, 5 dc in next stitch to create the opposite lobe. Join. You now have two prominent bulges.
Round 6 — tidy
Ch 1, sc around evenly, working extra sc into the base of the 5-dc clusters to keep shape flat. Join.
Round 7 — stem & leaf
- Stem: At the top center between lobes, ch 4, sl st back into second ch to make a short stem loop (or ch 6 and sl st back to create a slightly taller stem). Secure with a few sc stitches at base.
- Leaf: With green yarn, ch 6, sc in 2nd ch from hook, hdc, dc, hdc, sc; sl st to base. Fasten off and tack leaf next to stem.
Round 8 — edge
Ch 1, sc around entire apple including working around the base of stem and leaf for neatness.
Assembly & finishing
- Weave in tails securely. Block slightly with steam or wet blocking to flatten apple nicely.
- For a thicker coaster, add a second round in contrasting color (e.g., cream) underneath.
Tips & variations
- Make a green apple by switching to green yarn and cream leaf.
- For a holiday set, work a tiny embroidered worm for playful coasters.
Care
Cotton coasters: machine wash warm on gentle; reshape while damp.
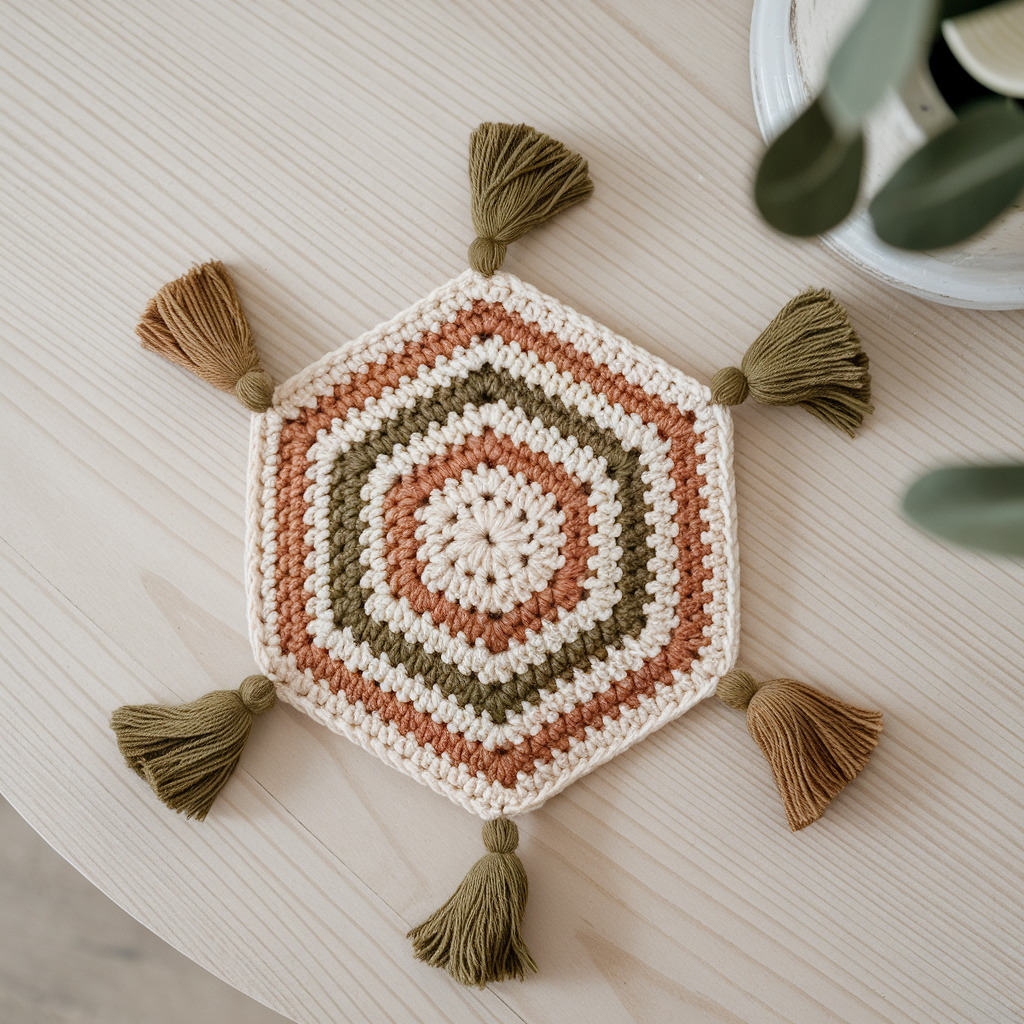
6. Crochet Boho Hexagon Coaster Pattern
Skill level
Easy → Intermediate (granny-style hexagon, great for modular sets)
Finished size
Roughly 4–4.5 in (10–11.5 cm) across flats with worsted cotton and 4.0 mm hook. Make larger by adding more rounds.
Materials
- #4 cotton in one or more colors — small scraps are perfect.
- 4.0 mm hook, tapestry needle
Notes
Hexagons are modular: make many and join for table runners or placemats.
Step-by-step (classic hexagon granny-ish)
Round 1 — center ring
MR, ch 2 (counts as hdc), work 11 hdc into MR. Pull tight. Join to top of ch2. (12 hdc)
Round 2 — create corners
Ch 2, hdc in next 2 sts, (hdc, ch 2, hdc) in next st (corner) — repeat around so you have six corners. Join. (Corners are ch-2 spaces)
Round 3 — expand sides
Ch 2, work (hdc) in each st along the side until you reach corner, in corner work (hdc, ch 2, hdc) again, repeat around. Join. This makes a flat hexagon.
Round 4 — decorative ridge
Work one round in FLO only of sc or hdc to give a ridged texture (this helps coasters grip). Join.
Round 5 — optional boho tassel points
At each corner, work sl st into corner, ch 6, sl st back into corner to create small loops or tassel attach points. Add tiny tassels if desired.
Assembly & finishing
- Weave in ends and block lightly. For a stable coaster, work one final round of single crochet around the entire motif in a solid color.
- To make a set with a boho vibe, use natural colors (cream, terracotta, olive).
Tips & variations
- Make hexagons in gradient colors and join to make a table runner.
- Join hexagon coasters to a felt backing for extra absorbency.
Care
Machine wash and dry per yarn label. Cotton holds up well.
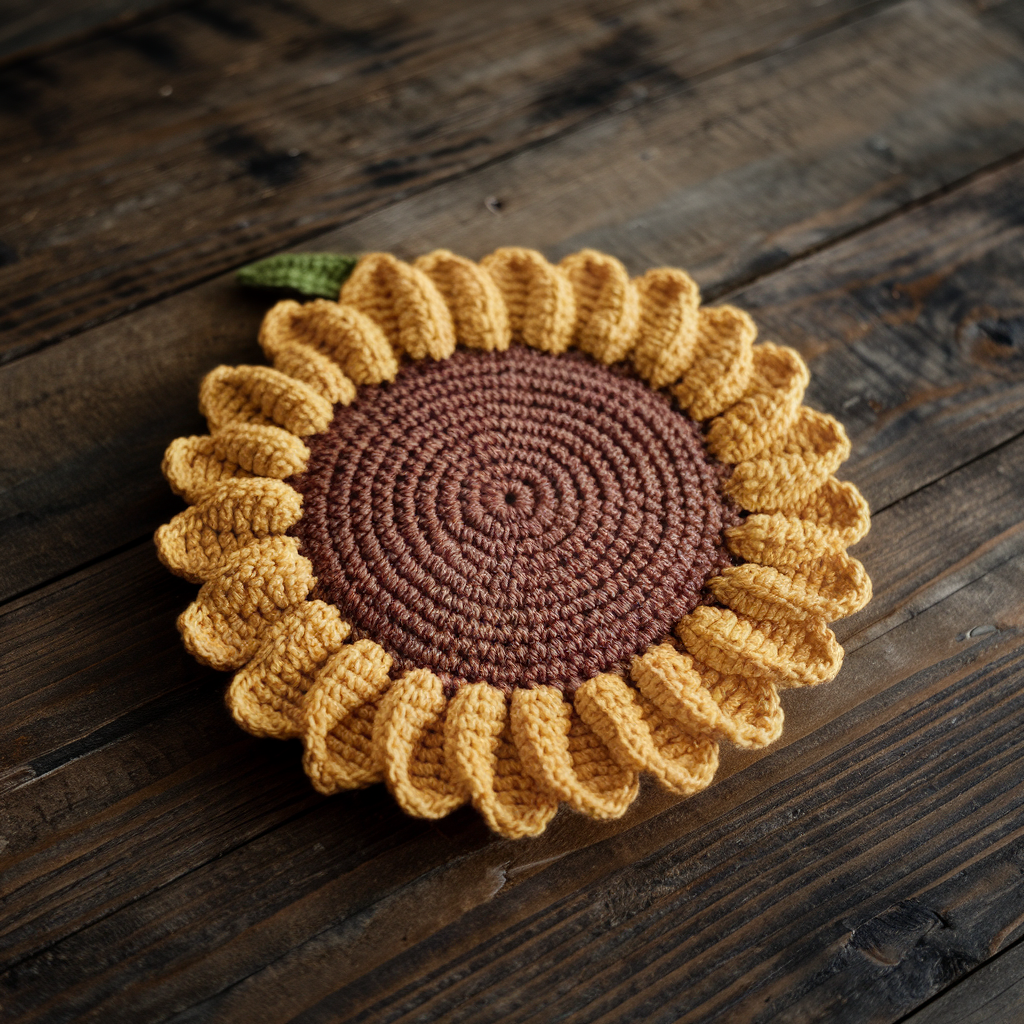
7. Crochet Sunflower Coaster Pattern
Skill level
Easy → Intermediate (center disk + petal round)
Finished size
About 4.5–5 in (11.5–13 cm) across when made with worsted cotton and a 4.0 mm hook.
Materials
- Cotton yarn: brown (center) ~10–15 yd, yellow for petals ~20–30 yd, green optional for tiny leaf accent.
- 4.0 mm hook, tapestry needle
Step-by-step
Center disk (brown)
- MR, ch 1, 6 sc into ring. Join. (6)
- Ch 1, 2 sc in each st around. Join. (12)
- Ch 1, sc 1, inc around. Join. (18)
- Ch 1, sc 2, inc around. Join. (24) — fasten off brown or continue one more round for larger center.
Petal round (yellow)
- Join yellow in any st on outer round. Ch 3, (sc, hdc, 5 dc, hdc, sc) into same stitch, ch 2, sl st into next stitch. Repeat around. You’ll make a petal cluster into each stitch or into every other stitch depending on spacing; for 24 base stitches you’ll get 12–24 petals depending on how you place them — place 1 petal per 2 sts for 12 big petals or 1 per st for 24 smaller petals. Adjust to taste.
Finish & edge
2. Work a round of sc underneath the petals, catching the back loops to flatten. For a sturdy coaster, add a second round of sc in contrasting color to form a firm border.
Assembly & finishing
- Weave in ends. Block to set petals. For extra stability, add a thin felt disc glued/sewn to underside (helps with hot mugs).
Tips & variations
- Add an inner ring of seed stitch (French knots or small beads sewn) in the center for texture.
- Use variegated yellow or ombré yarn for realistic petals.
Care
Machine wash gentle; reshape when damp.
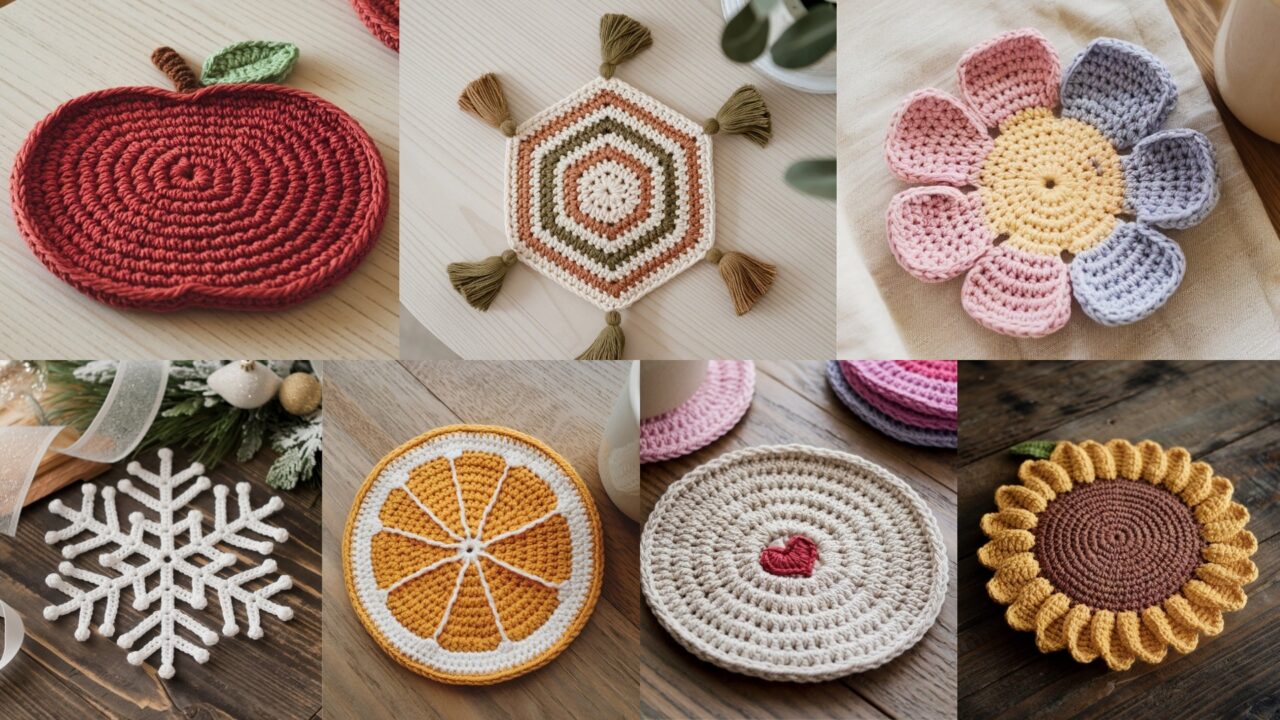
Conclusion
There you have seven distinct coaster patterns that suit seasonal decor and everyday use: a delicate snowflake for holiday tables, cheerful flower and sunflower motifs for spring and summer, a modern citrus slice for bright kitchens, a sweet heart motif for gifting, a playful apple for breakfast nooks, and a boho hexagon for effortless sets and modular projects.
Quick practical tips before you make a set
- Fiber choice matters: 100% cotton (or cotton blends) is best for coasters because it absorbs, blocks well, and withstands machine washing. Thread and fine yarn are wonderful for decorative coasters you’ll block and display.
- Blocking makes a difference: especially for lace-like snowflakes and sunflower petals — block to size to open the stitches and flatten the piece.
- Add backing for heavy-duty use: glue or sew a thin felt circle to the underside if you plan to use coasters for hot mugs or to protect delicate surfaces.
- Scale up: make multiple motifs and join them for larger trivets or placemats. Hexagons and flower motifs join especially well.
- Label care: when selling or gifting, include fiber content and care instructions (e.g., “100% cotton — wash gentle, lay flat to dry”).