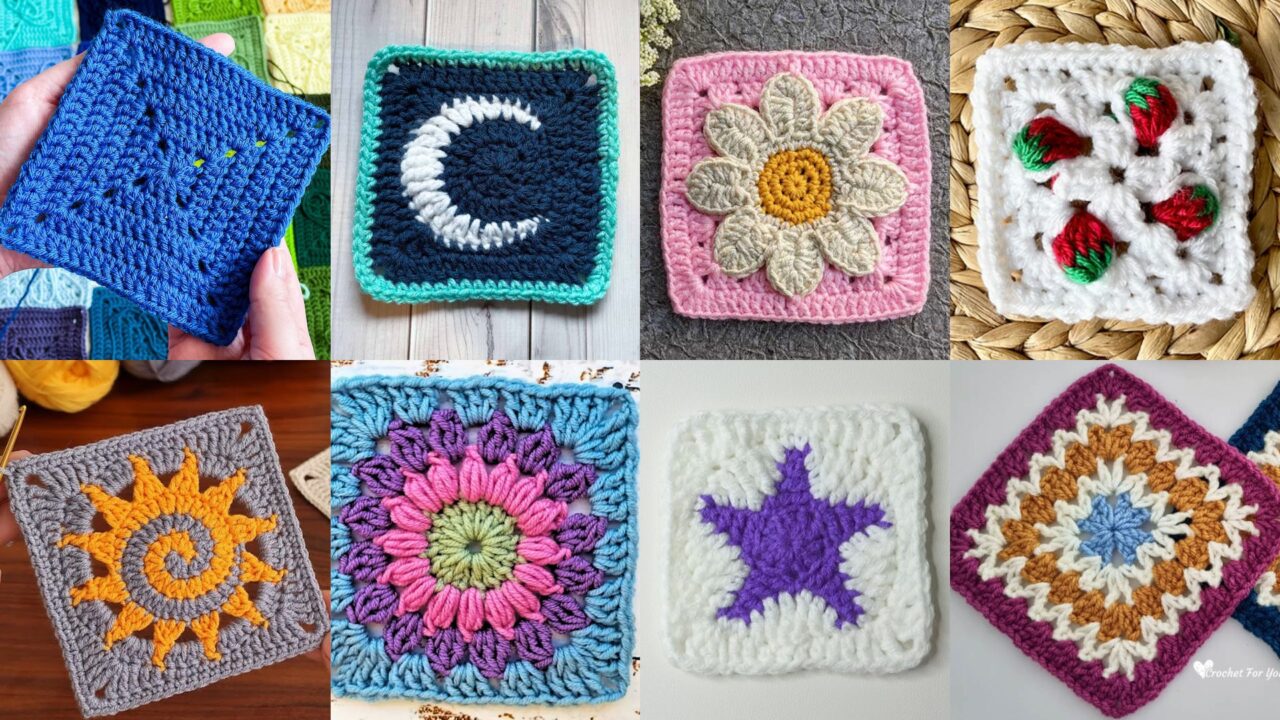
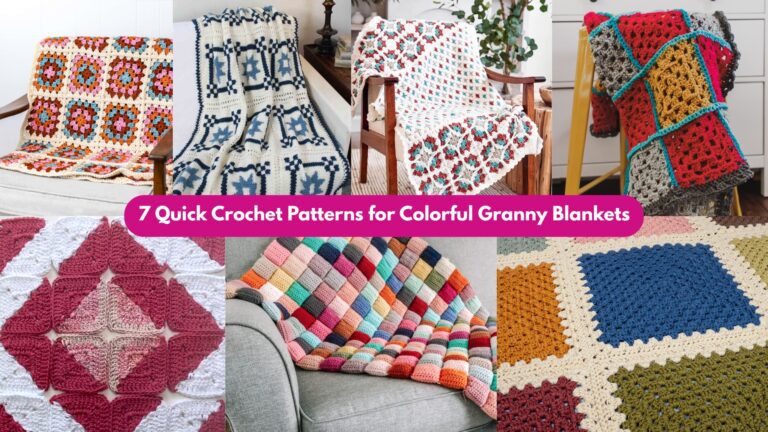
Crochet granny squares are timeless — tiny stitches that turn into blankets, cushions, bags, garments, and heirlooms. Whether you love crisp geometry, floral motifs, textured 3-D details, or bold colorwork, a thoughtfully written granny square pattern makes the process joyful and repeatable. Below you’ll find eight distinct granny square patterns: each includes skill level, materials, a clear stitch key (US terms), a detailed round-by-round step-by-step guide, finishing/assembly ideas, and practical tips so you can make perfect squares every time.
Notes before you begin
- All patterns use US crochet terms.
- Yarn & hook suggestions are given as starting points — adjust for your tension and desired drape.
- Make one test square first to check size/gauge and practice color changes.
- Abbreviations: ch = chain, sl st = slip stitch, sc = single crochet, hdc = half double crochet, dc = double crochet, tr = treble (UK = double treble), BLO = back loop only, FLO = front loop only, sk = skip, sp = space, beg = beginning, RS = right side.
1. Crochet Solstice Granny Square Pattern
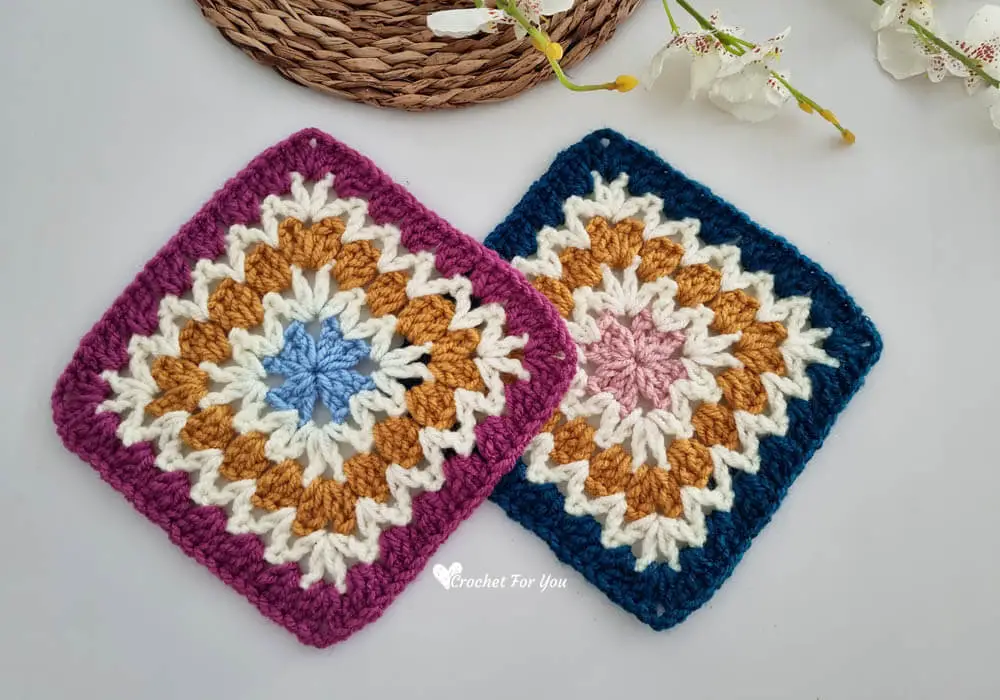
Skill level: Intermediate (color changes + shaping)
Materials:
- DK/sport weight yarn in 3 colors (A, B, C) — small scraps (~15–25 yards each)
- Hook: 3.5 mm (E) or size to match yarn
- Tapestry needle, scissors, blocking tools
Idea: a sun-and-moon look — a solid center that radiates long petals to corners; great for gradient or variegated yarn.
Stitch key: ch, sl st, sc, dc, hdc
Gauge (approx): 4 in = 14 dc and 8 rows (depends on yarn)
Instructions (round by round):
Round 1 (center disk, Color A)
- Make a magic ring. Ch 2 (counts as hdc).
- Work 11 hdc into ring (12 hdc total including ch2). Pull ring closed. Join with sl st to top of ch2. (12 hdc)
Round 2 (petal starters, change to Color B)
- Join Color B with a sl st in any stitch. Ch 3 (counts as dc).
- dc in next stitch, ch 1 — repeat around for a texture of alternating dc and ch-spaces. You should have 12 dc and 12 ch-1 sps. Join with sl st to top of ch3. (12 dc, 12 ch-1)
Round 3 (petal expansion)
- Sl st into the first ch-1 space. In that ch-1 sp work: (sc, hdc, dc, tr, dc, hdc, sc) — this creates a puffed petal.
- Sl st into next ch-1 sp, repeat petals in every ch-1 space around (12 petals). Join to first st and fasten off Color B. (12 petals)
Round 4 (square shaping, change to Color C)
- Join Color C in the top of any petal. Ch 3 (counts as dc). Dc in next petal top. Ch 2, dc in next two petal tops — repeat until you have created four corner ch-2 spaces positioned roughly every third petal. Adjust counts so you have 4 corners evenly spaced.
- After finishing the round, join and fasten off.
Round 5 (granny rounds to square)
- Join Color C at a corner ch-2 sp. Work (3 dc, ch 2, 3 dc) in the corner ch-2. Along each straight edge work: (3 dc in gap between petals) across until next corner. Repeat around for 4 sides. Join, fasten off.
- Repeat a final round of grannies if you want a larger square.
Finishing & variations: block gently to flatten and open petals. Try one color per round for a gradient solstice effect, or use a variegated yarn for the center and solid for outer rounds.
Tips: count petals and redistribute petals so corners fall every 3 petals — if they don’t line up, add or remove an extra dc in Round 4 edge placements to space corners evenly.
2. Crochet Star Granny Square Tutorial
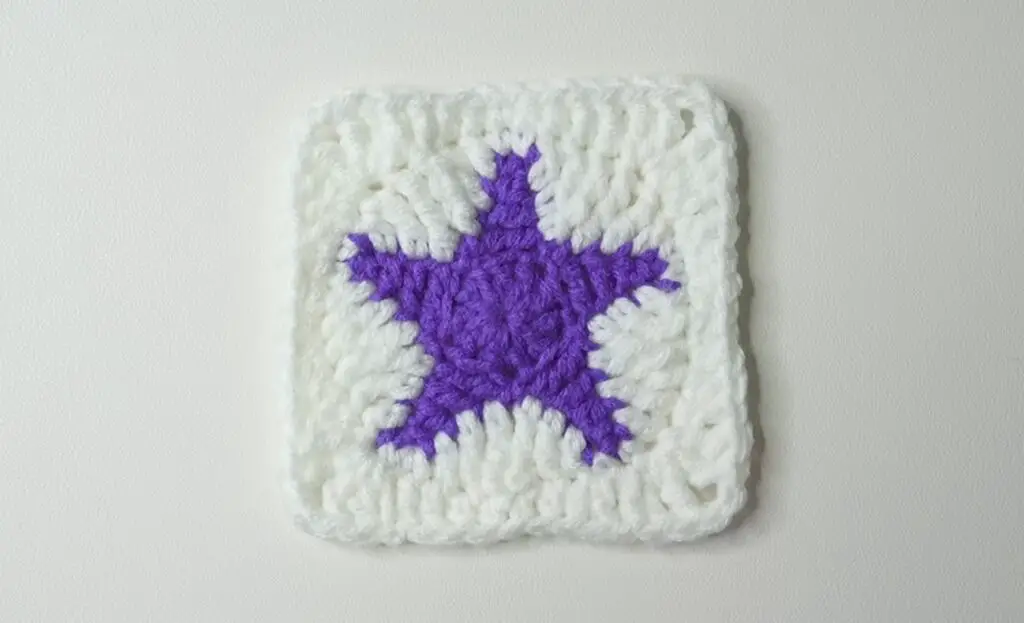
Skill level: Intermediate (special stitch shaping)
Materials:
- Worsted weight (#4) in two contrast colors (Star color & Background)
- Hook: 4.0 mm (G/6)
- Tapestry needle, blocking pins
Idea: a central five- or six-pointed star radiating into a square frame — great for holiday blankets or statement squares.
Stitch key: ch, sl st, sc, hdc, dc, puff (optional)
Instructions (6-point star version):
Round 1 (star center, Star color)
- Ch 4, join to form ring. Ch 3 (counts as dc), (dc, ch 1, dc) in ring — repeat 6 times to create 6 petals separated by ch-1 sps. Join to top of ch3. (6 petals)
Round 2 (star points)
- In each ch-1 space: (ch 1, sc, ch 2, dc, ch 2, sc) — this extends and shapes star points. Join. Fasten off.
Round 3 (switch to Background color, start square formation)
- Join background color in any sc. Ch 3 (counts as dc), dc in next sc of point, ch 1, dc in next sc until you reach the tip of a point where you’ll work (dc, ch 2, dc) to make a corner shaping. Continue around so that you have four corner ch-2 sps spaced evenly (for a square). Join and fasten off.
Round 4 (granny edge to square)
- Join background at a corner ch-2 sp. Work (3 dc, ch 2, 3 dc) in corner. Along edges work (3 dc in each corner-to-corner gap) across; where gaps are wider, work clusters with ch-1 sps between them to keep edges even. Join and fasten off.
Finishing & variations: for a textured star, replace dc points with puff stitches or front-post dc to make the star raised. For a five-pointed star switch to a ch-5 foundation and make five petals in Round 1.
Tips: keep point tips sharp by blocking and pinning the tips outward while wet. If points round out during joining rounds, add a picot (ch 3, sl st in top) at tips before joining.
3. Crochet Solid Seamless Granny Square Pattern
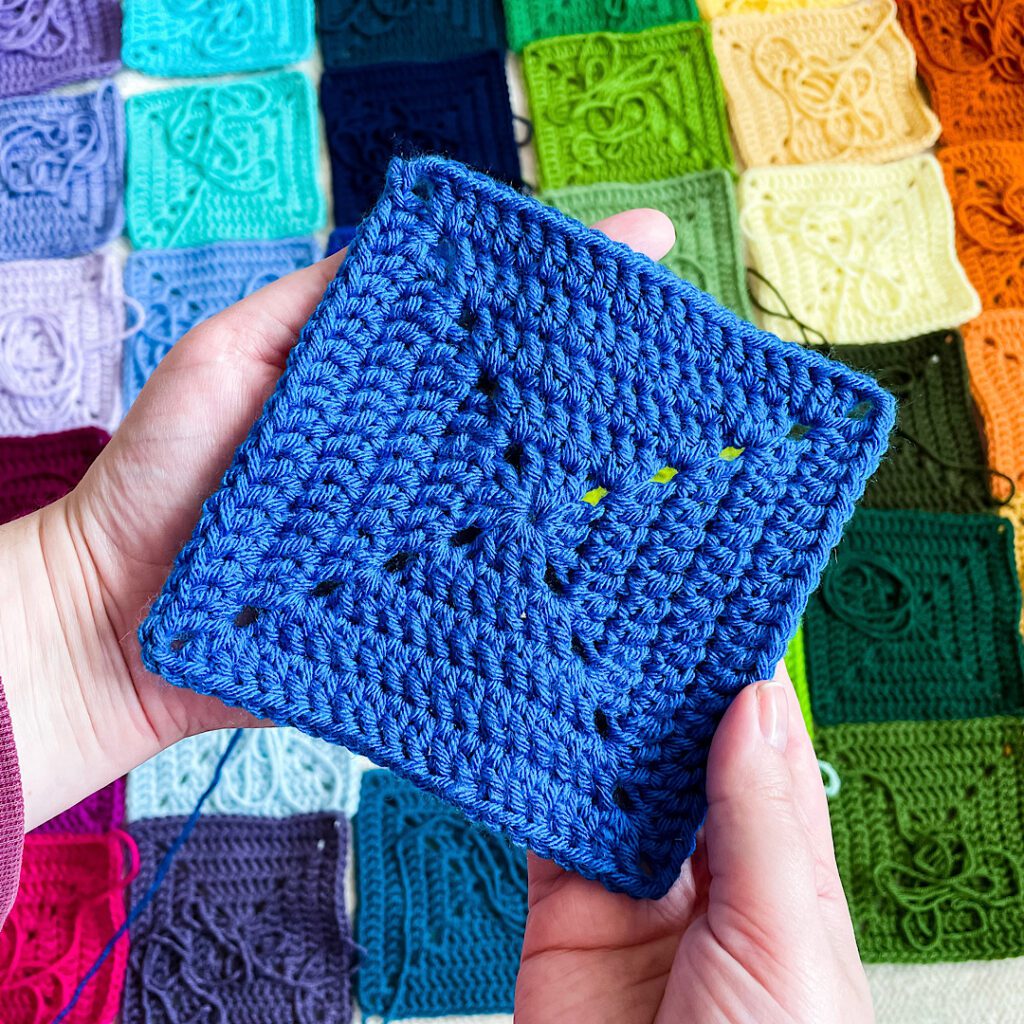
Skill level: Advanced-beginner (seamless construction)
Materials:
- Worsted weight (#4) yarn — main color and one contrast for optional border
- Hook: 4.5 mm (7) or size to get a neat fabric
- Tapestry needle
Idea: no seams, continuously worked square — no visible join lines — perfect for blankets where join lines would distract.
Stitch key: ch, sl st, sc, dc, FLO/BLO optional
Instructions (continuous rounds):
Start (solid disc)
- Make a magic ring. Ch 2 (counts as hdc). Work 11 hdc into ring. Join with sl st to top of ch2. (12 hdc)
Continuous Round 1 (increase round)
- Ch 2, dc in same st, ch 1, skip next st, dc in next st — alternate to begin your shaping. The goal is to create four quarter points which will become corners. As you progress, make larger increases in four places across the round to force a square shape. A reliable strategy: place increase clusters (2 dc incs separated by ch-1) at approximately quarter positions — you’ll move these quarter marks as rounds grow.
Continuous Round 2+ (turn into granny clusters)
- Work in the back loop only (BLO) for the very next round to create a neat ridge if desired: (3 dc) cluster in gap, ch 1 between clusters — place clusters evenly across each straight edge and double up clusters at four places to form corners: e.g., (3 dc, ch 1) × n, (3 dc, ch 2, 3 dc) for corner — continue without fastening off; simply continue the next round from the work-in-progress.
How to maintain seamless square geometry (practical technique)
- On each round place a corner cluster where the square should grow — this is usually every 1/4 of the perimeter. As the square grows, you’ll increase the number of clusters between corners. Count clusters on each side and keep counts equal.
- Work in continuous rounds (no turning; do not join at the end) and mark the first stitch of each round if you want an exact starting point.
Final rounds & border
- When your square reaches desired size, finish with 1–2 rounds of sc all around for a crisp edge. Optionally add a reverse-sc (working into FLO) to create a frame.
Finishing & variations: this method adapts to any yarn weight; use contrast color for the final round to mimic the classic granny look but keep the seamless construction.
Tips: continuous rounds create a gentle spiral seam — to hide it, use a small slip stitch at your first stitch, or use a hook one size smaller for the first sc border to tighten up the edge.
4. Crochet Sunburst Granny Square Tutorial
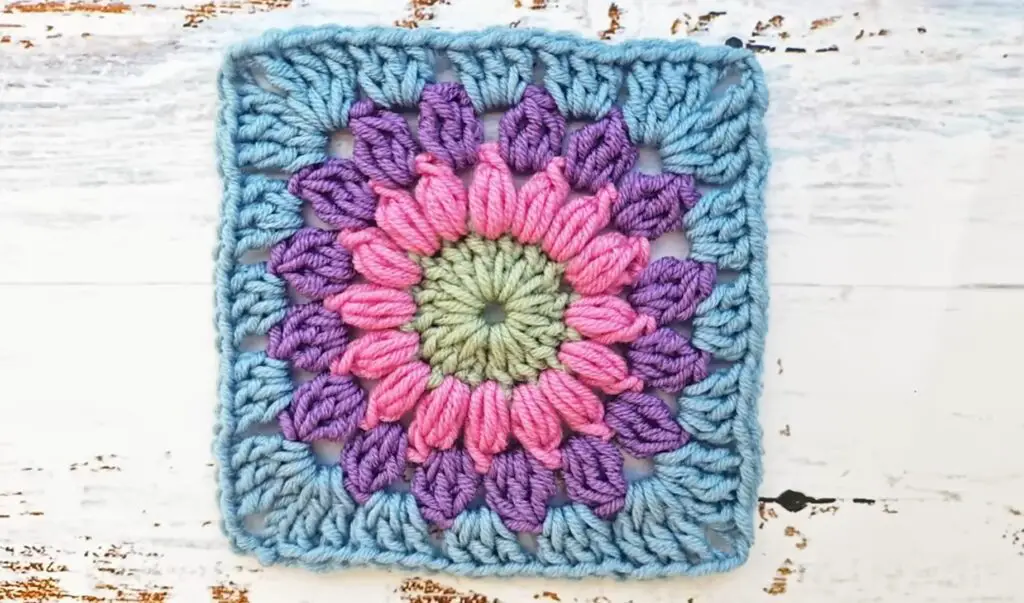
Skill level: Intermediate (popcorns/puff clusters)
Materials:
- Fingering or DK weight yarn; 3 colors (center, burst, border)
- Hook: 3.5–4.0 mm
- Tapestry needle, blocking supplies
Idea: a bright central burst (lots of texture) that graduates into a square — dramatic in colorwork.
Stitch key: ch, sl st, sc, dc, puff (yo, insert, yo pull up, repeat, draw yarn through all loops), ch-sp
Instructions:
Round 1 (center puff ring, Color A)
- Make a magic ring. Ch 1, puff stitch (5 loops) into ring, ch 1, sl st into ring — make 8 puffs (or 10 for more points). Pull tight and join.
Round 2 (expand burst, Color B)
- Join Color B in any ch-sp. Ch 3 (counts as dc), dc in same ch-sp, ch 1, puff in next ch-sp, ch 1, (dc, dc) in next ch-sp — alternate puffs and dc clusters so the puffs stand out. Aim to place puffs evenly (8 or 10).
Round 3 (fill to a round)
- Work dc clusters and ch-1 sps around to form a round; where a puff sits, place a stitch to anchor it (sc or dc). Fasten off Color B.
Round 4 (square shaping, Color C)
- Join Color C. Work a round of (3 dc, ch 2, 3 dc) in corners, and across edges work (3 dc in each gap) until you reach a corner. Repeat around to square the round. You may need to add or subtract dc clusters per side to keep the square even.
Round 5 (frame & texture)
- Add a textured border: BLO dc round to create a subtle frame, then finish with an sc round.
Finishing & variations: use metallic or wool blends for a more dramatic puff. To make a low-profile square for blankets, reduce puff loops (3-loop puff instead of 5).
Tips: puff stitches bulk — keep the rest of your fabric open by adding ch-spaces so the square stays balanced. Block firmly to coax puffs into even positions.
5. Crochet Moon Granny Square Pattern
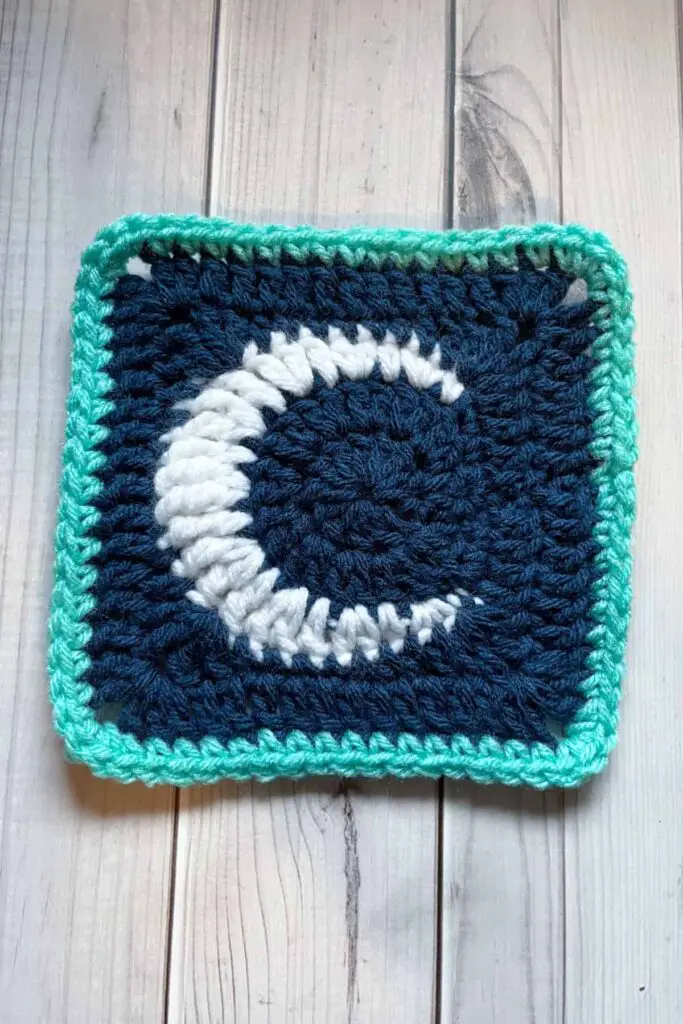
Skill level: Intermediate (curved motif & corner placement)
Materials:
- DK yarn in two or three colors (Moon, Sky, Border)
- Hook: 3.5–4.0 mm
- Tapestry needle, optional small button for moon center
Idea: crescent or full moon motif set inside a square — pretty for night-themed blankets or nursery pieces.
Stitch key: ch, sl st, sc, hdc, dc, fpdc (front-post dc), bpdc (back-post dc)
Instructions (crescent moon version):
Round 1 (moon foundation, Moon color)
- Chain 12. Join into a ring with sl st. Ch 2, work 22 hdc into ring for a flat disc. Join.
Round 2 (shape the crescent — subtractions & additions)
- Switch to Sky color. To create a crescent, you’ll create a partial round that leaves part of the disc open. Start by working dc clusters around 2/3 of the disc, then work fewer stitches on the inner arc to create an indent — the technique is to skip designated stitches for the inner curve so you end up with a crescent silhouette. For example: work 12 dc around one side, then ch 2 and sl st across the inner 6 hdc (or fasten off and rejoin on the other edge) — this opens the negative space.
Round 3 (frame to square)
- With Sky color, continue by working rounds that bridge the crescent edge into a square: place corner clusters where you want the square to form and fill edges with 3 dc clusters. On the inner crescent side, add ch-spaces to keep the curve visible.
Round 4 (detail & texture)
- Use fpdc rows around the moon to make it pop against the sky. Work a round of fpdc around the moon motif (switch to Moon color) to create a raised lunar rim.
Finishing & variations: add embroidered craters with french knots using a thin yarn or embroidery thread. For a full moon, use a circle of textured stitches (bobble or popcorn) centered in the square.
Tips: shaping a crescent is easier if you sketch the desired silhouette and count stitches to leave open for the inner arc. Blocking helps the moon curve sit smoothly within the square.
6. Crochet Strawberry Granny Square Tutorial
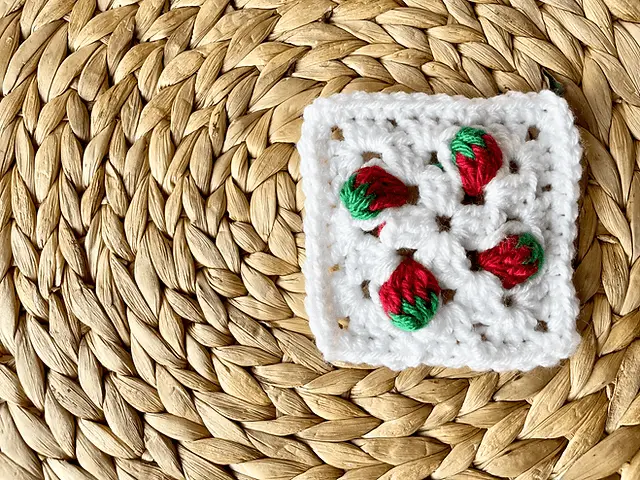
Skill level: Intermediate (color work + small applique)
Materials:
- Worsted weight yarn: red (berry), green (leaf/calyx), small bit of cream or black for seeds
- Hook: 4.0 mm (G/6) and 3.0 mm for small details if desired
- Tapestry needle, small amount of stuffing (optional for tiny 3D berries), stitch markers
Idea: a cute strawberry motif in the center of a granny square — perfect for kids’ blankets, bags, and appliques.
Stitch key: ch, sl st, sc, hdc, dc, tr, seed stitch (embroidery)
Instructions:
Round 1 (center berry, red)
- Magic ring. Ch 2, work 10 dc into ring. Join. (10 dc)
Round 2 (shape berry)
- Ch 2, 2 dc in each st — increase evenly to make an oval/bulb shape (work increases on top and bottom only to shape like a strawberry). Aim for 16–18 dc total depending on size.
Round 3 (convert to motif)
- Stop increasing on the sides — work dc evenly around to round out the berry. Fasten off red leaving tail to sew to square center.
Calyx/leaves (green)
- Join green at berry top. Ch 6, sl st in 2nd ch from hook, sc in next, hdc in next, dc in next — fasten off to create one leaf. Make 4–6 leaves around the top of the berry and sew in place. Optionally add a tiny picot at leaf tips for character.
Square background (make a granny frame)
- With background color, make a small starting round behind the berry: ch 4, join to make a ring, work (3 dc, ch 2, 3 dc) in ring to make first square round. Continue classic granny rounds until square size desired.
Seeds & details
- Embroider tiny seed dots with cream or black using a running stitch or French knots. To make a 3-D strawberry, lightly stuff the red motif before sewing the calyx on.
Finishing & variations: try polka-dot strawberries with white seeds or make a cluster of mini strawberries in one square for a playful look.
Tips: keep the berry small relative to the square unless you want a bold motif. Use a smaller hook for the berry and leaves to tighten the fabric for shaping.
7. Crochet 3-D Daisy Granny Square Pattern
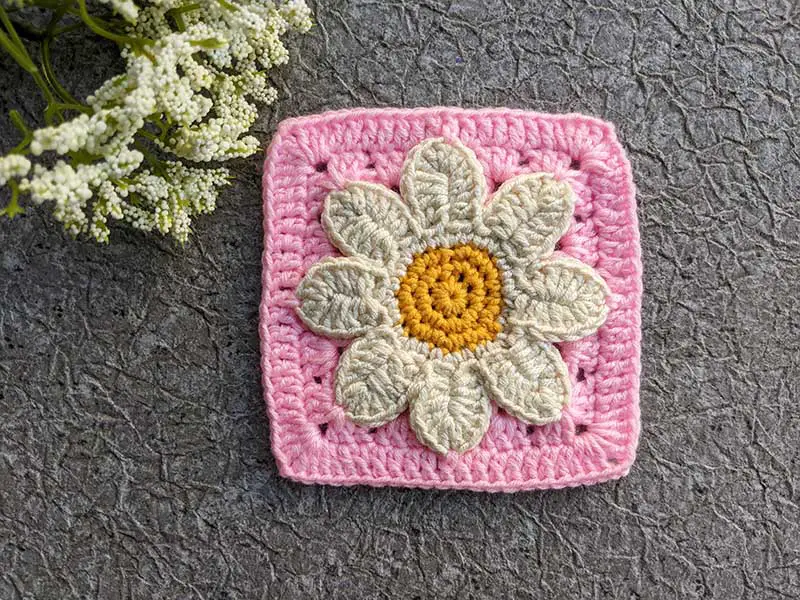
Skill level: Intermediate (3-D petals + assembly)
Materials:
- Sport or DK yarn in yellow (center), white (petals), and background color
- Hook: 3.5 mm (E)
- Tapestry needle, optional small button for center
Idea: a daisy that lifts off the square with layered 3-D petals — gorgeous as a focal square in blankets or pillows.
Stitch key: ch, sl st, sc, hdc, dc, puff, picot
Instructions:
Round 1 (yellow center)
- Magic ring, ch 1. Work 12 sc into ring. Join. (12 sc) Fasten off yellow leaving tail.
Round 2 (petal foundation, join white)
- Join white in any sc. Ch 3, sc in next st repeat around to create 12 ch-3 loops (petal bases). Join and do not fasten off.
Round 3 (3-D petals)
- Into each ch-3 loop work: (sc, hdc, 3 dc, hdc, sc) — this creates a full petal. When all petals are worked, fold each petal slightly and tack its base with a tiny stitch to anchor it upward (this makes them 3-D). Fasten off and weave in ends.
Round 4 (secure center)
- Sew the yellow center disk over the petal bases so the petals appear to radiate from a rounded center. You can add a small button or French knot cluster in the center for detail.
Round 5 (square frame)
- With background color, join behind the daisy and work classic granny rounds: (3 dc, ch 2, 3 dc) in corners; clusters across edges. Add one more round of sc for a tidy edge.
Finishing & variations: make double-layered petals by working a second round of smaller petals over the first. For extra height, use puff stitches for petals.
Tips: pin each petal in place while tacking so the shape is symmetrical. Light blocking with steam can help petals set their curve.
8. Crochet Spiral Sun Granny Square Tutorial
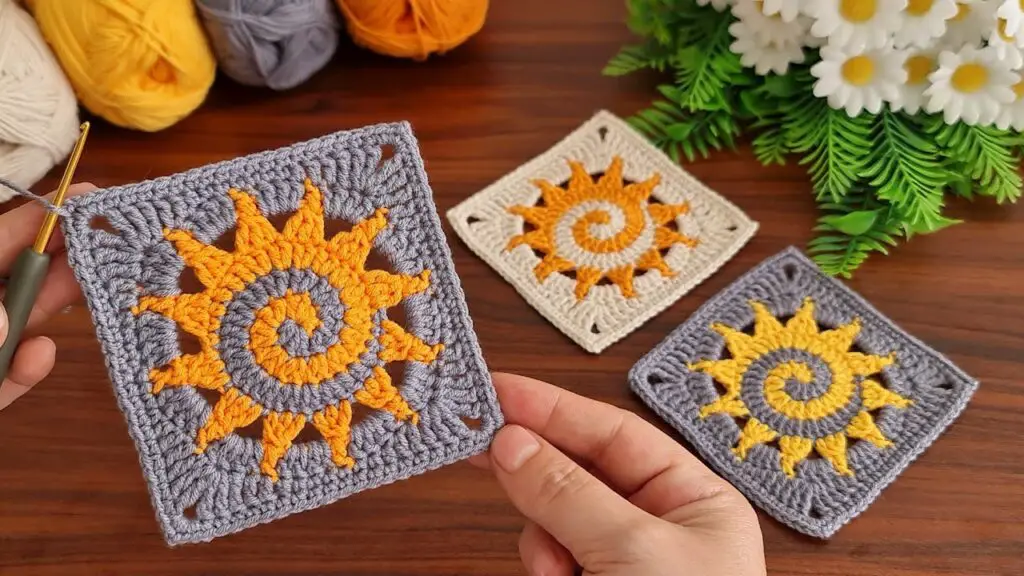
Skill level: Intermediate (continuous spiral color changes)
Materials:
- DK yarn in 3–4 contrasting colors (sun colors: yellow, orange, coral, brown)
- Hook: 3.5–4.0 mm
- Tapestry needle, stitch marker for rounds
Idea: a spiral center that twists like rays into a square, very dynamic when worked in gradient colors.
Stitch key: ch, sl st, sc, hdc, dc, fpdc
Instructions (spiral center then square):
Spiral center (continuous rounds, Color A→B→C)
- With Color A, ch 5 and join to make ring. Round 1: ch 3 (counts as dc), work 11 dc into ring. Do not join — this will be a continuous spiral. Place a stitch marker at the first dc to help locate the start later.
- Change to Color B by dropping Color A and beginning Color B on the next stitch (carry yarn up the inside or cut and weave). Work around in dc but increase gently at four quarters to start forcing the spiral outward (e.g., add 2 dc in one stitch every 6–8 stitches). Continue for 2–3 rounds, changing to Color C to form subtle rings inside the spiral. Keep stitching in spiral without joining.
Transition to square (Color D)
- When your spiral is big enough, start converting round into corners: select four evenly spaced points and work corners there: e.g., in one spot work (3 dc, ch 2, 3 dc); continue along edges with clusters (3 dc in each gap) until you hit the next corner point. Because you worked in spiral, you’ll need to count clusters to place corners evenly — aim for identical cluster counts per side.
Square rounds & texturing
- Add rounds of fpdc or bobble stitches radiating from the center to emphasize the sun rays. Finish with a 2–3 round border in a solid color for a clean finish.
Finishing & variations: use a slubby or textured yarn for the spiral for maximum visual interest. For a looser drape, use a larger hook for the spiral rounds; for more structure, tighten the hook for border rounds.
Tips: if the spiral wants to curl, block it and add more increases on the flat side to flatten. Carrying color inside the spiral (without cutting) creates neat, tidy color changes and fewer ends to weave.
Conclusion
Granny squares are a crochet playground: the same set of stitches yields geometric effects, lively texture, dramatic colorwork, and charming motifs. The eight patterns above — Solstice, Star, Solid Seamless, Sunburst, Moon, Strawberry, 3-D Daisy, and Spiral Sun — give you a broad toolkit. Start by making one or two test squares to practice the specialty techniques (puffs, continuous rounds, 3-D petals) and to check your size. Block each completed square for clean edges and consistent size, then choose a joining method that suits your project — slip-stitch join for visible seams, join-as-you-go for smooth continuity, or whip stitch for an invisible finish.
Mix and match motifs, swap colors, and scale squares up or down by adding more rounds — granny squares are endlessly remixable. Have fun experimenting with texture and color; your next beautiful blanket, pillow, or tote is only a handful of squares away.


