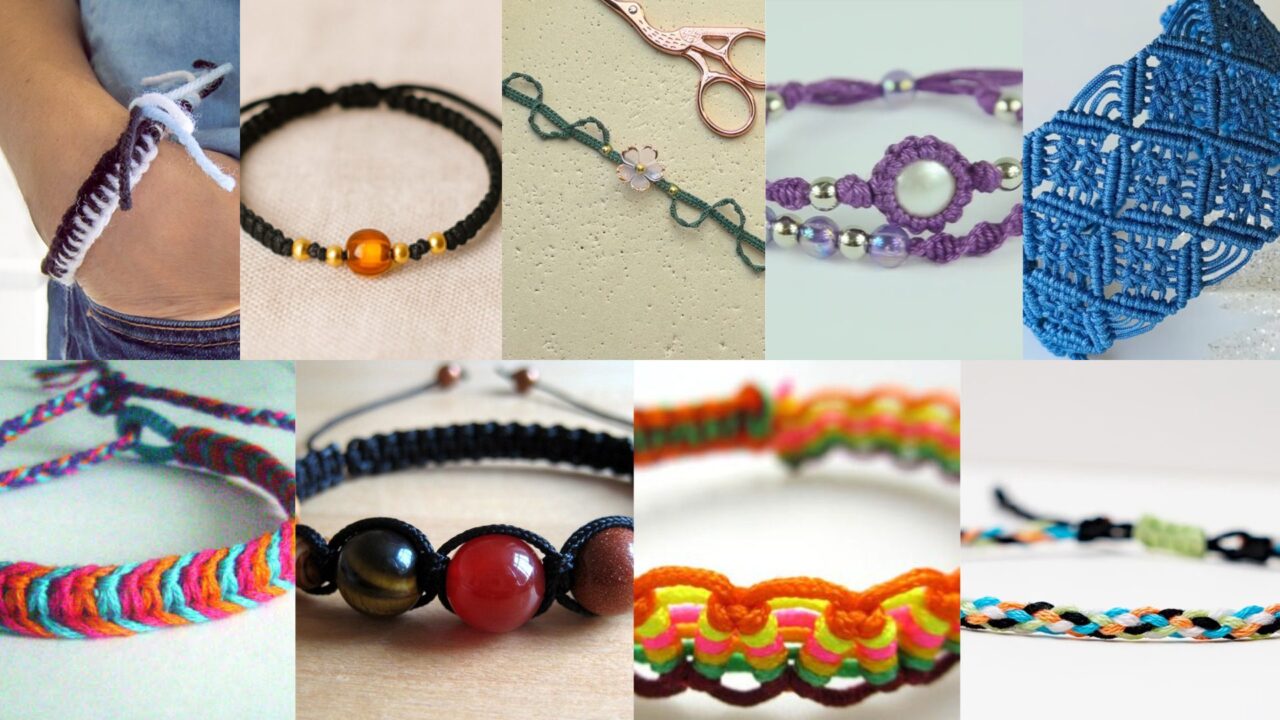
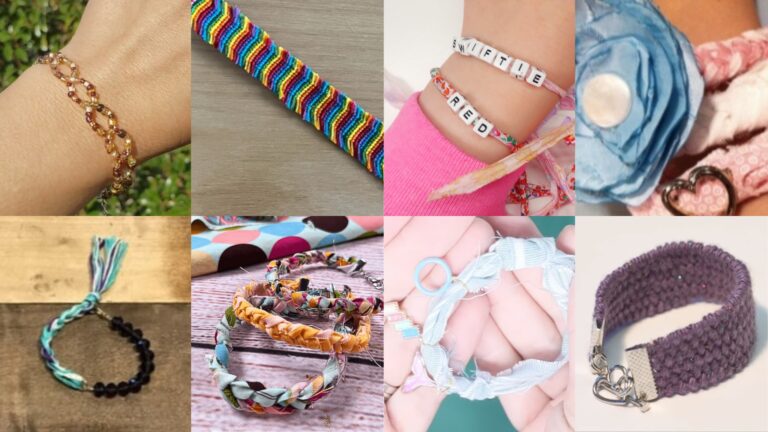
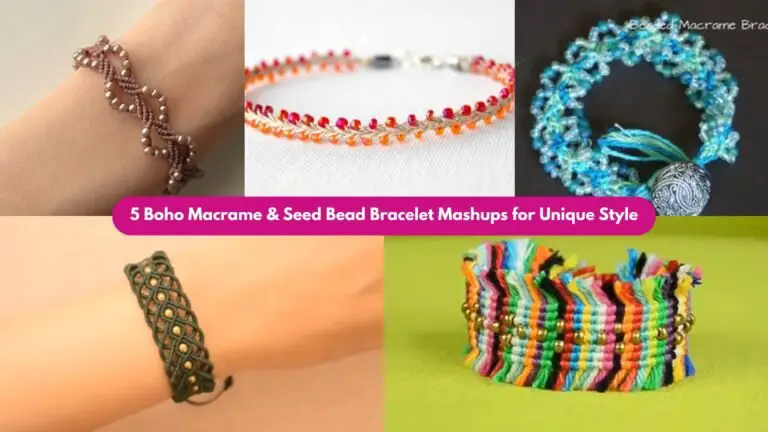
Macramé bracelets are endlessly satisfying: tactile, meditative to knot, and endlessly customizable with cord, beads, and finishes. Whether you’re a total beginner or you already know your square knot from your half hitch, this collection gives you nine distinct, wearable macramé bracelet designs — each with a clear materials list, skill level, exact knots used, a step-by-step build (with how-to counts and measurements), plus variations and finishing notes. Read the introduction, pick a design (or nine), and enjoy turning cord and beads into jewelry everyone will notice.
Quick tools, materials, and knot glossary
Tools & basics
- Sharp scissors, ruler or tape measure, clipboard or macramé board, pins or binder clips, bead awl or needle (for threading), lighter (for nylon cord), jewelry glue (optional), pliers (for jump rings/clasps).
Common materials
- Macramé cord: 1.0–1.5 mm waxed polyester cord (strong & tidy), 0.8–1.2 mm nylon, or natural cotton 1.5–2.5 mm for softer look.
- Beads: 2–8 mm glass, wooden, metal, or gemstone beads; ensure hole fits cord.
- Findings: jump rings, lobster clasps, crimp tubes (optional), magnetic clasps, bead tips.
- Buttons or toggle beads for button-loop closures.
Knot glossary (used across patterns)
- Lark’s head — for attaching cords to a base ring or anchor.
- Square knot (SK) — classic macramé knot (two half knots).
- Half knot (HK) — one half of a square knot; repeated HKs produce a spiral/rope.
- Double half hitch (DHH) — used for tidy lines and waves (sometimes called double hitch).
- Diagonal clove hitch — created with DHHs along a guiding core to make angled patterns.
- Overhand knot — simplest stopper knot.
- Sliding knot / adjustable closure — creates adjustable bracelet length.
1. Wave Macramé Friendship Bracelet Pattern
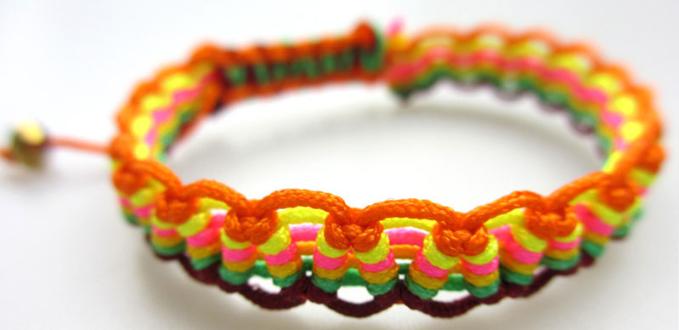
A flowing, ocean-inspired design that shows off diagonal double hitch lines that look like rolling waves.
Skill level: Intermediate | Time: 45–75 minutes
Finished width/length (example): 12–15 mm wide; fits wrist 16–20 cm (adjustable).
Materials
- 4 core cords (0.8 mm) + 8 working cords (0.8–1.0 mm), each ~60 cm (adjust for wrist)
- 12–18 small beads (optional accent), clipboard/pins
Knots used
- Lark’s head (start), double half hitch (DHH), overhand for finishing.
Set-up
- Cut four core cords 60 cm each and lay side-by-side. Fold in half and attach with lark’s head to a holding ring or secure to board (gives a 30 cm working length).
- Cut eight working cords 60–80 cm each (depending on desired length and knot density). Attach four evenly across the top by lark’s head so each working cord sits beside a core.
Step-by-step
- Anchor the outermost core pair so you have a tidy row. Your working cords will knot diagonally across the core bundle.
- Wave motif (repeat unit): Working left-to-right, take the first working cord and make DHHs around each core cord moving rightwards for 6–8 DHHs (this creates a diagonal line). Stop, then reverse direction using the next working cord to make DHHs back to the left across the cores for 6–8 knots. These two diagonal rows create a V-like trough; repeat below to form a wave crest.
- After 2–3 wave repeats, slide a bead onto the center cores (if using) and continue knotting the wave pattern over the bead to anchor it.
- Continue until the bracelet length (measured against wrist + 4–6 cm for closure) is reached. Keep knot counts consistent to maintain an even wave spacing.
- Finish with a tidy row of square knots (or a small braid) and secure with an overhand knot. Trim tails to ~1–1.5 cm and melt/tuck ends if using synthetic cord.
Variations
- Use three colors: navy for troughs, aqua for crest, white for core to enhance the ocean look.
- Add irregular bead “spray” across some crests for shimmer.
Finishing
- For an adjustable finish, create a sliding knot with two short cords or add a button loop at one end and a button at the other. Weave in ends, add a dab of glue under finishing knots if needed.
2. Spiral Double Beaded Macrame Bracelet Tutorial
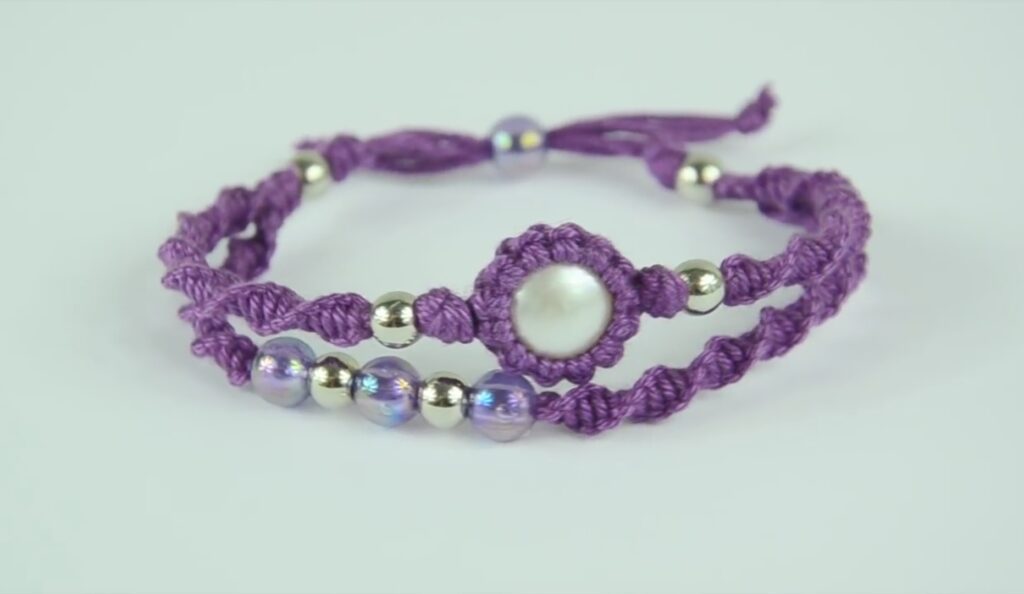
A sexy spiral rope built by repeating half knots with beads threaded onto the core — the spiral and beads give a professional, store-bought look.
Skill level: Beginner → Intermediate | Time: 30–50 minutes
Finished size: 6–10 mm thick; length to fit wrist + 4–6 cm.
Materials
- 1 core cord (1.5–2 mm waxed cord) or 2 parallel core cords
- 2 working cords (0.8 mm) — the knotting cords
- 20–30 small beads (2–4 mm) with holes large enough for the core, or use cylindrical spacer beads
- Clasp or sliding knot hardware
Knots used
- Half knots (HK), overhand knots, lark’s head.
Set-up
- Cut one core (or two cores laid together) 60–80 cm depending on wrist size. Thread beads onto core and slide them toward the center — these become the central spine.
- Cut two working cords ~100 cm each and attach them by lark’s head to the core at one end.
Step-by-step
- Begin spiral: With both working cords on either side of the core, tie a half knot (left over right) — that’s one HK. Repeat the same half knot direction (left over right) continuously. Repeated HKs create a spiral (also called a half-knot spiral).
- After 3–4 half knots, push one bead up on the core until it sits snug against the knot column. Continue making HKs so the knot column compresses the bead into place. Repeat: 3–4 HKs, bead, 3–4 HKs, bead, etc., until the bracelet is the right length. The alternating beads will appear within the spiral’s turns.
- Finish: When length is reached, secure with a tight overhand knot around the core, trim ends and melt/tuck or whip with a small thread. Attach hardware (crimp bead + clasp) or form a sliding knot.
Variations
- Use metallic seed beads for a luxe look; use gemstone rondelles for elegance.
- Change the number of HKs between beads to tighten or loosen the spiral pitch.
Finishing
- To make it adjustable, finish with two short tails and make a sliding knot. Beads prevent slippage and provide weight and polish.
3. Straight Wave Friendship Bracelet Pattern

A crisp geometric wave that uses alternating square knots on a central core to create a straight but undulating motif.
Skill level: Intermediate | Time: 40–60 minutes
Finished width: 8–14 mm depending on cord thickness.
Materials
- 4 core cords (0.8–1.2 mm) + 8 working cords (0.8–1.0 mm), each ~70–90 cm
- Optional accent beads (4–6 mm)
Knots used
- Square knot (SK) grouped, alternating rows; double half hitch for tidy edging.
Set-up
- Secure four core cords to a holding bar. Attach eight working cords via lark’s head, spaced evenly.
Step-by-step
- Block of SKs: Work a row of square knots across the width using working cords grouped in fours: take cords 1–4 form SK, cords 5–8 make next SK, etc. That row is the base.
- Wave offset: For the next row, offset your square knot groups by taking cords 2–5 as one knot, 6–9 as next, etc. This offset creates a zig that reads as a straight wave when repeated. Alternate offset direction every row or every two rows to smooth the wave.
- Incorporate beads: Slide a bead onto the center core(s) every 6–8 rows and continue SK rows over it to lock it in place. The bead sits embedded in the wave so it glints in the center of waves.
- Continue alternating base vs offset rows until bracelet length is reached. Finish with a tidy row of DHHs to create a firm border. Knot and attach closure.
Variations
- Make a double-width bracelet by adding more working cords and repeating the offset pattern.
- Use ombré-colored cords for subtle wave transitions.
Finishing
- Finish with a braided tail and sliding knot or attach a metal clasp with crimp tubes. Trim and secure tails.
4. Fairycore Macrame Bracelet Tutorial
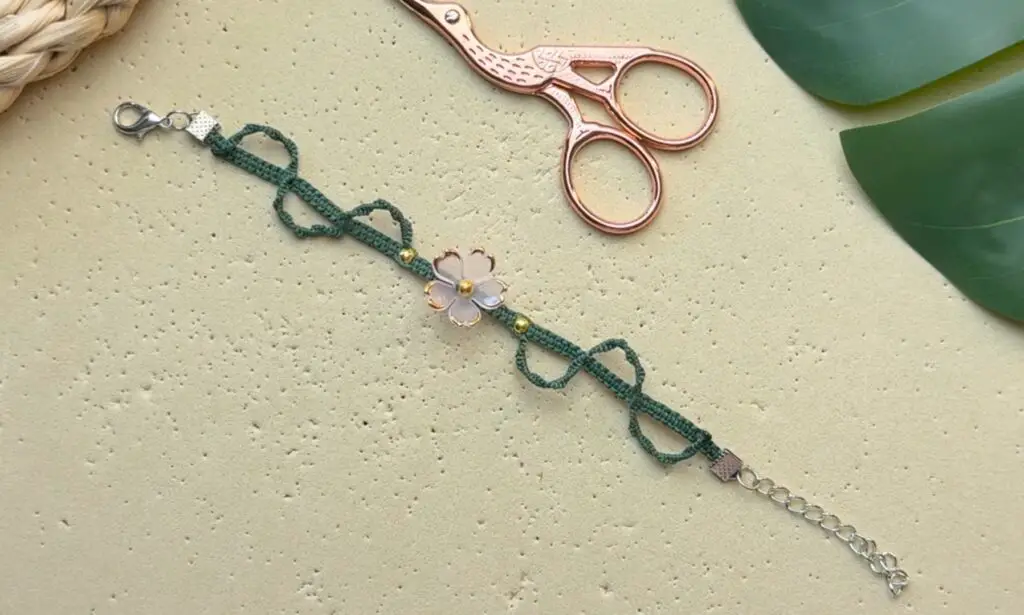
Delicate, airy, and full of pastel beads — this style leans into tiny seed beads, spaced knots, and dainty finishing for ethereal, fairycore feels.
Skill level: Beginner → Intermediate | Time: 45–70 minutes
Finished look: delicate 6–10 mm width; long dangling charm optional.
Materials
- 2–3 core cords (thin 0.6–0.8 mm nylon)
- 2–4 ultra-fine working cords (0.5–0.8 mm), pastel colors
- Seed beads (11/0) and 3–4 focal flower/pearl beads
- Small charm for center (optional)
Knots used
- Square knot (small scale), lark’s head, micro DHH.
Step-by-step
- Attach cores and working cords with lark’s head; leave a 6–8 cm tail for sliding closure.
- Micro square knots: Use groups of four very thin cords to tie shallow square knots (1–2 mm each). Space knots with a single seed bead threaded onto center cores, then lock the bead into place with the next micro SK. Repeat: bead — 3 SKs — bead — 3 SKs. This spacing gives the bracelet an airy, beaded garland look.
- Add focal elements: Midway, string a slightly larger pearl or flower bead onto the core and tie micro SKs above and below to hold it centered. Add tiny dangling charms by making short lark’s head loops and attaching small jump rings.
- Continue the micro SK + bead sequence until you reach desired length. End with a 4–5 cm tail for knot/slider.
Variations
- Use iridescent seed beads for sparkle.
- Add a tiny tassel charm for more fairy whimsy.
Finishing
- Make a sliding knot using the tail cords for an adjustable fit, or finish with a small button and loop. Trim tails and seal the ends of synthetic cords with a lighter.
5. Aura Solar Macrame Protection Bracelet Pattern
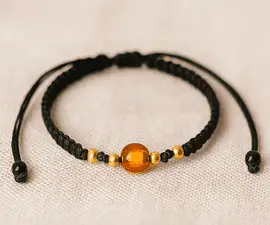
A boho-chic bracelet centered on one large focal gemstone (e.g., sunstone, labradorite) with protective knotting patterns around it.
Skill level: Intermediate | Time: 50–90 minutes
Finished size: focal bead ~10–16 mm centered; bracelet length adjustable.
Materials
- 1 focal bead with wide hole (10–16 mm) or cabochon with wire-wrapped bail
- 2 core cords (1.2–1.5 mm) for strength, 4–6 working cords (0.8–1.0 mm)
- Accent beads, small spacer beads, clasp or sliding knot hardware
Knots used
- Square knots, alternating SK rows, wrapped hitches, and decorative half hitch rays around the stone.
Step-by-step
- Attach core cords to a holding base; create a small cradle for the focal bead by making a short tube of square knots (4–6 rows) large enough to sit the bead inside. Place the focal bead into the cradle.
- Once the bead is sitting snug, continue knotting around it: use alternating SK rows to form a band, and use DHH or wrapped half hitches radiating out (like sun rays) for a decorative aura — e.g., make 3–4 DHHs from bead edge outward, back to bead, repeated around.
- Add small spacer beads on selected SKs to shimmer in the band next to the stone.
- Continue banding until the bracelet length meets wrist + adjustable allowance. End with tidy finish: 4–5 extra rows of SK ending in braid or sliding knot.
Variations
- Use a carved sunstone for literal sun energy or rose quartz for gentle vibes.
- Swap out rays for tiny dangling bead tassels.
Finishing
- Because focal beads can be heavy, reinforce cradle by doubling the core or wrapping with a few extra HK rows. Secure ends with extra knots and glue if needed.
6. Five Strand Braid Macrame Friendship Bracelet Tutorial
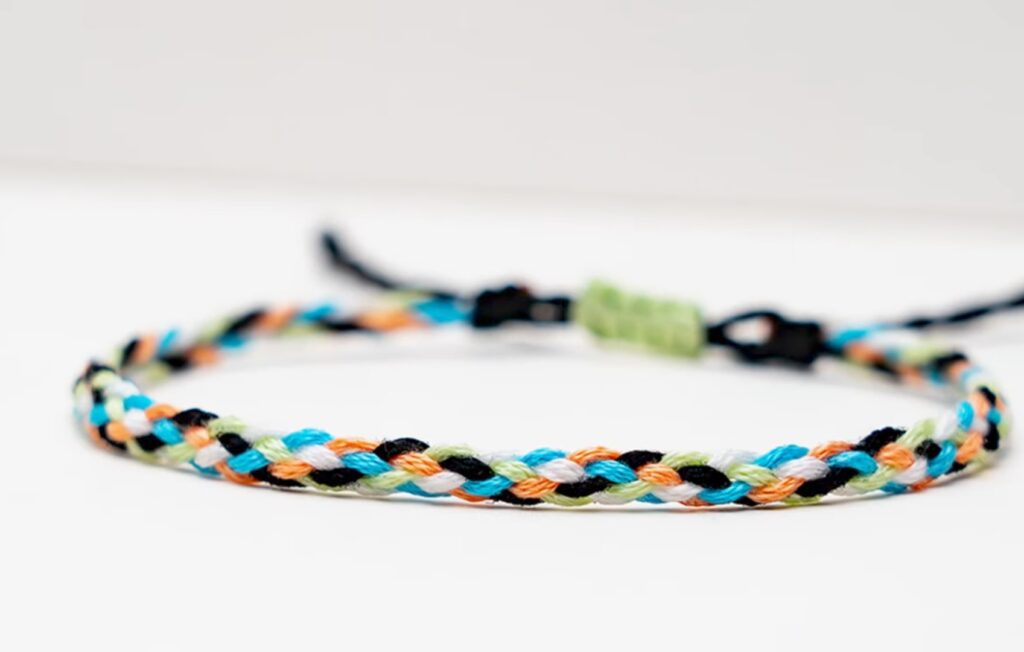
A braided look done with macramé technique — elegant in leather-style cord or soft in cotton.
Skill level: Beginner → Intermediate | Time: 30–50 minutes
Finished width: 8–12 mm depending on strands.
Materials
- Five cords of equal length (1.5–2.0 mm) — cotton for casual, faux leather for sleek look
- Clasp or sliding knot
Knots used
- Basic 3-strand braid logic adapted for 5 strands with over-under weaving, or use HK spiral sections and flat SK panels for texture.
Step-by-step (5-strand plaited braid)
- Secure the five cords across a clamp. Label them 1–5 left to right.
- To braid five strands, follow this repeating sequence: take strand 1 over 2, under 3, over 4, under 5 — pull snug — then take new leftmost strand and repeat the same move. A 5-strand plait is essentially an extended over/under pattern; practice on a short sample to get rhythm.
- Keep tension even; when you’ve braided length to wrist + tails, tie an overhand knot and finish with a sliding knot or end caps/clasp.
- Optionally, accent the braid by inserting a bead thread through one strand periodically.
Variations
- Alternate sections of braid with square-knot panels for texture.
- Use five colors for rainbow plait.
Finishing
- If using synthetic cords, melt ends slightly for a neat finish; for cotton, whip with a small length of matching thread and tuck.
7. Shamballa Bracelet Pattern
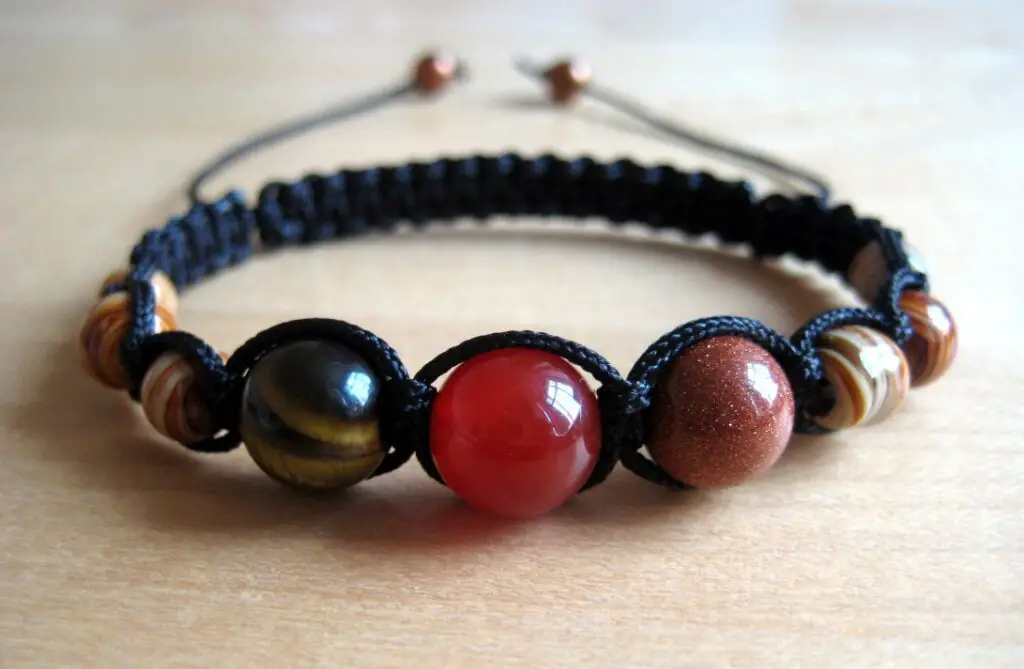
Inspired by Tibetan-style Shamballa beads: a row of sparkly beads encased in macramé square knots — classy and calming.
Skill level: Intermediate | Time: 40–70 minutes
Finished width: bead-in-center row ~8–10 mm wide
Materials
- 2 core cords (1.0–1.5 mm) + 2 thin knotting cords (0.8 mm)
- 7–9 Shamballa beads (8–12 mm) — crystal rondelles or gemstone beads with large holes
- Clasp or sliding knot
Knots used
- Square knots (for bead encasing), half knots for closures.
Step-by-step
- Thread core cords through bead holes and space beads along the center cores; secure ends with tape.
- Use the two outer working cords to tie square knots over the cores so that each bead sits snugly between two SK packets: tie 3–4 SKs before the next bead, then push bead up to sit tight, tie another 3–4 SKs, and repeat. The SK groups encase the bead row and give the Shamballa look.
- After the last bead, finish with 6–8 SKs and end in a sliding knot or clasp. Keep SK tension even for a polished look.
Variations
- Use mixed metal spacer beads between crystals for luxe contrast.
- Make a triple-row Shamballa by repeating parallel bead rows and joining them with cross-knots.
Finishing
- Secure knots with a small dab of jewelry glue inside the last knot if using slippery cords; hide glue with a small decorative bead.
8. Diamond Macrame Cuff Bracelet Tutorial
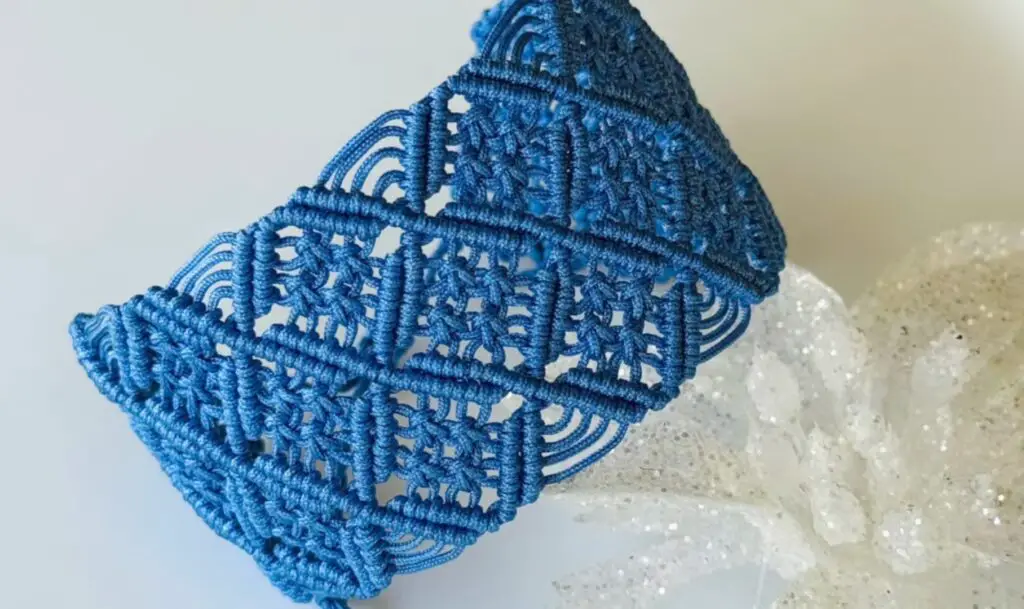
youtube.com/@reasonsbyandreeap
A wide cuff that uses diagonal clove hitch/DHH patterns to form diamond motifs — bold and modern.
Skill level: Intermediate → Advanced | Time: 90–150 minutes
Finished size: cuff width ~25–40 mm (depends on motif), circumference to fit wrist plus closure.
Materials
- 12–20 working cords (0.8–1.2 mm), length 120–200 cm depending on cuff width and wrist size
- Core base cords or backing (optional)
- Ruler/graph paper for motif charting
Knots used
- Double half hitch (DHH), diagonal clove hitch, square knot filler.
Step-by-step
- Decide cuff width (number of cords). For a diamond pattern, arrange cords in multiples according to pattern repeat (e.g., groups of 8). Secure top edge to board.
- Chart motif: On paper, map the diamond: DHHs slanting left create one side; DHHs slanting right the other. Start from top center and work outwards: use DHHs with a dedicated anchor cord (the cord you wrap around).
- Work the first diamond row by making diagonal DHHs from the outermost working cord toward the center until the diamond apex is reached. Mirror on the opposite side. Fill diamond interiors with alternating SKs or small netting of square knots.
- Repeat diamond units down the cuff row by row, staggering every other row to form linked diamonds. Keep tension uniform.
- Finish top and bottom edges with a strong row of reverse half hitch knots to prevent fraying. Attach a snap closure or sew in a leather backing with a metal clasp.
Variations
- Insert small seed beads inside diamond centers for sparkle.
- Use two-tone cords for dramatic contrast on the diamond edges.
Finishing
- Because cuffs get more wear, consider attaching a leather backing or sewing edges for extra durability. Use small rivets or end caps for a professional look.
9. Ladder Stitch Friendship Bracelet Pattern
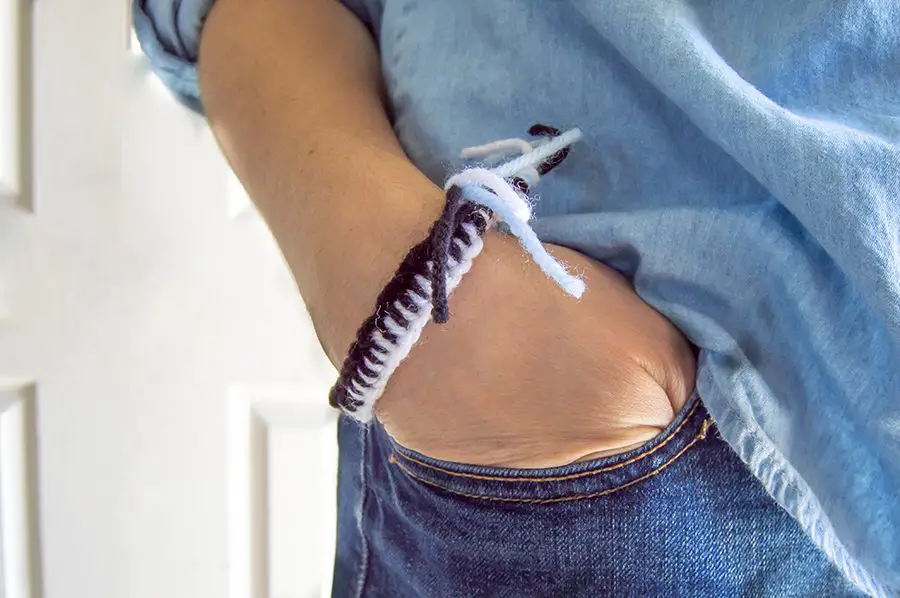
An architectural, ladder-like macramé pattern — great for showcasing a thin central core with decorative side rails.
Skill level: Beginner → Intermediate | Time: 35–60 minutes
Finished look: narrow ladder 8–12 mm wide with strong rails.
Materials
- 2 central core cords + 4 side working cords (0.8–1.2 mm)
- Small spacer beads optionally threaded on core
- Clasp or sliding closure
Knots used
- Double half hitch (for ladder rails), square knots (for rungs if used).
Step-by-step
- Attach central cores and working cords. Keep the two core cords parallel and taut — these form the ladder spine.
- Use one working cord on the left to make sequential DHHs around both core strands to create the left rail. Mirror with the right-working cord to create right rail. These rails will run parallel.
- For ladder rungs, use short square knot sets across the two rails connecting them every 4–6 DHH rows. Alternatively, insert small tubular beads across cores to emulate rungs.
- Continue the rail + rung sequence until you reach desired length. Finish with a neat overhand knot and sliding closure.
Variations
- Make it chunky by doubling rails or add metallic thread on rails for shine.
- Thread small tube beads on the rungs for an industrial look.
Finishing
- Use bead tips or crimp tubes at ends if attaching metal clasps. Melt or tuck synthetic cord ends for cleanliness.
Conclusion
These nine macramé bracelet patterns cover a wide stylistic range — from delicate fairycore strands to bold diamond cuffs and bead-studded Shamballa elegance. Pick the pattern to match your mood or skill level: try the Spiral Double Beaded for a quick statement, the Wave or Straight Wave for flowing texture, and save the Diamond Cuff for a dedicated weekend project. Swap cord thickness, beads, and colorways to make each design entirely your own. Happy knotting — I can’t wait to see what you create.


