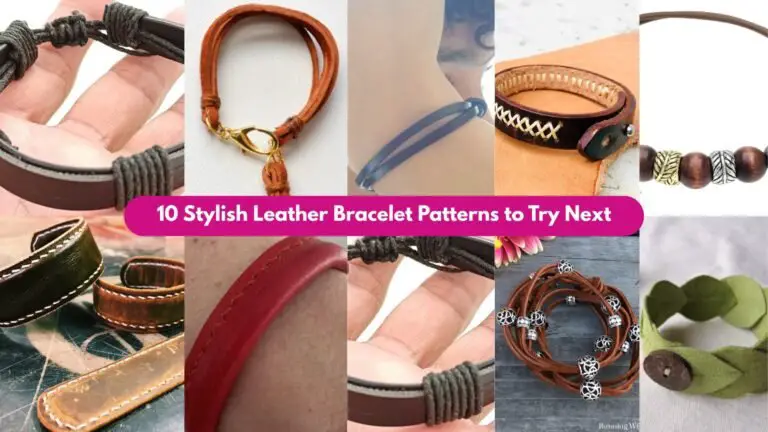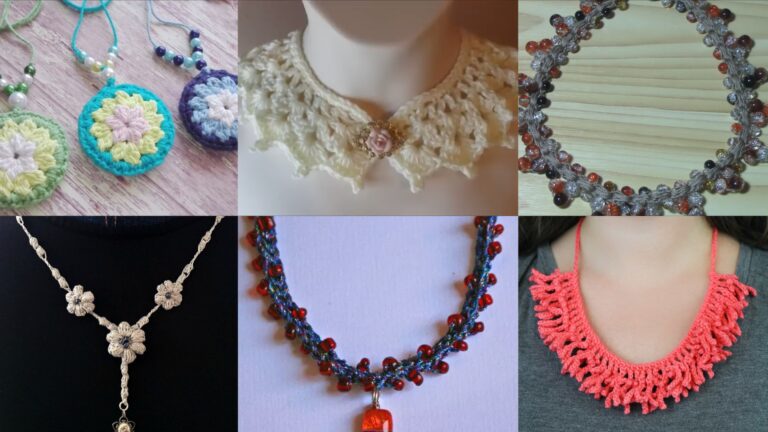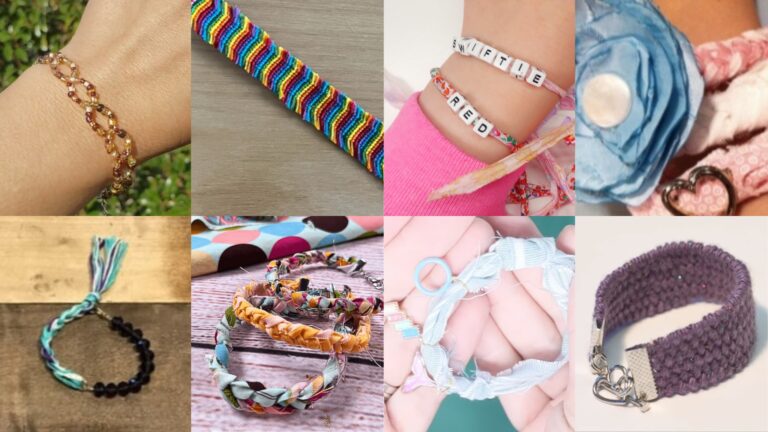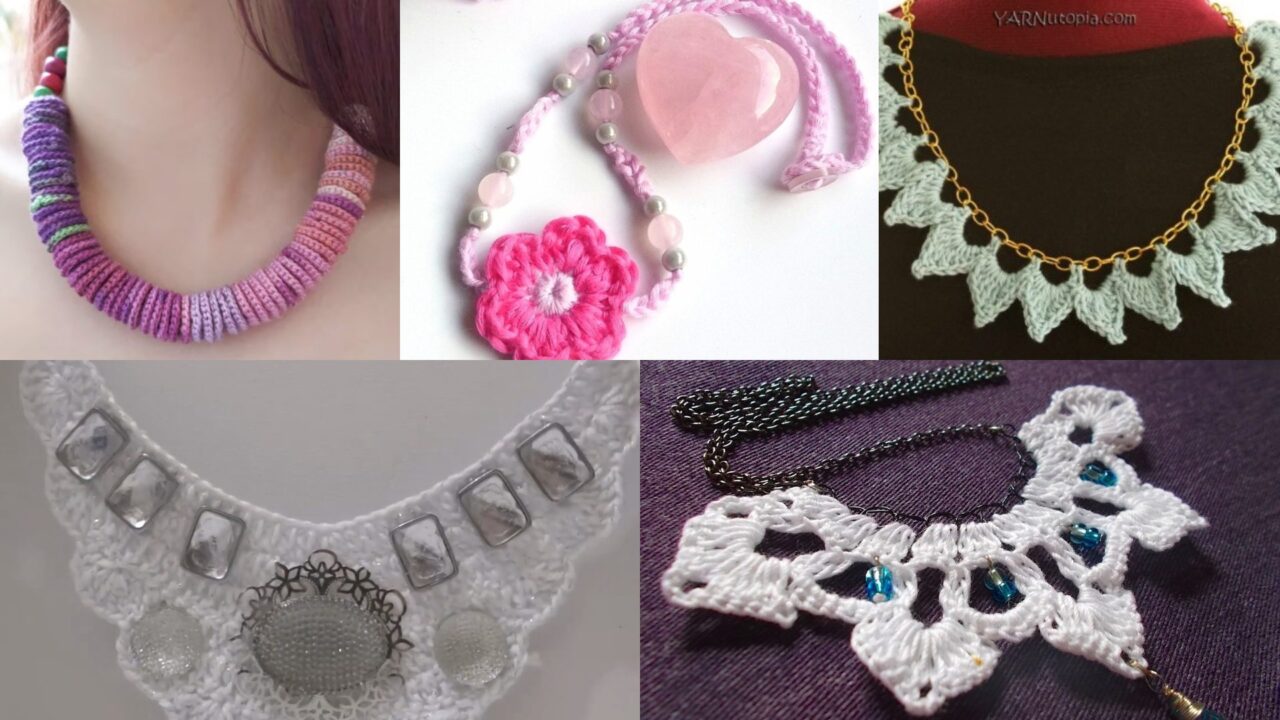
Handmade crochet necklaces are tiny works of art — lightweight, endlessly customizable, and perfect for showing off color, texture, and your handiwork all year round. Whether you want fresh florals for spring, boho layers for summer festivals, bold spikes for fall, sparkly rhinestone glamour for winter parties, or a mixed-media garland for transitional wardrobes, these five patterns cover every mood and season. Each pattern below includes skill level, materials, finished size, clear step-by-step instructions, finishing notes, and helpful tips so you can make beautiful, wearable necklaces with confidence.
Quick stitch legend (US terms): ch = chain, sl st = slip stitch, sc = single crochet, hdc = half double crochet, dc = double crochet, tr = treble (tr), st(s) = stitch(es), sk = skip, rep = repeat, beg = beginning.
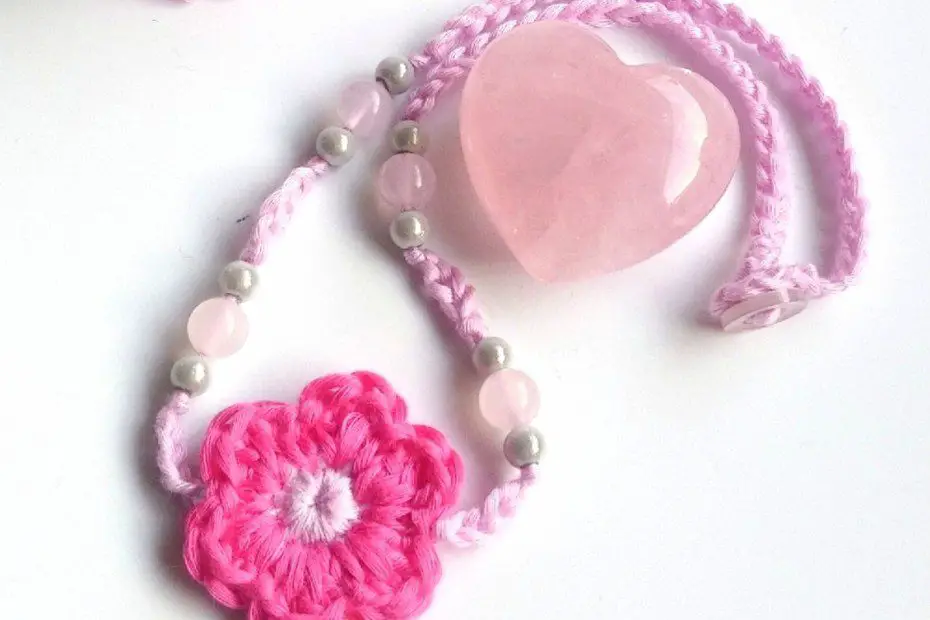
1. Crochet Spring Blossom Beaded Necklace Pattern
Skill level: Beginner–Intermediate (basic crochet + beading)
Materials:
- Fingering or sport-weight cotton (or cotton-blend) — about 50–80 g
- Small seed beads and 6–10 small pearl or glass beads for centers
- Crochet hook 2.5–3.5 mm (match yarn)
- Tapestry needle, small jump ring or bail, necklace chain or cord (16–20″)
- Optional: fabric stiffener (diluted) or spray starch
Finished size: Single blossom pendant about 1.5–2″ (4–5 cm) across; necklace length customizable (typical 16–18″).
What you’ll make
A delicate crocheted blossom pendant with beaded center that hangs from a short chain or cord — fresh and feminine for spring outfits.
Step-by-step
Make the blossom (make 1–3 for cluster look):
- Center ring: ch 4, sl st to form a ring. Ch 1 (does not count as st).
- Round 1 (petal bases): sc 8–10 into ring (even distribution) — adjust to get a flat round. Join with sl st. (You may work 8 sc for a small blossom, 10 for fuller.)
- Round 2 (petals): ch 3, skip next st, sl st into next st — rep around to make loops for petals; join.
- Round 3 (petal shaping): Into each ch-3 loop: (sc, hdc, 2 dc, hdc, sc) — this creates a small ruffled petal. Fasten off and weave ends.
- Beaded center: Thread a small pearl or glass bead onto a short length of thread; sew it into the center of the blossom with a few secure passes. For extra sparkle, sew seed beads around the bead in a circle.
Optional cluster: Make 2–3 blossoms in varying sizes/colors and attach them together by sewing the backs together slightly overlapped to make a cluster pendant.
Attach bail and chain:
6. Sew a small jump ring or create a tiny crochet loop (ch 6, sl st to base) at the back/top of the blossom. Attach to chain/cord using the jump ring, or slide the chain through the crochet loop.
Finishing & styling
- Lightly spray with diluted fabric stiffener if you want the petals to hold shape (dry flat).
- Wear alone on a dainty chain or as part of a short layered set.
Tips
- Pre-string seed beads onto the working yarn if you plan to incorporate beads into petals — slide beads into place as you work.
- Use variegated thread for a subtle watercolor blossom effect.
- For a sturdier pendant, make two identical blossoms and sew them together around a thin piece of felt.
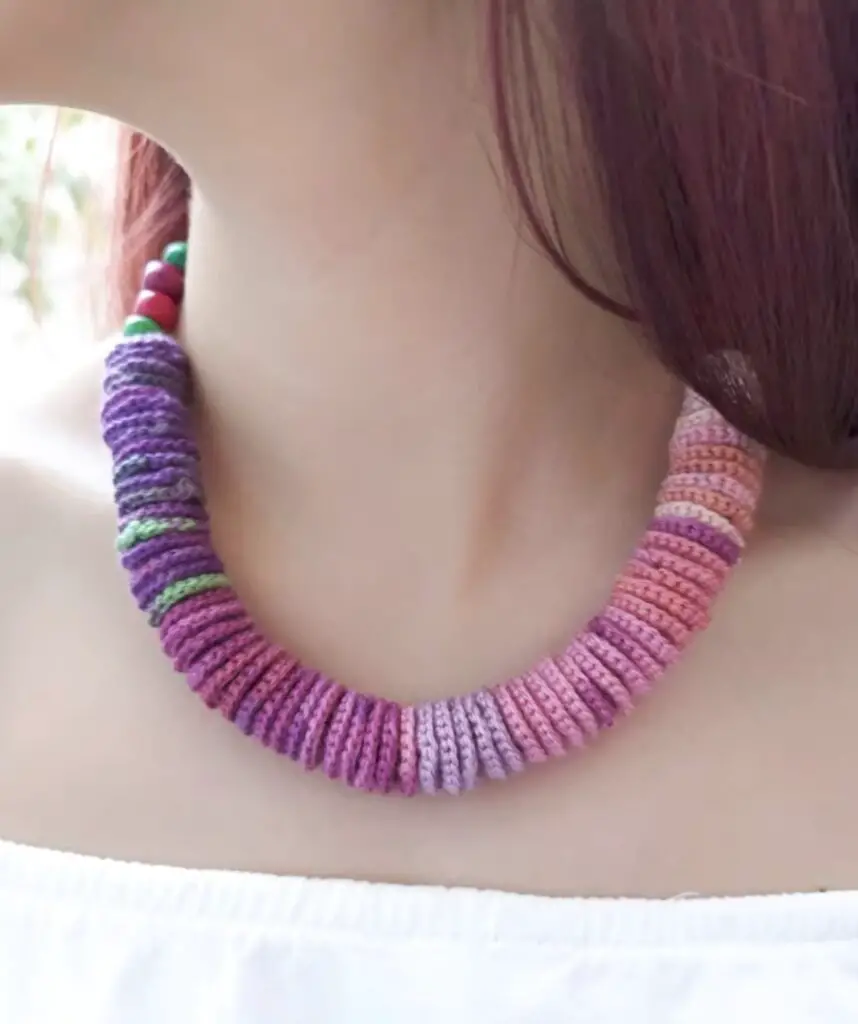
2. Bohemian Crochet Necklace Tutorial
Skill level: Intermediate (combination of simple motifs + assembly)
Materials:
- Light worsted or DK cotton, any color palette (2–3 colors recommended)
- Small wooden beads, metal spacer beads, tassels or charms
- Crochet hook 3.5–4.5 mm
- Necklace cord, chain, or a long crocheted strap (30–36″)
- Tapestry needle, scissors
Finished size: Long boho strand about 28–36″ (can be doubled for layered look).
What you’ll make
A long bohemian necklace built from small crocheted beads, bead spacers, and a statement tassel — wearable as a single long strand or doubled for layered styling.
Step-by-step
Crocheted bead covers (make 8–12):
- Slide a small wooden bead onto a short length of yarn and hold it near the center. Ch 2, work 6 sc into the 2nd ch from hook to form a small ring that will snugly fit the bead. Place this little circle over the bead and continue to work rounds increasing slightly to cover the bead: Round 2 — 2 sc in each st (12 sc). Round 3 — sc, 2 sc in next around (18 sc) if needed. Finish and secure, trimming yarn with tail tucked inside bead. Repeat for all beads.
Simple motif beads (optional):
2. Make tiny granny or shell motifs (about 1–1.5 cm) to alternate between wooded beads for more texture.
Assemble necklace:
3. Decide length: if using cord, measure and cut. If crocheting the strap: ch to desired length (e.g., 140 ch for 36″ loop) and work a row of sc for a firm strap, or ch a long chain for a delicate look.
4. Arrange beads and motifs on strap/cord: slide on wooden beads (if used using a drilled hole) or sew crocheted bead covers onto strap at intervals. Add metal spacers for shine. Create an intentional pattern (e.g., bead, 10 ch, bead, 6 ch, motif, 10 ch).
5. Add a tassel or pendant at center by tying or sewing it to the strap. Finish ends with crimp beads + clasp or tie a slipknot for adjustable length.
Finishing & styling
- Boho necklaces look great layered with shorter chains and chokers.
- Add charms or coin pendants for more festival flair.
Tips
- Use natural wood for an earthy look, or painted beads for boho-bright.
- If you want instant durability, thread beads on thin beading wire and cover with a crocheted sleeve for a “necklace rope” effect.
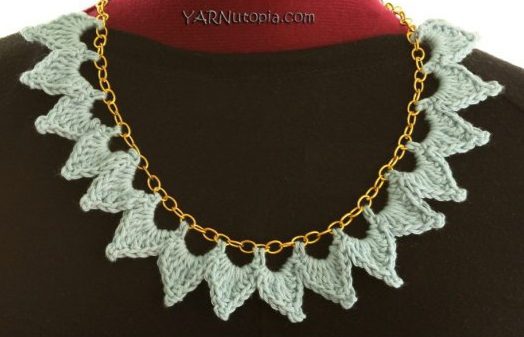
3. Crochet Spike Statement Necklace Pattern
Skill level: Intermediate (shaping + joining)
Materials:
- DK or light worsted yarn (contrasting colors for spikes and base) — 50–100 g
- Small wooden or plastic cones (optional) or make crocheted spikes
- Crochet hook 3.5–4.5 mm
- Necklace chain or ribbon base (16–20″)
- Tapestry needle, glue (optional for attaching cones)
Finished size: Collar-style length about 16–18″; spikes length vary (0.5–2″).
What you’ll make
A dramatic statement collar with repetitive spike motifs that create texture and movement — bold enough for cooler months and stylish for evening looks.
Step-by-step
Make a crocheted spike (make 8–12):
- Work a tapered, cone-shaped spike: ch 3, join to form a ring. Round 1: ch 1, 6 sc in ring, join. Round 2: sc in next, 2 sc in next around (9 sc). Round 3: sc in each stitch. Round 4: sc2tog, sc around to begin tapering (reduce gradually), continue rounds decreasing until you can close the tip with a few sc2tog and finish off, leaving tail to sew. Alternatively, create a short icord-like spike by crocheting dc decreases.
- Stuff very lightly with a small bit of yarn or leave hollow.
Prepare collar base:
3. Crochet a short collar strip to attach spikes: ch to desired length (matches chain/neck size minus seam allowances), row 1 sc across. Work 6–8 rows to create a firm, stable base that will sit against the neckline.
Attach spikes:
4. Place spikes evenly along the lower edge of the collar base. Sew each spike securely, using the tail to stitch into the base and knot. For added strength, attach a small wooden/plastic cone inside crocheted spike with glue then sew around rim.
5. Finish collar sides with small chains or ribbon loops and attach clasp hardware.
Finishing & styling
- Wear as a collar with a simple solid top to let spikes be the focal point.
- For softer looks, make spikes smaller and more widely spaced.
Tips
- For metallic accents, use yarn with metallic thread intertwined or sew small metallic beads to spike tips.
- Balance: more spikes = heavier visual weight; fewer larger spikes = modern drama.
4. Crochet Necklace Using Rhinestones Tutorial

Skill level: Intermediate (small embellishments + glue/secure setting)
Materials:
- Fine cotton thread or embroidery floss for delicate look, or lace-weight yarn for larger pieces
- Flat-back rhinestones (glass or acrylic) with holes or sew-on settings, or sew-on crystals
- Small crochet hook (1.5–2.5 mm for thread)
- Felt backing (optional), fabric glue that dries clear (optional), needle and matching thread, ribbon or chain for neckband
Finished size: Pendant about 1.5–3″ depending on design; necklace length 16–18″ typical.
What you’ll make
A sparkling focal pendant or a row of rhinestone-studded motifs on a delicate crocheted chain — ideal for party season and winter holiday outfits.
Step-by-step
Make the base motif (e.g., a small round doily pendant):
- ch 6, sl st to form ring. Round 1: ch 3, work 11 dc into ring (12 dc total). Join.
- Round 2: ch 2, sk next st, dc in next around to create picot spaces for rhinestones. Join and fasten off.
Attach rhinestones:
3. Use sew-on rhinestones: place rhinestone so its holes align with the motif where you want sparkle. Sew through holes with matching thread, securing tightly but not distorting the work. For flat-back rhinestones without holes, use a tiny dot of clear-drying fabric glue applied to the motif and press rhinestone into place — allow full cure per manufacturer instructions.
4. For extra security, back the motif with a small felt circle glued and sewn to cover the backside and capture glue spills.
Create delicate chain/base:
5. Make a crocheted chain of sc or picot loops to act as the neckband (or attach the motif to a thin chain with jump rings). For crocheted strap: ch long length (adjust to desired length), work 1–2 rows of sc to make it stronger.
6. Attach motif at center with a few secure stitches. Add a small clasp or tie ends.
Finishing & styling
- Rhinestone pieces are best kept for special occasions; avoid washing. Spot-clean only.
- Combine with simple earrings for cohesive sparkle.
Tips
- Use sew-on settings for heavy stones to avoid glue failure.
- If you want full bling, crochet a narrow band and sew a row of small sew-on rhinestones along it for a crystal collar.
5. Crochet Mixed Media Garland Necklace Pattern

Skill level: Intermediate (assembly + mixed materials)
Materials:
- Variety of yarns/threads (cotton, metallic, ribbon yarn), small crochet motifs (flowers, leaves, tiny circles), beads, miniature charms, tiny pompoms, vintage buttons — mix & match
- Thin chain or leather cord (20–30″) for base
- Crochet hook to match threads, tapestry needle, small jump rings, glue (optional)
Finished size: Long garland-style necklace 30–36″ which can be doubled or worn long.
What you’ll make
A playful garland necklace composed of many small crocheted motifs and found objects strung together — eclectic, seasonal, and endlessly customizable.
Step-by-step
Make motifs (create a set of small components):
- Tiny flowers: ch 4, sl st to ring; Round 1: ch 2, 5 dc in ring, sl st in ring repeat to make 5 petals. Fasten off.
- Tiny leaves: ch 7, sc in 2nd ch from hook, hdc in next, dc in next 2, hdc, sc; sl st to base. Fasten off.
- Mini pom-poms: wrap yarn 20–30 times around a small cardboard circle, tie center, cut loops and trim to small pom.
- Crochet small circles/coins: ch 4, sl st; round 1: 8 sc in ring; join — make several in different colors.
Prepare base & layout:
5. Lay out chain or cord and pin or mark where you want each motif. Alternate textures: motif, bead, tiny button, chain section, motif. Space items rhythmically (every 1–2″ depending on motif size).
6. Attach motifs: For motifs with a small loop, thread through chain links or use tiny jump rings to attach motifs to chain. For motifs without holes, sew them onto thin ribbon or slide the ribbon through a sewn loop. Use small jump rings to attach charms and buttons (stitched onto a tiny jump ring).
Secure & finish:
7. Use jump rings for metal pieces and sew or glue (sparingly) textile pieces onto the chain. Add a clasp to the ends or leave long to knot when worn.
8. For extra security, stitch motifs at two points so they don’t flip easily; use matching thread to keep invisible.
Finishing & styling
- This necklace looks great layered over knitwear in fall/winter or over a breezy dress in spring/summer.
- To change seasons, swap motifs: pastel florals for spring, shells for summer, wooden leaves for autumn, felted beads for winter.
Tips
- Balance weight: heavier objects (metal charms, buttons) should be placed near the back or balanced between two sides.
- Keep spare motifs on hand so you can swap pieces seasonally without re-making the whole necklace.
General Finishing, Care & Styling Notes
- Blocking: For crochet motifs (flowers, leaves), gently block on a flat surface to open petals and even edges. Use a light spray of water or fabric stiffener for pieces that need to hold shape.
- Attachment security: Sew rather than glue when possible. If you must use glue (for rhinestones or cones), choose a fabric-safe, clear-drying adhesive and use sparingly.
- Neckline pairing: Short, delicate pieces (blossoms, rhinestones) pair well with V-necks and scoop necks; long garlands and boho strands layer nicely over turtlenecks or maxi dresses.
- Care: Fiber necklaces (cotton, thread) are best spot-cleaned or hand-washed gently. Bead- and metal-heavy necklaces should be wiped clean and stored flat to avoid tangling or tarnish.
- Customization: Change yarn weight, add metallic thread, or swap beads to adapt each pattern for seasonality — light linen blends for summer, wool-blends for cozy winter statement pieces.
Conclusion
These five crochet necklace patterns give you a seasonal toolkit: delicate spring blossoms, bohemian long strands for sunny days, dramatic spikes for statement outfits, rhinestone sparkle for celebrations, and a playful mixed-media garland for everyday eclectic style. Each project is intentionally adaptable — change yarn, color, bead choices, or scale to make each necklace your own. Enjoy mixing techniques (crochet + beads + metal) and experimenting with placement to create wearable art that suits your wardrobe and the changing seasons.