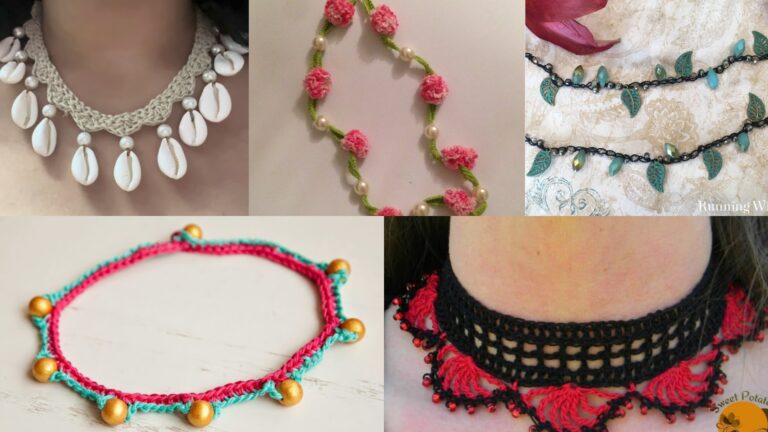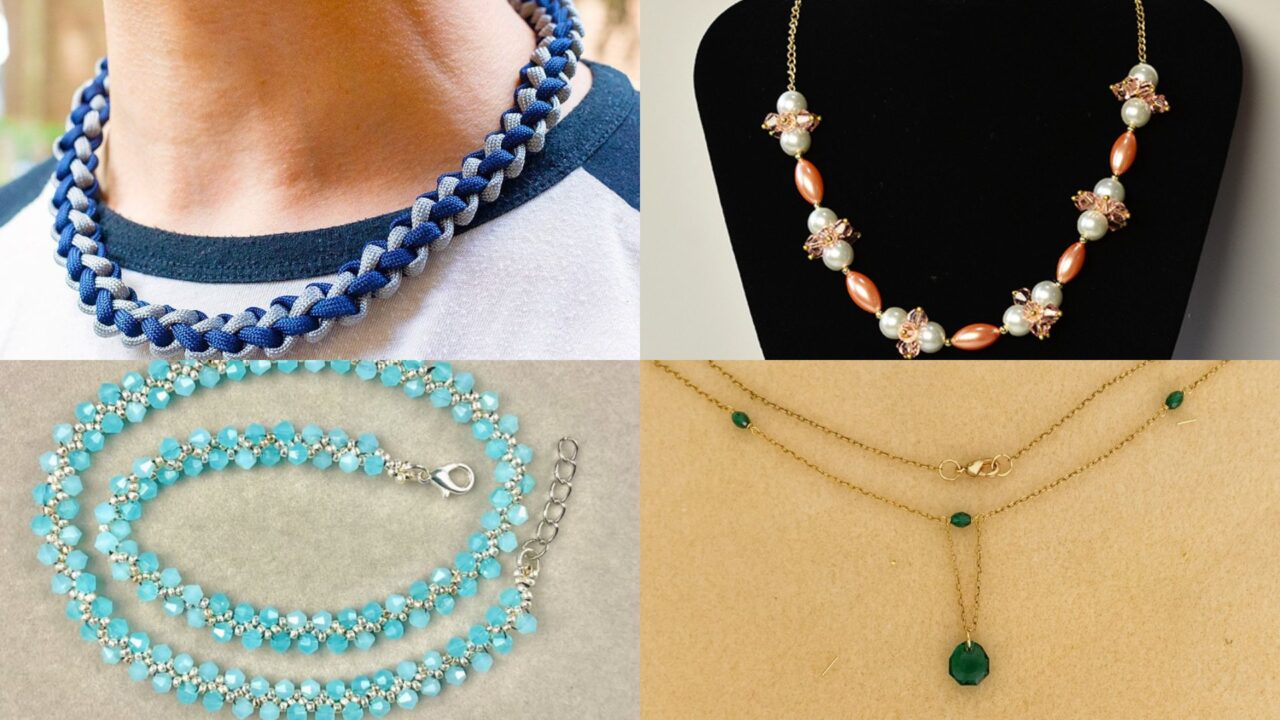
Necklaces are one of the most satisfying projects for makers — small, fast, and endlessly customizable. Whether you like clean minimal lines, natural stones, rugged paracord, or delicate crochet and tatting, this collection gives you eleven beginner-friendly patterns that teach useful techniques and result in wearable pieces. Each pattern includes skill level, materials, step-by-step instructions, finishing notes, and practical tips so you can make each necklace with confidence.
Use this post as a menu: pick the style that matches your materials and mood, then follow the step-by-step guide. Swap colors, bead sizes, and closures to make each design your own.
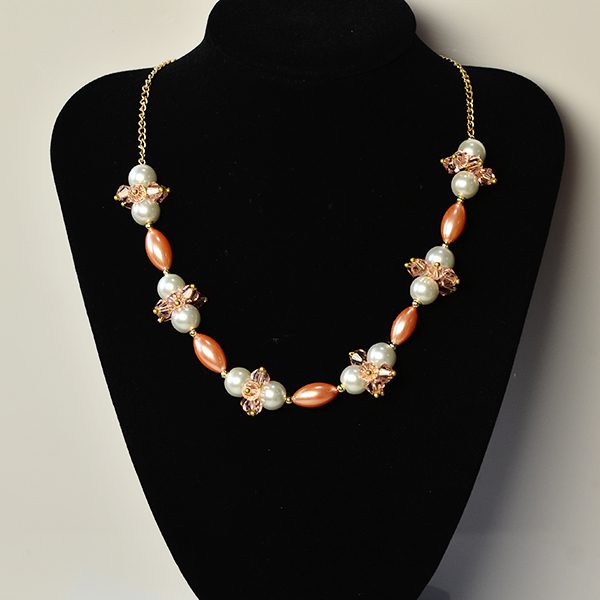
1. Simple Pearl Chain Necklace with Glass Beads Pattern
Skill level: Beginner
Materials:
- 16–18″ chain (fine to medium gauge)
- Small glass pearl beads (4–6 mm), 12–20 beads depending on design
- Headpins (one per bead)
- Jump rings (2) and clasp (lobster or spring ring)
- Round-nose pliers, chain-nose pliers, wire cutters, ruler
Finished length: 16–18″ adjustable
Step-by-step
- Measure your chain to the desired finished length, leaving 1/2–1″ extra for attaching the clasp. Cut the chain.
- Slide a pearl bead onto a headpin. Using round-nose pliers, bend the wire just above the bead 90°.
- Wrap the wire around the round-nose pliers to form a loop. Trim excess wire with cutters and close the loop neatly with chain-nose pliers so the bead dangles cleanly. Repeat for each bead.
- Decide bead spacing: for a clustered look, attach beads close together on the central links of the chain; for spaced look, attach beads every 1/2–1″ or on every 3rd link.
- Open a jump ring, slip on one end of chain and one half of clasp, close. Repeat on the other end with the remaining jump ring (or attach extender chain as desired).
- Attach each bead loop to the chosen chain links with pliers; close loops fully.
Finishing & care
- Ensure wire loops are tightly closed so beads don’t fall off.
- Store flat to avoid kinking the chain; polish gently with a soft cloth.
Tips
- Use plated or brass chains for a budget-friendly look; sterling chain for higher-end finish.
- Mix glass pearls with tiny spacer beads (seed beads) for color accents.
2. Chain and Crystal Bead Necklace Tutorial

Skill level: Beginner–Intermediate
Materials:
- Medium-weight chain (18–20″)
- Swarovski or Czech crystal bicones (4–6 mm), 12–24 pieces
- Bead caps (optional), headpins, jump rings, clasp
- Crimp beads & crimping pliers (optional if using beading wire)
- Pliers and cutters
Step-by-step (beaded drops on chain)
- Create crystal drops: slide a crystal onto a headpin, add bead cap if desired, form a wrapped loop (or simple loop) and trim. Make enough for your chosen spacing.
- Lay out the chain and mark the center. Decide how many drops you want; symmetrical looks work best (e.g., 5 drops: 2 on each side + center).
- Open the chosen chain link with pliers, slip on the drop loop, and close link (or attach drop using a small jump ring). Repeat with each drop.
- Attach clasp and jump rings to chain ends. If you want a clustered look, attach several drops to the same link.
- For a more formal version, attach crystals onto a short length of fine wire and then attach that wire segment to the chain, hiding wire with a decorative bead cap.
Finishing & care
- Check every connection for tightness. Crystals are delicate — avoid hard knocks.
- Store in a separate pouch to protect the crystals’ facets.
Tips
- Try alternating crystal sizes for graduated sparkle.
- Use an extender chain to make the necklace adjustable for different necklines.
3. Paracord Necklace Pattern
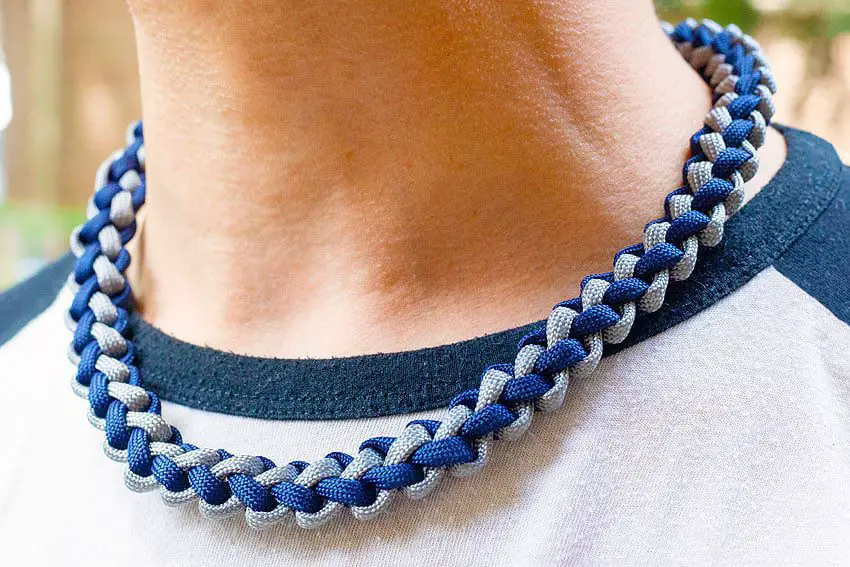
Skill level: Beginner (basic knots)
Materials:
- 4–6 mm paracord (one or two colors), about 1.5–2 meters depending on length/style
- Buckle, ring, or bead closure (or tie ends)
- Scissors, lighter (to melt ends), ruler
Step-by-step (simple knotted pendant style)
- Decide finished length. Cut two equal lengths of cord (or one long folded if making symmetrical).
- Fold cords in half, form a loop at the midpoint for a slip-over closure or attach a small ring for a clasp later.
- Make a few square knots or spiral knots starting just below the loop to create a neckband. Alternate colors every few knots for pattern. Square knot: with two center cords as core, tie left cord over, then right cord over, pull tight; repeat to complete the knot.
- Leave a central open area for a pendant or bead. Thread a large wooden or metal bead onto the center cords and secure above and below with tight overhand knots or a couple of half hitches.
- Finish the ends by tying securely, trimming, then singeing with a lighter and pressing melt together (carefully) to prevent fraying.
Finishing & care
- Paracord is weatherproof and great for casual, outdoorsy styles.
- Avoid direct contact with perfumes or oils which can darken natural cord fibers.
Tips
- For a cleaner finish, use end beads or crimps specifically made for cord ends.
- Try the cobra knot for wider band looks or macrame for more intricate designs (see macrame pattern).
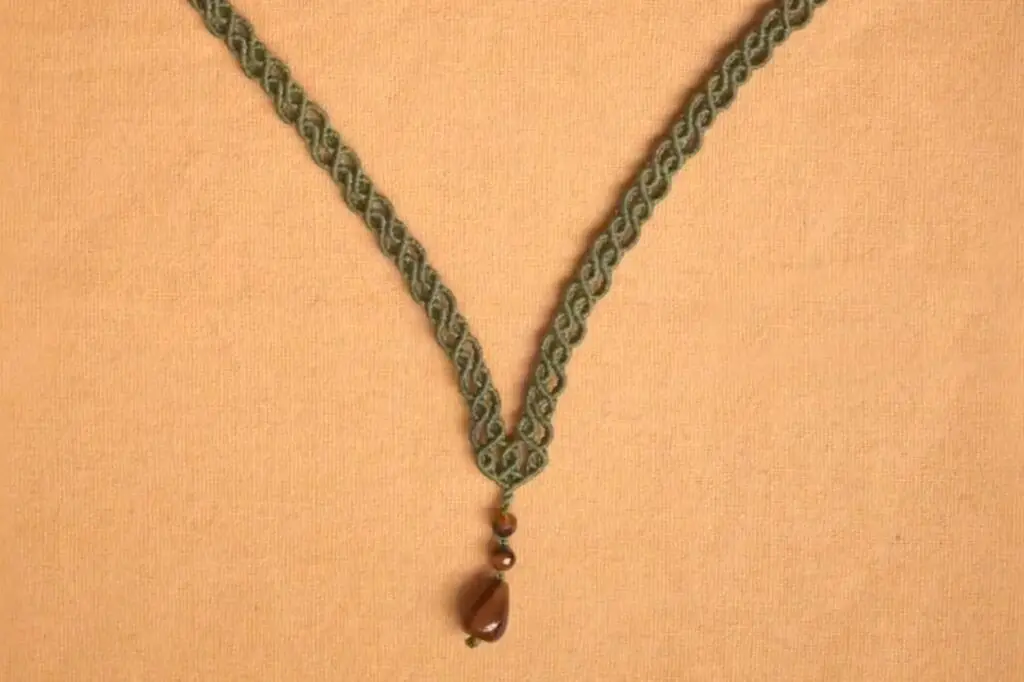
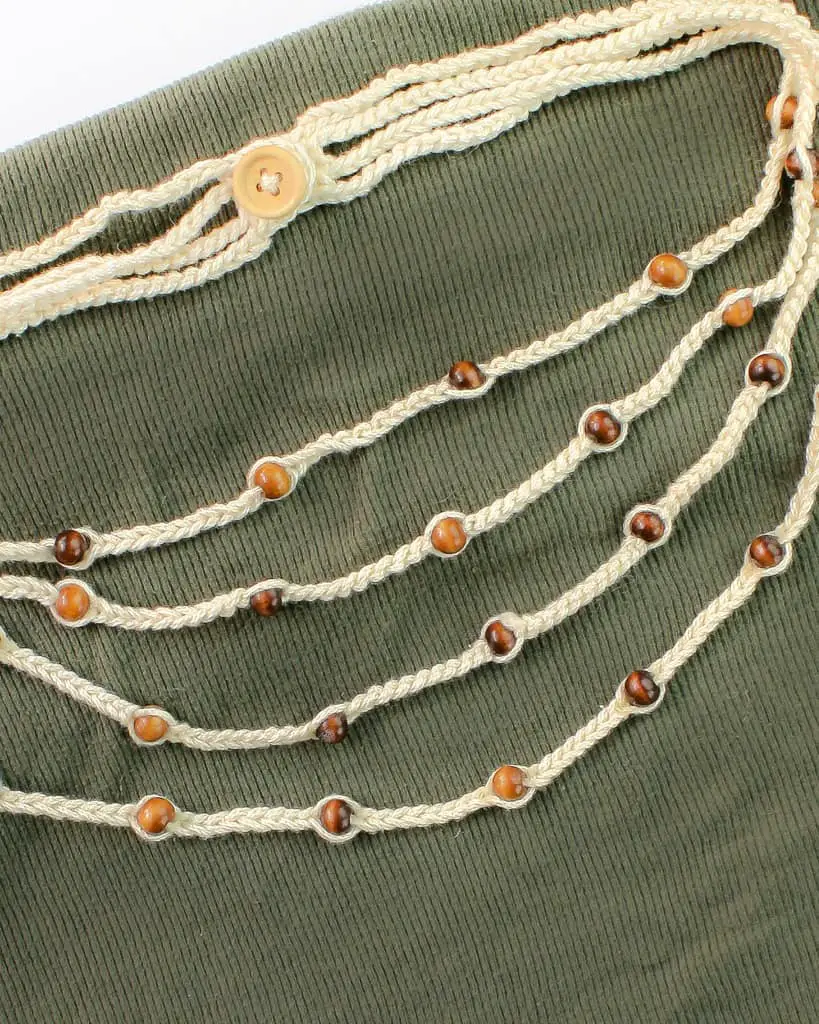
4. Macramé Necklace with Stone Tutorial
Skill level: Beginner–Intermediate (macramé basics)
Materials:
- Waxed cotton cord or thin macramé cord (1 mm–1.5 mm)
- Flat stone or cabochon with a narrow middle or hole — 20–30 mm
- Beads (optional), scissors, glue (clear-drying), tape, ruler
Step-by-step (wrapped cabochon)
- Cut four lengths of cord: two long outer cords (~1.2–1.5 m) and two shorter working cords (~1.0 m). Fold and secure at top (use tape to hold on a board).
- Position the stone between cords centered beneath the anchor point.
- Use square knots (or half knots) to create a tight net that holds the stone. Start with two square knots across the front, then bring cords around the back and repeat to form a woven cradle. Pull knots snug so the stone is secure but not crushed.
- When the stone is snugly cradled, add decorative rows of knots above and below, incorporating beads if desired. Create a short macramé strap or attach chain ends to wear as a necklace.
- Finish by tying the cords in a secure loop and trimming excess; dab glue on internal knots to secure.
Finishing & care
- Test fit by gently shaking to ensure the stone is secure. Add extra knots if needed.
- Avoid soaking; spot clean cords carefully.
Tips
- Use slightly thicker cord for larger stones.
- Add a small piece of felt behind the stone for comfort and to prevent movement.
5. Bohemian Beaded Necklace Pattern
Skill level: Beginner–Intermediate
Materials:
- Mixed beads (wooden, glass, seed beads) — 20–60 depending on size
- Beading thread or thin wire, beading needle (if thread), clasp and jump rings
- Spacer beads, pendant (optional), bead stopper or tape
Step-by-step (layered boho strand)
- Plan your layout: arrange beads on a bead mat—mix small seed beads with larger focal beads and spacers for rhythm.
- Cut a length of beading thread about 2× the desired finished length plus extra for knotting. Secure one end with bead stopper.
- String beads in the planned order. For a textured boho look, cluster several seed beads between larger beads. Add a small pendant as focal center if you like.
- When beading is complete, secure the ends with crimps if using wire, or tie secure surgeon’s knots if using thread (apply a tiny drop of clear glue on a knot for longevity). Attach jump rings and a clasp.
- Trim excess thread/wire and tuck knots into nearest beads for a tidy finish.
Finishing & care
- Keep the necklace away from water for wooden beads; wipe clean with a dry cloth.
- Store flat to avoid tangles.
Tips
- Mix textures (matte wood + shiny glass) for an authentic boho vibe.
- Use a multiple-strand approach: make two shorter matching strands and connect as layered necklace using a multi-loop clasp.
6. Bicone Easy Beaded Necklace Tutorial
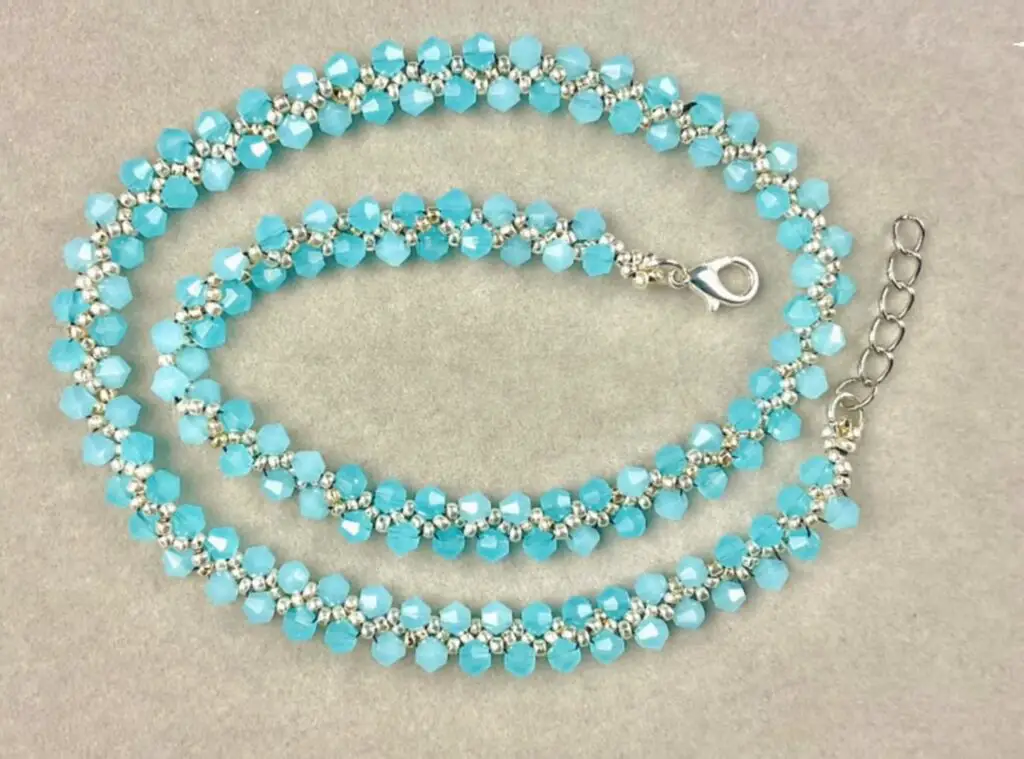
Skill level: Beginner
Materials:
- Bicone crystals (4–6 mm), seed beads (11/0), beading wire or stringing thread, crimp beads, clasp
- Beading needle (if using thread), wire cutters, crimping pliers
Step-by-step (sparkling single strand)
- Cut beading wire to desired length plus 6″ extra. Attach one end to clasp using a crimp bead and crimping pliers.
- String seed beads in a repeating pattern and intersperse bicones at regular intervals (for example: 5 seed beads, 1 bicone, 5 seed beads). Continue until length reached.
- Finish by sliding a crimp bead, loop through clasp, and crimp. Trim excess wire and hide the crimp by sliding a nearby bead over it or using crimp covers.
Finishing & care
- Use crimp covers for a professional, bead-like finish.
- Store in a pouch to protect the crystal facets.
Tips
- Try a graduated necklace using smaller bicones near the back and larger ones at the front for a soft V shape.
- Alternate bicone colors for gentle ombré effects.
7. Three Beaded Layered Necklace Pattern
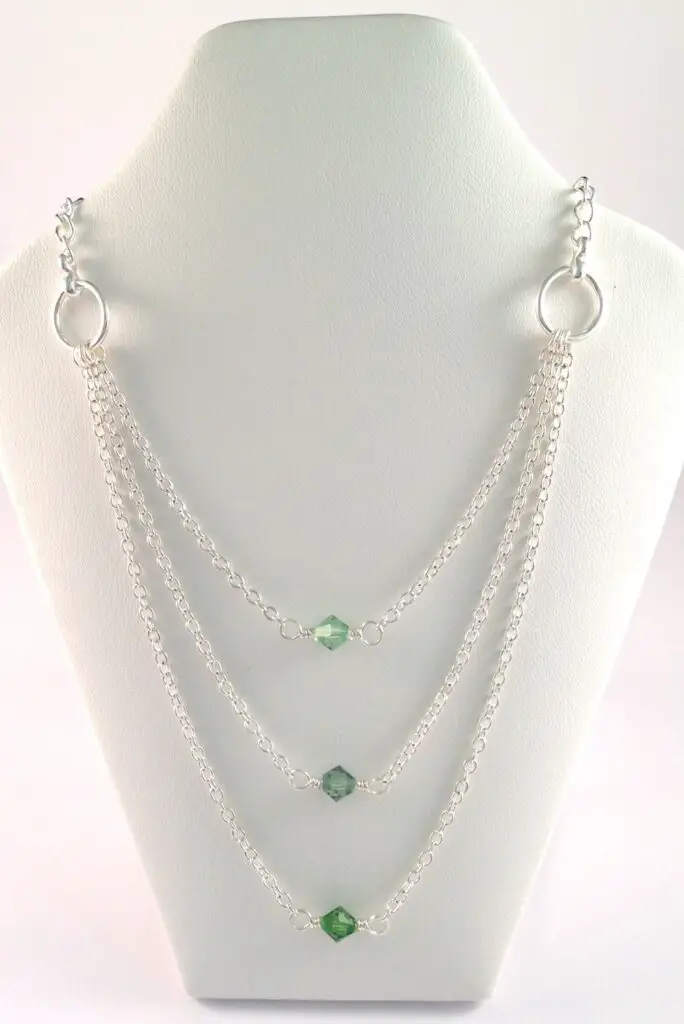
Skill level: Beginner–Intermediate (basic assembly)
Materials:
- Three chains or three beaded strands of varying lengths (e.g., 14″, 16″, 18″)
- Jump rings, clasp, small connectors (multi-strand ends) or a chain connector bar
- Assortment of small charms, beads, or pendants (optional)
- Pliers, cutters
Step-by-step
- Prepare three separate strands: one short choker-like, one mid-length, and one longer. For beaded strands, string seed beads on thin wire or thread; for chain strands, choose delicate chain styles.
- Use a multi-strand clasp connector or a small split ring with multiple loops to attach the three strands so they remain aligned at the back. Attach a clasp to the connector.
- At the front, balance the visual weight: the shortest strand can be plain, the middle can have a tiny pendant, and the longest can have a small charm cluster. Attach charms with jump rings.
- Test layering on and adjust lengths for a clean, non-tangling look—shorten or lengthen with jump rings as needed.
Finishing & care
- Make sure connectors are strong — lighter chains can pull out of weak crimps.
- When storing, hang or lay flat to preserve layers.
Tips
- Keep clasp width small to comfortably fit behind the neck with all connections.
- Use an extender on the shortest layer to adjust the spacing between layers.
8. Paracord Macramé Necklace Tutorial
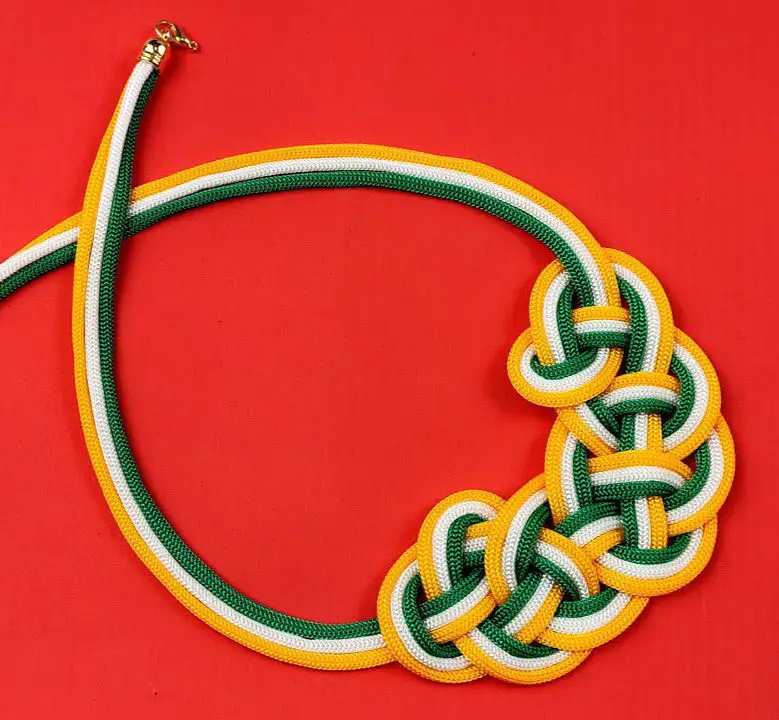
Skill level: Intermediate (combines paracord with macramé)
Materials:
- Two colors of paracord or waxed cord (1–2 m total)
- Decorative bead or pendant with large hole
- Scissors, lighter, ruler
Step-by-step (woven macramé pendant cord)
- Cut one main cord (length to go around neck plus extra) and two working cords about 4× the desired finished cord length. Fold all cords in half and secure top.
- Using the working cords, knot a series of square knots around the main core (the pendant cord), creating a flat decorative band. Alternate colors every several knots.
- Slide pendant or bead onto the cord and secure with tight half hitches beneath the pendant. Continue macramé to create a finishing neckband if desired.
- Finish ends with strong knots, melt paracord ends slightly, and press to seal.
Finishing & care
- Check knots for slippage and reinforce with a drop of glue if necessary.
- Paracord is durable—perfect for everyday wear.
Tips
- Use a larger pendant for dramatic focal points; smaller beads for delicate looks.
- Try alternating knot patterns (spiral vs. flat) for texture variation.
9. Square Crochet Necklace Pattern
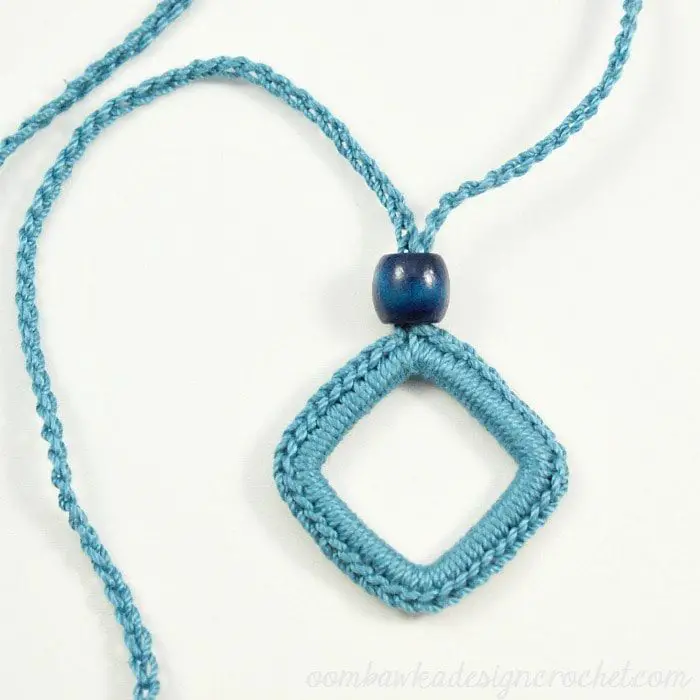
oombawkadesigncrochet.com
Skill level: Beginner–Intermediate (basic crochet)
Materials:
- Fine crochet thread or fingering yarn, small crochet hook (size appropriate to thread)
- Small beads (optional), tapestry needle, measuring tape
- Necklace chain or cord to attach finished piece
Step-by-step (crocheted square pendant)
- Crochet a small square motif: ch 4, join to ring. Round 1: ch 3, 2 dc, ch 2, 3 dc, ch 2 — three corners; join. Round 2: in each corner do (3 dc, ch 2, 3 dc) to expand square. Stop when you reach desired pendant size (about 2–3 cm).
- Optionally incorporate beads: thread small beads onto yarn before you start and slide them into position as you crochet. Add a row of beads or scatter them on the square.
- Make a small loop at top of square (ch 6 and attach back to top edge) to act as bail. Alternatively sew your square to a jump ring.
- Attach jump ring to loop and hang from chain or cord.
Finishing & care
- Block the square gently to flatten and define edges.
- Crochet thread may need gentle hand-washing only.
Tips
- Use metallic thread or embroidery floss for a lacy, decorative look.
- Make a trio of small squares joined horizontally for a wider bib-style necklace.
10. Rose Garden Crochet Necklace Tutorial

Skill level: Intermediate (small motif assembly)
Materials:
- Cotton thread or light yarn, small hook
- Small rose crochet motifs (pre-made or crocheted), tiny leaves, yarn needle, chain or ribbon for base
- Optional tiny beads for centers
Step-by-step
- Crochet several tiny rose motifs (approx. 1–2 cm each): foundation ch 21, sc across, roll strip and sew to form a rose, or follow a spiral rose pattern if you know it.
- Arrange roses on a flat surface as you want them to appear along the necklace—single focal rose or small cluster. Add tiny crocheted leaves between flowers.
- Sew roses and leaves onto a ribbon or crocheted chain base using matching thread; hide stitches within the petals for neatness. Add bead centers if desired for sparkle.
- Attach clasps to ribbon ends or tie ribbon ends for an adjustable, romantic finish.
Finishing & care
- Hand-wash gently and reshape petals while damp.
- Avoid heavy perfumes that may discolor cotton.
Tips
- For sturdier wear, stitch the motifs onto a thin metal or leather strip that’s comfortable against skin.
- Use variegated thread for roses for a painterly color effect.
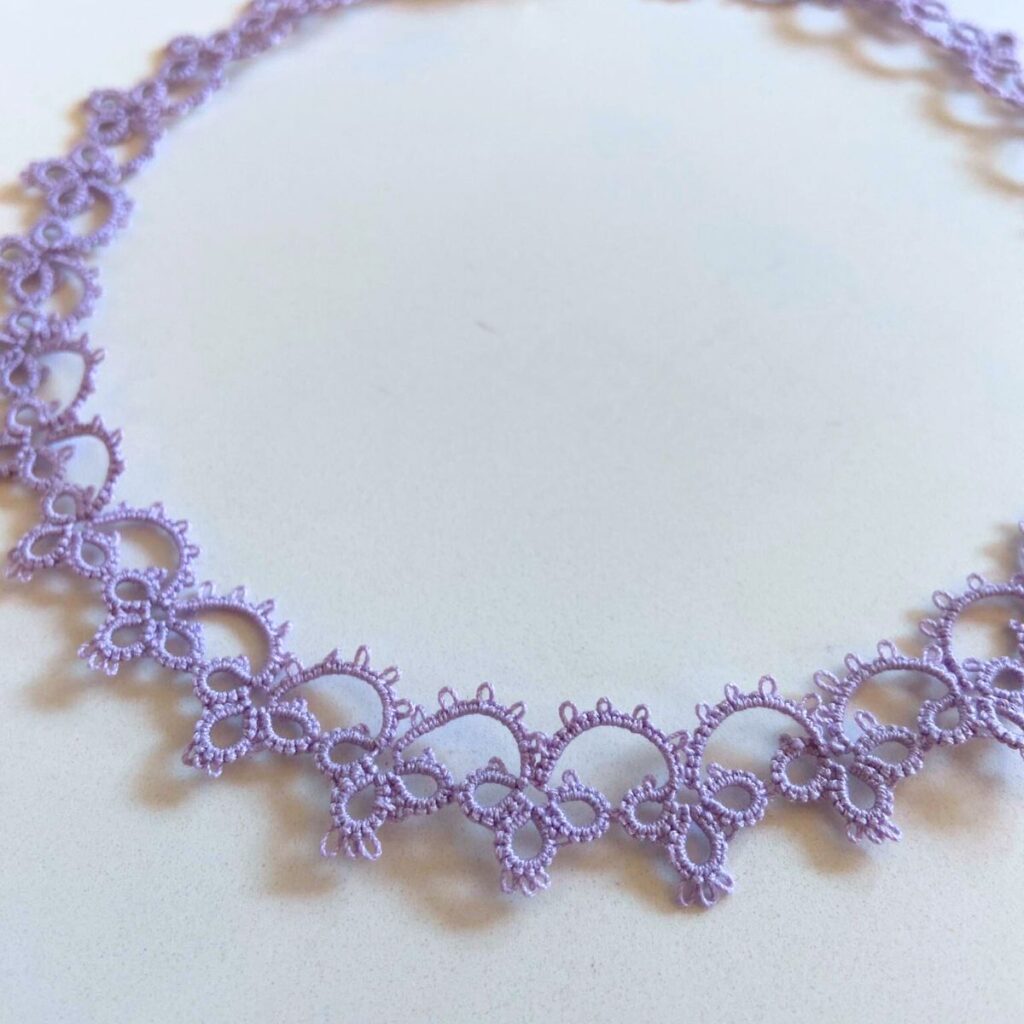
11. Easy Necklace Tatting Pattern
Skill level: Intermediate (basic tatting rings and chains)
Materials:
- Tatting shuttle or tatting needle, fine cotton thread (size 20–30)
- Small beads (seed beads), jump ring, clasp, small pliers
Step-by-step (simple tatted daisy strand)
- Tat small rings (e.g., 5–5–5 picots) to form tiny daisy motifs. Basic ring: [knot sequences] (if new to tatting, follow a standard beginner ring pattern). Add a bead on the core thread before closing the ring for centers.
- Make a chain of rings connected by picots to form a short motif strand that will act as your focal necklace panel.
- Join ends with a jump ring and attach a short fine chain or thread to finish the necklace length. Attach clasp.
- Tat several small motifs and join them into a flexible necklace by connecting picots across motifs.
Finishing & care
- Stiffen lightly with diluted fabric stiffener if you want a firmer, lace-like look; otherwise keep soft for comfort.
- Store flat to avoid crushing.
Tips
- Tatting is portable—practice with scrap thread before committing to your final color.
- Use contrasting center beads to make the motif pop.
Conclusion
These eleven necklace patterns cover a wide range of beginner-friendly techniques: simple stringing, chain work, paracord and macramé knots, crochet motifs, and delicate tatting. Each pattern is designed to teach a technique you can reuse across other projects — once you’ve made one basic beaded strand, you can graduate quickly into multi-strand layering; once you’ve made a small crochet motif, you can turn it into earrings, bracelets, or a statement bib.
Choose one project to start, gather your materials, and enjoy the satisfying rhythm of creating something small and wearable. Care for your pieces according to the materials used (gentle washing for fiber work, careful storage for beads and crystals), and don’t be afraid to experiment with color or scale to make each necklace uniquely yours.