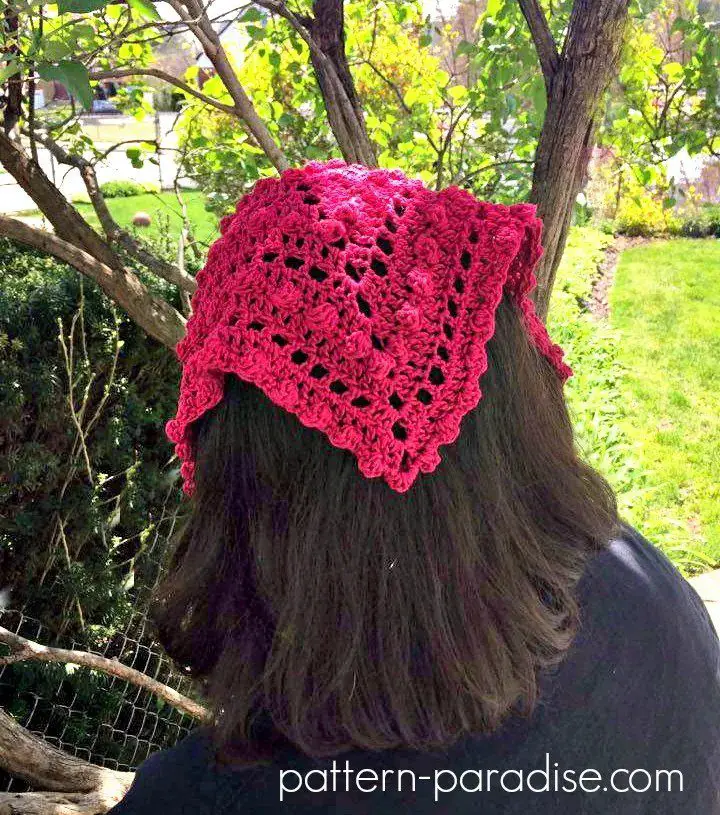
Light, breezy, and endlessly customizable — a crocheted bandana is the perfect summer accessory. Below you’ll find a clear introduction to materials and stitches, then seven complete bandana patterns with skill level, materials, step-by-step instructions, finishing notes, and practical tips so you can make each bandana with confidence.
Quick stitch legend (US terms): ch = chain, sl st = slip stitch, sc = single crochet, hdc = half double crochet, dc = double crochet, tr = treble crochet, st(s) = stitch(es), beg = beginning, yo = yarn over.
Use a light cotton or cotton-blend yarn for summer — it breathes well and blocks nicely.
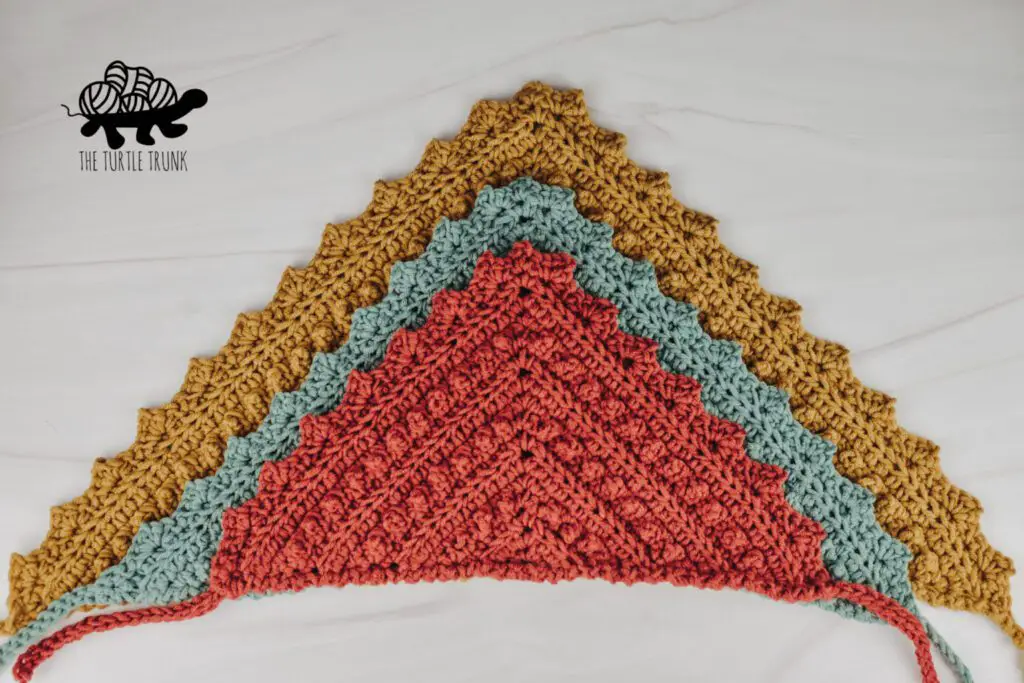
1. Crochet Bobble Kerchief Bandana Pattern
Skill level: Intermediate (basic increases + bobble stitch)
Materials:
- Light DK or sport weight cotton (approx. 100–150 g)
- Crochet hook 4.0 mm (adjust for gauge)
- Yarn needle, scissors, stitch marker
Finished size (approx): 24–28″ (61–71 cm) across top; 12–14″ (30–36 cm) drop. Adjust by adding or reducing rounds.
Step-by-step instructions
- Make a slipknot. Ch 4; join with a sl st to form a ring.
- Round 1 (center): ch 3 (counts as first dc), work 2 dc into ring, ch 1, 3 dc into ring two times (you’ll have three 3-dc groups separated by ch-1 spaces). Join with sl st to top of ch-3.
- Round 2 (first increase): sl st into the first ch-1 space, ch 3, 2 dc in same ch-1 space, ch 1, 3 dc in next ch-1 space, ch 1; at the corner space work (3 dc, ch 1, 3 dc). Join. This forms the triangular shape.
- Subsequent rounds: For each new round, work 3 dc into each side space and (3 dc, ch 1, 3 dc) in the corner space. This is the standard triangle increase that keeps the bandana flat.
- Add bobbles for texture: After 4–6 rounds, add a bobble round every 2–3 rounds. A bobble: (yo, insert, pull up loop) repeated 5 times into same stitch leaving loops on hook, yo and pull through all loops, ch 1 to secure. Place bobbles staggered across rows (for example, every 3rd 3-dc group) to create balanced texture.
- Continue alternating plain rounds and bobble rounds until top edge reaches desired width.
Finishing
- Work one round of sc along the top edge; place 3 sc in corner gaps to keep edge flat.
- Optionally add small tassels at the two lower corners for a boho finish.
- Weave in ends and block lightly to shape the triangle and open the bobbles.
Tips
- Space bobbles wider if they’re pulling the fabric in; reduce bobble size (3 partial dc) for subtler texture.
- Use a slightly larger hook for the last 2–3 rounds to soften the drape.
- Mark the center stitch on each row if you have trouble locating the center increase.
2. Picot Bandana Crochet Tutorial
Skill level: Beginner+ (basic stitches + picot edge)
Materials:
- Sport or DK cotton (approx. 80–120 g)
- Crochet hook 4.0 mm (or size recommended on yarn label)
- Yarn needle, measuring tape
Finished size (approx): 22–26″ (56–66 cm) across top; 10–13″ (25–33 cm) drop.
Step-by-step instructions
- Start a small triangle: ch 3, dc 2 in 3rd ch from hook (or create a magic ring and work 3 dc cluster).
- Row method: Begin each row with ch 3 (counts as dc). Work dc across; at the center increase by working (dc, ch 1, dc) in the center stitch; finish the row with 2 dc in the last stitch or space to form the corner. Turn. Repeat rows until the bandana reaches desired width.
- Alternative: use the round-by-round triangle method (same as Pattern 1) if you prefer working in the round.
- Edge preparation: Fasten off center tail if used. Join yarn at a corner with sl st and work one round of sc around the entire outer edge to even it out.
- Picot round: sc 2–3 sts, ch 3, sl st into first ch (forming a picot) — repeat across. Adjust spacing (2–4 sc between picots) to suit your yarn weight.
Finishing
- Wet-block or steam lightly to flatten picots.
- Use a contrast color for the picot round for visual interest.
Tips
- If picots curl, add one extra sc between them to stabilize the edge.
- For a stretchier picot, make ch 5 and sl st into the 3rd ch instead of ch 3.
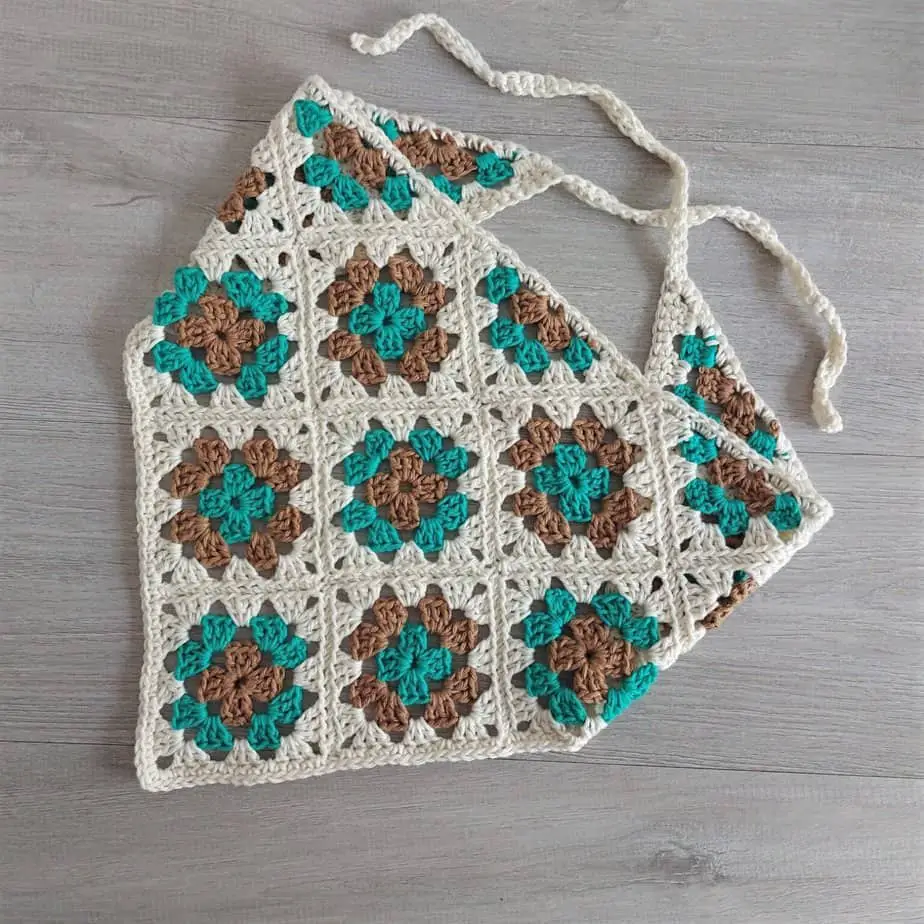
3. Crochet Granny Square Bandana Pattern
Skill level: Beginner–Intermediate (granny clusters + joining)
Materials:
- Light worsted or DK cotton in 2–3 colors (total ~120–180 g)
- Crochet hook 4.0–4.5 mm
- Tapestry needle, scissors
Concepts: Either join pre-made granny squares or work the granny stitch in a triangular layout.
Option A — Make & join three granny squares
- Make standard granny squares approx. 6–7″ (15–18 cm) each: ch 4, join to ring. Round 1: ch 3, 2 dc, ch 2, 3 dc, ch 2 repeat 3 times; join. Work 2 more rounds of granny clusters to reach size.
- Make three identical squares. Lay them out so two share the top and one points downward to form a triangle, then join with sl st or mattress stitch. Trim and shape any excess to form a neat triangle.
Option B — Granny stitch triangle (direct)
- ch 5, sl st to form ring. Round 1: ch 3, 2 dc in ring, ch 2, 3 dc in ring, ch 2 — three groups. Join.
- For each round, work (3 dc, ch 2, 3 dc) in corner spaces and single 3-dc granny clusters into side spaces. Continue rounds until desired width.
Finishing
- Add a tidy sc round and optional picot or scallop border.
- Weave in ends and block to even squares and joins.
Tips
- Change colors every 1–2 rounds for a fun striped granny look.
- To make a lighter bandana, use fewer rounds or thinner yarn.
4. Easy Crochet Bandana Tutorial
Skill level: Beginner (very simple rows of dc or hdc)
Materials:
- Cotton or cotton-blend DK (80–120 g)
- Crochet hook 4.0–5.0 mm (larger hook = softer drape)
- Tapestry needle
Finished size: Customizable — stop when top edge measures what you want.
Step-by-step instructions
- Start with a magic ring or ch 3 and work 3 dc into the ring to form a small triangle center. Join lightly.
- Row increases method (straightforward): Each row begins with ch 3 (counts as dc). Work dc across the row; at the middle of the row work 2 dc in the center stitch (this creates the center increase). Also increase at the beginning and end of each row by working 2 dc in the first and last stitch or by ensuring the turning chain creates the corner increases. Repeat until desired width.
- Alternatively use the round increase triangle method (same as Pattern 1) if you prefer working in rounds.
Finishing
- Work one round of hdc or sc for a neat edge.
- Add ties (long chain) or a button & loop if you want a no-tie closure.
Tips
- Use a larger hook for a looser, breezy drape; use a smaller hook for more structure.
- This method is great for a quick project or beginners who want a wearable piece fast.
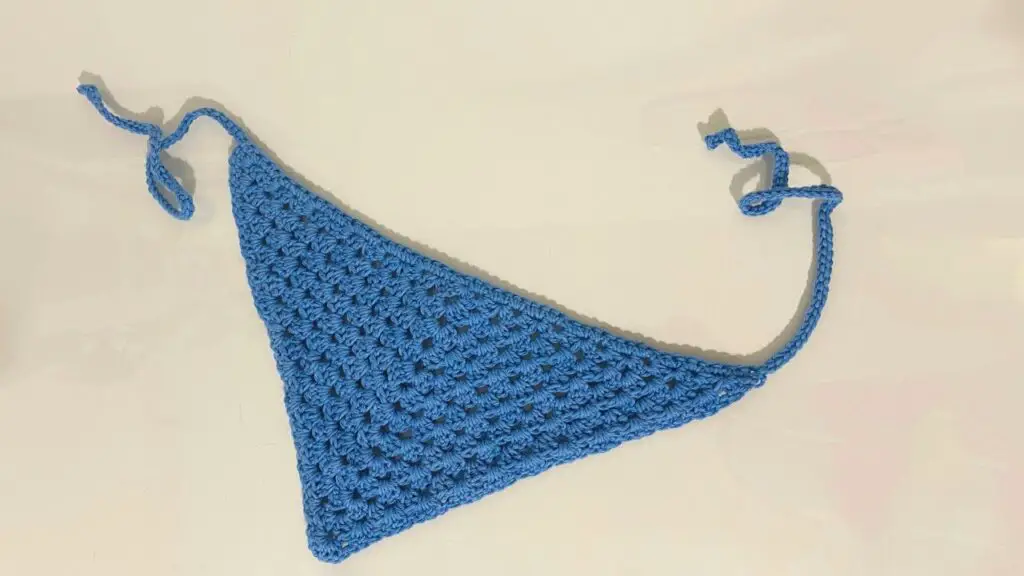
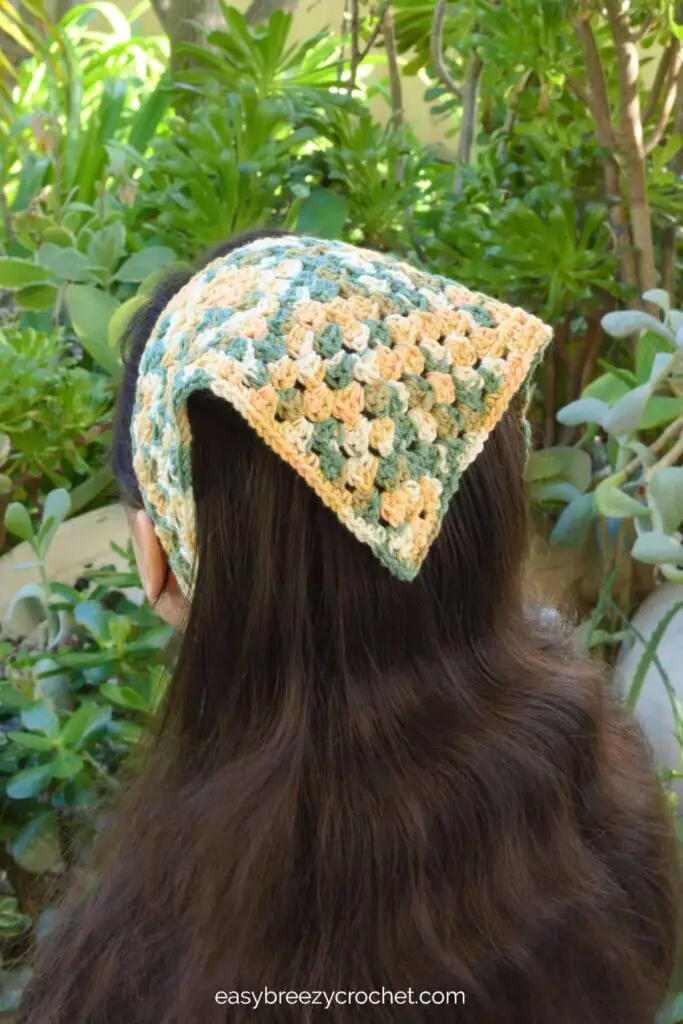
5. Crochet Bandana Using Granny Stitch Pattern
Skill level: Beginner–Intermediate (classic granny clusters)
Materials:
- DK cotton (100–150 g)
- Hook 4.0 mm
- Tapestry needle
Step-by-step instructions
- ch 5; sl st to make a ring. Round 1: ch 3, 2 dc in ring, ch 1, 3 dc in ring, ch 1 twice; join — you’ll have three groups.
- For each round, work granny clusters into each space and for the center increase do (3 dc, ch 1, 3 dc) in the middle space. This builds the triangle naturally with granny clusters across the rows.
- Continue rounds until the top edge is the width you want.
Variations
- Alternate colors every 1–2 rounds for stripes.
- Use 2-dc clusters for a denser fabric.
Finishing
- Add a sc border to tidy the shape.
- Weave in ends and block lightly.
Tips
- If you prefer smaller holes, use a slightly smaller hook.
- Stopping earlier gives a narrower top edge for a bandana-style headwrap.
6. Scalloped Bandana Crochet Tutorial

Skill level: Intermediate (scallop/shell edging)
Materials:
- Sport or DK yarn (80–130 g)
- Hook 4.0 mm
- Yarn needle
Concept: Make any triangle base, then add an attractive scalloped shell border.
Step-by-step instructions
- Create a triangle base using the easy dc triangle or granny triangle method to your desired size.
- Work one round of sc around the entire outer edge to even the stitches and prepare a stable base for shells.
- Scallop/shell round: skip 2 sts, 5 dc in next st (shell), skip 2 sts, sc in next st — repeat around. Adjust the number of skipped stitches or dc in the shell so the shells sit evenly. If spacing doesn’t finish neatly, add 1–2 extra sc between shells to balance.
- For a deeper scallop, increase to 7 dc per shell; for a tighter scallop, use 3 dc.
Finishing
- Weave ends and block so scallops set nicely.
- Optionally sew small beads at shell centers for a delicate shimmer.
Tips
- If scallops ripple, add an extra round of sc before the shell round to stabilize.
- Try a contrasting color for the scallop round to frame the bandana.
7. Crochet Summer Mesh Bandana Pattern

Skill level: Beginner (airy open mesh)
Materials:
- Fingering or sport cotton for light drape (80–120 g)
- Hook 3.5–4.5 mm (choose for desired openness)
- Yarn needle
Finished size (approx): Aim for 24–26″ across top for a light, drapey bandana.
Mesh stitch idea & instructions
- Begin with a magic ring and work 3 dc clusters (or start with ch 3 and small cluster method).
- Row structure (dc + ch-1 mesh): Each row begin with ch 3 (counts as dc). Ch 1, skip next st, dc in next st across to the center. At the center make ch 1 then dc into center stitch (this creates the center increase). Continue the mesh to the end and finish with 2 dc in the last stitch to form the corner. Turn. Repeat rows.
- For larger holes, use ch 2 between dcs instead of ch 1.
- Continue rows until the top edge is the width you want.
Finishing
- Work a gentle sc or picot edge if desired.
- Block while damp to open and set the mesh.
Tips
- Mesh is forgiving — to make it fuller, add rows; to make it lighter, use a thinner yarn.
- Cotton-linen blends work beautifully for a beachy finish.
General Finishing & Fit Notes (applies to all patterns)
- Sizing: For an adult neck kerchief, aim for 22–28″ (56–71 cm) across the top. For larger headscarves, add rounds/rows. The drop (center point length) is commonly 10–14″ (25–36 cm) but adjust to personal preference.
- Blocking: Lightly wet/block cotton bandanas to shape edges and open lace/motif patterns. Pin flat on a towel until dry.
- Ties & closures: Add long ties (chain and whipstitch ends) or small tassels at two top corners. For a no-tie option, sew a button on one corner and make a small loop on the opposite corner.
- Care: Machine wash gentle or hand wash; reshape while damp and line dry for best results. Avoid high heat.
Conclusion
These seven bandana patterns — from quick beginner triangles to textured bobbles, lacy scallops, and airy mesh — give you a range of styles to match any summer outfit. Each pattern is easily adjustable: change yarn weight, hook size, or number of rounds to make the bandana larger, smaller, lighter, or more structured. With simple finishing options like picot edges, scallops, tassels, or buttons you can personalize every piece for a casual beach look, a boho festival vibe, or a delicate neckline accent.
Happy hooking! 🧶