Beaded earrings are one of the fastest ways to add personality to any outfit — lightweight, customizable, and perfect for using up bead stash. Whether you love clean geometric shapes, boho tassels, or delicate floral motifs, these eight patterns cover a range of styles and skill levels. Each tutorial includes a materials list, step-by-step instructions, finishing notes, and quick tips so you can make beautiful, wearable earrings today. Grab your beads, thread, and pliers — let’s make some sparkly ear candy.
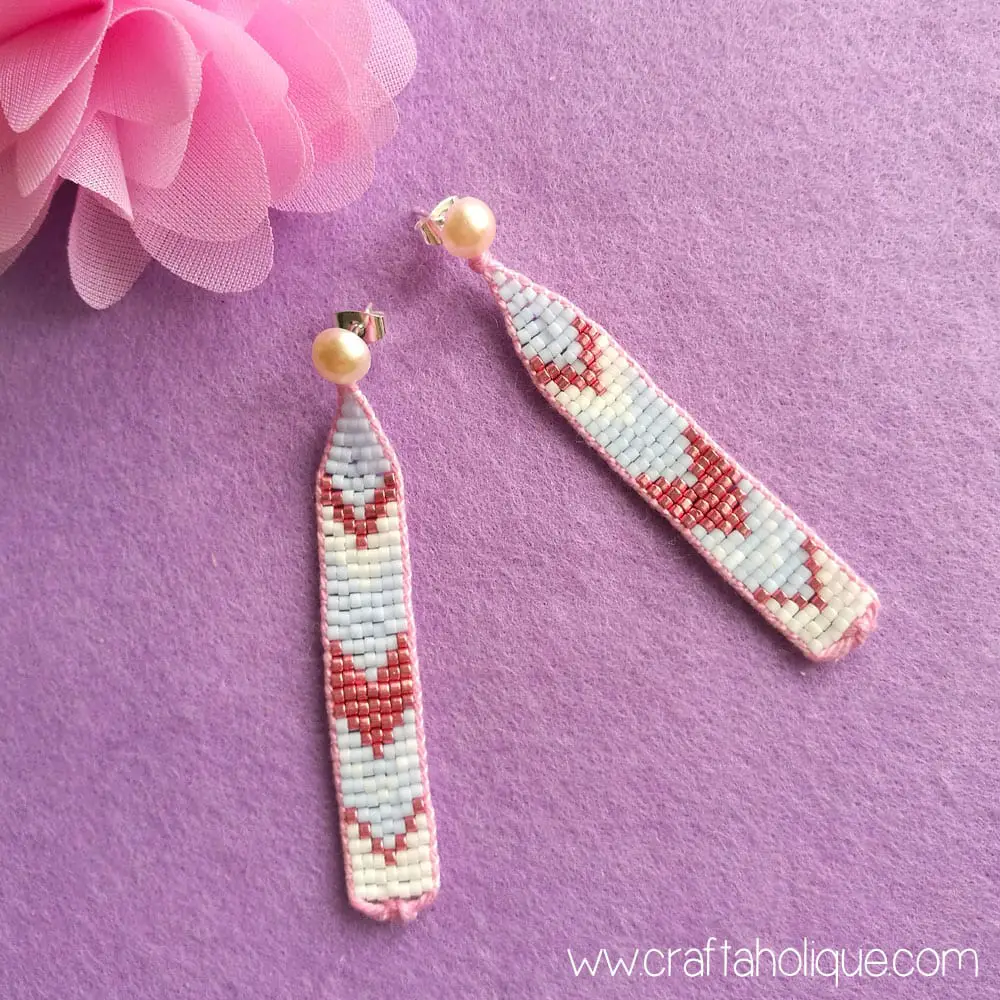
1. Teo Earrings Beaded Pattern

A modern, slightly curved rectangle using seed beads — minimalist and elegant.
Skill level: Beginner–Intermediate
Materials
- Size 11/0 seed beads (2 colors or gradient)
- Beading needle
- Beading thread (Nymo, FireLine, or similar)
- Flat nose pliers, round nose pliers
- 2 earwire findings
- Small jump rings (2)
- Scissors or thread snips
Step-by-step
- Cut thread: Cut ~1 m (39″) of beading thread and thread your needle. Thread both ends together for strength (optional) and tie an overhand stop knot 6–8 cm from the end.
- Create base row: Pick up enough beads to make the base width (example: 12 beads). Slide them down to the stop knot.
- Loom/peyote start: Work flat even-count peyote stitch (if you used 12 beads, pick up one bead, skip next bead on base row, pass through next bead, continue) until your strip reaches desired length (typical 3.5–4 cm). This produces a slightly flexible rectangle.
- Shape curve (optional): To create a subtle curve like the Teo shape, add 1–2 extra beads at the ends of alternating rows for a tapered edge; or use a slightly narrower top and wider middle.
- Finish rows: End with a complete row of peyote and weave the thread back through several rows to secure, tying small square knots if needed. Trim ends closely.
- Attach jump ring: Stitch a small loop of thread into the top center (or create a bead loop) and attach a jump ring through it. Use pliers to open jump ring, pass through bead loop, and attach earwire. Close jump ring.
- Repeat: Make the second earring to match.
Finishing & tips
- Block your finished pair by gently flattening them under a heavy book for a day to remove twists.
- Use thin clear nail polish or a tiny dab of jewelry glue on knot tails if thread slips.
2. Easy Fringe Beaded Earrings Tutorial
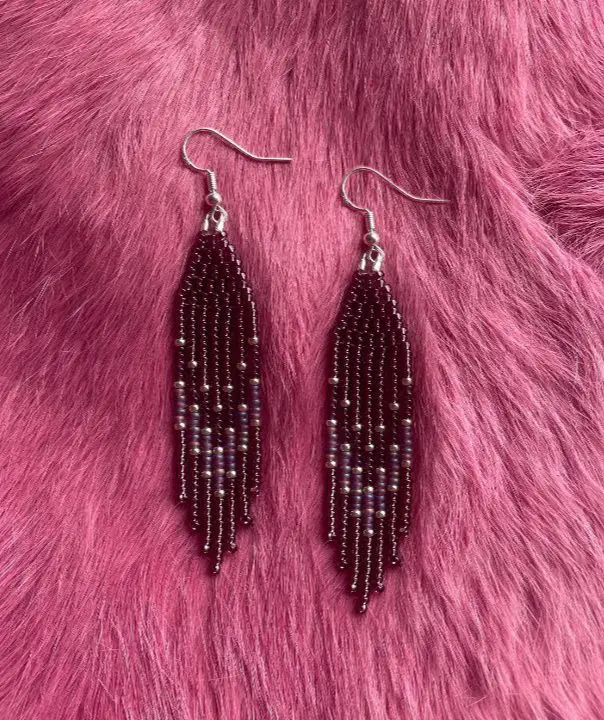
A playful, movement-filled design with rows of fringe — great for color play.
Skill level: Beginner
Materials
- Seed beads (11/0) and/or 8/0 beads for accents
- Beading thread and needle
- 2 headpins or small eye pins (optional)
- 2 earring findings (earwires or hoops)
- Scissors, pliers
Step-by-step
- Prepare base: Decide fringe length (e.g., 2.5–4 cm). String a base row of beads to act as the top (6–10 beads depending on fringe density). Tie thread securely into a small loop or reinforce by weaving back.
- Create fringe strands: For each fringe, thread chosen beads in desired pattern (e.g., 3 × 11/0, 1 × 8/0 accent, 2 × 11/0) then pass back through the first bead of that fringe to lock it in place, leaving a small loop at top. Repeat for each fringe across the base.
- Secure ends: After finishing a row of fringes, weave the working thread back across the top row through multiple beads, knot, and bury the tail inside the beadwork.
- Attach findings: Create a small bead loop on the top center or use a headpin through center bead, make a wrapped loop and connect to earwire. Alternatively, stitch a jump ring through the top row and attach earwire.
- Repeat for second earring.
Finishing & tips
- Keep fringe lengths staggered for a layered look.
- Add metallic or glass accent beads near tips for sparkle and weight so fringes hang nicely.
3. Chevron Beaded Earrings Pattern
A geometric V chevron using brick stitch or peyote — crisp and modern.
Skill level: Intermediate
Materials
- Size 11/0 seed beads (3 contrasting colors)
- Beading needle & thread
- Small circular or teardrop earwire findings (or posts)
- Jump rings, pliers
Step-by-step (brick stitch method)
- Design your chevron: Sketch a small triangle pattern on graph paper or map out bead counts per row (e.g., rows: 1,3,5,7,5,3,1 for a centered chevron).
- Start row 1: Pick up the number of beads in the bottom row (1 bead) and pass through the stopper knot to secure.
- Brick stitch up: For each new bead, pass needle under the thread bridge formed between beads of the previous row and back up through the new bead to lock it into place. Increase beads each row according to your pattern to form the chevron shape.
- Color changes: Change color by picking up beads of the new color and continuing the brick stitch — carry thread behind beads neatly, catching it every few stitches.
- Top loop: When you reach the top, leave a small loop of beads (3–4 beads) centered to attach a jump ring. Reinforce by weaving back through beads multiple times.
- Attach earwire: Open a jump ring, pass through bead loop, add earwire, and close.
Finishing & tips
- Use quality seed beads for more uniform edges.
- Keep even tension for crisp chevron points.
4. Mandala Beaded Earrings Tutorial
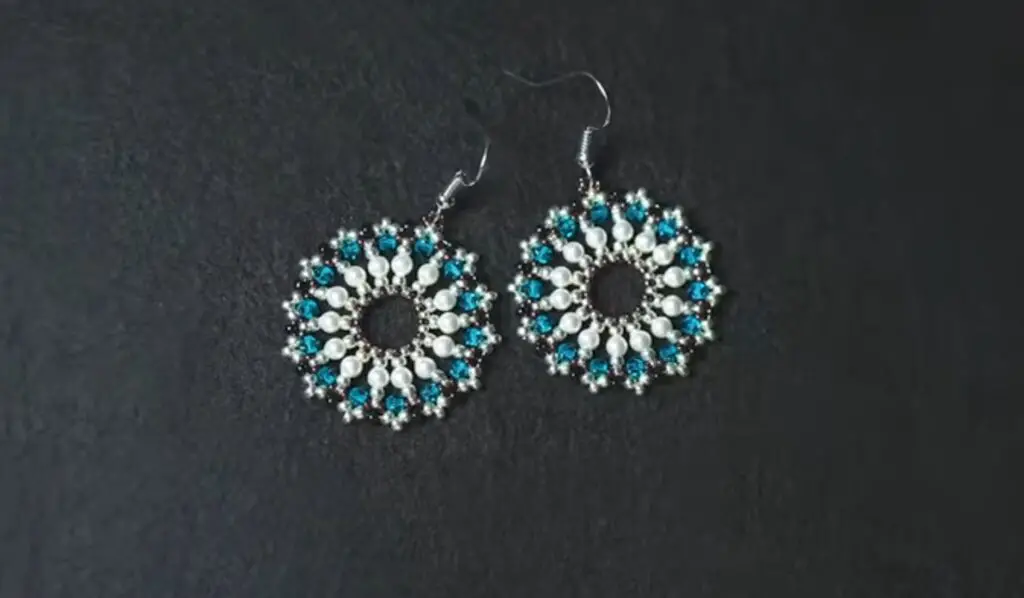
Round, radial beaded mandala built on a little circular frame — intricate and eye-catching.
Skill level: Intermediate–Advanced
Materials
- Mix of seed beads (11/0), delica beads (11/0 or 15/0), and small faceted beads for shimmer
- Beading thread and needle
- Small brass or silver circle connector (flat ring) or make ring with stiff beading wire
- Earwires, jump rings, pliers
Step-by-step
- Prepare ring: If using a metal connector ring (12–16 mm), that will be the mandala base. If not, make a small ring with 28–30 AWG wire and wrap to form a neat circle.
- Base round: Stitch a bezel of seed beads around the ring using needle and thread — pick up one bead, pass needle through ring, then back up through bead to stitch it snugly against the ring. Continue until the ring is encased.
- Radial rounds: Work outward in concentric rounds with increases: e.g., Round 1 add 16 beads; Round 2 alternate tiny spacer beads and accent beads; Round 3 form tiny petal loops by stitching (3–5 beads, slip stitch into next base bead), etc. Keep symmetry by planning bead counts divisible by the number of segments (e.g., 8 or 12 segments).
- Create petals & edges: Use slightly larger faceted beads or round crystals to make protruding petals; secure by weaving through base beads and reinforcing.
- Finish center: Add a focal bead or a tiny cabochon stitched into place with a peyote bezel if desired.
- Attach earwire: Add a tiny jump ring to the top or stitch a beaded loop and connect earwire.
Finishing & tips
- Work with short thread lengths (~60–90 cm) to avoid tangles and keep tension consistent.
- Symmetry is key — count beads and repeat the same sequence in each segment.
5. Darling Daisy Beaded Earrings Pattern
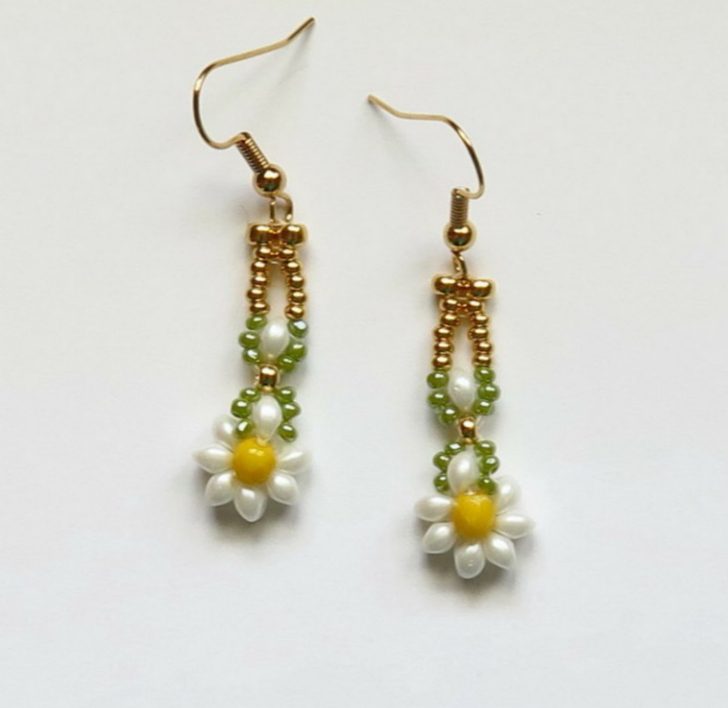
Sweet daisies made with a small seed bead circle and petal loops — charming and quick.
Skill level: Beginner
Materials
- Seed beads (11/0) for petals and center (contrasting colors)
- Beading thread and needle
- Earwires, jump rings, pliers
- Optional tiny glass pearl for center
Step-by-step
- Make center ring: Pick up 6 seed beads, pass needle back through first bead to form a ring. Tie a small knot or weave thread to secure.
- Form petals: For each petal: Pick up 4–6 seed beads (for petal length), pass back into the bead on the center ring where you want the petal anchored, then pass through the next center bead to move to the next attachment point. Repeat around until you have 6–8 petals.
- Reinforce: Weave thread through the center ring and petal bases a couple of times to tighten and secure shape.
- Center bead (optional): Sew a tiny pearl or metallic bead into the center for a polished look.
- Attach earwire: Stitch a small loop of beads (3–4 beads) at top for a jump ring or use a headpin passed through top petal, create a loop, and attach earwire.
Finishing & tips
- Use matte petals and metallic center for contrast.
- Make micro daisies for studs by using size 15/0 beads and attaching to post findings.
6. Beaded Wire Triple Flower Daisy Earrings Tutorial
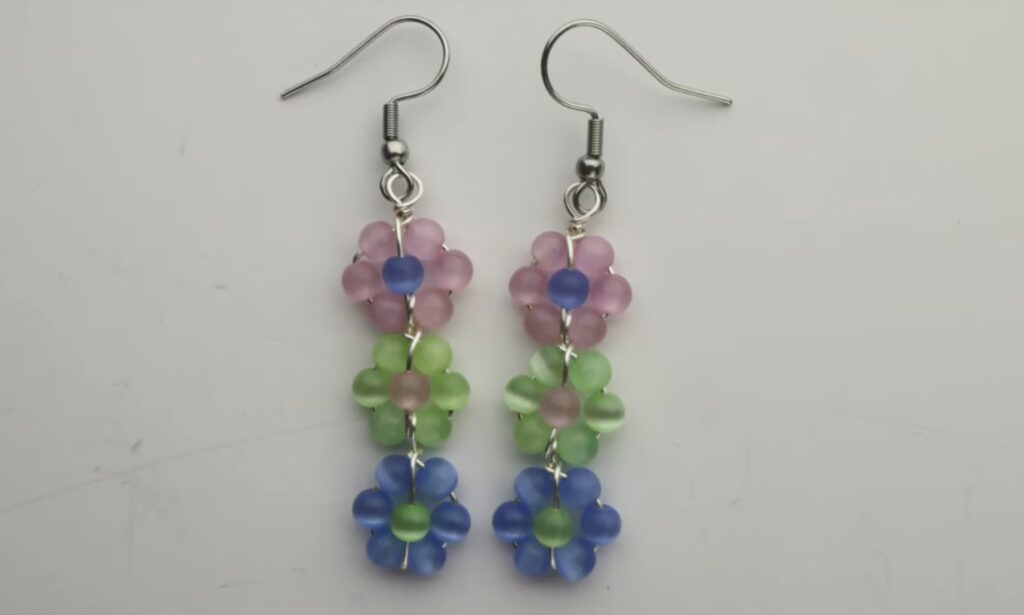
Wirework + beads: three stacked daisy motifs on a wire frame for a 3D floral cluster.
Skill level: Intermediate (basic wirework)
Materials
- 26–28 AWG craft wire (gold or silver plated)
- Seed beads for petals and centers
- Round nose pliers, wire cutters, flat nose pliers
- Earwires
- Optional small jump rings
Step-by-step
- Cut wire lengths: Cut three pieces of wire per earring: short (3–4 cm), medium (4–5 cm), long (5–6 cm) — these will be flower stems.
- Make petal loops: For each wire piece, thread beads for one petal length (e.g., 5 beads), bend wire into a small loop and twist the wire just beneath the beads to hold the loop. Repeat 5–6 times around to create petals, twisting wires together at center to form a flower. Use pliers to flatten twists and trim excess wire.
- Create center: Thread a contrasting bead onto a short length of wire, place at center of petals and wrap tiny wire around petals’ base to secure. Trim and tuck ends neatly.
- Form cluster: Take the three flower stems and wire-wrap them together, arranging them at slightly different heights to create a cascading triple flower. Wrap a thin finish wire around the stem base to hold them.
- Attach earwire: Create a small wrapped loop at the top of the stem cluster and attach earwire. Reinforce wrap and trim ends.
- Repeat for other side matching lengths and arrangement.
Finishing & tips
- Use nylon-coated wire if you want less tarnish and gentler edges.
- Cover the wire base with a tiny ribbon wrap or small electrical tape (hidden) for comfort.
7. Beaded Tassel Earrings Pattern
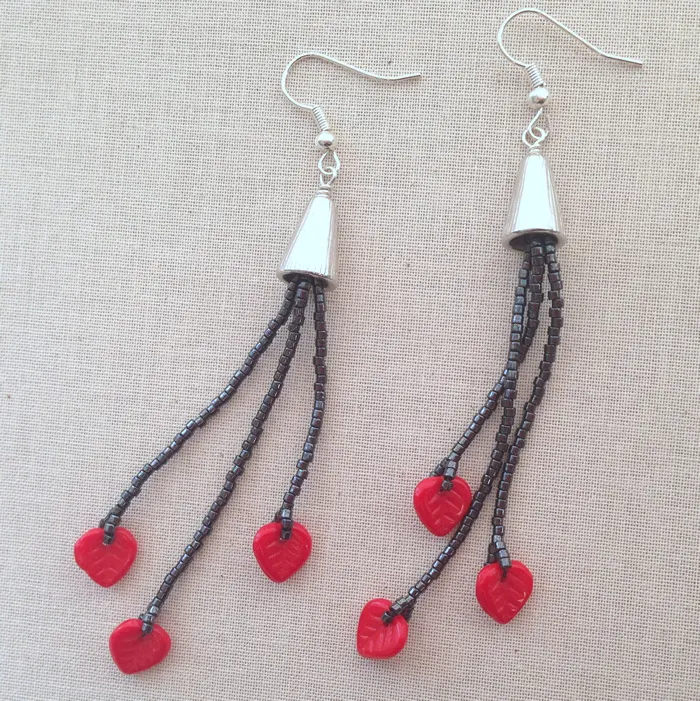
Tassels made from beaded strands — lightweight, dramatic, and customizable.
Skill level: Beginner–Intermediate
Materials
- Seed beads (11/0) or 8/0 for bolder tassels
- Beading thread and needle or fine fishing line
- Small jump rings, earwires, flat nose pliers
- Optional small end cap findings or a bead cone
Step-by-step
- Decide tassel length & number of strands: Example: 7 strands × 3.5 cm each for medium tassel.
- String strands: For each strand, thread the required number of beads onto a length of thread. Knot or create a loop at the top of each strand (leave extra thread at top to wrap).
- Assemble tassel head: Gather all strand tops together and wrap a short length of thread tightly around them several times to form a neat head; finish with a small knot and weave in the tail. If using an end cap, glue and insert the wrapped top into the cap.
- Add connector: Stitch or wrap a tiny loop of beads into the top of the tassel or attach a jump ring to the wrapped head. Connect the jump ring to earwire.
- Repeat to make matching earring.
Finishing & tips
- Add a bead spacer or gold accent bead at the head of tassel for polish.
- Use multiple colors across strands for an ombré tassel effect.
8. DIY Beaded Bead Earrings Tutorial
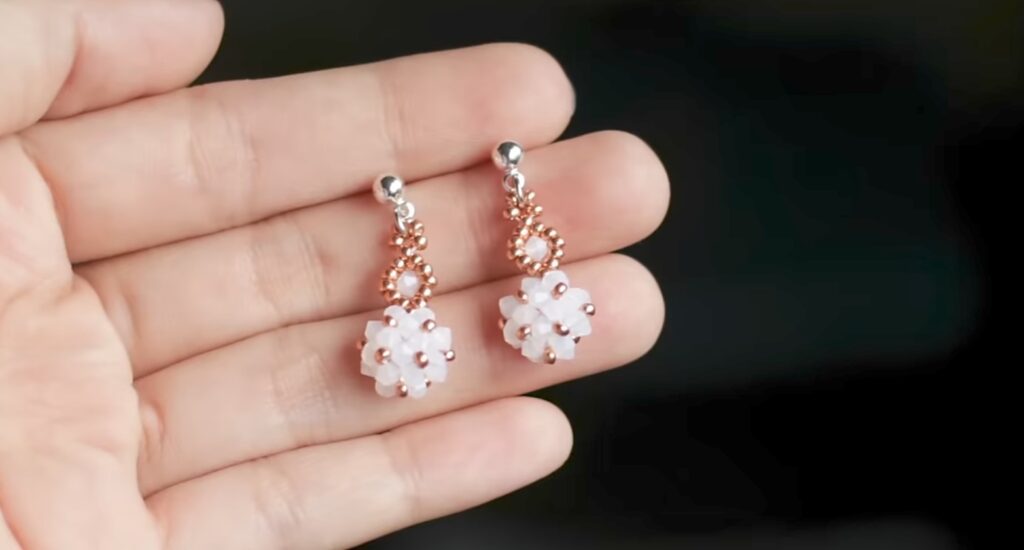
Make your own “beads” from small seed beads (bead-on-bead technique) and hang them as focal drops.
Skill level: Intermediate
Materials
- Seed beads (size 11/0 or 15/0)
- 4 mm or 6 mm headpins or fine wire to wrap
- Beading needle & thread (if weaving a bead sphere)
- Earwires, pliers, cutters
Step-by-step (bead sphere with peyote/bead weaving)
- Weave bead bead: Use netting or circular peyote to create a small hollow bead around a 4–6 mm core bead (or without core, sew a small beaded ball). For example, make a peyote tube fitted around a round core then close ends by decreasing rounds to form a sphere.
- Finish sphere: Once sphere is closed, weave thread back through to secure and hide tails. Optionally, add a tiny dab of glue to interior if using a core.
- Attach to headpin: If hollow, carefully pass a headpin through center (if possible) or stitch a short wire loop into top. Make a wrapped loop with pliers and attach to earwire.
- Alternate method: Make stacked beaded beads: string multiple bead-woven discs onto a headpin and create a loop at top to attach to earwire.
- Repeat for second earring.
Finishing & tips
- Use metallic seed beads for a luxe, faceted look.
- Make graduated sizes and stack two beads for a tiered drop.
Conclusion
These eight beaded earring patterns give you a wide creative playground — from minimal geometric Teo earrings and chevrons to playful fringes, floral mandalas, and tactile wirework. Start with simpler designs (fringe, daisies) to build confidence, then try more technical projects (mandala, bead-woven spheres, wire flowers). A few consistent practices will make all your pairs look pro: use quality thread, work with comfortable lighting and a bead mat, test symmetry as you go, and always finish knots by weaving them back through beads.