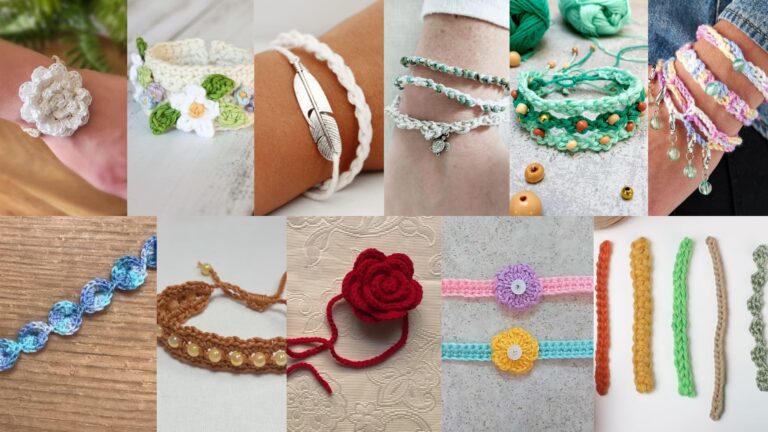
Friendship bracelets are more than just colorful accessories—they’re tiny symbols of care, creativity, and connection. Whether you’re making one for your best friend, a family member, or even yourself, these bracelets carry a special personal touch that store-bought jewelry can’t match. They’re also incredibly fun to make, surprisingly quick, and a wonderful way to explore your creative side without expensive materials or advanced skills.
In this post, we’ll walk through 10 beautiful and easy friendship bracelet patterns that you can start making today. From timeless designs like the Chevron and Candy Stripe to unique styles like the Greek Wave and Chinese Snake Knot, you’ll find something for every taste. Each tutorial includes clear instructions, tips for getting your knots neat, and creative ways to customize your bracelets with colors and charms.
So, grab your embroidery floss, clear a cozy spot at your table, and let’s dive into the colorful, knot-filled world of friendship bracelets!
1. Pura Vida Recreation Friendship Bracelet Pattern
Pura Vida bracelets are known for their relaxed, beachy vibe and minimalist charm. This recreation keeps that laid-back aesthetic but lets you choose your own colors and beads.
Skill Level: Beginner
Materials:
- Embroidery floss (any color combination you like)
- Small charm or bead (optional)
- Scissors
- Tape or clipboard
Instructions:
- Cut 3–4 strands of embroidery floss about 30 inches long.
- Tie them together with an overhand knot, leaving a 2–3 inch tail for tying later.
- Secure the knot to a clipboard or table with tape.
- Separate the strands and twist them tightly in one direction for 1–2 minutes.
- Fold the twisted strands in half, letting them coil naturally into a rope-like texture.
- Tie a knot at the end to secure the twist.
- Add a bead or charm in the middle if you want a Pura Vida-inspired accent.
Tip: For a more authentic look, use ocean-inspired colors like turquoise, sandy beige, and coral pink.
2. DIY Chevron Friendship Bracelet Tutorial
The Chevron pattern is a classic for a reason—it’s symmetrical, bold, and looks professional even when made by beginners.
Skill Level: Beginner to Intermediate
Materials:
- 6 strands of embroidery floss (2 strands each of 3 colors), each about 30 inches long
- Scissors
- Clipboard or tape
Instructions:
- Arrange the strands in a mirrored order (e.g., A-B-C-C-B-A).
- Starting with the far-left strand, make forward knots over each strand toward the center.
- With the far-right strand, make backward knots toward the center.
- Tie the two center strands together with a forward knot.
- Repeat the process, always starting with the outermost strands and working inward.
- Continue until you reach your desired length, then knot the end.
Tip: Use contrasting colors for a sharp, eye-catching “V” effect.
3. Ultimate Friendship Bracelet Pattern
This is a customizable mix of chevron, candy stripe, and beads—ideal for those who love variety in one bracelet.
Skill Level: Intermediate
Materials:
- Multiple colors of embroidery floss (30 inches each)
- Small beads
- Needle (optional for beading)
- Tape or clipboard
Instructions:
- Start with a simple chevron pattern for about 1 inch.
- Switch to candy stripe for the next section.
- Thread a few beads onto the strands, spacing them evenly.
- Return to chevron or stripe, alternating for variety.
- End with a braided section for a secure tie.
Tip: This pattern is perfect for using leftover floss from other projects.
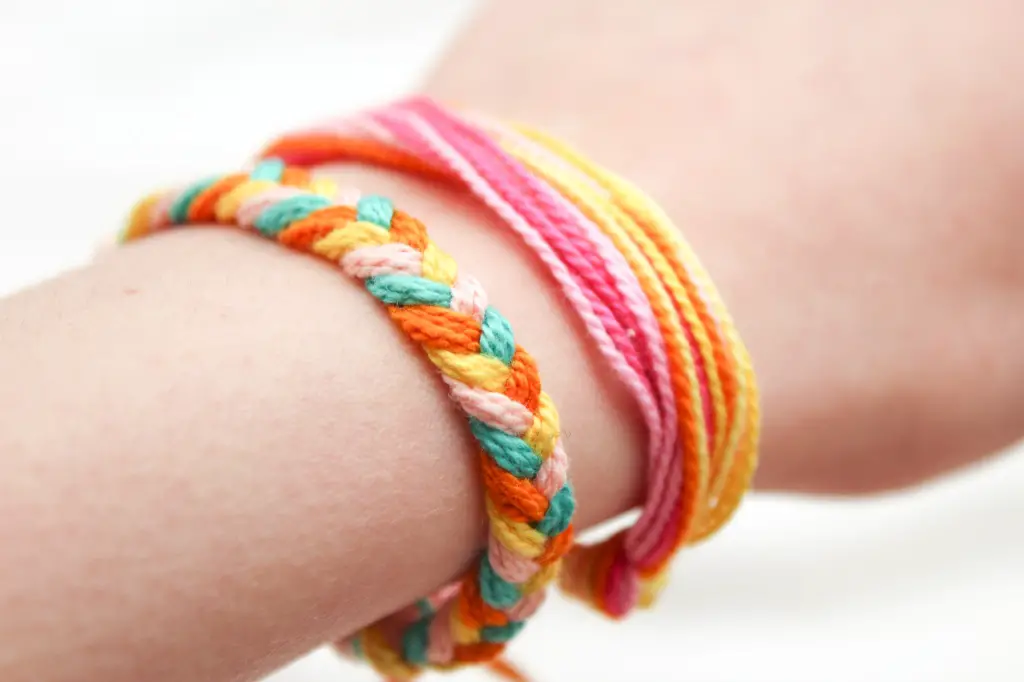
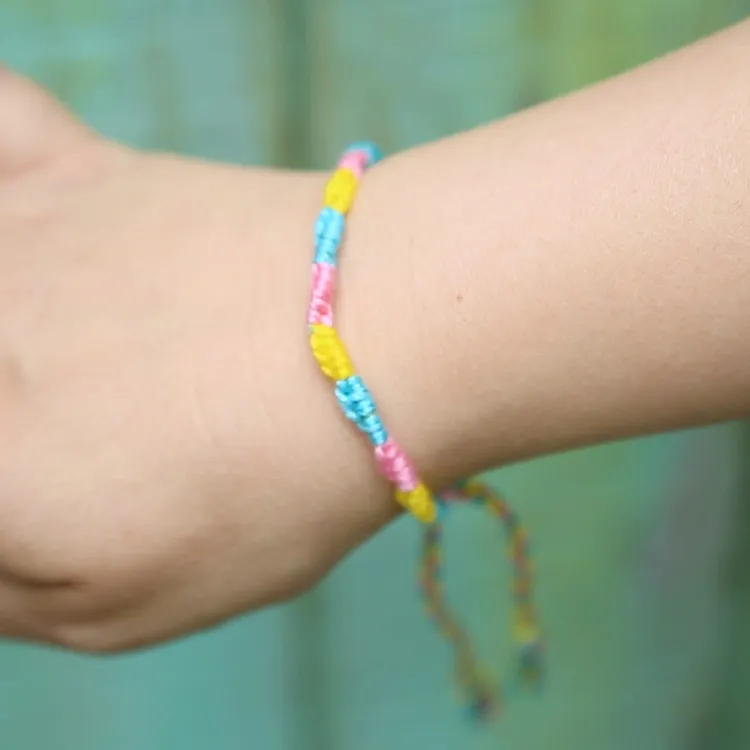
4. DIY Candy Stripe Friendship Bracelet Tutorial
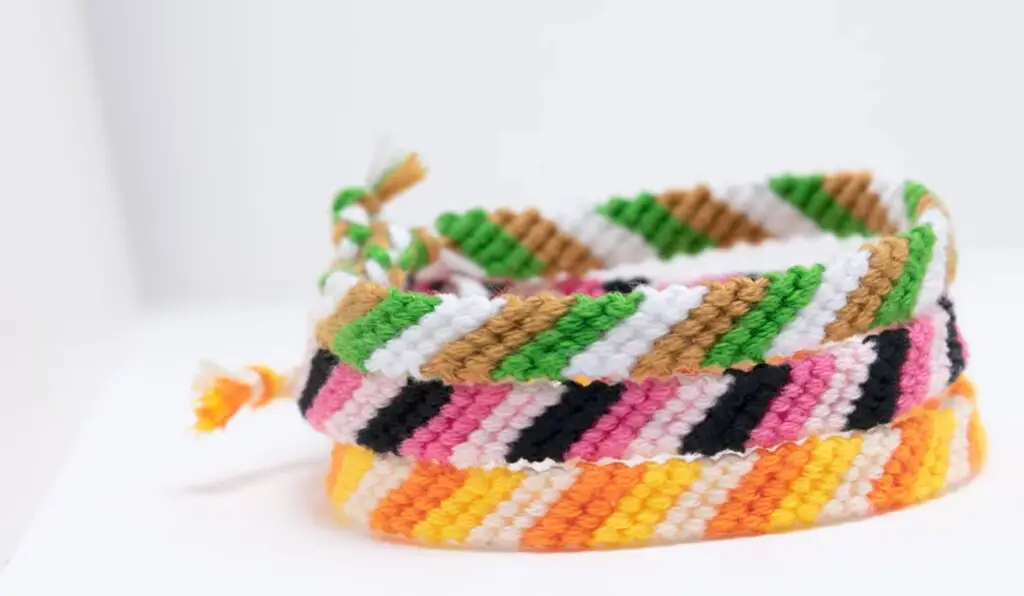
Candy stripe bracelets are perfect for beginners and can be made in any color scheme.
Skill Level: Beginner
Materials:
- 4–6 strands of embroidery floss (30 inches each)
- Tape or clipboard
- Scissors
Instructions:
- Arrange your strands in the color order you want.
- Take the far-left strand and make forward knots over each strand to the right.
- Once the strand reaches the far right, start again with the new far-left strand.
- Repeat until you get the length you want.
Tip: Use pastel colors for a sweet, candy-like vibe.
5. Friendship Bracelet with Chinese Snake Knot Technique Pattern
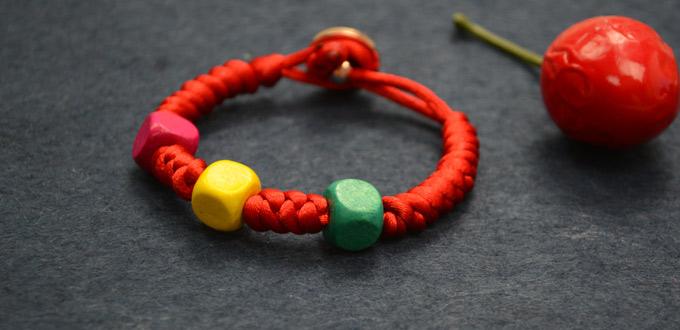
The Chinese Snake Knot gives your bracelet a textured, braided look without complex knotting.
Skill Level: Intermediate
Materials:
- Paracord or thicker cord (about 40 inches)
- Scissors
- Lighter (if using nylon cord to seal ends)
Instructions:
- Fold the cord in half.
- Make a loop with the right strand and place it over the left strand.
- Pass the left strand under the loop and pull it through from the top.
- Tighten the knot and repeat the process along the length of the bracelet.
Tip: This style works well as a unisex bracelet and is great for outdoor or sporty looks.
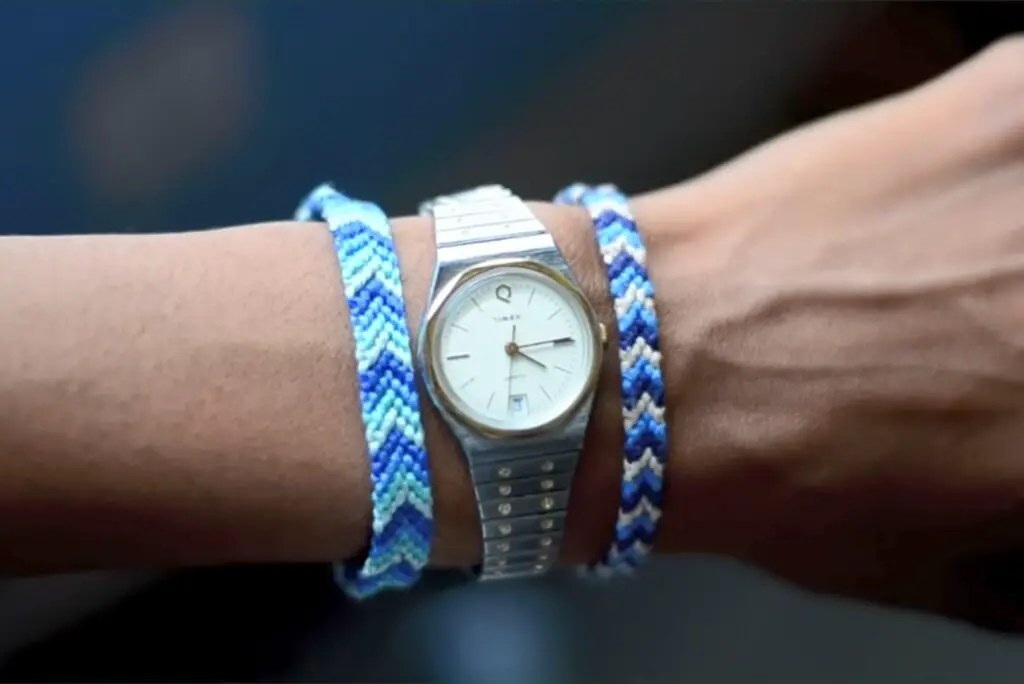
6. Greek Wave Friendship Bracelet Tutorial
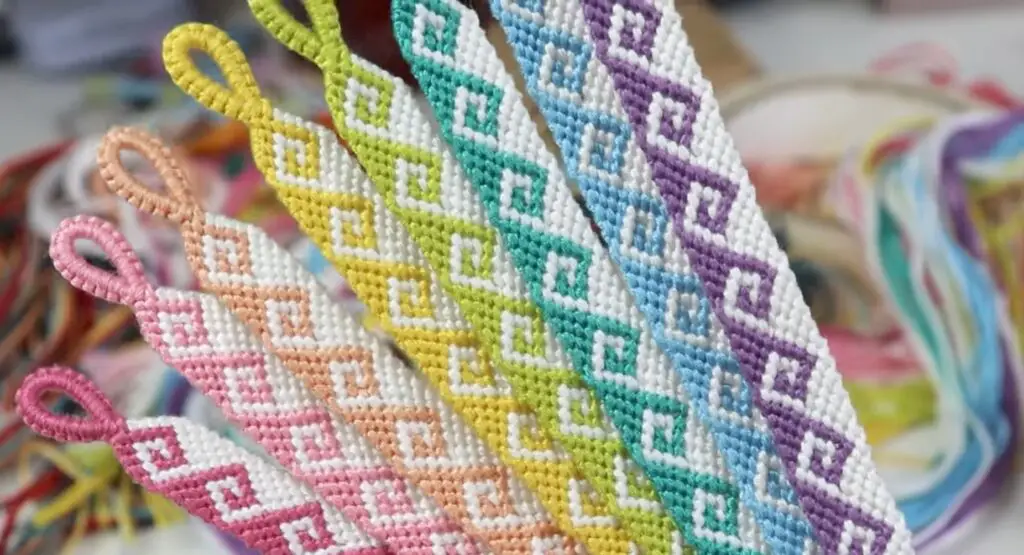
This pattern creates a wavy, zigzag effect that’s both playful and stylish.
Skill Level: Intermediate
Materials:
- 4 colors of embroidery floss (30 inches each)
- Clipboard or tape
Instructions:
- Arrange strands in color order.
- Use forward knots for the first half of the wave, then backward knots for the other half.
- Alternate colors every few rows to create the wave effect.
Tip: Using ocean blues and sandy yellows makes this look like sea waves.
7. Flip Flop Friendship Bracelet Pattern
Named for its alternating knot directions, this bracelet has a casual and relaxed feel.
Skill Level: Beginner
Materials:
- 2–4 colors of embroidery floss (30 inches each)
- Scissors
- Tape or clipboard
Instructions:
- Make a few rows of forward knots.
- Switch to backward knots for the same number of rows.
- Alternate until you reach the desired length.
Tip: This is a great “practice” bracelet because it teaches both knot directions.
8. Easy Macrame Friendship Bracelet Tutorial
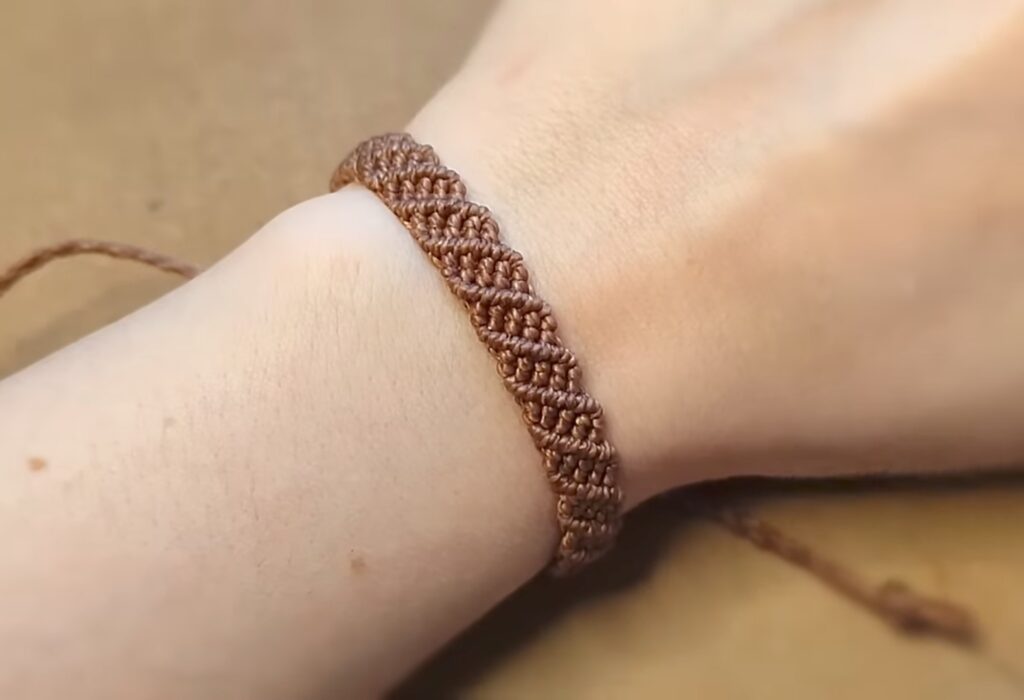
This macrame version uses square knots for a sturdy, chunky look.
Skill Level: Beginner to Intermediate
Materials:
- 2 base cords (about 15 inches each)
- 2 working cords (about 30 inches each)
- Tape or clipboard
Instructions:
- Place the base cords in the center and the working cords on the outside.
- Use the left working cord to make a “4” shape over the base cords, then pass the right working cord over the left cord, under the base cords, and through the loop.
- Tighten and repeat in reverse for the next knot.
- Continue until you reach your desired length.
Tip: Use hemp cord for a natural, boho look.
9. Spiral Friendship Bracelet Pattern
The spiral bracelet uses only half of the square knot, which causes the pattern to twist naturally.
Skill Level: Beginner
Materials:
- 2 base cords (15 inches each)
- 1 working cord (30 inches)
- Scissors
Instructions:
- Set up as you would for square knots.
- Repeat the first half of the square knot over and over without alternating sides.
- Watch the bracelet naturally twist as you go.
Tip: This looks especially nice in bright rainbow colors.
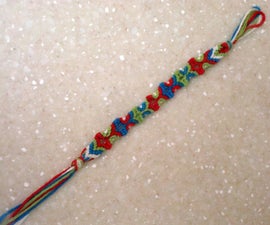
10. Hearts Friendship Bracelet Tutorial
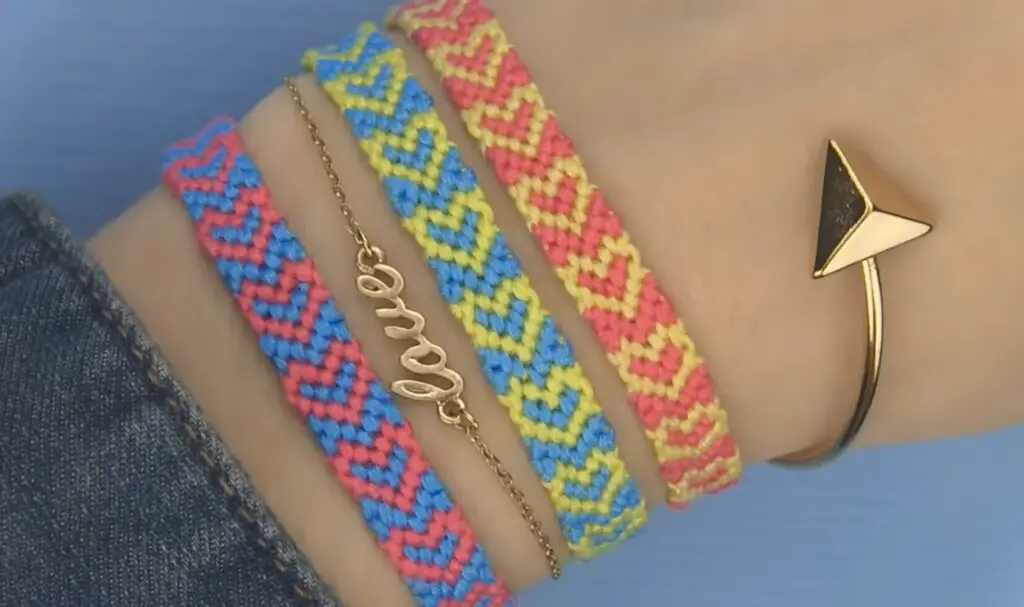
A sweet design with tiny heart shapes woven into the bracelet—perfect as a gift.
Skill Level: Intermediate
Materials:
- 6 strands of embroidery floss (2 strands each of 3 colors)
- Tape or clipboard
Instructions:
- Arrange strands so that the heart color is in the middle.
- Knot in a chevron style, but when you reach the middle, use the heart color to make small “bumps” that form the heart shapes.
- Continue, alternating heart rows with background rows.
Tip: Pink and red hearts on a white background make for a classic Valentine’s look.
Conclusion
Friendship bracelets are more than just a craft—they’re a little act of love you can wear and share. With patterns ranging from the super simple Candy Stripe to the more intricate Greek Wave and Hearts, there’s something here for every mood, skill level, and occasion. The best part? Once you learn the basic knots, you can mix patterns, play with colors, and add personal touches like charms or beads to make each bracelet unique.
So, pick a pattern that catches your eye, gather your materials, and start knotting your way to a beautiful handmade piece that’s sure to make someone’s day. After all, the best gifts are the ones made with your own two hands.