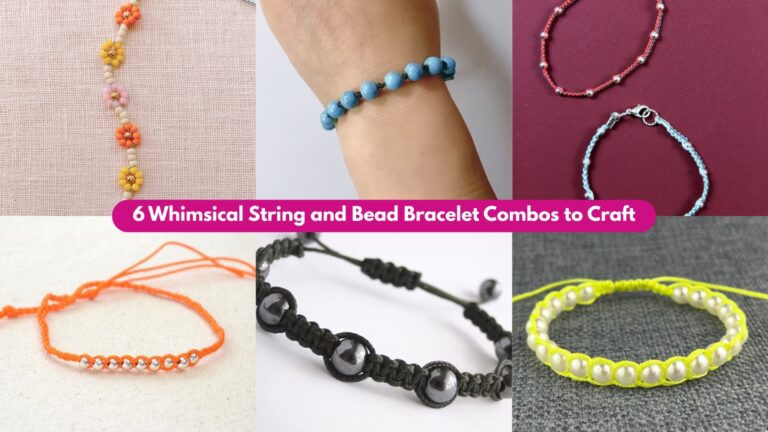
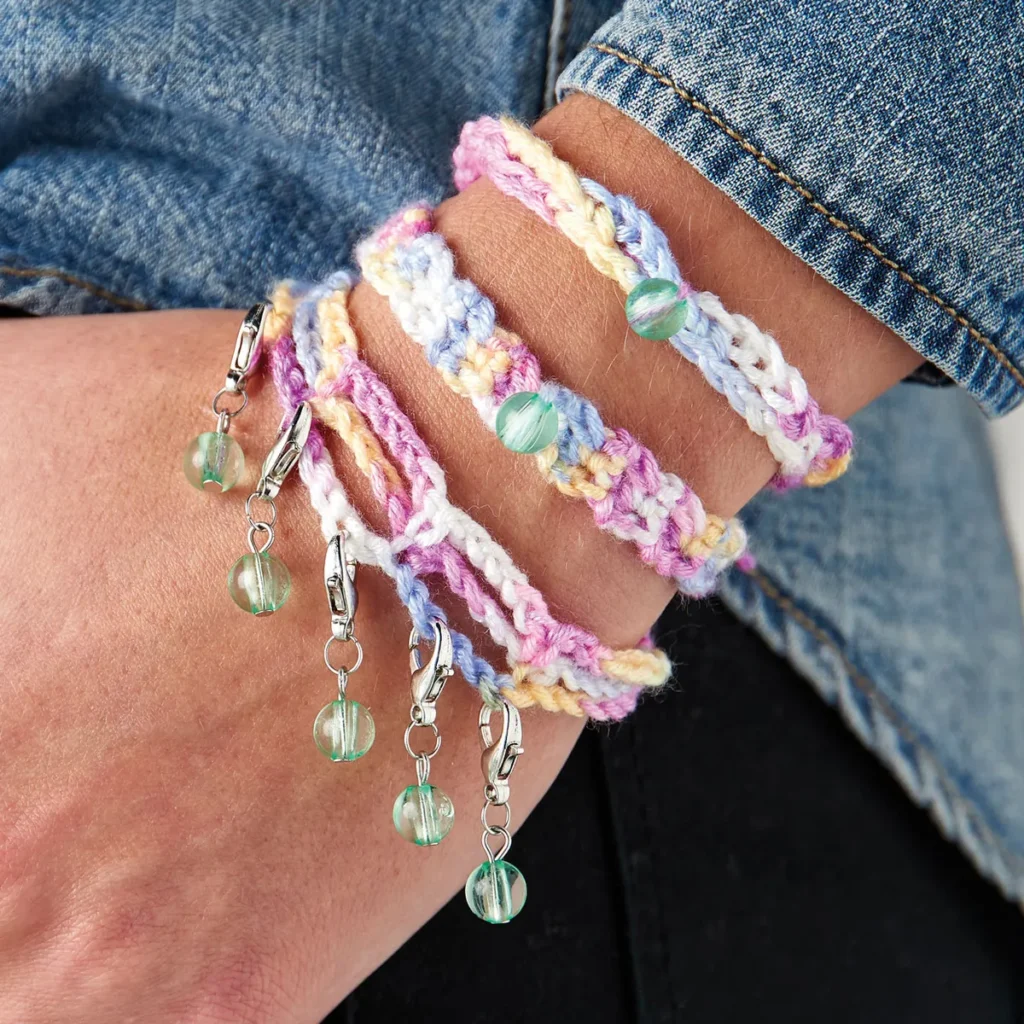
Whether you’re just picking up a hook or you’ve been crocheting for years, there’s a bracelet pattern here to spark your creativity. From delicate bead‑studded designs to playful flower motifs, these 11 crochet bracelet patterns cover all styles and skill levels. Each tutorial includes clear, step‑by‑step instructions and a list of simple materials—so you can start stitching right away. Ready to fill your wrist candy box? Let’s dive in!
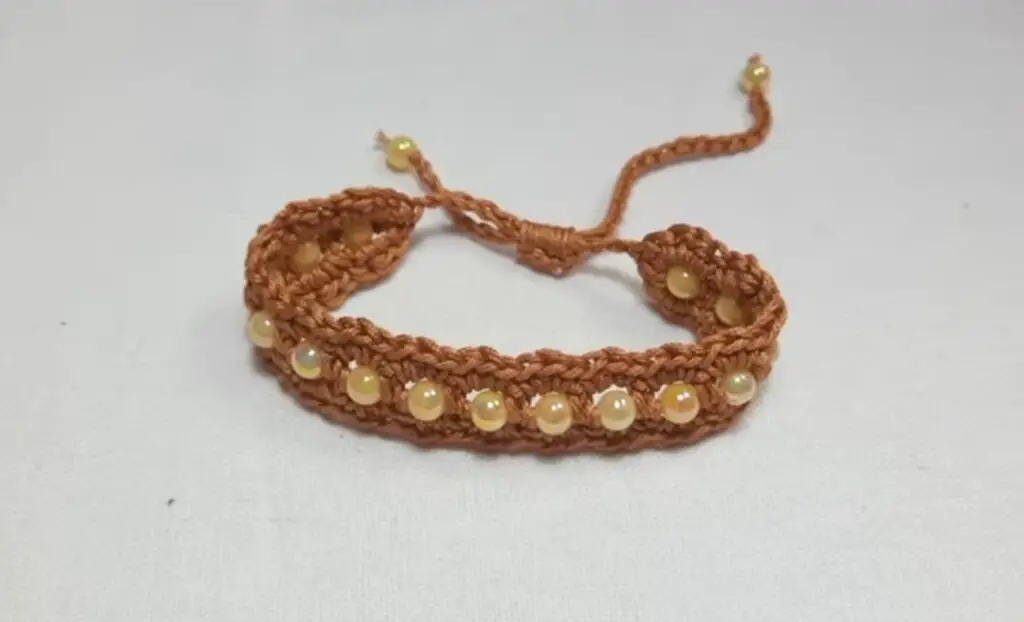
1. Crochet Beaded Bracelet Pattern

Skill Level: Intermediate
Materials:
- Fingering‑weight cotton yarn
- 2.5 mm hook
- 30–40 small glass beads (size 6/0)
- Yarn needle
Instructions:
- Pre‑string Beads: Thread beads onto yarn before you begin.
- Foundation Chain: Chain 40 (or your wrist circumference + 2 cm).
- Row 1: SC in second chain from hook, sliding one bead up as you work each stitch. Continue to end.
- Row 2: Chain 1, turn, SC across—beads will sit on the right side.
- Repeat Row 2 until the band is about 1 cm wide.
- Finishing: Weave ends, then fold into a loop and slip‑stitch ends together or add a small button closure.
2. Crochet Cord Bracelet Tutorial
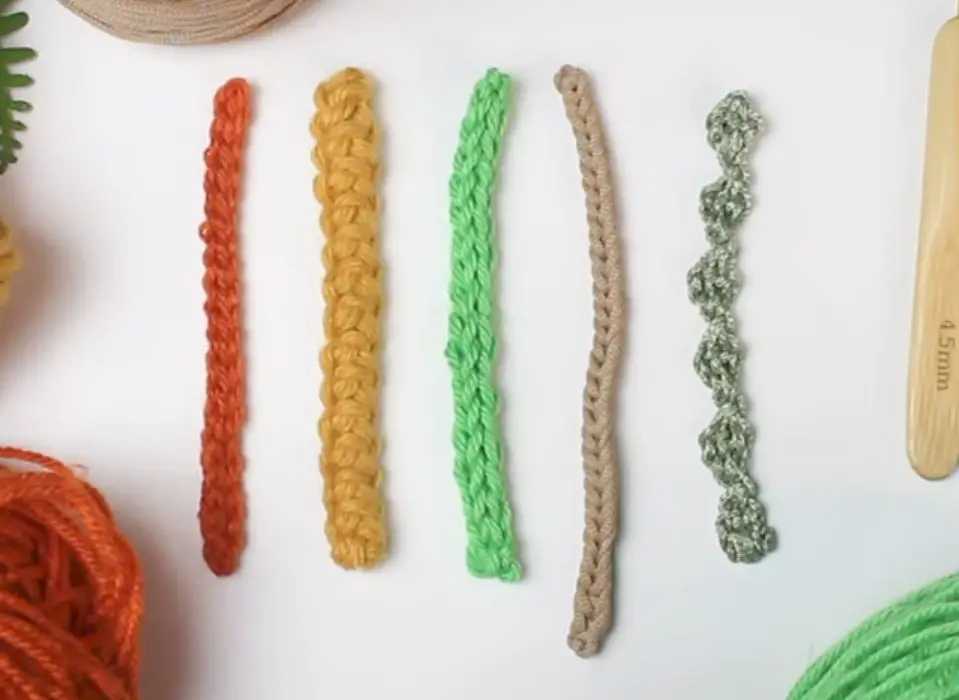
Skill Level: Beginner
Materials:
- 4 mm braided cord or macramé cord
- 4.0 mm hook
Instructions:
- Chain Base: Chain 60 in back loop only for texture.
- Slip‑Stitch Row: SL ST in each stitch back across.
- End Knots: Leave long tails and tie simple overhand knots on each end.
- Adjustable: Create a sliding knot by wrapping one tail around the other twice and threading through—this makes your bracelet size‑friendly.
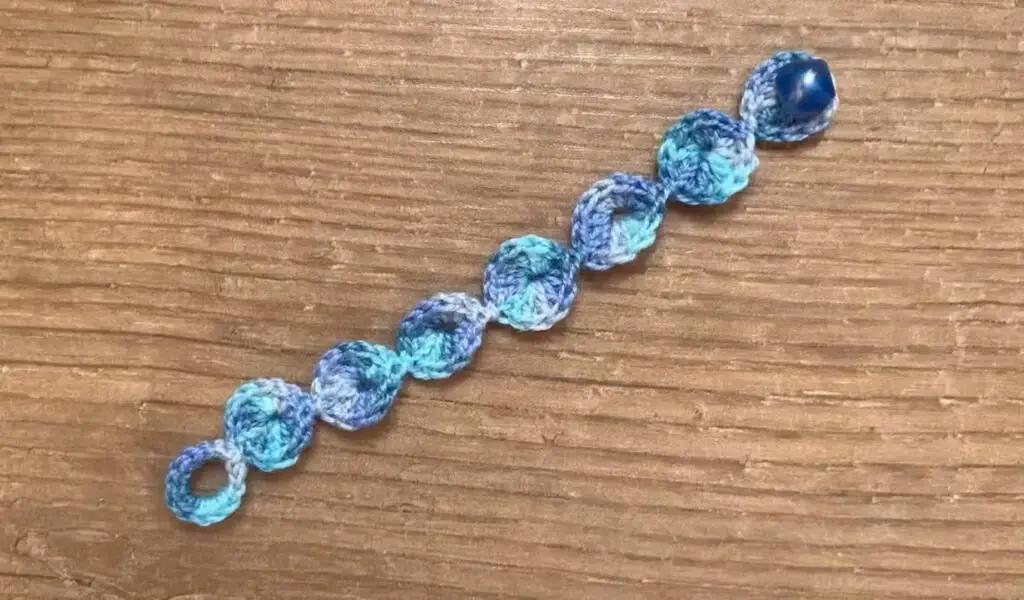
3. Crochet Feather Bracelet Pattern
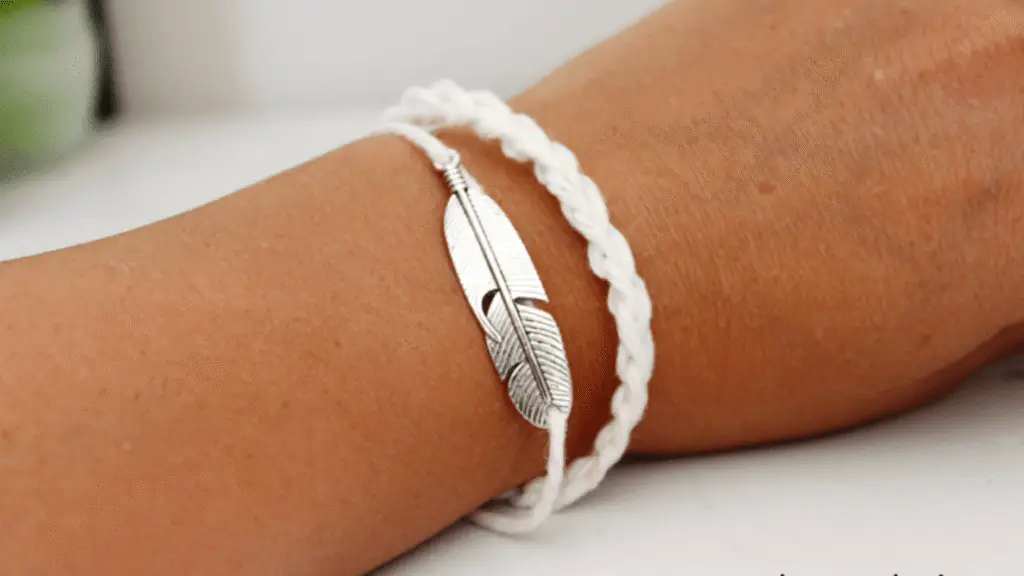
Skill Level: Beginner‑Plus
Materials:
- Sport‑weight yarn
- 3.0 mm hook
- Small eyelet or jump ring
- Lobster clasp (optional)
Instructions:
- Feather Motif: Chain 20, SC in 2nd chain, HDC in next chain, DC in next 2, then reverse back for the quill.
- Attachment Loop: Chain 5 at the stem, SL ST to form a small loop.
- Make 3–5 Feathers: Space them evenly on a 40‑chain foundation by slip‑stitching into the chain, adding a feather motif, then continuing.
- Closure: Sew on a clasp or tie the ends in a knot.
4. Beginner-Friendly Crochet Bracelet Tutorial
Skill Level: Absolute Beginner
Materials:
- Worsted‑weight yarn
- 4.5 mm hook
Instructions:
- Chain 35.
- Row 1: SC in second chain from hook and across.
- Row 2: Chain 1, turn, SC in each stitch to end.
- Repeat Row 2 until strip is about 1 cm wide.
- Finishing: Fold into loop and slip‑stitch ends; add a button or simply knot for closure.
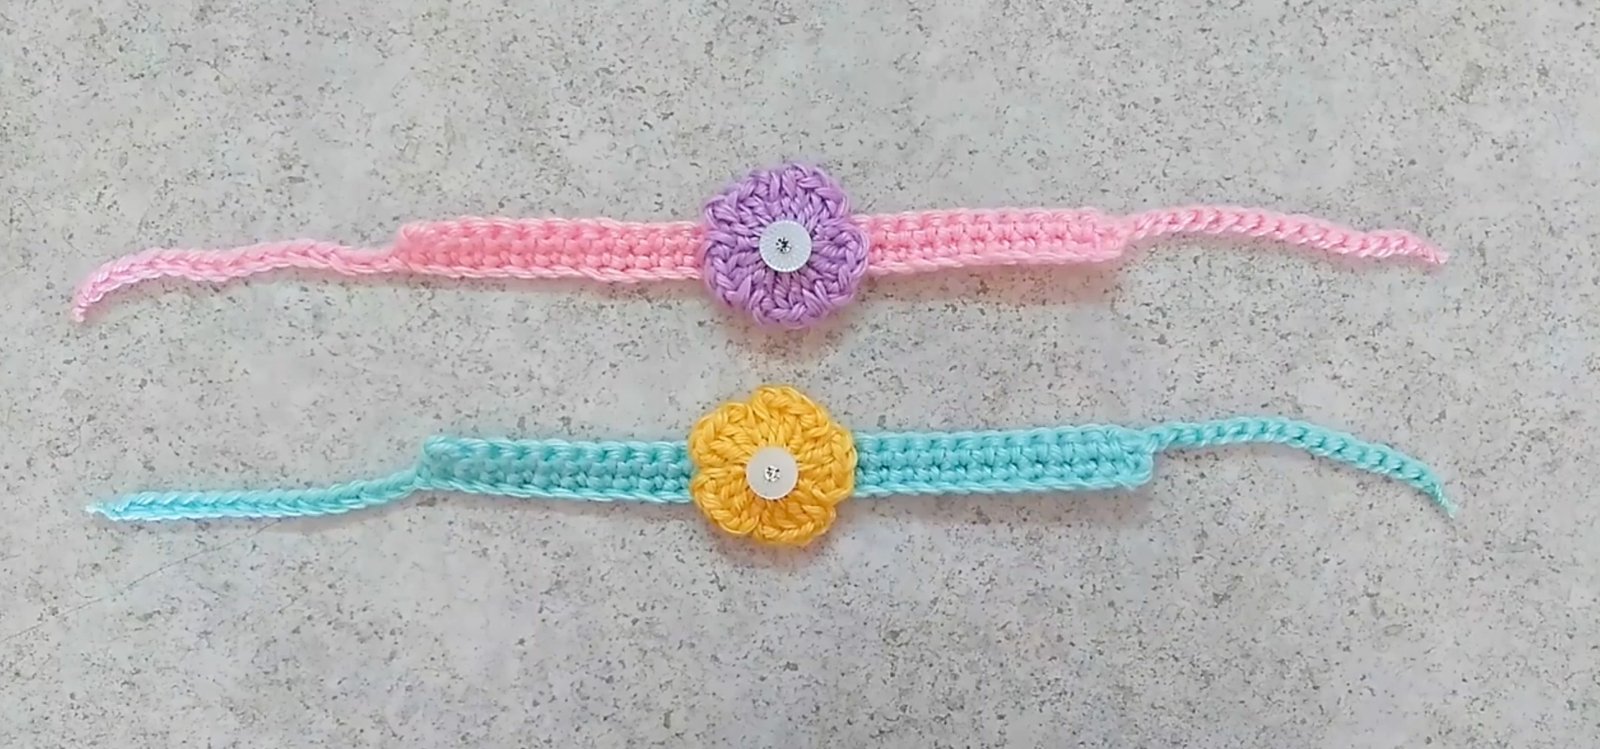
5. Boho Summer Flower Crochet Bracelet Pattern
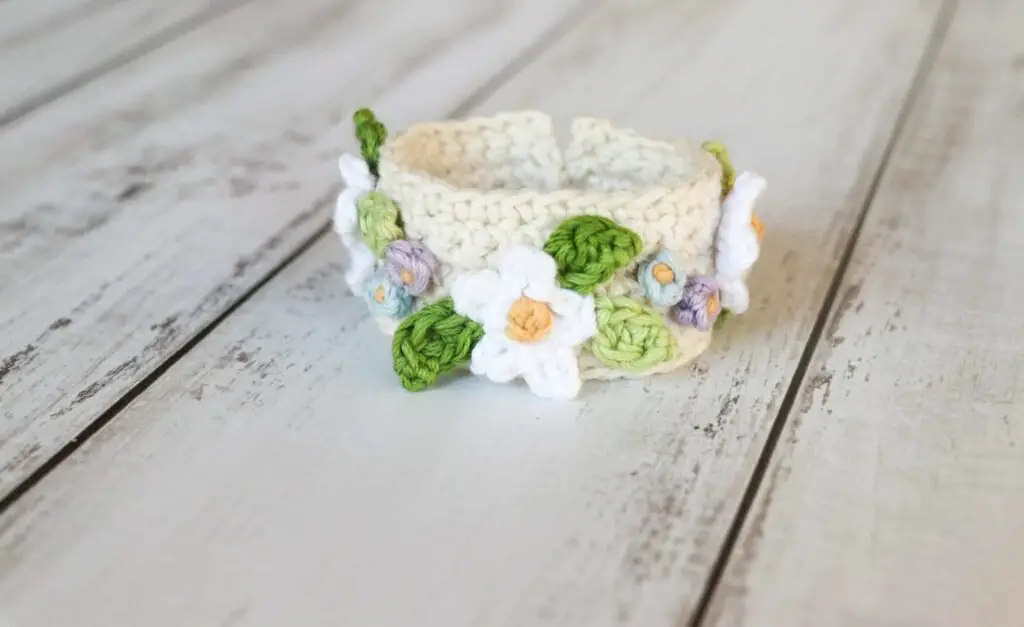
Skill Level: Intermediate
Materials:
- DK‑weight cotton in 2–3 colors
- 3.5 mm hook
Instructions:
- Flower Motifs: Magic ring, chain 3 (counts as DC), 2 DC, chain 2, SL ST into ring, repeat 5 times; fasten off.
- Joining Flowers: SL ST through the chain‑2 spaces of adjacent flowers to create a flower chain long enough for your wrist.
- Base Band: SC along the back of the flower chain to stabilize.
- Closure: Add loops or sew on a button through one flower’s center.
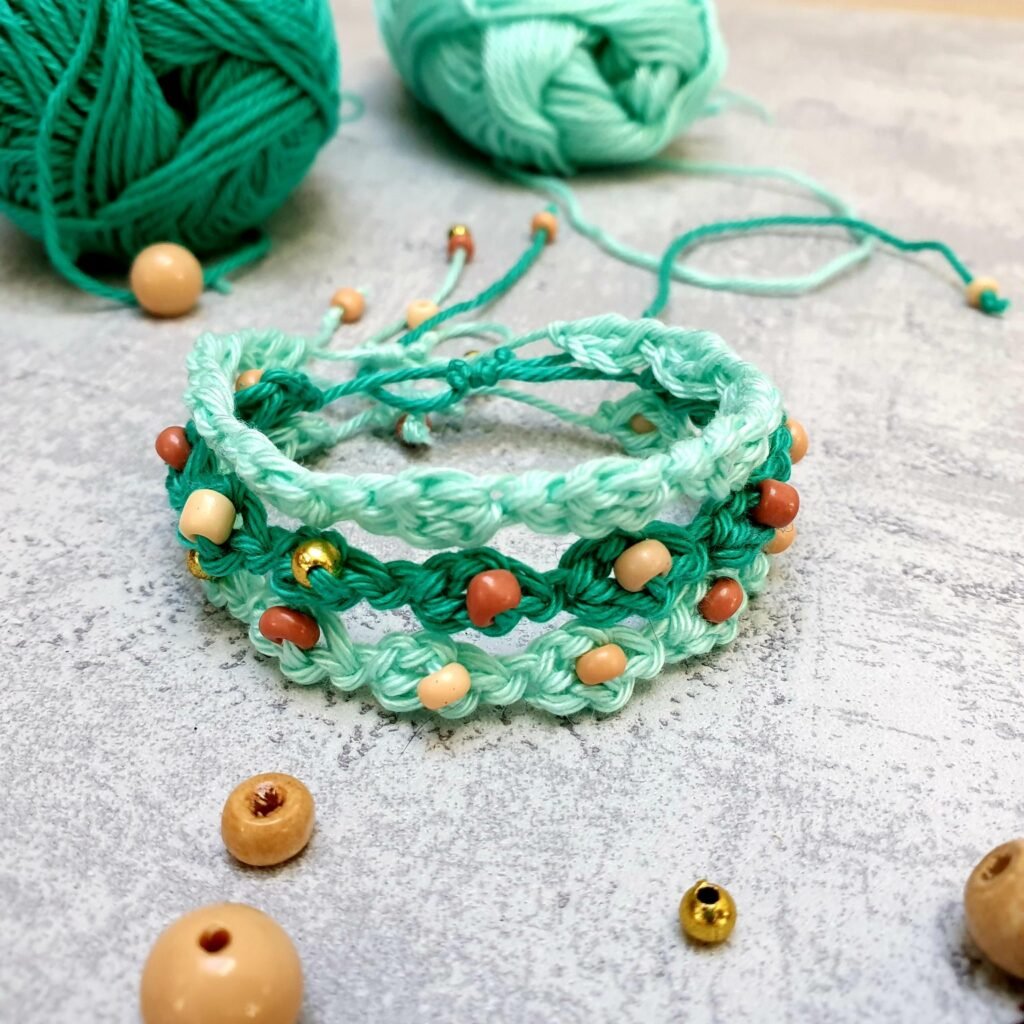
6. Crochet Bracelet with Beads Tutorial
(Different approach from #1: beads added after stitch)
Skill Level: Intermediate
Materials:
- Sport‑weight yarn
- 3.0 mm hook
- Pony beads
Instructions:
- Row 1: Chain 40, SC across.
- Row 2 (Bead Row): SC next stitch, push a bead up close, chain 1, skip 1 stitch; repeat to end—this spaces beads across your band.
- Rows 3–4: SC in each stitch to trap beads in place.
- Finishing: Weave in ends and connect with slip‑stitch seam or button loop.
7. Crochet Friendship Bracelet Pattern
Skill Level: Beginner
Materials:
- Two contrasting colors of fingering‑weight yarn
- 2.5 mm hook
Instructions:
- Chain 45 in Color A.
- Row 1: SC across in Color A.
- Row 2: Switch to Color B, SC 2, chain 2, skip 2, repeat.
- Row 3: Return to Color A and SC across.
- Repeat Rows 2–3 until the band is 1 cm wide.
- Finishing: Chain 8 at each end to form loops, secure with slip‑stitch, and add a small button.
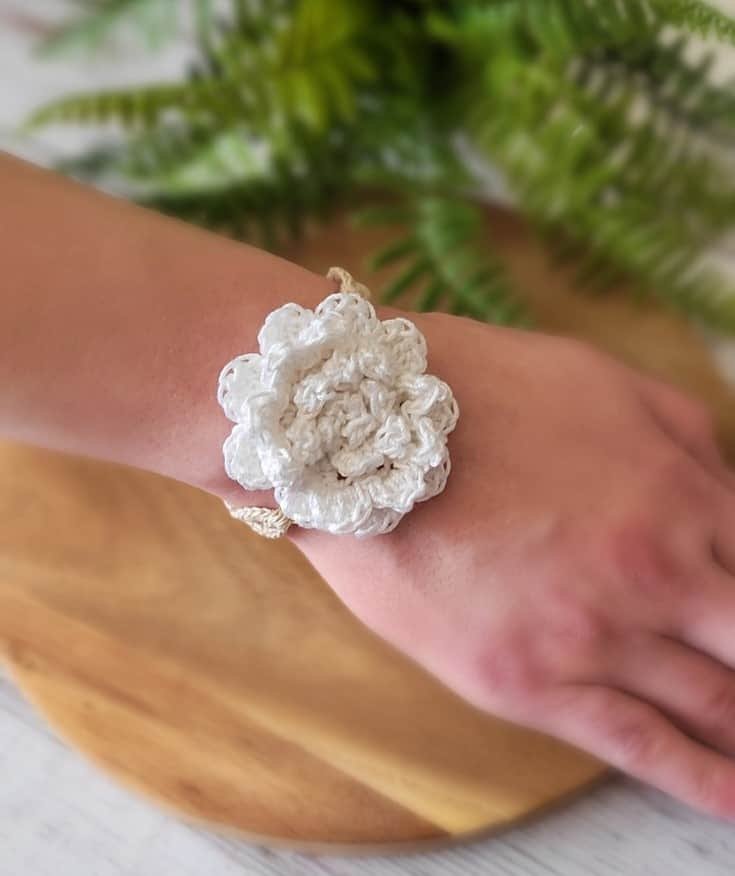
8. Crochet Rose Flower Bracelet Tutorial
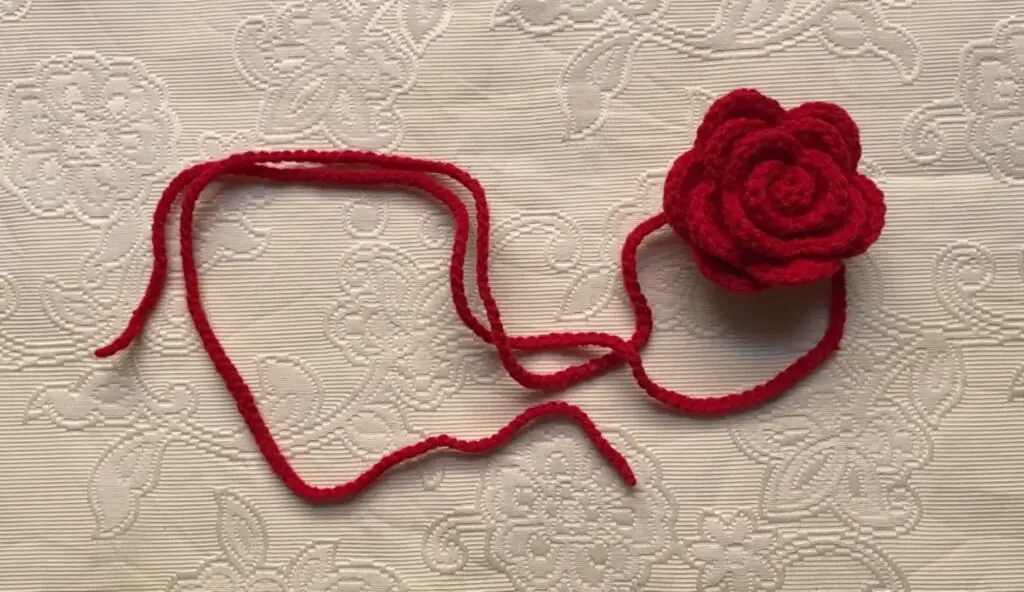
Skill Level: Intermediate
Materials:
- Small‑skein yarn in rose and green
- 3.5 mm hook
Instructions:
- Rose Motif: Chain 50, DC in 3rd chain from hook, DC across. Roll strip into a rose shape and tack sew the base.
- Leaf Embellishments: Around the rose base, chain 8, SC in 2nd chain, HDC, DC, HDC, SC, SL ST back into bracelet.
- Band: Work SC or HDC around the wrist length, attaching the rose in the center.
- Closure: Sew ends together or use a small snap.
9. Left Over Yarn Crochet Bracelet Pattern
Skill Level: Beginner
Materials:
- Assorted leftover yarn scraps
- 3.5 mm hook
Instructions:
- Stripe Chain: With multiple colors, chain 40, alternating yarn every 10 chains.
- Row 1: SC across, changing yarn at the end of each color block.
- Rows 2–4: Continue SC to build width (~1 cm).
- Finishing: Weave in a colorful tangle of ends, fold into loop, and slip‑stitch seam.
10. Crochet Summer Flower Bracelet Tutorial
Skill Level: Beginner‑Plus
Materials:
- Sport‑weight cotton in bright colors
- 3.0 mm hook
Instructions:
- Flower Centers: Magic ring, chain 3, 11 DC into ring; join.
- Petals: Chain 4, SL ST in same stitch, repeat around for 12 petals.
- Join Flowers on Chain: Chain enough to fit wrist, SL ST through flower centers after each chain segment.
- Backing: SC behind the flowers to even out the band.
- Closure: Add a small button or tie a simple knot with extended chain.
11. Flower Bracelet Crochet Pattern
Skill Level: Intermediate
Materials:
- DK‑weight yarn
- 3.5 mm hook
Instructions:
- Five‑Round Flower:
- Rnd 1: Magic ring, chain 1, 12 SC in ring; join.
- Rnd 2: Chain 3, SL ST into next SC around for 6 loops.
- Rnd 3: In each loop, (SC, HDC, 3 DC, HDC, SC); join.
- Connecting Flowers: SL ST from petal to petal of adjacent flowers, forming a chain.
- Back Edging: SC behind the row of flowers to stabilize the bracelet.
- Finishing: Slip‑stitch ends together or add button and loop.
Conclusion
From beaded elegance to whimsical flowers, these 11 crochet bracelet patterns offer endless ways to express your style and creativity. Whether you’re freeing up leftover yarn, experimenting with textures, or perfecting your first chain stitch, each tutorial guides you toward a beautiful, wearable result. Pick your favorite design, gather your materials, and get ready to adorn your wrists (and your friends’) with handcrafted charm. Happy stitching!