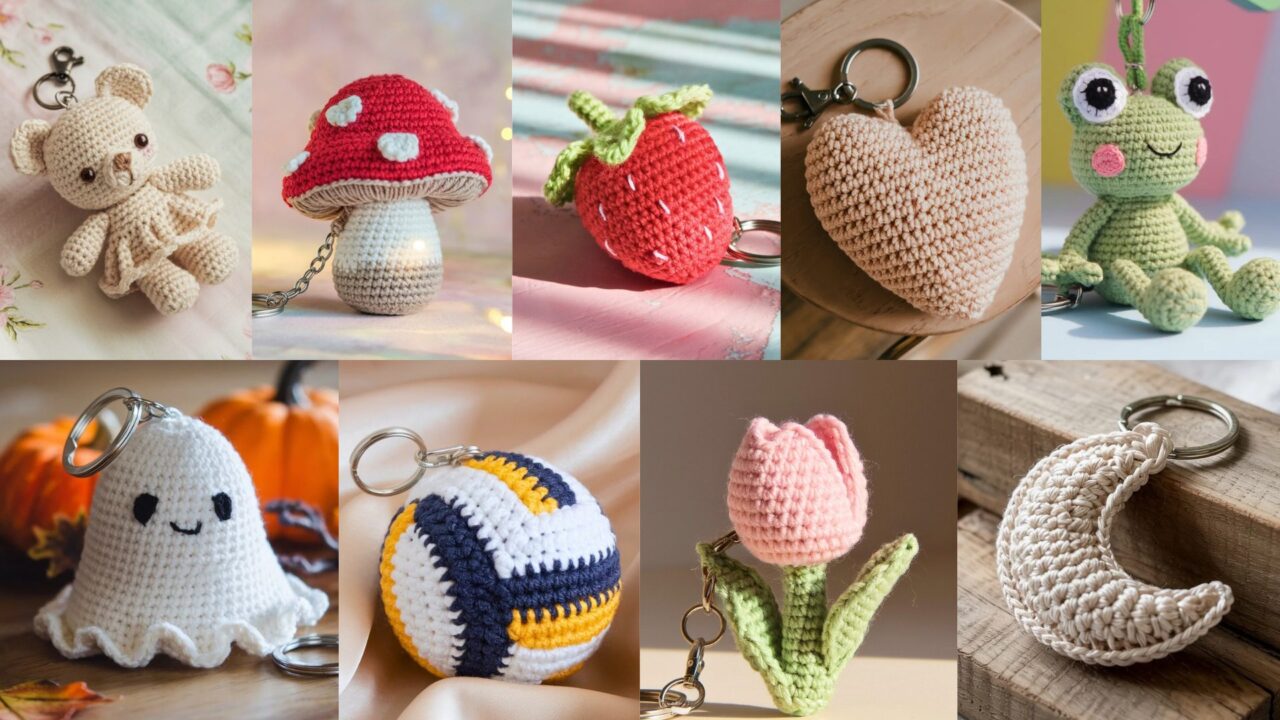
Small, portable, and endlessly customizable — crochet keychains are the perfect tiny projects for using scraps, practicing stitches, and gifting something handmade. They’re quick to finish (most under an hour), durable when worked tightly, and make great little accents for bags, zippers, and keys. This collection of nine patterns covers sweet shapes (hearts, strawberries, moons), tiny amigurumi (bear, frog), seasonal fun (ghost), sporty charm (volleyball), and classic cute motifs (mushroom, tulip).
Each pattern below includes skill level, finished size, materials, abbreviations (US terms), full step-by-step rounds/rows, assembly and how to attach the keychain hardware, plus tips and variations so you can personalize them. Use a slightly smaller hook than the yarn label recommends to keep stuffing from showing through and choose sturdy yarn for things that’ll see a lot of handling.
1) Heart Keychain Crochet Pattern
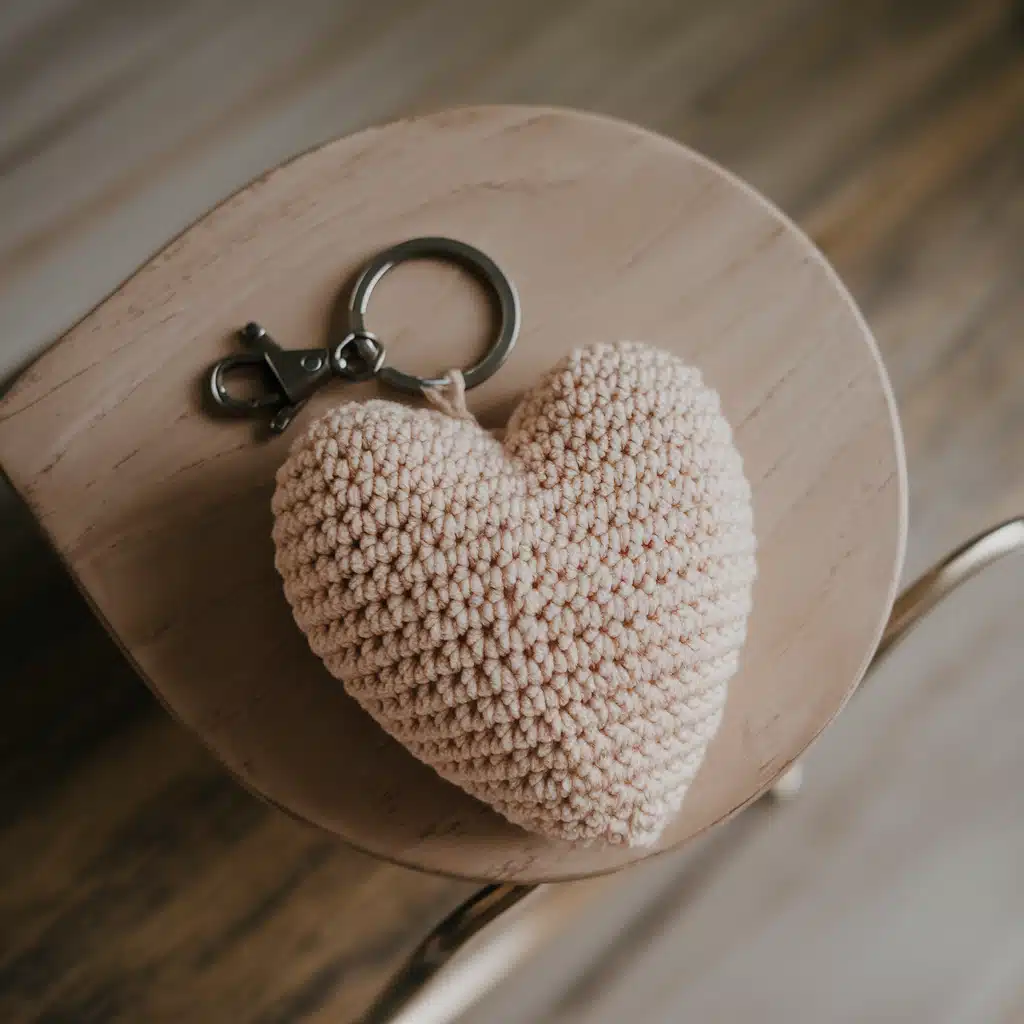
Skill level: Beginner
Finished size: ~2.5–3″ (6–8 cm) wide (using worsted weight yarn + 3.5–4.0 mm hook)
Materials
- Worsted weight yarn (small amounts): main color + optional trim color
- Hook: 3.5–4.0 mm
- Fiberfill (small pinch)
- Yarn needle, scissors
- Keychain ring + short lobster clasp or split ring
- Stitch marker (optional)
Abbreviations (US): MR = magic ring, ch = chain, sl st = slip stitch, sc = single crochet, inc = increase (2 sc in same st), dec = single crochet decrease
Pattern (Make 2 — front & back)
- MR, 6 sc into ring. (6)
- Sc, inc around. (9)
- 2 sc, inc around. (12)
- 3 sc, inc around. (15)
- Sc around for 2 rounds. (15)
- 3 sc, dec around. (12)
- Sc, dec around. (8)
- Sc around. (8) — fasten off one round early for shaping if desired; leave tail to sew.
Shaping the top lobes (optional alternative for distinct heart lobes)
- On one piece only, after Round 3 above, work 2 small rounded lobes: ch 6, sl st in 2nd ch from hook and back across to form a loop, repeat for second lobe, then continue rounds to form outer body. (This gives a more defined heart top.)
Assembly
- Place the two heart pieces wrong sides together. Begin joining with sc through both loops around, stop when about ⅔ joined.
- Stuff lightly with fiberfill so heart is plump but not overstuffed.
- Finish sc join, fasten off and weave in ends.
- Attach a short length of yarn or a small metal jump ring to the top center seam (where the two lobes meet). Secure the jump ring by stitching through several stitches around it, then attach keychain ring/lobster clasp.
Tips & Variations
- Use sport or fingering yarn + 2.5–3.0 mm hook for a mini heart that’s perfect as zipper charm.
- Add a tiny embroidered initial or French knot for personalization.
- Work an outer contrasting edge round of reverse sc for a cute border.
2) Crochet Coquette Bear Keychain Pattern
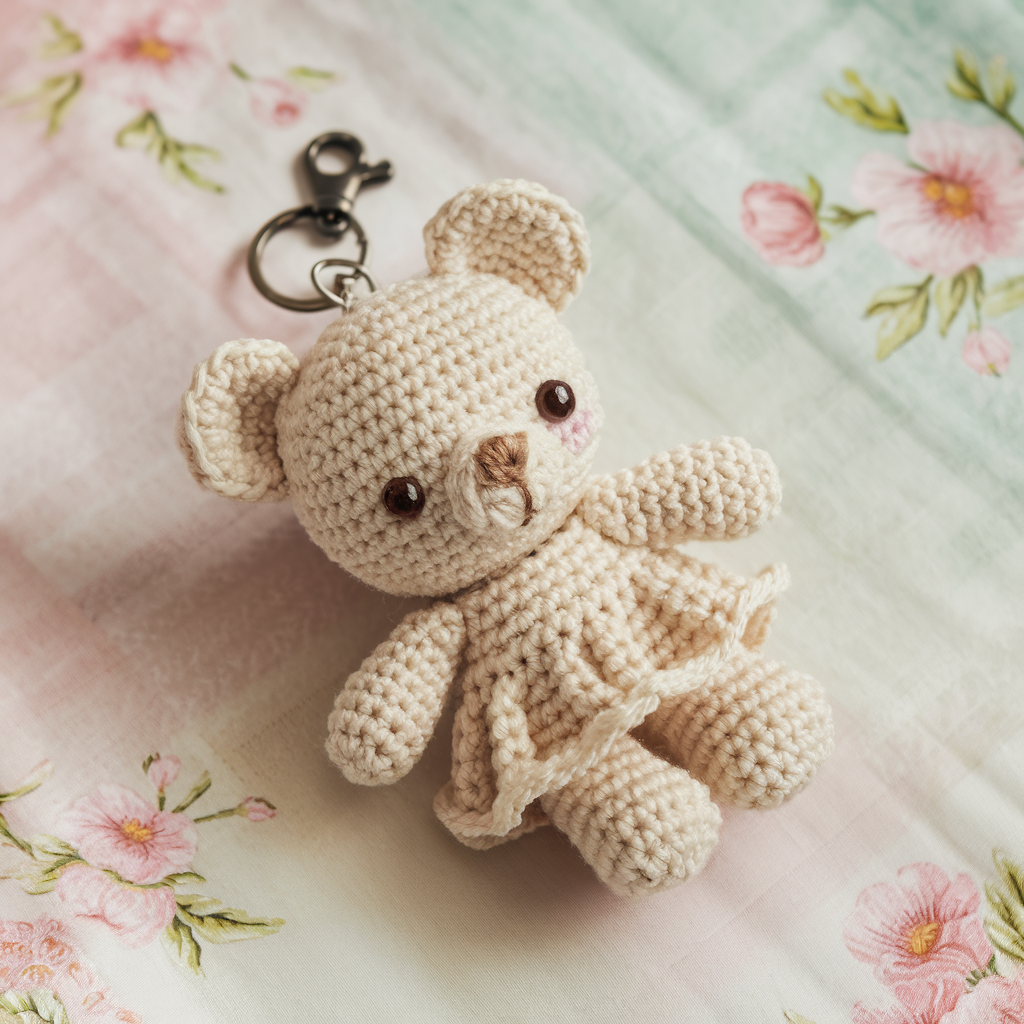
Skill level: Intermediate (tiny amigurumi shaping)
Finished size: ~2.5–3 inches tall
Materials
- Worsted or DK yarn: main color (bear), contrast for muzzle/inner ear, tiny amount for bow or coquette details
- Hook: 3.5–4.0 mm (use smaller if using worsted)
- Safety eyes 6 mm (or embroider for child-safe), polyfill, yarn needle
- Small keychain ring + lobster clasp, optional jump ring
Abbreviations: MR, ch, sc, inc, dec, sl st
Head (worked in continuous rounds)
- MR, 6 sc. (6)
- Inc around. (12)
- Sc, inc around. (18)
- 2 sc, inc around. (24)
- 3 sc, inc around. (30)
6–10. Sc around (30) — place safety eyes between rounds 7–8 about 6–7 sts apart. - 3 sc, dec around. (24)
- 2 sc, dec around. (18) — start stuffing.
- Sc, dec around. (12)
- Dec around to close. Fasten off and weave end.
Body (small)
- MR, 6 sc. (6)
- Inc around. (12)
- Sc, inc around. (18)
4–7. Sc around (18) — stuff lightly. - Sc, dec around. (12)
- Dec around and leave opening to sew to head.
Ears (Make 2)
- MR, 6 sc. (6)
- Sc, inc around. (9)
- Sc around 2 rounds. Flatten and sew to head top.
Arms & Legs (Make 4 very small stubs)
- MR, 6 sc, sc around 3 rounds, flatten and sew to body (arms at sides, legs at bottom).
Bow / Coquette detail
- Ch 10, sc across, fold and wrap center with yarn to make bow. Sew to one ear or neck.
Assembly
- Sew head to body securely.
- Attach ears, arms, legs in proportion.
- If using safety eyes for a gift for young child, replace with embroidered eyes instead for safety.
- Sew a small loop made from a few rounds of sc at the top of the head or back, secure a jump ring through the loop, then attach keychain hardware.
Tips & Variations
- Use fuzzy yarn for a plush teddy look.
- Crochet a tiny scarf, hat, or heart for the bear to hold.
- To make it durable, stitch the loop into several stitches and knot the yarn on the inside before finishing.
3) Halloween Ghost Keychain Crochet Pattern
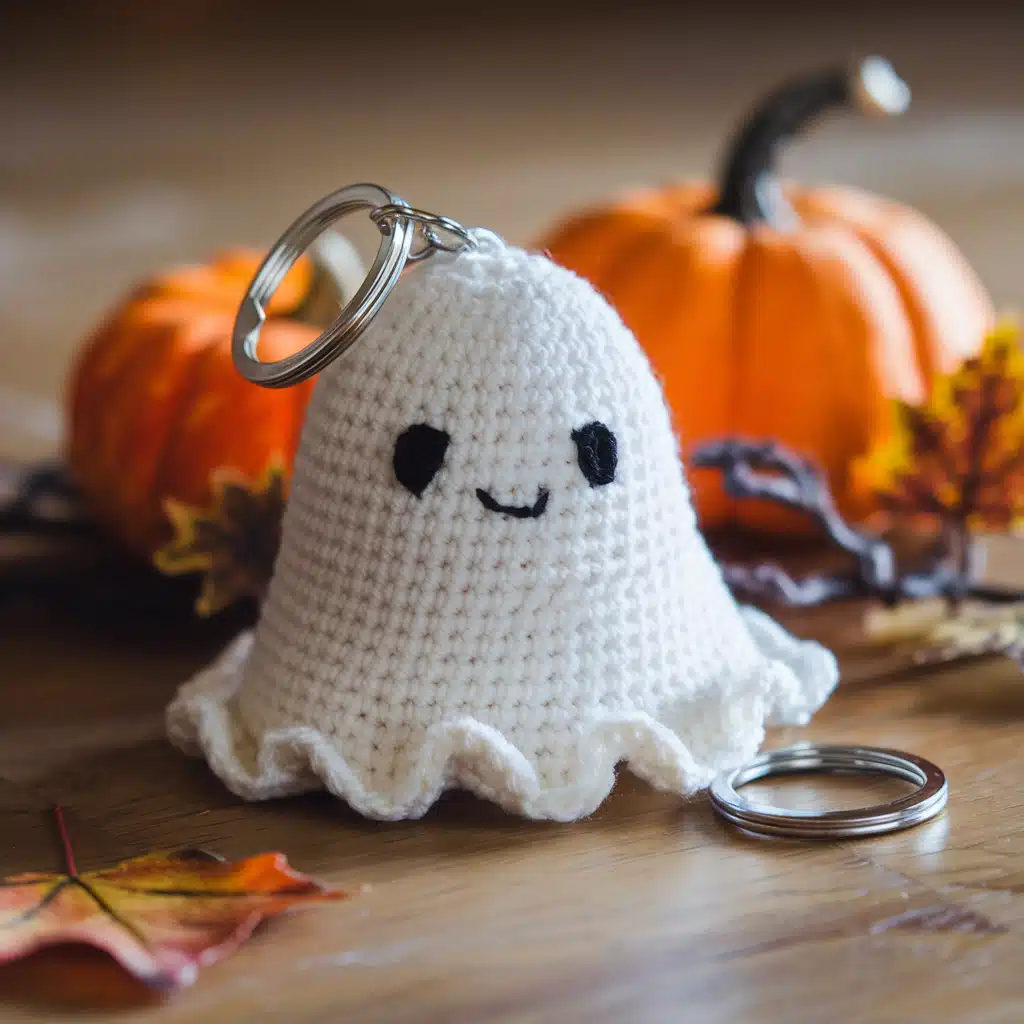
Skill level: Beginner
Finished size: ~2.5–3.5″ (6–9 cm) tall depending on yarn/hook
Materials
- Worsted or DK yarn (white for ghost, optional black for eyes)
- Hook: 3.5–4.0 mm
- Small black safety eyes or embroidery thread for eyes/mouth
- Polyfill (a pinch), yarn needle, keychain ring
Abbreviations: MR, ch, sc, inc, dec, sl st
Ghost Body (one piece)
- MR, 6 sc. (6)
- Inc around. (12)
- Sc, inc around. (18)
- 2 sc, inc around. (24)
- Sc around for 3–4 rounds (body height).
- Optional: beginning the ruffled bottom — ch 3, sl st in next st around to create loops for frill. Alternatively, work a round of sc, inc to widen then work shell stitches (5 dc in one st, skip 1) around for a wavy frill.
- Stuff lightly before finishing.
- Decrease rounds if needed to close the head area: 2 sc, dec around, sc, dec around, finish and fasten off leaving tail.
Face
- Embroider two oval eyes and a little smiling mouth with black yarn. If using safety eyes, insert them between rounds 6–7 before stuffing.
Assembly & Keychain Attachment
- With a blunt yarn needle, sew a small cord loop to the top of the ghost’s head using several tight stitches — this creates a very secure anchor point. Insert a small metal jump ring through the loop and attach the keychain hardware.
- Optionally glue or sew a felt backing to the inside top to hide knot ends.
Tips & Variations
- Make mini ghosts using cotton thread and a 1.75–2.5 mm hook for delicate charms.
- Add a tiny black hat or bat applique for a spookier look.
- Use glow-in-the-dark yarn (for novelty) for an eerie nighttime effect.
4) Cute Volleyball Keychain Crochet Pattern
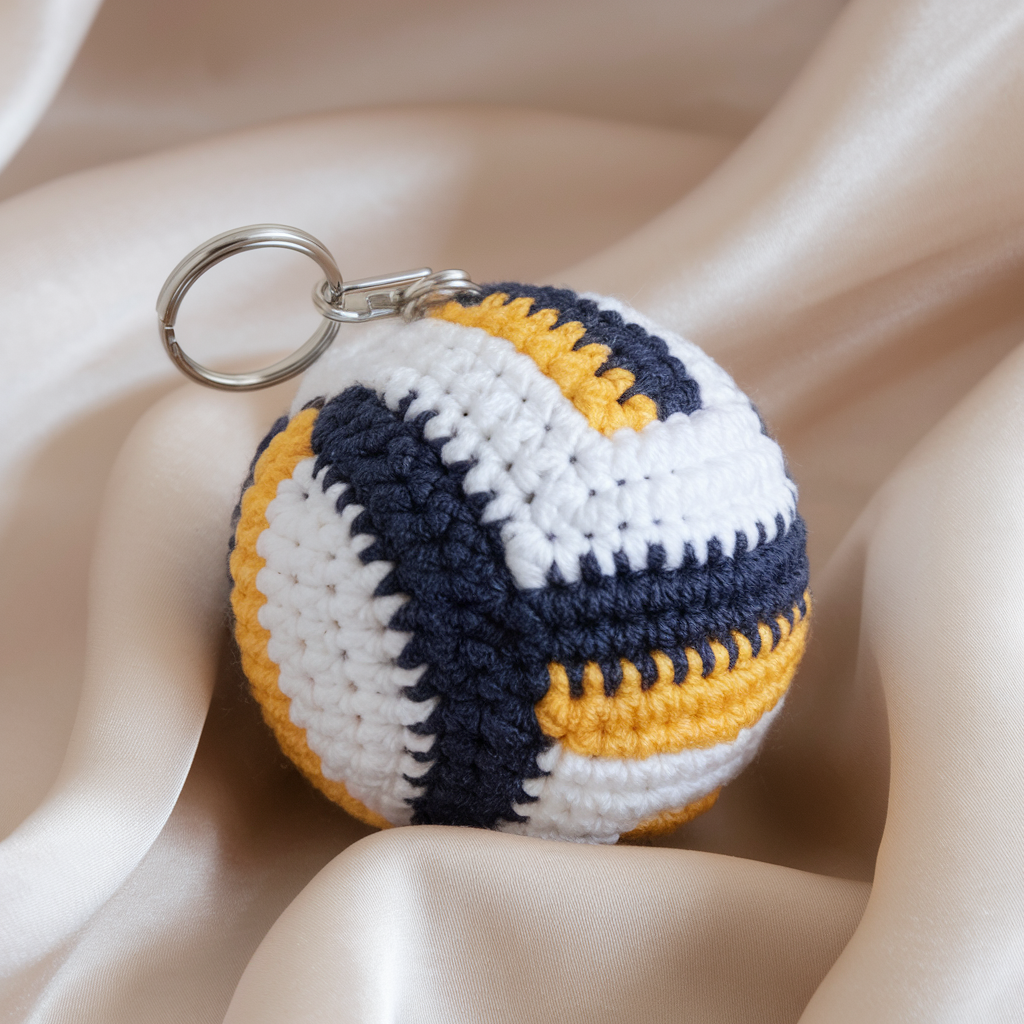
Skill level: Beginner–Intermediate (small spherical amigurumi + surface embroidery)
Finished size: ~1.5–2″ (4–5 cm) diameter — perfect mini keychain or zipper pull
Materials
- Sport or DK yarn in white + small scrap of black or dark gray for lines
- Hook: 2.5–3.5 mm (use size that gives tight stitches)
- Fiberfill small amount, yarn needle, keychain ring
- Optional: thin black embroidery floss for volleyball seams
Abbreviations: MR, sc, inc, dec, sl st
Ball (make 1)
- MR, 6 sc. (6)
- Inc around. (12)
- Sc, inc around. (18)
- 2 sc, inc around. (24)
- 3 sc, inc around. (30)
6–8. Sc around (30) depending on size desired. - 3 sc, dec around. (24)
- 2 sc, dec around. (18) — insert eyes? (not needed)
- Sc, dec around. (12)
- Dec around to close, stuff firmly before final rounds and leave hole to sew.
Surface Detail (volleyball seams)
- Using thin black yarn or embroidery floss, stitch the classic curved seam lines on the white ball: mark the positions roughly opposite each other and use a simple backstitch or surface slip stitch to form 2–3 curved panels that imitate a volleyball’s pattern.
Attachment
- Before fully closing, use a short length of yarn to create a strong top loop by chaining 8–12, slip stitch back to the starting point making a small cord. Secure by working a few sc rounds onto the chain to form a neat base, sew through several stitches of the ball, and then run a jump ring through the cord to attach keychain hardware. Alternatively, sew a sturdy jump ring at the very top and secure inside with extra stitches.
Tips & Variations
- Use sport yarn for a true miniature; worsted will give a chunkier look.
- Work in a small bead or bell inside for jingling keychains (sew bead into the stuffing area).
- Brand it! Embroider a tiny team initial with contrasting yarn.
5) Little Frog Keychain Crochet Pattern
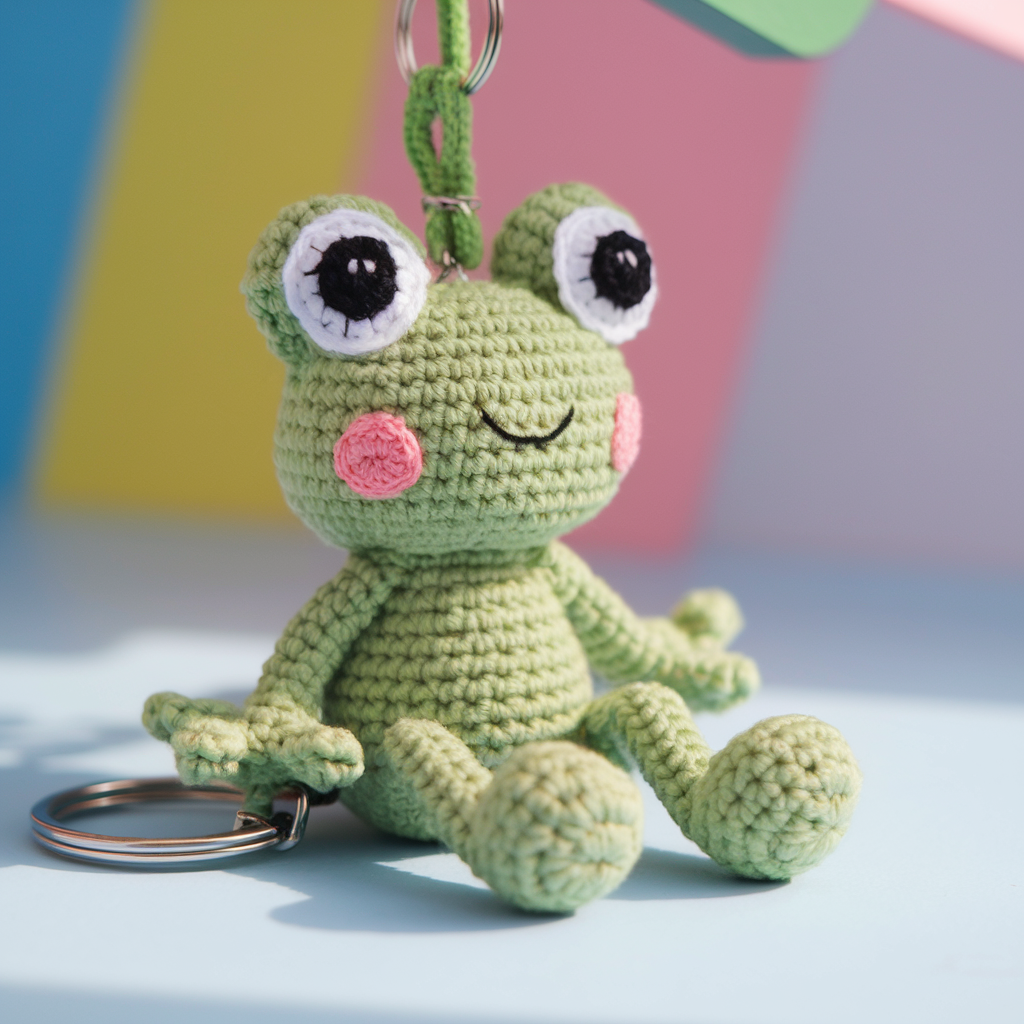
Skill level: Intermediate (small shaping + applique eyes)
Finished size: ~2.5–3.5″ (6–9 cm) from head to bottom (sitting frog)
Materials
- DK or worsted yarn in green + small whites/black for eyes
- Hook: 3.0–3.5 mm
- Fiberfill, yarn needle, safety eyes (optional)
- Keychain ring + jump ring
Abbreviations: MR, sc, inc, dec, sl st, hdc
Head & Body (one-piece, slightly egg-shaped)
- MR, 6 sc. (6)
- Inc around. (12)
- Sc, inc around. (18)
- 2 sc, inc around. (24)
5–8. Sc around (24) to lengthen body. - 2 sc, dec around. (18)
- Sc, dec around. (12) — begin stuffing.
- Dec around to close and leave tail for sewing base if not closing fully.
Eyes (Make 2 small spheres)
- MR, 6 sc. (6)
- Inc to 12. (12)
- Sc around 1–2 rounds, fasten off leaving tail. Sew to top front of head so they sit slightly bulging. Add a small black embroidery stitch or black safety eye to center. Flatten or sew the spheres to form slightly eyelid look.
Legs & Feet (Make 4 tiny stubs)
- For front legs: MR, 6 sc, sc 3–4 rounds, flatten and sew to front body sides.
- For back legs: MR, 8 sc, sc 3–4 rounds, flatten into webbed foot by stitching slight grooves (sew two small stitches to form toe indentations).
Mouth & Cheeks
- Use a single strand of pink yarn to stitch a small smile. Add two small French knots for rosy cheeks if desired.
Assembly & Keychain Loop
- Attach eyes firmly near top; secure with extra stitches.
- Sew legs and feet into position so frog sits nicely.
- Create a small loop at the top back of the head, reinforce by stitching into body core, add a jump ring and attach keychain hardware.
Tips & Variations
- Use fuzzy yarn for a vintage plush frog.
- Make a tiny lily pad base (a small round with scalloped edge) and stitch frog to it; add a small chain between lily pad and keyring.
- For a kawaii look, use oversized embroidered eyes and tiny blush circles.
6) Crochet Tulip Keychain Pattern
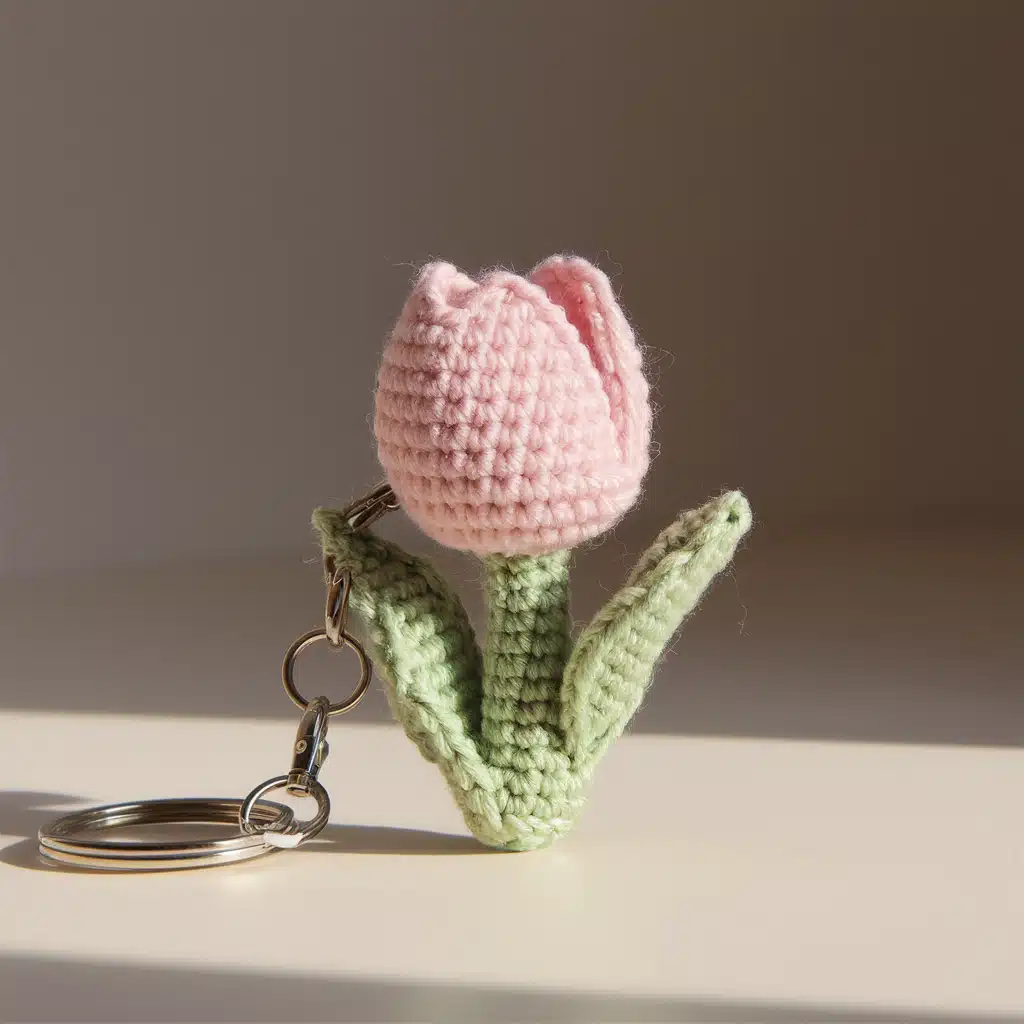
Skill level: Beginner–Intermediate (flower + stem assembly)
Finished size: ~4–5″ (10–13 cm) long including stem, flower approx 2″ across
Materials
- Sport or DK yarn: tulip color (red/pink/yellow), green for stem and leaves
- Hook: 2.5–3.5 mm (smaller for tighter petals)
- Yarn needle, small amount of fiberfill for petal base, keychain ring
Abbreviations: ch, sl st, sc, hdc, dc
Petal (Make 3)
- Ch 6.
- Dc in 4th ch from hook, dc in next 2, hdc in next, sc in last ch, turning and continue along other side of chain with sc, hdc, dc, dc to make a petal-shaped oval.
- Fasten off and make two more petals.
(Alternative flower: work a small sphere and then attach petals around it.)
Flower Assembly
- Arrange 3 petals in a circular overlap so they cup like a tulip bloom. Sew them together at the base with matching yarn.
- Lightly stuff the base so petals stand open slightly.
Stem & Leaves
- For the stem: ch 30–40 (length as desired), sc back along chain to form a thin tube. Alternatively crochet a thicker stem by working a small tube in rounds (MR, 6 sc then sc around for length).
- Leaves (make 2): Ch 10, sc back along chain shaping with increases and decreases—make a tapered leaf. Sew leaves to sides of stem near bottom of flower.
Keychain Attachment
- Fold the top 3–4 chain stitches of the stem into a loop and sew through several stitches at the tube top to create a secure anchor. Insert a jump ring and attach keychain hardware. For extra security, wrap stem top with floral tape or wrap yarn multiple times and stitch the tail in.
Tips & Variations
- Add tiny bead “dew drops” sewn onto petals.
- Make a bouquet of 3 small tulips and attach to a single ring for a charming cluster keychain.
- Use a stiffer yarn (cotton) so petals hold shape better.
7) Mushroom Keychain Crochet Pattern
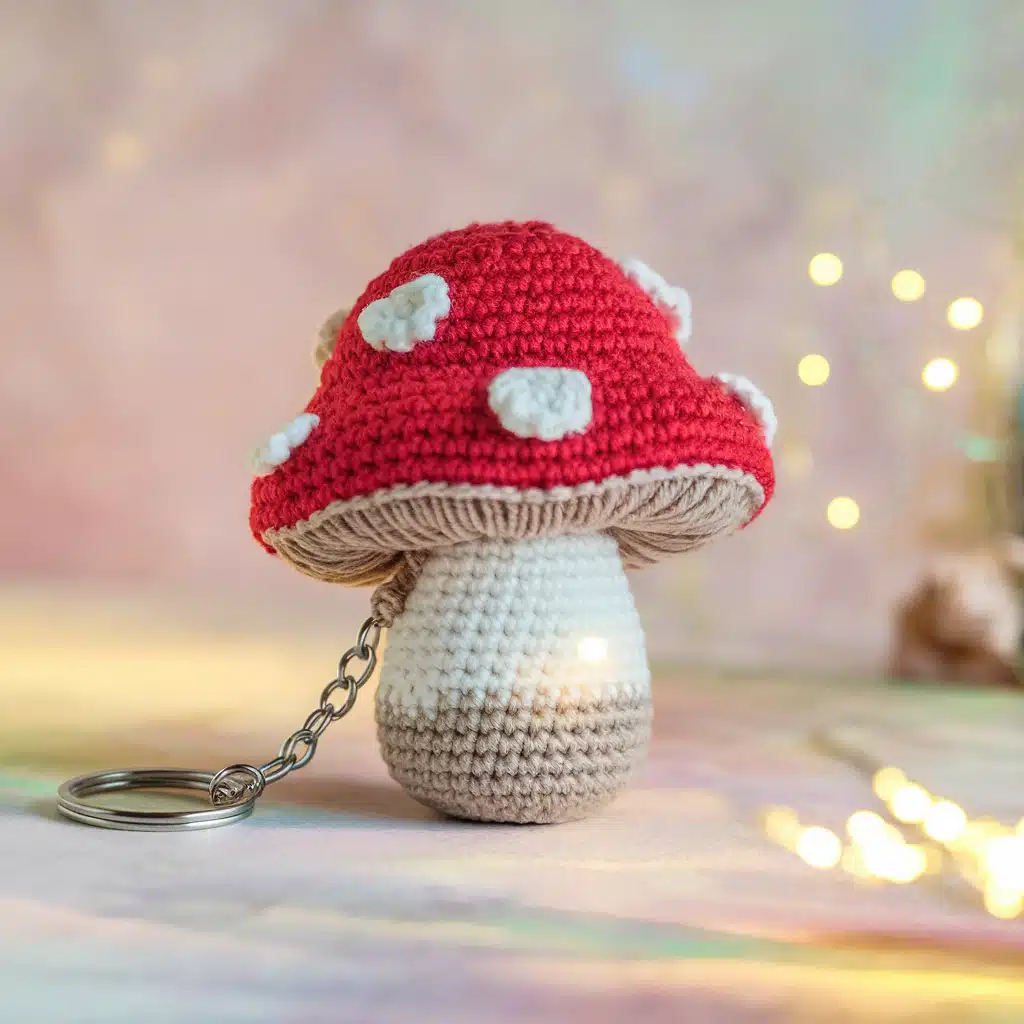
Skill level: Beginner–Intermediate
Finished size: ~2–3″ (5–8 cm) tall depending on yarn/hook
Materials
- Worsted or DK yarn: red (cap), white (stem and dots), optional tan/brown for undercap
- Hook: 3.0–4.0 mm
- Fiberfill, yarn needle, keychain ring
Abbreviations: MR, sc, inc, dec, sl st, ch
Cap
- MR, 6 sc. (6)
- Inc around. (12)
- Sc, inc around. (18)
- 2 sc, inc around. (24)
- Sc around for 2 rounds to create dome. (24)
- Optional: work one round of sc in BLO to create a ridge. Fasten off leaving tail.
Stem (Make 1)
- MR, 6 sc. (6)
- Sc around for 6–8 rounds to desired stem height. Can increase to 8–10 sts for a wider stem by inc evenly in a round.
- Stuff lightly. Flatten top slightly and sew to cap underside.
Spots
- Crochet small circles: MR, 6 sc — sew several onto cap in a balanced layout. Or embroider small French knots with white yarn.
Assembly & Keychain Loop
- Sew cap and stem together securely. Before fully closing, add stuffing to give mushroom a plump shape.
- Create a small loop by stitching a short length of chain into the top center of the cap (or attach a small jump ring sewn into the top), then attach the keychain hardware.
Tips & Variations
- Make tiny mushrooms to line a keychain ring or make a cluster of 3–4 mini mushrooms for a woodland charm.
- Use fuzzy yarn for a toadstool with cozy texture.
8) Strawberry Keychain Crochet Pattern
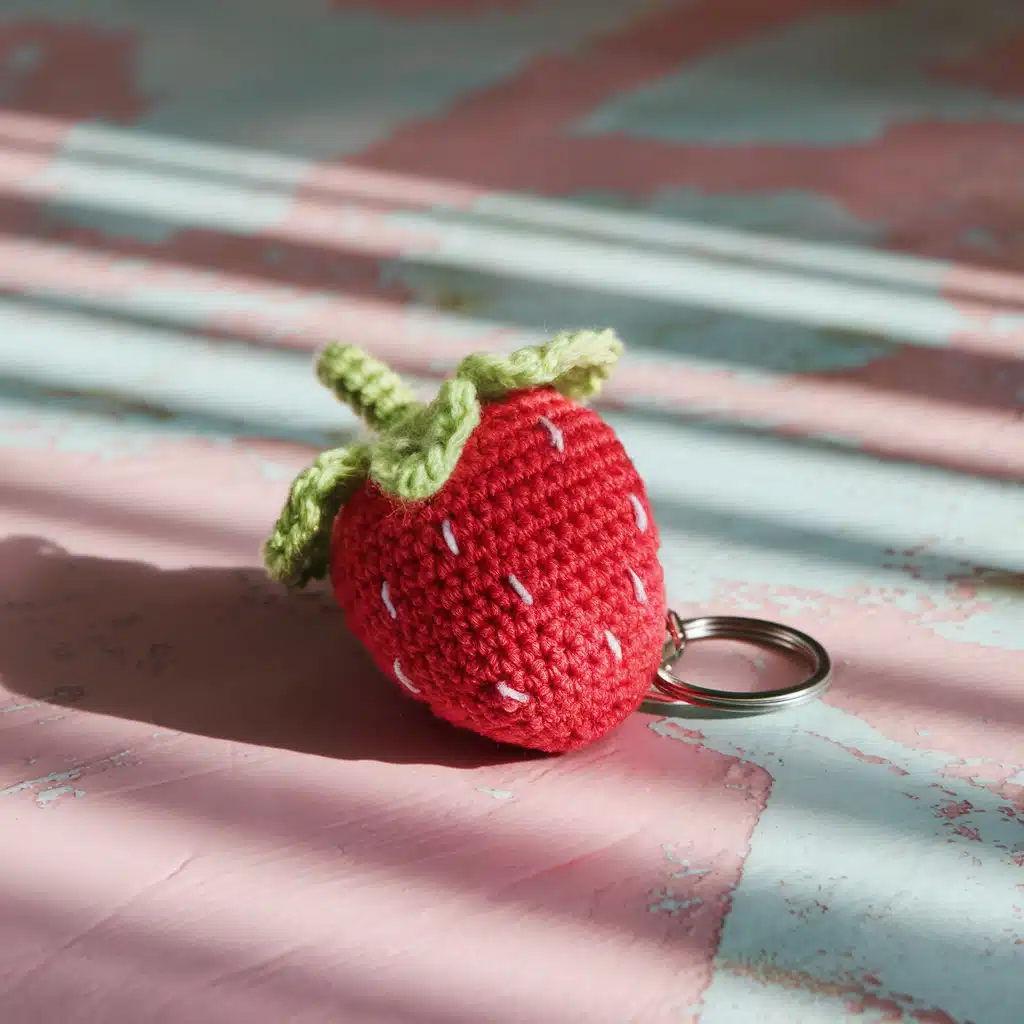
Skill level: Beginner–Intermediate
Finished size: ~2–3″ (5–7 cm) tall (berry only)
Materials
- Worsted or DK yarn: red (berry), green (calyx/leaves), small brown for seeds (or use embroidery thread)
- Hook: 3.0–3.5 mm
- Fiberfill, yarn needle, keychain ring
Abbreviations: MR, sc, inc, dec, sl st, ch
Berry Body
- MR, 6 sc. (6)
- Inc around. (12)
- Sc, inc around. (18)
- 2 sc, inc around. (24)
- Sc around 3–4 rounds to build height and a slightly tapered shape.
- 2 sc, dec around. (18)
- Sc, dec around. (12) — stuff lightly.
- Dec to close and fasten off.
Calyx / Leaves (Make 4–5)
- With green, ch 6. Sc back along chain. In the base stitch, ch 3, sl st in base to create small pointed leaves, or crochet small pointed triangles (ch 6, sc back along, dec to taper).
- Arrange leaves around top, sew securely over the berry’s opening so they cover the top and hide the join.
Seeds (Embroidered)
- Using small brown or yellow embroidery thread, stitch tiny french knots or straight stitches across the red body to suggest seeds.
Attachment
- Create a small loop by chaining 8–12 at the top center (hidden behind leaves), secure into the calyx by sewing through several stitches and add a jump ring and keychain hardware.
Tips & Variations
- Add a tiny white crocheted seed or bead for shimmer.
- Make a whole bunch on one ring for a fruit cluster keychain.
- Use textured cotton for a realistic finish.
9) Moon Keychain Crochet Pattern
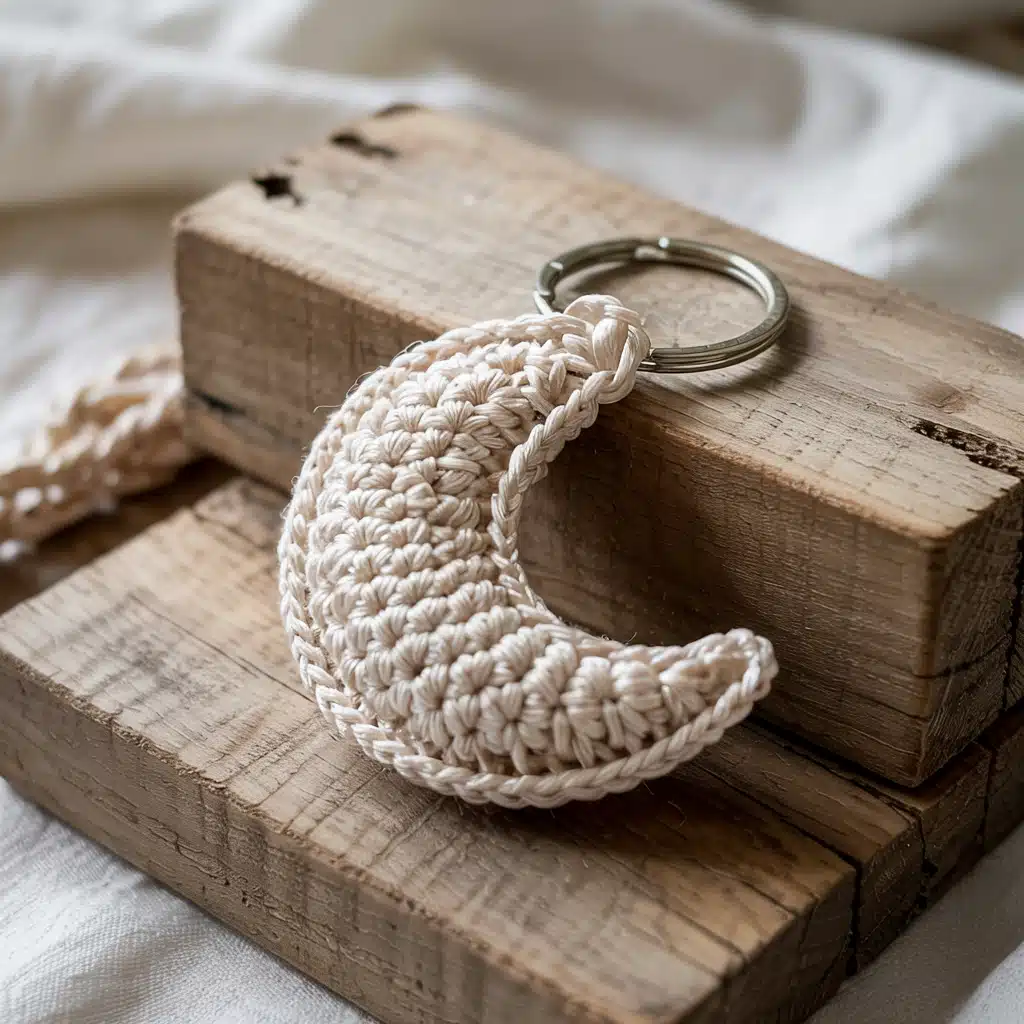
Skill level: Beginner–Intermediate (shaping a crescent)
Finished size: ~2.5–3.5″ (6–9 cm) tall depending on scale
Materials
- DK or worsted yarn: pale yellow, gray or white for accents
- Hook: 2.5–3.5 mm
- Fiberfill, yarn needle, keychain ring
Abbreviations: MR, sc, inc, dec, ch, sl st
Crescent Moon (worked as a flat piece then joined)
- Ch 16 (or length for desired crescent height).
- Row 1: Sc in 2nd ch from hook across. (15)
- Row 2–5: Ch 1, sc across. Slowly decrease at the beginning of rows to create tapering at top and bottom: on row 3 do dec at first st and last st. Continue shaping by decreasing more on upper rows so one end becomes thinner creating a crescent curve. Alternatively work a small oval and gather one side tightly when sewing to create crescent shape.
- Do same for second flat piece and sew them together with a small stuffing inside, leaving a small opening to add fiberfill. Or work a single piece in rounds where increases on one side and decreases on the other will form a curved crescent.
Face & Details (optional)
- Embroider a sleepy face with two small curved lines for closed eyes and a tiny smile. Add tiny star-shaped appliqués or bead sewings. Use a thin contrasting yarn for stitched craters or shading.
Attachment
- At the top tip of the crescent, create a reinforced loop (stitch a short chain into the seam and secure with several passes) and insert jump ring for keychain hardware.
Tips & Variations
- Make a moon-and-stars set by adding a tiny star charm crocheted separately and hanging from the same ring with a short chain.
- Use variegated yarn to mimic moon shading.
- For a nightlight look, use glow-in-the-dark yarn for the moon.
Conclusion
There you have it: nine charming and fully detailed crochet keychain patterns you can make from scraps or a single skein. These projects scale easily (use thinner yarn and smaller hooks for dainty charms or bulkier yarn for bold zipper pulls), and each one gives you chances to practice shaping, tiny appliqué, embroidery, and secure hardware attachment. When making keychains, always reinforce the attachment loop well (sew through many stitches, add a hidden knot, or use a metal jump ring sewn into the fabric) so your charm survives daily wear.


