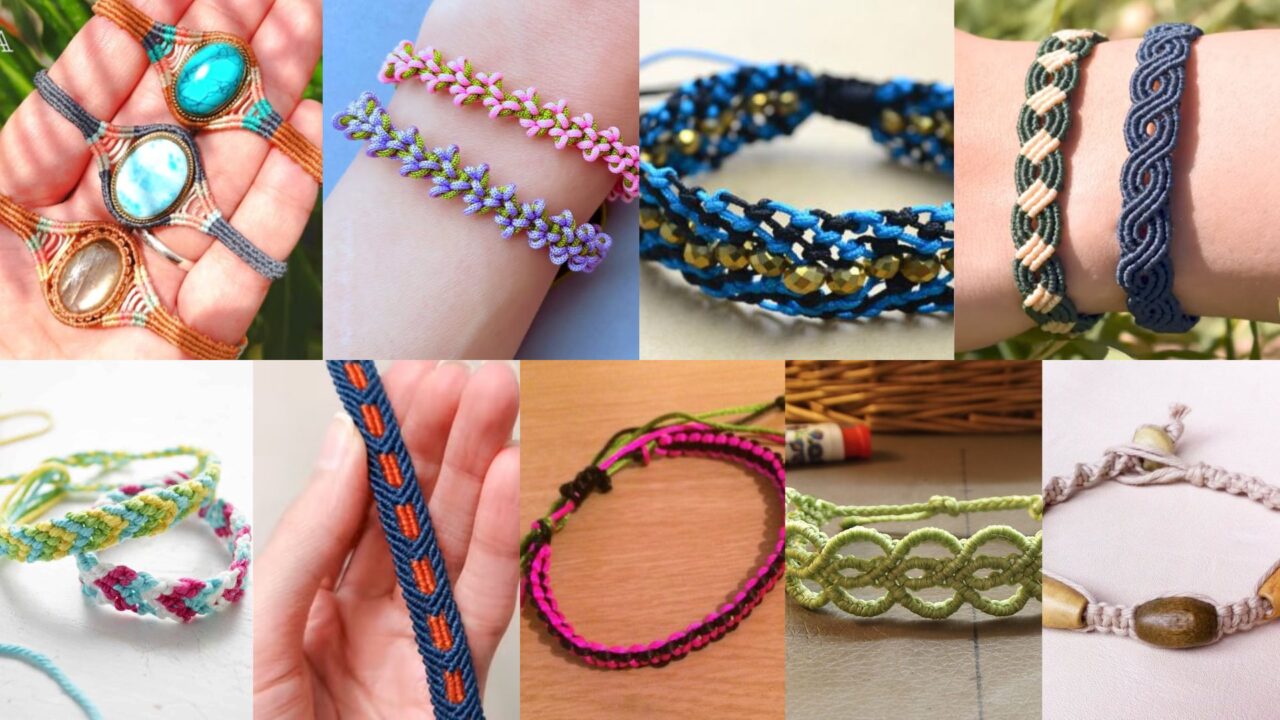
Macramé bracelets are timeless, tactile, and hugely satisfying to make — tiny canvases for color, texture, beads, and personality. Whether you love delicate micro-knot work, chunky friendship styles, gemstone bezels, or something super quick, this collection of nine patterns covers wearable favorites for beginners through intermediate makers. Each pattern includes skill level, materials, finished size guidance, a clear step-by-step tutorial, finishing notes, and troubleshooting tips so you can make a beautiful bracelet you’ll actually wear.
Quick knot legend:
LR = lark’s head knot, FK = forward knot, RK = reverse knot, SK = square knot, HK = half knot, HHK = half-hitch knot, MH = macramé hitch (a general term). Measurements are approximate — adjust to wrist size.
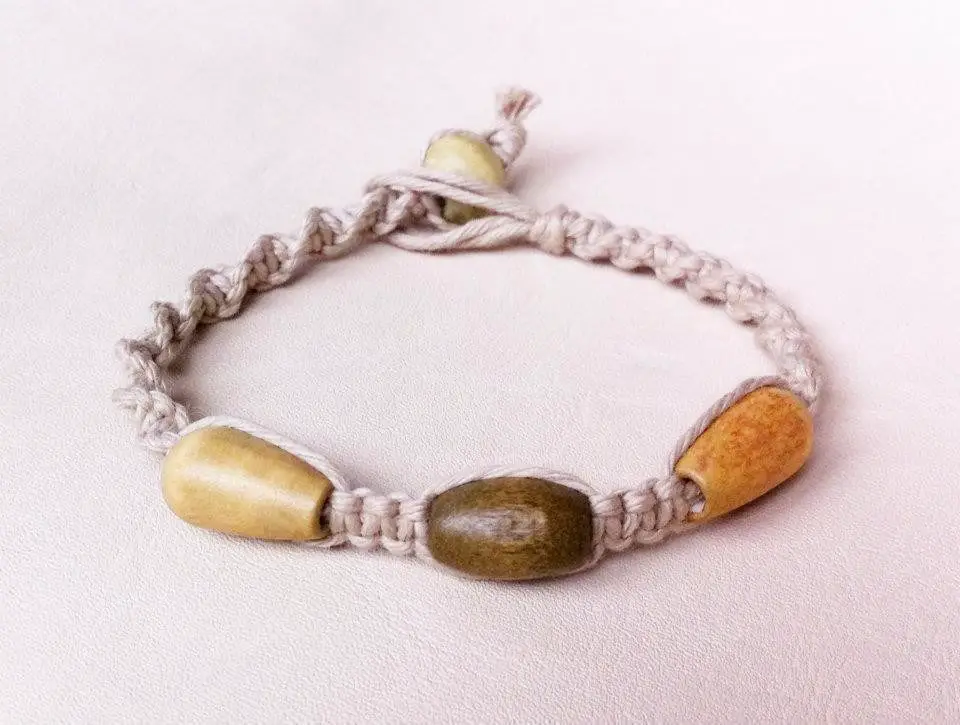
1. Adjustable Macramé Friendship Beaded Bracelet Pattern
Skill level: Beginner
Materials
- 1 main cord (falling cord) for base: 1 mm–2 mm waxed cord or nylon (about 40–60 cm)
- 2 working cords (for knots): 0.8–1.5 mm each, 1 m each (one on each side)
- 8–12 small beads (4–6 mm) — glass, wood, or metal
- Scissors, ruler, lighter (for synthetic cord), tape or clipboard
Finished size: Adjustable — fits most wrists (6–8.5″ / 15–22 cm).
What you’ll make
A classic sliding-knot friendship bracelet with beads strung along a center cord and a macramé sliding closure that makes it adjustable.
Step-by-step
- Prepare cords: Fold the base cord in half and anchor it (tape/clipboard). Measure and fold working cords so each working cord is about 100 cm. Attach working cords to the base cord using a lark’s head knot at the midpoint, leaving 6–8 cm tail at each end for finishing. Your working cords will be used to knot around the base.
- Center bead row: Slide beads onto the base (center) cord in desired arrangement. Leave ~2–3 cm on each side of the beads before knotting begins so beads don’t slide into the closure.
- Make square knots: Use the two working cords to form square knots around the base cord: left working cord over base cords, right working cord over left, through the loop, pull tight; then reverse for the second half of the square knot. Make 6–10 square knots to anchor the beads.
- Space beads: After anchoring, slide more beads into desired positions and repeat small groups of square knots between bead clusters. Continue until you reach desired length leaving about 5–6 cm on each end for the closure.
- Create sliding closure: Bring the two ends of the base cord together so the bracelet forms a loop. Use one working cord (or a new short working cord) to make a tight series of square knots around both base cords (about 10–15 knots) — this is the sliding knot. Make a second sliding knot on the other side if desired for added grip. Trim and melt tips if synthetic; tuck ends.
Finishing & care
- Trim tails to tidy length; seal synthetic cords with a lighter (carefully) or glue for natural fibers.
- To clean: spot wipe beads, avoid prolonged soaking.
Tips
- Waxed cord prevents slippage of beads.
- Use contrasting cord color for visual pop around beads.
- If your sliding knot slips, add a small dab of clear glue inside the knot (not on the outside visible part).
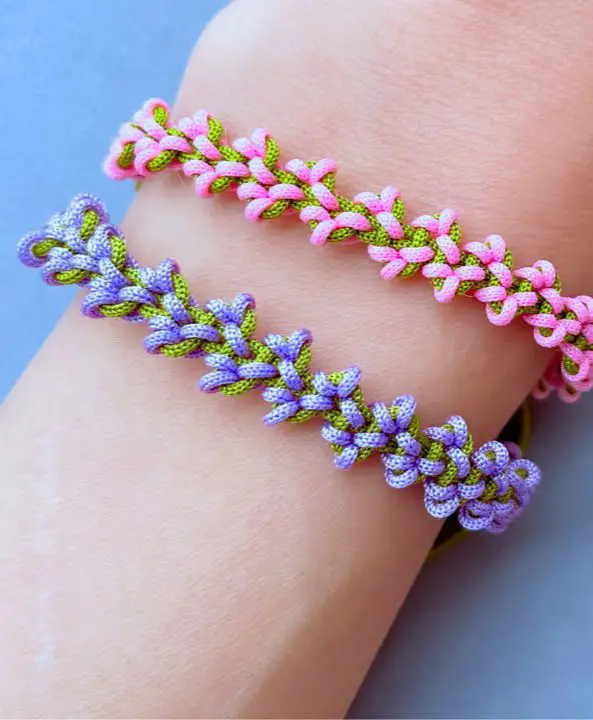
2. Lilac Flower Macramé Bracelet Tutorial
Skill level: Intermediate (small motif assembly + knotting)
Materials
- 1.0–1.5 mm cotton cord (main) — 2 m
- 0.5–1.0 mm cord for flower accents or embroidery thread — 1 m
- Small round bead for flower center (3–5 mm)
- Crochet thread or thin cord for delicate petals (optional)
- Scissors, needle, glue (clear), tape/clipboard
Finished size: Delicate bracelet about 6.5–7.5″ (16.5–19 cm) before closure (adjust).
What you’ll make
A feminine macramé bracelet with tiny crocheted or knotted lilac blossoms spaced along a knotted band.
Step-by-step
- Set up base cords: Cut two base cords (40–50 cm each) and two working cords (120 cm each). Secure base cords on clipboard; working cords are used to knot.
- Create band: Work a row of flat square knots for about 3–4 cm — this forms the base band. Keep tension even.
- Make flower loop: For each flower, tie a small loop of thin cord (or use crochet thread to make a 5-petal motif: ch 6, sl st to form ring, then 5 petal loops of ch 4 each, secure and fringe). If crocheting petals, make very small 5-petal motifs and sew them to the band.
- Attach flower centers: Sew a small bead to the center of each petal cluster with thread or tack it with a drop of clear glue. Space flowers evenly along the band by making flower attachments every 1–1.5 cm.
- Continue band: Between flowers, add more square knots to maintain length. Finish with a sliding macramé closure or jewelry clasp.
Finishing & care
- Trim excess and tuck ends; a dab of glue inside knots secures delicate thread.
- Hand-wash and reshape if using cotton.
Tips
- For sturdier flowers, crochet them small and press lightly with fabric stiffener before sewing.
- Use pastel tones and matte beads for a soft, pretty finish.
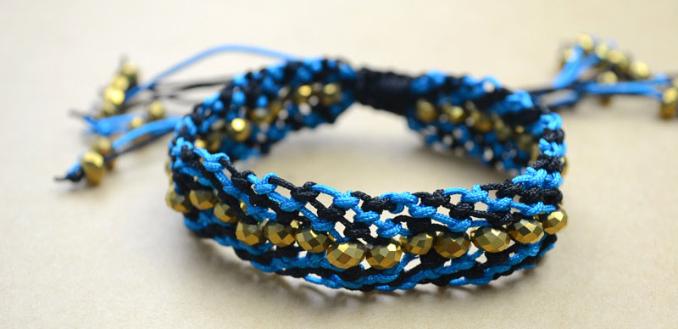
3. Braided Bracelet Using Wood Beads Pattern
Skill level: Beginner
Materials
- 3 strands of waxed cotton or leather cord (2–3 mm) about 60–80 cm each
- 6–10 wooden beads with large holes (6–10 mm)
- Clasp (lobster + jump ring) or sliding knot closure
- Scissors, glue (optional)
Finished size: 7–8.5″ adjustable (depending on closure).
What you’ll make
A rustic yet polished braided bracelet with wood beads threaded into the braid for boho charm.
Step-by-step
- Secure cords: Tie the three cords together at one end with a simple knot leaving about 4–6 cm tail. Tape the knot to your work surface or secure in a clipboard.
- Start braid: Begin a standard three-strand braid for about 1–2 cm.
- Add beads into braid: Slide a wood bead onto the center strand, then continue braiding over the bead so it sits centered on the braid. Repeat bead placement at even intervals across the desired length.
- Finish braid: After last bead and a short plain braid section, knot the ends securely. Trim tails to desired length. Attach a clasp with a small jump ring or make an adjustable sliding knot using the tail cords.
Finishing & care
- Leather or waxed cord gives a durable finish; avoid prolonged water exposure.
- For leather, use jewelry glue on knots to prevent slippage.
Tips
- Alternate bead positions (center vs. side) for asymmetry.
- Experiment with bead shapes (round, disc) for different textures.
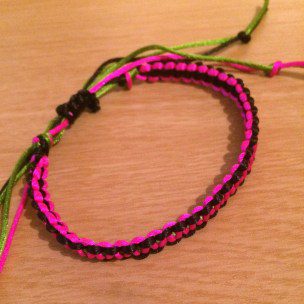
4. Easy and Fast Macramé Bracelet Tutorial
Skill level: Beginner (fast make)
Materials
- 1.5–2 mm braided cord or paracord, 1–1.5 m total
- Bead or charm center (optional)
- Scissors, lighter (if paracord), tape/clipboard
Finished size: 6.5–8.5″ with sliding closure.
What you’ll make
A minimalist, quick macramé bracelet using repetitive half-knots (spiral) and an adjustable closure — perfect for making multiples fast.
Step-by-step
- Fold & set up: Fold cord in half and tape the looped center to surface. The two folded strands form the base; two working cords will be used in half knots.
- Make half-knot spiral: With left working cord, do a half-knot around the two middle cords: left over center, right over left, pull tight. Repeat the same half-knot (not alternating) to create a spiral. Continue for 4–6 cm.
- Add a bead (optional): Slide a bead onto the center cords and continue spiral for another 2–3 cm then stop.
- Make sliding closure: Use the two ends to form a flat sliding knot over both bracelet ends: wrap one end around both strands tightly about 10–12 times, finish with a square knot, then repeat with the other end if desired. Trim and melt ends for paracord.
Finishing & care
- For textile cord, tuck ends into the knot or use glue.
- The spiral effect looks decorative without extras.
Tips
- Vary the number of half-knots to change spiral tightness.
- Use bright cord for festival sets — makes multiple in under an hour.
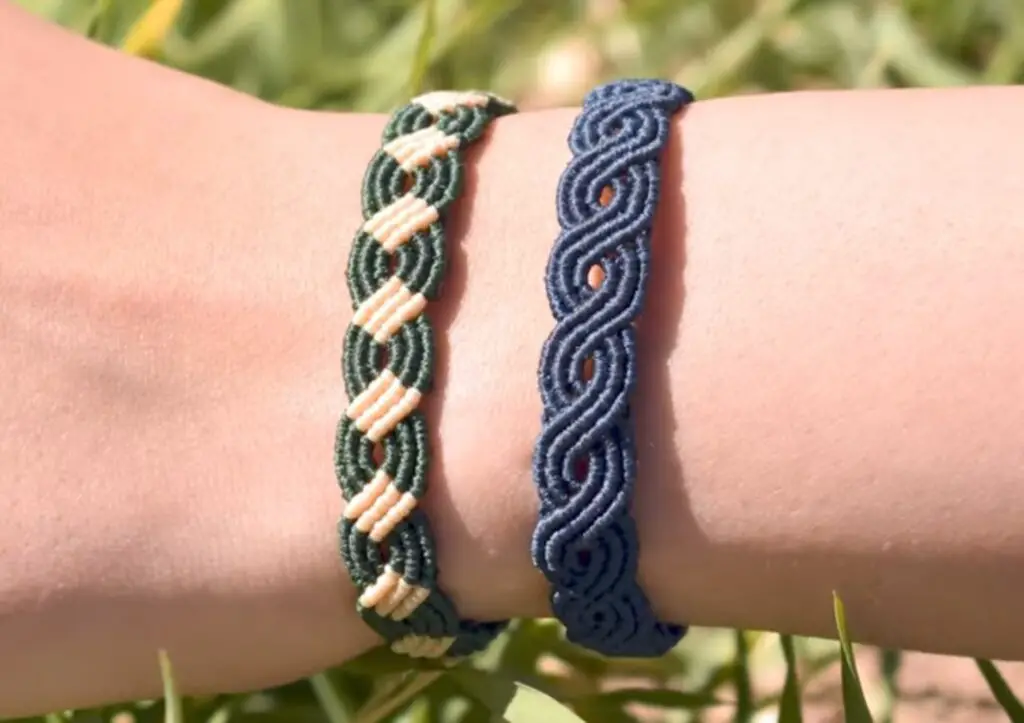
5. Chevron Macramé Friendship Bracelet Pattern
Skill level: Intermediate (patterned mirroring)
Materials
- 8 working cords (4 pairs) of embroidery floss or thin macramé cord — each ~80–100 cm (use pairs of same color for chevron stripes)
- Tape/clipboard, scissors
Finished size: 6–8″ after knotting; adjust for wrist.
What you’ll make
A classic chevron friendship bracelet built from mirrored forward and reverse knots producing V-shaped stripes.
Step-by-step
- Arrange cords: Fold all cords in half and secure the midpoint to create a loop for a tie. You’ll have 16 strands hanging (8 pairs if folded). Arrange colors symmetric: A, B, C, D | D, C, B, A.
- Start first row: Working from the outermost left cord (A), make forward knots (two half-hitches) across the left half until it meets the center. Do the outermost right cord (A) mirrored with reverse knots across the right half until center; join both center cords with a knot. This completes one row of the chevron.
- Continue rows: Repeat with next color pair (B), working toward center from both sides. Keep tension even so the chevrons stay sharp. Continue alternating colors until bracelet reaches desired length.
- Finish: Tie a knot at the end and braid the tails to create ties or make a small loop and button closure.
Finishing & care
- Trim tails neatly and tie secure double knots. Use a dab of glue on the final knot if you want permanence.
- Hand-wash if needed; embroidery floss holds color well.
Tips
- Keep cords flat (not twisted) as you knot to maintain crisp lines.
- If you prefer beads, thread small seed beads onto center strands before knotting a section to lock them in place.
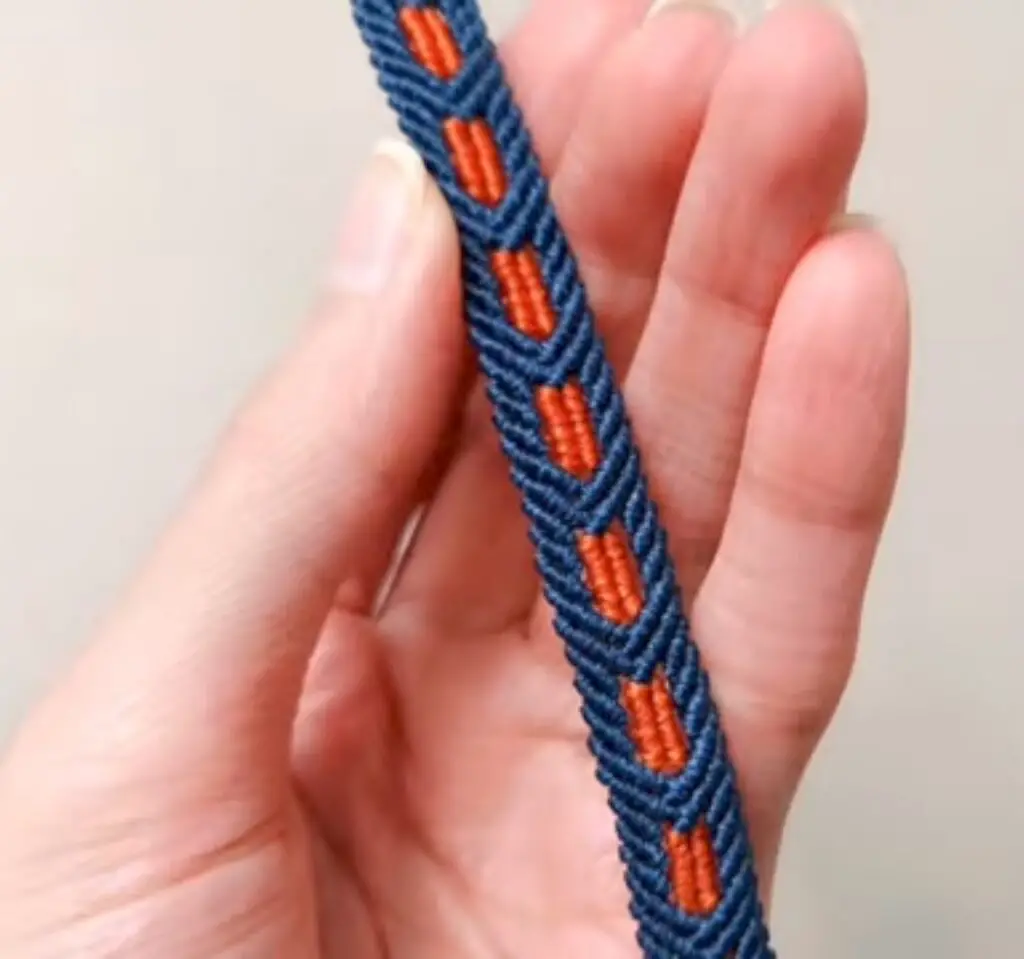
6. Chevron Inlay Men’s Macramé Bracelet Tutorial
Skill level: Intermediate (flat band + accent inlay)
Materials
- Flat leather cord or 2 mm waxed cord for base; 1 m
- 4–6 accent cords (thin) in contrasting color, ~1 m each
- Clasp or magnetic closure, jump rings, pliers
- Tape/clipboard, scissors
Finished size: 7–9″ depending on wrist and clasp.
What you’ll make
A masculine chevron-style bracelet with a sturdy band and a woven chevron inlay for a refined, wearable look.
Step-by-step
- Prepare base: Use two or three wide cords laid parallel as a base or use a flat leather strap as base. Secure at top.
- Add accent cords: Place accent cords over the base and knot them using forward and reverse knots to create chevrons across the base (same principle as friendship chevron but the inlay sits on top of base). Keep knots flat and snug against base.
- Work length: Continue inlay chevrons until you reach desired length, wood or metal beads can be added sparsely for texture.
- Attach hardware: Trim and glue ends into end caps, attach jump rings and clasp or magnetic closure for a neat finish.
Finishing & care
- Leather base can be conditioned lightly; avoid soaking.
- Magnetic clasps are very handy for everyday wear.
Tips
- Use neutral accent tones (brown, black, navy) for masculine palette.
- For greater durability, stitch the ends of inlay to the base before capping.
7. Micro Macramé Heart Pattern Bracelet

Skill level: Advanced (micro knots + shaping)
Materials
- Fine micro cord (0.5–0.8 mm) or nylon thread, several colors optional — about 2 m total
- Small seed beads for embellishment (11/0)
- Thin needle, tape/clipboard, scissors, magnifier (optional)
Finished size: Delicate, about 6.5–7.5″ — can be made longer.
What you’ll make
A very fine, romantic bracelet with tiny macramé knots forming heart motifs and bead accents — delicate jewelry look.
Step-by-step
- Set up cords: Anchor a center core cord; use two or four fine working cords for knotting. Keep work taut and use a magnifier if your cords are extremely fine.
- Form heart motif: Create a small heart by building a V-shape of half-knots and decreasing symmetrically to shape lobes: start with an arch of HKs that forms one lobe, mirror on the other side, then bring both sides together with connecting knots to form the V base. This takes practice — work on a scrap until the shape reads as a heart.
- Add beads: Stitch 1–2 seed beads into the heart center before closing the motif by threading bead onto core and knotting around it.
- Repeat motifs: Space small hearts along the length with short segments of plain HKs or tiny square knots. Continue until bracelet length achieved.
- Closure: Make a micro sliding knot (many tight half-hitch wraps) to allow adjustability.
Finishing & care
- Micro cord won’t fray much; tidy ends with a tiny drop of glue.
- Store flat to avoid flattening the tiny motifs.
Tips
- Practice heart shape on scrap cord first — micro macramé is exacting but beautiful.
- Use a clipboard and small pins to hold motif shape while knotting.
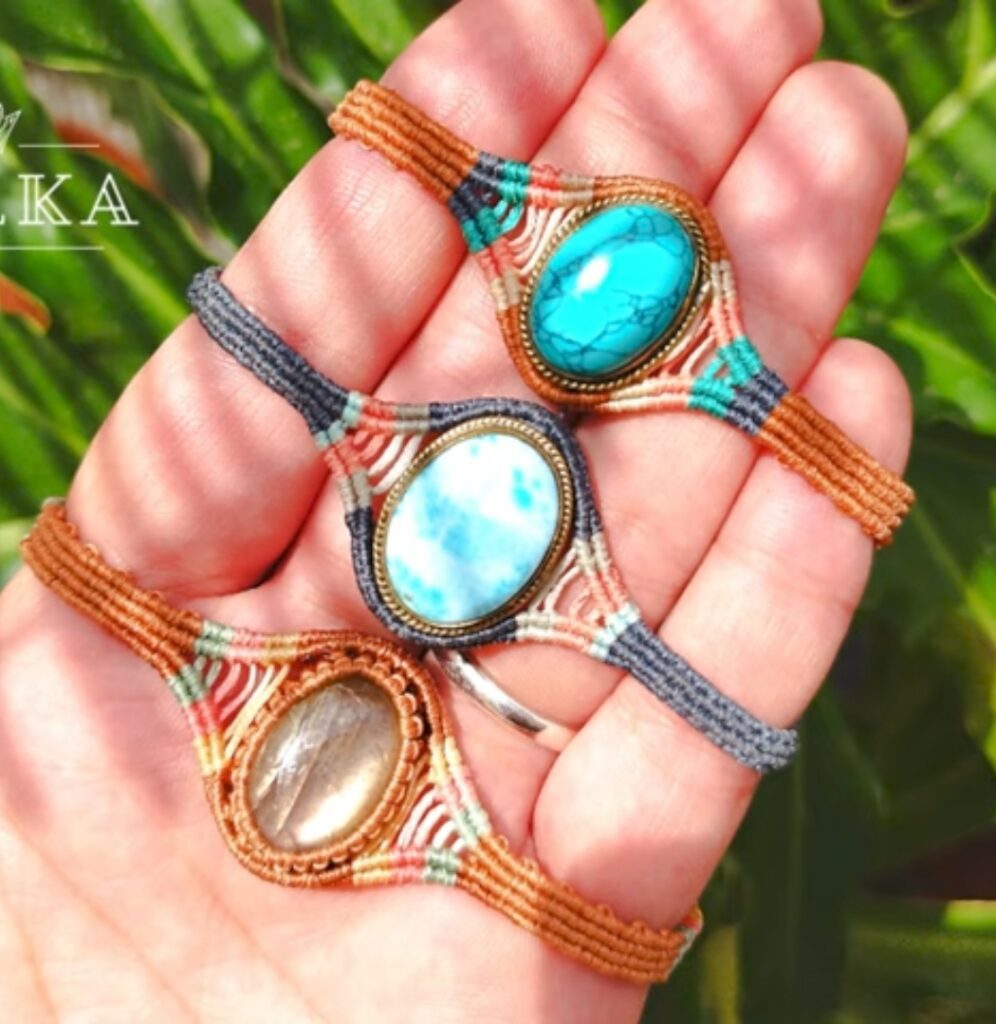
8. Macramé Gemstone Bezel Bracelet Tutorial
Skill level: Intermediate (bezel setting + knotting)
Materials
- 1–2 mm macramé cord (waxed or nylon) for durable bezel — ~2 m
- Gemstone cabochon (10–20 mm) or small flat-backed stone
- Two thinner cords for weaving/edge details (~1 m each)
- Scissors, tape/clipboard, glue (optional), measuring tape
Finished size: Adjustable to wrist — typical 6.5–8.5″.
What you’ll make
A protective knotted bezel that hugs a cabochon stone, held by decorative knots and finishing in an adjustable band.
Step-by-step
- Lay out core: Fold main cord to create a loop to anchor. Place stone at center; position cords around it so you can work knots forming a snug cradle.
- Start bezel: Work tight square knots around the stone using the main cords, gradually pulling the stone into a woven cradle. Alternate directions to form a circular bezel that hugs the cabochon.
- Secure stone: As the bezel tightens, insert the stone and continue knots until only a small opening remains; loosen or tighten to seat the stone firmly without cracking it. Add a few half-hitch rows along the bezel edge for reinforcement.
- Finish band: Extend the cords into a band using square knots or macramé braid. You can decorate the sides with small accent knots or bead inlays.
- Closure: Make sliding knot closure or add a jewelry clasp. Trim and secure tails.
Finishing & care
- Check bezel tension regularly — too tight can fracture stone edges; too loose risks loss.
- Add a dab of glue behind the stone (hidden) if the piece is for rough wear, but avoid gluing if you want replaceable stones.
Tips
- Try stones with beveled edges — they sit more easily in bezels.
- Use waxed cord for longevity and water resistance.
9. Simple Macramé Bracelet Pattern
Skill level: Beginner (classic everyday style)
Materials
- 1.5–2 mm cotton or hemp cord, 2–3 strands, 1–1.5 m total
- Beads (optional)
- Scissors, tape/clipboard
Finished size: 6.5–8.5″ depending on wrist.
What you’ll make
A clean, versatile bracelet built from rows of square knots with an optional bead focal — perfect for everyday wear and gifts.
Step-by-step
- Anchor cords: Fold three cords in half and secure midpoint. This gives you six working strands. Leave 6–8 cm tails for finishing.
- Row of square knots: Use the outermost two strands as working cords and the middle four as core. Make a series of square knots across for about 4–6 cm (or longer depending on style).
- Optional bead: Slide a bead onto the core strands and tie a few square knots below to lock it in place, then continue knotting.
- Finish: Tie a simple adjustable sliding knot with the tail ends to make the bracelet adjustable, or braid tails and knot for tie closure.
Finishing & care
- Cotton and hemp soften with wear; they can be hand-washed and air-dried.
- For greater strength, double cords where needed.
Tips
- Play with cord thickness and number of repeats to change bracelet weight and look.
- Add a metallic bead or a tiny charm for a personal touch.
Troubleshooting & Common Tips (applies to all patterns)
- Even tension: Keep knot tension consistent — practice on scrap cords to get muscle memory.
- Measure as you go: Especially for fitted styles, periodically wrap the work around the wrist or a measuring tape to check length.
- Hide ends neatly: Tuck ends into knots, melt (synthetic cords), or secure with a tiny amount of glue tucked into knots.
- Sealing: For natural fibers, a drop of fabric glue inside knots adds durability without being visible. For nylon or polyester, melting is effective but do it carefully.
- Adjustability: Sliding knots make bracelets one-size-fits-most and are great for gifting.
- Materials choice: Waxed cord, nylon, and paracord are long-lasting; cotton and hemp have a softer, natural look and patina with wear.
Conclusion
These nine macramé bracelet patterns range from quick, beginner-friendly projects to refined micro macramé and gemstone bezels, giving you a full toolkit for gifts, market stalls, or personal wear. Start with a simple sliding-knot band to build confidence, then try floral accents, chevrons, and stone bezels to expand your skills. Macramé rewards experimentation — change cord thickness, swap beads, or combine techniques to make each bracelet uniquely yours. Happy knotting!