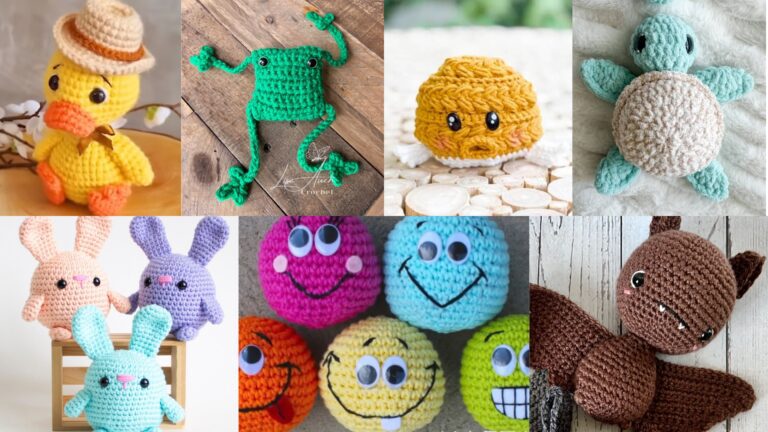
Valentine’s Day projects that don’t suck fall into two camps: quick, charming gifts (coasters, keychains, tiny plushies) and pieces that actually look like effort (blankets, scarves, wearable gifts). This collection gives you both. Each pattern below includes a skill level, clear materials and tools, finishing size, practical stitch counts, and exact construction steps so you don’t have to improvise your way into tears at 2 a.m.
Two pre-flight checks you must do before chaining anything: 1) make a 4″ swatch in the stitch you’ll use and compute stitches-per-inch, and 2) decide whether the finished item is for a kid (no small safety parts) or an adult. That second one saves you a lawsuit, and also saves your pride.
Quick common notes (read this — it saves time)
- Abbreviations (US terms): ch = chain, sc = single crochet, hdc = half double crochet, dc = double crochet, tr = treble, sl st = slip stitch, MR = magic ring, inc = 2 sc in same st, dec = sc2tog (prefer invisible dec for amigurumi), BLO/FLO = back/front loop only, st(s) = stitch(es).
- Hook & yarn baseline: Most minis use cotton/worsted + 3.5 mm hook or crochet thread + 2.25–3.0 mm for finer rings and jewelry. For plushies, worsted acrylic or cotton and 3.5–4.0 mm hook. I’ll call out when I deviate.
- Safety: For toys that will be handled by babies or toddlers, do not use safety eyes or glued-on decorations — embroider features and sew parts securely.
- Swatch math (how to size quickly): Make a 4″ swatch in your main stitch. Count stitches across 4″. Divide by 4 → stitches per inch. Example: 20 sc across 4″ → 5 st/in. If a ring/band needs 2.25″ circumference → 2.25 × 5 = 11.25 → round to nearest whole stitch (12).
- Stuffing tip: Use small amounts gradually to avoid lumps. A chopstick or closed ballpoint pen handles small crevices.
- Finishing: Weave tails through multiple stitches; knot and bury tails inside toy. For flat items, block lightly on a pinboard.
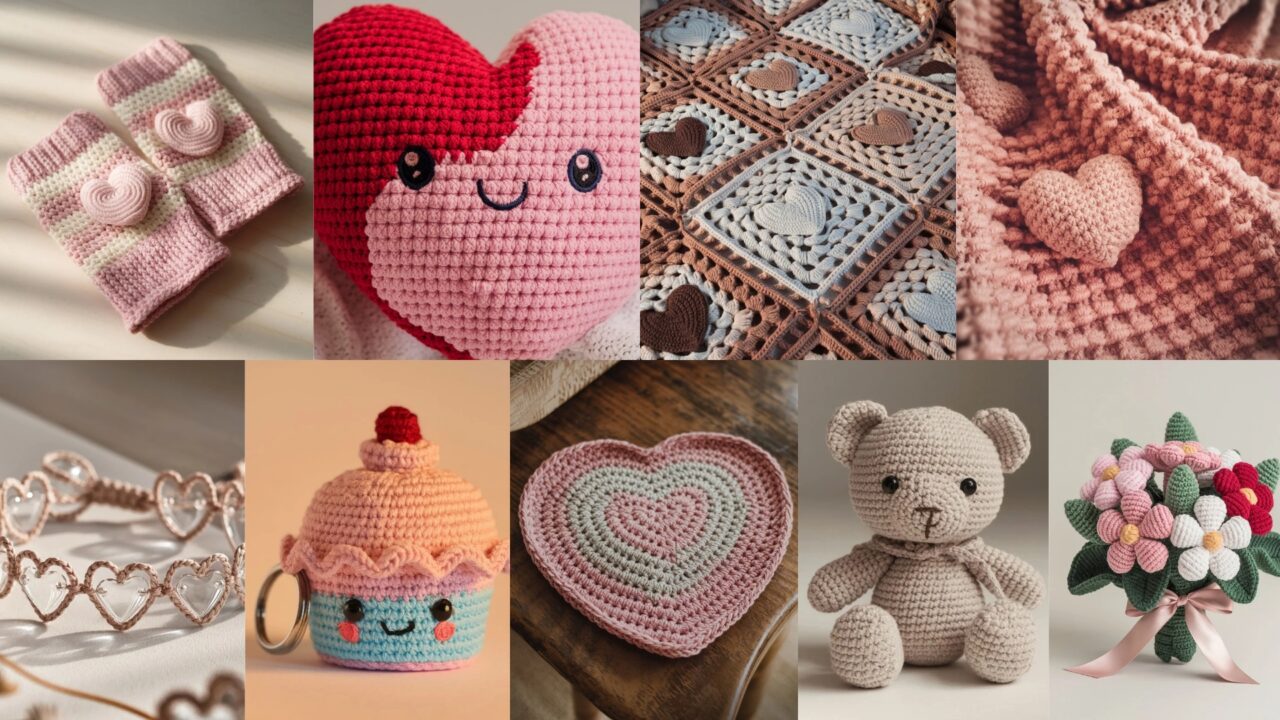
1. Crochet Heart Stuffed Plushie Pattern
A soft, squishy heart plushie — great for tiny love notes, keyring-sized gifts, or a weighted drawer charm.
Skill level: Beginner (amigurumi basics)
Materials & tools: worsted acrylic or cotton, 3.5 mm hook, polyester stuffing, tapestry needle, optional embroidered face thread.
Finished size: ~4–5″ wide (adjust by yarn/hook)
Gauge example: 16 sc × 16 rounds ≈ 4″ in worsted/3.5 mm
Construction overview
Two symmetrical heart halves crocheted in rounds, joined and stuffed (or worked top-down and closed). This pattern uses a semi-spherical heart shaped by increases and short decreases.
Step-by-step (make two halves, join)
Half heart — make 2 (left + right)
- MR; Round 1: ch1, 6 sc in MR. (6)
- R2: inc around → 12.
- R3: sc 1, inc around → 18.
- R4: sc 2, inc around → 24.
- R5: sc 3, inc around → 30.
- R6: sc around 30.
- R7: sc 3, dec around → 24.
- R8: sc 2, dec around → 18. Fasten off leaving tail.
Make second half the same. Place both halves with right sides out and join around with sc in both loops while stuffing gradually — keep stuffing firm but not rock-hard. When you have about 6–8 sts left, decrease and close with invisible decrease. Weave tail. Add embroidered eyes or small message patch.
Variations & finishing
- Make tiny hearts by substituting DK + 2.75 mm hook.
- Add a ribbon loop at the top before fully closing for hanging.
- For a flat heart (coaster), make just one heart half, work a final round of sc for stability, and block.
2. Crochet Plush Flower Bouquet Pattern
A cluster of crocheted blooms tied into a tiny “bouquet” — perfect as an everlasting Valentine’s posy.
Skill level: Confident Beginner (multiple small motifs + assembly)
Materials & tools: small scraps of worsted or DK in 3 colors, 2.75–3.5 mm hook, floral wire or pipe cleaners (optional stems), green yarn for wrapping, small ribbon.
Finished size: ~6–8″ tall assembled bouquet (scaleable)
Components
- Petaled flowers (make 5–7), small bud cones (optional), leaves (make 6), stems (pipe cleaner or crocheted stems), floral wrap.
Flower — small 5-petal (make 5–7)
- MR, ch1, 6 sc in MR; tighten. (6)
- R2: ch3, sl st into next st around to create 6 loops; join.
- R3: Into each loop make (sc, hdc, 3 dc, hdc, sc) — forms a petal. Fasten off leaving tail for sewing.
Bud — tiny cone (optional)
- MR, 6 sc; R2: sc, inc ×3 → 9; R3: sc around 9; finish with small cap.
Leaf (make 6)
- ch7, sc in 2nd ch from hook, hdc, dc, hdc, sc; turn and sl st to base to form teardrop. Fasten off.
Stem
Option A: Insert floral wire into a crocheted tube — ch 6, join, sc in rounds until stem is desired length; slide wire inside and fold bottom to anchor. Option B: use pipe cleaners wrapped tightly with yarn.
Assembly
- Sew flowers/buds to the tops of stems. Arrange bouquet, add leaves, wrap stems together tightly with green yarn (spiral-wrap), secure with ribbon. Optionally add a little gift tag sewn to bouquet.
Variations
- Make all-roses by working tighter petals in smaller sizes.
- For a “pillow bouquet,” hot-glue flowers to a small pillow if it’s decorative only.
3. Crochet Little Teddy Bear Pattern
A mini teddy bear with round head, body, limbs and sewn-on muzzle — classic keepsake.
Skill level: Confident Beginner → Intermediate (assembly of multiple parts)
Materials & tools: worsted yarn, 3.5 mm hook, stuffing, tapestry needle, 6–8 mm safety eyes (or embroidered eyes), brown/back yarn for nose.
Finished size: ~6–7″ standing (make smaller with sport yarn + 2.75 mm hook)
Construction summary
Parts: head+body joined, 2 arms, 2 legs, 2 ears, muzzle. Assembly uses sturdy stitching for safety.
Head & body (worked continuous top-down)
Head
- MR, 6 sc (6)
- inc around → 12
- sc, inc ×6 → 18
- sc2, inc ×6 → 24
- sc around 24 for 3 rounds (adjust to head height)
- sc2, dec ×6 → 18
- sc, dec ×6 → 12
Stop, stuff head firmly; insert safety eyes between rounds 6–7 about 6–8 sts apart. Add nose embroidery later.
Body (attach to head and continue)
8. Continue without break: inc around to widen for neck to torso — e.g., (sc, inc) ×6 → 18
9. Rounds of sc to form torso length (e.g., 6–8 rounds)
10. Decrease gradually for the bottom and stuff as you go; close with dec rounds.
Arms & legs (make 4)
- Arm: MR 6 sc; R2 inc →12; sc rounds 4–6 rounds; fasten leaving tail. Slightly stuff and sew to sides.
- Leg: same pattern but longer and a little wider; attach to bottom/front so teddy can sit.
Ears (2)
- MR 6 sc; R2 sc, inc ×3 → 9; sc 1 round; flatten and sew to top sides of head.
Muzzle & nose
Muzzle: MR, 6 sc; R2: inc → 12; R3: sc around 12; flatten and attach centered low on head. Nose: embroidery in a triangle with brown yarn; two or three vertical stitches then a small horizontal stitch.
Assembly & reinforcement
- Sew arms and legs through several passes, create small safety seam on inside. For saleable toys, add a small felt backing under muzzle to distribute tension and cover stitches.
Variations & finishing
- Make bear clothing (tiny scarf or vest).
- Use boucle yarn sparingly for a fuzzy antique teddy look (avoid for baby toys).
4. Crochet Fingerless Heart Gloves Pattern
Functional and sweet — wrist-warmers with a heart appliqué. Great for date-night layering.
Skill level: Confident Beginner
Materials & tools: worsted or DK yarn (soft acrylic/wool-blend), 4.0 mm hook, tapestry needle.
Finished sizes: S/M/L — instructions include stitch math to adapt.
Sizing & gauge example
- Swatch: 16 hdc = 4″ (4 hdc/in). If wrist circumference 7″ and you want snug fit 7″ finished → 7 × 4 = 28 hdc around.
Construction overview
Worked as a tube in the round with a thumb hole and heart applique sewn on top.
Step-by-step (tube with thumb hole)
- Measure & compute: Determine wrist circumference and hand width at knuckles without thumb. Calculate foundation chain required for a snug tube (stitches per inch × circumference). Chain that number, join without twist. Example: 28 ch join.
- R1–R6: hdc in each stitch around to form comfy cuff (6 rounds).
- Body: Continue in hdc or a decorative stitch (V-stitch: dc, ch1, dc in same st) until the glove reaches just before knuckles (measure on wearer).
- Thumb hole: On the round where you want the thumb, work across the number of stitches that cover the back of hand, then ch enough to span the thumb hole circumference (e.g., ch6), skip those ch on the following round and resume hdc across to end. Next round, work hdc into the ch-6 loop to create the thumb opening. Alternatively, work flat for a few rows to create a thumb slit and seam edges later.
- Top edge: Finish with 2 rounds of sc or decorative picot. Fasten off and weave ends.
Heart applique (small)
- MR, ch1, 6 sc into ring; sl st to close. R2: ch3, sl st in next around to make loops. R3: Into each loop make (sc, hdc, dc, hdc, sc) to form 6 petals — trim to get a heart shape OR follow this simpler heart:
Simple heart (flat): ch6; sc in 2nd ch from hook and across (5 sc). Row2: ch1, sc2tog, sc, sc2tog (3 sc). Row3: ch1, sc3, then shape lobes with a small picot. Block and sew center onto glove back.
Variations & finishing
- Work left/right variation for thumbs in correct positions.
- Add a tiny ribbon bow near heart or a contrasting edge.
5. Crochet Interlinked Hearts Bracelet Pattern
A dainty chain of tiny linked hearts that actually holds together — wearable and clever.
Skill level: Confident Beginner (joining small motifs)
Materials & tools: thread-size 8 or fine DK, 2.25–3.5 mm hook, small clasp (optional), jump rings if you want metal closure.
Finished length: adjustable bracelet 6.5–8.5″ (custom fit)
Construction plan
Make several small heart motifs and link them by crocheting a small connecting chain or by sewing them with small bars between hearts. Option: use metal jump rings to add extra durability.
Heart motif (small, make multiples)
- MR; R1: ch1, 6 sc in MR → pull tight. (6)
- R2: ch3, sl st in next st around → creates 6 loops.
- R3: In each loop: (sc, hdc, dc, hdc, sc) → 6 tiny petals; arrange two petals together to create heart lobes and form lower point by decreasing stitches on two adjacent petals. Alternatively, simpler flat-heart pattern: ch6, sc 4, 3 sc in last ch, sc back down and small shaping to a heart.
Joining hearts
- Option A (crochet chain join): After each heart, ch 6 and sl st into a central few stitches of next heart to form a short link; continue until bracelet length is reached.
- Option B (sew & reinforce): Sew hearts edge-to-edge with a narrow bar (crocheted: ch6, sc back across to create small band), then knot and weave inside.
Closure
- Sew small metal clasp to ends or make one heart with a ch loop as closure and a bead to secure it.
Durability tip
- Reinforce connecting chains with a second pass of sc or tiny sewn bars; thin thread can break.
Variations
- Make a longer strand for a necklace.
- Add seed beads into the center of each heart for sparkle.
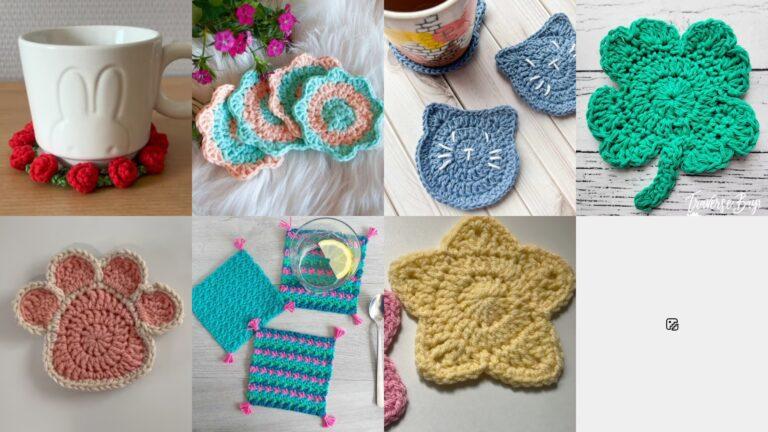
6. Crochet Heart Coaster Pattern
A flat heart-shaped coaster — fast, repeatable gift set. Cotton preferred.
Skill level: Beginner
Materials & tools: 100% cotton worsted or mercerized cotton thread, 3.5–4.5 mm hook.
Finished size: ~4–5″ across depending on rounds.
Construction overview
Worked flat in joined rounds; increases shape the heart.
Step-by-step (flat heart)
- Ch 2, 6 hdc in 2nd ch from hook, sl st to join — or start with MR 6 sc if you prefer. (6)
- R2: inc in each st → 12.
- R3: sc 1, inc → 18.
- R4: sc 2, inc → 24.
- Now shape heart top lobes: Fold circle in half to mark center; working from center point, on each side create semi-circles by making shell stitches: In one quarter of the round work (3 dc, ch2, 3 dc) into a single stitch to make a lobe; repeat on the opposite quarter. The remaining arcs form the lower point by continuing even sc rounds with small decreases in the center to form tip. (Exact math varies with yarn; aim for 4–6 rounds of shells & sc to reach desired size.)
- Finish with a round of crab stitch (reverse sc) for a tidy edging.
Variations & finishing
- Add contrasting border color.
- Use two hearts back-to-back with a thin layer of batting between for insulated mini-trivets.
7. Crochet Smiley Cupcake Pattern
A tiny cupcake with a smiling face — adorable gift-topper, keyring, or cupcake-fairy companion.
Skill level: Confident Beginner
Materials & tools: worsted yarn in cupcake base color, frosting color, small amount for cheeks/face, 3.5 mm hook, stuffing, optional keyring.
Finished size: ~2.5–3.5″ tall (mini)
Components
- Cup base (cylindrical), frosting dome (rounded), little face embroidery, optional cherry pom.
Cup base
- Ch 12, join to work in the round (or MR and grow to the circumference you want). R1–R6: hdc in each st around to build height (6 rounds = base height). Optionally add vertical ribbing with BLO hdc rounds.
Frosting dome
- MR; 6 sc. R2: inc around → 12. R3: sc, inc around → 18. R4: sc 2, inc → 24. R5–R6: sc around. R7: sc 2, dec → 18. Stuff lightly. R8: sc, dec → 12. Close with dec to top.
Assembly
- Sew frosting to cup base with whipstitch, stuff and align seam hidden. Embroider two small eyes and a smile (black embroidery thread). Add tiny blush dots with peach yarn or fabric-safe blush. Make a tiny red ball (MR 6 sc) for cherry and sew to top. Add keyring by creating a small loop of chain attached to frosting seam, or sew to base.
Variations
- Add scalloped edge at frosting rim for piped look.
- Make matching coaster cupcake by using flat frosting disk.
8. Crochet Heart Motifs Blanket Pattern
A blanket composed of linked heart motifs — romantic and chunky or delicate depending on yarn.
Skill level: Intermediate (repeat motifs + joining)
Materials & tools: main color + contrast (optional), worsted or bulky cotton (for lap blanket), 4.0–5.5 mm hook.
Finished size: depends on motif size & grid — example 9 × 12 motifs ~ throw size.
Motif (heart square) — make many and join
Heart-in-square motif (approx 6″ square sample)
- Start with a magic ring: MR; ch2, 12 dc in MR; pull tight and join = center.
- R2: ch3, [dc, ch2, dc] into same space to make first corner; dc across to next corner, (dc, ch2, dc) repeat making four corners (creates square). Join.
- R3: Work hearts into one side by changing color to heart color: In center of one side’s squares work small heart cluster: (dc3, ch2, dc3) then sc along remainder of side. Continue other sides with sc or small shells to define square shape. Repeat rounds to square-out motif to final 6″ size. (Pattern can be simplified: work a granny square then overlay a heart with surface crochet).
- Block motifs square and join-as-you-go or mattress stitch to assemble blanket in desired grid.
Joining method
- Join-as-you-go (JAYG): When final round of a motif, instead of finishing, pair with already-made neighbor and sl st into neighbor’s stitches at regular intervals; continue. This yields neat joins.
- Sewing method: Use whipstitch/mattress stitch on blocked motifs for a flat seam.
Edging
- Work 2–3 rounds of sc across whole blanket for stability, then final shell/picot border for polish.
Variations & tips
- Make hearts in contrasting colors and background neutral for grown-up palette.
- Make smaller motifs for baby-sized blanket; add soft cotton backing for durability.
9. Crochet Bobble Heart Scarf Pattern
A cozy scarf with raised bobble hearts tucked into a textured field — warm, showy, and full of heart.
Skill level: Intermediate (bobble stitch + repeating chart)
Materials & tools: worsted weight yarn soft for neckwear, 5.0 mm hook, approx 400–600 yds depending on length.
Finished size: ~8–10″ wide × 60–72″ long
Stitch vocabulary
- Bobble (5-dc bobble): YO, insert hook, pull up loop, repeat 5 times (or pull up 4 loops for tighter bobble), YO and pull through all loops, ch1 to close.
Pattern logic
Work a background of dc or waffle stitch; place bobble hearts as a knit-style intarsia chart: bobbles replace dc in charted positions to form heart shapes. Alternatively, work plain scarf and sew small bobble-heart appliqués onto the finished scarf for easier construction.
Row-by-row (applique method — simpler)
Make bobble heart appliqués (make 10–14 depending on scarf length)
- Ch 6, Row1: sc in 2nd ch from hook across (5 sc). Turn.
- Row2: ch1, sc across (5). Row3: ch1, sc2tog, sc, sc2tog → 3 sc. Row4: ch1, sc3 → 3 (this forms a tiny triangle). Make two small side lobes by adding tiny 3-dc clusters on current outer stitches (for two small lobes), or do MR and 3–4 petal loops to form heart top. There are many micro-heart patterns; pick one that gives a bobble center or use a small puff stitch as center.
Scarf base
- Ch foundation to desired width (e.g., ch 32 for 8″ wide depending on gauge: example gauge 4 dc = 1″, 32 ch → approx 8″). Row1: dc across. Row2–end: work pattern in waffle or dc for desired texture until length achieved. Block lightly.
Applique attach
- Sew bobble hearts onto scarf evenly spaced down the center or staggered columns. Anchor with many small stitches so bobbles don’t pop off.
Variation (integrated bobble hearts)
- Chart a bobble-heart motif across rows, replacing dc with bobble where heart pixel sits. This requires working bobbles on the main scarf and is more advanced.
Final finishing & practical care
- Weave & hide tails through at least 1″ of stitches and knot inside stuffing if toy.
- Reinforce critical attachments (eyes, buttons) with multiple passes and consider adding felt backing under heavy attachments.
- Washing: acrylic = machine wash gentle in laundry bag; cotton = machine wash gentle and reshape; embellishments = hand wash. Air dry flat.
- Presentation: package small sets (coaster + heart plushie + card) in a kraft box for instant Valentine’s-grade presentation.
Conclusion
There — nine Valentine’s projects that scale from ten-minute charmers (ring, coaster) to real keepsakes (blanket, teddy). The difference between a sloppy “I crocheted this” and a treasured gift is three things: correct sizing (swatch), secure assembly (stitch through layers), and thoughtful finishing (blocking/edge). Start small if you’re short on time — make a heart plushie or a set of heart coasters and call it a win.