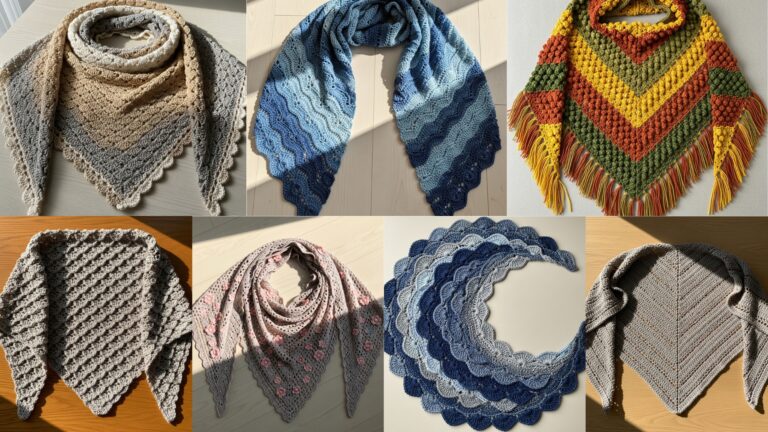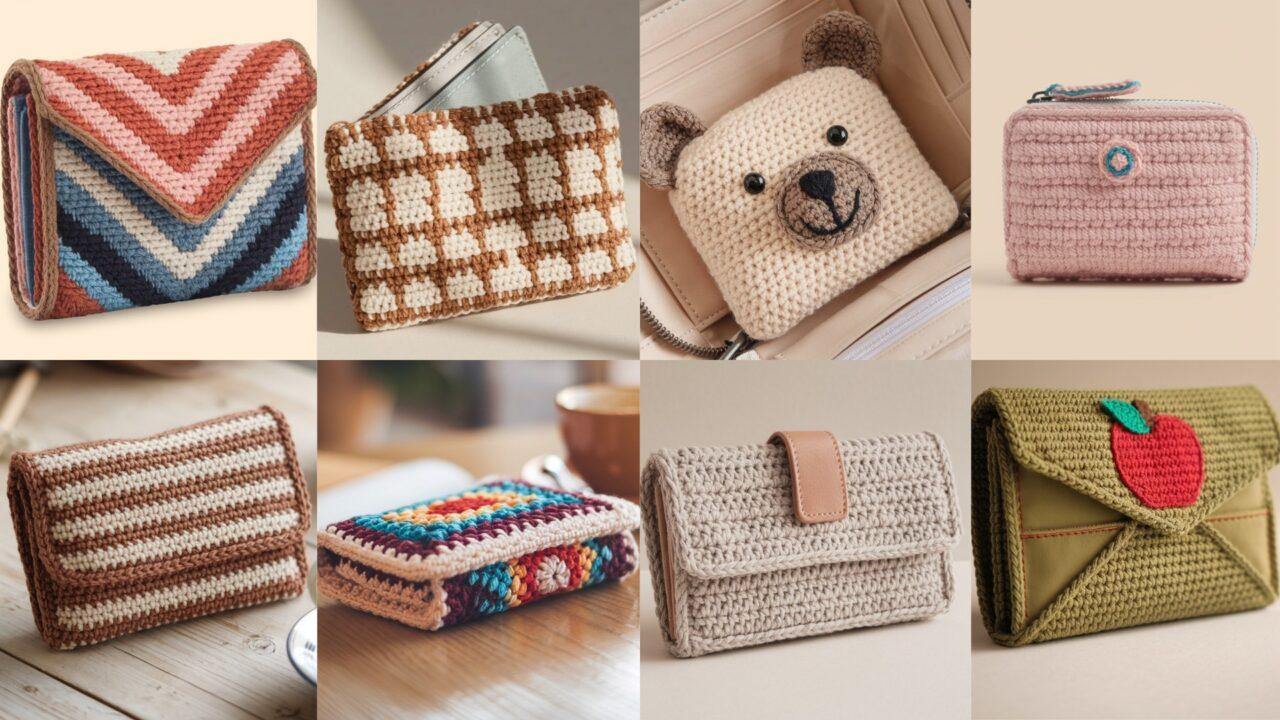
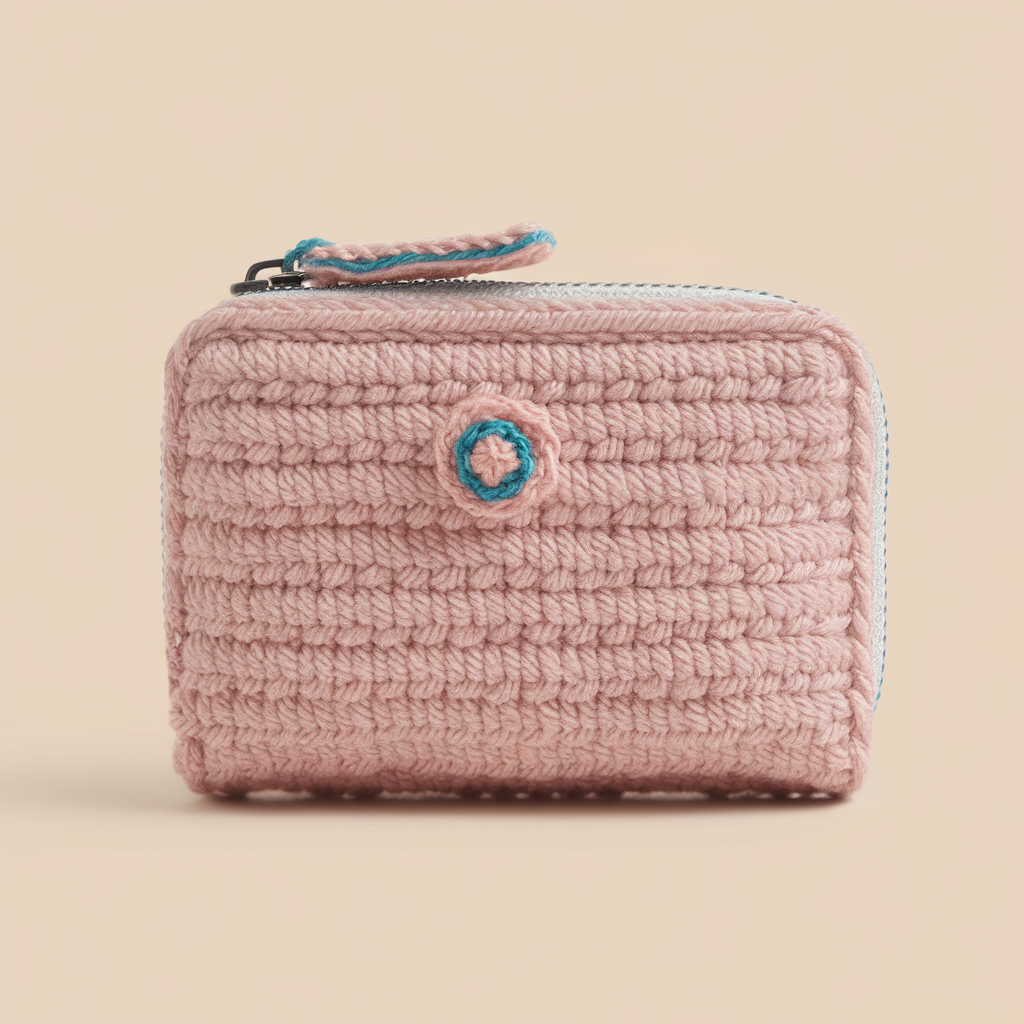
A handmade crochet wallet is the perfect marriage of practicality and personality. Small enough to be a fast make, but large enough to show off stitch texture, colorwork, or tiny motifs — wallets make excellent gifts and useful pattern tests for learning color changes, lining, and closures. This post walks you through eight distinct crochet wallet patterns — from checked and chevron designs to animal motifs, trifolds, and tiny coin pouches — with long, copy-ready instructions.
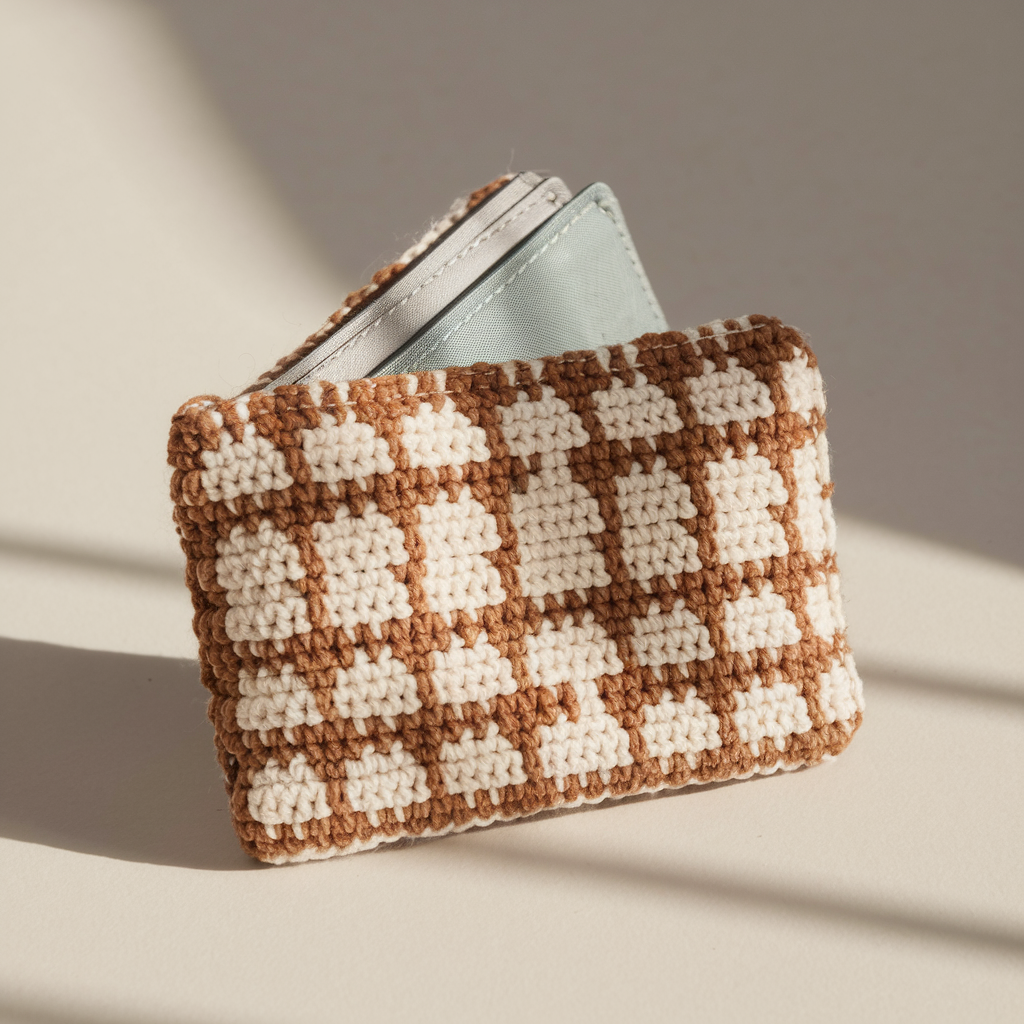
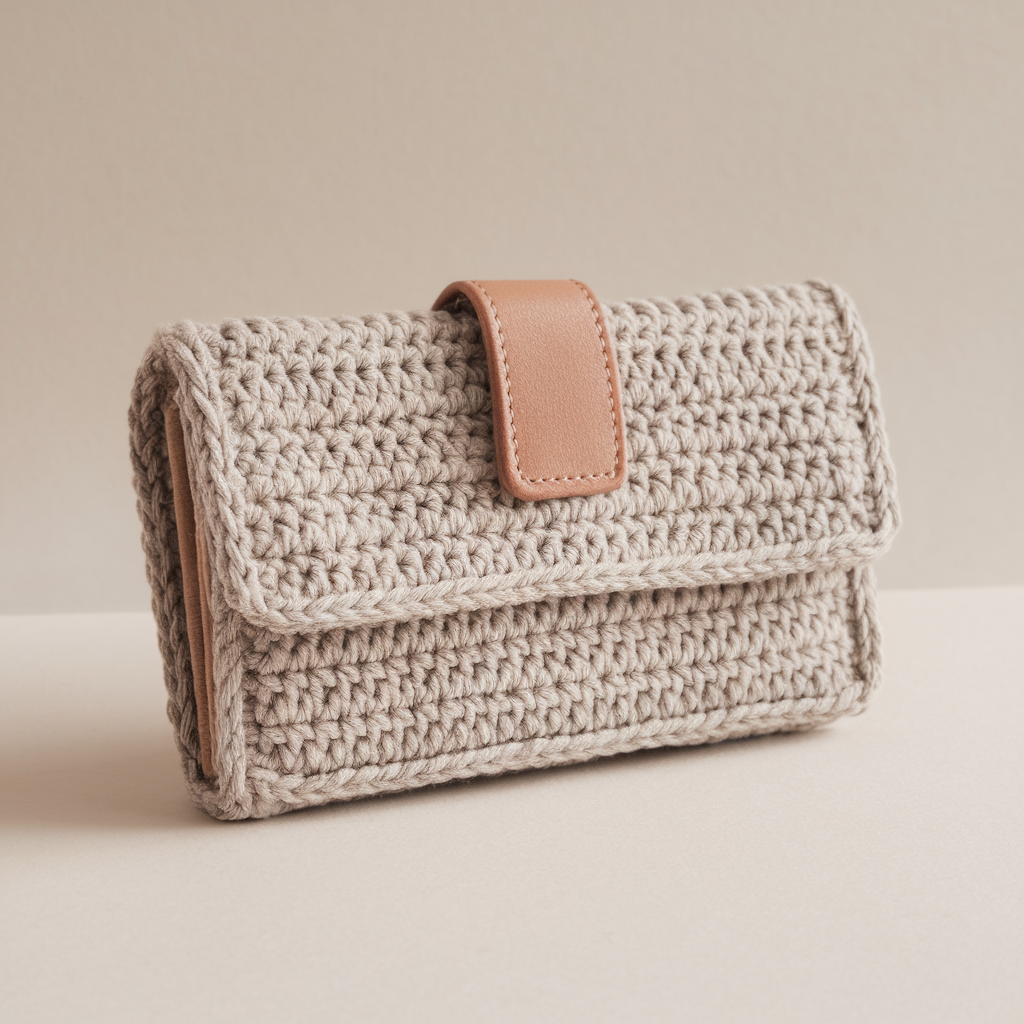
1. Crochet Checked Wallet Pattern
Skill level
Easy–Intermediate — simple color changes and tidy joining.
Finished size
Closed: ~7.5 cm × 10.5 cm (3″ × 4.2″). Open flat: ~15.5 cm × 10.5 cm (6.2″ × 4.2″). Adjust chain count to scale up or down.
Materials & notions
- DK or sport weight yarn in two contrasting colors (A and B), ~120–150 yd total. Cotton blends are ideal for structure.
- 3.5 mm (E) crochet hook (adjust for your gauge).
- 1 small snap or magnetic clasp (10–12 mm), optional zipper for coin pocket.
- Lightweight cotton fabric for lining, sewing thread, scissors, tapestry needle, stitch markers, pins, small iron and interfacing (optional).
Stitch abbreviations (US)
ch, sc, hdc, dc, sl st, RS (right side), WS (wrong side).
Step-by-step instructions (checked panel, flat wallet)
Gauge idea & foundation:
Make a small swatch to estimate how many stitches per inch. For this sample, chain 36 (this gives the folded wallet width ~7.5 cm). Work in multiples of 6 for the 6-st checked repeat described below.
Body — checked pattern (single panel)
- With Color A, ch 36. Row 1 (RS): sc in 2nd ch from hook and across — 35 sc. Turn.
- Row 2 (WS): ch 1, sc across. Turn.
- Row 3 (RS) — begin checked pattern: [Color A for 3 sts, Color B for 3 sts] repeat across. Working in sc mosaic-style (color changes carried or switched at end of row): join Color B where needed by working the next sc with Color B. At color change, complete the last sc of previous color and pull new color through on final yarn-over to avoid gaps. Turn.
- Continue Rows 2–3 (or repeat Rows alternating blocks) to create a grid: 3 rows of Color A followed by 3 rows of Color B vertically will produce squares; the horizontal 3-st repeats create the other axis. For a simple 6×6 checked grid you can do: Row sets A×3, B×3 repeated until desired height — for our wallet make 18–20 rows total so panel height when folded equals ~10.5 cm. Fasten off and weave in ends.
Alternative easier checked (striped blocks method):
Make horizontal stripes of 3 rows in Color A then 3 rows in Color B. Then on every striped block alternate the 3-st horizontal color thirds by carrying the alternate color across the row to create square blocks — see photos or chart in your pattern PDF.
Assembly & finishing
- Block the panel lightly to even edges.
- Fold panel in half widthwise so short edges meet and you have a folded wallet. Pin in place.
- Sew side seams: Using whipstitch or mattress stitch, sew both sides leaving the top (fold) open. Use tight stitches and a double strand of matching yarn for strength.
- Lining: Cut lining fabric 2–3 mm smaller than interior dimensions (e.g., 7.2 × 4.0 cm for sample). Fold and sew side seams, then slip the lining inside the wallet. Hand-stitch lining to the top fold with ladder stitch for a clean inner finish.
- Closure: Add a snap in the center or sew a small magnetic clasp to secure wallet closed.
Tips & variations
- Carrying yarn across short distances is fine; for long floats, catch them every few stitches or use duplicate color jump technique.
- For a softer look, use cotton/silk blends; for durable wallets use 100% cotton or cotton/linen.
- Make larger check blocks (4×4 sts) for a bold look.
Care
Machine wash gentle or hand wash depending on yarn; remove lining (if sewn in loosely) before washing or wash inside laundry bag.
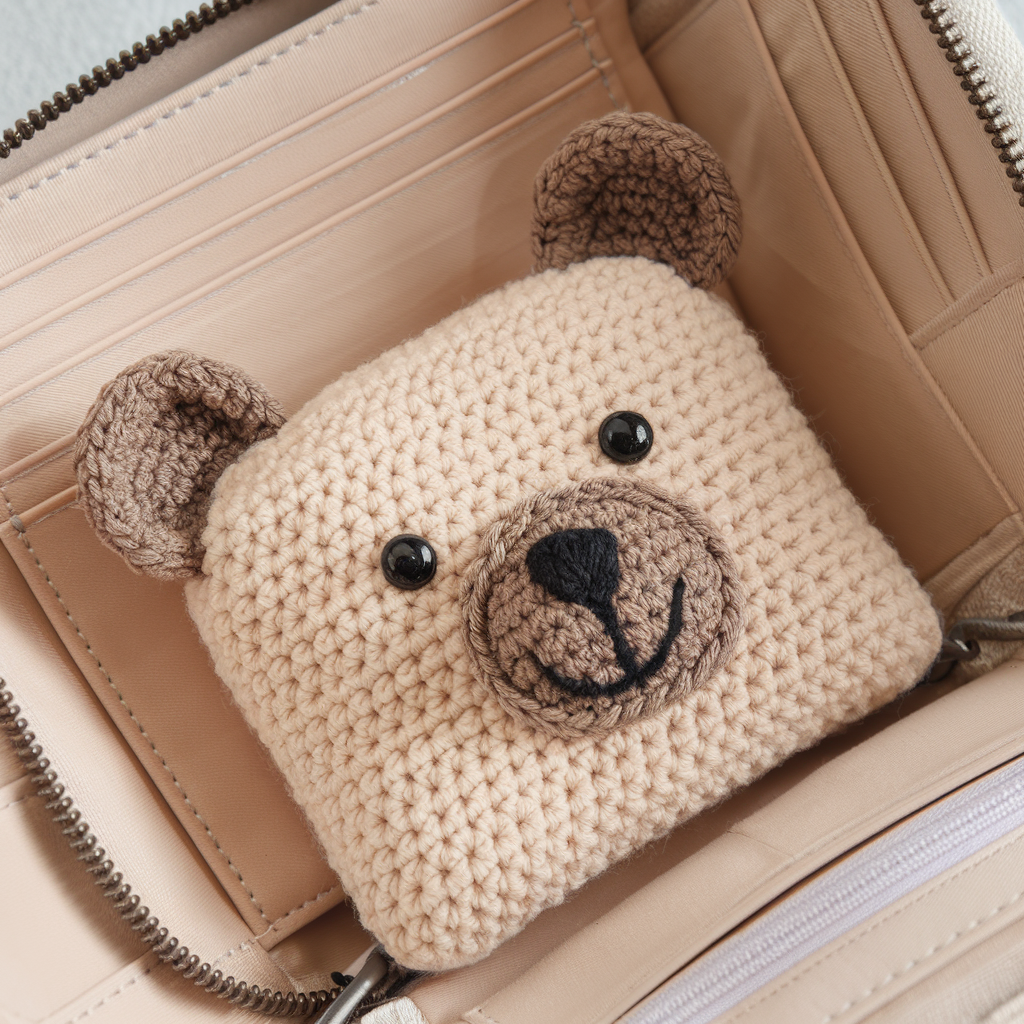
2. Crochet Bear Wallet Pattern
Skill level
Intermediate — requires motif work and applique, plus lining.
Finished size
Closed: ~9 cm × 12 cm (3.5″ × 4.7″). Coin pocket optional adds thickness.
Materials & notions
- DK cotton for body (Color A) and contrast for bear features (B: e.g., brown), small amount of black for facial embroidery.
- 3.5–4.0 mm hook.
- Small zipper (10–12 cm) for coins or metal snap for flap.
- Felt for backing of eyes (optional), small safety eyes if preferred.
- Lining fabric, interfacing, tapestry needle.
Design overview
Make a rectangular wallet front with the bear’s face crocheted as an appliqué or surface crochet. Add a coin pocket interior or card slots, depending on skill.
Step-by-step instructions
Body panel
- Ch 44. Row 1: sc in 2nd ch and across (43 sc). Turn. Rows 2–26: ch 1, sc across until panel measures about 24 cm in height (adjust to have enough room for fold and flap). For a flap style wallet, make one panel for back, one for front plus a flap piece; for a simple bifold, make one long rectangle and fold in half.
Bear face applique (small circle nose/muzzle)
- With Color B (brown): magic ring, ch 1, 6 sc into ring. Pull tight and join. (6)
- Round 2: ch 1, 2 sc in each st around. (12)
- Round 3: ch 1, sc in next st, 2 sc in next repeat around. (18) — makes a flat circle approx 2–3 cm. Fasten off leaving long tail to sew.
Ears (make 2):
- Ch 5, sl st into 1st to make ring or sc into ch to create a tiny triangle ear: ch 4, sc into 2nd ch from hook, sc next, sl st to last and fasten off. Sew ears at top corners of front panel.
Assembly of face:
- Center the muzzle circle on the front panel where you want the face. Sew carefully with matching yarn leaving slight stuffing (optional) to make it puff.
- Embroider nose and mouth with black yarn (small triangle and two curved lines). Add small buttons or felt circles for eyes — if you use safety eyes, attach before sewing muzzle to panel.
Wallet construction
- Fold panel and sew sides as in Pattern 1 (bifold) or assemble separate front/back panels and seam sides with whipstitch leaving the top open.
- Add a zippered coin pocket: crochet a small coin pouch (ch 18, sc rows to make rectangle, seam sides leaving top open), insert and sew to lining before stitching lining into wallet.
- Insert lining and attach closure (snap or flap with button).
Tips & variations
- Use embroidery to make different expressions: sleepy bear, smiling bear, etc.
- For toddlers, avoid buttons; embroider eyes to prevent choking hazard.
- Use textured stitches (bobble or popcorn) for a fluffy muzzle effect.
Care
Hand wash recommended due to appliqué and stuffing; air dry.
3. Crochet Trifold Wallet Pattern
Skill level
Intermediate — requires measured panels, card slot partitioning, and secure closures.
Finished size
Closed: ~8.5 cm × 11.5 cm (3.3″ × 4.5″). Open flat: ~25.5 cm × 11.5 cm (10″ × 4.5″).
Materials & notions
- DK or worsted yarn (cotton blend for structure), ~200–260 yd.
- 3.5–4.5 mm hook depending on yarn.
- 2–3 small snaps or magnetic closures, interfacing for lining, thin elastic for card retention (optional).
- Lining fabric and sewing supplies.
Construction overview
Make three panels joined in sequence: left card pocket panel, center billfold panel, right card pocket panel. Add internal stitched card slots by partitioning the lining.
Step-by-step instructions
Panel sizes and pattern
- Decide finished single panel width: For an 11.5 cm wide final wallet, each fold panel will be about 8.5 cm wide when folded (accounting for overlap when closing). For sample, chain 36 for each panel width. You will make one long strip that is 3 × panel width plus 2 seam allowances. So ch 36 × 3 = ch 108 as foundation for the whole flat body. Alternatively make three separate panels and join later. Making one strip simplifies alignment.
Method A — one long panel
- Ch 108. Row 1: sc in 2nd ch and across (107 sc). Work Rows 2–24: ch 1, sc across. This creates a tall, long strip. Measure and mark panel boundaries (every 36 sts) to fold later.
Method B — three separate panels
- Make three panels each ch 36, sc rows to same height and seam them with whipstitch to form a long triple panel.
Card slots
- Before folding into wallet, decide where card slots will be. On left and right panels, fold the top 2–3 cm down to form interior pockets and stitch along sides to create readymade slots. Alternatively, create separate short rectangular pocket pieces: ch 20, sc rows to height 8 cm, sew to the left panel along three edges leaving top open. Repeat for multiple card slots stacked vertically.
Folding and seams
- Fold the long strip into thirds along the marked panel boundaries. Fold left panel over center, then right panel over left to form trifold. Check that right panel overlaps left panel slightly for closure.
- Sew side seams: whipstitch side edges vertically from bottom to top but leave top edges open. For extra neatness, add small gusset at bottom corners if you want depth (fold corner into triangle and stitch closed).
Closure
- Top closure can be a snap on the outer flap or magnetic closures: place snaps so that rightmost flap overlaps left flap and snaps together. Sew magnets into lining for invisible closure.
Lining
- Make a long lining the size of the inside dimensions minus 3–5 mm and sew card pockets onto lining before inserting. Insert lining and hand-stitch to top edge.
Tips & variations
- Use a striping pattern to mark panels visibly.
- Add a zipper along the outer edge to make a secure trifold zip-around wallet (more advanced).
- Reinforce card slot tops with a short sc round or small strip of interfacing to prevent stretch.
Care
Machine wash gentle for cotton; remove rigid hardware first if possible.
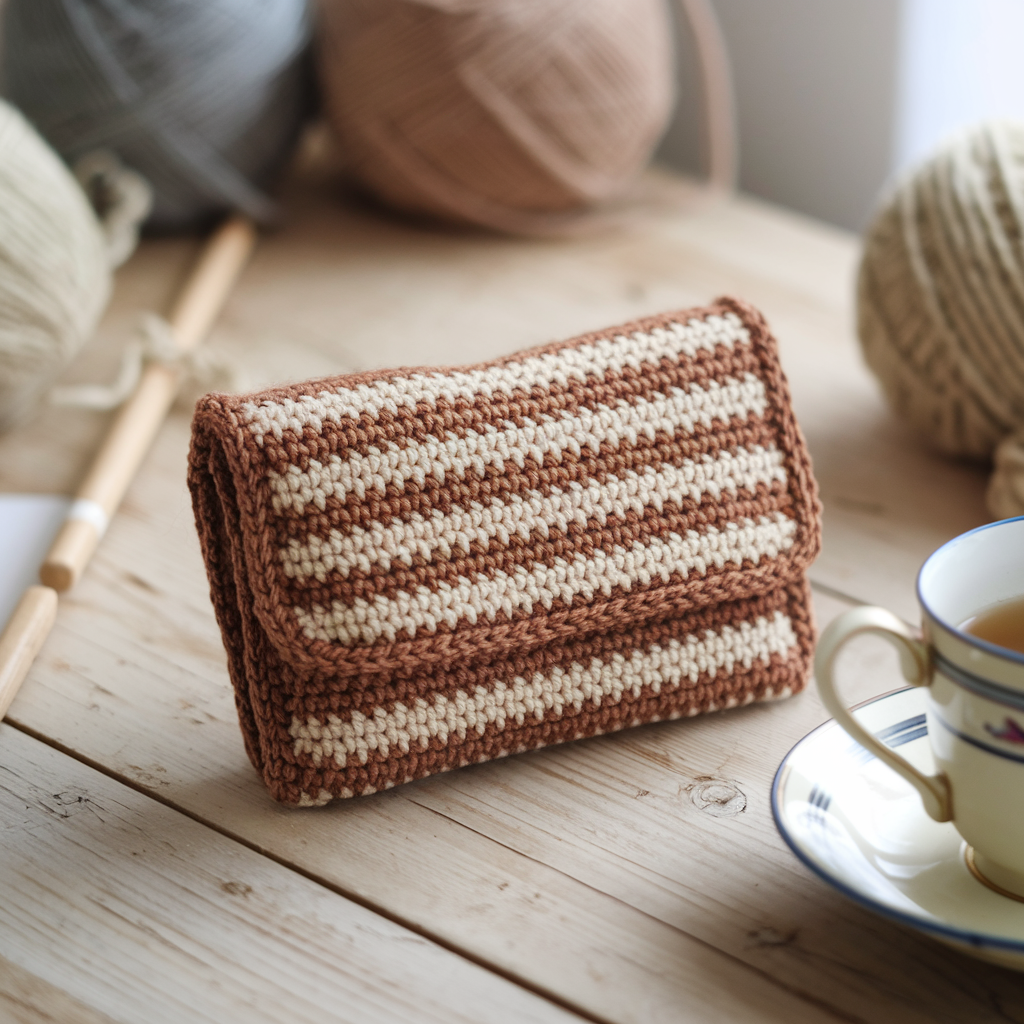
4. Crochet Striped Wool Wallet Pattern
Skill level
Easy — simple stripes, warm wool blend yarn (note: wool can felt a bit).
Finished size
Closed: ~9 cm × 11 cm (3.6″ × 4.3″).
Materials & notions
- Wool or wool-blend DK yarn in 3–4 coordinating colors, ~140–180 yd total.
- 3.5–4.0 mm hook.
- Snap closure or toggle, lining fabric recommended to avoid wool pills against cards.
- Tapestry needle.
Step-by-step instructions
Body — work in sc stripes
- Chain 40 (sample). Row 1: sc in 2nd ch and across (39 sc). Turn.
- Row 2–6: Using Color A, sc across for 5 rows (stripe width). Change yarn color on the last yarn-over of the last sc to avoid loose ends.
- Row 7–11: Color B, sc across 5 rows. Continue alternating colors for 4–6 stripes in total, or create gradient effect by shifting colors more frequently. Work until panel height suits your final fold (~22 rows for sample). Fasten off.
Optional texture — seed stitch border
- Work one round of alternating sc and ch1 along top and bottom edges to give a tidy framed look.
Fold and seam
- Fold in half and seam sides as earlier. Insert lining and attach snap.
Finishing & felting notes
- If you like a felted, compact wallet: wash completed outer shell in warm water agitation (test with a swatch first) until fabric slightly felts and becomes denser. Do not felt lined wallet unless lining compatible.
- After felting, reshape to flat rectangle and insert lining; felting will make wallet very durable.
Tips & variations
- Use colors that shift like a sunset for eye-catching stripe.
- Felted wool wallets are especially good for card-holding because they resist stretching.
Care
- Wool: hand wash or very gentle wash and reshaping; avoid high heat. Felted pieces are more tolerant.
5. Crochet Granny Square Wallet Pattern

Skill level
Easy–Intermediate — motif making, joining, and finishing.
Finished size
Closed: depends on granny dimensions. For four 6 cm squares arranged 2×2 the closed wallet will be ~12 cm × 12 cm (4.7″ × 4.7″). For a more rectangular wallet use 2×3 layout.
Materials & notions
- DK or worsted cotton in multiple colors (scraps work great).
- 3.5–4.0 mm hook.
- Lining fabric and small snaps or zipper.
- Tapestry needle, scissors.
Step-by-step instructions
Make granny squares
- Make 6 granny squares if doing a 2×3 layout: Standard granny in 3 rounds — magic ring, round 1 ch3, 2dc, ch2 ×4; round 2 join 3dc-ch2-3dc in each corner; round 3 add outer dc round to reach target size (make each ~6 cm).
Layout & join
- Block squares flat to uniform size. Layout in desired rectangle (2 across × 3 down). Join squares using slip-stitch join on RS for a decorative ridge or whipstitch for invisible seam.
Form wallet
- Fold the joined rectangle to form a wallet: for a 2×3 layout fold in half along the horizontal to create three panels; seam sides accordingly. Optionally add a bottom strip for depth.
- Add a lining cut to the interior size and sew into place. Attach a snap or small zipper to close.
Edge finishing
- Work a round of sc around outer edge to unify the grannies into a neat border — very useful when working in multiple colors.
Tips & variations
- Use a monochrome outer round to unify color-scrappy grannies.
- For a coin pocket, add a small granny-based pouch inside and zip into the lining.
- Create a contrast piping by adding a round of reverse sc (crab stitch) around the edge.
Care
Machine wash gentle for cotton; lining may reduce stretching.
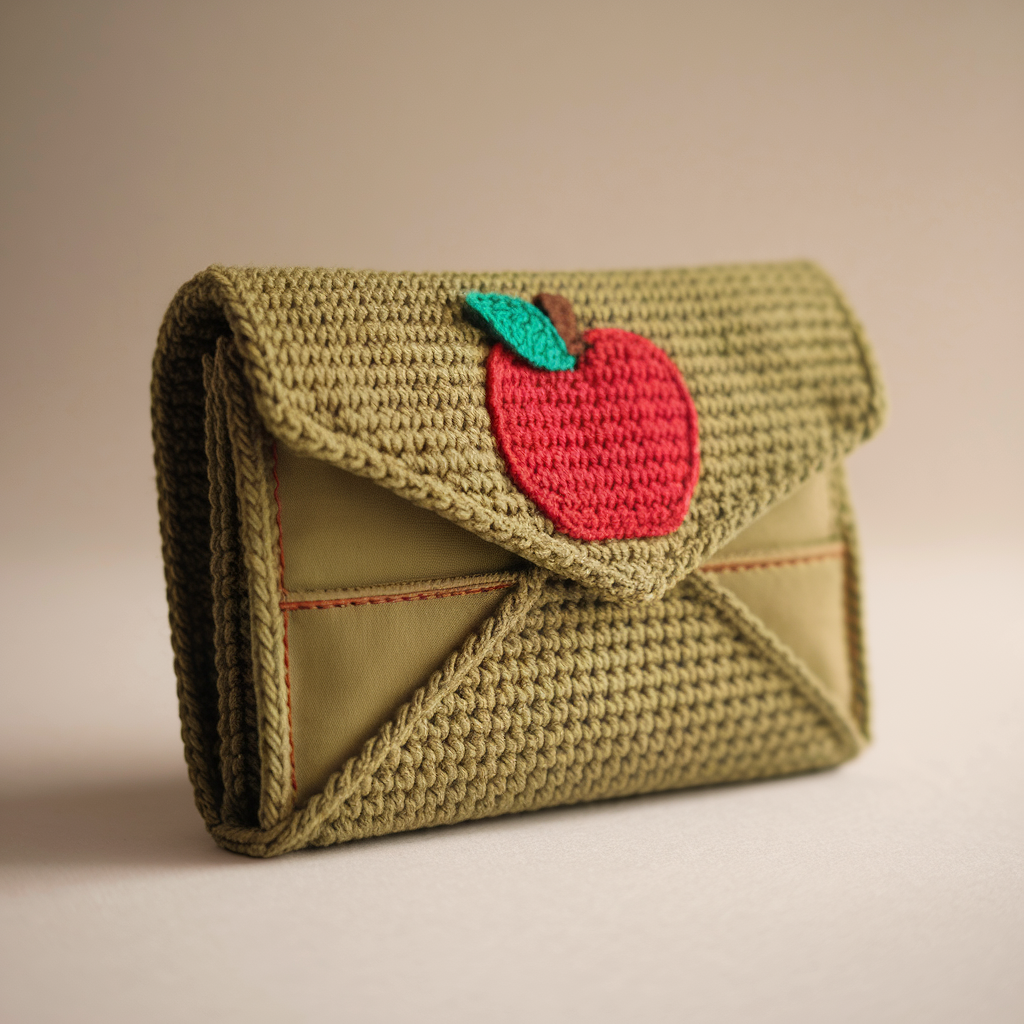
6. Crochet Apple Folder Wallet Pattern
Skill level
Intermediate — creative folding (origami-style) and measured stitch counts for pleats.
Finished size
Closed: approx 8 cm × 11 cm (3.1″ × 4.3″) — shape is slightly curved depending on folding.
Materials & notions
- DK yarn for body, small amount of contrasting yarn for apple motif.
- 3.5–4.0 mm hook.
- Snap or button closure. Lining material for pockets.
- Tapestry needle, pins for shaping.
Design concept
This “apple folder” wallet folds in a diagonal/triangular origami manner reminiscent of a fruit folder: you crochet a special trapezoid panel with extra rows for folding and a center applique apple.
Step-by-step instructions
Calculate trapezoid dimensions
- Decide base width (long edge) and top width (short edge) — e.g., base 22 sts, top 14 sts. Your trapezoid will be worked by decreasing evenly on both ends to shape. Chain 22.
Trapezoid body
- Ch 22. Row 1: sc in 2nd ch and across (21 sc). Turn.
- Row 2: ch 1, sc in first 2 sts, sc2tog at end? Instead of dec per row we decrease one stitch each side every few rows so you maintain shape. Example decrease every 4th row: Work sc across until last two sts, sc2tog to decrease; repeat on opposite side next decrease row. Continue until width reduces to 14 sts (top). Maintain consistent height so the final folded wallet matches measurements. Block trapezoid to shape.
Apple appliqué
- With red yarn: magic ring, ch1, 6 sc in ring. Round 2: (2 sc in each st) around for 12 sc. Round 3: sc, inc around to make larger circle for apple body. Create small green leaf separately: ch 6, sc hdc dc hdc sc across chain to make leaf. Sew leaf to top of apple. Add small brown stem with a short loop of brown yarn. Sew apple applique onto the trapezoid front where fold will reveal it.
Folding & assembly
- Fold bottom corners diagonally to meet in center (this creates the pocket). You’ll fold the trapezoid into the apple folder shape: fold short top edge down as flap and tuck into front pocket made by folded bottom triangles. Secure sides with small seam stitches (not across the flap). Insert lining pre-sewn to match internal folded pocket shape. Attach snap under flap for closure.
Tips & variations
- Make apple in variegated yarn for a fun look.
- For sturdier folds, add thin interfacing strips in lining where fold creases go.
- Add card slots by sewing small rectangle fabric pockets inside.
Care
Hand wash recommended if appliqués are delicate; air dry.
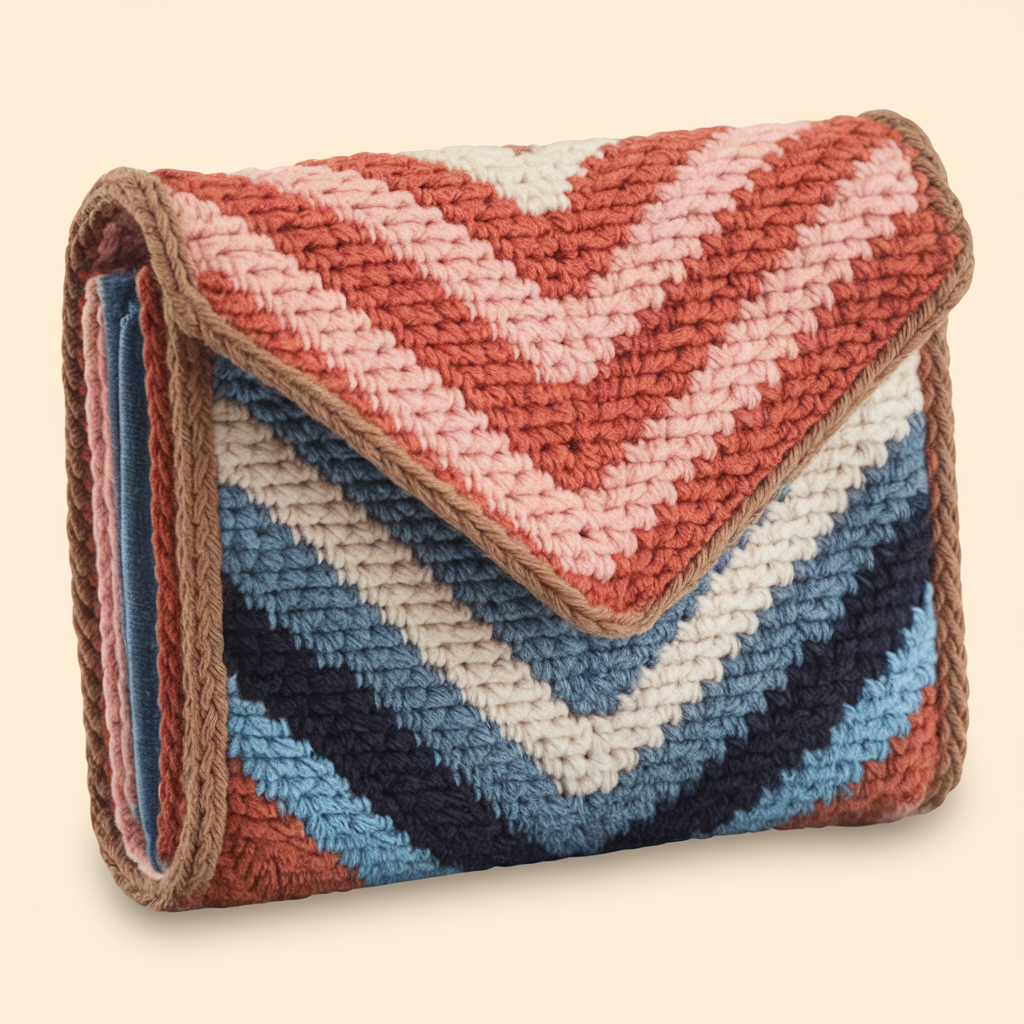
7. Crochet Chevron Wallet Pattern
Skill level
Intermediate — chevron stitch (V-shape increases/decreases) and careful edge control.
Finished size
Closed: ~8.5 cm × 12 cm (3.3″ × 4.7″). Chevron repeat width should evenly divide across the foundation.
Materials & notions
- DK yarn in two or three colors for striped chevron, ~150–200 yd.
- 3.5–4.0 mm hook.
- Lining fabric, small snap or button, tapestry needle.
Step-by-step instructions
Foundation & chevron repeat
- Decide how many chevrons across — each chevron repeat = 12 sts + edge stitches. For a wallet with 4 chevrons across, chain (12 × 4) + 2 = ch 50. Row 1: sc in 2nd ch and across.
- Row 2 (chevron row): sc2tog twice, sc in next 6, (3 sc in next st to make peak), sc in next 6, sc2tog twice — this is a common sc chevron decrease/increase set; adjust number of sc between decreases to get desired slope. Turn.
- Continue chevron rows, changing colors every few rows (e.g., 4 rows per color) to create a striped chevron effect. Work until panel height suits folded wallet (about 20–24 rows).
Edge control & finishing
- Work a round of sc around entire panel to unify zigzag edges — when you reach peaks/troughs, place multiple sc into the peak or a single sc into trough to keep edges flat. This neatens the scalloped edges.
Fold & assemble
- Fold and seam like previous rectangular wallets. Lining recommended because chevron has holes in peaks — a lining prevents cards snagging. Insert snap or button closure.
Tips & variations
- Use two contrasting colors for bold chevrons or gradient for modern look.
- Use front post/back post stitches for an embossed chevron.
Care
Machine wash gentle for cotton; block after washing to restore chevron shape.
8. Crochet Cute Mini Wallet Pattern
Skill level
Beginner — small, fast, and perfect for scrap yarn.
Finished size
Closed coin-card size ~7 cm × 9 cm (2.8″ × 3.5″).
Materials & notions
- DK or worsted yarn small amounts, ~60–90 yd.
- 3.5 mm hook.
- Small zipper (6–7 cm) for coin compartment, or snap.
- Lining fabric scrap, tapestry needle.
Step-by-step instructions
Simple zipped mini wallet (rectangle, zipper top)
- Ch 28. Row 1: sc in 2nd ch and across (27 sc). Rows 2–12: ch1, sc across — make rectangle tall enough so folded height ~4.5 cm (if folding). Alternatively make rectangle width ~9 cm and height ~6–7 cm for zip top.
- If using zipper: fold rectangle in half with RS together, align zipper across top and hand-stitch zipper to crocheted edge as in earlier patterns. Sew side seams leaving bottom seam closed with mattress stitch. Add lining if desired.
Card-pocket variant (open top)
- Fold rectangle so top edge becomes fold of wallet and sew two sides leaving top open. For card pocket, sew small rectangle piece inside to make a sleeve.
Quick coin pouch alternative (tube)
- Ch 16, join in round, sc around for 10–12 rounds, finish with 1 round sc, close bottom by gathering and weaving through last round, and insert zipper into top to make tiny coin purse.
Tips & variations
- Use novelty buttons or tiny appliqués to personalize.
- Make a set of mini wallets in rainbow colors as gift set.
Care
Machine wash gentle for cotton; hand wash for delicate yarns or if zipper/metallica parts present.
Conclusion
Wallets are satisfying small projects that let you practice lots of useful techniques — color changes, applique, shaping, lining, and hardware installation — without committing to a large item. This collection of eight unique wallet patterns includes designs for every maker: bold checks and chevrons for modernists, cute animal and mini wallets for gifters, structured trifolds for organization, and textured wool or granny-square options for scrap-busters.
Final practical checklist before gifting a wallet:
- Test seams and closures under light load (cards/coins) so you can reinforce if needed.
- Always add a lining for wallets that will hold cards or coins — it prevents snagging and absorbs wear.
- Use small rectangles of canvas or interfacing behind hardware to stop stress from pulling at the crochet fabric.
- Block flat and square motifs before joining for a professional finish.
- Photograph at least one open and one closed shot plus a close-up of the stitch and lining for clear pattern references.