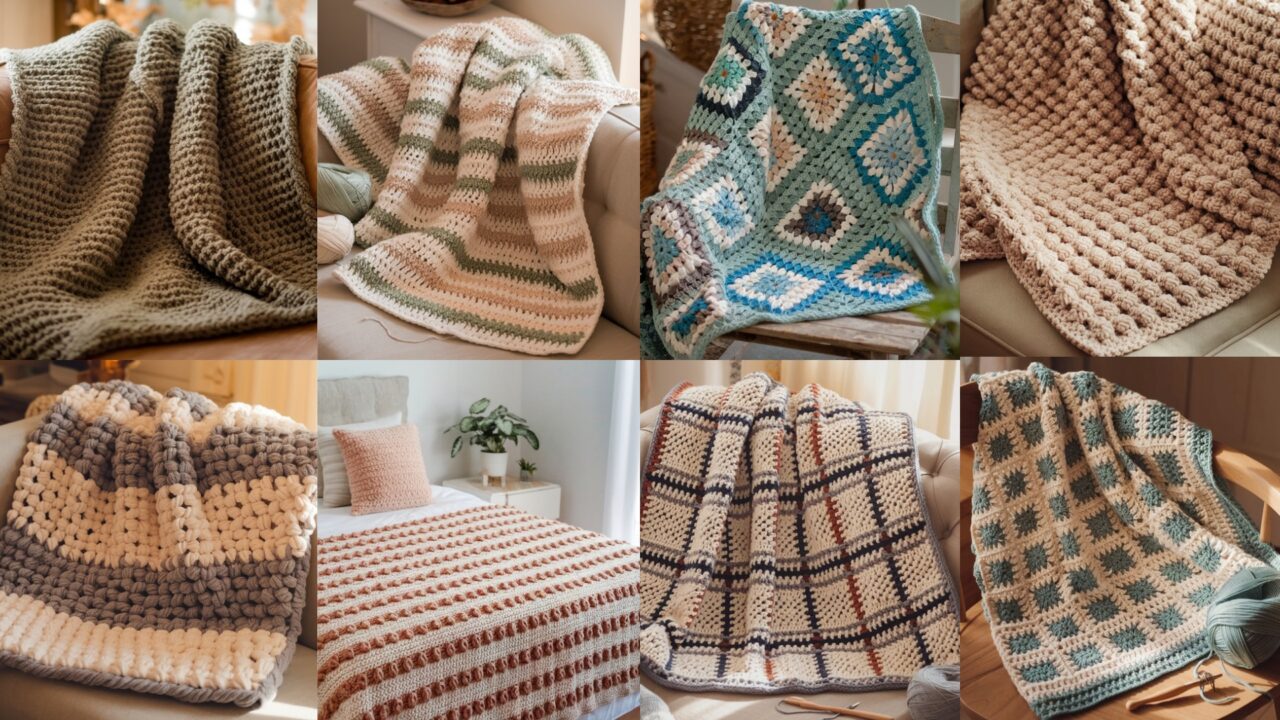
Cozy up — we’re about to take a friendly deep-dive into eight delightful crochet blanket patterns that span from ultra-beginner to show-stopping texture work. Whether you want a quick weekend throw, a snuggly chunky blanket for movie nights, or a thoughtful baby gift, each pattern below contains: a clear description, materials list, stitch abbreviations, an easy-to-follow step-by-step pattern, finishing tips, and variation ideas. I’ve written them to be approachable and practical — grab your hook and yarn and let’s make something beautiful.
Quick notes that apply to all patterns
- Skill levels indicated: Beginner / Easy / Intermediate / Advanced.
- Adjusting size: For all patterns you can make your blanket wider by increasing foundation chain length (watch pattern multiples when specified) and longer by adding rows/rounds. I’ll point out where to change size for each pattern.
- Yarn & hooks: If you change yarn weight, always check gauge and adjust your hook. When using a heavier yarn, increase hook size; for lighter yarns, decrease it.
- Blocking & finishing: Blocking evens stitches and improves drape. For acrylic blends, steam block lightly or skip if manufacturer advises otherwise. Always weave in ends securely.
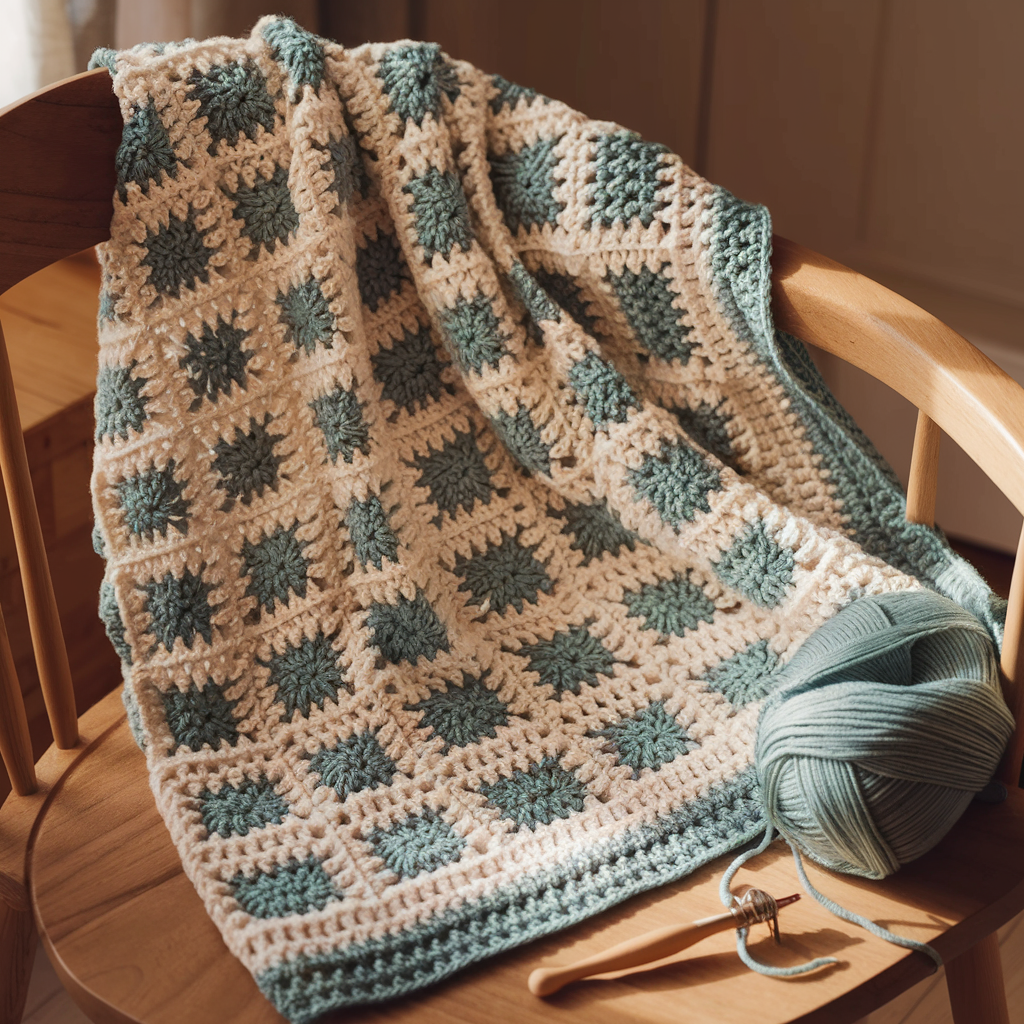
1. Crochet Harbour Granny Square Blanket Pattern
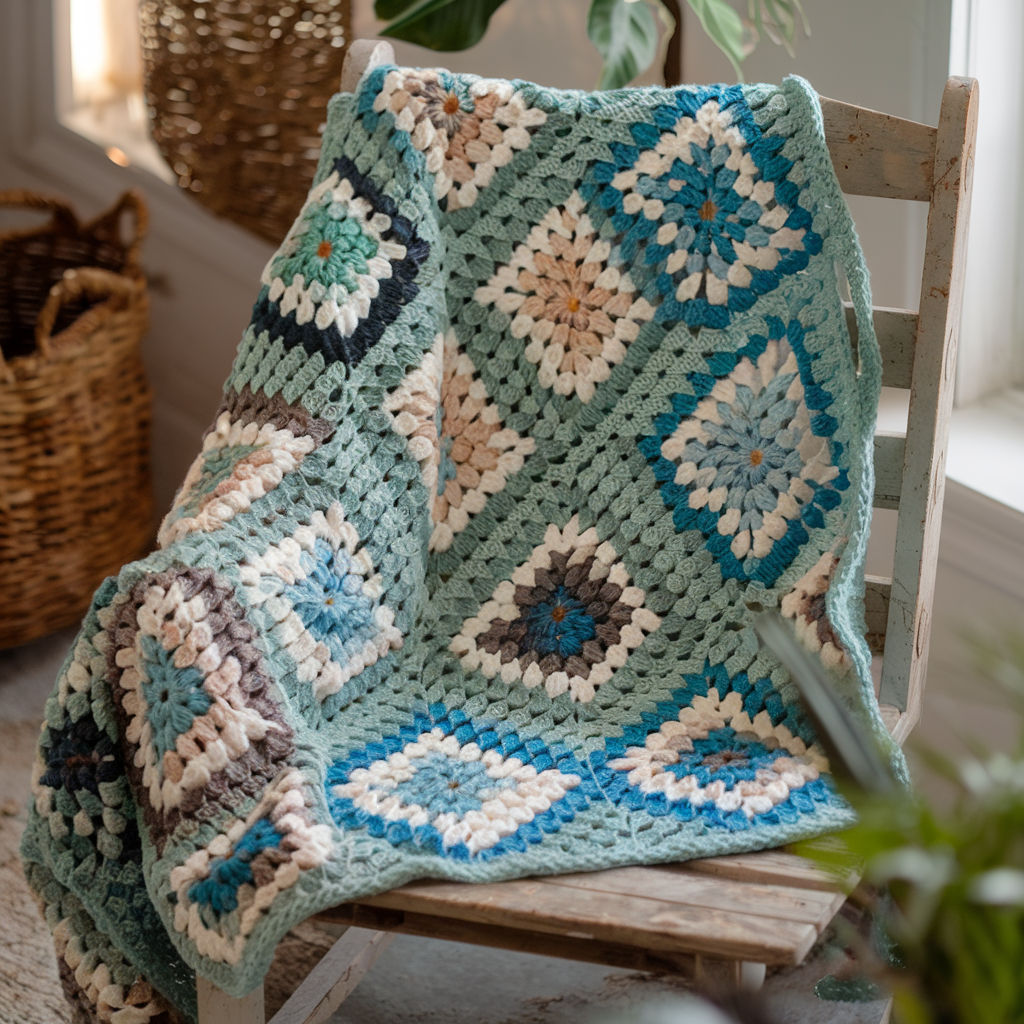
Skill level: Easy
Style: Classic meets coastal — granny-squares joined together, great for scraps or gradient cakes.
Materials
- Worsted weight yarn (Category 4) — approx. 1500–2500 yards depending on blanket size.
- Baby: ~1000 yds, Throw: ~1800 yds, Afghan: ~2400 yds (these are estimates — adjust if you add borders).
- Crochet hook H/8 (5.0 mm) or size to match gauge
- Yarn needle, scissors, stitch markers (optional)
Stitches used & abbreviations
- ch — chain
- sl st — slip stitch
- sc — single crochet
- dc — double crochet
- ch-sp — chain space
- sp — space
Finished sizes & gauge
- Single granny square (example): 8″ square using 4–5 rounds (gauge will vary by yarn and hook).
- Make squares until desired blanket width/height is reached.
Pattern overview
- Make many granny squares — each square is worked in the round, joined later.
- Join squares using whip stitch, slip-stitch join, or join-as-you-go (JAYG).
- Add a unifying border.
Step-by-step: Granny square (classic shell style)
- Magic ring (or ch 4, sl st to form ring).
- Round 1: ch 3 (counts as first dc), 2 dc, ch 2, 3 dc into ring — repeat between * * three more times (you’ll have four shell clusters). Join with sl st to top of ch-3. Fasten off color if changing. (Result: 4 shell clusters, 4 ch-2 corner spaces.)
- Round 2: Join new color in any ch-2 corner space. ch 3, 2 dc, ch 2, 3 dc (first corner). ch 1, (3 dc, ch 2, 3 dc) in next ch-2 corner space — repeat for remaining corners. Join.
- Round 3 and beyond: Repeat Round 2, but between corner shells put ch 1 (or ch 2 if you want more open space). Each round expands square. Work until the square reaches ~8–10″ or desired size. Fasten off.
Make as many squares as you need
- For a throw 50″ x 60″, using 10″ squares, you’ll need 5 x 6 = 30 squares (but keep flexible: pattern and size vary).
Joining options
- Whip stitch (seam visible, flat): With wrong sides together, whip stitch through back loops only for a tidy ridge.
- Slip stitch join (visible ridge on one side): Lay squares right sides together and sl st through both loops along edge.
- Join-as-you-go (JAYG): On the final round of each square, slip-stitch into adjacent squares’ edge spaces to join without sewing.
Border
- After joining, work 3–5 rounds of single crochet or half-double crochet around the whole blanket to finish. For a modern look: Round 1: sc evenly; Round 2: crab stitch (reverse sc) for a neat edge.
Tips & variations
- Use a gradient cake or ombré yarn for coastal color flow.
- Alternate solid and variegated squares.
- Add a lacy round (chain loops) for an airy blanket.
2. Crochet Beginner-Friendly Striped Blanket Pattern
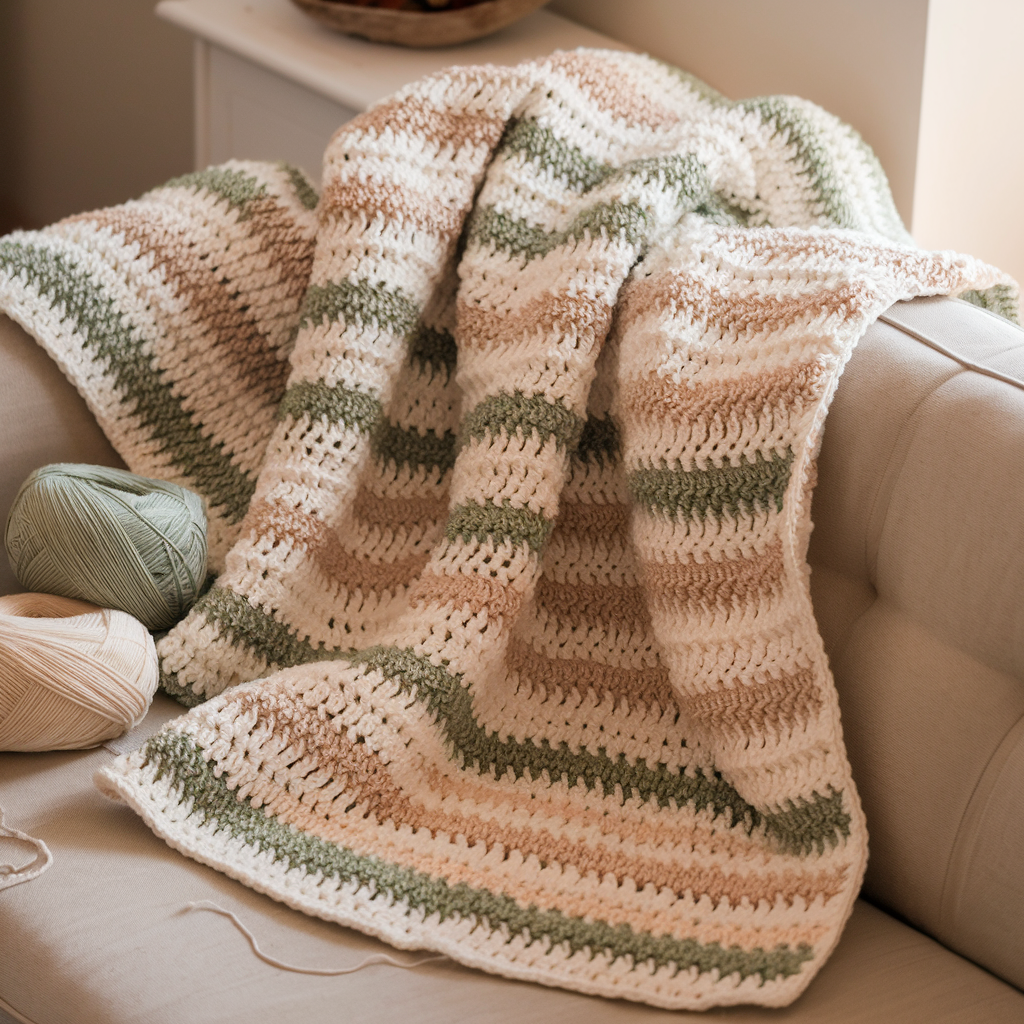
Skill level: Beginner
Style: Clean, forgiving rows of color — perfect if you only know chains and double crochet.
Materials
- DK or worsted weight yarn, depending on desired drape:
- Throw: ~1500–2000 yards worsted OR ~2200–2800 yards DK.
- Hook: G/6 (4.0 mm) for DK or H/8 (5.0 mm) for worsted (or adjust to yarn).
- Tapestry needle, scissors
Stitches used & abbreviations
- ch — chain
- dc — double crochet
- sc — single crochet
- st(s) — stitch(es)
Gauge & finished size
- Example gauge: 14 dc x 8 rows = 4″ (10 cm) with H/8 and worsted.
- Make foundation chains to match desired width.
Pattern (simple striped dc blanket)
- Foundation chain: Chain until the blanket width is desired. If you want a neat edge, chain a multiple of 2 + 2 for turning. Example: ch 120 + 2 = 122 for a medium throw (adjust as needed).
- Row 1: dc in 3rd ch from hook (counts as first dc), dc in each ch across. Turn.
- Row 2: ch 2, dc in each st across. Turn.
- Repeat Row 2 until stripe length reached. Change color every X rows (e.g., every 6 rows for bold stripes or every 2–3 rows for narrow stripes). Carry yarn up side or fasten off and weave ends (weave ends as you go for neater back).
Edge treatment
- For clean edges, finish with one round sc around, working 3 sc in each corner.
Tips
- To avoid long floats, change color at the end of a row and carry the unused color along the edge or weave in every 4–6 rows.
- Use a self-striping yarn for effortless stripes.
Variations
- Alternate rows of sc and dc for a subtle texture.
- Add a simple chevron by decreasing & increasing stitches (requires a stitch multiple).
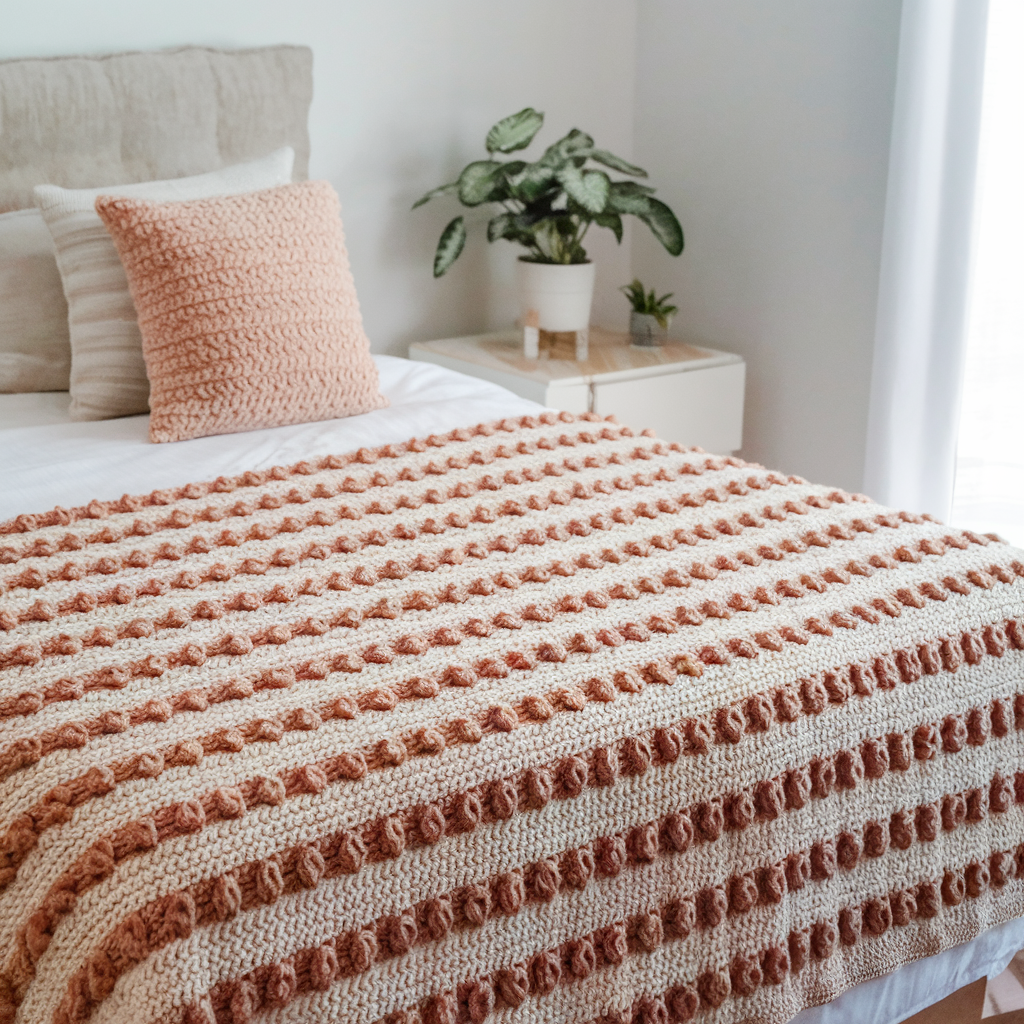
3. Crochet Faith Throw Chunky Blanket Pattern
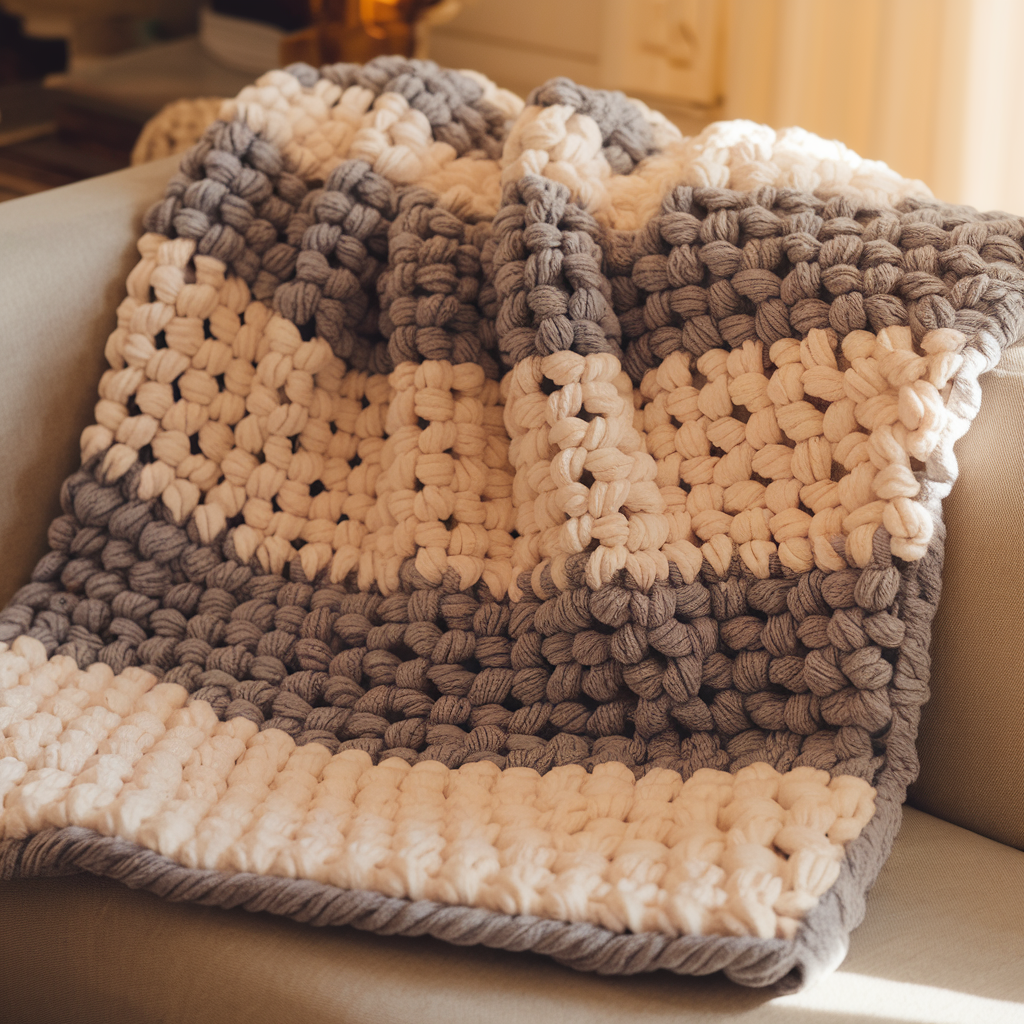
Skill level: Easy
Style: Chunky, cozy, made with super bulky yarn for quick results and dramatic texture.
Materials
- Super bulky (Category 6) yarn — approx. 900–1600 yards depending on size.
- Throw ~900–1200 yds.
- Crochet hook: L/11 (8.0 mm) to P/16 (11.5 mm) — choose according to yarn and desired drape.
- Tapestry needle
Stitches used & abbreviations
- ch — chain
- sc — single crochet
- hdc — half double crochet
- dc — double crochet
- fpdc — front post double crochet
- bpdc — back post double crochet
Design concept
The “Faith Throw” uses alternating bands of basic stitches and wide post-stitch ribbing to create high-impact texture that reads as intentional and elegant.
Step-by-step pattern (approx. 40″ x 50″ throw)
- Foundation chain: ch 54 (or any even number for stitch multiple) — adjust for width.
- Row 1: dc in 3rd ch from hook and across. Turn. (Counts as first dc.)
- Row 2: ch 2, dc across. Turn. Repeat Row 2 for 6 rows to form a stable base.
- Texture band (ribbing): Next 6 rows — work fpdc and bpdc alternating: fpdc around next st, bpdc around next st across. Turn each row with ch 2. This creates a deep rib.
- Smooth band: 6 rows of hdc across.
- Alternate 6 rows ribbing with 6 rows smooth (dc or hdc) until blanket reaches desired length, ending with a smoothing band. Fasten off.
Finishing
- Work 2–3 rounds of sc around the blanket, placing 3 sc in each corner to keep it from puckering. Optionally finish with a braided fringe.
Tips
- Use larger hook for loose, squishy drape; smaller for dense, warm.
- If stitches look tight, change hook size up one or two sizes.
Variations
- Use two contrasting colors: one for ribbing bands, another for smooth bands.
- Add a simple surface crochet motif (like a cross) with a contrasting yarn to emphasize the “Faith” theme.
4. Crochet Endless Rectangle Blanket Pattern
Skill level: Intermediate (but approachable)
Style: Large rectangular motifs or extended rectangular granny worked in rows to build an “endless” repeating field — great for runner-to-bed-size blankets.
Materials
- Worsted yarn — 1800–2800 yards depending on size.
- Hook: H/8 (5.0 mm) with worsted.
- Tapestry needle, blocking pins (optional)
Stitches & abbreviations
- ch — chain
- sl st — slip stitch
- dc — double crochet
- tr — treble crochet
- shell — typically 3 dc in same st
Pattern concept
Work a repeating rectangular motif — for example, a “brick” of shells and spaces — that you continue row after row; because it’s rectangular, there are no corners to fuss over.
Step-by-step: Endless rectangle pattern (sample)
- Foundation chain: ch 160 (or a multiple of 8 + 4 for balance).
- Row 1: dc in 4th ch from hook, ch 1, skip 1 ch, dc in next ch across for a slightly open mesh. Turn.
- Row 2: ch 3, 3 dc in next ch-1 space, ch 1 across; end with dc in top of ch-3. Turn. This row places shell clusters in the mesh.
- Row 3: ch 3, dc in each st across, working dc into shells and spaces evenly. Turn.
- Row 4: Repeat Row 2. Continue Rows 2–4 as a 3-row repeat (or make your own repeat) until desired length.
Edging & finishing
- For even edges, do a border: Round 1: sc evenly around; Round 2: crab stitch. Block flat.
Tips to expand width/length
- To widen, add foundation multiple and repeat motif. Because it’s repetitive, it’s easy to stop and pick up later without losing rhythm.
Variations
- Replace shells with cluster stitches or puff stitches for a chunkier look.
- Use graduated colors to create a waterfall effect down the blanket.
5. Crochet Mosaic Baby Blanket Pattern
Skill level: Intermediate (mosaic techniques are chart-based but easy once you learn)
Style: Graphic colorwork using single-color rows and slip-stitch mosaic techniques — crisp motifs without carrying lots of yarn.
Materials
- DK or worsted weight yarn — baby blanket ~800–1200 yards.
- Hook: G/6 (4.0 mm) for DK, H/8 (5.0 mm) for worsted.
- Two or three contrasting colors (A = background, B = motif, optional C accent).
- Tapestry needle
Stitches & abbreviations
- ch — chain
- sl st — slip stitch
- sc — single crochet
- dc — double crochet
- st(s) — stitch(es)
- Mosaic uses mostly dc rows with slip stitches to form color patterns.
How mosaic crochet works (brief)
- You work full rows in one color; when a motif row needs a different color, you use slip stitches in the bar of the stitch below (skipping stitches in the previous row) to create the color pattern. You only work with one color per row, so you never carry multiple yarns along the row.
Step-by-step basic mosaic motif baby blanket
- Foundation chain: ch 84 (multiple of 12 + 12 for a repeat) for approx. 30″ width (adjust as desired).
- Row 1 (RS): dc across in Color A. Turn.
- Row 2 (WS): ch 2, dc across in Color A. Turn.
- Row 3 (Color B row — motif row): ch 2, dc in next 4 sts with Color B, sl st in next 4 sts with Color B (working into the dc below), repeat across. Turn. (Follow a chart for more complex arrangements.)
- Row 4 (Color A): ch 2, dc across in Color A. Turn.
- Repeat Rows 2–4 following your chosen chart to build the mosaic motif. Alternate blocks of motif and plain rows for breathing space.
Reading or designing a mosaic chart
- A mosaic chart shows blocks of filled squares indicating slip-stitch placement. Each filled square usually translates to a slip stitch over one stitch, and empty squares to dc worked in the row below. There are many simple free charts (hearts, stars, geometric shapes) you can follow.
Border & finishing
- Add a 3-round border: Round 1 sc, Round 2 dc, Round 3 crab stitch or scallops in contrasting color.
Tips
- Use high-contrast colors for crisp mosaic lines.
- Practice a small 6-row sample to learn the slip-stitch rhythm.
- Use a light background and darker motif for classic look or invert for modern style.
6. Crochet Plaid Blanket Pattern
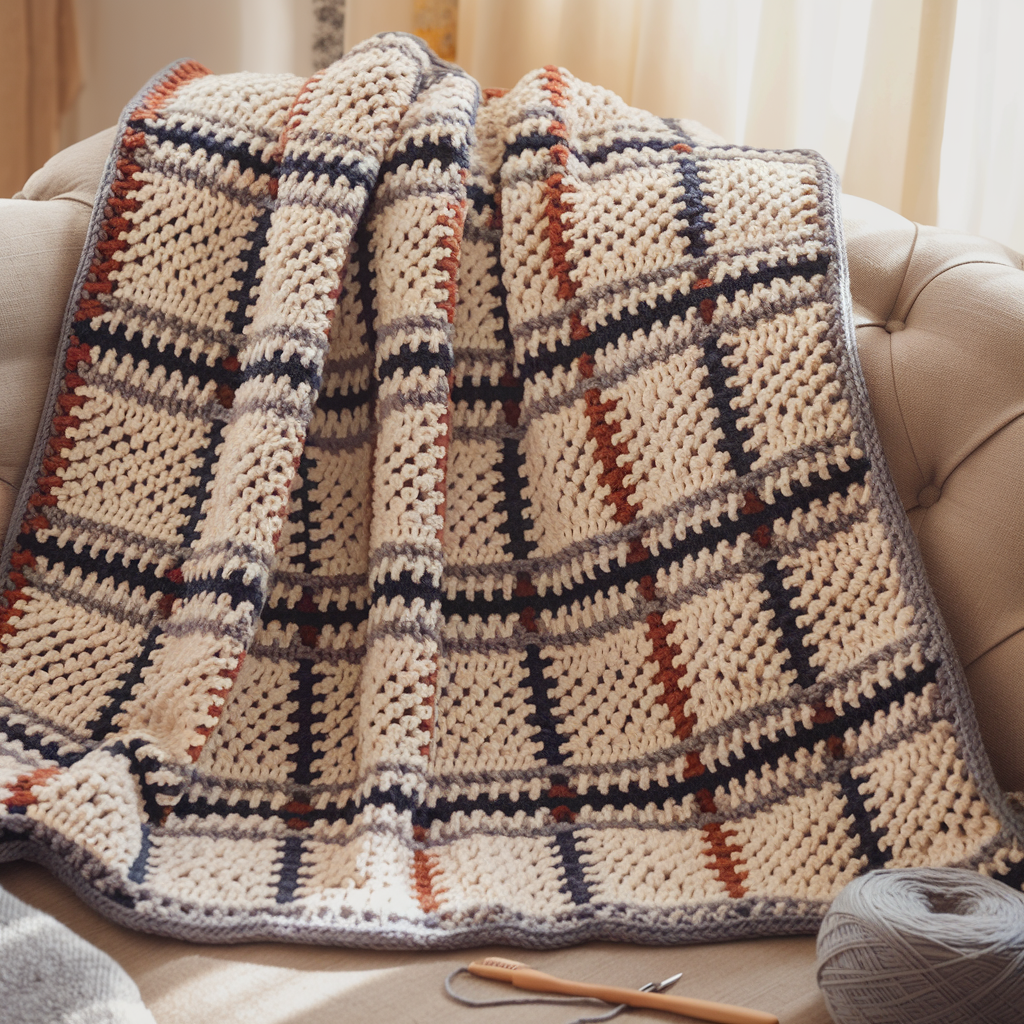
Skill level: Intermediate
Style: Plaid effect using mosaic striping, tapestry-style colorwork, or stripes and surface slip stitches.
Materials
- Worsted weight yarn — 1600–2600 yards depending on full size.
- Hook: H/8 (5.0 mm)
- 3–4 colors: base color + 2–3 contrast colors for crossbars.
Techniques used
- Stripes, carried yarn (tapestry crochet), or surface slip-stitching to overlay crossbars. You can achieve plaid two ways:
- Tapestry crochet: Carry colors along and change frequently to create woven-like crossbars.
- Striped blanket with surface crochet: Work broad stripes, then overlay horizontal/vertical lines using surface slip stitch to form plaid.
Step-by-step — surface crochet plaid (easier)
- Base: Work a striped or solid blanket in dc to your size. Example: Make a 50″ x 60″ throw in broad stripes of Color A and B, alternating every 10 rows.
- Mark vertical lines: Using pins or stitch markers, mark vertical lines equally spaced across the blanket for the plaid’s vertical bands. Spacing might be 4″, 6″, or 8″ depending on desired plaid scale.
- Surface slip stitch: With Contrast Color C and tapestry needle or hook, work surface slip stitch along marked lines front post across the fabric to create vertical bands. Repeat for horizontal bands — this overlays crossbars to form plaid.
- Alternate: For more texture, work surface single crochet for thicker bars.
Step-by-step — tapestry crochet plaid (advanced but integrated)
- Work dc in pattern, carrying colors and changing according to a chart that indicates where vertical and horizontal bands intersect. Carry unused yarn along back, crocheting over it occasionally to secure. This yields an integrated plaid without surface stitching but requires more attention.
Border
- A simple 2–3 round sc or hdc border in the main color will frame the plaid beautifully.
Tips
- For crisp lines, use yarns with good stitch definition (wool blends or high-quality acrylic).
- Keep tension even when carrying yarn to avoid puckering.
Variations
- Make a muted flannel plaid with tone-on-tone colors, or a bright, modern plaid with saturated contrasts.
7. Crochet Alpine Stitch Blanket Pattern
Skill level: Intermediate to Advanced (texture-focused)
Style: A rich, diagonal-raised rib (alpine stitch) — looks woven and luxurious.
Materials
- Aran or worsted weight yarn — 1800–2600 yards for a throw.
- Hook: I/9 (5.5 mm) recommended for arans; adjust as needed.
Stitches & techniques
- ch — chain
- dc — double crochet
- fpdc — front post double crochet
- bpdc — back post double crochet
- alpine stitch uses combinations of dc and front/back post stitches to create raised diagonal ribs.
Basic alpine stitch sequence (one sample repeat)
Alpine stitch often uses a 4-row repeat:
- Row A: dc across.
- Row B: ch 2, fpdc around next st, bpdc around next st across.
- Row C: dc across.
- Row D: ch 2, bpdc around next st, fpdc around next st across.
This alternation causes diagonals to form and is repeated for the blanket body.
Step-by-step pattern (approx. 48″ x 60″)
- Foundation chain: ch 120 + 2 (adjust for multiple and desired width).
- Row 1 (RS): dc across starting in 3rd ch from hook. Turn.
- Row 2: ch 2 (counts as first hdc or turning chain for height), fpdc around next dc, bpdc around next dc repeat across. Turn.
- Row 3: ch 2, dc across. Turn.
- Row 4: ch 2, bpdc around next dc, fpdc around next dc across. Turn.
- Repeat Rows 1–4 until desired length.
Border & finishing
- Add a classic 3-round border of sc, hdc, then sc. Or create a wide ribbed border using fpdc/bpdc rows to echo the main texture.
Tips
- Watch your tension with post stitches — they can tighten the fabric; go up a hook size if rows pull in.
- Use stitch markers to mark every 10–20 stitches when working wide blankets to avoid counting mistakes.
Variations
- Use contrast color every 12 rows to let the texture shine.
- Combine alpine stitch with a solid granny square edge for a mixed-texture look.
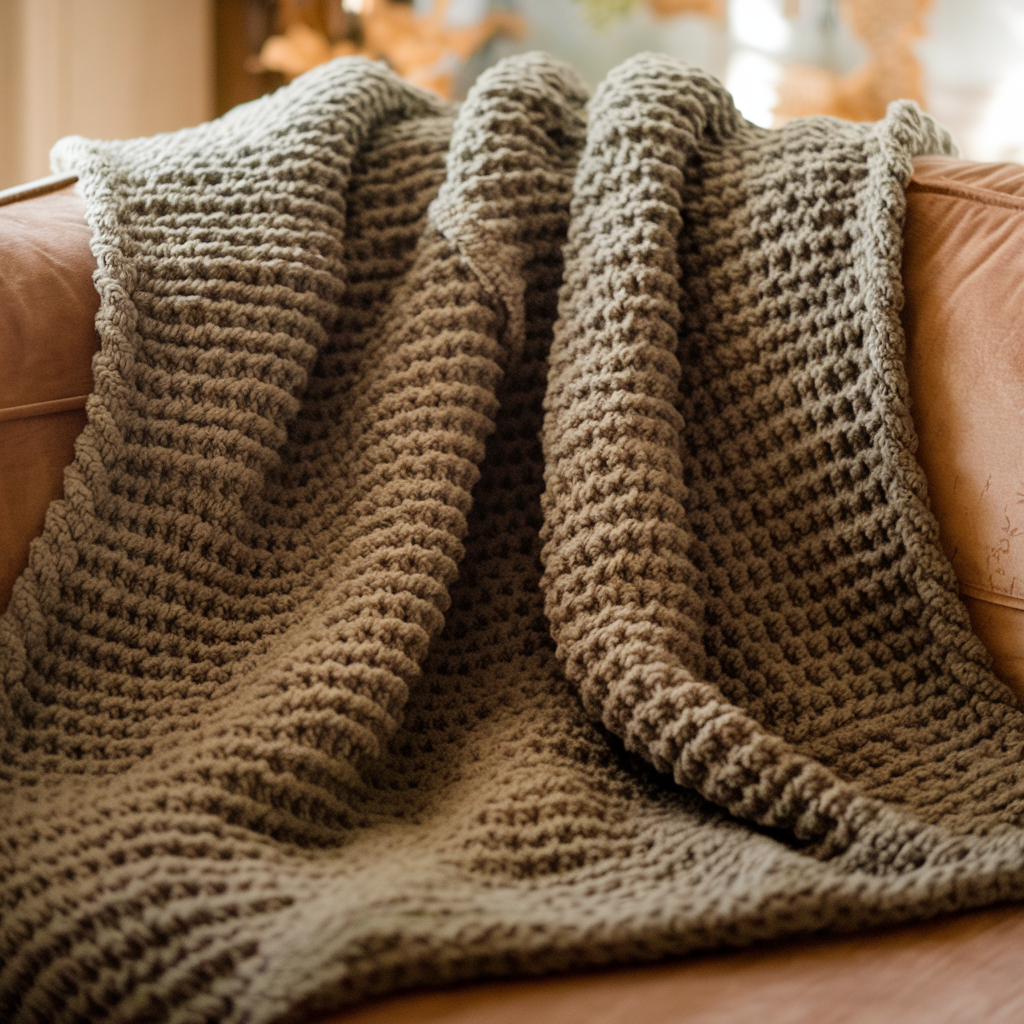
8. Crochet Waffle Stitch Blanket Pattern
Skill level: Easy to Intermediate
Style: Deep, squishy squares made with front post double crochets and regular stitches — waffle stitch is famously cozy.
Materials
- Worsted weight yarn — 1400–2200 yards (throw to afghan).
- Hook: H/8 (5.0 mm) or I/9 (5.5 mm) for chunkier waffle.
Stitches & abbreviations
- ch — chain
- dc — double crochet
- fpdc — front post double crochet
- bpdc — back post double crochet (sometimes not used)
- st(s) — stitch(es)
Waffle stitch basics (2-row repeat)
- Row 1 (foundation): dc across.
- Row 2 (waffle row): ch 2, fpdc around next 2 dc, dc in next st repeat across. This creates raised vertical ridges. Repeat Row 1 and Row 2 for the waffle texture.
Step-by-step waffle blanket (sample)
- Foundation chain: ch 132 + 2 for turning chain (adjust to desired width).
- Row 1: dc in 3rd ch from hook and across. Turn.
- Row 2: ch 2, fpdc around next 2 dc, dc in next st repeat across; end with dc in top of turning ch. Turn.
- Row 3: ch 2, dc across. Turn.
- Repeat Rows 2–3 until desired length.
Alternative waffle (grid waffle with 3-row repeat)
- Another waffle uses a 3-row repeat where you create blocks of post stitches that intersect to make a grid-like square waffle. If you want square waffles, the repeat is: Row A dc, Row B fpdc over next 2 stitches every other stitch, Row C dc across; adjust numbers to form squares.
Border & finishing
- Add 2 rounds of sc around; for a plush finish, do 2 rounds of sc then 1 round of crab stitch.
Care
- Waffle stitch traps heat and can be slightly dense; be sure fiber choice matches intended use (cotton for summer waffle; wool/acrylic for cozy winter).
Tips & variations
- Use speckled yarn for a playful waffle, or keep it tonal for cottage-core elegance.
- Add fringe or tassels for boho vibes.
Conclusion
You now have eight distinct crochet blanket patterns to choose from — classic granny squares, simple striped comfort, chunkily dramatic throws, endless repeats, graphic mosaic work, woven-look plaid, alpine-textured luxury, and the ever-cozy waffle stitch. Each pattern invites experimentation: change yarn weights, tweak color changes, scale the stitch repeats, or combine techniques (for example, use mosaic panels inside a waffle border!).
Pick the pattern that fits your weekend mood:
- Want fast and satisfying? Try the Chunky Faith Throw or Waffle Stitch.
- Want meditative repetition? The Endless Rectangle or Striped Blanket is your jam.
- Want detail and wow? Mosaic Baby Blanket or Alpine Stitch will reward patience.
One final set of universal tips:
- Make a small sample swatch of the stitch pattern (4″–6″) to test how the yarn and hook interact.
- Weave in ends as you go when working stripes or mosaics to keep the back tidy.
- Keep good lighting and a comfortable chair — your shoulders will thank you.
If you want, I can:
- Convert any single pattern into a printable PDF with step counts sized for baby/throw/afghan, or
- Provide a simple stitch chart (text or ASCII-style) for the mosaic, alpine, or waffle stitch, or
- Create a materials shopping list tailored to your preferred size and yarn brand.
Which pattern do you want turned into a step-by-step printable first?