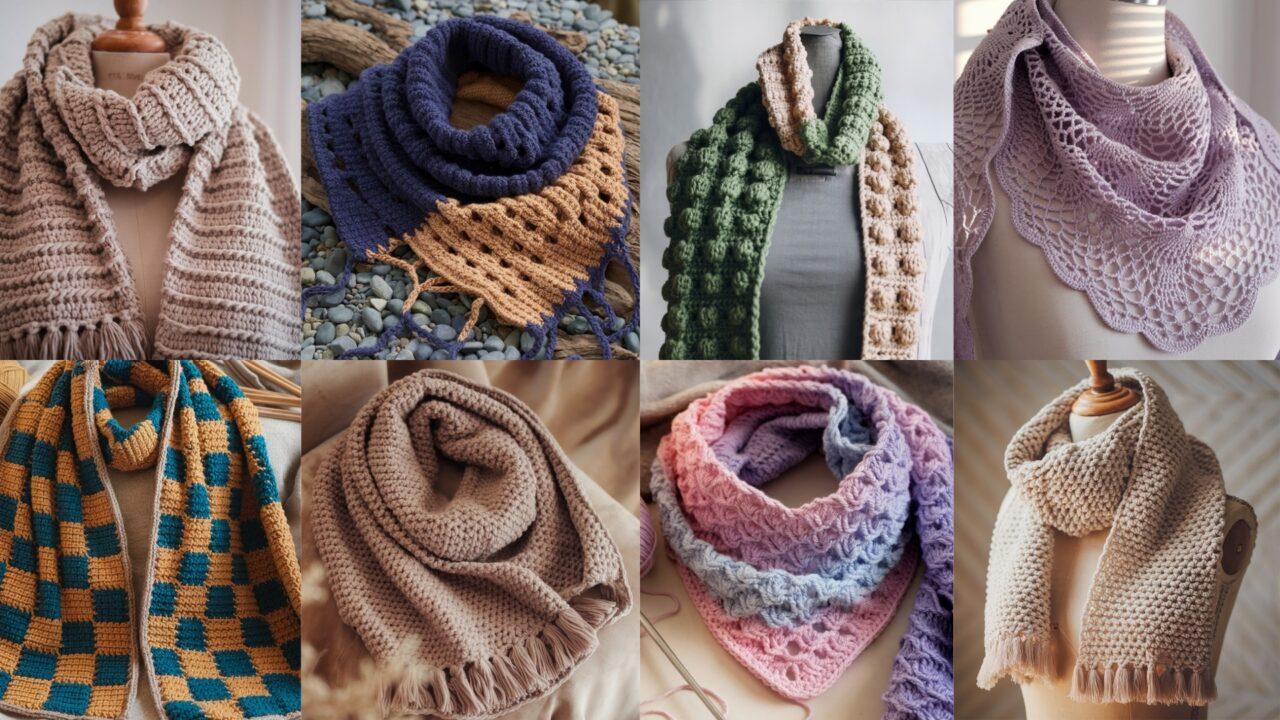
A handmade scarf is one of the most rewarding crochet projects: useful, wearable, and one of the best places to practice new stitches and textures. This post collects eight trendy scarf patterns that cover a wide range of styles — from chunky, ultra-cozy wraps to delicate lacy neck scarves — so you can pick a project that matches your wardrobe, weather, and mood.
Each pattern below follows the same helpful structure so you can jump right in: Skill level → Finished size → Materials & gauge → Step-by-step instructions → Finishing → Tips, troubleshooting & variations → Care. I give adjustments for width/length, notes about drape, and suggestions for tailoring the look. Let’s stitch warmth and style.
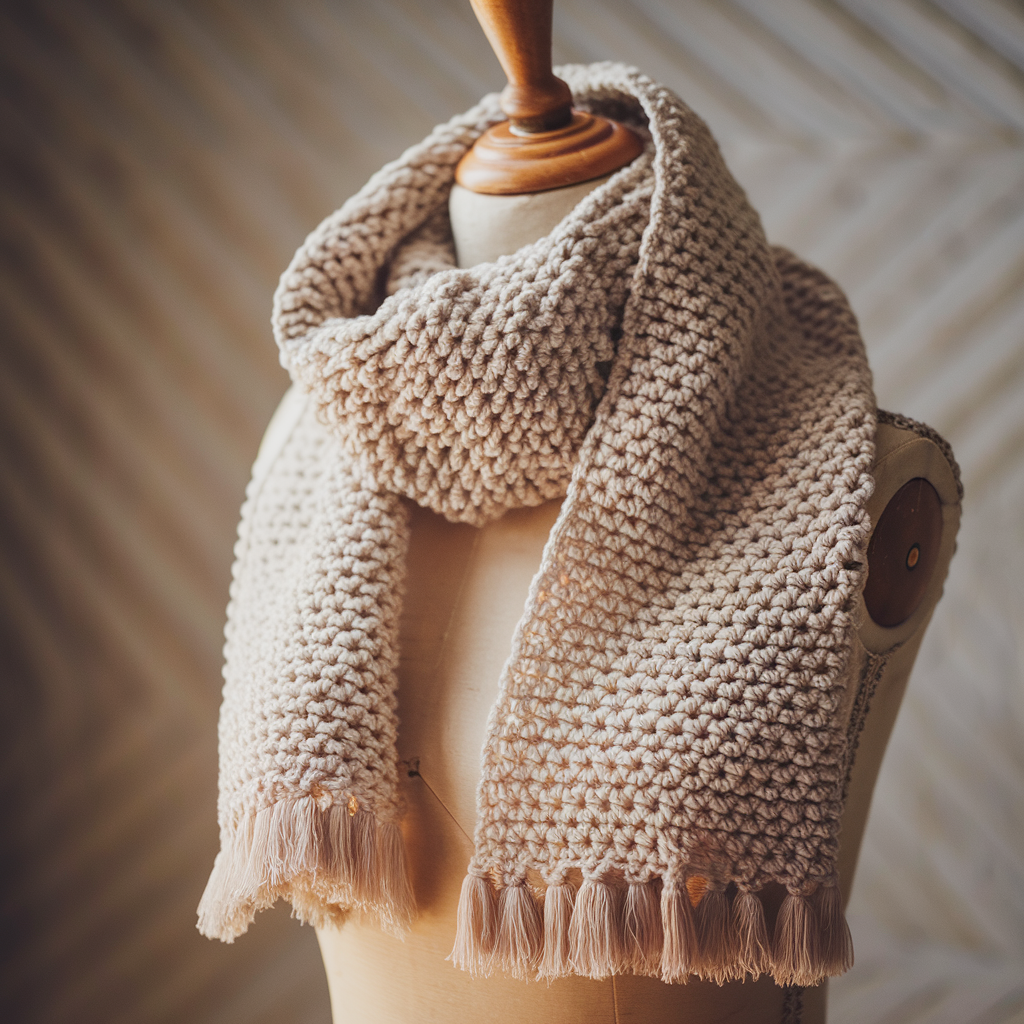
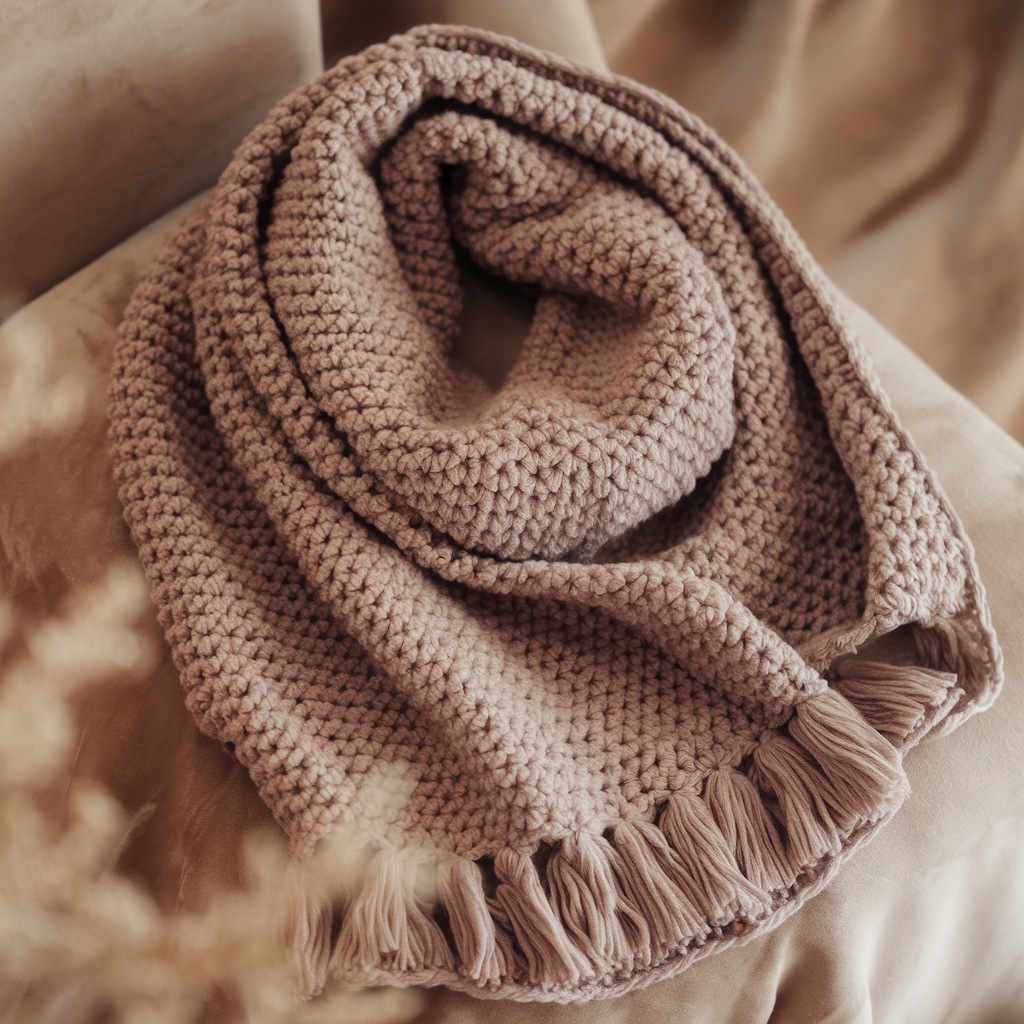
1. Moss Stitch Crochet Scarf Pattern
Skill level
Beginner → easy repeating pattern, great for practicing rhythm stitches
Finished size
Approx 8″–10″ wide × 60″–72″ long (20–25 cm × 150–180 cm). Adjust chain for width and add/subtract repeats for length.
Materials & gauge
- Worsted weight yarn (#4), approx 400–800 yds depending on length and fringe
- 4.0–5.0 mm (G–H) hook (use one that produces a nice, squishy fabric)
- Tapestry needle, scissors, optional fringe comb
- Gauge: not critical, but with 4.5 mm hook you might get ~16 sts × 20 rows = 4″ in moss stitch; swatch if exact sizing is important
What is moss (linen) stitch?
Moss stitch alternates single crochet and chain spaces, creating a dense, woven fabric with subtle texture — very warm and reversible.
Step-by-step instructions
- Foundation chain: Chain an odd number. For a standard width work ch 31 (or ch 35 for a wider scarf).
- Row 1 (RS): sc in 2nd ch from hook, ch 1, skip next ch, sc in next ch — repeat across, ending with sc in last ch. Turn.
- Row 2 (WS): ch 1 (does not count), sc in first sc, ch 1, sc in next ch-1 space — repeat to end, ending with sc in top of turning ch. Turn.
- Repeat Row 2 for the rest of the scarf until length desired.
- Optional fringe: Cut multiple equal strands, fold in half, attach along short edges with lark’s head knots.
Finishing
- Weave in ends. If yarn tolerates it, block lightly (steam or wet-block) to even edges.
- A single round of sc along both long edges will stabilize and tidy the scarf.
Tips & troubleshooting
- Moss stitch can tighten; if fabric feels too stiff, try a slightly larger hook.
- If edges wave, check that your turning chain counts and end stitches are consistent — sometimes adding an extra sc in the last stitch of the row helps.
- For drapier scarves, use a softer fiber (merino blends or bamboo blends) and go up a hook size.
Variations
- Make an oversized scarf by chaining more foundation and repeating the same pattern.
- Alternate two colors every 6–8 rows for subtle striping.
- Work moss stitch with a bulky yarn for a fast, warm piece.
Care
- Cotton/acrylic: machine wash gentle and tumble low. Wool or delicate blends: hand wash and lay flat.
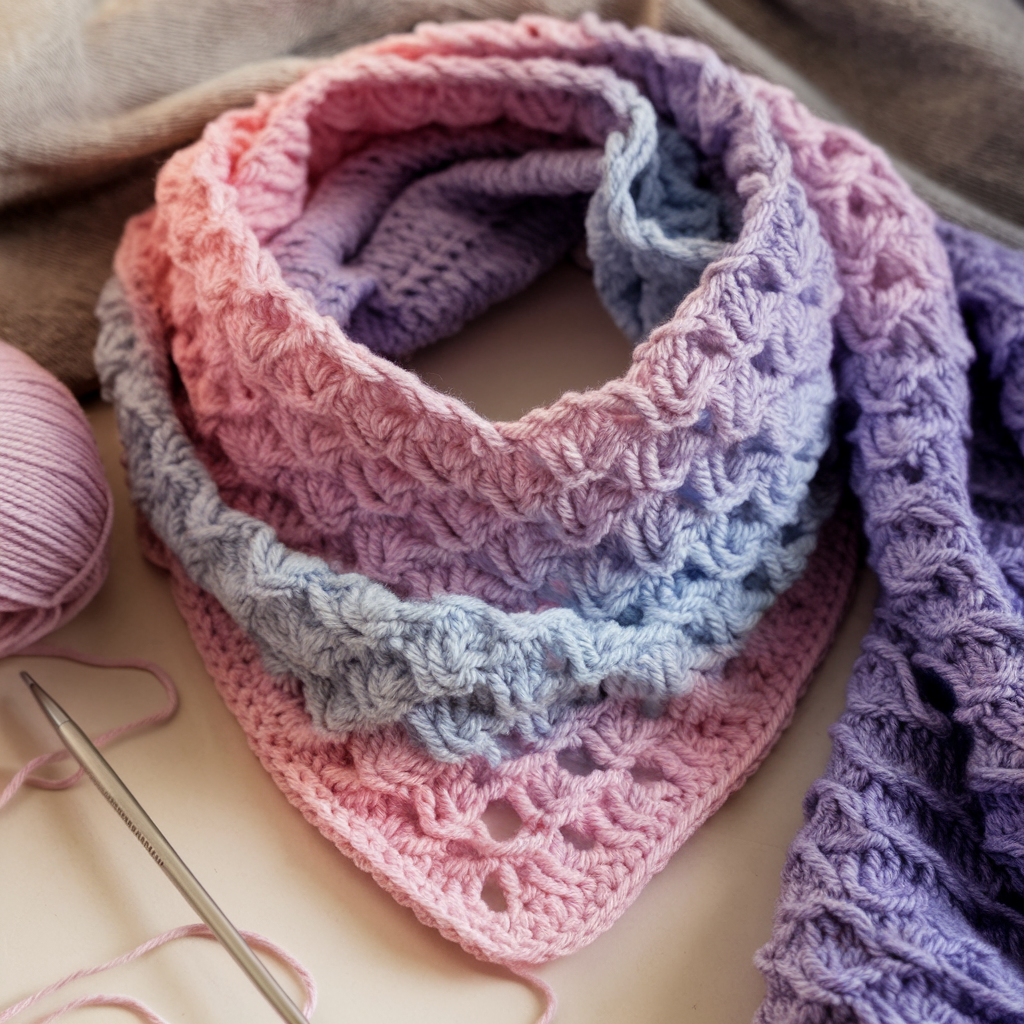
2. Crochet V-Stitch Scarf Pattern
Skill level
Beginner → great for those who know dc and chain stitches
Finished size
Approx 8–10″ wide × 60″–72″ long (20–25 cm × 150–180 cm). Make longer for a wrap.
Materials & gauge
- DK to worsted weight yarn (#3–#4) depending on how lacy or dense you want it
- 4.0–5.5 mm hook
- Gauge: a 10 cm swatch in V-st pattern (dc, ch1, dc) will vary; don’t worry unless you need precise measurements
What is the V-stitch?
A V-stitch is typically (dc, ch1, dc) worked into a space; it opens the fabric to a pretty lacy texture that still has body.
Step-by-step instructions
- Foundation: Chain in multiples of 3 + 2. Example: ch 32 for 30 V-stitches across.
- Row 1: Dc in 4th ch from hook (counts as dc), ch 1, skip 2 ch, (dc, ch 1, dc) in next ch — rep across, ending with dc in last ch. Turn.
- Row 2: Ch 3 (counts as dc), turn, sk next ch-1 space, (dc, ch 1, dc) in next ch-1 space — work V-st into the ch-1 spaces from previous row. End with dc in top of turning ch. Turn.
- Repeat Row 2 until desired length.
- Optional edging: Work a round of sc or crab stitch (reverse sc) to tidy edges.
Finishing
- Block to open the V-stitch lacy pattern.
- Sc border helps weight and shape the scarf.
Tips & troubleshooting
- For an even look, make sure your V-stitches are placed in the chain-1 spaces, not into stitches.
- If the scarf looks too open, use a smaller hook or denser yarn; for more drape, go up a hook size.
Variations
- Make a triangle scarf by increasing each RHS row at one edge.
- Use self-striping yarn to create colorful effects with minimal effort.
Care
- Follow yarn label; block after washing to restore lace.
3. Chunky Crochet Scarf Pattern
Skill level
Beginner → very fast, satisfying to work up
Finished size
Lap/wrap scarf: 8–12″ wide × 60–80″ long (20–30 cm × 150–200 cm). Adjust chain for width.
Materials & gauge
- Super bulky yarn (super bulky #6 or roving) — approx 400–800 yds depending on size
- 10–16 mm hook (or use arm-knitting technique)
- Tapestry needle
- Gauge: with super bulky and large hook, freedom is common — check to match thickness preference
Fabric & look
Chunky scarves give instant coziness and dramatic texture. Single crochet or half double crochet rows are common.
Step-by-step instructions
- Foundation chain: Chain desired width — with bulky yarn, chain 12–20 for an 8–12″ width. Don’t make too many chains; each chain is large.
- Row 1: Hdc across (or dc for looser, sc for denser). Turn.
- Row 2+: Ch 1 (or ch2 for dc), hdc across. Repeat until desired length.
- Alternative stitch for texture: Use front loop only hdc rows alternating with back loop only for ribbing.
Finishing
- Add a chunky fringe, tassels, or a pompom.
- Weave in ends with extra care due to bulk.
Tips & troubleshooting
- Super bulky can be heavy — limit length if you want a light accessory.
- If edges are sloppy, add a round of sc with the same yarn or 1 hook size smaller for a neat edge.
Variations
- Use arm-knitting for an even faster project.
- Work a chevron in chunky for dramatic peaks.
Care
- Many super bulky yarns require hand washing and lay flat to dry. Check label.
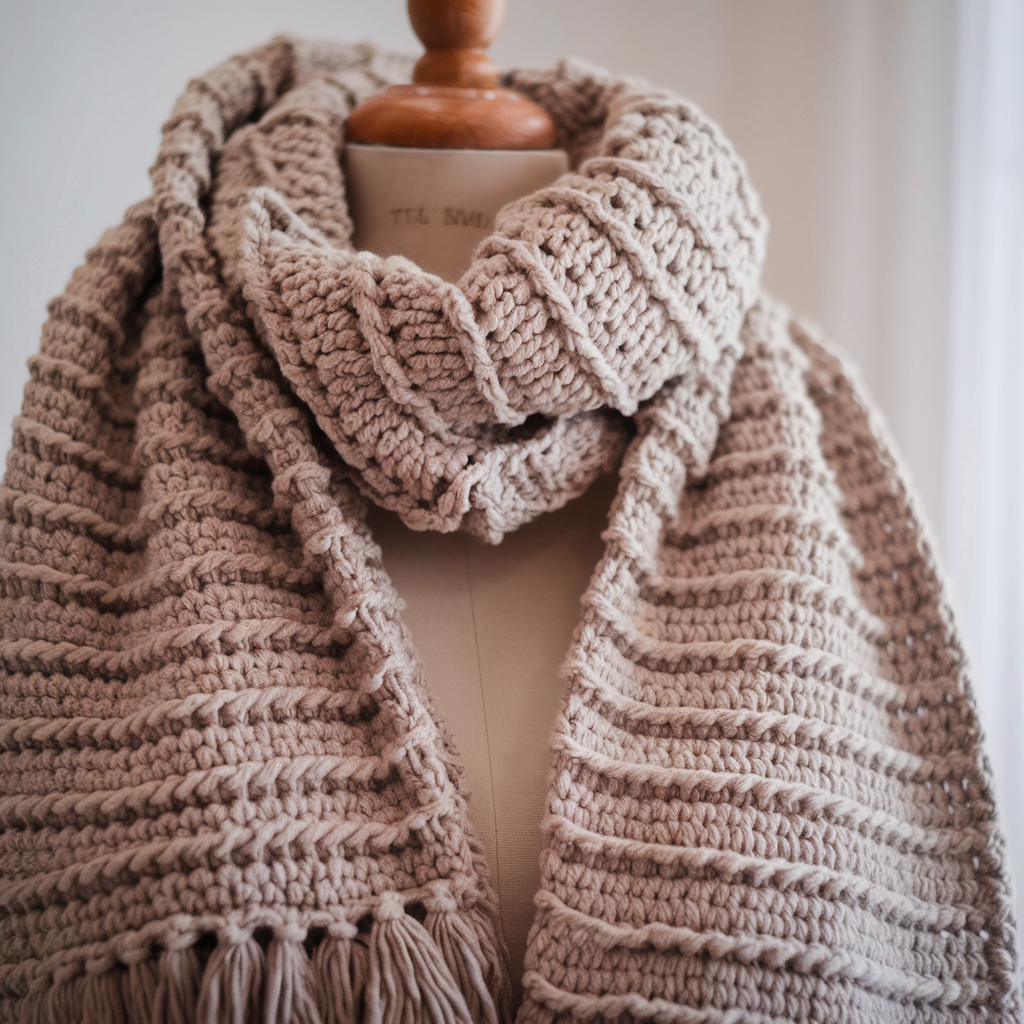
4. Crochet Ribbed Scarf Pattern
Skill level
Beginner → uses easy back-loop/ front-loop techniques
Finished size
8–10″ wide × 60–72″ long (20–25 cm × 150–180 cm). For a chunky rib, use bulky yarn and increase width.
Materials & gauge
- Worsted or bulky yarn depending on depth of rib
- 5.0–8.0 mm hook
- Gauge: rib height depends on stitch and hook; sample to confirm look
What is ribbing in crochet?
Ribbing is usually created by working into the back loops (or front loops) only, producing vertical ridges similar to knit ribbing.
Step-by-step instructions (Back-loop rib)
- Foundation chain: ch 26 (or desired width).
- Row 1: sc in 2nd ch from hook and across. Turn.
- Row 2: ch 1, sc in BLO across. Turn.
- Repeat Row 2 until desired length.
- Optional deeper rib (waffle/rib combo): Alternate rows of BLO sc with rows of front post/back post dc to make chunky ribs.
Finishing
- Add fringe or a simple sc border to stabilize long edges.
- Block lightly perpendicular to ribs if desired.
Tips & troubleshooting
- Blending BLO with post stitches creates a lofty texture — if it flattens, try larger hook.
- Keep tension even; ribs look their best when consistent.
Variations
- Combine knit-look rib using half double crochet in back loop only.
- Use two colors and alternate every few rows for striped rib.
Care
- Machine wash or hand wash as yarn label directs. Lay flat to avoid stretching.
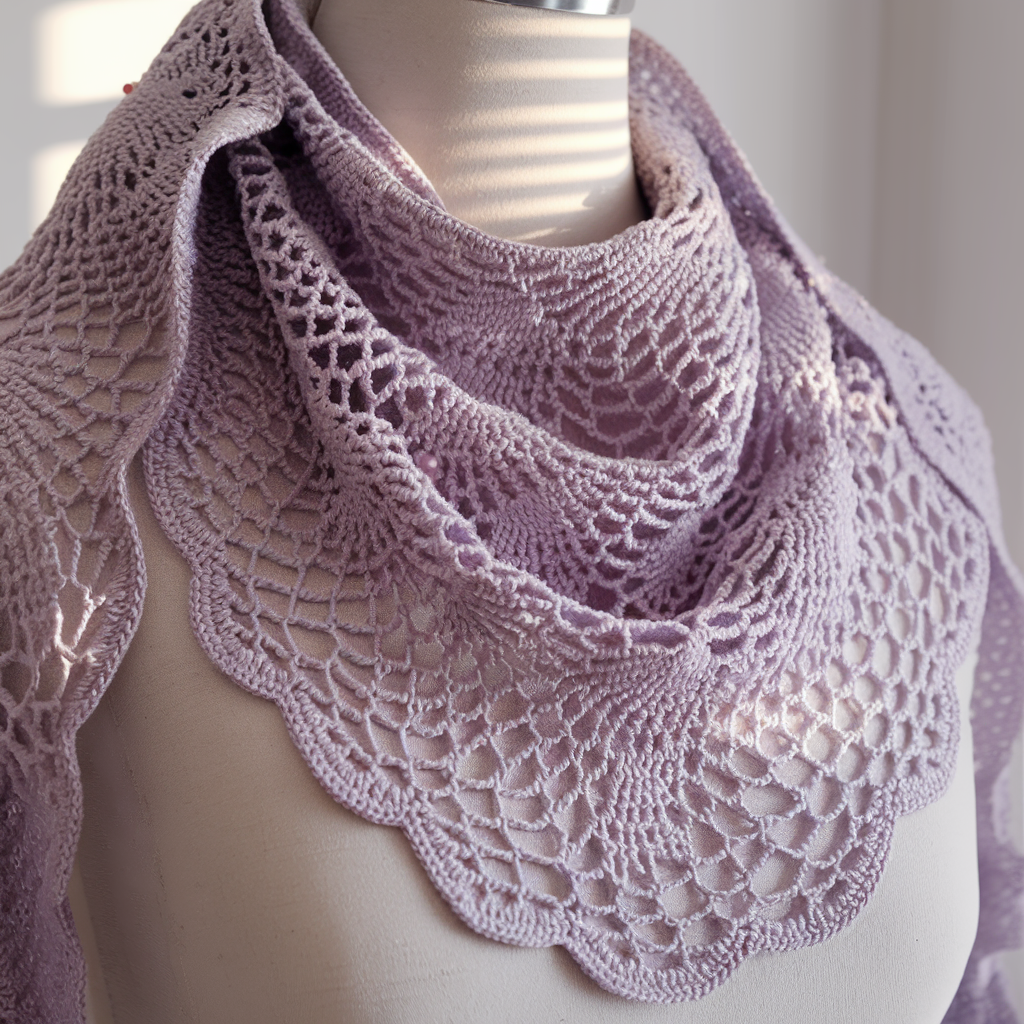
5. Lace Scarf Crochet Pattern
Skill level
Intermediate → requires reading lace repeats and blocking
Finished size
Delicate neck scarf: 6–8″ wide × 60–72″ long; longer for a shawl effect
Materials & gauge
- Fingering or sport weight yarn (bamboo, silk blends, or cotton for drape)
- 3.0–4.5 mm hook
- Blocking wires/pins and surface to block on
- Gauge: important only if you need an exact width
Lace ideas
Lace scarves can be simple mesh or complex shell/sprigs patterns. Below is a versatile shell mesh.
Step-by-step instructions (Shell mesh)
- Foundation chain: multiple of 8 + 5. Example: ch 53 for ~6–8″ width.
- Row 1: Dc in 4th ch from hook and across. (This establishes height)
- Row 2 (shell row): Ch 3, skip 2 ch, (5 dc) in next ch, skip 2, dc in next ch — repeat. Turn.
- Row 3 (anchor row): Ch 3, dc in center of each 5-dc shell to anchor shell. Turn.
- Repeat Rows 2–3 until length achieved.
- Edge: Work a delicate picot or scallop edging.
Finishing
- Wet block: pin edges to open shells and straighten waves. Block is essential for lace clarity.
- Weave in ends carefully on WS.
Tips & troubleshooting
- If lace puckers, pin out wider during blocking.
- Use smooth yarn to show stitch definition; matte yarns highlight texture better than shiny ones.
Variations
- Add beads into shells for sparkle by pre-stringing beads or adding them on the hook.
- Make triangle or crescent shapes with increases/decreases for a shawl.
Care
- Hand wash and block dry for best results. Silk blends often require gentle handling.
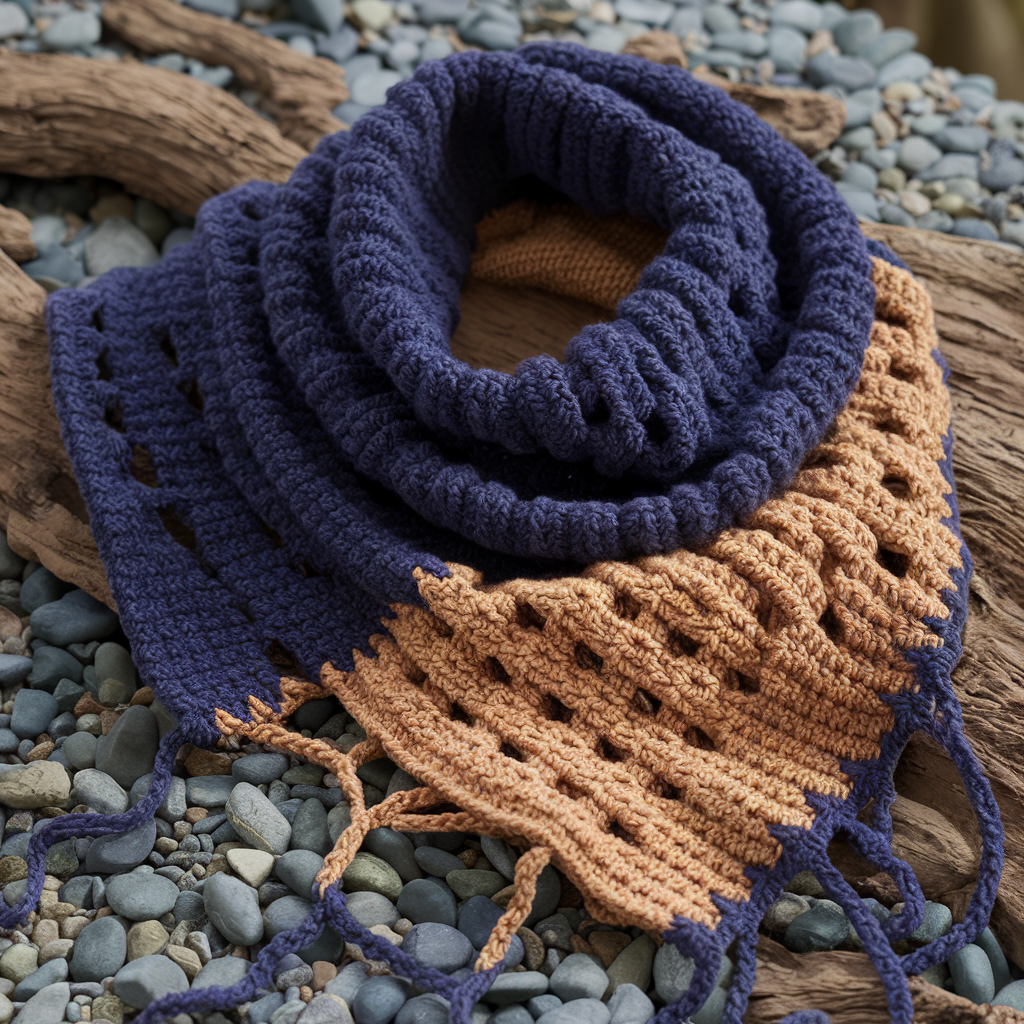
6. Riverbed Scarf Crochet Pattern
Skill level
Intermediate → texture with alternating stitch panels
Finished size
10–12″ wide × 60–80″ long (25–30 cm × 150–200 cm). The pattern often looks best slightly wider.
Materials & gauge
- Worsted weight yarn; two colors recommended for river effect
- 5.0 mm hook
- Gauge: sample to see how the textured ripple falls
What is the riverbed pattern?
The riverbed pattern mimics flowing water with alternating ridged and open panels — often built from post stitches, V-stitches and chains.
Step-by-step instructions (one simple interpretation)
- Foundation: ch 31 (or any multiple for desired width + balance).
- Row 1: dc across foundation.
- Row 2: fpdc around next 2 sts, bpdc around next 4 sts, ch 1, skip 1 — this alternates raised columns and recessed sections. Turn.
- Row 3: dc in back loops across to flatten selected columns and vary the texture.
- Row 4: Switch color (optional) and repeat Row 2 with offset to create the river motion.
- Repeat Rows 2–4 until desired length.
Finishing
- Add a simple border to contain texture — sc round will do.
- Fringe or tassel optional.
Tips & troubleshooting
- Use two complementary colors (a deep blue and a muted sand) to emphasize the river motif.
- If fabric becomes too stiff with post stitches, alternate with plain dc/hdc rows to balance.
Variations
- Work this as a blanket panel as well — riverbed design scales nicely.
- Use textured yarns to emphasize ridges.
Care
- Check labels: acrylic blends are easy care; wool blends need gentle washing.
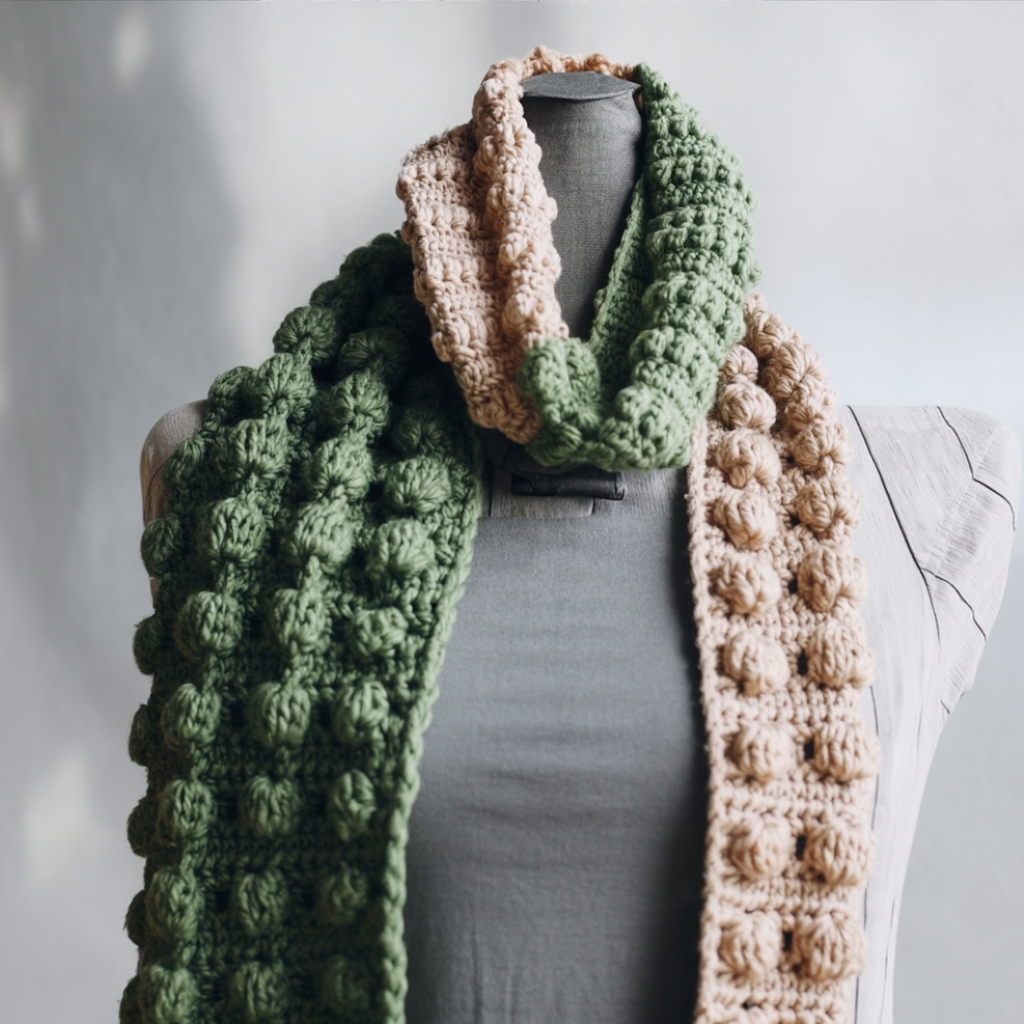
7. Bobble Scarf Crochet Pattern
Skill level
Intermediate → bobble (popcorn/cluster) stitches require technique but are repeatable
Finished size
8–10″ wide × 60–72″ long; bobbles add thickness so narrower widths look fuller.
Materials & gauge
- Worsted weight yarn
- 5.0 mm hook
- Tapestry needle
- Gauge is flexible; bobble height varies with hook and yarn
What is a bobble?
A bobble is a cluster of partial stitches worked into the same stitch and closed together to make a raised “popcorn” nub — great for playful texture.
Step-by-step instructions (sample bobble stripe scarf)
- Foundation: ch 31 (or desired width).
- Row 1: sc across.
- Row 2 (bobble row): ch 1, sc in first st, skip 1, (bobble) in next st, sc in next 2 sts — repeat across.
- Bobble (5-dc bobble): (yo, insert hook in st, pull up loop) five times, then yo and pull through all loops on hook to close, ch 1 to secure.
- Row 3: sc across to stabilize bobbles. Turn.
- Repeat: alternate 1–3 plain sc rows with a bobble row every 4th or 6th row until length achieved.
Finishing
- Block gently by shaping bobbles — don’t press them flat.
- Add a single crochet border if desired (careful around bobbles).
Tips & troubleshooting
- Bobbles can pull in the fabric — balance with flat rows to prevent scarf from shrinking in length or width.
- Work bobbles on a larger hook for puffier look, or a smaller hook for dense nubs.
Variations
- Create a polka dot effect by placing single bobbles spaced across a lacy field.
- Make clustered bobble flowers by grouping bobbles in motifs.
Care
- Turn scarf inside out and machine wash delicate or hand wash. Bobbles recover shape when reshaped while damp.
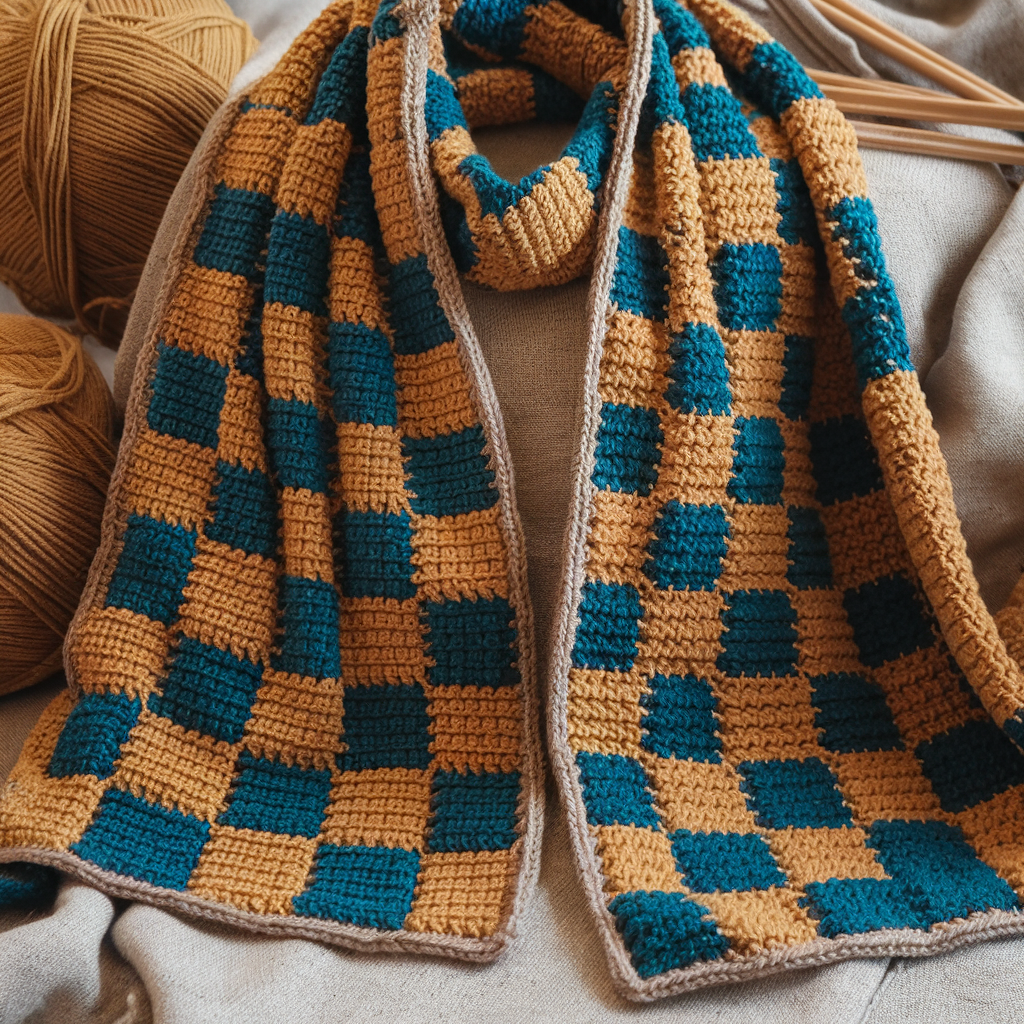
8. Crochet Checkered Style Scarf Pattern
Skill level
Easy–Intermediate → color changes and mosaic/check pattern
Finished size
8–10″ wide × 60–70″ long
Materials & gauge
- Two colors of worsted or DK yarn (Color A & Color B)
- 4.0–5.0 mm hook
- Tapestry needle
- Gauge: ensure square repeat looks balanced (e.g., 6 sts × 6 rows per check block)
What is the checkered style?
A checkered scarf alternates small square blocks of color using simple color change techniques (stripes, mosaic, or tapestry crochet). Below is a simple stranded/striped block method (carrying yarn along the side).
Step-by-step instructions (simple block stripes)
- Foundation: ch 31 for a narrow scarf (adjust multiple for width).
- Row 1: With Color A, sc across.
- Rows 2–6 (block height): Continue sc in Color A for 5 rows (or 6 for square).
- Change color: On the last yarn-over of the last sc, change to Color B, and sc for same block width (5 rows).
- Alternate blocks: Work 5 rows Color A, then 5 rows Color B across the length, but shift every alternate block by half the block width to create a checkerboard stagger.
- Carrying yarn: Carry unused color along the edge (crochet over it) to avoid long floats — or cut and weave in ends if you prefer no carry.
Finishing
- Work one round of sc in a neutral color to unify the edges. Weave in ends.
Tips & troubleshooting
- For neat edges when carrying yarn, trap yarn inside the last loop of stitch at the side so no long floats show.
- To avoid tension problems with stranded color, practice carrying loosely.
Variations
- Use a mosaic crochet chart for sharper geometric checks with fewer floats.
- Make a wide statement scarf with bigger check blocks in bulky yarn.
Care
- For colorfastness, wash new colorwork separately the first few times. Machine wash gentle for acrylic/cotton blends, hand wash for wool.
Conclusion
These eight scarf projects cover a wide spectrum — tactile moss stitch for everyday warmth, lacy V-stitch and shellwork for lighter seasons, chunky wraps for instant cosiness, and playful textures like bobbles and riverbed lines for visual interest. Use the same pattern to practice different yarns, or choose one pattern and make multiple scarves in different fibers to see how the stitch behaves.