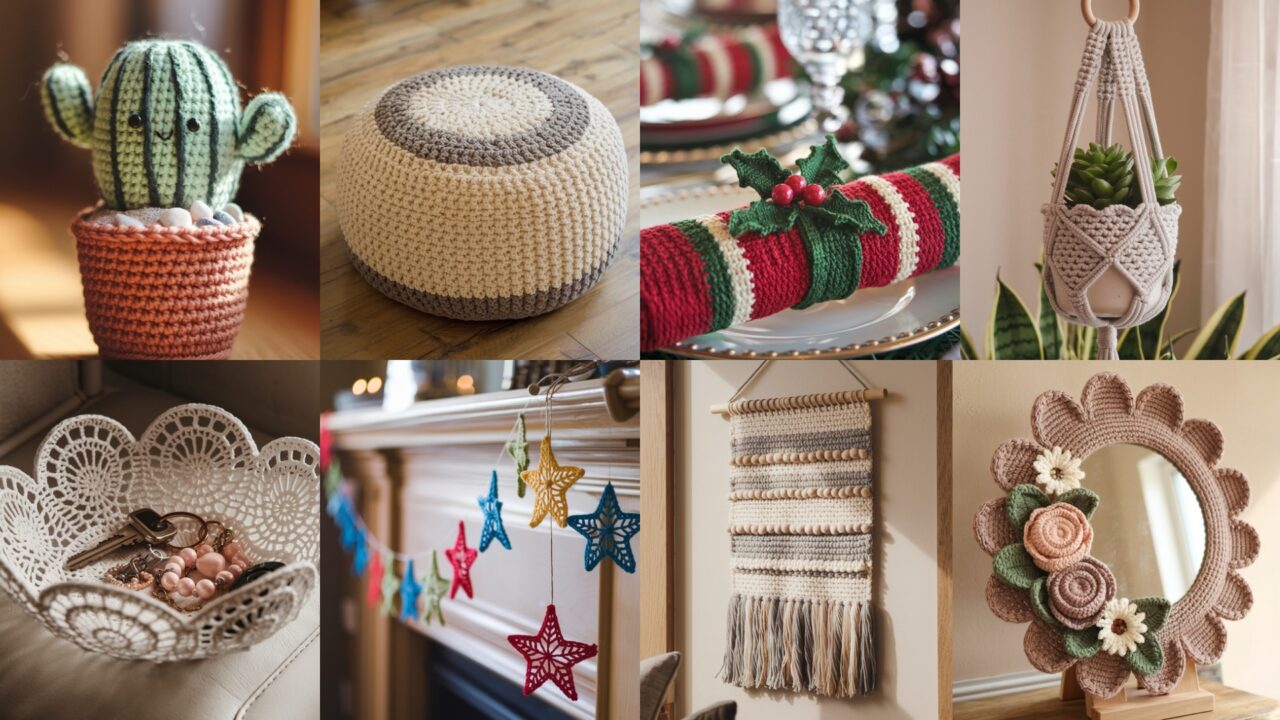
Home décor isn’t about brand-name candles or pretending drapes were always in style. It’s about texture, scale, and the tiny structural choices that keep things from collapsing the first time you sit on them. These eight projects give you authentic, useful home pieces — a pouf that actually bears weight, napkin rings your guests won’t lose inside their pockets, functional planters that don’t leak, and small accents that survive kids, pets, and climate-induced existential dread.
For each project I give: materials, exact math for sizing (do the multiplication!), step-by-step construction, finishing tips, and practical variations.
Universal quick notes before you start (seriously—read this)
- Abbreviations (US): ch, sc, hdc, dc, tr, sl st, MR (magic ring), st(s) = stitches, BLO/FLO = back/front loop only, inc = 2 sc in same st, dec = sc2tog.
- Yarn & hooks baseline: Most projects use worsted cotton or cotton blend for structure and washability and hooks 4.0–6.5 mm. Where softness matters (pouf cover), you can use bulky; where rigidity matters (bowl, planter), use tightly woven cotton. I’ll note yarn weight and yardage per pattern.
- Swatch rule (do it): Make a 4″ square in the stitch you’ll use, block it if you intend to block. Count stitches across 4″ and rows across 4″ and compute stitches-per-inch and rows-per-inch. Use that number to scale widths/heights. If you skip it — you will frog later.
- Stuffing & linings: For pouf and baskets use upholstery foam or polyfill + inner liner bag. For planters use planted plastic pot placed into crocheted sleeve — do not put soil directly into the crochet (rot, leaking). I’ll show how.
- Finishing: Weave ends well, add internal fabric liner where friction or moisture happens, reinforce handles with webbing or folded fabric, and test with weight before gifting.
1. Crochet Foolproof Pouf Pattern

A real pouf you can sit on, not a sad knitted ottoman that collapses under hope.
Skill level: Confident Beginner → Intermediate
Materials: bulky yarn (or hold 2 worsted together) about 600–1000 yds depending on size; 8.0 mm (L) hook for bulky or 6.5 mm for held-double worsted; tapestry needle; upholstery foam (1 dense inner foam cylinder or foam snippets), heavy-duty cotton fabric for inner liner (approx 1–2 yds), sewing machine or needle & heavy thread. Approx finished sample: 18–20″ diameter pouf.
Why this method: a double-layer system — a sturdy sewn inner liner that carries weight + a decorative crochet outer cover — is essential. The crochet cover is removable and washable; the inner liner holds the foam and takes the abuse.
Gauge & sizing (example)
Swatch: if 4″ = 8 sc in bulky yarn → 2 sc/in. For a 20″ diameter pouf you need circumference ≈ π × D = 3.14 × 20 ≈ 62.8″ circumferential stitches. Stitches around = 62.8 × 2 = ~126 stitches. Because we’ll work top→decrease→body→increase→decrease to shape, use these numbers to stop increases.
Step-by-step
A. Make the inner liner (non-negotiable)
- Cut fabric: a circle for top, a circle for bottom, and a side rectangle. Circle diameter = desired pouf diameter + 1″ seam allowance. Rectangle size = circumference + 1″ × depth you want (for an 18″ diameter and 8″ tall pouf: rectangle width = π*18 ≈ 56.5″ + 1″ ≈ 57.5″; height = 8″ + seam allowance).
- Sew cylinder: Fold rectangle into a tube and sew long edge. Hem circle edges, pin to tube, and sew bottom and top in with reinforced stitch. Leave a zipper or large opening to insert foam. Use interior seams flat and strong.
B. Make foam insert
- Use an upholstery foam round (easier) or cut leftover sofa foam into chunks and shove it in for more squish. For furniture-grade seating, buy a dense foam round; for casual use, polyfill or batt works. Insert foam into liner and zip closed.
C. Crochet outer cover — worked top-down circle + body
Top (crown) — magic circle increases to reach top size
- MR, ch1, 6 sc in MR — R1 = 6.
- R2: inc in each st → 12.
- R3: sc1, inc ×6 → 18.
- Continue increasing by +6 each round until you reach HALF the targeted top diameter in stitches. For example, if you plan top radius to equal half of final diameter (approx), stop increases when your round stitch count equals ~half the circumference needed. Practically: for 126 stitches around, you’ll want to stop increases around 63 stitches (after flattening round). You’ll likely stop increases when you reach ~63 sts — check flatness. This math depends on actual stitch density; measure across.
Body rounds
5. Work even rounds sc around until the round count brings you to the pouf side height (measure against the liner). For a side height of 8″, use rows-per-inch from swatch to compute rounds needed.
Under (bottom)
6. For shape you may mirror decreases in the opposite direction or simply have an open skirt to pull over. Many poufs are made by seaming a large crocheted tube; but the easiest removable cover method: crochet a top and a matching bottom circle in same number of rounds as top; then make a hip (band) or a long rectangle to stitch between top and bottom to make a cover that slips over the liner like a pillowcase.
Joining
7. Make a long band the height equal to pouf side and length equal to circumference; seam it to top and bottom crochet pieces. Add a hidden zipper if you want the cover removable with ease (optional but smart).
D. Finishing
- Weave in ends, block lightly. Put the crochet cover over the foam liner and adjust. For extra hold, add internal ties sewn to liner and crocheted loops inside cover to prevent slipping.
Variations & tips
- For boho look use chunky roving yarn; for durable urban use hold two worsted cottons together.
- If you want the pouf to collapse more, use softer foam or batt; for seating use high-density foam.
- If you’re going to sit on it daily, reinforce seams and use upholstery thread.
2. Crochet Christmas Napkin Ring Pattern

Tiny fast wins: make a set, gift them, or pretend you made them for Pinterest without stressing.
Skill level: Beginner
Materials: sport or DK yarn, 3.5–4.5 mm hook, small buttons or beads for accents (bells, holly berries), tapestry needle. One ring = ~10–15 yds. Finished inner circumference should be ~3.5–4″ for folded napkin; adjust.
Approach & sizing
Measure the rolled napkin circumference (or test with your napkin). If rolled napkin circumference is 3.5″, make inner ring slightly smaller for snug fit (3.25″). Compute stitches: if your swatch shows 4 sts/in, then 3.25″ × 4 sts/in = 13 stitches.
Pattern — basic ring (ribbed)
- Chain foundation: ch 14 (allows 13 sc). Join to a loop (careful not to twist) with sl st. Marker = beginning.
- Round 1: ch1, sc in each ch around (13 sc). Join.
- Rounds 2–6: ch1, hdc in BLO around to make ribbed look (gives stretch). Repeat until band height ≈ 1″ (4–5 rounds).
- Decorative top (optional): you can crochet a tiny holly applique: ch6, sc across to make small leaf shapes or a tiny star. Sew on and add 2–3 red seed beads for berries. For a bow: ch 12, sc across, pull center tight wrapping a short yarn piece.
Finishing
- Sew trim securely. Weave ends. Make 6–8 sets for table of 6 or twenty as gifts.
Variations
- Make seasonal sets: metallic yarn for NYE, muted tan and olive for thanksgiving.
- Use felt backing for bead attachments to prevent snagging.
3. Crochet Doily Bowl Pattern

Lacy bowl that keeps keys, jewelry, remote — beautiful and useful. Use cotton for crisp shape.
Skill level: Confident Beginner → Intermediate
Materials: crochet cotton thread size 10 for small bowly doily or worsted cotton for more sculptural bowl; 3.0–4.5 mm hook; starch or fabric stiffener if you want a rigid bowl.
Why this method
You’ll crochet a flat doily and then shape it over a bowl with spray starch or diluted PVA to create a permanent bowl. If you want a soft basket instead, work in denser stitches or add a stiff base.
Step-by-step (doily → bowl)
A. Make the doily
- Use a typical lacy doily pattern (shells, picots, fans). Example starter: MR, ch3, 12 dc in ring, join. Then 2nd round fans: ch3, 5 dc in next st, ch3, sl st etc. Work until diameter ~10–12″ for medium bowl.
B. Stiffening & shaping
2. Prepare your shaping mold (an existing glass bowl or plastic bowl that’s the size you want).
3. Mix a stiffening solution: liquid starch or equal parts PVA glue + water (thin). Place doily over inverted bowl and pin edges with rustproof pins. Spray or brush solution evenly. Let dry completely (24 hours). Remove and you have a stiff bowl. For a softer, drapier bowl, use less solution.
C. Alternative soft bowl
4. If you prefer flexible bowls, work in worsted cotton using denser stitches (sc rounds) and a base: MR → increase to diameter ~6–8″, then work straight up in sc rounds for 4–6″. Add a round of sc in BLO for a firm rim. This yields a functional catch-all.
Finishing
- If using stiffening, you can paint the dry bowl or coat with a clear varnish for durability. For food use, line with cloth first; do not assume starched doily safe for direct food contact.
4. Crochet Star Garland Pattern

Fast, festive, and cheerful — make one length for a mantel or multiple for a year-round twinkle.
Skill level: Beginner
Materials: cotton or acrylic worsted, 4.0–5.0 mm hook, yarn needle, thin twine or ribbon for stringing, optional beads. Each star uses ~5–10 yds.
Star motif (small 5-point)
- MR, ch3, sl st into ring × 5 to make 5 loops. Tighten.
- Into each loop work: sc, hdc, dc, hdc, sc — shape a point. Fasten off, leave tail for sewing. Make 12–20 stars.
Assembly
- Block stars if needed to flatten points.
- String on twine with needle: either sew stars onto twine at intervals (2–4″ apart) or make tiny loops on back of each star and thread twine through loops. Add beads between stars for weight.
- For stability outdoors, use weatherproof yarn and UV-resistant twine.
Variations
- Make jumbo stars for a statement piece: use larger hooks and thicker yarn.
- Make color gradients for an ombré garland.
5. Crochet Textured Wall Hanging Pattern

Tactile, modern, and large enough to not get lost on a wall. Texture comes from front-post stitches, bobbles, and fringe.
Skill level: Intermediate
Materials: worsted cotton ~400–700 yds depending on size, 5.5–6.5 mm hook, wooden dowel 20–30″ (or branch), tapestry needle. Finished sample: 20″ wide × 30″ long including fringe.
Construction idea
Work a rectangular panel using a repeat of textured stitches (waffle stitch + bobble rows + surface crochet lines) and mount on dowel with top sleeve or loops.
Sample panel pattern (waffle + bobble bands)
- Foundation: Decide width 20″. If swatch = 4 sts/in then stitches = 20 × 4 = 80 sts; ch 81.
- Row 1: sc across.
- Row 2: waffle row: fpdc around next st, hdc in next two repeat across.
- Row 3: sc across to anchor. Repeat waffle section 6 times.
- Row X: bobble row: across do sc 3, bobble in next st to create dotted texture; anchor with sc row. Alternate bands of waffle and bobble for interest. Add a vertical surface crochet line in contrasting color by using a long running chain sewn on top after panel is completed to create geometric lines.
Edge finishing & hanging
- Add a top sleeve by folding panel over dowel 1.25″ and slip-stitching to back or sew a separate strip as a pocket. Insert dowel and hang with cord.
- Add fringe: bundle lengths doubled and lark’s head along bottom; trim fringe to even or stagger for tiered look.
Variations & tips
- Use mixed fibers: mix natural cotton and a slubby boucle for contrast.
- Add a small pocket on front or leather tabs for an industrial touch.
6. Crochet Faux Hanging Planter Pattern

Looks like the real macramé deal, but washable and less knot-tying. Includes an inner pot guide — never put soil on yarn.
Skill level: Confident Beginner
Materials: sturdy cotton rope or macramé cord (approx 3–5 mm) about 100–200 yds depending on length; 6.0–8.0 mm hook if you crochet a sleeve; small plastic planting pot that fits inside; wooden ring for hanger. Finished sample holds a 6″ nursery pot.
Two methods: (A) Crocheted sleeve (elastic, neat) or (B) macramé-style knotted hanger (textural). I’ll give both.
A — Crocheted sleeve (simple)
- Make pot measurement: measure pot height and max diameter. For a 6″ pot, measure circumference = π×D ≈ 3.14×6 ≈ 18.8″. If cord gauge yields 2.5 sts/in, stitches needed ≈ 18.8 × 2.5 ≈ 47 → ch 48.
- Work in rounds: join ch into loop, work sc in each st around until tube height equals pot height + allowance (e.g., 8″ tall for snug hold). At top, work decorative scallop or loop row for hanger.
- Bottom: either leave pot flat bottom exposed or crochet a circular base by MR and increasing to same diameter, then seam tube to base.
- Hanging loop: make three evenly spaced loops on top edge by leaving long chains and attaching them to a wooden ring or gather them and knot. Insert plastic pot inside, then plant.
B — Macramé-style knotted hanger (handy and trendy)
- Cut 8 cords length = desired drop × 2 + pot height + 10″ extra. For a 12″ drop and 6″ pot: 12×2 + 6 +10 = 40″ cord length each.
- Knot groups of 4 by simple square knot sequences and create netting: start with a gathered top at wooden ring, then do alternating square knots and half-hitches until you have netting that matches pot diameter. Finish by binding knot under pot.
Caution: Always place plastic nursery pot or a saucer inside the hanger to catch water. For drip watering: keep planter inside pot, not suspended in yarn.
Variations
- Crochet sleeve with openwork stitches for an airy look; use plant-friendly materials (cotton).
- Use colored rope for a modern pop.
7. Crochet Flower Mirror Frame Pattern

A framed mirror with a floral crocheted wreath around the edge — perfect for entryways or bedrooms; light, removable, and elegant.
Skill level: Intermediate
Materials: worsted cotton or DK, 4.0–5.0 mm hook, small round mirror (glass or acrylic) with an existing backing, hot glue gun, felt backing, floral wire (optional). Wreath diameter depends on mirror size; sample for 10″ mirror uses about 150–250 yds.
Approach
Make a scalloped band that fits around mirror edge, attach clusters of crochet flowers to that band, and glue to mirror backing. Use felt to hide glue and secure loosely so you can remove for washing.
Step-by-step
A. Measure mirror circumference
- Measure mirror edge circumference or approximate: circumference = π × D.
B. Make scalloped band
- Chain enough stitches so the band comfortably wraps around the mirror (snug but not stretched). Example: if mirror circumference 31″ and swatch = 4 sts/in → 31 × 4 = 124 stitches → ch 125.
- Work a base of sc rounds to make a strap 1/2–1″ wide. Add a final scallop row: (skip 2, 7 dc in next st, skip 2, sl st) around to form shells.
C. Make crochet flowers & leaves
- Make 8–12 small flowers: MR, ch3, 8 dc in MR etc. Or petal templates: make layered roses or daisies as earlier.
- Make leaves: ch6, sc, hdc, dc, hdc, sc; sl st to base.
D. Assembly
- Pin band to mirror and place flowers where you like; hot glue each flower to band and to felt-covered backing for clean finish. Use floral wire behind heavy motifs for extra hold if needed.
- Attach hanging hardware to mirror backing per mirror instructions and hide with felt.
Variations & tips
- Use tiny beads for centers.
- For a permanent frame, sew pieces to a sturdy backing board and then glue mirror; keep caution with glass gluing.
8. Crochet Cactus Plant Pattern

Zero watering, maximum smugness. Small amigurumi cactus in a crocheted pot — great as shelf decor or group in a windowsill.
Skill level: Confident Beginner (amigurumi basics)
Materials: sport/DK yarn in green (cactus), terracotta color (pot), 3.5–4.5 mm hook, polyfill, small plastic pot for inner form optional, stitch marker. Finished sample: 3–5″ tall cactus.
Body (column cactus)
- MR: 6 sc in MR (R1 = 6). R2: inc in each st → 12. R3: (sc1, inc) ×6 → 18. R4–R12: sc around until height ~3–4″. R13: dec around to close slightly if stuffing. Stuff with polyfill. Close top with decs and fasten off.
Arms or ribs (optional)
- For arms: make a small cylinder attached to side by sewing. For ribs: use surface slip-stitch lines in darker green to suggest vertical ribs.
Pot
- Make base circle: MR, ch1, 6 sc in MR, join. R2: inc around → 12. Continue increasing until circle equals pot base diameter (e.g., 2.5″). Then work straight up in sc for pot height (2–3″). Stuff inside or insert a small plastic pot for realism and weight. For heavier base, fill bottom with pebbles inside a small plastic cup before fitting in crochet pot.
Assembly
- Sew cactus to pot base securely. If you used inner plastic pot, place cactus in pot and glue or stitch as needed. Add faux sand (glue small pebbles or felt) on top.
Variations & care
- Make different cactus shapes: round barrel, tall column, or prickly pear pads. Use embroidery floss for spines or small tufted loops for flowers. Dust occasionally.
Conclusion
There: eight decorative projects that actually serve a function, not just look pretty on an Instagram grid. The difference between “cute clutter” and “useful decor” is a lining, a reinforced seam, and the right material choice. Swatch first, measure, pick the correct yarn for the job (cotton for durability, bulky for poufs, macramé cord for planters), and do the internal liner on anything that will hold weight or moisture.