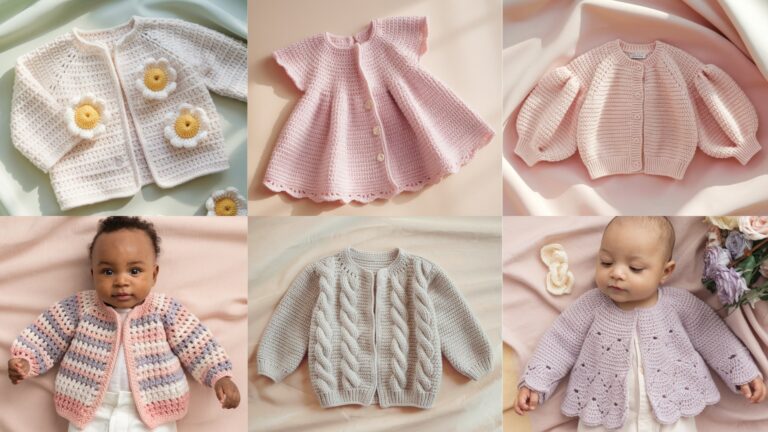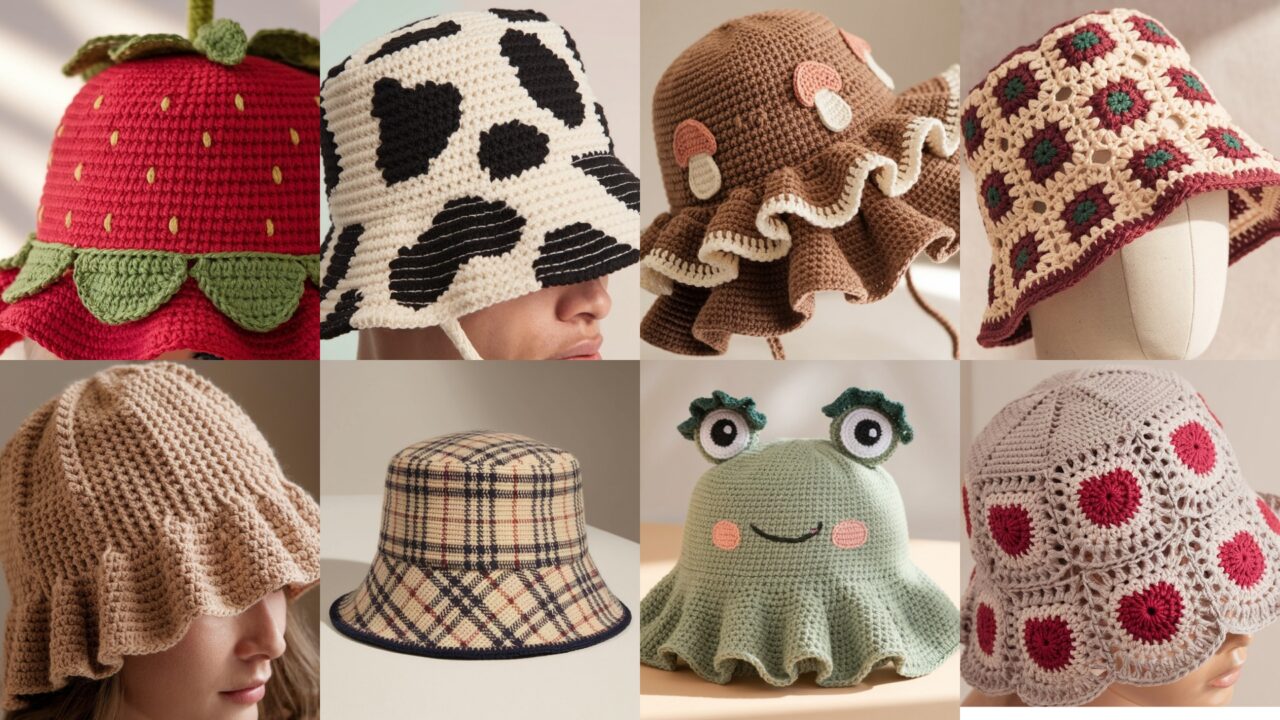
Bucket hats are back, but this time they’re smarter: the shape is flattering, the brim protects your face, and the silhouette is perfect for mixing with chunky knits or summer linen. Crochet makes the form playful — granny squares, ruffles, appliqués, and colorwork all translate beautifully. Below are eight eye-catching bucket-hat patterns that cover a range of skills (beginner → confident intermediate) and aesthetics (cute, retro, bold, subtle).
Before you dive into individual patterns, read the short construction primer so you won’t end up with a hat that fits your cat instead of your head.
Quick primer — how a crochet bucket hat is built (so you can adjust anything)
Most bucket hats follow the same three-part structure:
- Crown — the top circular or slightly oval section that sits on the top of your head. Usually worked in rounds from the center outward (magic ring or small chain-loop) with evenly spaced increases.
- Side (crown wall) — the vertical band that determines hat height. Worked in straight rounds with no (or minimal) increases to maintain the diameter. You can adjust height to be slouchy or snug.
- Brim — flared, structured area that gives the bucket shape. Built with a few increase rounds to create flare, then straight rounds for width. Add stiffening techniques or tighter gauge for a stiffer brim.
Basic sizing reference (adult):
- Head circumference: 55–58 cm (21.5–23 in) typical.
- Crown diameter for adult medium: ~20–21 cm (8–8.25 in).
- Side height: 8–10 cm (3–4 in) depending on how deep you want it.
- Brim width: 5–7 cm (2–2.75 in) standard; wider for sun hats.
General tips:
- Measure as you go. Use a soft tape measure around your head where the hat will sit; adjust rounds accordingly.
- Gauge matters for fit and brim behavior. If your stitches are loose, the brim may flop. Use a smaller hook for the brim if you want structure.
- Stitch choices: sc = tighter/firm; hdc = moderate; dc = softer/looser. Mix for texture/structure.
- Blocking & interfacing: wet blocking can shape the brim; you can add a light interfacing or sew in woven hat-band to stiffen. For sun protection, adding a thin cotton lining helps.
Abbreviations (US): ch (chain), sl st (slip stitch), sc (single crochet), hdc (half double crochet), dc (double crochet), tr (treble), inc (2 sc in same st), dec (sc2tog), st(s) (stitch(es)), BLO (back loop only), FLO (front loop only), rep (repeat), RS/Ws (right side/wrong side).
Now the patterns.
1. Crochet Cherry Granny Square Bucket Hat Pattern
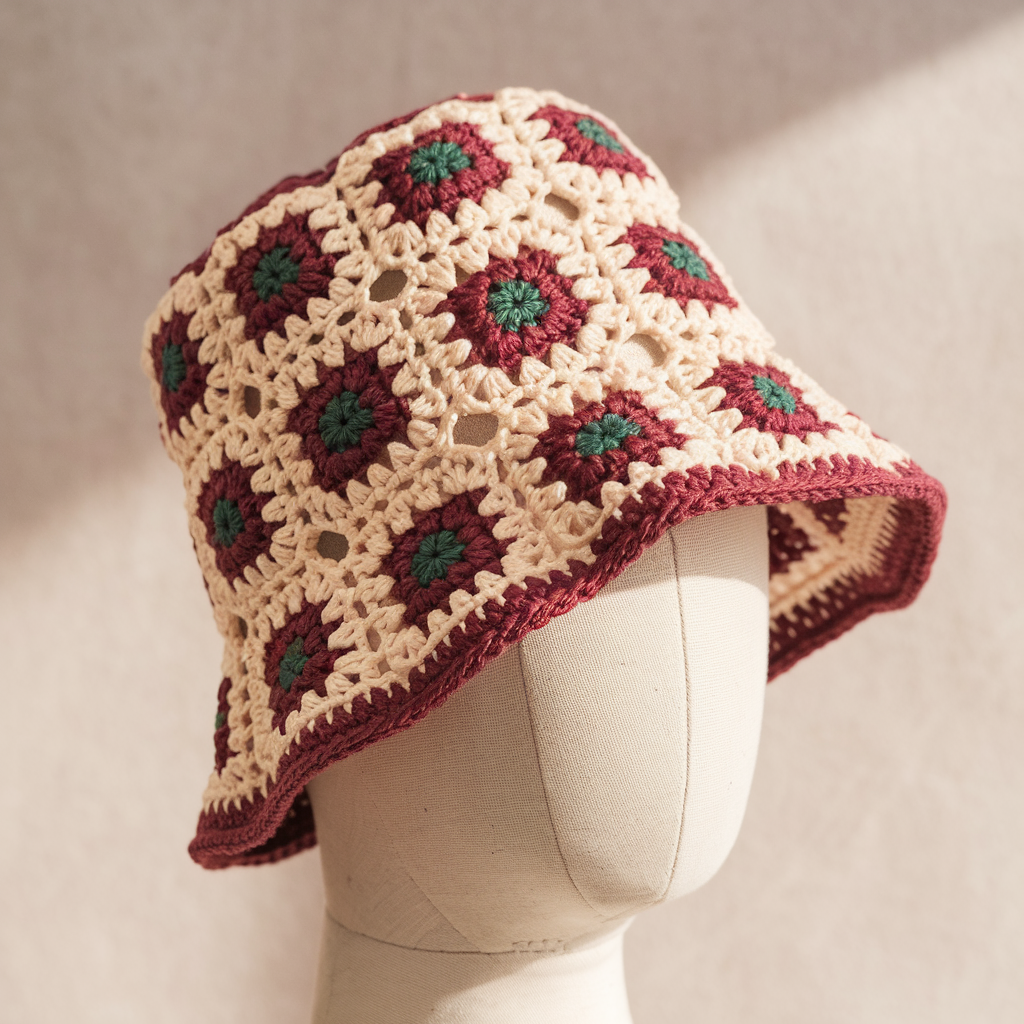
Romantic, retro granny squares meet a bucket silhouette topped with little cherry appliqués. Works great in cotton or acrylic blends.
Skill level: Intermediate (granny squares + joining + shaping)
Materials
- DK / worsted cotton or acrylic (contrast coffee and green for cherries + main color)
- 3.5–4.5 mm hook (use smaller for tighter brim)
- Yarn needle, stitch marker, scissors
- Optional internal stiffening (1/4″ interfacing or hat wire)
Finished size: medium head (adjust using primer guidelines)
Construction overview
Make granny squares for crown and sides, join in a circle, add brim rounds, sew small cherry appliqués on top.
Granny square (classic small — make 7–9)
- Ch4, sl st to form ring. (or magic ring)
- R1: ch3 (counts as dc), 2 dc into ring, ch2, 3 dc into ring, ch2 rep 3 times, join to top of ch3. (4 clusters)
- R2: Sl st into next ch-2 space, ch3, 2 dc, ch2, 3 dc in same space (corner made). ch1, (3 dc, ch2, 3 dc) in next corner repeat around. Join.
- Optional R3: repeat corner increases with ch1 spaces for a slightly larger square. Aim size so 7–9 squares form the crown & wall when joined (arrange 3–4 around crown + a band for sides).
- Make total squares: crown = 1–3 small squares joined in a circular flower arrangement; side band = enough granny squares to encircle head at desired height (approx 9–12 small squares depending on size).
Joining
- Lay squares in ring order and join with whip stitch or join-as-you-go (JAYG) slip-stitch method. Make seam neat on inside.
- After joining the side band to the crown, work a round of sc around the inside join to firm the seam.
Sides (if you prefer one-piece)
- Instead of many granny squares, you can make a large circular granny (increase rounds) for the crown then switch to joined granny stitch rows for sides — same look, fewer seams.
Brim
- R1 (attach to bottom of side band): sc evenly around the lower edge to create base row (BLO works for a ridged look).
- R2: ch1, sc around for 2 rounds.
- R3 (flare): ch2 (counts as hdc), hdc in next 2 sts, inc in next repeat around to create slight flair.
- R4–R6: sc or hdc around (no increases) for desired width. Use smaller hook for these rounds if you want a stiffer brim. For more flare add one more increase round.
- Finish with 1–2 rounds of slip stitches to tidy edge.
Cherry appliqué (make several)
- R1 (cherry): magic ring, 6 sc into ring, sl st, join.
- R2: inc in each st around to 12 sc; sl st and fasten off.
- Stem/leaf: with green, ch6, sc back across (or chain 6 and sl st to base for a tiny stem), add 2 tiny ch3 leaves sewn at base.
- Sew cherries to top or side of hat in pairs or clusters.
Finishing
- Weave in ends. Block gently. If brim is floppy, sew a thin interfacing between inner brim rows or insert a soft hat wire.
Styling
- Use variegated yarn for granny squares for a vintage summer vibe. Pair with simple tee and sandals.
2. Crochet Strawberry Inspired Ruffles Bucket Hat Pattern

Cute, sculpted ruffles evoking strawberry edges — sweet and playful.
Skill level: Confident beginner (working ruffles & color changes)
Materials
- Sport or DK yarn in red (main), green for leaf trim, and optional seeds color (yellow)
- 4.0 mm hook for body, 3.5 mm for tighter brim/ruffles
- Yarn needle, stitch marker
Construction overview
Work crown in spirals, build side, and add a layered ruffle brim plus a leafed band.
Crown & side
- Magic ring. R1: ch2, 12 hdc in ring; join. (12 hdc)
- R2: ch2, hdc inc in each st around = 24 hdc; join.
- R3: ch2, hdc in next 2, inc around = 32 hdc; adjust until crown diameter ~20 cm.
- Side: work even hdc (no increases) for 8–10 rounds to desired height.
Strawberry “seeds”
- Use surface embroidery with small yellow French knots or tuk (small sl st clusters) randomly spaced on the body. Add after side completed.
Ruffled brim (two layers)
- Brim base: attach yarn to bottom edge, ch1, sc around 2 rounds for a tidy edge.
- Ruffle layer 1: switch to 3.5 mm hook, 2 dc in next st repeat around for gentle ruffle, join.
- Ruffle layer 2 (top ruffle): on next round, 3 dc in next st repeat — more volume. Offset this round from previous to make scallops show. Fasten off and weave ends.
Leaf trim (band)
- With green, ch long enough to wrap base of crown (measure). Sew to base and then create little leaf clusters: ch4, sc in 2nd ch from hook, sc next, sl st to base repeat along band.
- Sew band to hat just above brim.
Finishing
- Block ruffles lightly by pinning them to shape; steam or wet block and allow to dry.
- Weave in ends, maybe tack a couple of ruffle points to the brim edge if wind makes them flap.
Styling
- Great with summer dresses and playful kids’ outfits. Use sport cotton for softer, lighter ruffles.
3. Crochet Cow Print Bucket Hat Pattern
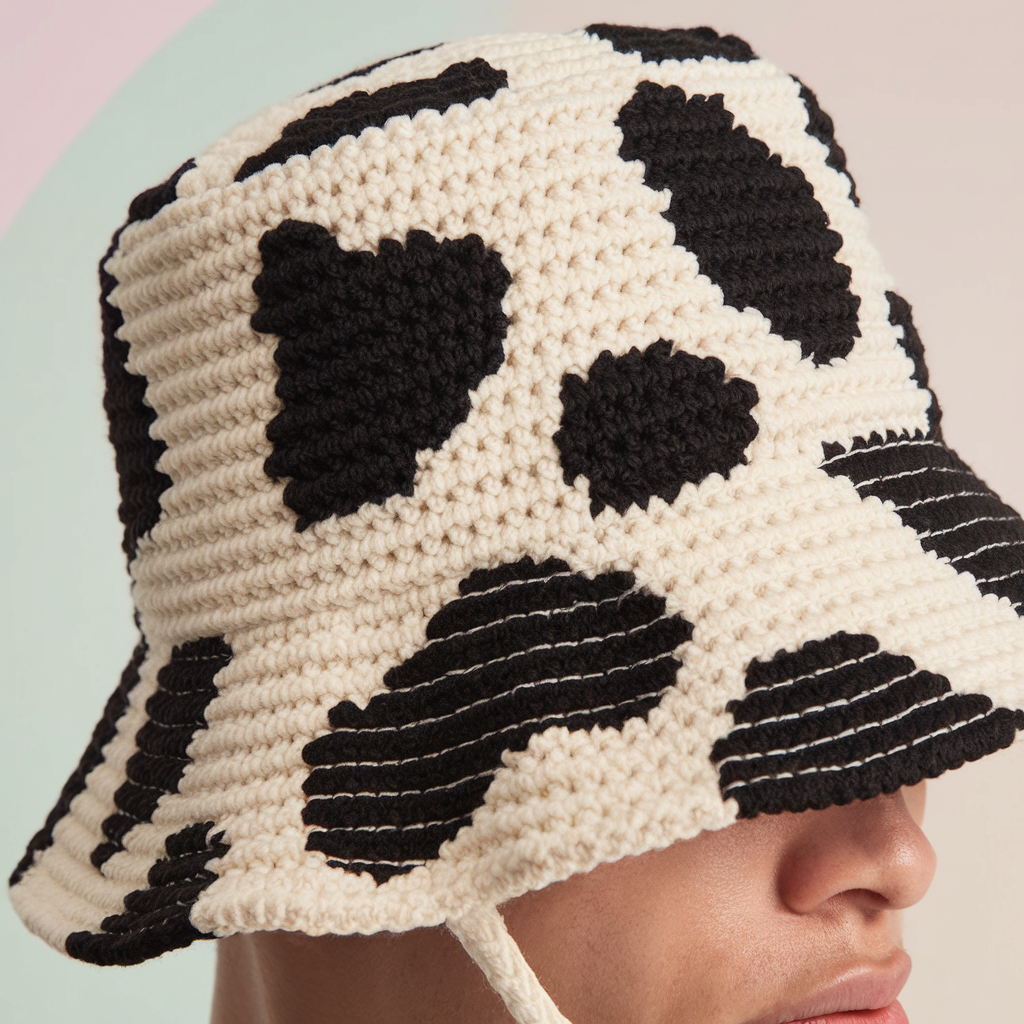
Modern, bold, and surprisingly simple. Cow spots are easy with surface crochet or simple intarsia/scrap-carrier method.
Skill level: Confident beginner (colorwork basics)
Materials
- Main yarn (white/cream) + black or brown for spots
- 4.0–5.0 mm hook depending on yarn weight
- Tapestry needle for surface work
Approach A — surface applique (easiest)
- Crochet hat body in main color (see crown/side primer: sc or hdc).
- Make irregular spot appliqués: ch6, R1: 8 sc around into a small blob shape, then ch1 and add a couple more sc cluster rounds in some spots to create larger spots. Alternatively, make freeform shapes by working sc clusters into chain loops.
- Sew spots randomly across hat body with yarn needle, leaving edges slightly raised for texture.
Approach B — carried float colorwork (tighter)
- Carry contrast yarn behind main (tapestry method) only over a few stitches (avoid long floats). When making a spot, change to black for a small cluster of stitches and then switch back. Keep floats <3–4 sts or catch them.
Hat base (simple)
- Magic ring; R1: ch2, 12 hdc in ring; join. Increase evenly until crown diameter ~20 cm (use hdc or dc depending desired drape).
- Side: work hdc (or sc) even for 8–10 rounds.
- Brim: increase round, then several rounds of sc or hdc with smaller hook for structure.
Finishing
- Once hat is assembled, surface embroider additional spot outlines with sl st for a cartoon look or leave raw for a modern vibe.
- Add a wide makeshift chin strap for festival wear, or keep minimalist.
Styling
- Works well in monochrome outfits; pair with white tee and oversized denim jacket for instant streetwear cred.
4. Crochet Heart Shaped Granny Square Bucket Hat Pattern
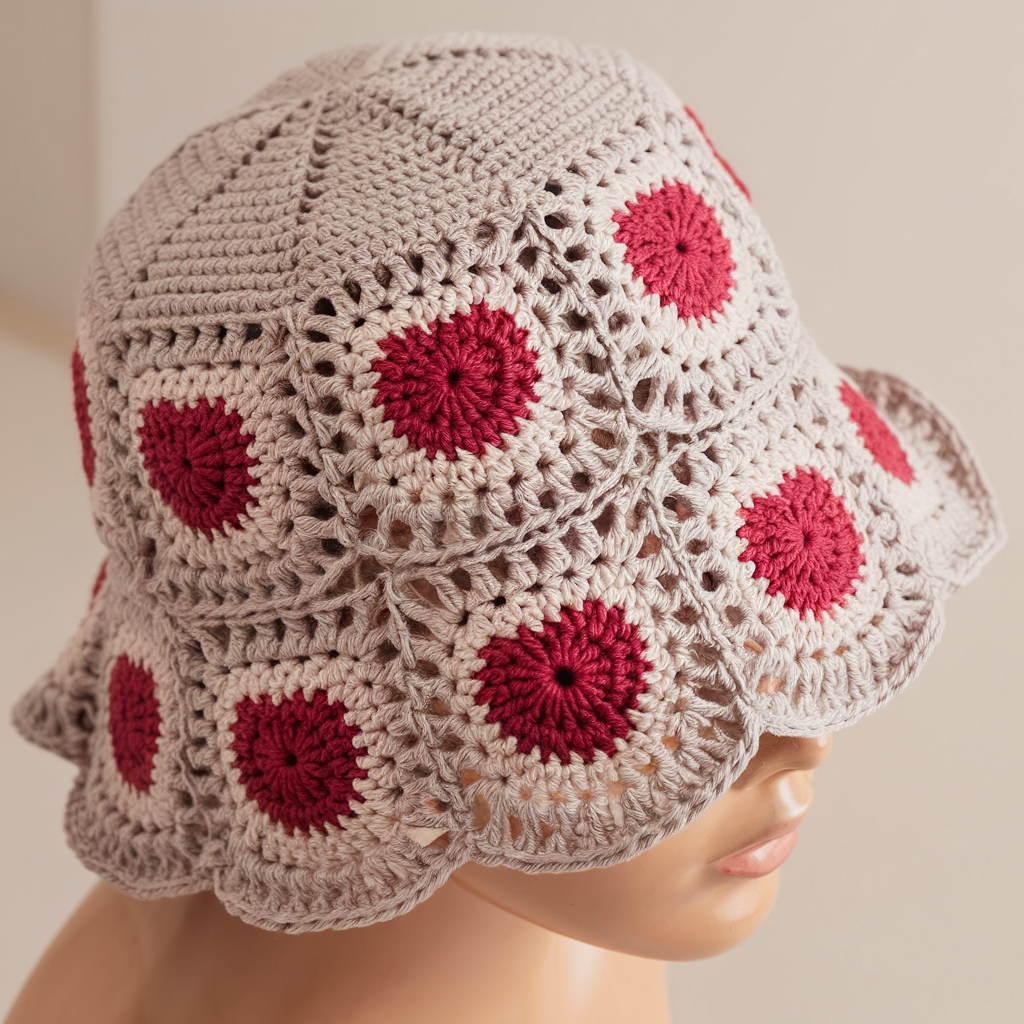
A sweet, romantic bucket hat made from heart-motif granny squares. Great for gifts and gender-neutral romance.
Skill level: Intermediate (motif squares + join)
Materials
- DK cotton or acrylic (main + contrast for hearts)
- 3.5–4.0 mm hook
- Yarn needle
Heart granny motif (make multiple)
- Ch6, sl st to make a ring. R1: ch3, 2 dc in ring, ch2, 3 dc in ring, ch2 repeat total 4 clusters (granny base). Join. (same as small granny).
- In contrast color, make heart: on one side of granny, sc across 3–4 stitches to make a curve, on top of clusters work small puff or 3 dc group to form lobes — alternatively use a simple heart applique: ch5, sc2 in 2nd ch from hook, hdc next, sc last, join and flatten into heart shape sewn onto center of granny.
- Make enough squares to form crown + band (similar to cherry granny instructions). Join as squares to form hat body.
Brim & finishing
- Same as granny hat instructions: sc base, increase for flare, 2–4 rounds of tidy join, sl st edge.
Tips
- Keep contrast hearts all facing same direction for a cohesive look. Use a light fabric adhesive to position hearts before sewing.
5. Crochet Checkered Bucket Hat Pattern
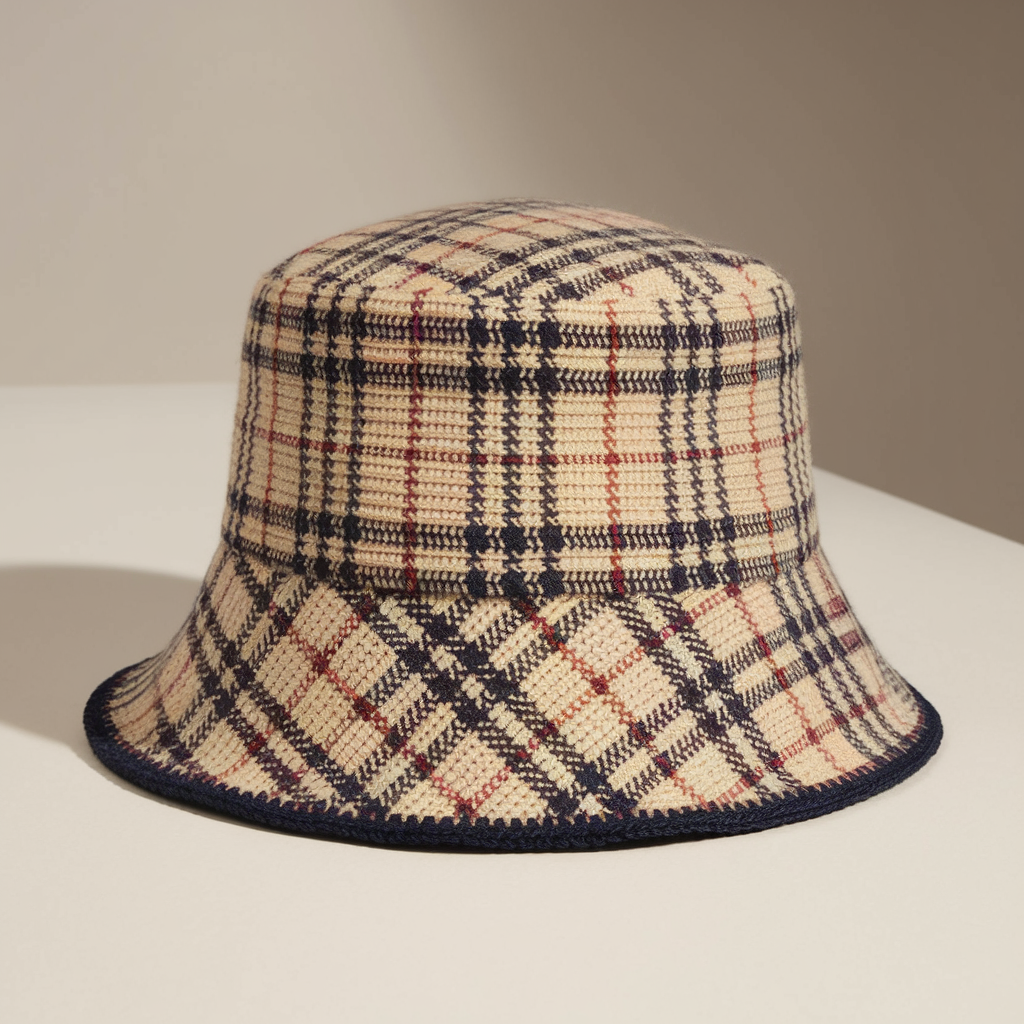
Crisp, geometric checkers: classic and modern depending on color. Use tapestry crochet or stripe blocks.
Skill level: Intermediate (color changes)
Materials
- Two contrasting colors (e.g., cream + navy)
- 4.0 mm hook (or size suitable for yarn)
- Tapestry needle
Construction (tapestry/simple block stripes)
Option A — Stripes then block stitch (easiest)
- Work hat body in horizontal color blocks: alternate 2 rounds color A, 2 rounds color B as baseline.
- After body done, on rows add slip-stitch crossovers to create square effect: on a color change row do sc in next 2 stitches, ch2, skip 2 pattern to give a square illusion. This is a freer approach that looks checked at distance.
Option B — true check (tapestry)
- Work crown in rounds with colorwork squares using single crochet. Plan grid: e.g., each check square = 4 stitches × 2 rounds. Chart it: alternate colors within each round as needed, working in tapestry technique and catching floats behind work (catch every 3 stitches).
- Keep floats short; if a float crosses more than 4 stitches, twist and anchor.
Brim
- Use main color for structure, add a final round of color B as a trim for contrast.
Tips
- Graph your pattern on squared paper before crocheting to avoid surprises.
- For beginner-friendly approach, use surface slip stitches to “draw” checks over a neutral base (faster, less floats).
6. Crochet Mushroom Inspired Ruffles Bucket Hat Pattern
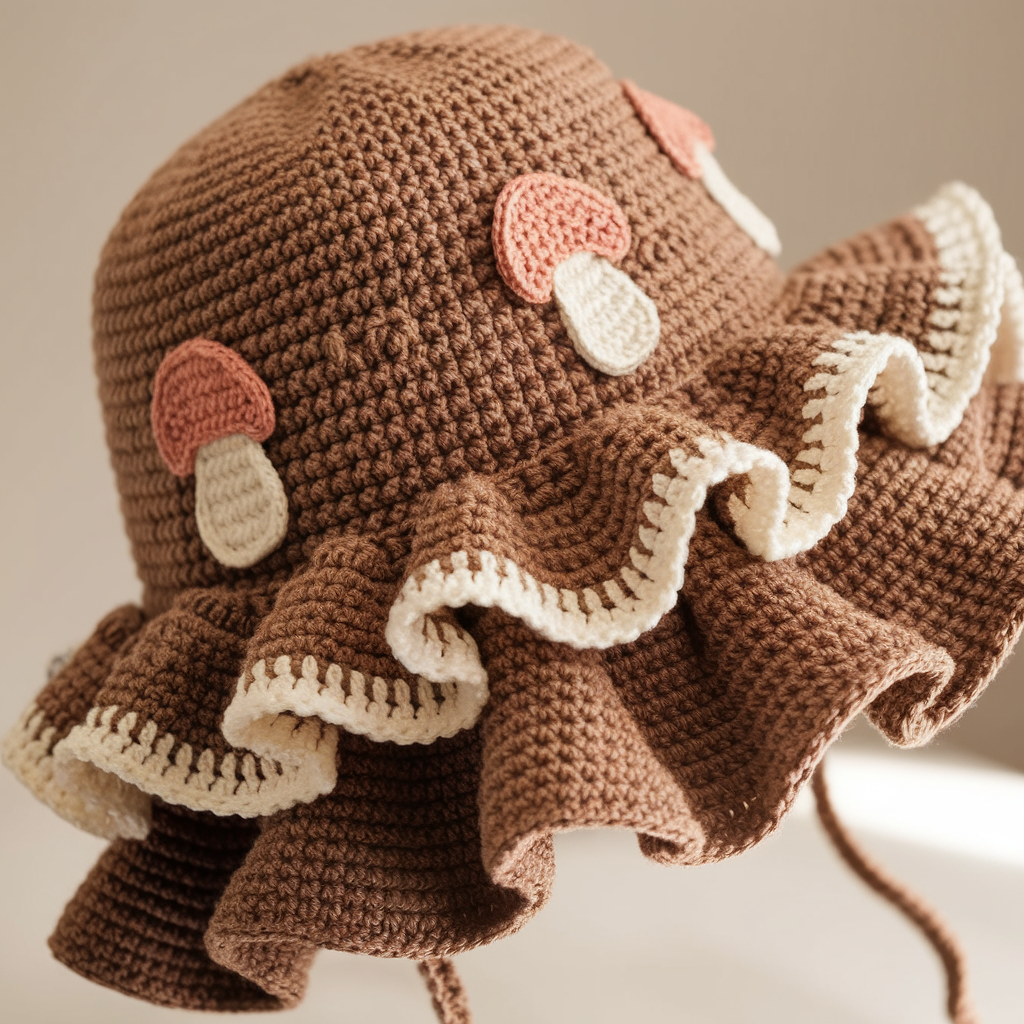
Playful, organic ruffles with mushroom-like caps and little frilly edges.
Skill level: Confident beginner / Intermediate
Materials
- DK yarn in natural mushroom tones + cream/spot color for ruffle underside
- 4.0 mm hook and 3.5 mm hook for ruffles
Crown & side
- Make crown in rounds (dc or hdc) to desired diameter, then make side 8–10 rounds even.
Mushroom cap ruffles
- Create a layered brim of ruffles that look like mushroom gills:
- Brim base: sc around.
- Ruffle 1 (undercap): using contrasting lighter color, ch3, sl st in next st around to create loops.
- Ruffle 2 (gill layer): in top of loops, 3 dc in loop, sl st in next repeat around. This creates narrow, repeating frilled shapes reminiscent of gills.
- Ruffle 3 (outer skirt): add larger scallops outside with 5 dc in next st, sl st next for a rounded cap edge.
- Play with tension & hook to vary how flared each layer sits.
Spots & stem details
- Add small circular appliqués for mushroom spots (sc 6 into ring, inc round to 12 sc) and sew on.
- Add thin stem-like ties if you like for under-chin fastening (optional, for kids).
Finishing
- Block carefully; ruffles can be steam-shaped. Sew a few tacking points to hold ruffles in place if they flop.
Styling
- Perfect for festivals or quirky streetwear. Use neutral yarns for a mature look.
7. Crochet Granny Stitch Bucket Hat Pattern
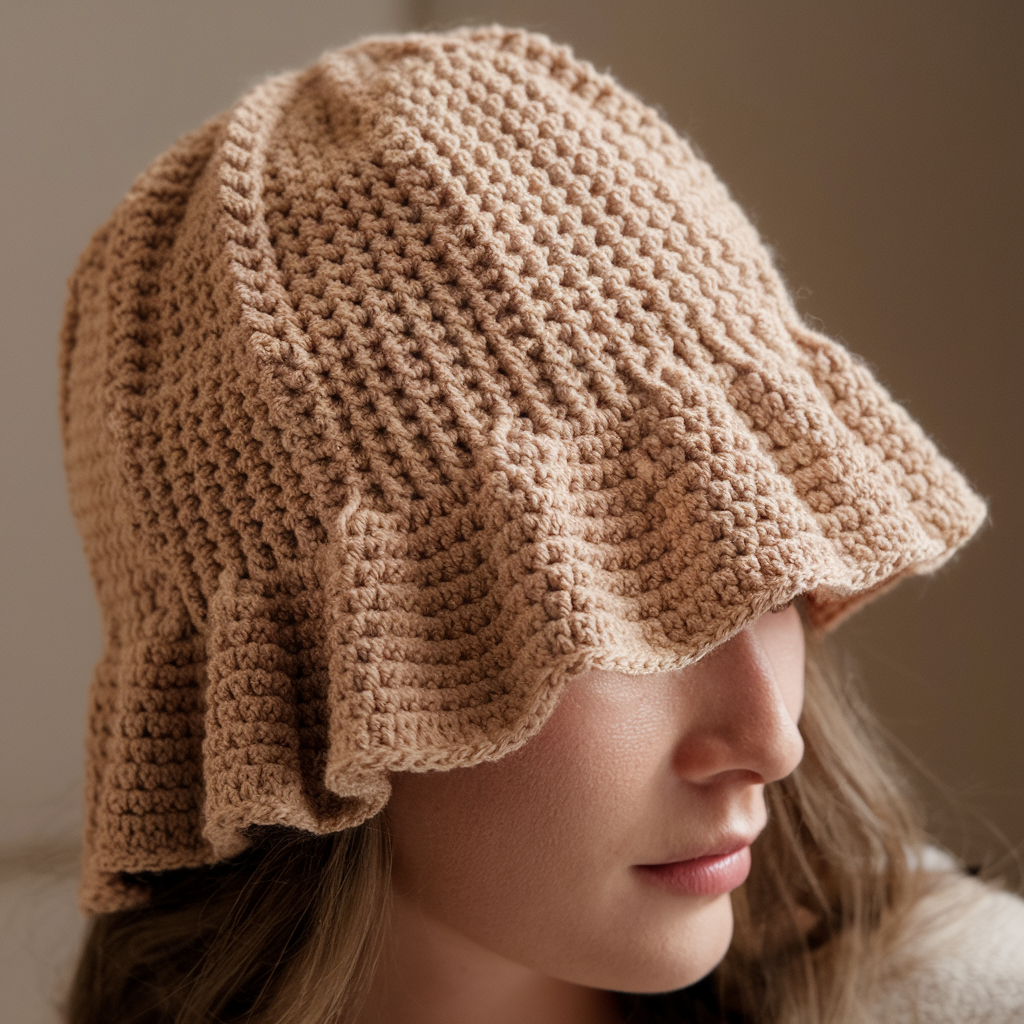
Clean, vintage granny stitch rows produce a structured but soft texture.
Skill level: Beginner — great for learning stitch rhythm
Materials
- DK or worsted (cotton/acrylic)
- 4.0 mm hook for body, 3.5 mm for brim if desired
Granny stitch refresher
- Granny stitch: cluster = (dc, ch1, dc) usually worked into spaces or stitches. For hat body we’ll use a modified granny-row approach.
Body (worked in rounds, not squares)
- Crown: magic ring, ch3, 12 dc into ring; join. Increase evenly until crown diameter reached (use dc increases).
- Switch to the granny stitch: Ch3, dc, ch1, dc into same space, skip appropriate stitches (or work granny clusters into existing ch1 spaces) — essentially a continuous-round granny texture. Alternative: do offset cluster rounds like broomstick-style granny rows for texture.
- Side: continue granny rounds without increasing for desired height.
Brim
- Join yarn and sc around bottom for a tidy edge.
- Increase round with sc in next 2 sts, inc as needed to flare. Use hdc for mid-brim rounds to soften. Finish with 1–2 rounds sc for structure.
Tips
- Granny stitch tends to be looser; tighten tension or use smaller hook for brim if you need stiffness.
- This is a great fast hat pattern: texture reads classic and pairs with every outfit.
8. Crochet Cute Froggy Ruffles Bucket Hat
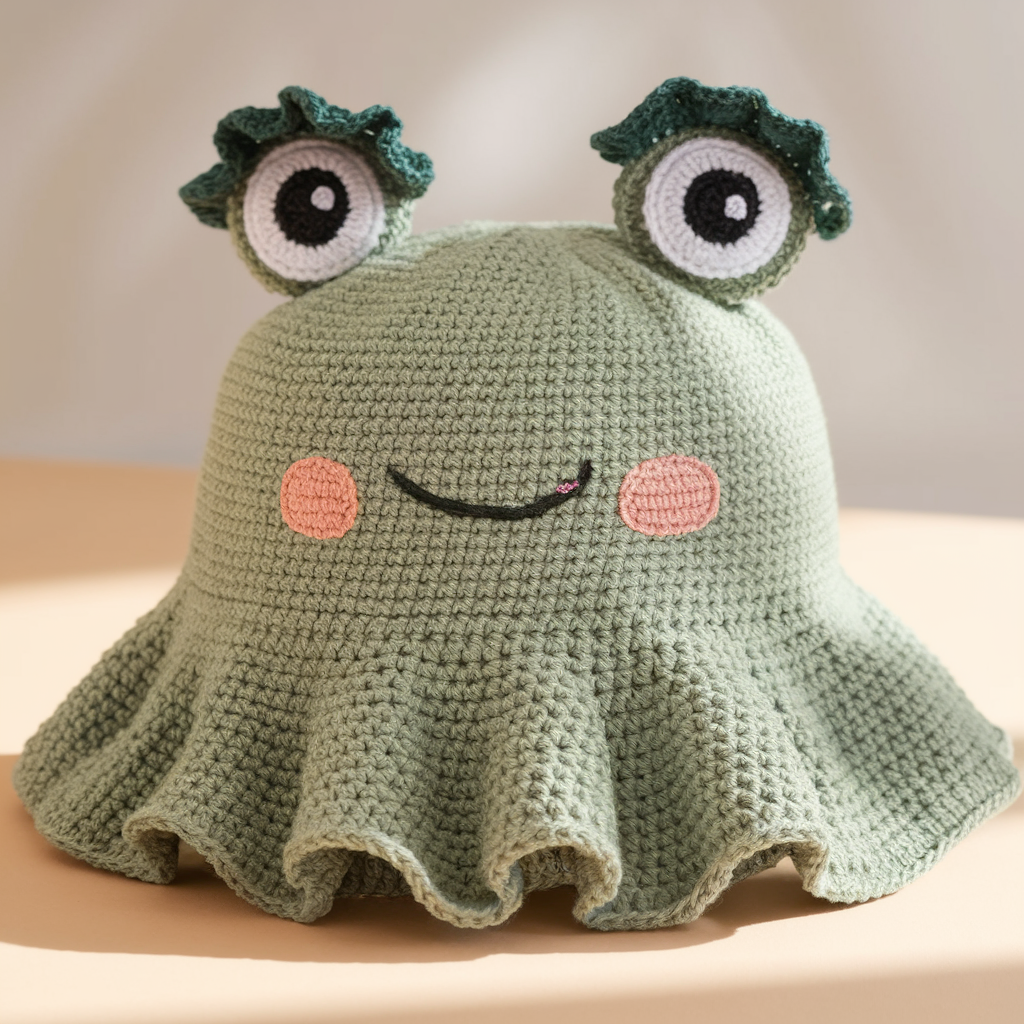
Totally adorable; add frog eyes, a smiling face, and little ruffle eyelids for the full croak.
Skill level: Intermediate (appliqués + shaping)
Materials
- Green worsted yarn (main), white and black for eyes, pink for tongue optional
- 4.5 mm hook for body, 3.5 mm small hooks for appliqués
- Yarn needle, small amount of stuffing for eyeballs
Body
- Make crown and side in hdc or dc with green yarn. Keep side height moderate for hat-sitting eyes (6–8 rounds).
Eye appliqués (make 2)
- White eyeball: magic ring, 6 sc; R2: inc around to 12 sc; join. Add tiny stuffing and close with decreases leaving a small opening for black pupil.
- Black pupil: with black yarn, ch4, sl st to form small circle or make 6 sc into ring and tight close. Sew to center of white eye.
- Eyelid ruffle: with darker green, ch long enough to partially cover eye and sc back with ruffled stitch: in each st do dc, ch1, dc to create eyelid frill. Attach eyelid across top of eye and sew the eye to top of crown so it peeks out.
Mouth & cheeks
- Embroider a wee smile with pink yarn or add small blush circles with pink yarn or fabric paint.
Brim (ruffled)
- A ruffled brim in three layers: sc base, then hdc/2hdc increases, then outer scallop layer with 3–5 dc clusters. This creates a playful, lily-pad-like rim that suits frog aesthetics.
Finish
- Sew eyes securely through base of hat; tack them in 2–3 places so they survive washing. Add a small chin strap if for kids.
Styling
- Perfect for kids, costume parties, or anyone who secretly loves amphibians. Keep moderation in placement for adult wear.
Final finishing & practical notes for all hats
- Sizing: always check head circumference as you build. If hat stretches, factor in stitch elasticity: sc tightens, dc relaxes.
- Hook adjustments: if brim flops, go down a hook size for those rounds or add interfacings. If hat is too tight, go up a hook size.
- Seams: make seam on inside using mattress stitch or whipstitch; tidy it with a round of sc inside the hat.
- Lining: For a crisp professional finish, line with light cotton (hand-sew) — also improves sun protection and hides seams.
- Care: check fiber labels. Cotton and acrylic machine wash usually fine; block to shape while damp. Add a little interfacing along the brim for a sun hat that holds shape.
- Customization: swap yarn weights and adjust rounds by the primer method above; add embellishments — pins, ribbons, toggle trims, or leather tag to personalize.
Conclusion
There you go: eight full bucket-hat concepts with enough technical detail to actually make them, not just admire them. Pick a pattern that fits your vibe — granny-traditional, fruit-cute, or bold cow print — and follow the primer sizing rules as you go. Measure, adjust hooks and rounds, and don’t be shy about lining or interfacing the brim if you want sun performance.