Coasters are the perfect small project: fast to make, endlessly customizable, and practical for protecting surfaces from heat and spills. Below you’ll find one useful introduction that applies to all eight patterns (yarn, hooks, gauge, sizing, finishing and abbreviations), followed by eight complete, long-form coaster patterns. Each pattern includes skill level, materials, exact finished size guidance, a step-by-step instruction set, variations, finishing and care notes, and a short styling tip so you can drop the text straight into your blog.
Read the introduction first, then jump to any coaster you want.
yarns, hooks, gauge, sizing, tools, construction approaches & abbreviations
Which yarn and hook to choose
- Best weights: Sport (2) or DK (3) are ideal for coasters: sturdy enough to hold shape, thin enough for detailed stitches. Fingering (1) and crochet thread give delicate coasters; worsted (4) makes thick, absorbent coasters for hot mugs.
- Fiber choices:
- Cotton / cotton blends — top choice. Absorbent, washable, holds shape, and resists heat.
- Mercerized cotton — slightly shinier, crisp stitches.
- Acrylic / blends — inexpensive and forgiving but less absorbent.
- Linen / bamboo — lovely drape and absorbency, best for decorative coasters.
- Hooks: Work the hook recommended on the yarn label as a starting point. If you want a dense coaster, go down one hook size to tighten fabric; for a lacy look, go up a size.
Gauge, swatching & sizing
- Always make a small 3″–4″ swatch in the stitch pattern you plan to use and block it the same way you will finish the coaster. Count stitches per inch (spi) and rows per inch (rpi).
- Common coaster sizes:
- Small teacup coaster: 3.5–4.0 in (9–10 cm) diameter
- Standard mug coaster: 4.25–4.5 in (10.8–11.5 cm) diameter
- Large mug/travel mug: 5.0–5.5 in (12.7–14 cm) diameter
- Use your swatch measurements (spi) to compute foundation chains or motif repeats. Example: if you want 4.5 in diameter and your stitch produces ~4 sc per inch in the round, plan initial ring and increases to reach ≈ 18 stitches around the target circumference, then add rounds until diameter matches.
Construction approaches
- Worked in the round (spiral or joined rounds) — great for circular coasters (most patterns here use this).
- Motif pieced — granny, star, or flower motifs joined to make square or round coasters.
- Worked flat and shaped — rectangular or scalloped coasters that are folded or edged.
- Edging & blocking — a final round of single crochet or picot gives a neat edge; blocking opens lace and sizes the coaster.
Tools & finishing supplies
- Tapestry needle for weaving ends.
- Blocking supplies: pins and a foam board or blocking mats, spray bottle or steam iron on low for cotton.
- Optional: small piece of thin cork or felt backing for non-slip or extra insulation (glue or hand-stitch).
Care & labeling
- Cotton: Machine wash warm or gentle — check yarn label. Lay flat to dry to keep shape.
- Acrylic/blend: Machine wash cold/gentle, tumble low or air dry.
- If you attach felt or cork backing, note care instructions accordingly (hand wash recommended).
Abbreviations (US)
- ch — chain
- sc — single crochet
- hdc — half double crochet
- dc — double crochet
- tr — treble (tr)
- sl st — slip stitch
- st(s) — stitch(es)
- inc — increase (2 sc in same st)
- dec — decrease (sc2tog)
- BLO / FLO — back loop only / front loop only
- MR — magic ring
- RS / WS — right side / wrong side
1. Crochet Christmas Circle Coaster Pattern

Style & vibe: Festive round coaster with a starburst center and a scalloped holly-edge. Makes a cheery seasonal set.
Skill level: Confident beginner (working in the round, basic increases, scallops)
Materials
- Sport or DK cotton in red, green, and cream: ~40–60 yd total (majority red/green).
- Hook: 3.5–4.0 mm (choose tighter for denser fabric).
- Tapestry needle, blocking pins. Optional: small felt circle for backing.
Finished size
- Approx 4.5 in diameter using DK and 3.5 mm hook. Adjust by changing hook/yarn.
Gauge example
- 14 dc × 12 rows = 4″ in a blocked swatch. Use your swatch to tailor rounds.
Step-by-step
- Starburst center (cream) — MR method
- MR; R1: ch1, 8 sc into MR; pull tight and join with sl st to first sc. (8 sc)
- R2: ch2 (counts as hdc), hdc in next st, ch2 around; sl st to top of ch2 — this creates small arch spaces (8 arches). Fasten off cream.
- Red rays
- Join red into any ch2 arch. R3: (ch3, 3 dc in same arch, ch3, sl st into next arch) repeat around. You are building elongated petals/rays. Adjust to have 8 petals. Fasten off red.
- Build round body
- Join green at base between petals. R4: ch1, sc evenly around the outer edge of petals to create a stable base (count sts to have even number, ~40 sc). Join with sl st.
- R5: ch2, dc in same st, sk1, 2 dc in next st around to begin shaping the round. Join. Continue working rounds of dc increasing evenly (example: R6: dc2, inc; R7: dc3, inc), until the piece lies flat and diameter is approx 4.5 in. Use the standard flat-circle increase principle: add increases spaced every N stitches to avoid ruffling.
- Scalloped holly edge
- With red or green (contrast), R(last+1): ch1, sc around to tidy edge. R(last+2): skip 2 sts, (5 dc) in next st, skip 2 sts, sc in next st repeat to form scallops. On every 3rd scallop or after desired interval, attach small green leaf: ch5, (sc, hdc, dc, hdc) across to form a tiny leaf and sl st to base. Alternatively make tiny holly leaves with short leaf pattern and sew between scallops.
- Finishing
- Weave in ends, block to exact diameter by pinning to mat and misting lightly, then leave to dry.
- Optional: sew a small felt circle to back for slip resistance — use fabric glue or hand-stitch.
Variations
- Reduce rounds for smaller tea-cup coasters.
- Make the starburst in gold or metallic thread for an elegant holiday set.
Care
- Cotton: machine wash gentle, reshape while damp.
Styling tip
- Make a set in alternating red/green for a table centerpiece with holiday mugs.
2. Crochet Ocean Blue Spiral Coaster Pattern
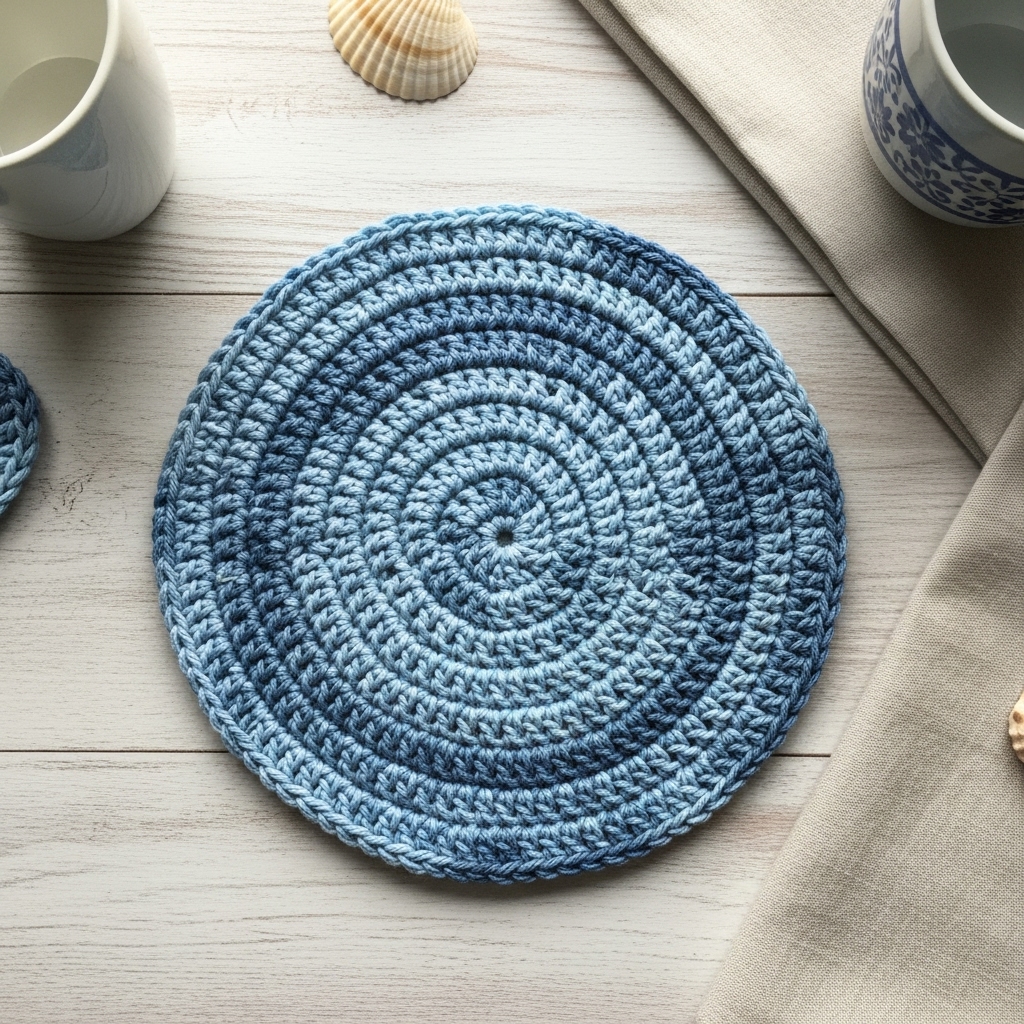
Style & vibe: Nautical spiral coaster that showcases variegated blue yarn; made flat in one continuous spiral for a hypnotic ocean effect.
Skill level: Beginner (working in continuous rounds/spiral and basic increases)
Materials
- Sport-weight variegated blue cotton yarn (or DK held single) — ~25–40 yd.
- Hook: 3.5 mm or size to create tight stitches.
- Tapestry needle, blocking pins.
Finished size
- Approx 4.25 in diameter.
Gauge example
- 16 sc across 4″ in single crochet using chosen yarn/hook.
Step-by-step
- Foundation MR spiral
- MR; R1: ch1, 10 sc into MR. Do not join; place stitch marker to mark rnd start as you work in continuous spiral. Tighten ring.
- Spiral increases
- Continue in spiral: work sc in every st for a round, then begin increasing evenly: for a flat spiral, follow this sequence: after first full round of 10 sc, work sc, inc repeatedly (pattern for the round). In practice: R2: increase every 2nd st; R3: increase every 3rd st; R4: increase every 4th st, etc. This keeps the spiral relatively flat as it expands.
- Alternatively, use standard round increments: R2: inc in every st (20 sc); R3: sc1, inc (30 sc); R4: sc2, inc (40 sc); and so on. Adjust based on stitch counts in your spiral.
- Keep tension for spiral
- Because you are working in the round without joins, watch for visible seam lines; keep your tension consistent. The variegated yarn will create a spiral color change as you add rounds.
- Shape & stop
- When the diameter reaches ~4.25 in, stop increasing and work 2–3 rounds of even sc in each stitch to create a firm surface.
- Edge
- For a tidy edge, finish with a round of reverse single crochet (crab stitch) for a rope-like border.
- Finishing
- Weave ends in on the WS; block lightly by pinning and spraying.
Variations
- Use two colors and alternate every round for a two-tone spiral.
- Make matching placemats by scaling up increases and holding two strands together.
Care
- Cotton: machine wash gentle; reshape.
Styling tip
- Pair with blue-and-white teaware for coastal decor; use for iced tea pitchers or cold glasses.
3. Crochet Scalloped Heart Coaster Pattern

Style & vibe: Feminine heart-shaped coaster edged with a delicate scalloped border — perfect for Valentine’s tea service.
Skill level: Intermediate (shaping heart, careful increases/decreases)
Materials
- Fingering or sport cotton in a soft color (e.g., blush or cream) — ~20–30 yd.
- Hook: 2.75–3.5 mm.
- Tapestry needle, blocking pins.
Finished size
- About 4.0 in across the widest part of heart.
Gauge example
- 18 sc by 14 rows = 4″ square (use swatch).
Step-by-step
- Make two heart halves (worked flat and joined)
- The heart can be made as one piece by working two small circles (lobes) then joining them and decreasing into a point — but a straightforward way is to work a simple heart motif in the round.
- Option A (flat heart worked in rounds): MR; R1: ch2, 6 hdc in MR, join (6). R2: ch2, 2 dc in next st, ch2, sl st in next repeat to create arches; form two lobes by working into two separate segments of the ring. Shape sides with small increases, then work tapered decreases to form point. Because this approach is pattern-dense, follow the exact chart below or use option B.
- Option B — two-lobe join method (clearer step-by-step)
- Lobe (make 2): MR; R1: ch2, 8 dc in MR; sl st to join; fasten off leaving tail for sewing. Block lobes to flatten.
- Body: Chain 12. Row1: sc in 2nd ch and across (11 sc). Turn and work ~4–6 rows sc to create a short band. On one long edge sew the two lobes on either end; fold band under and stitch the bottom to a point by overlapping the final row into a triangular shape — see assembly step.
- Assemble heart
- With a tapestry needle, sew lobes to the band ends securely. Shape the bottom into a tapered point by folding and stitching through several layers; secure well.
- Scalloped edge
- With same or contrast color, work a round of sc evenly around the heart. Then work scallops: skip 1 st, (5 dc) in next st, skip 1 st, sc in next st to create picot-like scallops following the heart curve.
- Block & finish
- Pin to heart shape and block to smooth edges and open scallops. Weave ends in.
Variations
- Add a small embroidered monogram on one lobe for personalized gifts.
- Use tiny seed beads at scallop tips for sparkle (sew beads on with beading thread).
Care
- Hand wash for delicate shapes; reshape while damp.
Styling tip
- Use for romantic breakfast settings or group into a heart garland for gift presentation.
4. Crochet Mug Biscuit Coaster Pattern

Style & vibe: A novelty coaster shaped like a biscuit (cookie) with a textured “biscuit top” stitch — fun for tea and snack pairings.
Skill level: Confident beginner (texture stitches & shaping)
Materials
- Sport or DK cotton in warm tan/biscuit color — ~25 yd.
- Hook: 3.5 mm.
- Tapestry needle, optional felt backing.
Finished size
- Approx 4–4.5 in diameter when worked in rounds with suggested yarn.
Gauge example
- 16 sc × 14 rows = 4″.
Step-by-step
- Bake the base — flat round
- MR; R1: ch1, 8 sc into MR; join (8 sc). R2: sc, inc around (12 sc). R3: sc 2, inc around (16 sc). R4: sc 3, inc around (20 sc). Continue increasing evenly until base is roughly 4 in across (calculate from gauge). Work 2–3 rounds even (no increases) to build thickness.
- Biscuit top texture
- Change to a textured stitch to simulate biscuit surface. Option: grain stitch — Row: sc, ch1 across in the round is subtle. Better: popcorn or bobble stitch — R: sc into next 2 sts, bobble in next st repeat. Work one or two rounds of bobbles spaced evenly to create a textured top.
- Edge ridge
- Work a round of hdc in the back loops only to create a slightly raised ridge like a biscuit edge. Follow with one round of sc to firm the edge.
- Optional “jam” center
- Create a small circular applique in red (MR; 6 sc; R2: inc around to make a 1″ circle) and attach to center, stitching around to hold. If making for a child, embroider center instead of adding small glazed beads.
- Finish
- Weave ends in and block lightly. Add felt backing if you want non-slip or heat insulation.
Variations
- Make a “chocolate chip” biscuit by crocheting tiny bobble chips in darker yarn and sewing them on before blocking.
- Scale down for teacup saucers or up for small trivets.
Care
- Cotton: machine wash gentle; air dry for longevity.
Styling tip
- Present coaster alongside the matching crocheted cookie for a whimsical tea-time gift set.
5. Crochet Lace Flower Coaster Pattern

Style & vibe: Elegant lace doily-style coaster with a floral motif — delicate yet functional when worked in mercerized cotton and blocked well.
Skill level: Intermediate (lace charts and blocking)
Materials
- Crochet thread or fingering cotton (size 10 or similar) in soft white or pastel — ~20–40 yd.
- Hook: 1.75–2.25 mm (depending on thread).
- Blocking board and fine pins.
Finished size
- Approx 4–5 in diameter after blocking (thread weight determines size).
Gauge example
- Lace gauges vary; follow pattern counts and block to size.
Step-by-step (flower medallion lace)
- Center flower
- MR; R1: ch3, 12 dc in MR, join (12 dc). R2: ch4 (counts as tr + ch1), (tr, ch1) in next st around join — creates airy ring.
- Petal rounds
- R3: ch3, sl st to form picot into each ch1 space around to form base for petals.
- R4 (petals): Into each space work sc, hdc, 3 dc, hdc, sc — these form the first petal round. Join.
- Lace expansion
- R5: ch5 to form arches between petals, sl st to next join; repeat around.
- R6: Work into each ch5 arch a shell: (dc5, ch3, dc5) for full lacy shell. Continue adding rounds of arches and shells until the diameter reaches target size.
- Final scallop
- Work a final round of picot-edged shells: sc, ch3, sc in centers of shells to create small delicate points.
- Blocking
- Immediately after finishing, pin the coaster to the blocking board to exact diameter, stretching shells evenly; spray lightly with water or use steam setting carefully. Let dry completely.
- Finishing
- Remove pins and weave ends.
Variations
- Use a slightly thicker thread and larger hook for sturdier coasters with the same look.
- Add a small fabric backing to protect tables if used with wet glasses.
Care
- Hand wash or gentle machine bag; reshape and dry flat.
Styling tip
- Perfect for an elegant tea party or to place under a teacup and dessert plate for a vintage look.
6. Crochet Yin Yang Coaster Pattern
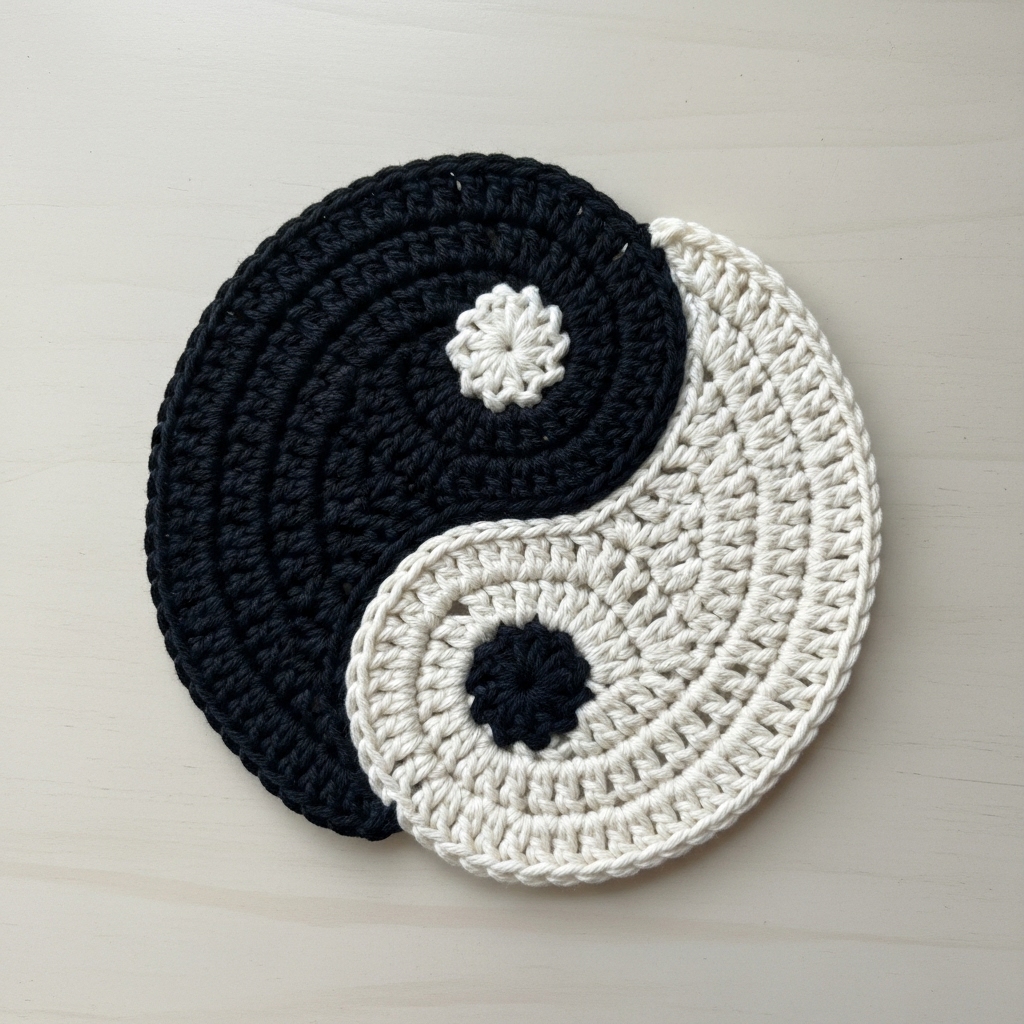
Style & vibe: Modern, graphic yin-yang coaster split into two contrasting halves — bold and eye-catching.
Skill level: Intermediate (shape joining and color changes)
Materials
- DK cotton in two contrasting colors (e.g., black and white or navy and cream) — ~30–40 yd.
- Hook: 3.5 mm.
- Tapestry needle, pins for blocking.
Finished size
- About 4.5 in diameter.
Gauge example
- 14 sc × 12 rows = 4″ (adjust with swatch).
Step-by-step
- Work two discs (half-discs)
- You will construct two semicircles and join them into a yin-yang circle. Each semicircle is a segment of a full circle.
- Semicircle A (color 1): MR; R1: ch1, 12 sc into MR; sl st to join (12). R2: sc, inc around (18). R3: sc 2, inc around (24). Continue rounds adding evenly spaced increases until the semicircle arc is half the final diameter (~half of the full circle increases). Fasten off leaving tail.
- Semicircle B (color 2): Make same size semicircle in contrasting color.
- Join semicircles
- Lay semicircles RS facing out and overlap edges. Seam with whipstitch or mattress stitch along the straight edges to form a full circle. Make sure the curved seam is smooth.
- Inner dots
- For the small inner dots: make two small circles (MR; 6 sc; R2: inc around to 12 sc) in contrasting colors — one black dot on the white side and vice versa. Sew them onto the appropriate side.
- Edge & tidy
- Work a round of sc in alternating colors around the perimeter to unify the join and give a clean border.
- Finishing & blocking
- Block to exact circle, smoothing center seam. Weave ends in.
Variations
- Use tonal colors for a softer yin-yang effect.
- Scale up into placemats by combining multiple yin-yang medallions into larger patterns.
Care
- Cotton: machine wash gentle, lay flat to dry.
Styling tip
- Use as a conversation-starting coaster set — alternate yin-yang coasters on a coffee table.
7. Crochet Checkerboard Heart Coaster Pattern
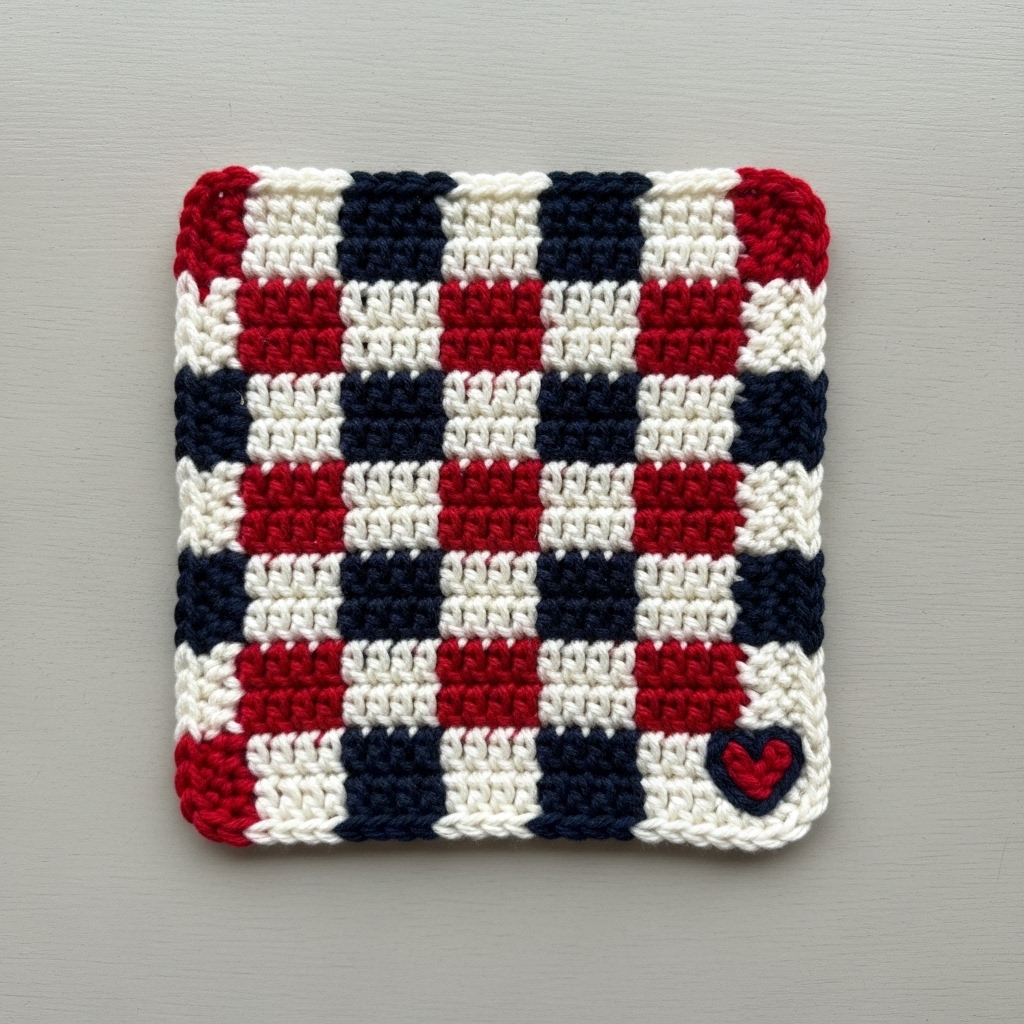
Style & vibe: Heart-shaped coaster with a checkerboard textured surface (alternating blocks) for a playful modern aesthetic.
Skill level: Intermediate (colorwork and shaping)
Materials
- Two colors DK cotton or sport yarn — ~30–40 yd each.
- Hook: 3.5 mm.
- Tapestry needle, blocking pins.
Finished size
- About 4 in across at widest point.
Gauge example
- 16 sc per 4″ in single crochet (use swatch).
Step-by-step
- Plan the checkerboard grid
- Decide on a 6 × 6 or 8 × 8 small square grid for the heart shape; each grid square can be 1–2 sc wide depending on gauge. For a 4″ coaster with 8 squares across, each square is 0.5″.
- Work flat square panel in tapestry/colorwork
- Using stranded crochet or tapestry method, ch the number of sts equal to grid width (e.g., 32 ch for 8 squares × 4 st per square). Row1: sc across in alternating colors to begin checkerboard. Work rows switching colors per row to create checker pattern. This is a time-intensive but precise technique — carry floats loosely on the wrong side and catch them every 3–4 stitches to avoid snagging.
- Shape heart
- Once panel reaches desired grid height, fold and stitch to form heart shape: cut pattern into heart template and trim/shape by decreasing and seaming edges into heart silhouette OR work heart shaping directly by decreasing on appropriate grid rows to create lobes and taper to point.
- Edge
- Work a round of sc around the heart to tidy edges, matching colors or in neutral.
- Finishing
- Block to shape. Weave in all ends, especially colorwork floats.
Variations
- Simpler approach: make checkerboard as center square and crochet two small semicircular lobes and a tapered bottom and join — combines motif and shaping for less tricky colorwork.
Care
- Hand wash or machine gentle; reshape when damp.
Styling tip
- Great for modern Valentine’s or to coordinate with bold kitchen tiles.
8. Crochet Granny Stitch Star Coaster Pattern
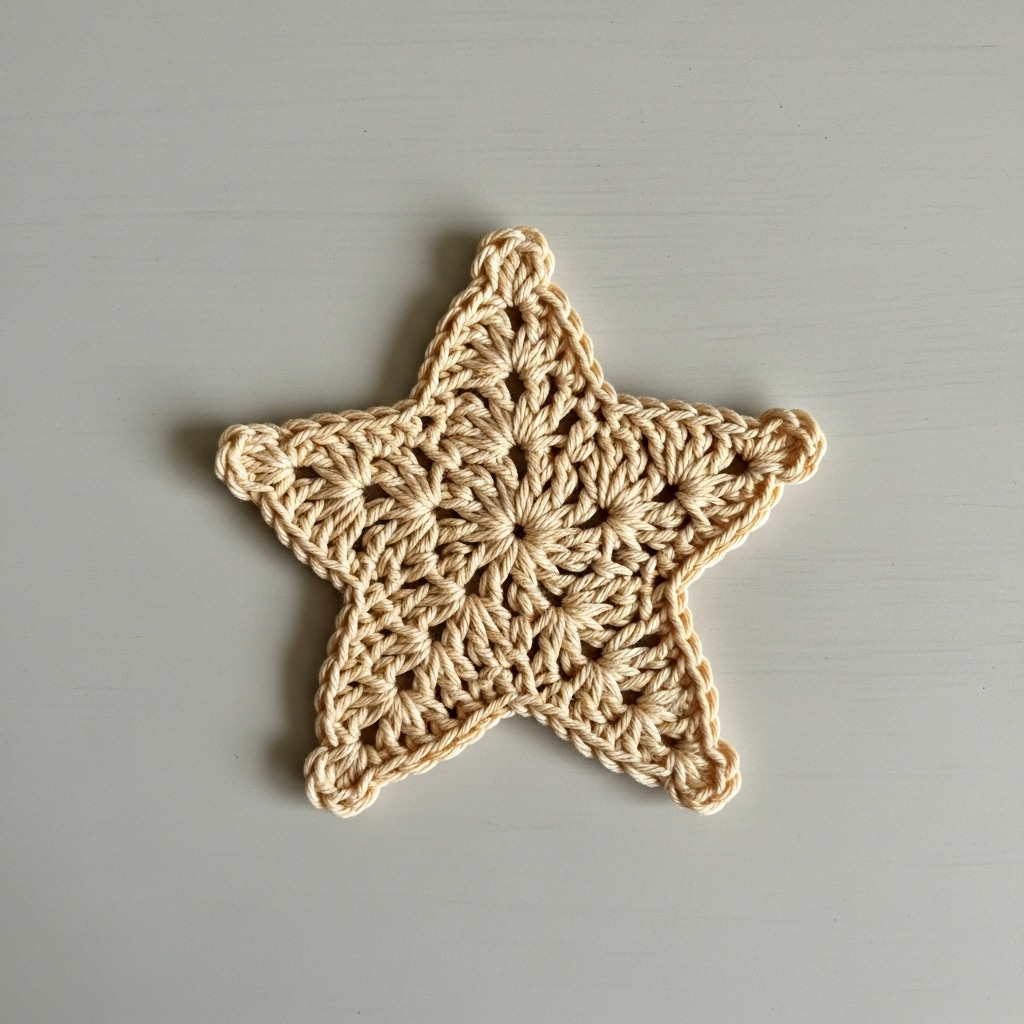
Style & vibe: A star-shaped coaster built from granny-stitch motifs — geometric and bold. Uses the classic granny stitch cluster to form star points.
Skill level: Confident beginner (granny clusters, joining)
Materials
- DK cotton in two colors (main + contrast) — ~30–40 yd total.
- Hook: 3.5–4.0 mm.
- Tapestry needle, blocking mat.
Finished size
- Star span ≈ 4.5–5.0 in tip to tip.
Gauge example
- Granny cluster 3 dc clusters ~ 1 in wide at chosen hook.
Step-by-step
- Make star motif using granny clusters
- Round center: MR; R1: ch3, 2 dc, ch2, 3 dc, ch2 × 5; join — you have 6 clusters (a hex).
- Round 2 (points): Into each ch2 space, work a shell that will read as a star point: ch1, (3 dc, ch3, 3 dc) in ch2 space; sl st to next ch2 space. This makes six pronounced points. Fasten off.
- Build star arms with granny rounds
- Continue working into chains between points to lengthen star arms: in the ch3 space of point, work granny clusters across: ch3, 3 dc in same ch3 space to form elongated arm segments as needed to achieve desired star span. Work color changes for contrast at arm tips.
- Edge & join
- Work a round of sc around the entire star to smooth rough edges. For a more solid coaster, make two star motifs and sew them together (wrong sides together) with a thin layer of felt inside to make it sturdy.
- Blocking
- Pin out points evenly on blocking mat and steam or mist to set shape. Points should be even and flat.
Variations
- Use three colors to create ombré star points.
- Join multiple small stars into a festive trivet.
Care
- Cotton: machine wash gentle; reshape and dry flat.
Styling tip
- Use as a striking centerpiece under a clear glass teapot for festive gatherings.
Conclusion
You now have eight detailed coaster patterns that cover seasonal, whimsical, modern and vintage styles. A few closing tips to make your post practical and attractive to readers:
Finishing quality
- Block every coaster. Blocking is essential for shape, especially for lace and star/coaster points. Pin to exact size and let dry.
- Weave ends securely. Use a tapestry needle to bury tails along multiple plies and stitch lines to prevent pullouts in laundering.
- Backing for function. If you plan to sell coasters, add a thin cork or felt backing fixed with fabric glue or hand-stitching to increase slip resistance and protect tabletops. Note care instructions change with backing choice.
Photography & content
- Provide for each coaster: (A) a flat full-image, (B) a close-up of stitch detail, (C) a scale shot with a mug/teacup, (D) a lifestyle shot with props. Natural light and neutral backgrounds show fiber color most accurately. For Pinterest create a vertical 9:16 image with a large title overlay and a close-up detail.
Selling & gifting
- Offer sets of 4 or 6 coasters in themed bundles (holiday set, coastal set, heart/romance set). Package with a small care card listing fiber content and washing instructions. Consider adding a matching gift tag and a small bag.
Patterns & downloads
- If you plan to offer PDFs, include a materials list, finished size table, gauge swatch instructions, and a single-page schematic for each pattern showing number of rounds and approximate increases for circle patterns.