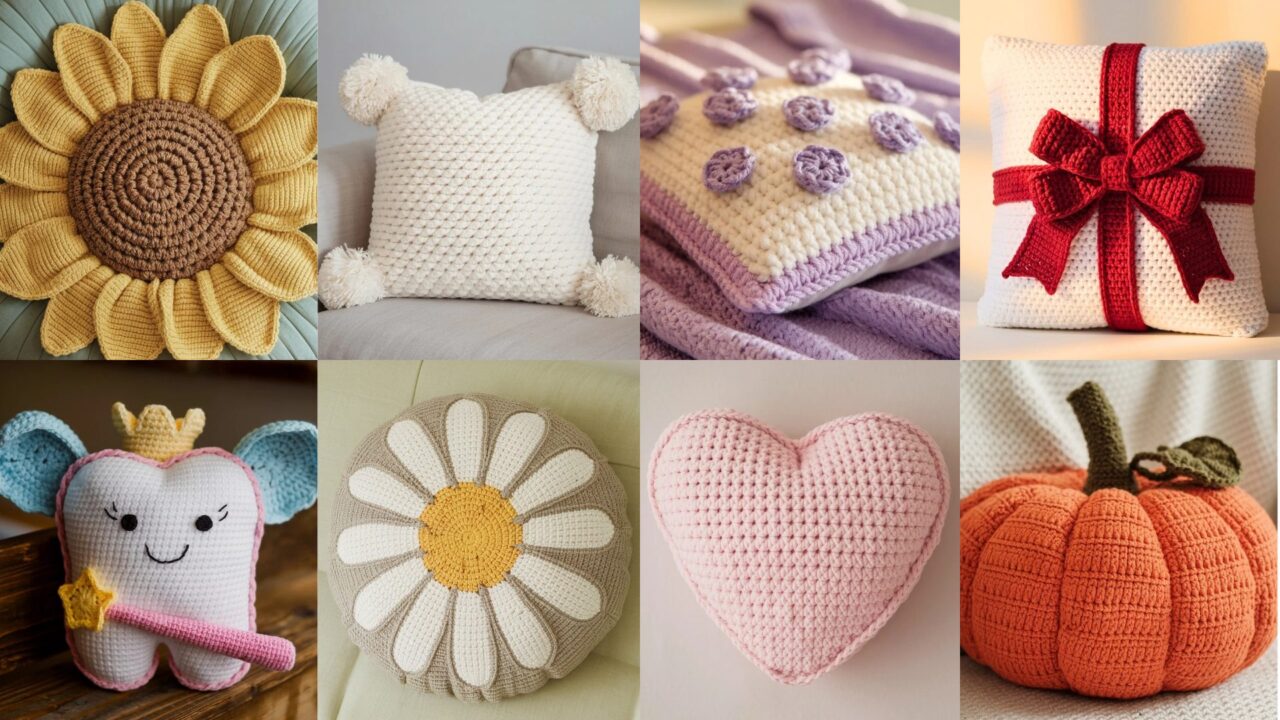
If you love quick, satisfying crochet projects that add personality to your home, pillows are a perfect place to play. This collection of eight patterns — from a daisy-motif round pillow to a candy heart and a pumpkin — is built for makers of all levels. Each pattern includes skill level, materials, clear step-by-step instructions, construction/assembly notes, and variation ideas so you can customize colors, size, and texture. I’ve written these so they’re easy to follow: read straight through or jump to the pattern you want. Let’s stitch cozy charm into your space!
1. Round Crochet Pillow with a Daisy Motif Pattern
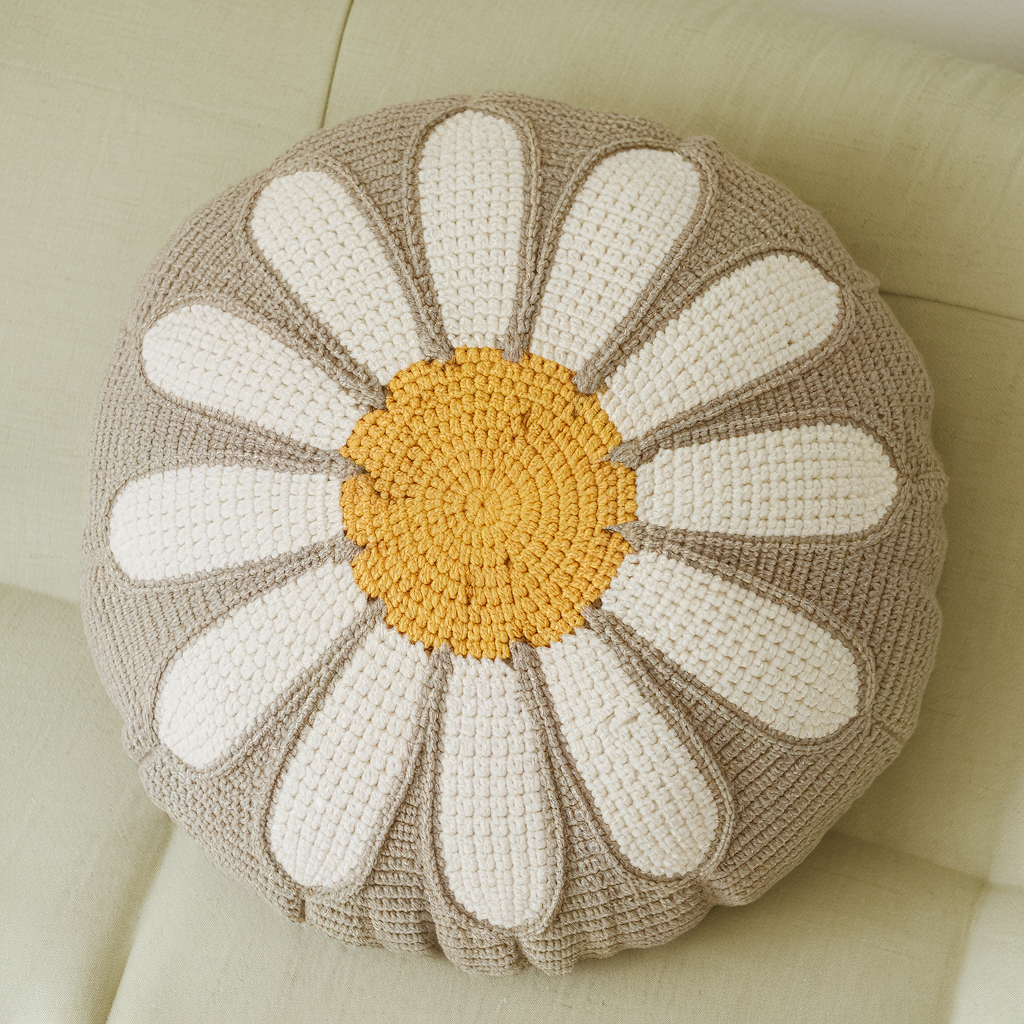
Skill level: Intermediate beginner — requires working in rounds, simple shaping, and surface slip-stitch flower.
Finished size: About 12″ (30 cm) diameter (adjust with yarn/hook).
Materials
- Worsted weight (#4) yarn: white (petals), yellow (center), main color for back (e.g., pale green)
- Hook: 5.0 mm (H/8) — adjust to get gauge
- Polyfill stuffing
- Yarn needle, stitch marker, scissors, tapestry needle
- Optional: pillow insert 12″ for ease
Abbreviations (US terms)
- ch = chain
- sl st = slip stitch
- sc = single crochet
- hdc = half double crochet
- dc = double crochet
- st(s) = stitch(es)
- BLO = back loop only
Gauge: 12 sc x 12 rows = ~4″ with worsted yarn and 5.0 mm hook (not critical — pillow sizing flexible)
Step-by-step — Front (Daisy Motif)
- Magic circle: Make a magic ring. Ch 1 (does not count as st).
- Round 1 (Center): 8 sc into magic ring. Pull tight. Join with sl st to first sc. (8)
- Round 2 (Increase): Ch 2, dc in same st, 2 dc in next st around. Join. (16 dc)
- This creates a slightly raised center suitable for the yellow disk. Fasten off yellow but keep tail for sewing, or work center in contrasting yellow yarn: join yellow and sc around as needed for a little puff.
- Petal base: Join white yarn at any stitch. Ch 3, skip 1 st, sl st in next st — repeat around to create loops for petals. You should get about 8 loops (one per gap between center segments).
- Form petals: Into each loop: (sc, hdc, 2 dc, hdc, sc) — this produces fuller petals. Fasten off and weave ends.
Step-by-step — Round Body (Front continued)
- Round body increases: Join main color at base of petals. Work dc evenly around to create a circular cushion face. Increase rounds as: work 2 dc in one st, then 1 dc in each of next 2–3 sts to keep circle flat. Continue until diameter ≈ 12″.
- Use stitch markers every 4–6 sts to keep increases even.
- Final decorative round (optional): Work a round of popcorns or reverse single-crochet edge to frame the daisy.
Back (Plain Round)
- Make a matching round: Starting with magic ring or ch 4 joined to make ring, work rounds of dc with the same increase pattern until same diameter as front. For a neat edge, work 1 round of sc around the last round.
Assembly & Stuffing
- Join edges: With right sides facing out, join front and back using sc or hdc through both loops, or whipstitch with tapestry needle for invisible join. Stop when ~⅓ open.
- Stuff: Insert polyfill (or pillow insert) evenly, adding small amounts at a time for a smooth finish.
- Finish seam: Continue joining until closed. Weave ends.
Tips & Variations
- Use a small pillow insert for plumper, even shape. For a softer look, stuff lightly.
- Switch petal stitch height (more dc for bloomier petals, fewer for flatter look).
- Embroider veins on petals with contrasting thread for interest.
2. Crochet Lilac Mini Pillow Pattern
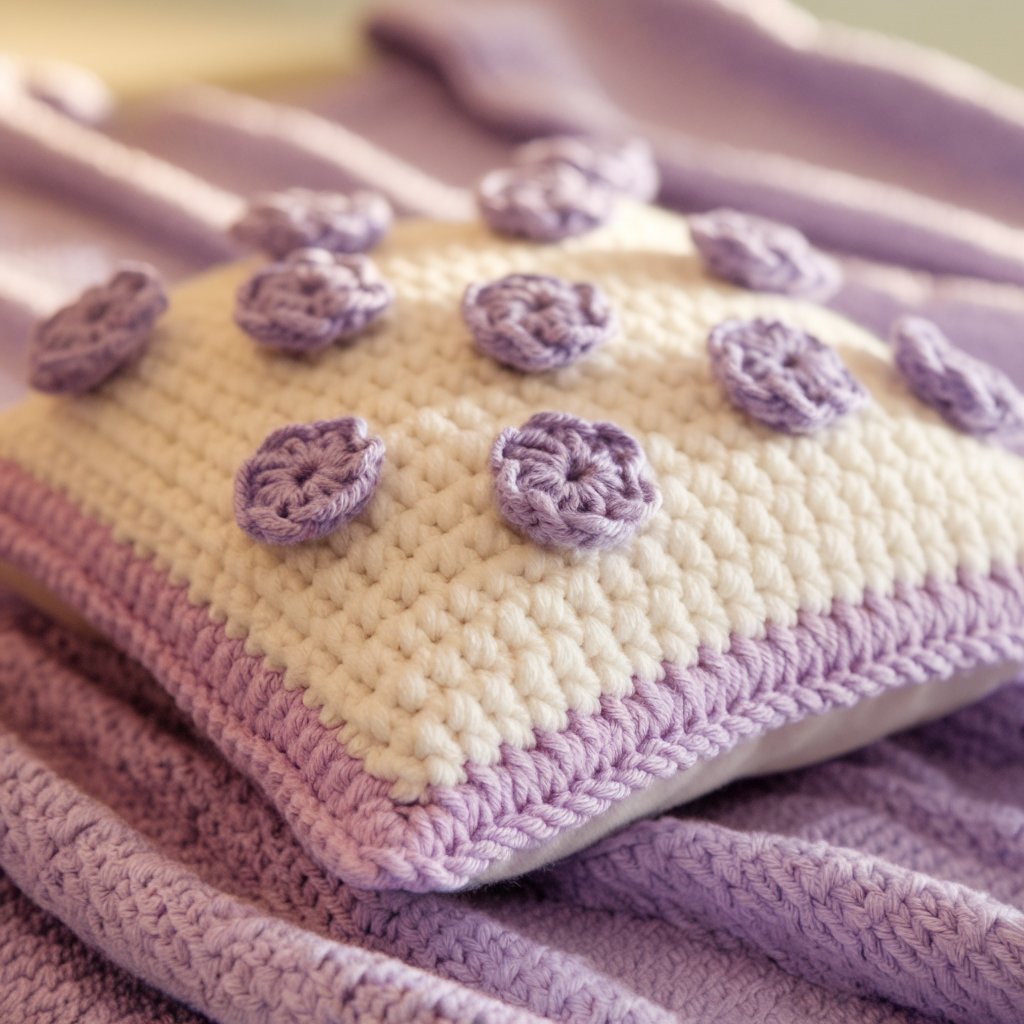
Skill level: Beginner
Finished size: ~6″ x 6″ (15 cm) — great as a mini accent or for gifting.
Materials
- DK or light worsted yarn (#3–#4) in lilac and contrasting color
- Hook: 4.0 mm (G)
- Polyfill or small 6″ pillow insert
- Yarn needle, scissors, stitch marker
Abbreviations
- ch, sl st, sc, hdc, dc, st(s)
Step-by-step — Mini Square (Make 2)
- Foundation: Ch 21.
- Row 1: Sc in 2nd ch from hook and across (20 sc). Turn.
- Rows 2–20: Ch 1, sc in each st across. Repeat until piece measures ~6″.
- Change color: For a lilac stripe pattern, switch color every 4 rows — optional for variegated look.
- Make a second square identical for back.
Assembly
- Seaming: Place squares wrong sides together. Using lilac yarn, sc through both loops around three sides.
- Stuffing: Before closing, stuff with polyfill evenly.
- Close: Finish seam with sc across final side. Fasten off and weave ends.
Decorative Option — Puff Lilac Flower
- Make puff flower (for center): With contrasting yellow: ch 2, (yo, insert hook into next st, yo, pull up a loop) repeat 5 times in same st to create 6 loops on hook, yo and pull through all loops, ch 1 to secure — make 5–7 petals arranged in circle and sew to pillow front.
Tips
- Use soft chenille or acrylic blend for a plush, cozy pillow.
- Mini pillows are great as couch clusters or gift bag fillers.
3. Crochet Chunky Pillow with Pom Poms Pattern
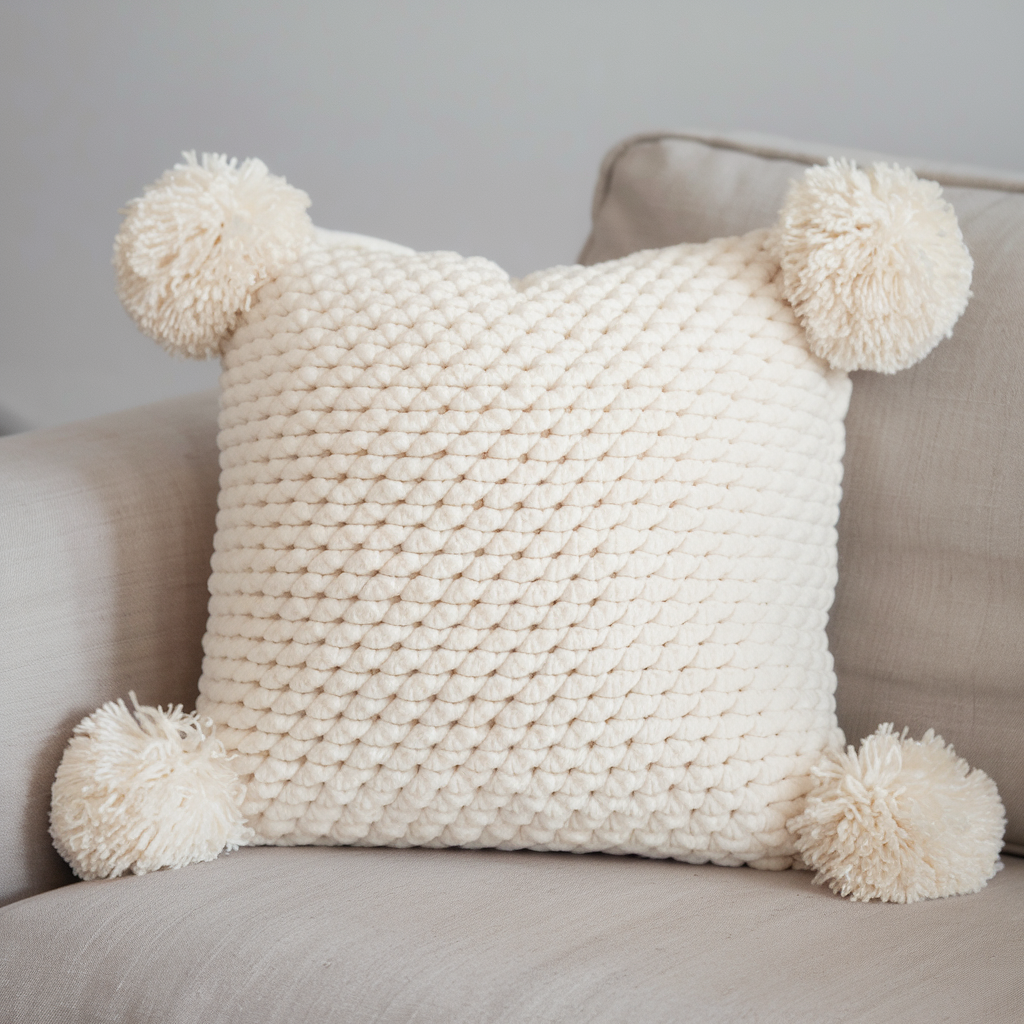
Skill level: Easy–Intermediate (bulky yarn and large hook)
Finished size: ~16″ x 16″ (40 cm) — chunky, cushiony.
Materials
- Super bulky yarn (Bulky #6) — about 400–600 g depending on size
- Large hook: 10 mm–12 mm (N/P) — check gauge
- Large pom-pom maker or handmade pom poms (6–8)
- Polyester insert 16″ or polyfill
- Tapestry needle, scissors
Abbreviations
- ch, sc, hdc, dc, BLO, FO = fasten off
Step-by-step — Panel (Make 2)
- Foundation: Ch 26 (adjust for desired width).
- Row 1: Hdc in 3rd ch from hook and across (24 hdc). Turn.
- Rows 2–30: Ch 2, hdc in each st across. Repeat until panel measures ~16″.
- Alternatively, work sc for denser fabric. Using BLO produces a ribbed, textured panel.
- Create texture: Add a row of puff stitches or bobble rows across the middle if you want extra dimension.
Pom Pom Attachment & Edge
- Attach pom poms: Make 6–8 large pom poms in coordinating color. Space them evenly along one panel edge. Sew securely with yarn and tapestry needle.
- Joining panels: Place panels right sides out. With large hook and same yarn, sc through both loops around three sides leaving one side open for insert.
- Insert pillow: Put in pillow insert for even fullness. Close final side with sc or mattress stitch.
Tips & Variations
- For a no-sew option, use large wooden buttons with loops to close one side.
- Use neutral chunky yarn for Scandinavian vibe; use bright colors for kids’ rooms.
- Hand-wash or dry-clean depending on yarn care.
4. Crochet Tooth Fairy Pillow Pattern
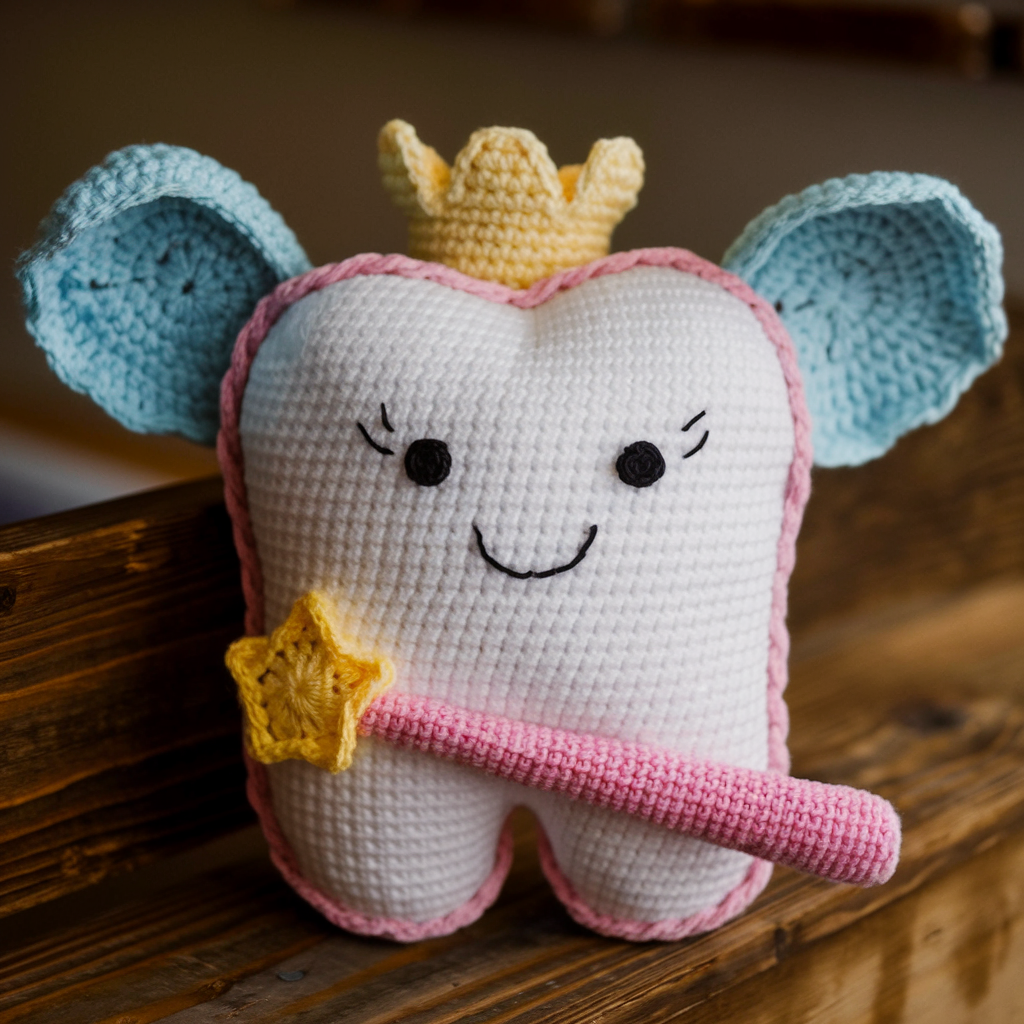
Skill level: Beginner–Intermediate (includes a small pocket)
Finished size: ~8″ x 8″
Materials
- Sport or DK yarn (soft cotton/acrylic)
- Hook: 4.0 mm
- Small button or Velcro for pocket closure
- Polyfill
- Yarn needle, scissors
Abbreviations
- ch, sl st, sc, hdc, st(s)
Design notes
This pillow has a small pocket to slip a lost tooth (or a little note) and can have a cute tooth or star applique.
Step-by-step — Pillow Parts
- Front square: Ch 31.
- Row 1: Sc in 2nd ch from hook and across (30 sc). Turn.
- Rows 2–24: Ch 1, sc across. Work until piece ≈ 8″.
- Pocket: Make a small rectangle: ch 13; sc across for 8 rows. Fasten off leaving long tail for sewing.
- Fold pocket along top edge and whipstitch bottom and sides to pillow front at desired location (lower center). Leave top open.
- Applique tooth: With white, chain 6, form small oval, or crochet a small amigurumi tooth: make 6 sc in magic ring, inc round to create a small dome, stuff slightly and sew to front above pocket.
Back
- Back square: Make same size as front but leave 4–6″ opening at top edge (or attach a button loop here).
Assembly
- Sew pocket to front: Position pocket and sew securely; add button or Velcro at pocket top.
- Joining: Place front & back right sides out and seam three sides with sc, stuff, then close leaving the pocket accessible.
- Closure: Optionally create small loop and button on back so parent can open pocket to remove tooth and leave treasure.
Tips & Safety
- Use Velcro for small children to avoid button hazards, or sew button securely and recommend parental supervision.
- Personalize with child’s initial embroidered on pocket.
5. Present Pillow with a Large Bow Crochet Pattern
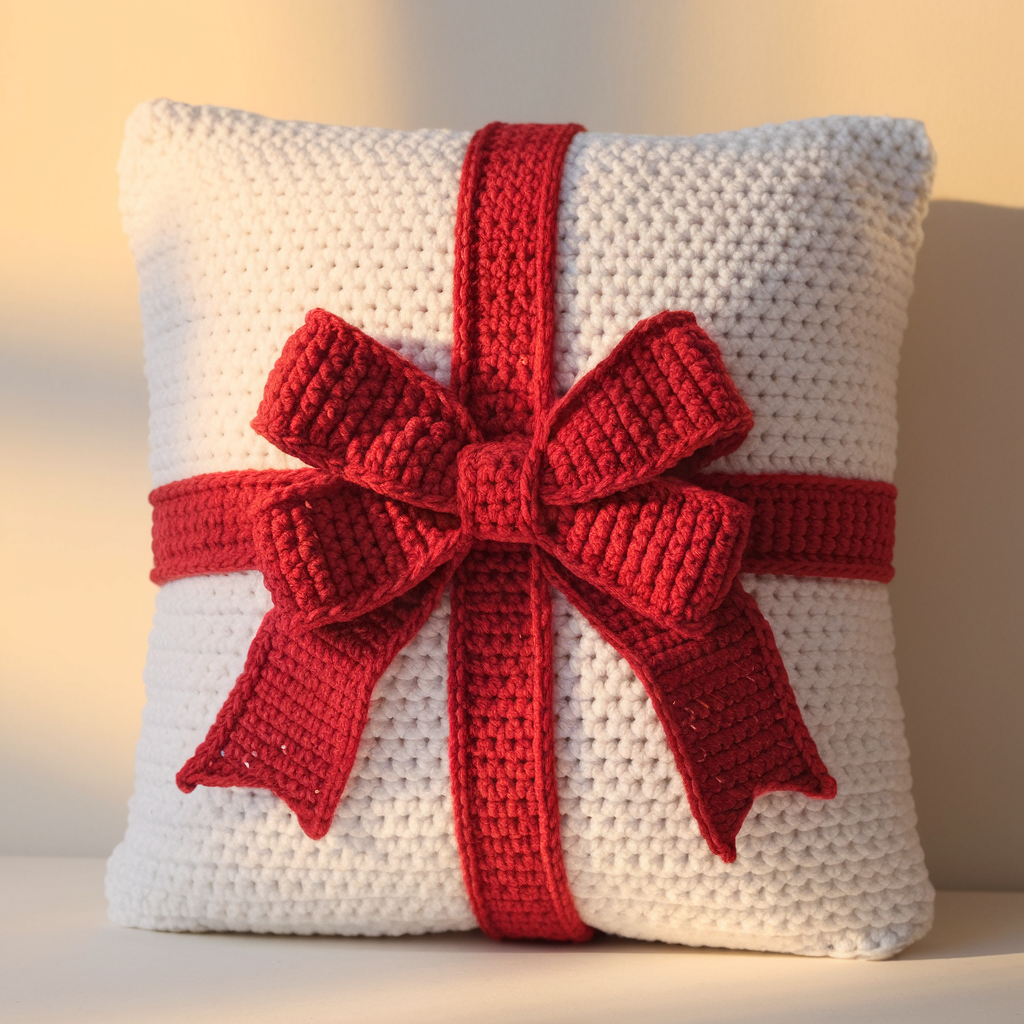
Skill level: Intermediate (seaming and shaping bow)
Finished size: ~14″ x 10″ (rectangular present pillow)
Materials
- Worsted yarn: main color for pillow, contrasting for bow
- Hook: 5.0 mm
- Pillow insert 12″ x 18″ or 14″ x 10″ depending on desired size
- Tapestry needle, scissors
Abbreviations
- ch, sc, hdc, dc, dec = decrease
Step-by-step — Pillow Body (Make 2 rectangles)
- Foundation: Ch 41 for 14″ length (adjust).
- Row 1: Hdc in 3rd ch from hook and across. (39 hdc)
- Rows 2–24: Ch 2, hdc across until rectangle measures desired width ~10″.
- Make second rectangle identical.
Bow
- Large bow loop (make 2 identical panels): Ch 31.
- Rows 1–8: Dc across until piece ≈ 10″. Fasten off.
- Bow center band: Ch 6; sc across 4 rows to create small strap to cinch bow.
Assembly
- Sew bow loops together: Fold each bow panel in half and seam sides to make thicker loop—alternatively stack two panels and sew through center to create fullness. Flatten and pinch middle.
- Attach middle band: Wrap center band tightly around bow middle and sew ends on reverse.
- Place bow on front rectangle: Center and sew bow firmly to the front rectangle.
- Join rectangles: With right sides facing out, join three sides with sc, insert pillow, finish closing.
Tips & Styling
- Use sparkly or metallic yarn for bow for holiday present look.
- For a gift tag, crochet a small rectangle and attach with a chain loop.
6. Large Crochet Pumpkin Pillow Pattern
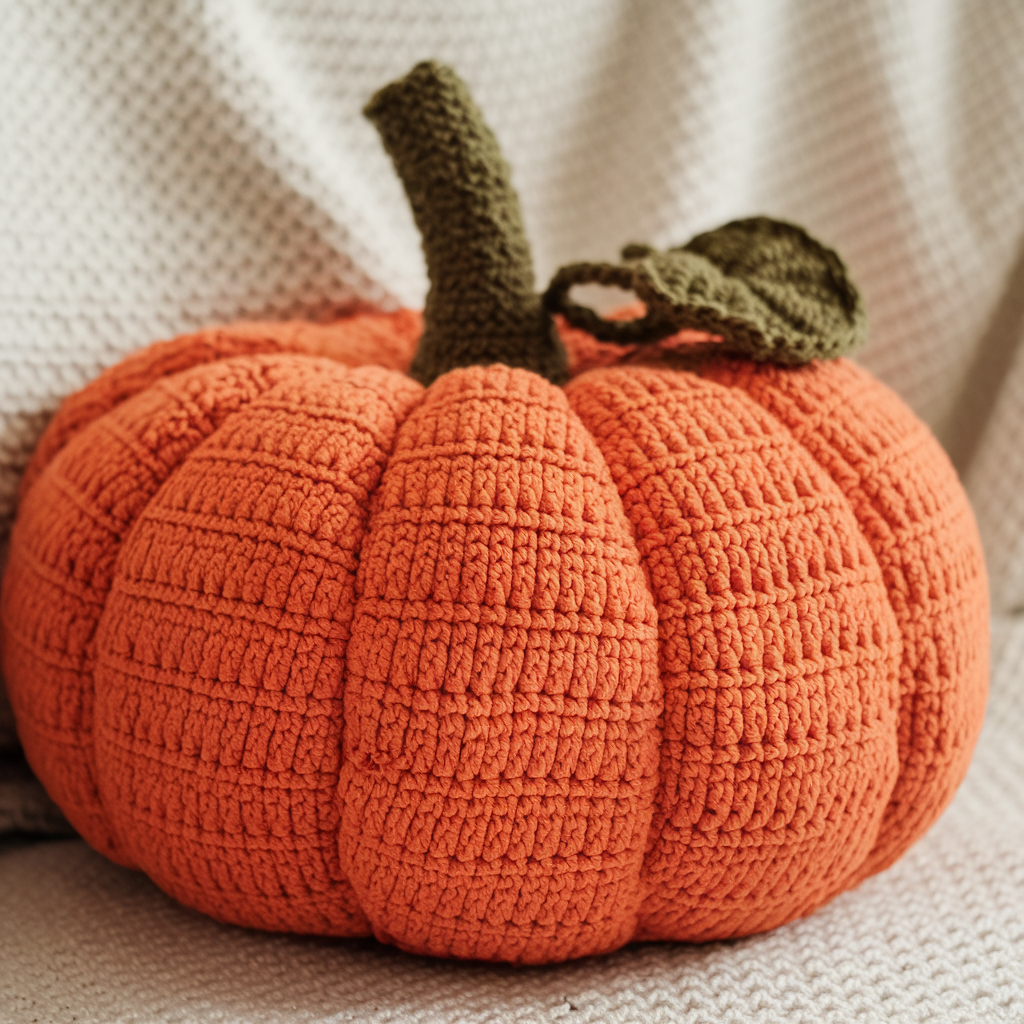
Skill level: Intermediate (shaping & surface embroidery)
Finished size: ~18″ wide (oval pumpkin)
Materials
- Bulky or worsted yarn in orange, brown (stem), and green (leaf)
- Hook: 6.0–8.0 mm depending on yarn
- Fiber stuffing or pillow insert
- Stitch markers, yarn needle, tapestry needle
Abbreviations
- ch, sc, hdc, dc, sl st, FLO/BLO, dec
Step-by-step — Pumpkin Sections (Make 8 panels)
- Make a pumpkin wedge: Ch 15.
- Row 1: Dc in 3rd ch from hook and across. (13 dc)
- Rows 2–20: Ch 3, dc across. Work more rows to make length equal to desired pumpkin height (~10–12″).
- Make 8 wedges—these will be sewn together to form a rounded pumpkin. Smaller number of wider wedges gives a smoother look; more wedges give a ribbed texture.
- Alternatively, crochet two large ovals (front/back) and gather sides with surface slip-stitch ribs for pumpkin ridges.
Assembly
- Sew wedges together: Place wedges side by side and whipstitch edges to create a round shape. Leave a small opening at top and bottom.
- Stuff: Stuff firmly to give pumpkin body fullness.
- Close top & bottom: Finish sewing opening.
Stem & Leaf
- Stem: With brown yarn, ch 6, sc in 2nd ch from hook across to form a tube about 2–3″ high. Stuff lightly and sew to top center.
- Veined leaf: Ch 8, sc back along chain, work a few decrease rows and finish with embroidered veins in green.
Surface Ribs (optional)
- Ribbing: Use bulky yarn and tapestry needle to weave lines from top to bottom (through pillow) to form pumpkin sections — this creates dramatic vertical ribs.
Tips
- For a flatter pillow, make front/back ovals and sew edges; for sculpted 3D pumpkin, wedges and stuffing work best.
- Use neutral colors for fall décor or pastel orange for softer look.
7. Candy Heart Pillow Crochet Pattern
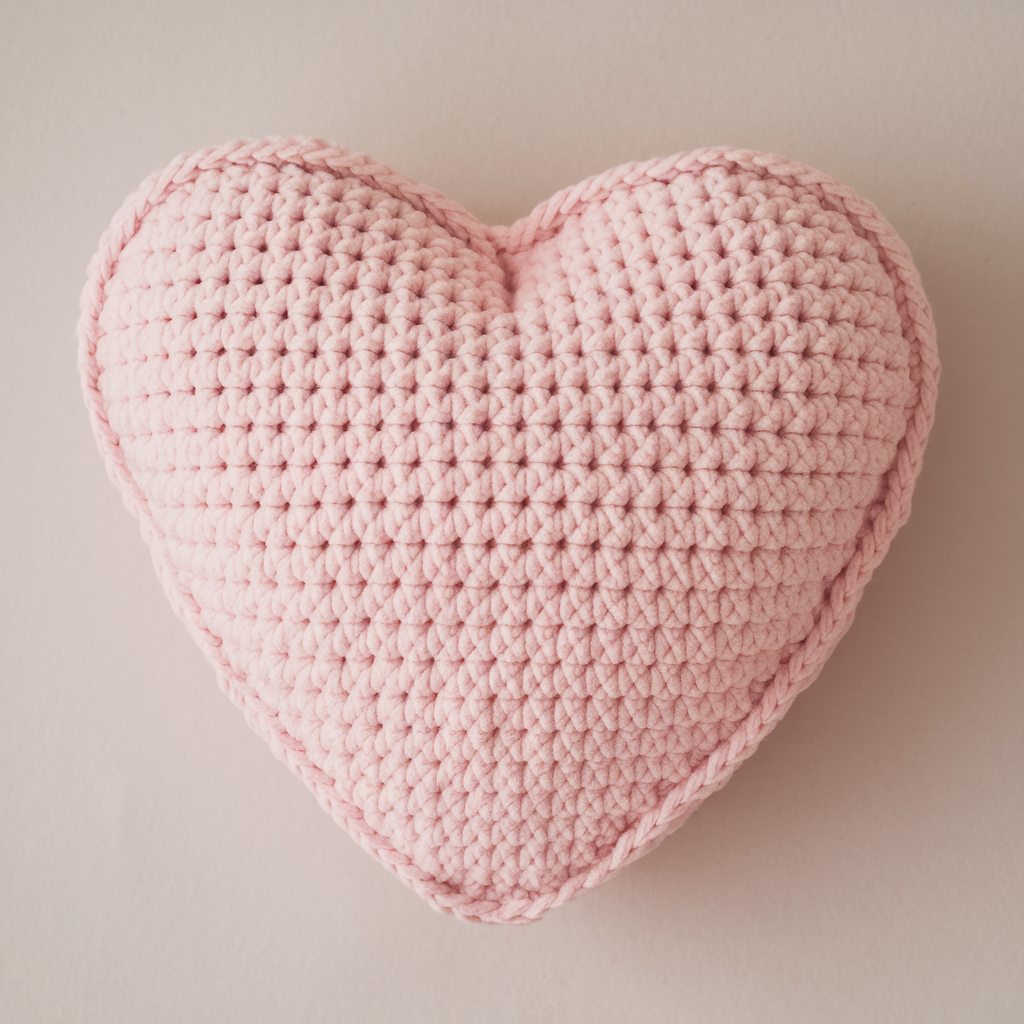
Skill level: Beginner–Intermediate
Finished size: ~10″ heart
Materials
- Worsted yarn in pink/red/white
- Hook: 4.5–5.0 mm
- Polyfill or small insert
- Yarn needle, scissors
Abbreviations
- ch, sl st, sc, hdc, dc, inc = increase (2 sc in same st), dec
Step-by-step — Heart (Make 2)
- Start with magic ring: Join color A (pink). Ch 2.
- Round 1: 3 dc into ring, ch 2, 3 dc into ring, ch 3, 3 dc, ch 2, 3 dc into ring to shape two lobes (you’ll make two heart lobes and point). Close ring and sl st to first dc. Fasten off.
- Alternatively, follow classic heart pattern: ch 4, work stitches into first ch to create two semicircles, and decrease to create point.
- Make second heart mirrored for back.
- Edge rounds: Join yarn and sc evenly around both hearts’ outer edges.
Assembly & Stuffing
- Joining: Place wrong sides together. Sc through both loops around, leaving small opening.
- Stuff: Fill with polyfill, ensuring heart points are firm.
- Close: Continue sc and finish.
Candy Messages
- Surface Lettering: With contrasting yarn and small needle, embroider short messages like “BE MINE”, “XOXO”, or numbers — keep letters chunky and short for readability. Use chain stitch or surface slip-stitch.
Tips
- Use a heart template to size consistently.
- For a candy-style look, use pastel colors and felt letters glued on if you prefer no embroidery.
8. Crochet Sunflower Pillow Pattern
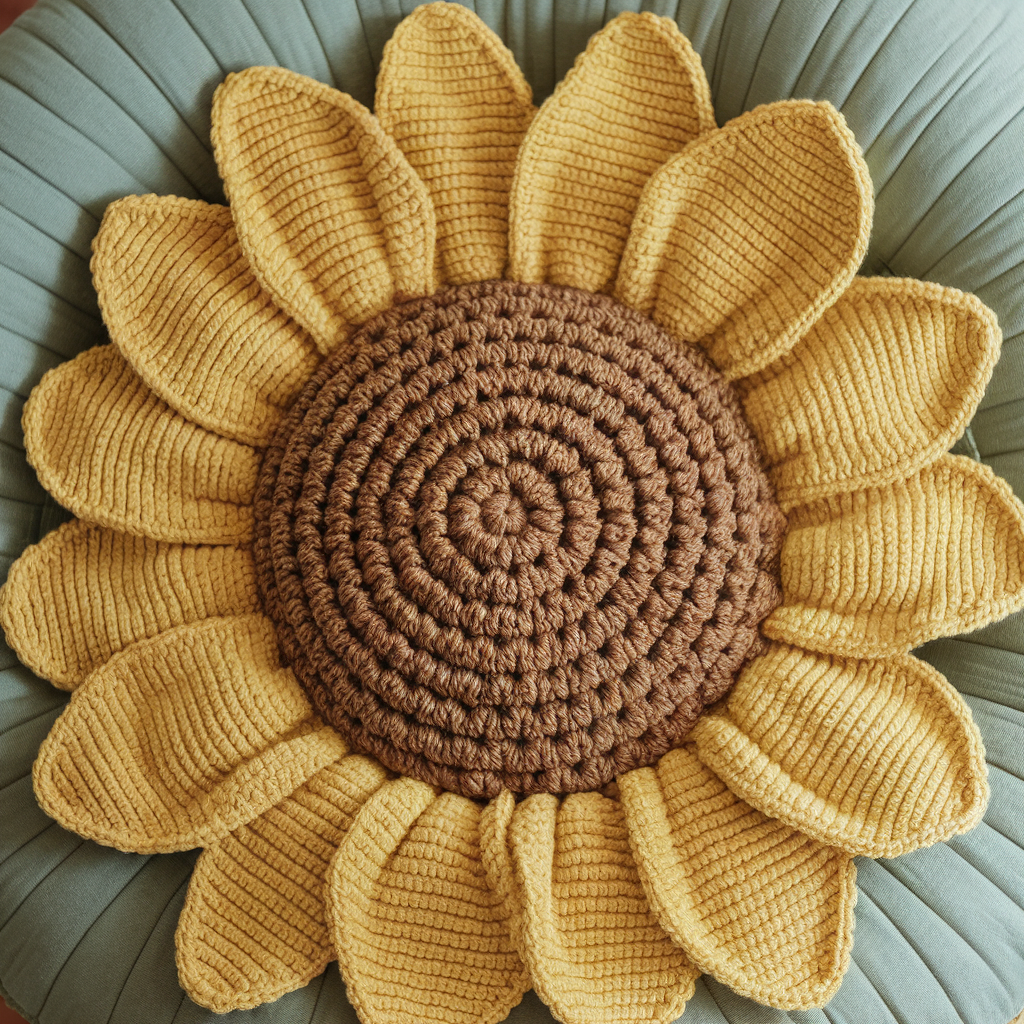
Skill level: Intermediate (flower applique + textured background)
Finished size: 14″ diameter round or square (depending on layout)
Materials
- Worsted yarn: yellow (petals), brown (center), green for leaves/background
- Hook: 5.0 mm
- Pillow insert 14″ or polyfill
- Tapestry needle, stitch markers
Abbreviations
- ch, sl st, sc, hdc, dc, tr = treble (US: tr), st(s)
Step-by-step — Sunflower Applique (Front)
- Center (Brown): Magic ring, ch 1, 10 sc into ring, join. (10)
- Round 2: Inc every st (2 sc in each) = 20 sc. Join.
- Create puff center for texture: Round 3: ch 1, (yo, insert, yo pull loop) 3 times, yo pull through all loops to make clusters across center (or use popcorns every other stitch).
- Petal base: Join yellow at any st. Ch 5, sl st into same st to make petal loops around — repeat for each st (about 20 loops).
- Form petals: Into each loop: (sc, hdc, 3 dc, hdc, sc) — fasten off and weave ends.
Pillow Body
- Background panel: Create a round or square panel in green: work rounds of dc until desired diameter ~14″.
- Attach sunflower: Sew sunflower applique to panel center with matching thread; secure petals flat.
Leaves (optional)
- Make leaves: Ch 12, sc back along chain shaping with increases/decreases to make leaf shape. Make 2–4 leaves and sew near flower.
Back & Assembly
- Make back panel matching front size.
- Join & stuff: Seam three sides with sc or whipstitch, insert pillow, finish closing.
Tips & Variations
- Use ombre yellow yarn for gradient petals.
- For modern look, place multiple small sunflowers across a square pillow.
- Add beaded centers for shine (sew beads into center carefully).
Conclusion
There you have it — eight cozy, creative crochet pillow patterns you can make right now. Each pattern is designed to be approachable and adaptable: change yarn weight and hook size to scale pillows up or down, swap colors to match your decor, and mix techniques (appliqué, surface embroidery, pom poms) to make each piece uniquely yours. If you want any one pattern converted to a printable PDF, sized differently, or turned into a video-friendly step list, tell me which one and I’ll lay it out in that format next — but for now, pick a yarn, pick a hook, and enjoy stitching your new favorite pillow!


