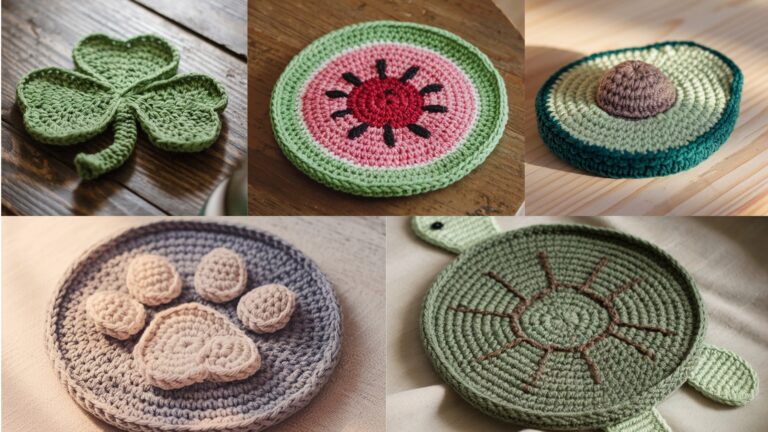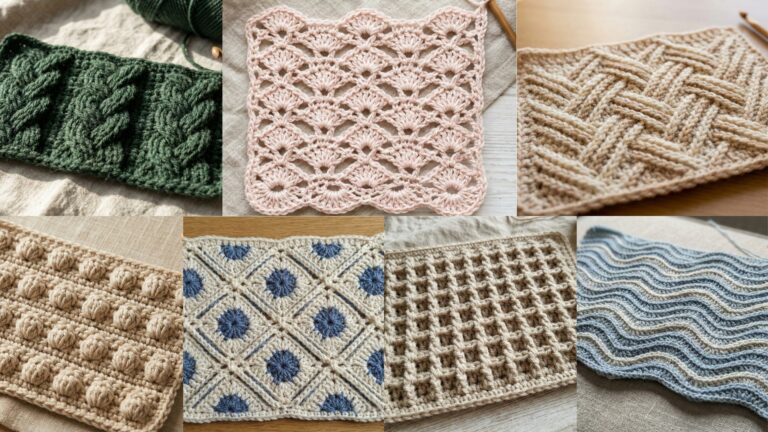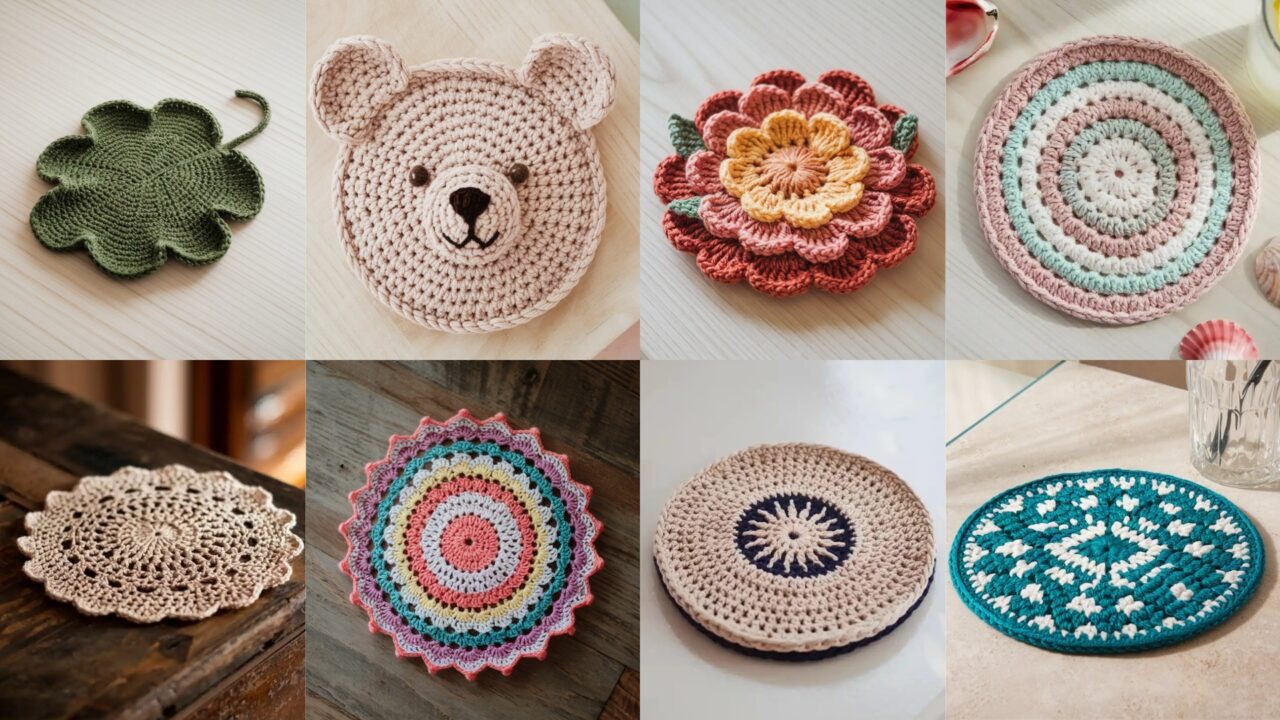
Coasters should be quiet heroes: absorb condensation, stop rings on wood, and be small enough to finish between episodes. These eight patterns run a range of looks — cute (bear), organic (leaf), graphic (mosaic), celestial (stargazer), meditative (mandala), beachy (tropical), floral (mum), and retro (vintage). Use cotton for durability and absorbency; linen blends work too. Each pattern below is written for a sample finished coaster of about 4–4.5 inches (10–11.5 cm) across — the sweet spot for mugs and small glasses — but I include notes showing exactly where and how to adjust size.
Before you stitch, read the quick common notes; they’ll keep you from frogging later.
Quick common notes (read this — this will save time)
Abbreviations (US): ch = chain, sc = single crochet, hdc = half double crochet, dc = double crochet, tr = treble, sl st = slip stitch, st(s) = stitch(es), MR = magic ring, inc = 2 sc in same st, dec = sc2tog, BLO/FLO = back/front loop only.
Materials (general):
- Yarn: 100% cotton (worsted #4 or cotton DK) for best absorbency and flatness. For lacy/coarse looks, use cotton-linen blends. Avoid fluffy, pelleted yarns — they hide stain resistance.
- Hook: 3.5–4.5 mm depending on yarn. Use the hook that gives you nice, firm fabric (not floppy) so coasters lie flat.
- Notions: tapestry needle, small scissors, tape measure or ruler, optional blocking board and pins, spray bottle or steam iron for blocking.
- Optional: thin felt backing (for furniture safety) or a drop of clear craft glue to secure felt.
Gauge & sizing logic (do this once):
- Make a 4″ (10 cm) sc swatch and count stitches across 4″. Example I use for math below: 16 sc = 4″ → 4 sts/in and 8 rows = 2″ → 4 rows/in. Use your swatch numbers instead of mine if different.
- Target coaster diameter (example): 4.25″ → multiply by stitches/in for round/grid sizing if needed. But most circular coaster patterns tell you which round to stop at — check your swatch to confirm.
Finishing basics:
- Always block flat when done (pin to a circle on a blocking mat and mist or use steam) if you want tidy edges.
- Weave ends neatly on the wrong side.
- For furniture protection, glue a small felt circle to the underside; for machine-washable coasters, sew felt on as a removable pad or skip felt entirely.
Care: cotton coasters can be machine-washed gentle and air-dried or low tumble. Avoid hot dryers repeatedly — yarn will age faster.
1. Crochet Bear Coaster Pattern
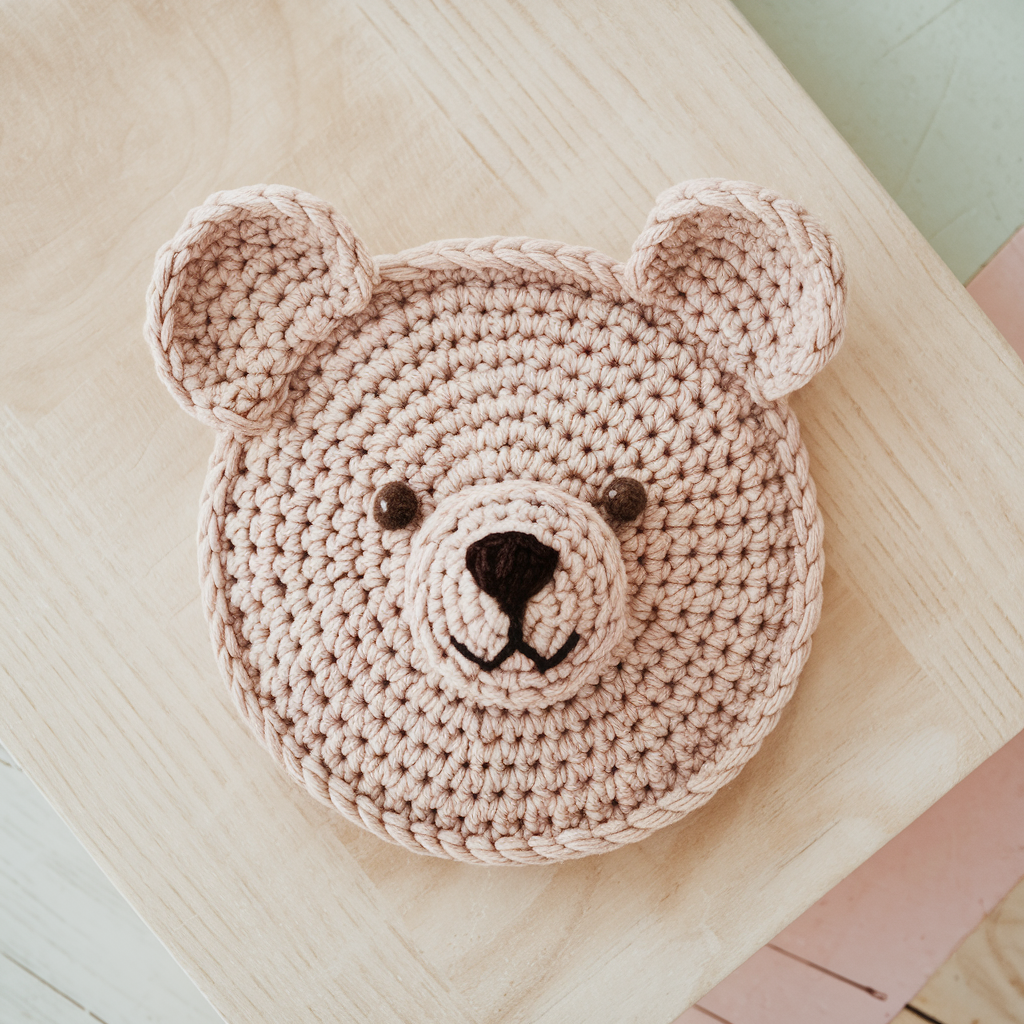
Cute, slightly kitschy, and great for kids’ rooms or gift sets.
Skill level: Confident Beginner
Finished size (sample): about 4–4.25 in (10–11 cm) diameter for base; ears add a bit.
Materials: cotton #4 (main color), small contrast for inner ear/nose if desired, 4.0 mm hook, tapestry needle.
Gauge for sample: ~4 sts/in (use your swatch).
Construction overview
Make a flat round for the coaster body, add two small ear appliqués, and optionally embroider a nose/face or add tiny felt pieces.
Steps — flat round base
- MR, ch1, 6 sc into MR. Join with sl st to first sc. (6)
- R2: ch1, inc in each st around. (12)
- R3: ch1, sc1, inc repeat around. (18)
- R4: ch1, sc2, inc repeat around. (24)
- R5: ch1, sc3, inc repeat around. (30)
- R6: ch1, sc4, inc repeat around. (36) — stop here if about 4″. If your swatch makes it smaller/larger, either add R7 (sc5, inc → 42) or stop at R5. Measure flat; aim for 4–4.25″ diameter.
Steps — ears (make 2)
- MR, ch1, 6 sc in MR. (6)
- R2: inc in each st → 12. R3: sc around 12 (or do sc1, inc for a slightly larger ear). Fasten off leaving tail. Flatten slightly and sew to top edge of coaster, spaced about 3–3.5″ apart center-to-center.
Face (optional)
- Use embroidery floss or small yarn to stitch a nose: a tiny triangle of satin stitch or embroider a smile. For safety with kids, avoid glued beads.
Finishing
- Weave ends, block flat. Optional: glue or sew a small felt circle on underside for table protection. Make a set of four in different colors.
Variations & tips
- Make a bear family — scale ears and rounds up/down for mug-sized or shot-glass coasters.
- For sturdiness, hold two strands together and use a larger hook for a chunky, absorbent coaster.
2. Crochet Leaf Coaster Pattern
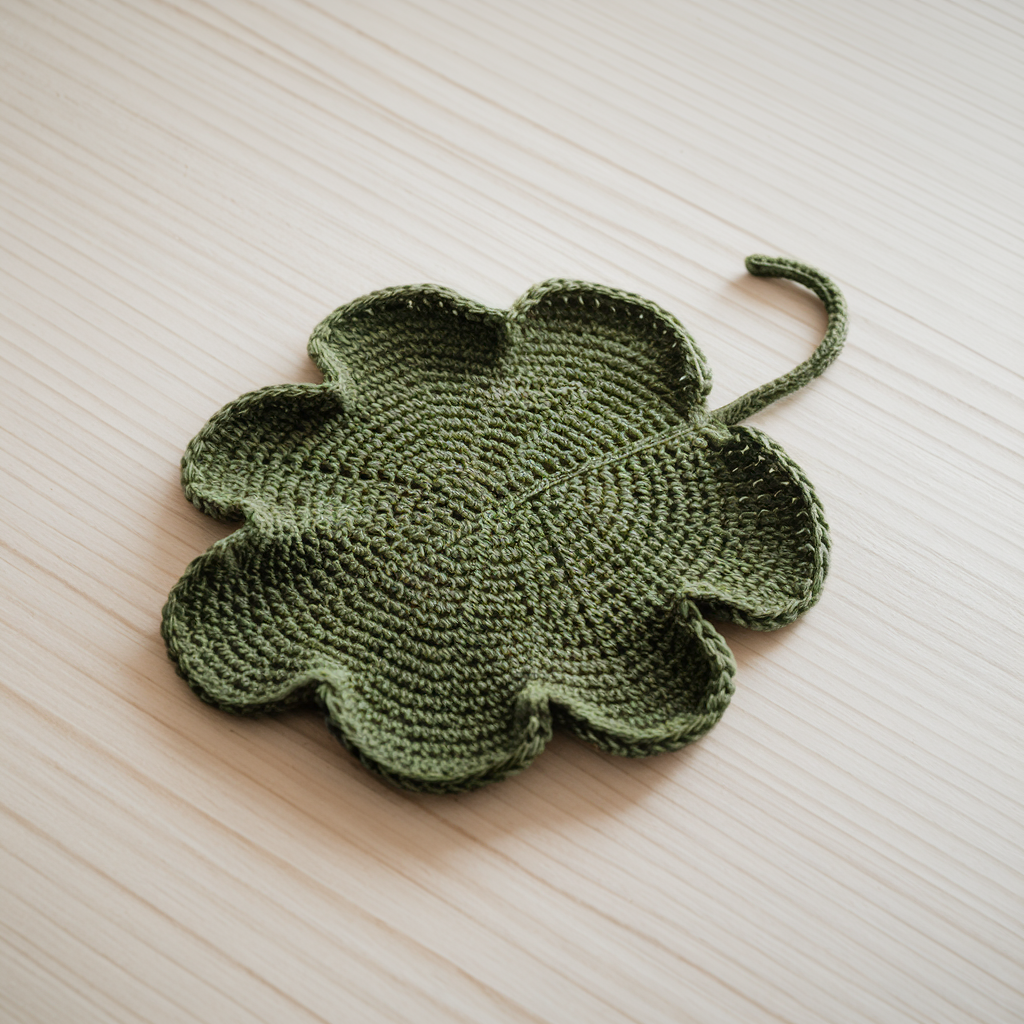
Organic, modern, and perfect for houseplant lovers. Works flat; use a firm cotton for crisp vein detail.
Skill level: Confident Beginner
Finished size (sample): about 4.25–4.5 in (11–11.5 cm) long (leaf shape is oval/teardrop).
Materials: cotton #4, 4.0 mm hook, tapestry needle. Optional blocking wires/pins if you want sharp lobes.
Construction overview
Work a teardrop/leaf with increases on one side, decreases on the other, plus surface stitch veins.
Steps — leaf model
- Ch 14 (this is the leaf center width; change if you want wider leaves). Row 1: sc in 2nd ch from hook across (13 sc). Turn.
- Row 2: ch1, sc across in BLO (to give slightly raised edge). Turn.
- Row 3: ch1, inc, sc across until 2 sts remain, inc, sc1 — increase at beginning and before last st to make rounded base. Turn.
- Row 4–Row X: Repeat increasing row every other row on both ends until leaf width reaches desired (makes rounded base). Then start decreasing rows symmetrically: sc across but dec 1 at each side every other row until you narrow to a point. Fasten off.
- For precise shaping: after reaching widest point (measure length about 2.5–3″), work same number of decrease rows as you did increase rows to create symmetrical leaf.
Veins (surface crochet)
- With a contrasting color and tapestry needle, surface-sl-st a central vein down the middle and 2–3 smaller veins toward the sides. Lightly block with pins to open shape.
Finishing
- Weave ends and block gently; pin edges for leaf lobes if desired.
Variations & tips
- Make a set in seasonal colors or use variegated yarn for a mottled leaf.
- For a sturdier coaster, make two leaves and join them (wrong sides together) with sc and stuff lightly with batting — gives insulating thickness.
3. Crochet Mosaic Coaster Pattern
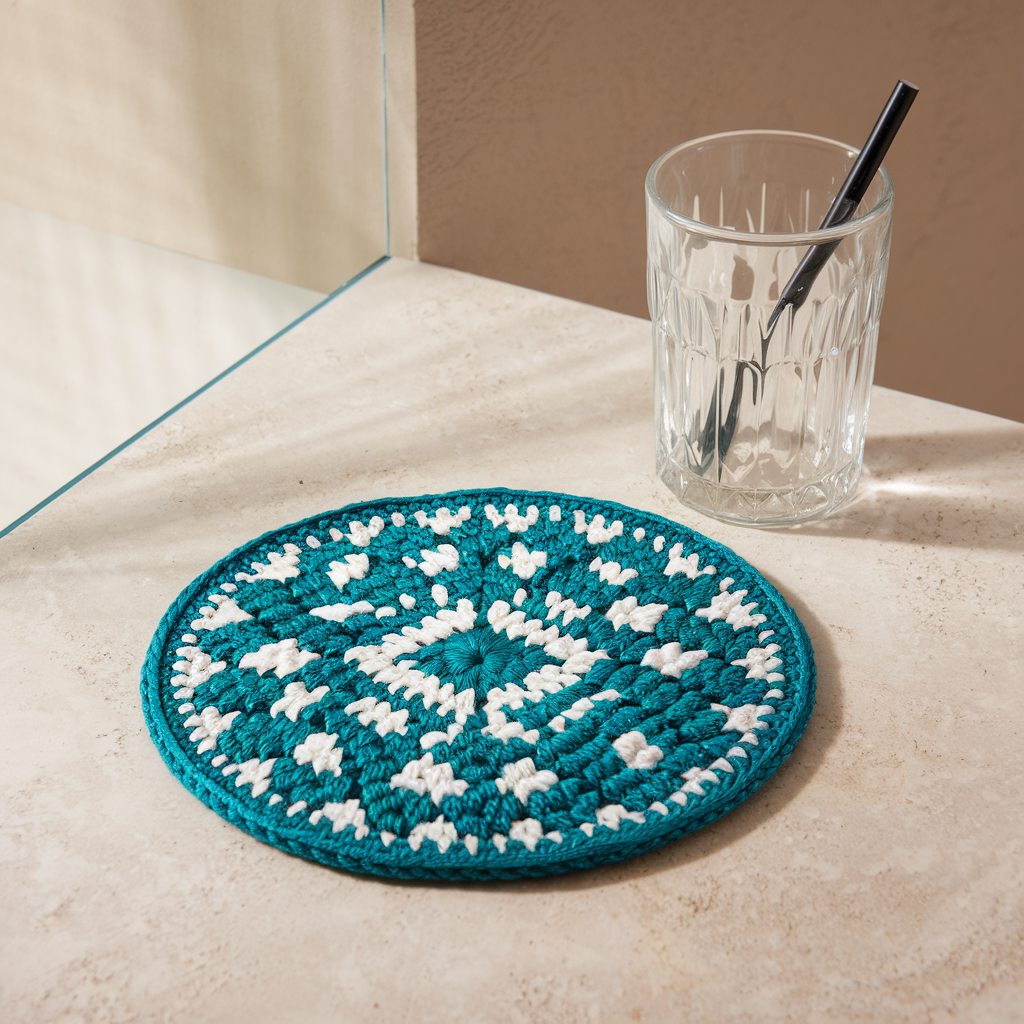
Bold geometric looks, reversible if done carefully. Mosaic crochet gives sharp two-color motifs with no floats carried too long.
Skill level: Intermediate (mosaic technique)
Finished size (sample): 4 in (10 cm) square or round variant.
Materials: cotton #4 in two contrasting colors (A & B), 4.0 mm hook, tapestry needle.
Gauge/model: Using 4 sts/in, a 16 × 16 grid will produce ~4″ square.
Construction overview
Work a small mosaic grid of blocks using slip-stitch color-shift mosaic technique — pattern shown for a 16 × 16 checker/diamond layout.
Steps — grid approach (square coaster)
- Foundation: chain 17 (makes 16 sts across). Row 1: sc across 16 sc. Turn.
- Follow a simple mosaic chart — for example a 16×16 motif: Row 2 (Color A): sc or sl st per chart; Row 3 (Color B): sl st row to carry pattern — mosaic alternates rows of single-color sc and rows of slipped stitches to create color blocks. I recommend following a printable 16×16 chart — but if you want to make one quickly: use small 4×4 diamond blocks repeated for a geometric motif.
- Work until you have 16 rows (or desired height), fasten off.
Round / circular mosaic (alternative)
- Use a radial mosaic design working in rounds: use color changes on alternating rounds and slip stitches to form geometric rays. Stop when you reach desired diameter (~4″).
Finishing & blocking
- Square coasters block very well. Pin into a neat square and spray lightly. Weave ends and trim.
Variations & tips
- Choose high-contrast colors (navy/turmeric, black/white) for graphic look.
- Use mosaic technique for holiday motifs (trees, stars) by making tiny simple charts.
4. Crochet Stargazer Coaster Pattern
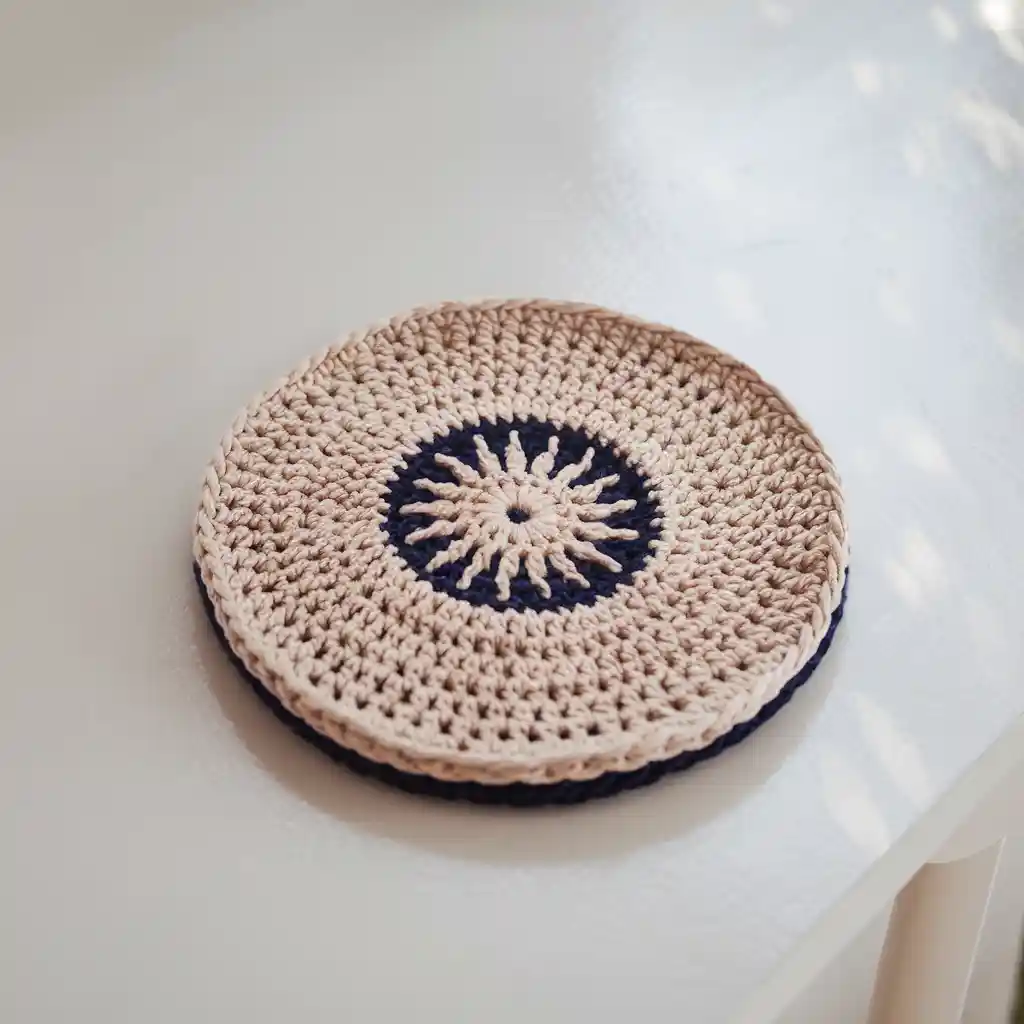
A starburst or star-in-a-circle motif. Fancy looking but quick to make — great for evening drinks.
Skill level: Confident Beginner → Intermediate (post stitches or star picots)
Finished size (sample): 4–4.5 in (10–11.5 cm) diameter.
Materials: cotton #4, 4.0 mm hook, tapestry needle. Use two colors for contrast if you want the star to pop.
Construction overview
Work a round base, then overlay a star motif using surface crochet or front-post stitches for raised star points.
Steps — base circle
- MR, ch1, 8 sc into MR. Join. (8)
- R2: ch1, inc in each st around → 16.
- R3: sc1, inc around → 24.
- R4: sc2, inc around → 32. Stop when circle is ~4″. (Adjust rounds based on gauge.)
Star overlay (8-point star)
- With contrasting yarn, mark 8 evenly spaced points (every 4th stitch if you have 32 sts). Use surface slip-stitch from center out to each mark to create raised rays: insert hook under post of the indicated stitch and sl st outward repeating for 4–6 sl st to form a ray. Repeat for all 8 points.
- Alternatively, work a star-in-round by making a 8-lobed star: MR, ch4 loops and then anchor them into the round center and crochet over them for petals.
Finishing
- Block with pins to keep star points crisp. Weave ends and trim. Optional: lightly stiffen with diluted fabric stiffener if you want permanent shape.
Variations & tips
- For metallic cocktail vibes, use a strand of lurex held with cotton for the star only (subtle shimmer).
- Use surface embroidery (chain stitch) for more delicate star lines.
5. Crochet Mandala Coaster Pattern
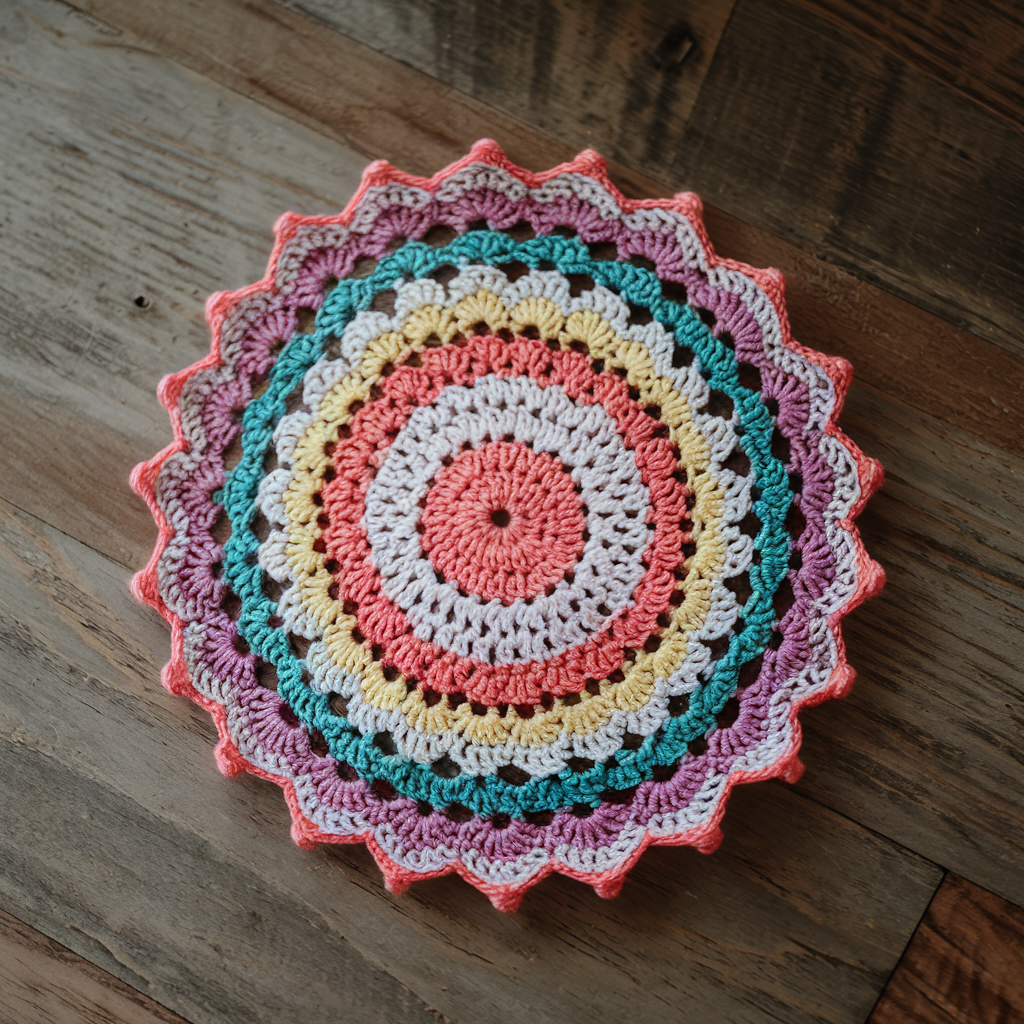
Hypnotic, layered, and excellent for using small color changes. Mandalas make very attractive coaster sets.
Skill level: Intermediate (multiple stitch types & color changes)
Finished size (sample): ~4–4.5 in (10–11.5 cm) diameter depending on rounds.
Materials: cotton #4 in 3–5 contrasting colors, 3.5–4.0 mm hook, tapestry needle.
Construction overview
Work in rounds using repeats: MR center, rounds of dc shells, popcorns/bobbles, picots, and sc rounds to create a layered mandala.
Steps — sample 8-round mandala
- MR, ch2, 12 dc into MR. Join. (12)
- R2: ch1, sc in next st, ch3, skip next repeat to make airy ring (12 loops).
- R3: In each ch3 space work (sc, hdc, 3 dc, hdc, sc) — forms petals. Join.
- R4: sc around petals to anchor. R5: Make small bobbles on alternating petals (bobble stitch = YO, insert, pull loop … close) for texture.
- R6: dc shells between bobbles. R7: sc round for tidy edge. R8: optional picot round for decorative points (sc, ch3, sl st back into same st) or a final sc round for flat edge.
Stop when coaster reaches ~4–4.5″. Blocking strongly recommended to flatten. Weave ends.
Variations & tips
- Try gradient colors or a single pop color for outer rounds.
- For more absorbency, make two identical mandalas and join wrong sides together with sc to create a double-thickness coaster.
6. Crochet Beach Coaster Pattern
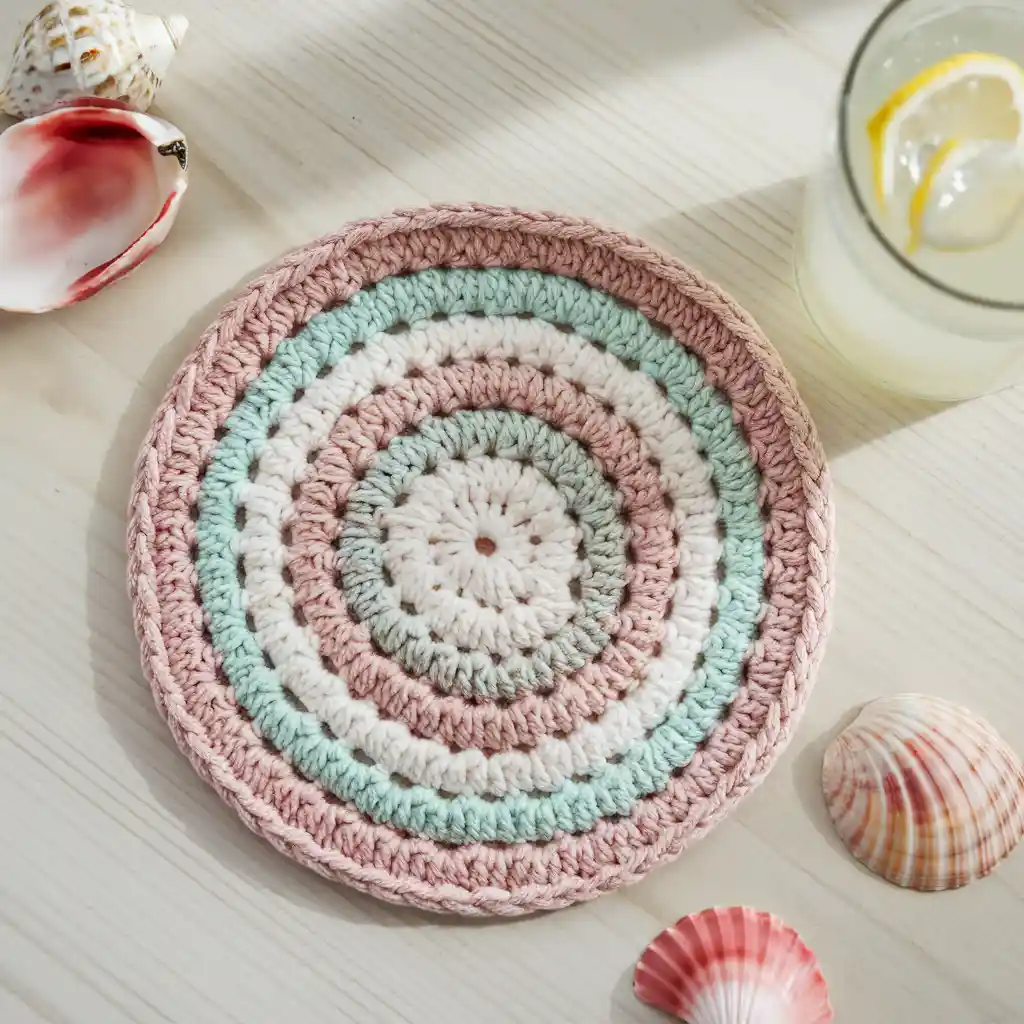
Light, airy texture and a laid-back palette — perfect for summer gatherings.
Skill level: Confident Beginner
Finished size (sample): 4–4.25 in (10–11 cm) diameter (round) or rectangular for sunglasses/glasses.
Materials: cotton-linen blend or DK cotton, 4.0 mm hook, tapestry needle. Optional fringe for nautical look.
Construction overview
Make a shell/lacy circle that’s still flat and dense enough to hold condensation. Use slightly tighter tension or an extra sc round for firmness.
Steps — airy shell circle
- MR, ch2, 12 dc in MR. Join. (12)
- R2: ch1, sc in next st around (creates base). R3: In each sc space work (2 dc, ch1, 2 dc) or a small shell to add texture. R4: sc round to stabilize. R5: repeat shell then sc until diameter ~4″. Finish with sc rounds for a firm rim.
Finishing
- Block flat; add a tiny fringe of 10–12 short strands at edge for beachy flair (optional). Weave ends.
- For coasters used with cold drinks, top with one extra round of sc to give rigidity.
Variations
- Use pale aqua + sand + cream for a beach-pack set.
- Make square version with a filet shell: chain multiples of 4 plus 1 and work open/closed blocks.
7. Crochet Mum’s Flower Coaster Pattern
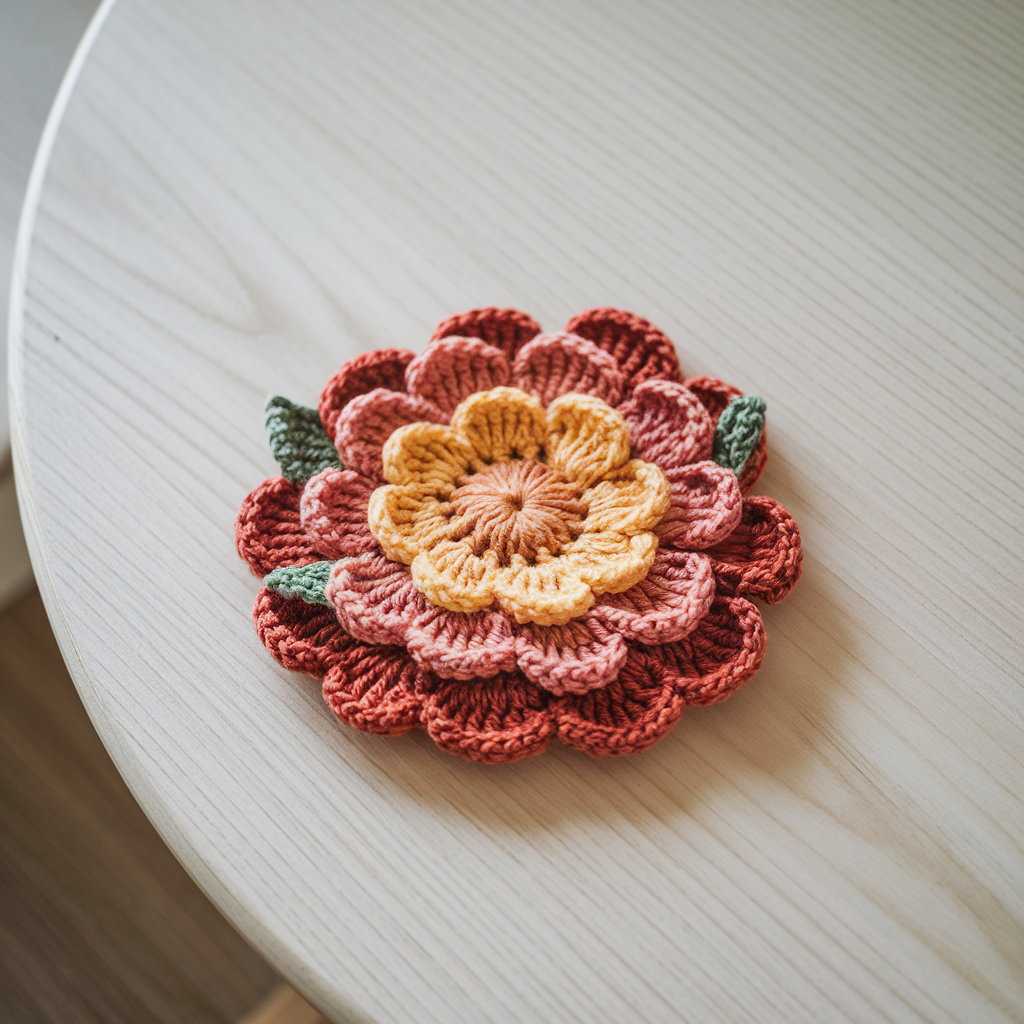
Classic English garden vibes — layered petals like a chrysanthemum. Pretty, gift-ready, and excellent for a grandmotherly tea party.
Skill level: Intermediate (petal rolling or layered petals)
Finished size (sample): ~4–4.5 in (10–11.5 cm) across with petals.
Materials: cotton #4, 4.0 mm hook, tapestry needle. You’ll want 2 colors: center + petals.
Construction overview
Crochet a small disk for center, then make a long petal strip and roll it into layered petals sewn to the disk, or create rounds of petals radially.
Steps — radial petal method (flat)
- MR, ch1, 8 sc in MR. Join. (8) — center.
- R2: For each sc make ch4, sl st in same st to create loops. R3: In each loop work (sc, hdc, 3 dc, hdc, sc) to form petals. Join.
- R4: sc round to anchor and make small petals in the spaces between big petals (sc, ch3, sc) for a layered look.
- Repeat petal rounds until diameter ~4″. Fasten off and weave ends.
Assembly & finishing
- Flatten petals and steam-block lightly to open petals. Add a small embroidered center or a tiny felt dot for contrast.
- Optionally sew onto a felt backing and glue a small coaster backing for durable use.
Variations
- Make mini sets in pastel combos for brunch gifts.
- For a more sculptural coaster, roll the petal strip (method 2) inward and stitch base firmly to flat disk.
8. Crochet Vintage Coaster Pattern
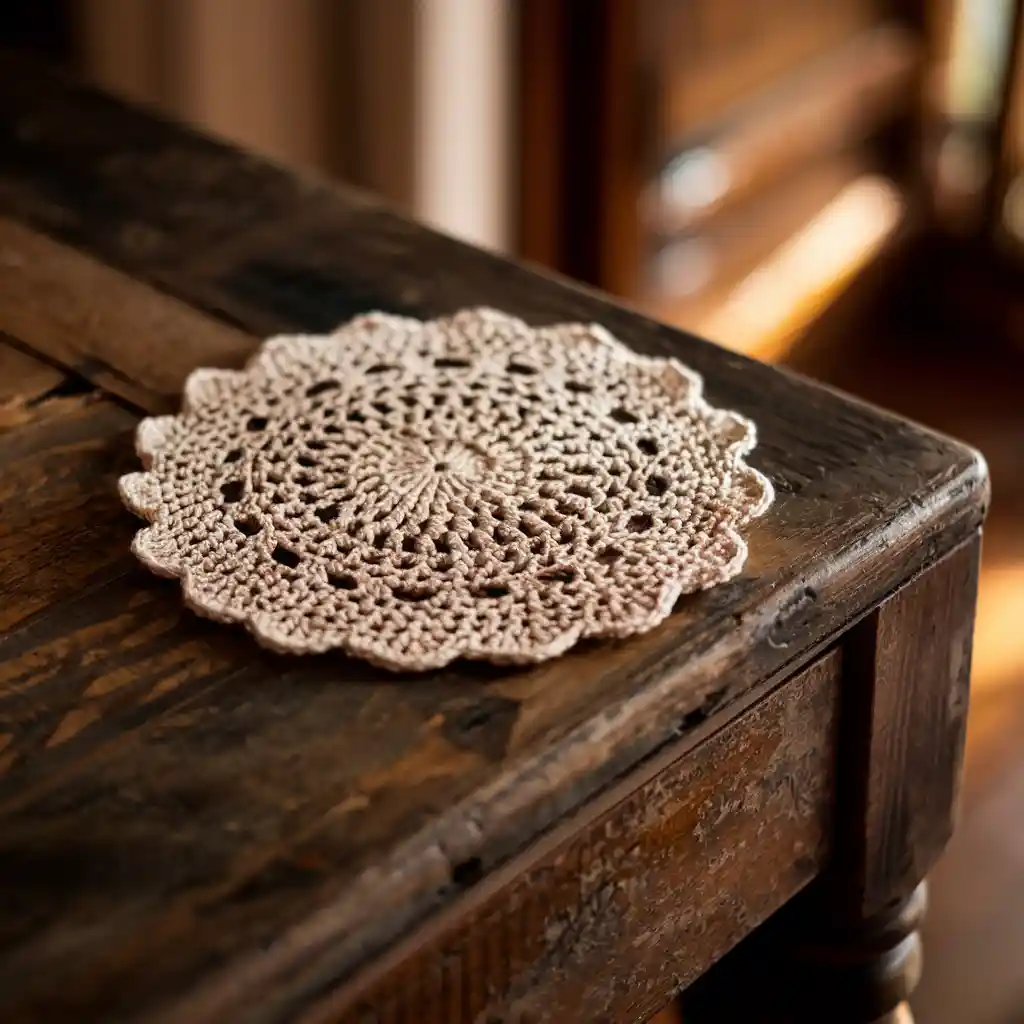
Retro motifs: scalloped edges, picots, and a little granny sensibility — great for afternoon tea and heirloom sets.
Skill level: Confident Beginner → Intermediate
Finished size (sample): 4 in (10 cm) round.
Materials: mercerized cotton or cotton thread for crisp vintage look, 3.5–4.0 mm hook, tapestry needle.
Construction overview
Make a small doily-like coaster: rounds of shells and picots with a tidy center.
Steps — classic doily coaster
- MR, ch3, 12 dc in MR. Join. (12)
- R2: ch3, sl st into next st around to make loops. R3: In each loop work sc, hdc, 3 dc, hdc, sc (petal shell). R4: sc round to anchor. R5: scallop round: (skip 2, 5 dc in next, skip 2, sl st) around. R6: picot trim — sc, ch3, sl st in top of sc around scallops for vintage points. Fasten off.
Finishing
- Block well (this pattern benefits from blocking to open scallops).
- If you expect heavy wet cups, add a denser round of sc inside to increase absorption.
Variations
- Add a tiny embroidered monogram or a small crocheted edging in a contrasting color for kitschy retro charm.
- Make placemats by scaling up rounds.
Final finishing notes (applies to all coaster patterns)
- Blocking: Most coaster patterns look crisper after blocking. For cotton, dampen and pin to shape on a blocking board, leave to dry. For delicate threads, press with a steam iron carefully (use cloth barrier).
- Backing: Felt circles glued or hand-stitched add slip resistance and protect wood, but they reduce breathability. If you plan to wash coasters a lot, sew a felt circle and make it removable or skip it.
- Stain care: cotton coasters can be machine washed; rinse immediately after spills and machine wash on gentle. Air dry flat to prevent warping.
- Set it: make sets of 4 or 6 with matched motifs and different colors; wrap with ribbon for easy gifting.
conclusion
There — eight coaster designs that actually get used: from kitschy bears to grown-up mandalas and vintage lace. Short checklist before you make any set: swatch once, choose cotton for absorbency, block flat, and decide whether you want felt backs for furniture protection.