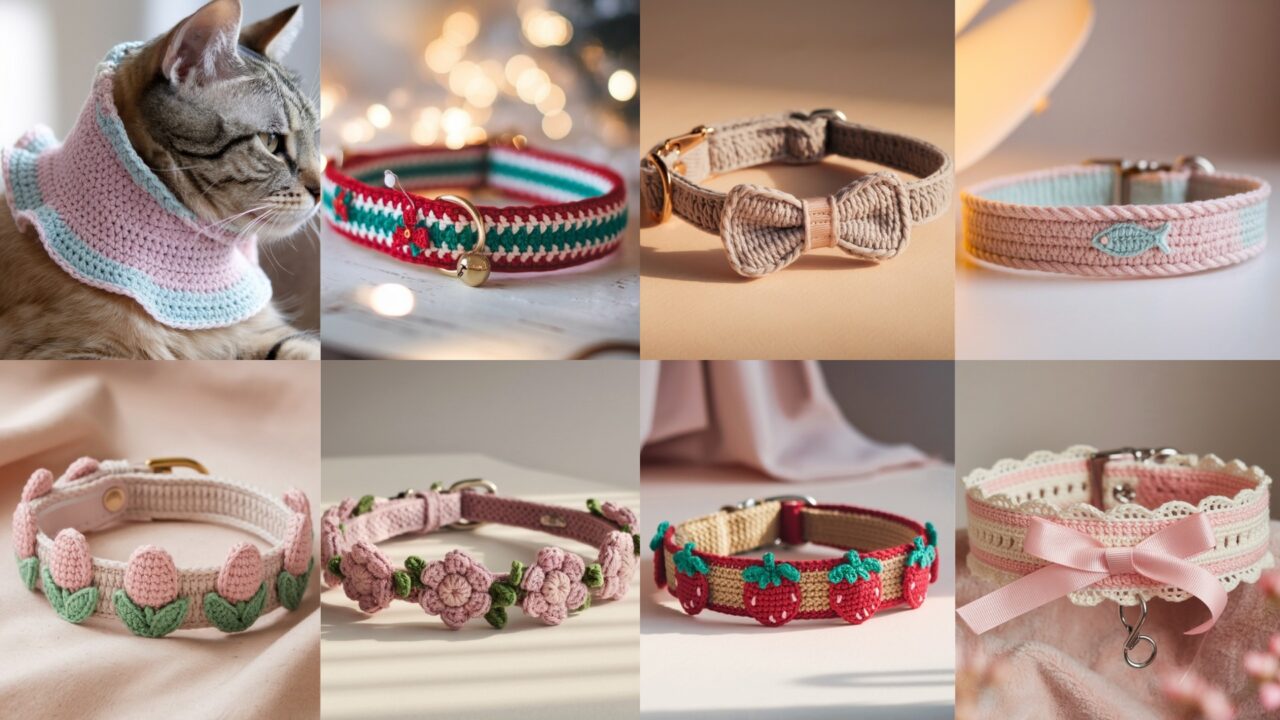
Cats are merciless critics of accessories. They’ll tolerate something comfortable, non-restrictive, and safe — and they’ll reject anything heavy, scratchy, or impossible to escape. These eight collars are built around that idea: a soft crocheted strap sized to the cat, a breakaway buckle or elastic safety section, a secure D-ring for ID and a light bell (optional), and small, washable embellishments you can remove.
Important safety first (read this):
- Always use a breakaway buckle (quick-release) on cat collars. If a cat gets snagged, the collar must open. Do not use fixed metal buckles unless the collar is supervised (e.g., for photos).
- Follow the two-finger rule: when fitted, you should be able to slide two fingers comfortably between collar and cat neck. That’s the best check for fit in addition to the measurements below.
- Don’t attach long cords, long tassels, glued beads or anything that can be chewed off and swallowed. Keep adornments short and sewn on with multiple stitches.
- If the cat is outdoor or escapes often, consider a breakaway plus ID tag and microchipping — collars are not a guarantee.
- Use soft cotton or cotton-blend yarn (machine-washable) or soft acrylic if you want colorfastness; avoid itchy wool for collar bands.
- Reinforce any D-ring attachment with webbing or multiple passes of stitching — metal or sewn webbing is much safer than a single thin crochet stitch holding a tag.
Universal base (how these collars are built — do this once)
Every collar below uses the same base strap method. I show the math for stitch counts so your readers can scale per their yarn/gauge.
Materials (base)
- Soft worsted cotton or cotton-blend yarn (#4) OR sport/DK for slimmer collars.
- Hook that gives a dense fabric (example: 4.0 mm with worsted). Use smaller hook if stitches look open.
- Breakaway buckle (plastic quick-release) sized to collar width (10–12 mm common for cats). Buy commercially — they’re calibrated to release.
- Small D-ring (lightweight) or split ring for tag.
- Sewing needle & thread, tapestry needle, scissors, optional 1/2″ cotton webbing strip for reinforcement.
- Small bell (optional) — lightweight only.
Sizing & swatch math (do this carefully)
Make a quick 4″ swatch in single crochet (sc) using your chosen yarn and hook to measure stitches per inch.
Example swatch we’ll use for the sample calculations:
- 4″ swatch = 16 sc across → that is 16 ÷ 4 = 4 stitches per inch. (Step-by-step: sixteen divided by four equals four.)
Using that example gauge, here are common cat neck sizes and required stitches for finished collar circumference (remember: finished circumference should allow two-finger space; we’ll give finished values):
Typical neck measurements (measure your cat):
- Kitten: ~6–7″
- Small adult: ~8–9″
- Medium adult: ~9–10″
- Large adult: ~10–12″
Recommended finished circumference (sample targets)
- Kitten finished = 6.5″
- Small finished = 8.5″
- Medium finished = 9.5″
- Large finished = 11″
Now compute stitches for each with our example gauge (4 sts/in):
- Kitten: 6.5 × 4 = 26 stitches. (6.5 times 4: 6×4 = 24; 0.5×4 = 2; 24 + 2 = 26.)
- Small: 8.5 × 4 = 34 stitches. (8×4 = 32; 0.5×4 = 2; 32 + 2 = 34.)
- Medium: 9.5 × 4 = 38 stitches. (9×4 = 36; 0.5×4 = 2; 36 + 2 = 38.)
- Large: 11 × 4 = 44 stitches. (11×4 = 44.)
Round to nearest whole stitch and ensure the number fits any repeat required by your embellishment (I’ll call out repeats when needed).
Base strap construction (sc strap, simple, sturdy)
- Decide collar width: narrow 3/8″ (one sc row), or wider 5/8–3/4″ (two sc rows). Wider straps distribute tension and feel nicer. Example here uses a 2-row strap (two sc rows worked in rounds gives ~3/4″ width).
- Chain foundation = number of stitches computed for circumference (e.g., medium = 38 ch). Add 2 extra ch for turning if working flat then joining (but we’ll work in joined rounds for neatness), so ch 38 then join to work in the round — or make a chain of 38, join without twist to form loop. Mark join with stitch marker.
- R1–R6: sc in each chain around for a stable band (6 rounds gives 3/4″ thickness depending on yarn — adjust). If you want a thinner collar use fewer rounds; thicker or cushioned add more rounds.
- After working band rounds, test on cat (or a neck form). If it’s too tight add one or two stitches to chain and rework — easier than frogging later.
- Finish strap ends: leave a 2–3″ tail to sew buckle pieces on, OR leave the band as a loop and split for buckle attachments (see assembly step for buckles).
Breakaway buckle & D-ring attachment (do not improvise)
- For safety use a commercial breakaway buckle: you must secure each half of the buckle to the collar ends. The safest method: fold the crochet band end over a short length of cotton webbing (about 1/2″ wide) for reinforcement, sew through both layers with heavy polyester thread several times (box stitch) and attach the buckle end to the webbing per buckle instructions. Sew the webbing securely; don’t rely on a single row of crochet stitches to hold the buckle under tension. If you don’t have webbing, do multiple passes of hand-stitching through the crochet fabric and tie a secure knot buried inside the band — but webbing is recommended.
- Add the D-ring between the webbing and buckle attachment or in a reinforced loop nearby.
1. Crochet Tulip Cat Collar Pattern
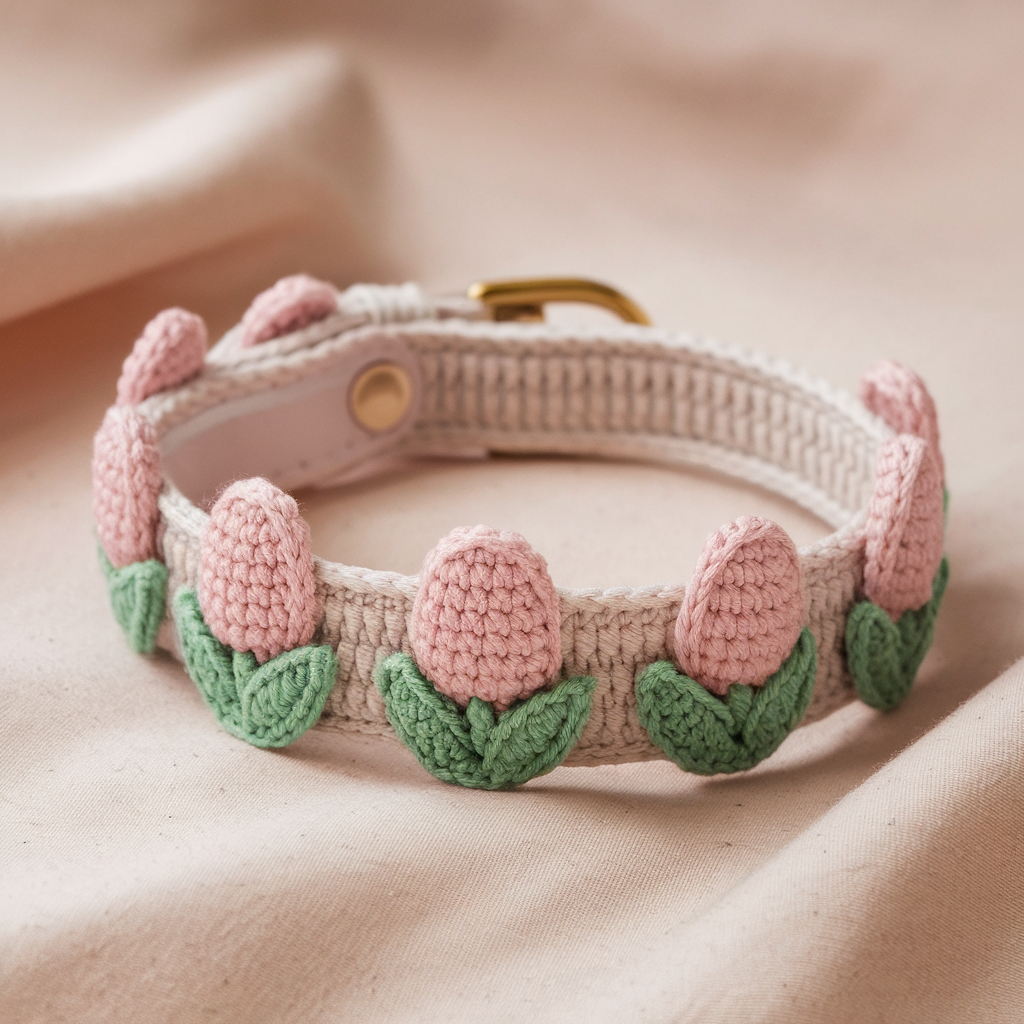
Charming, small tulip appliqués spaced around a soft strap.
Skill level: Confident Beginner
Materials: Cotton yarn (MC for strap), small contrasting yarn for tulips, 4.0 mm hook (adjust to yarn), breakaway buckle (10 mm), small D-ring, short webbing pieces, tapestry needle.
Sizing: Use the sample stitched counts from the universal base. Example medium = 38 ch → 38 stitches around.
Tulip applique (make 4–6)
- Base ring: MR, ch1, 6 sc in MR. Sl st to join. (6 sc)
- Petal loops: ch5, sl st into next st around to make 6 loops. Join.
- Petal shaping: Into each ch5 loop: (sc, hdc, 3 dc, hdc, sc) — gives a rounded petal. Fasten off leaving tails. Block lightly.
Assembly
- Make base strap as universal base. Work 6 rounds sc (or adjust thickness).
- Space tulip appliqués evenly: for example, on a medium 38-st collar place tulips every 6 stitches (tick marks: st 1, st 7, st 13, st 19, st 25, st 31 — 6 placements). Sew each tulip securely with thread through strap and petal base; weave in tails.
- Reinforce D-ring area with webbing and stitch tulips away from buckle so they don’t snag.
Finishing
- Optionally add a tiny embroidered center (French knot with contrast yarn) to each tulip. Keep centers small. Machine wash gentle; reshape.
2. Crochet Bowtie Cat Collar Pattern
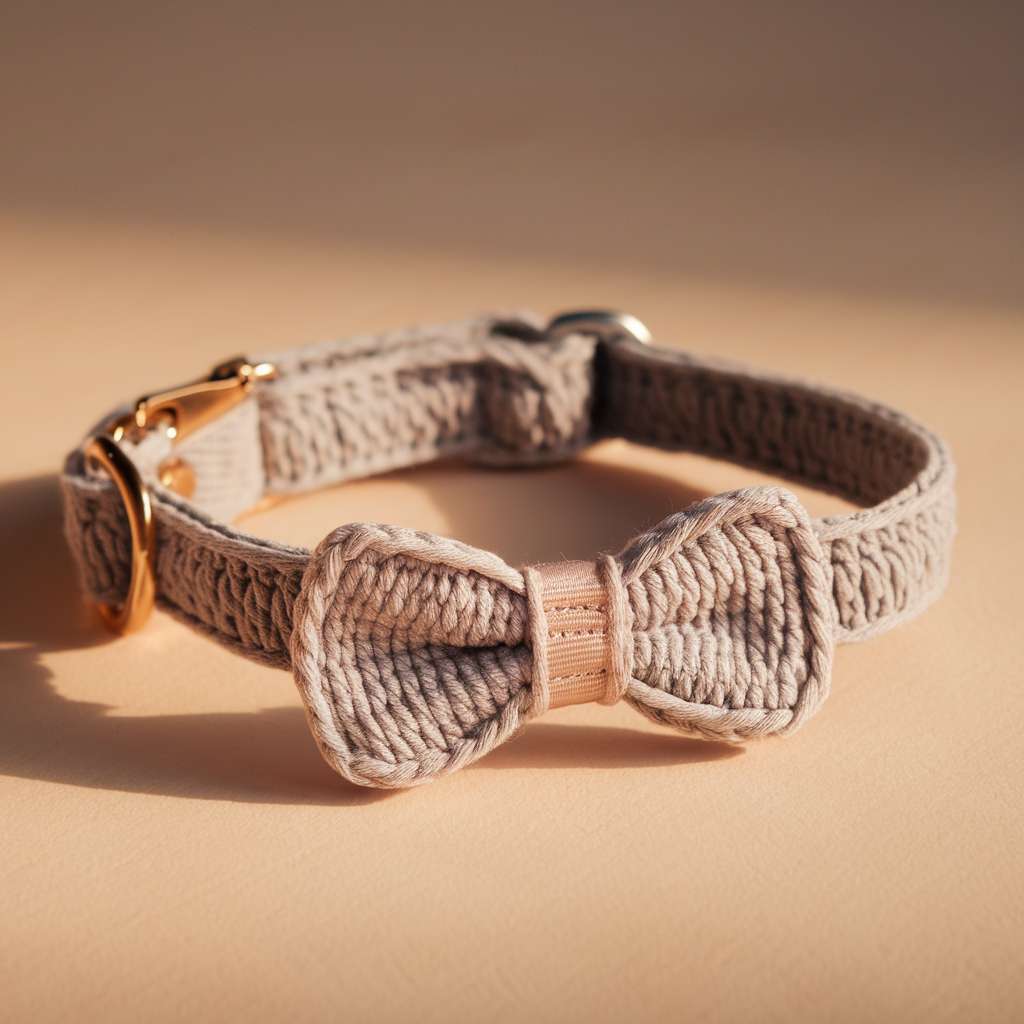
A dapper bow small enough not to bother whiskers, removable for washing.
Skill level: Beginner → Confident Beginner
Materials: Cotton or acrylic, 4.0 mm hook, same hardware.
Bowtie (detachable with loop)
- Ch 18, sc in 2nd ch from hook across (17 sc). Turn.
- Row2–Row4: ch1, sc across (17 sc). Fasten off leaving long tail.
- Pinch center, wrap with contrast yarn tightly 8–10 times and sew center wrap to the back. Leave a short slip loop behind the center wrap (a small slit) for the strap to pass through so the bow is removable. Alternatively, sew a small elastic loop on the back to slip over the strap.
Attach
- Make base strap. Slide bow loop over strap before fastening the buckle (or thread later by stretching loop over band). Position bow centered at front. Sew a few hidden stitches through the back of the bow and one ply of strap to keep orientation but allow removal for washing.
Tips
- Keep bow light; avoid beads. Add a small felt backing to stiffen bow if it flops.
3. Crochet Floral Cat Collar Pattern
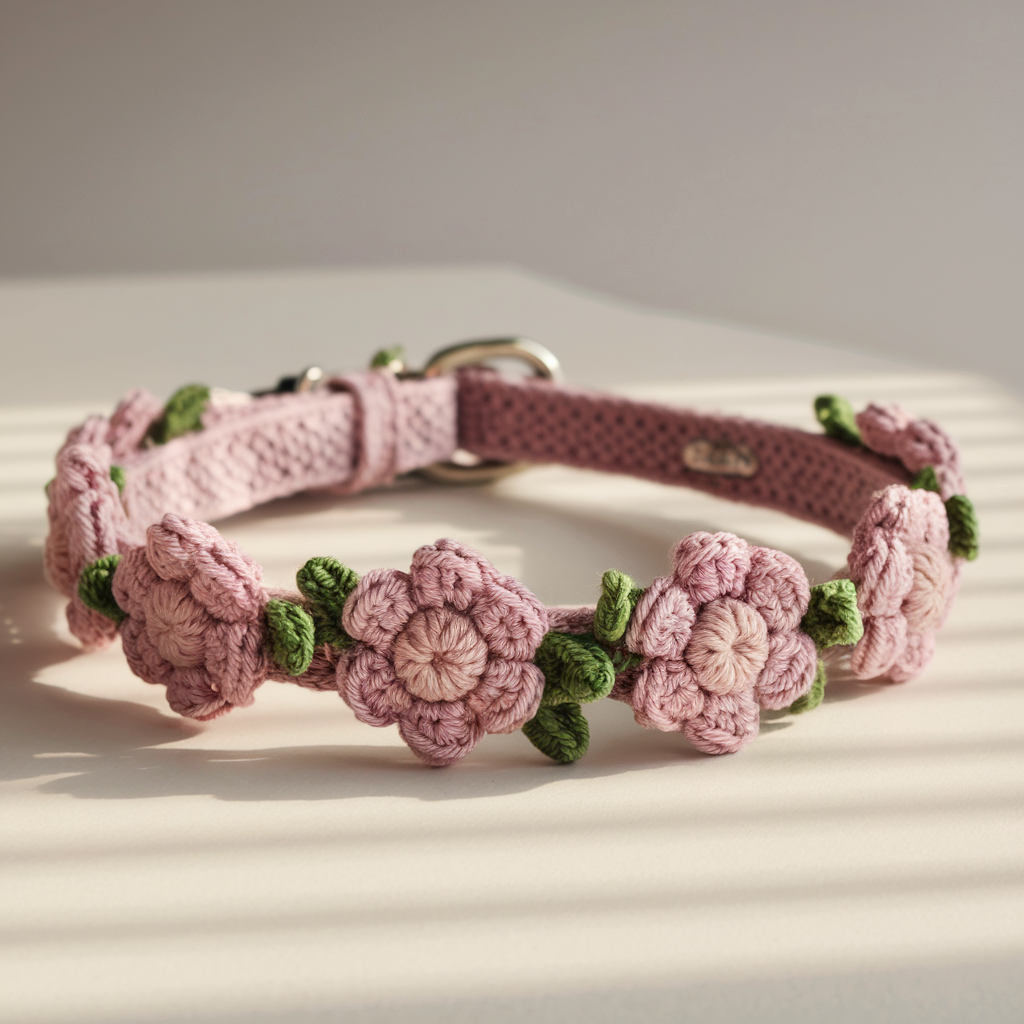
Lush little cluster flowers along the strap. Use two tones for a realistic look.
Skill level: Intermediate
Materials: Small amounts of two yarn colors, 4.0 mm hook.
Small flower motif (make 6–8)
- MR, ch1, 6 sc into ring; sl st to join.
- ch3, sl st into next st around to make 6 loops.
- Into each loop: (sc, hdc, 3 dc, hdc, sc) to make petals. Fasten off.
Tiny filler leaf (optional)
- ch5; sc in 2nd ch, hdc, dc, hdc; sl st to base. Fasten and sew next to flower.
Assembly
- Make strap. Sew flowers spaced evenly. Reinforce stitches and keep flowers low profile so cats are not tempted to chew.
4. Crochet Scarf-Inspired Cat Collar Pattern
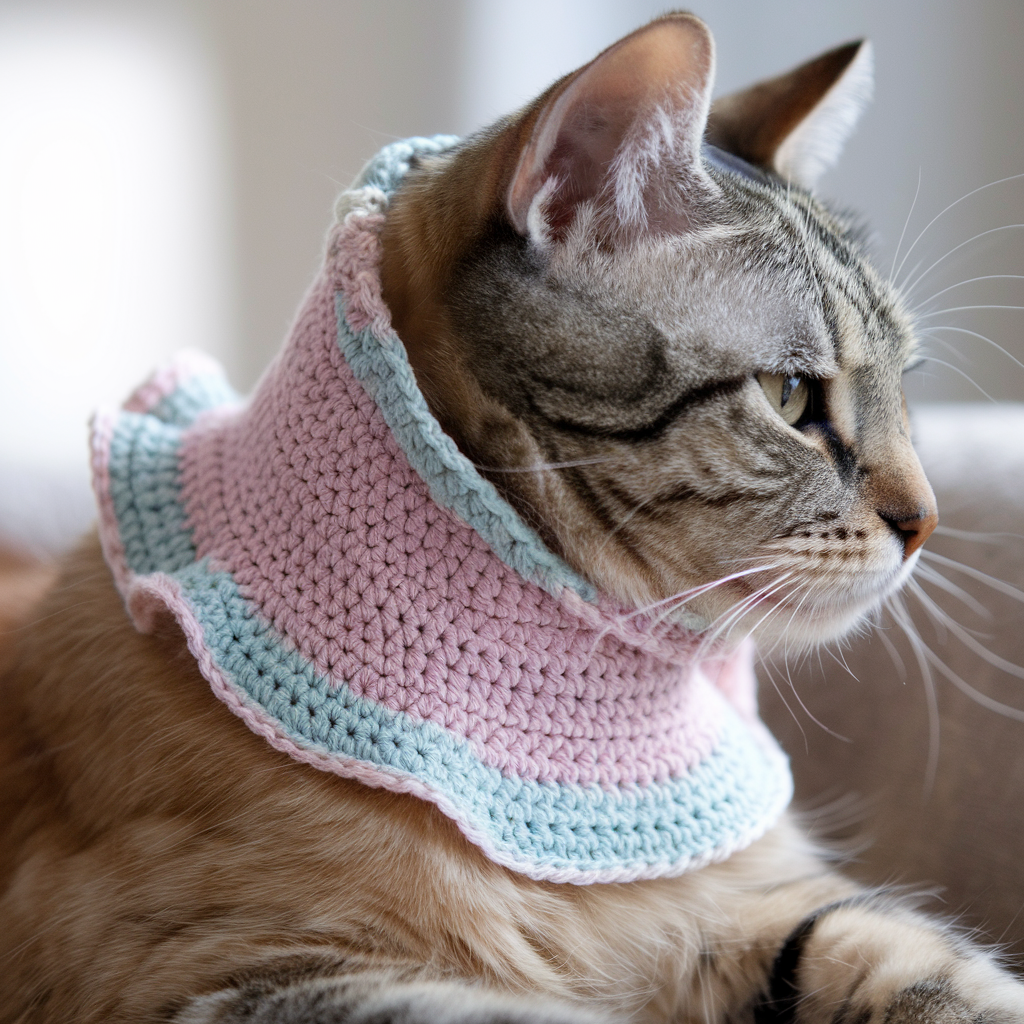
A scarflet look — very short, lies flat on chest (not long). Good for photos and short visits.
Skill level: Confident Beginner
Materials: soft cotton or cotton blend for comfort, 4.0 mm hook.
Scarflet piece (short ruffle)
- Work a base strap as usual but make it slightly wider (ch + one extra row) if you want a flatter look.
- Add a single-side ruffle: pick up stitches along the bottom edge of the strap and work shells (5 dc shell in each picked loop) across to create a small ruffle that hangs under the chin but is short (no more than 1–1.5″). Keep it minimal — cats hate long flapping stuff.
- Sew any loose ends underneath; ensure ruffle is soft and close to body.
Safety note: Keep ruffle short and well-sewn. Avoid dangling elements longer than ~1.5″ to cut snag risk.
5. Crochet Strawberry Motifs Cat Collar Pattern
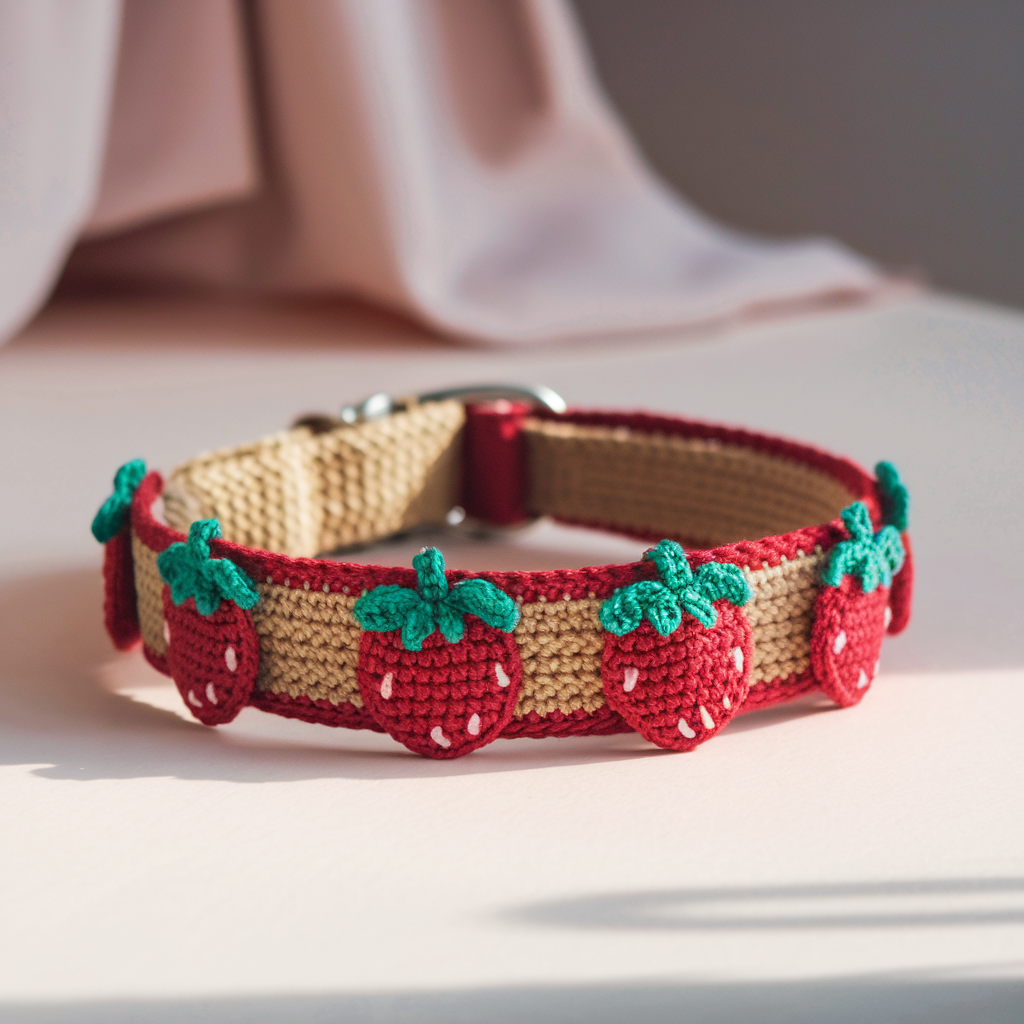
Cute seasonal collar with little strawberries (tiny and unchewable).
Skill level: Intermediate (small shaping + color change)
Materials: red, green, and tan yarn for seeds/stem, 4.0 mm hook.
Tiny strawberry (make 3–4)
- MR, R1: 6 sc. R2: inc around → 12. R3: (sc, inc) ×6 → 18. R4–R5: sc around. R6: (sc, dec) ×6 → 12. Stuff slightly and close (6). Fasten and sew small green leaf (3-picot cluster) at top. Keep strawberries under 1″ tall.
Assembly
- Sew strawberries to strap, spaced. Reinforce attachment with extra stitches and a felt backing if desired so the cat’s teeth don’t see yarn loops.
6. Crochet Small Fish Cat Collar Pattern
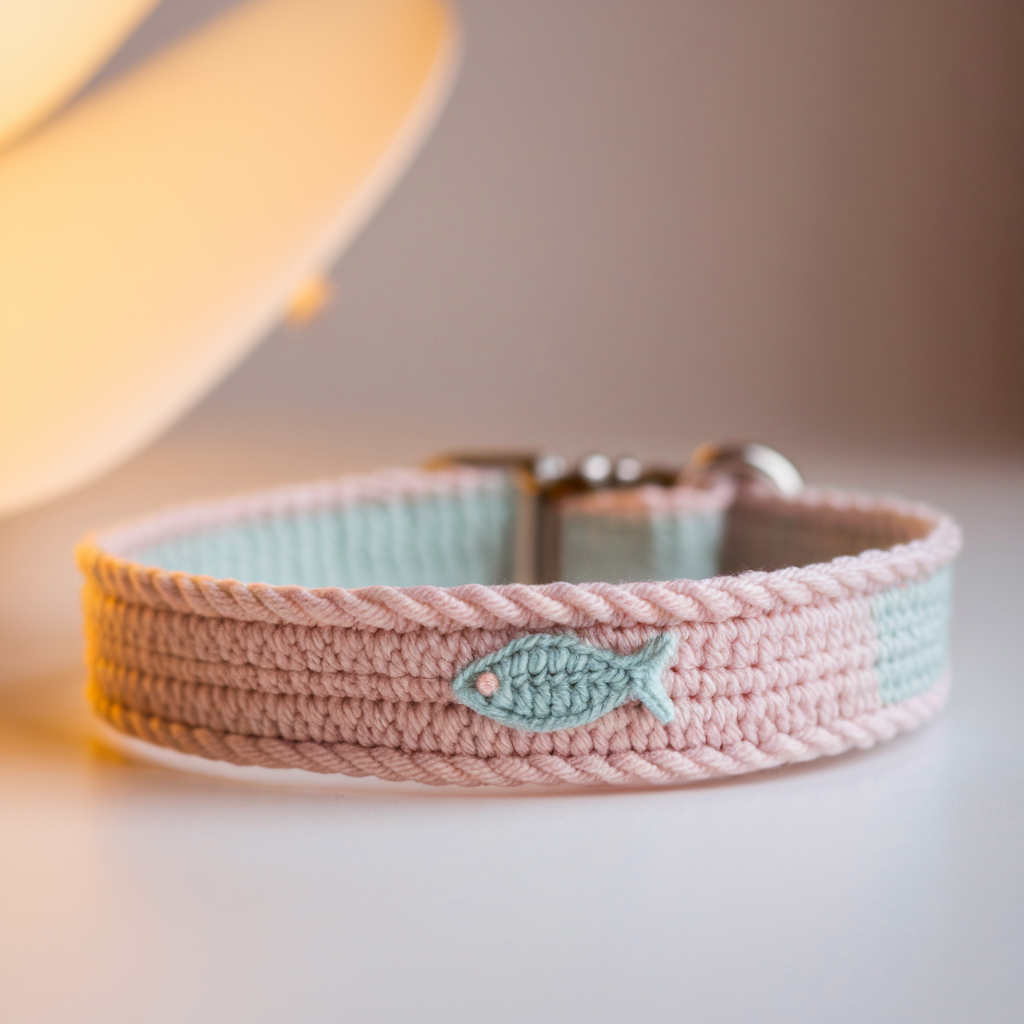
A kitty classic: a tiny fish motif on the strap.
Skill level: Confident Beginner
Materials: small amount of yarn in chosen color, 4.0 mm hook.
Fish motif
- Ch6, sc in 2nd ch from hook and across (5 sc). Turn.
- Row2: ch1, sc2tog, sc, sc2tog → 3 sc (forms fish body). Turn.
- Row3: ch1, dec to a point or add a small triangular tail by ch3, sl st into side.
Attach
- Sew flat to strap. Reinforce with extra passes.
7. Crochet Girly Cat Collar Pattern
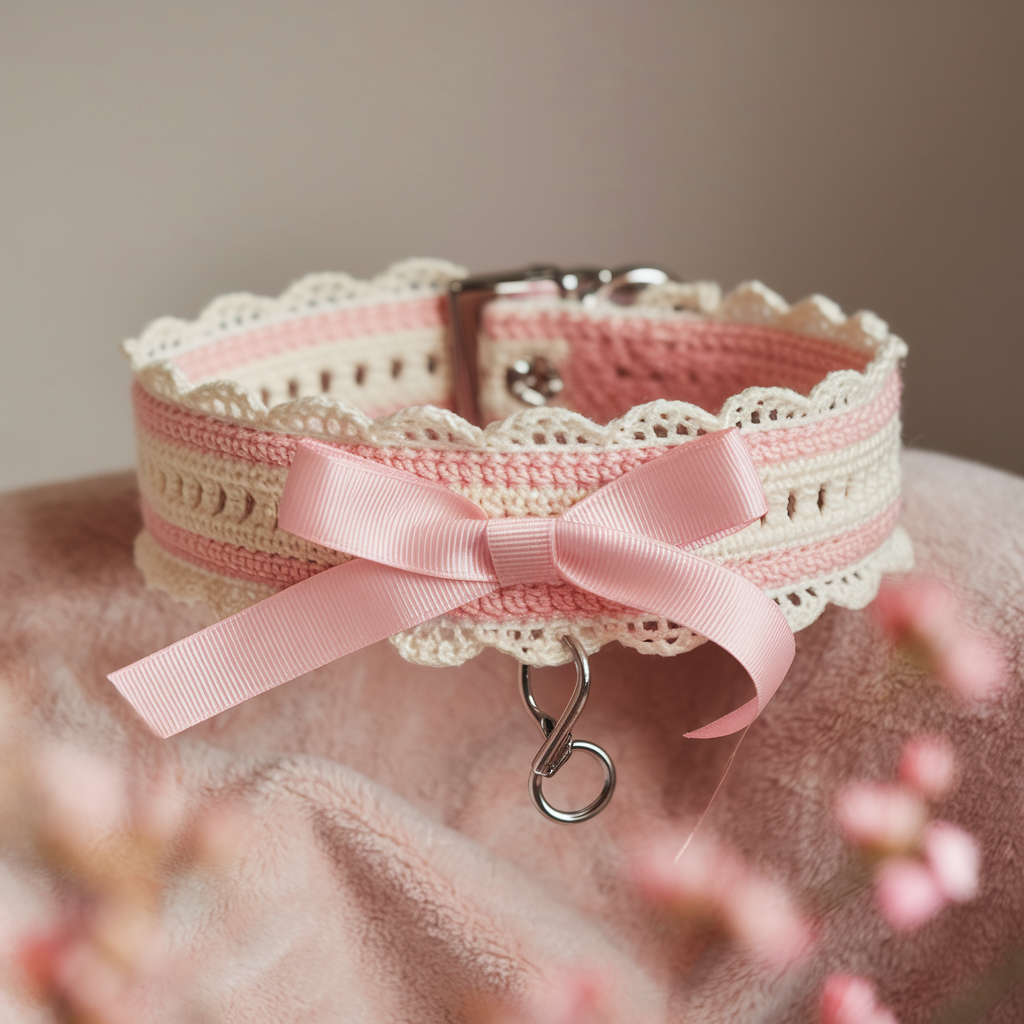
Lace trim and a removable satin ribbon — very pretty, washable, and removable so the cat has options.
Skill level: Intermediate (trim work + ribbon seam)
Materials: cotton + satin ribbon (1/4″ wide) and 4.0 mm hook.
Lace trim (eyelet picot)
- After making strap, pick up fine hook and work sc, ch3, sl st edging to form tiny picots along band edge. Alternatively make miniature scallops: 5 dc shell in alternating spaces.
- Thread a satin ribbon through a row of ch-loops (make a row of ch-loops 1 row above bottom edge before final edging); that ribbon is removable and can be tightened or removed for washing.
Safety: Keep ribbon short and sew ribbon ends inside the band if you leave it in place. For outdoor cats, remove ribbon — it’s decorative, not essential.
8. Crochet Christmas Cat Collar Pattern
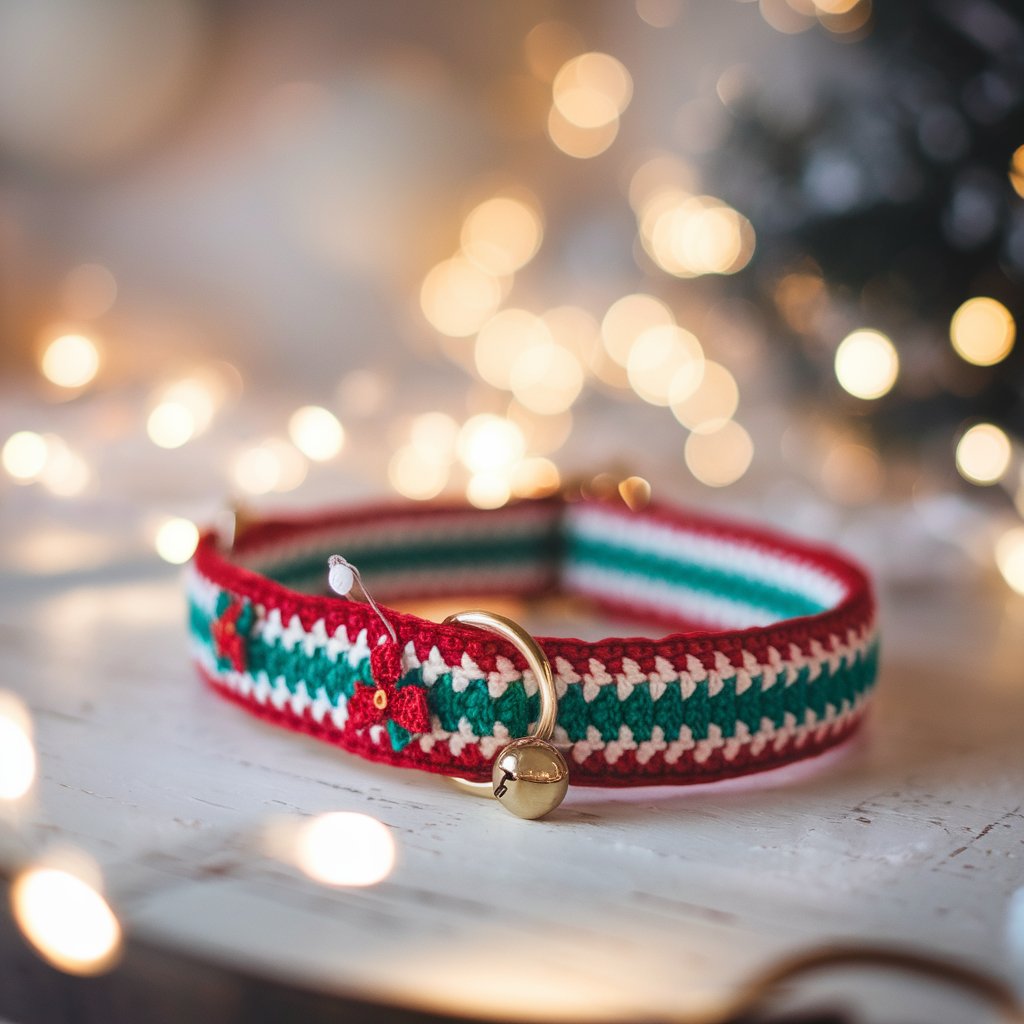
Festive red/green stripes + a tiny jingle bell (ultra lightweight) and breakaway buckle.
Skill level: Beginner → Confident Beginner
Materials: red & green cotton, metallic gold for tiny star applique (optional), tiny jingle bell (very light), 4.0 mm hook.
Body stripes
- Work base strap and stripe every 2 rounds (2 rounds red, 2 rounds green) for candy cane effect. Carry colour inside loosely or cut and weave ends.
Tiny star or holly (optional)
- Make tiny 6-pointed star using small chain and picots or two tiny leaf appliqués.
Bell attachment (very safe method)
- Sew D-ring to collar near buckle and attach the bell to the D-ring with its own small lightweight split ring. Make sure the bell is lightweight (<2 grams ideally). Test force and ensure bell won’t become a choking hazard if detached. If bell is larger/heavier, skip it.
Final assembly & safety finishing (do this every time)
- Add webbing under buckle ends: fold a short webbing strip inside the folded strap end, then heavy stitch through webbing + crochet fabric — box/X stitch at least 8 passes. This is the reliable way to secure buckles.
- D-ring: put D-ring on the sewn webbing before final sewing so it sits between strap and buckle. Avoid sewing D-ring directly into a single line of crochet stitches.
- Test the buckle: snap & unsnap several times. Tug gently to simulate snag force — the breakaway should open if pulled sharply; if it doesn’t, replace with a certified breakaway buckle.
- Sew embellishments extremely securely: sew through strap fabric multiple times and knot inside strap. Felt backing is a smart, sterile reinforcement under appliqués.
- Tag & bell: attach to the D-ring, not the embellishment. Make sure ID tag text is readable and light.
Washing & care
- Most cotton and cotton-blend collars are machine washable on gentle cycle in a mesh laundry bag. Remove bells, bows, ribbon if possible. Dry flat to reshape; don’t tumble-dry bells or hardware.
- Inspect collar regularly for loose stitching, fraying or stretching; replace if any hardware is compromised.
Conclusion
You can make cat collars that look cute and don’t sabotage the cat’s life. The two non-negotiables are: use a breakaway buckle, and reinforce hardware with webbing or heavy stitching. Make the strap soft, fit it using the two-finger rule, and keep decorations bite-safe and short.