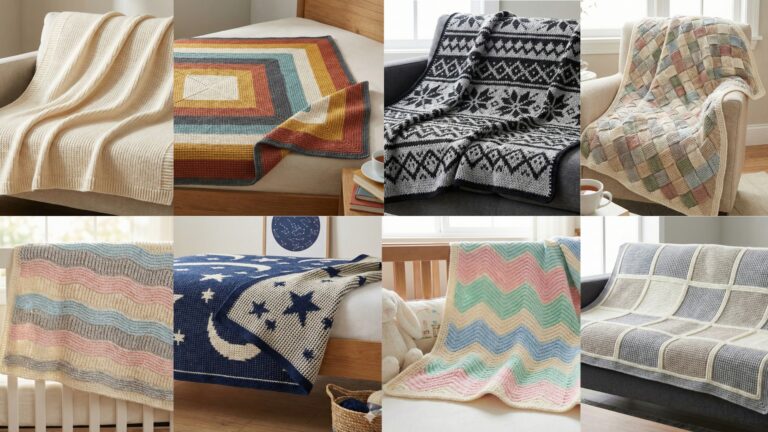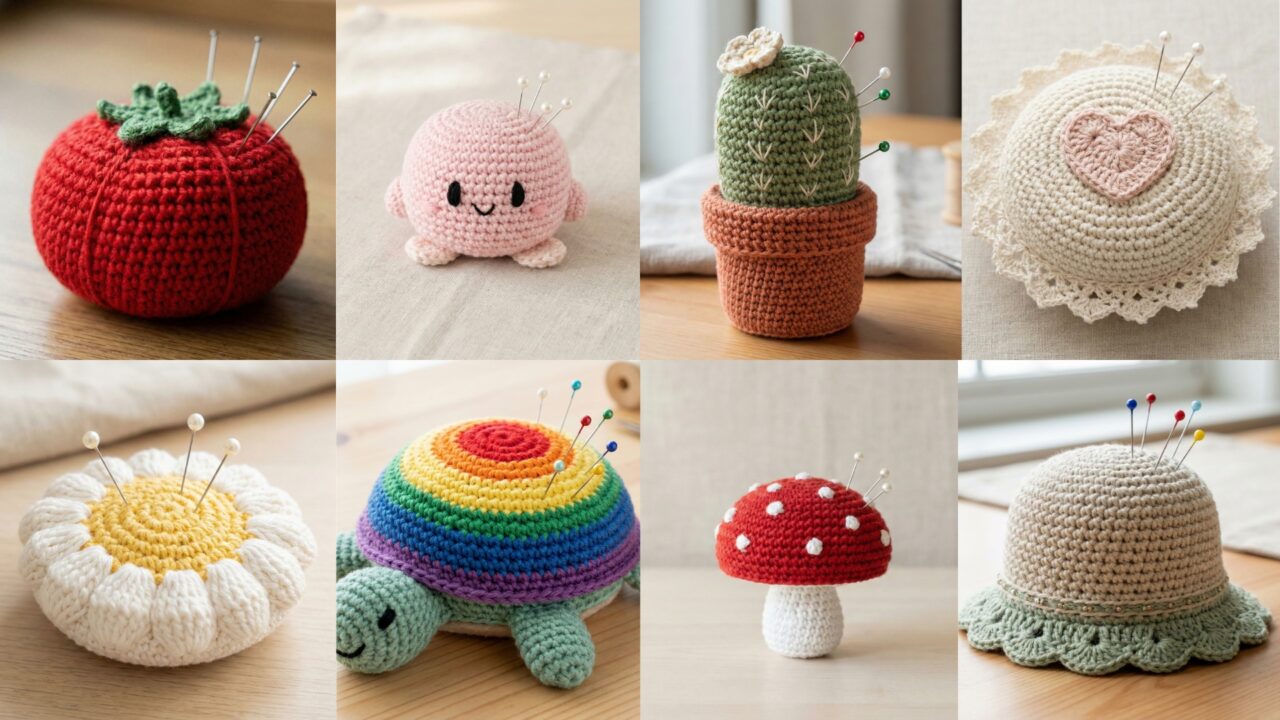
Pincushions are the perfect tiny project: fast to make, endlessly cute, and incredibly useful. Whether you keep one at your sewing machine, gift a set to a maker friend, or add a handful to craft-fair tables, a handmade pincushion brings personality to every sewing corner. This post includes eight fully detailed pincushion patterns — Lovebomb, Roundish Daisy, Adorable Mushroom, Kirby, Cute Cactus, Turtle Rainbow, Tomato, and Bucket Hat — each with materials, finished-size examples, stitch notes, and step-by-step instructions.
supplies, stuffing, safety & general tips
- Yarn: worsted cotton or cotton blend is ideal (durable, washable). For very small pincushions use DK/fingering; for chunky structured shapes try t-shirt yarn.
- Hook: 3.5–4.5 mm is common for worsted cotton pincushions; a smaller hook yields denser fabric.
- Stuffing: polyester fiberfill (washable), wool stuffing, or scrap-fabric stuffing. For heavy, stable bases add a small felt circle or plastic canvas.
- Notions: tapestry needle, stitch markers, small stuffing tool, scissors. Optional: strong encased magnets or emery powder — use caution (encase securely and keep away from children/pets).
- Construction: most are worked in continuous rounds (amigurumi-style) or as flat rounds joined and stuffed. Aim for a tight stitch so pins don’t slip between stitches.
- Size: examples are “medium” (≈3–4 in); scale by adding rounds or changing hook/yarn.
- Safety: if you make magnetic or emery elements, encase them and label the pincushion; keep away from children and pets.
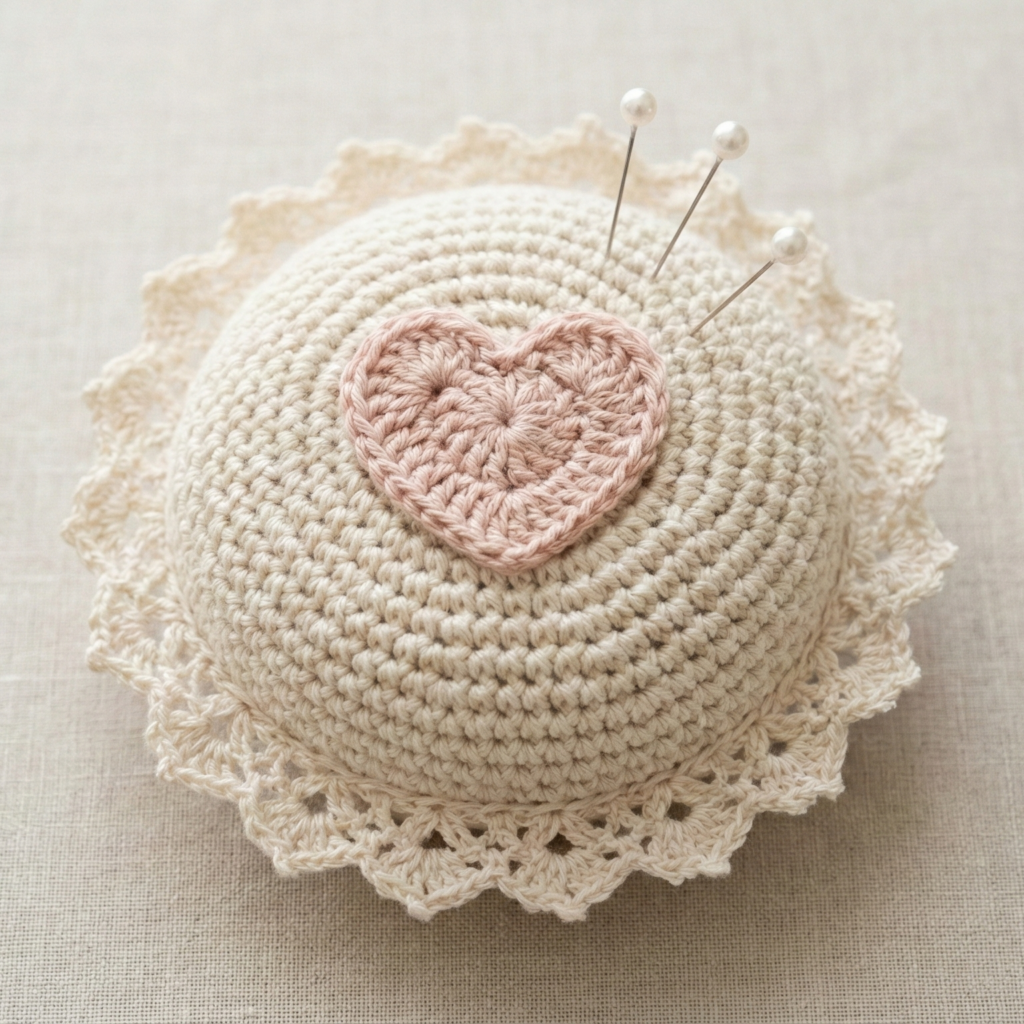
1. Crochet Lovebomb Pincushion Pattern
Skill level: confident beginner
Materials
- Worsted cotton: main color ~40 yd.
- Hook: 3.5 mm.
- Polyester fiberfill, tapestry needle.
Finished: ≈ 3 in × 2.5 in
Notes
Two flat heart halves are sewn together and stuffed for a plump heart.
Steps
- Half (make 2): MR, ch1, 8 sc in MR; sl st to join. R2: (sc, inc) around → 12 sc. R3: (sc2, inc) → 16 sc. R4: (sc3, inc) → 20 sc. Sculpt lobes with DC clusters in two adjacent sectors (work dc clusters where you want the lobes, keep sc elsewhere), or use a small heart chart for neat symmetry. Repeat to make two identical halves.
- Join & stuff: RS together, whipstitch leaving 1–1.5 in opening. Turn/flatten if needed, stuff firmly (push stuffing into lobes and the point). Close with ladder stitch.
- Finish: Embroider or add a small topper if desired.
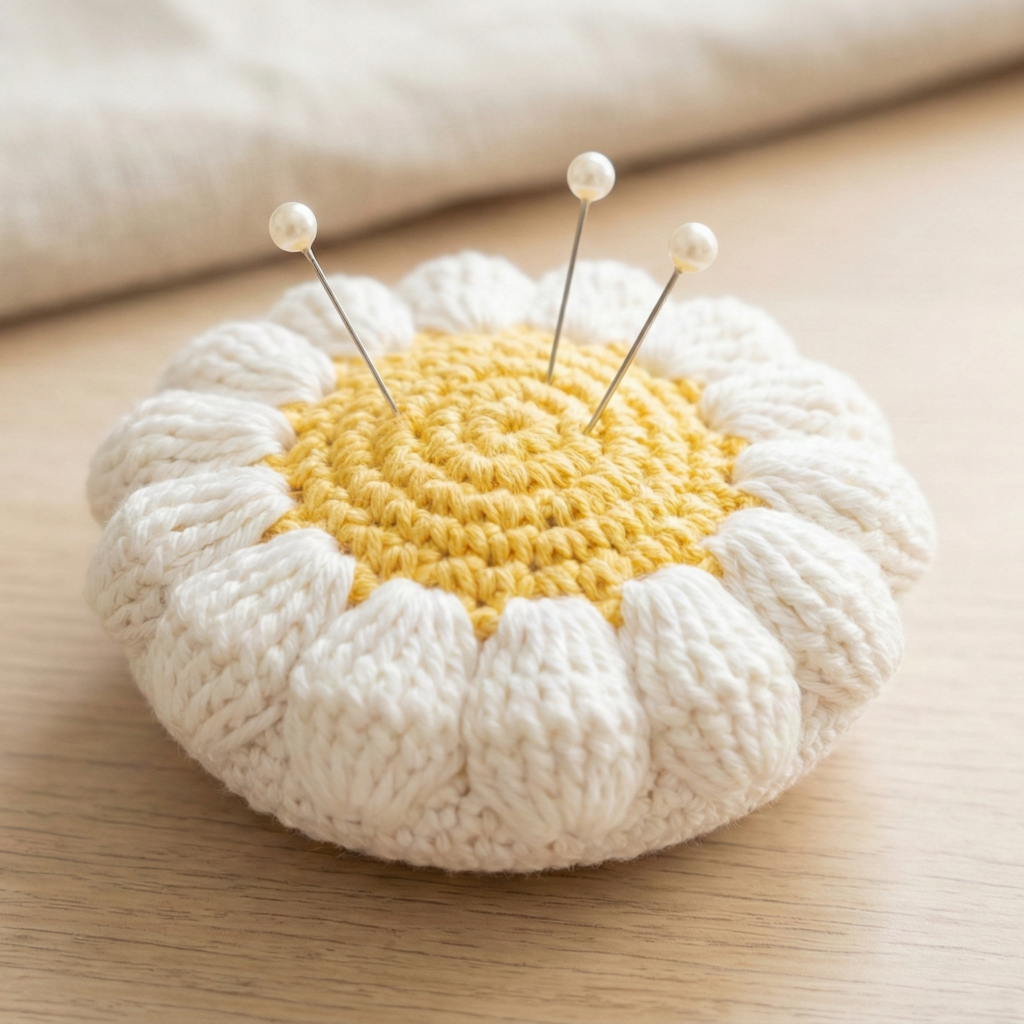
2. Crochet Roundish Daisy Pincushion Pattern
Skill level: confident beginner → intermediate
Materials
- Worsted cotton: white petals, yellow center.
- Hook: 3.5–4.0 mm.
- Stuffing, tapestry needle.
Finished: ≈ 3.5 in diameter
Notes
A yellow center disc, a round of shell petals, and a backing disc sewn together and stuffed.
Steps
- Center: MR, ch1, 8 sc; R2: 2 sc in each → 16; R3: (sc1, inc) → 24 sc. Fasten off, leave tail.
- Petals: Join white; ch2, 5 dc in next st, ch2, sl st in next st around for 8–10 petals.
- Backing: MR, increase in sc rounds until backing diameter = petals outer diameter (≈ 3.5 in).
- Assemble: Whipstitch petals to backing leaving gap to stuff; stuff firmly and close. Shape petals by hand or steam lightly.
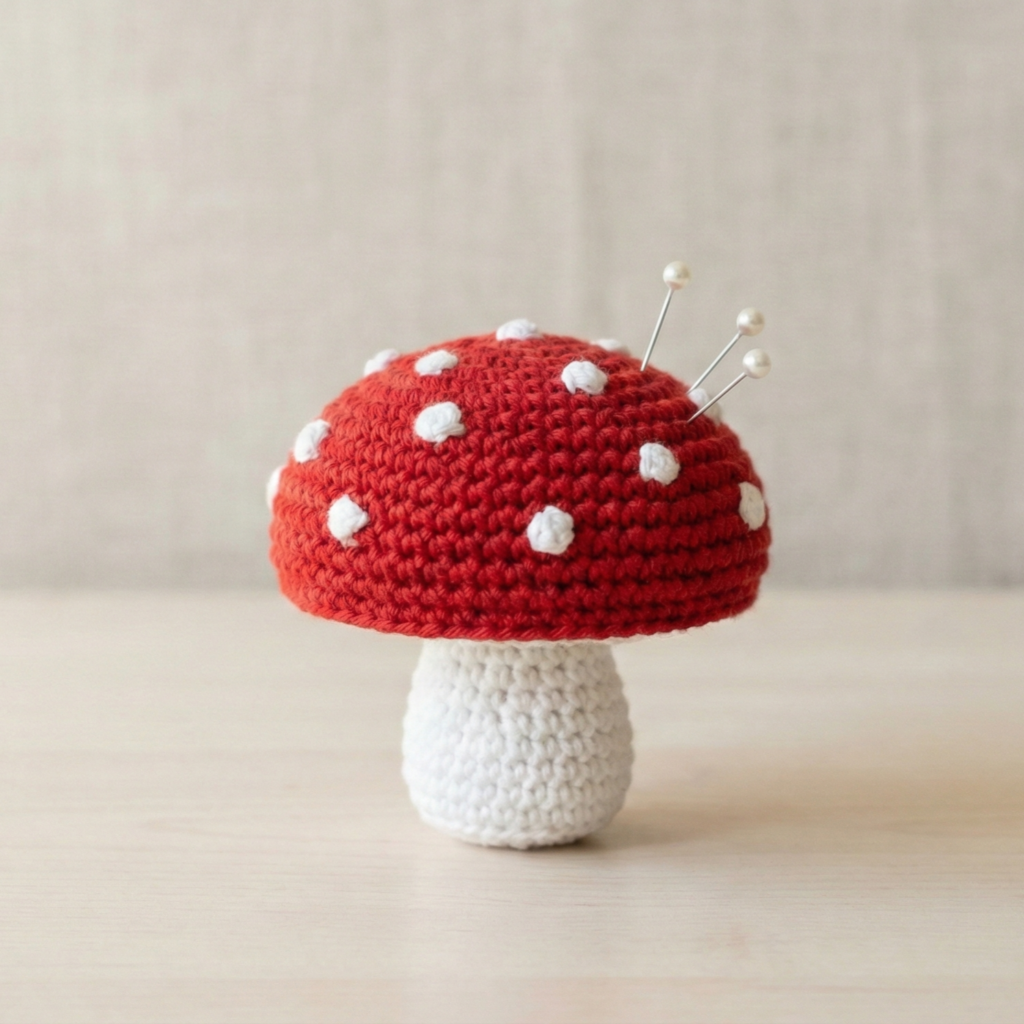
3. Crochet Adorable Mushroom Pincushion Pattern
Skill level: intermediate (amigurumi shaping)
Materials
- Worsted cotton: red (cap), white (stem & spots).
- Hook: 3.5 mm.
- Stuffing, tapestry needle, optional felt base.
Finished: cap ≈ 3–3.5 in diameter; height ≈ 2.75–3.25 in
Notes
Cap worked in rounds (increase to diameter, even rounds for depth). Stem is a short tube. Spots are small sewn discs.
Steps
Cap
- MR, ch1, 6 sc (6).
- R2 inc each → 12.
- R3 (sc1, inc) → 18. R4 (sc2, inc) → 24. R5 (sc3, inc) → 30. R6 (sc4, inc) → 36. Continue increases until desired diameter (often 42–48 sc for ~3 in), then work 3–5 even rounds for depth. Fasten off, leaving tail.
Stem - White: MR, 6 sc; R2–R7 sc around to desired height; stuff lightly.
Spots - Make several MR tiny discs (6 sc), flatten and sew to cap.
Assemble - Insert stem into cap opening, stuff cap firmly, and sew stem to cap base. Add a felt disc inside if desired, close seam, weave ends.
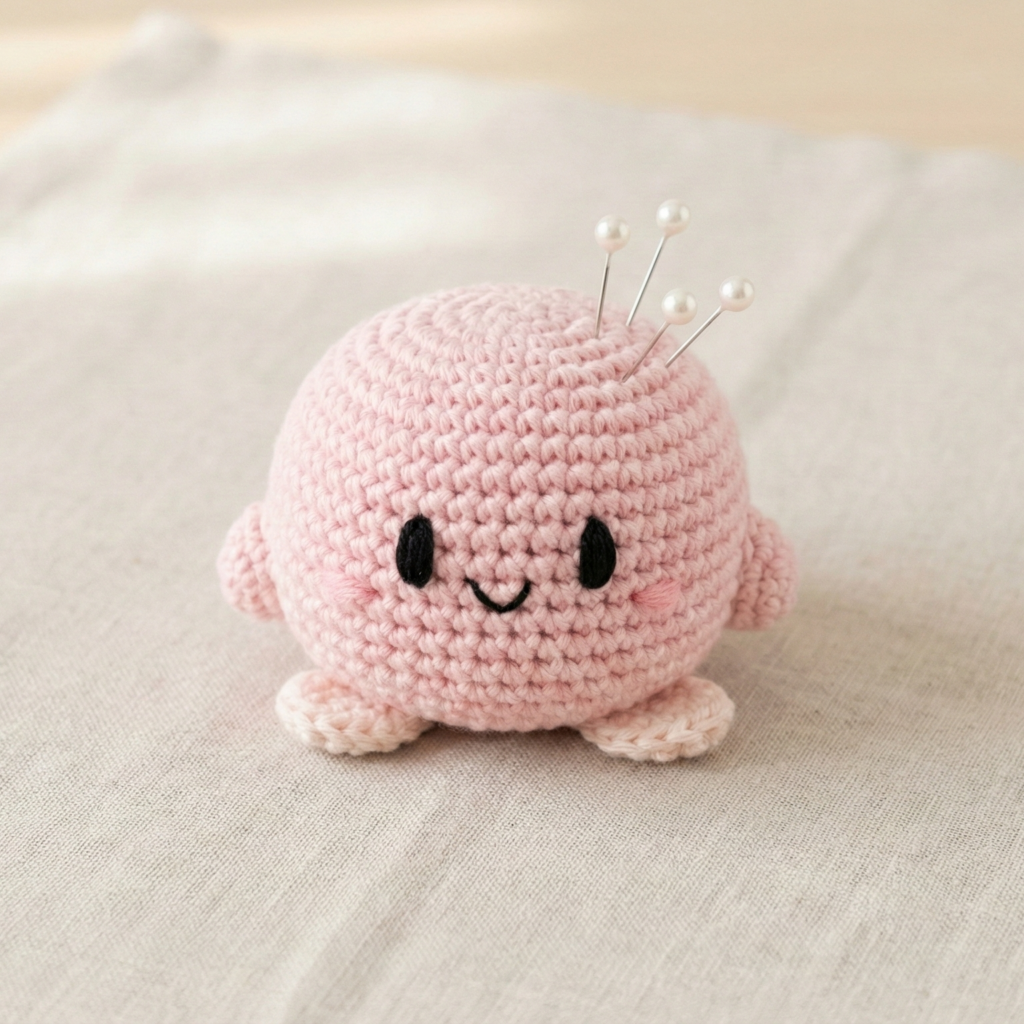
4. Crochet Kirby Pincushion Pattern
Skill level: confident beginner → intermediate
Materials
- Worsted cotton: pink ~40 yd, optional peach for feet, black floss for face.
- Hook: 3.5–4.0 mm.
- Stuffing.
Finished: ≈ 3–3.5 in diameter, squat
Notes
Worked as a round amigurumi body, faced embroidered, optional tiny feet.
Steps
- Body: MR, 6 sc → inc round → (sc1, inc) etc. Example increases to 36 sc, then several even rounds for height, then mirror decreases. Stuff firmly before closing.
- Feet (optional): small oval discs or flattened shapes sewn to underside.
- Face: Embroider eyes and mouth with black yarn or floss; add blush with pale pink thread or fabric paint. Weave ends.
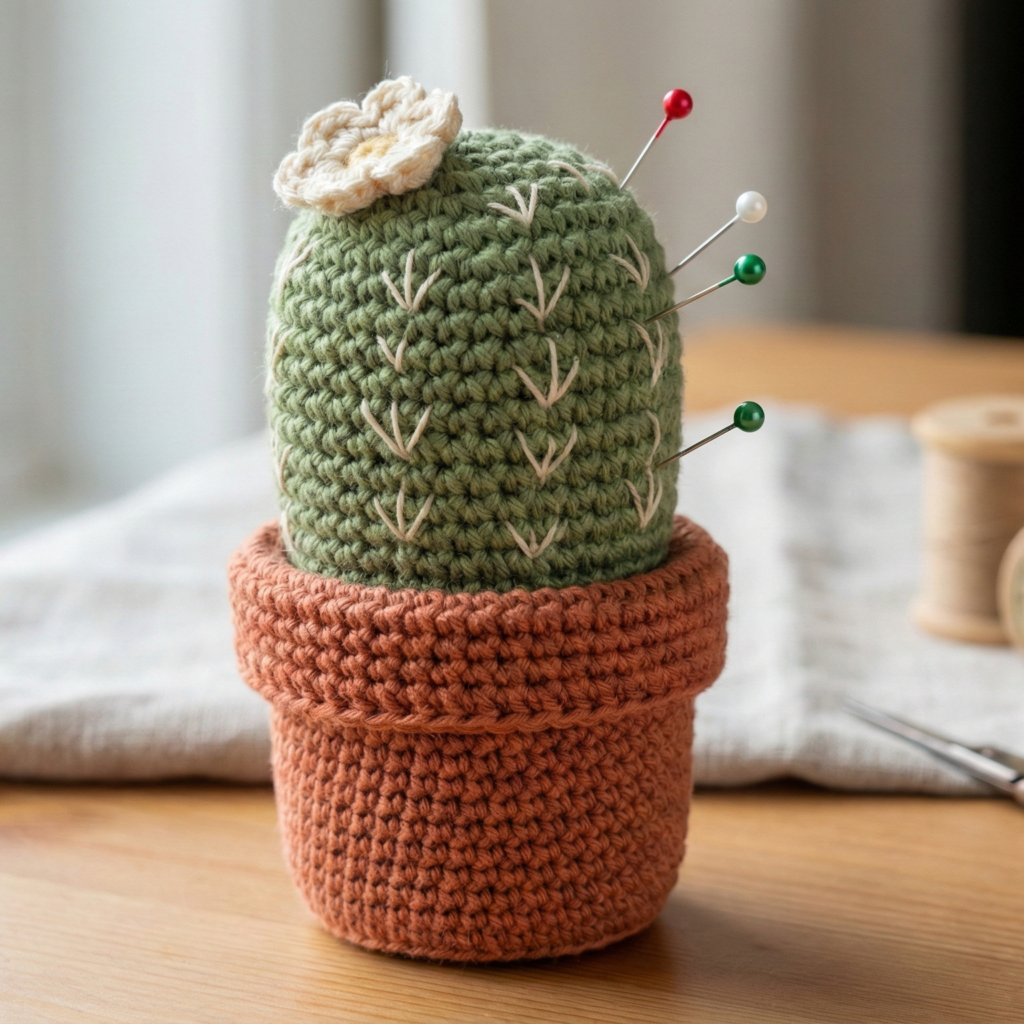
5. Crochet Cute Cactus Pincushion Pattern
Skill level: intermediate (tubular pieces + embroidery)
Materials
- Worsted cotton: cactus green ~40 yd, terracotta pot color ~20 yd.
- Hook: 3.5–4.0 mm.
- Stuffing, tapestry needle, optional small beads for flower.
Finished: stem ≈ 3–4 in tall × 1.25–1.5 in diameter; pot ≈ 2.5 in diameter
Notes
Make one or multiple cactus tubes, a pot base, embroider spines, and attach.
Steps
Cactus stem (per stem)
- MR, 6 sc → inc rounds until 24–30 sc (for 1.25–1.5 in dia). Work even rounds until 3–4 in tall. Stuff as you go; close top with decreases.
Pot - MR, increase to base diameter (~2.5 in), then work a few rounds up for a short pot wall; optional BLO round to fold for a rim.
Assemble - Sew stem(s) into pot; embroider spines with straight stitches in contrasting yarn or metallic thread; add tiny crochet flower or bead to top. Sew felt base for stability.
6. Crochet Turtle Rainbow Pincushion Pattern
Skill level: intermediate (amigurumi + applique)
Materials
- Worsted cotton in rainbow colors and green for body ~80–120 yd total.
- Hook: 3.5 mm.
- Stuffing, felt underside.
Finished: shell ≈ 3.5–4 in diameter
Notes
Shell is the functional pincushion (striped or color-ring disc). Sew small head/legs and attach felt underside.
Steps
Shell
- Work a flat sc disc in sc, increasing rounds and changing colors every 1–2 rounds to form rainbow rings until ~3.5–4 in diameter.
Body - Small head: MR, 6 sc, 2–3 rounds of sc; legs: tiny ovals. Stuff lightly and sew to shell edge.
Underside - Cut felt disk to shell size and sew to bottom for stability; sew head/legs at seam. Weave ends.
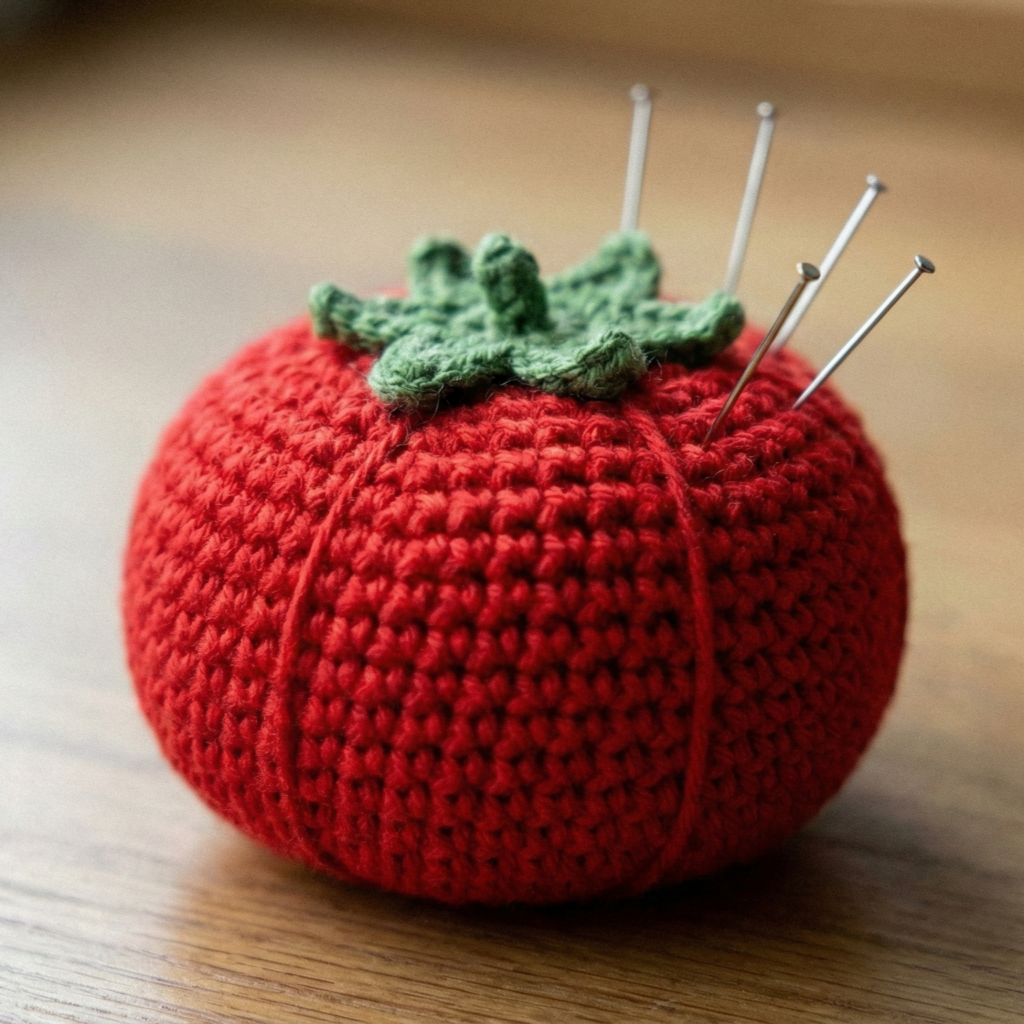
7. Crochet Tomato Pincushion Pattern
Skill level: confident beginner
Materials
- Worsted cotton: red ~40 yd, green ~15 yd.
- Hook: 3.5–4.0 mm.
- Stuffing, embroidery floss for segments, small felt optional, cord for strawberry emery.
Finished: tomato ≈ 3.5 in diameter; tiny strawberry ≈ 1.25–1.5 in
Notes
Round body with radiating embroidery segments, green calyx, and attached mini strawberry emery.
Steps
Tomato
- MR, 6 sc → inc rounds until desired diameter (36–42 sc typical), then several even rounds for depth; decrease symmetrically, stuff firmly, close.
- Use embroidery thread to stitch 6–8 radiating lines from the top center down to mimic segments.
Calyx - Crochet scalloped strip or small pointed leaves and sew onto top.
Strawberry emery - MR, increase to tiny oval, stuff lightly; attach by a short cord to top center. (If you use emery powder, encase it in a small sealed pouch before inserting into strawberry.)
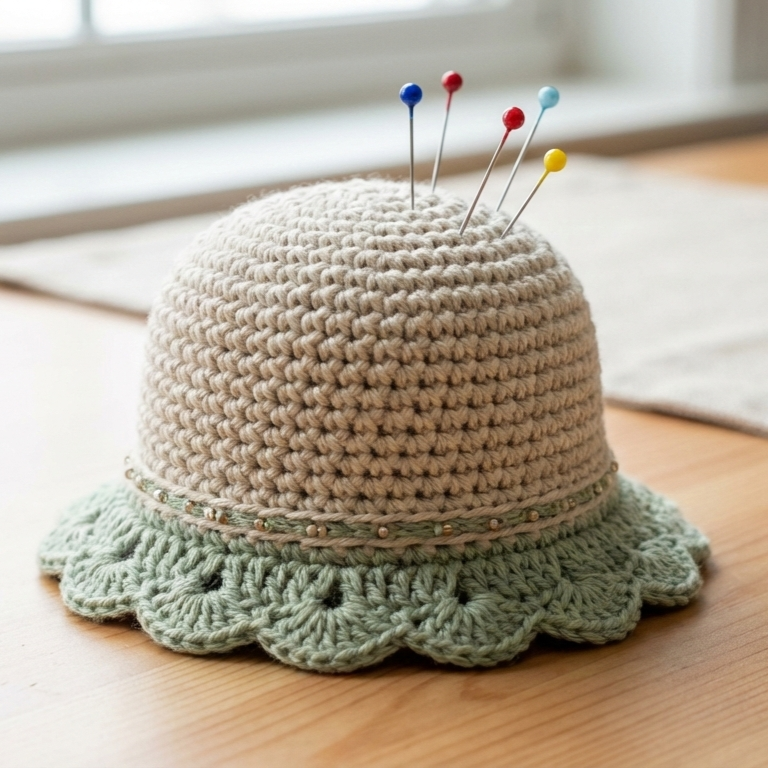
8. Crochet Bucket Hat Pincushion Pattern
Skill level: intermediate (flat shaping + brim)
Materials
- Worsted cotton in main color ~40 yd, contrast ~15 yd.
- Hook: 3.5–4.0 mm.
- Stuffing.
Finished: crown ≈ 3–3.5 in dia; brim ≈ 0.5–1 in
Notes
Flat crown disc, short side wall, scalloped/ruffled brim. Stuff lightly for a hat look.
Steps
- Crown: MR, increase in sc rounds until crown ≈ 3 in.
- Side wall: several rounds sc for ~1 in height.
- Brim: switch color, sc1, skip1, 5 dc in next repeat for scalloped brim; secure with sc round if desired.
- Stuff: insert stuffing lightly to dome crown; close underside and weave ends. Add ribbon or bead trim if desired.
Final finishing, blocking & safety tips
- Tight fabric: If stitches are loose, use a smaller hook to prevent pins slipping through.
- Stuff firmly: Firm stuffing helps pins stand; for a heavier base consider poly pellets in a small inner bag (keeps weight but allows outer to be washable).
- Bases: Felt or plastic canvas discs add stability and protect surfaces.
- Magnets & emery: Encapsulate securely (felt pouch, glued capsule); label and keep away from kids/pets.
- Care: Hand-wash or gentle machine cycle only if all materials / embellishments are washable; avoid tumble-drying delicate items.
Conclusion
These eight pincushion designs give a lot of range: romantic hearts, cheery daisies, classic mushrooms and tomato pincushions, playful characters, and functional cactus/turtle ideas. Each is compact, quick, and perfect for scrap yarn. Make a matching set, scale a favorite design up or down, or combine motifs — pincushions are fun to mix and display.