

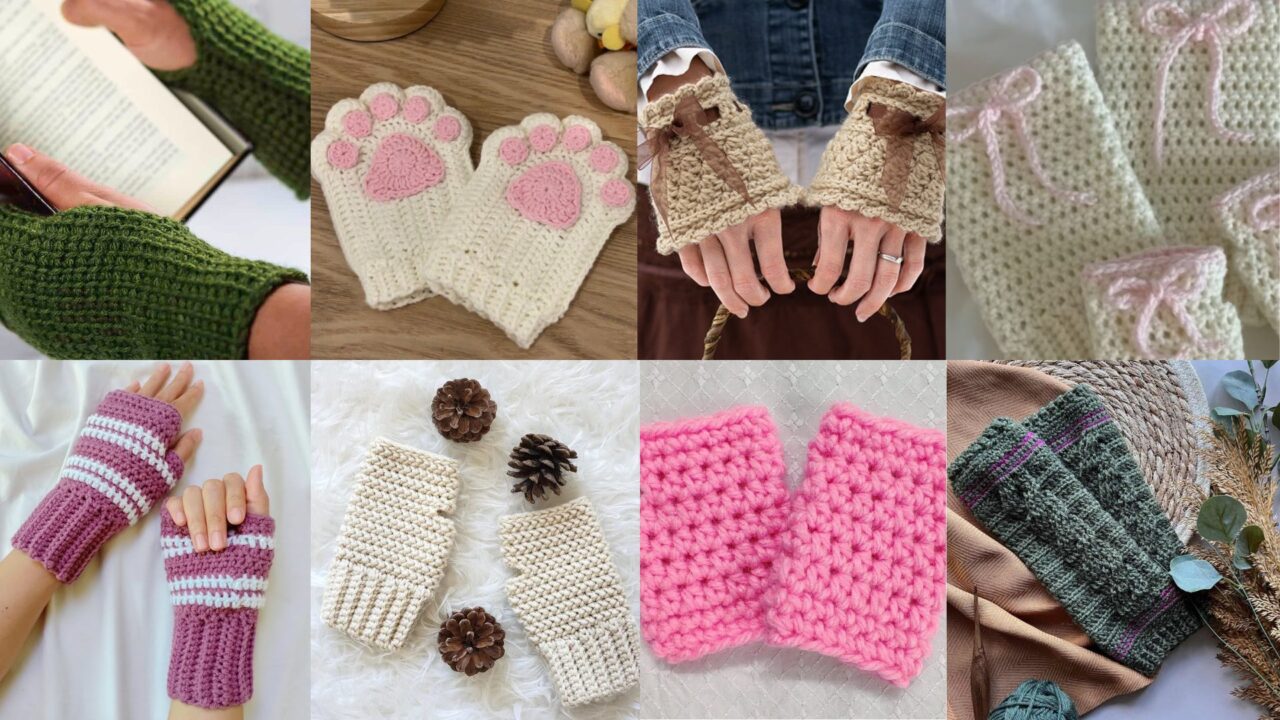
Wrist warmers (aka wristlets, wristers, or arm warmers) are the perfect small crochet project: fast to make, endlessly customizable, and they keep your hands cozy while leaving fingers free for typing, texting, or crafting. Below you’ll find eight patterns — from elegant Victorian-inspired “wristers” to playful cat-paw fingerless gloves and an ultra-simple beginner tutorial. Each pattern includes skill level, materials, finished-size guidance, a step-by-step pattern you can follow, finishing notes, and customization tips so you can make warmers that fit your style and your wrist.
Quick stitch legend (US terms): ch = chain, sl st = slip stitch, sc = single crochet, hdc = half double crochet, dc = double crochet, tr = treble crochet, st(s) = stitch(es), BLO = back loop only, FLO = front loop only, inc = increase (2 sts in same st), dec = decrease (sc2tog unless otherwise noted). When I give a sample stitch count it’s for an average adult medium wrist (≈ 7″ / 18 cm circumference). Measure the wearer and adjust chain or rounds to fit.
1. Crochet Avery Arm Warmers Pattern
Skill level: Beginner–Intermediate
Finished size (sample): Wrist circumference 7″ / length 10″ (forearm to wrist) — adjustable
Materials
- Worsted weight yarn (approx. 150–200 yds / 130–180 m)
- Hook 5.0 mm (H) — or one that gives firm fabric
- Tapestry needle, stitch marker, measuring tape
Construction overview
Avery arm warmers are worked in the round from wrist up toward the forearm with a neat ribbed cuff (worked in BLO) and a simple textured body (hdc rows) for warmth and stretch. Thumb opening is created by skipping a few stitches and rejoining.
Gauge (informal)
Approx. 14 hdc × 12 rows = 4″ in pattern.
Step-by-step
- Measure and foundation: Measure wrist circumference. For 7″ wrist with worsted yarn a foundation of 38–42 sts in hdc worked in the round is common. Start with a foundation chain of (your stitch count) and join to work in the round OR use a flexible foundation hdc row and join. Example: ch 39, join with sl st to form loop (careful not to twist). Place marker.
- Ribbed cuff (BLO): Round 1: ch 1, hdc in BLO around; join. Repeat for 6–8 rounds (this creates a stretchy rib). You can also do sc in BLO for a tighter rib.
- Body — textured hdc rows: Switch to working regular hdc rounds (both loops). Rnd: ch 1, hdc in each st around; join. Repeat until length from cuff to thumb opening is about 3″ (or desired distance from wrist to thumb base).
- Thumb opening: Decide thumb placement (usually on side seam). Work up to the thumb-start marker, ch 2 (counts as spacer), skip 4–6 sts (depending on thumb size), ch 2, continue hdc around and join. On the next round, hdc into each ch-2 space across to form a neat horizontal bar across the gap. Continue body rounds for 1–2 more inches if making a wrist-length warmer; or continue to desired forearm length for longer arm warmers.
- Top edge finishing: Work 6 rounds of hdc or 1–2 rounds of sc for neatness. Fasten off and weave in ends.
- Thumb / finishing: Work a small thumb cuff by joining yarn to the hole edge: ch 1, sc around the thumb hole for 5–7 rounds for a small tube; fasten off. Weave in ends. Block lightly to shape.
Customization & tips
- Make the cuff longer if you like a folded look.
- Add simple color stripes every 6 rounds for visual interest.
- If your gauge is loose, go down a hook size for a warmer fabric.
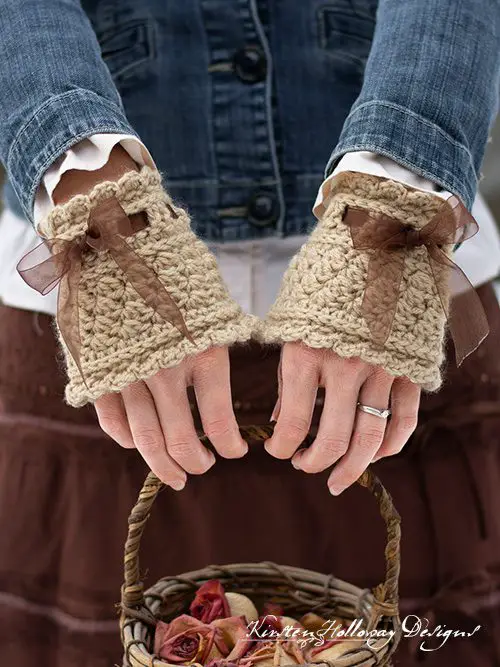
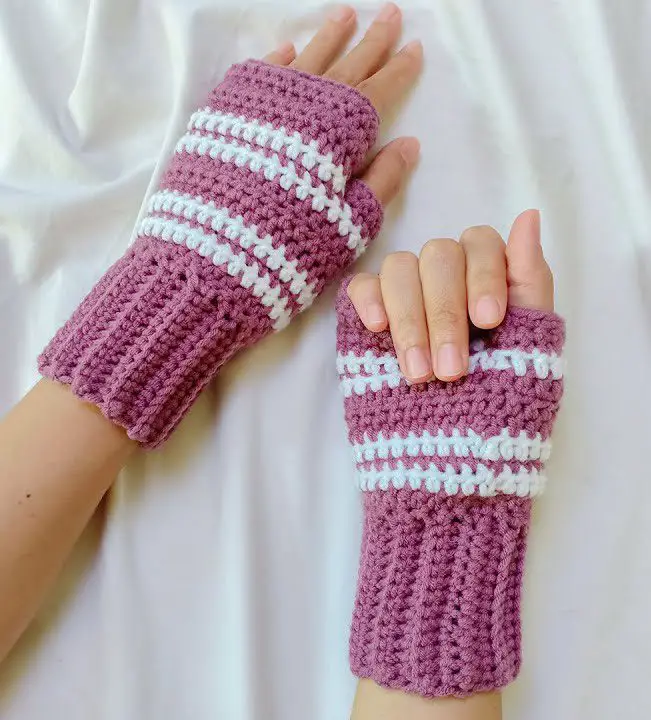
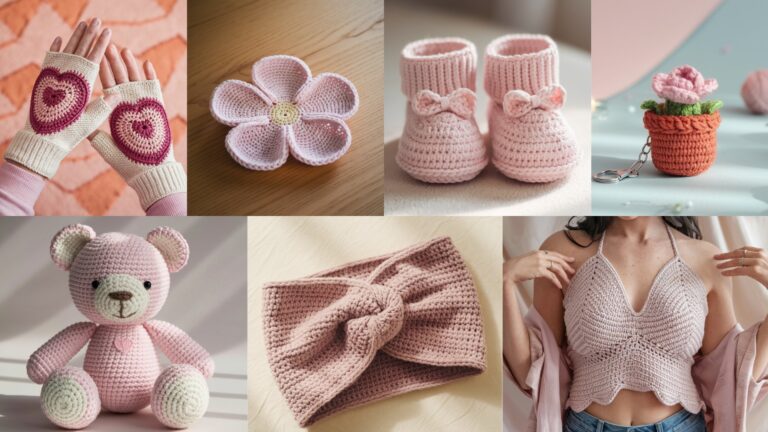
2. Fingerless Gloves with Bows Crochet Pattern
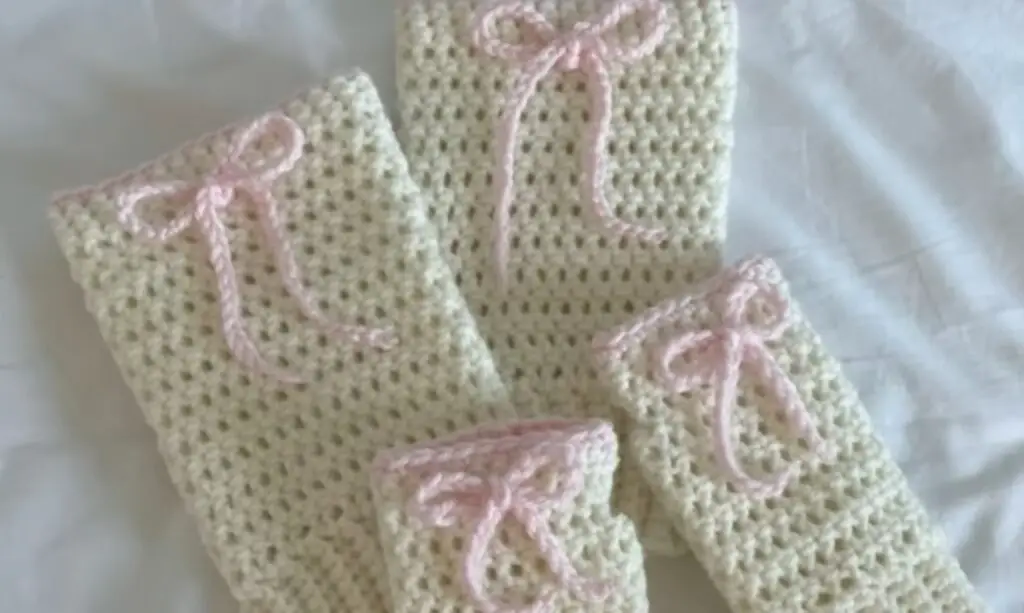
Skill level: Beginner
Finished size (sample): Wrist 7″, finger opening to knuckles
Materials
- DK or worsted yarn (approx. 80–120 yds)
- Hook 4.0 mm (G)
- Tapestry needle, small ribbon or crocheted bow motif
Construction overview
These classic fingerless gloves include a pretty bow accent sewn to one side. They’re done as a simple tube with a separate thumb opening and a decorative bow attached.
Step-by-step
- Foundation: Chain to fit wrist circumference loosely (for 7″ wrist about 30–34 ch in hdc). Join without twisting to form a loop.
- Rib cuff (optional): Ch 1, sc in BLO around for 6 rounds to create a ribbed cuff.
- Body: Switch to hdc in the round for 10–14 rounds until the piece reaches the base of the thumb.
- Thumb opening: Same method as Pattern 1 — create a ch-2 spacer (or ch-3), skip 4–5 sts, continue hdc around. On next round, hdc across ch-2 space to stabilize and continue 1–2 rounds to approach the knuckles.
- Knuckle edge: Work 2–3 rounds of sc for a neat edge at the knuckles. Fasten off, weave ends.
- Bow: Make small bow: ch 12, sc in 2nd ch and across to make a narrow strip 10–12 rows long; fasten off and use remaining yarn end to cinch the center, wrap tail a few times and tie off. Sew bow to outer side of glove. Alternatively use a ready satin ribbon bow.
Tips
- Place bow slightly off-center (outer side of hand) for classic look.
- Make a reversible bow by crocheting two quick rectangles and sewing them together with a small center wrap.
3. Victorian “Wristers” Crochet Hand Warmers Pattern
Skill level: Intermediate (lace + shaping)
Finished size (sample): Wrist 7″, length 6–8″ depending on ruffle
Materials
- Fingering or sport-weight yarn (mercerized cotton or light wool) — 150–200 yds
- Small hook 3.25–4.0 mm (D)
- Tapestry needle, optional small button for cuff
Construction overview
These victorian-style wrist warmers feature delicate lace (shells and picot edging) and a ruffled cuff. Worked flat and seamed, they make an elegant accessory.
Step-by-step
- Make a lace strip (flat): Ch 40 (or multiple of lace pattern + 2). Row 1: sc across. Row 2: ch 3 (counts as dc), sk 2, 5 dc in next st (shell), sk 2, dc in next — repeat across. Row 3: ch 1, sc across shells and dcs, anchoring shells. Repeat Rows 2–3 until the strip measures desired circumference minus 1″ (this allows slight stretch). Add more rows for a taller warmer.
- Thumb opening (if flat): On the row that will align with thumb location, stop working for the width of thumb (e.g., leave a 1–1.5″ gap). Work both sides independently for several rows mirroring pattern to create the thumb gap, then rejoin.
- Ruffled edge: For the upper cuff, on the open edge: 5 dc in each st around for one round to create ruffles; repeat if you want larger ruffles. Add picot edge: sc 3, ch 3, sl st in base (picot) around.
- Seaming: Fold strip so right sides together and seam with invisible mattress stitch leaving thumb opening as needed. Turn right side out.
- Optional button cuff: Add a small tab to overlap and sew a tiny button for decorative closure.
Tips
- Block lace fully to open shells and set ruffles.
- Use mercerized cotton for crisp lace definition.
4. Crochet Striped Fingerless Gloves Tutorial
Skill level: Beginner
Finished size (sample): Wrist 7″, knuckle coverage approx. 2–3″
Materials
- Two or three colors of worsted yarn (about 120 yds total)
- Hook 4.5–5.0 mm (G–H)
- Tapestry needle
Construction overview
A fast, fun pattern worked in the round with color changes to create stripes. Great for scrap-busting.
Step-by-step
- Foundation: Chain to wrist circumference (e.g., 36 ch), join into the round.
- Cuff (rib): Work sc in BLO for 6 rounds in color A.
- Striped body: Switch to hdc for warm fabric. Work 3 rounds in color B, switch to color C for 2 rounds, alternate colors until piece reaches the base of the thumb.
- Thumb opening: Work ch-2 spacer, skip 4–6 sts, continue hdc. On next round, hdc across spacer to stabilize.
- Knuckle edge: Finish with 2 rounds of sc in BLO for a tidy edge. Fasten off.
- Optional thumb cuff: Join yarn and sc 6–8 rounds around thumb opening.
Color-change tips
- Carry colors up the inside (tapestry method) if floats are short, otherwise fasten off and weave tails.
- Make stripes thin (1–2 rows) for candy-cane look or thick (4–6 rows) for bold bands.
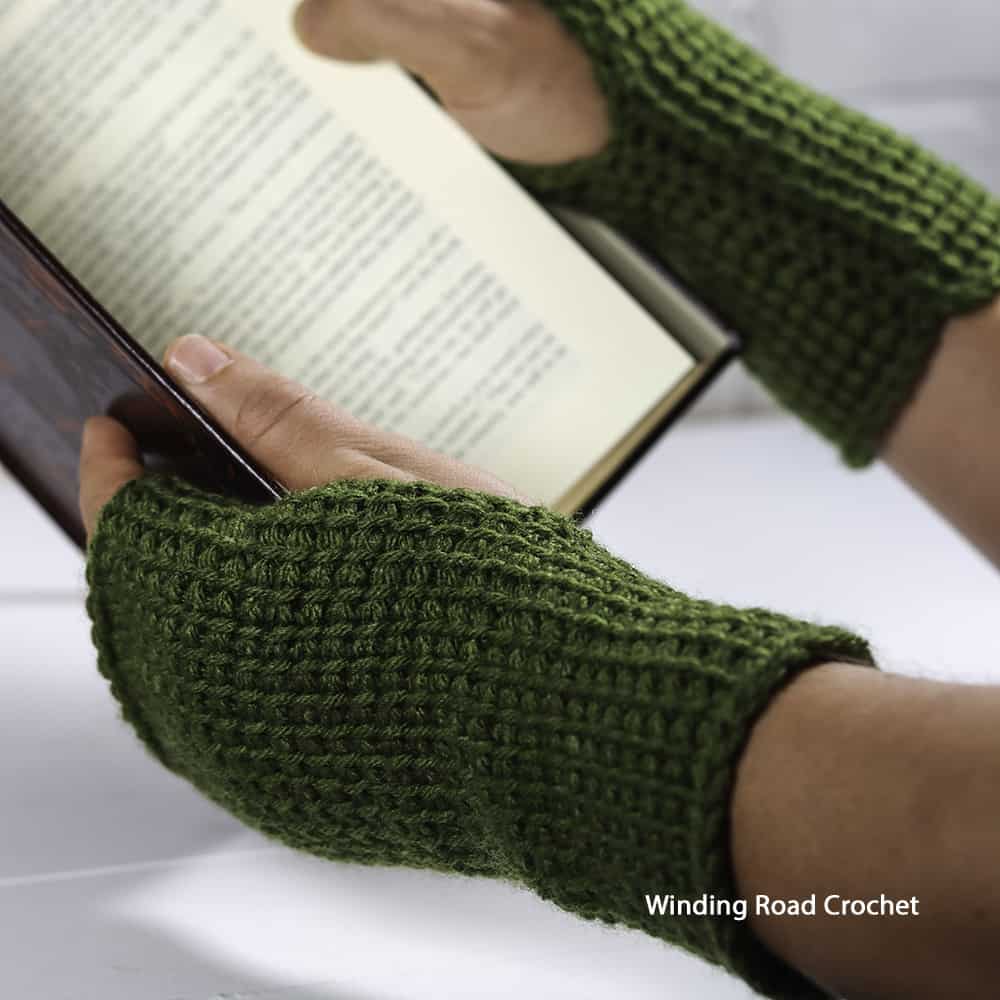
5. Tunisian Wrist Warmer Crochet Pattern
Skill level: Intermediate (Tunisian technique)
Finished size (sample): Wrist 7″, length 6″ (short cuff)
Materials
- DK yarn (approx. 120–160 yds)
- Tunisian crochet hook (stitch count dependent length) 4.5 mm
- Tapestry needle
Technique note
Tunisian crochet creates a dense, warm fabric that’s ideal for wrist warmers. I’ll use Tunisian Simple Stitch (TSS) for the body and a Tunisian rib for the cuff.
Step-by-step
- Cuff (Tunisian rib): Chain 26 (or gauge to wrist circumference). Work Tunisian rib for 6–8 rows: forward pass pick up loop in each chain (alternating TSS and Tunisian purl for rib), return pass work off loops in pattern. This makes a stretchy cuff.
- Body (TSS rounds): Change to TSS rounds worked flat then seam: Work forward pass picking up loops across. On return pass, work off loops as normal. Repeat until length from cuff to top reaches 3.5–4″ (or desired height). For a tube, you can join edges by whipping or mattress stitch.
- Thumb opening: To add thumb hole, stop short of full circumference on one repeat, skip a set number of stitches (corresponding to thumb width), and continue the forward pass on remaining stitches; on return pass, work across picked-up loops to create small gap; later pick up stitches around gap and work a small Tunisian round for a thumb cuff.
- Top finishing: Work a row of Tunisian crab stitch or single crochet around the top edge for neatness. Fasten off and weave in ends.
Tips
- Tunisian fabric is less stretchy — account for snug fit. Subtract 0.5″ from measurement for fitted fit.
- Use a smaller hook if your TSS is loose.
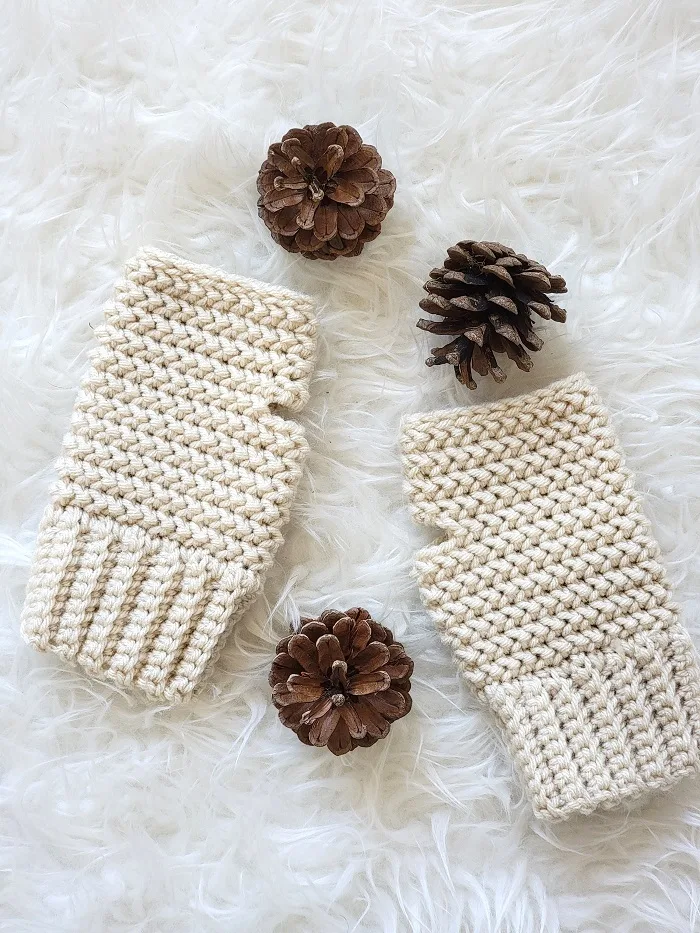
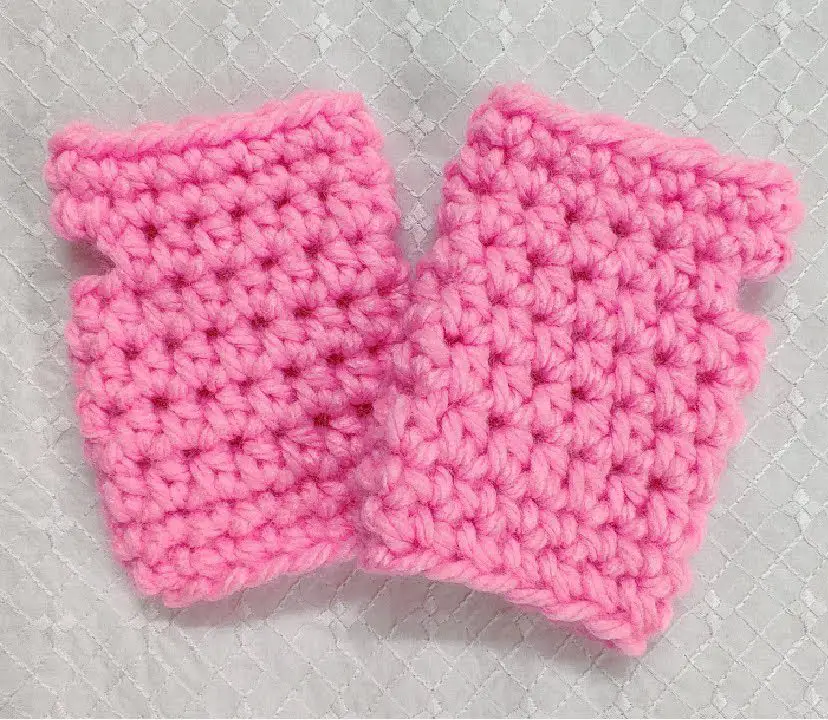
6. Easiest Wrist Warmer Crochet Tutorial
Skill level: Absolute Beginner
Finished size (sample): Adjustable (basic rectangle seamed)
Materials
- Bulky yarn (super quick) — 100 yds
- Hook 6.5–8.0 mm (K–L)
- Tapestry needle
Construction overview
This is the simplest — crochet a narrow rectangle, seam sides leaving thumb opening, and finish edges. Great first project.
Step-by-step
- Make rectangle: Ch 22 (or width to fit wrist comfortably). Work sc rows until piece measures desired length from wrist to knuckle (about 6″ for a short warmers). Keep count for thumb placement.
- Seaming & thumb hole: Fold rectangle so edges meet, and seam along short side from bottom to where you want the thumb (leave ~2″ gap), then continue seaming the rest. The gap acts as the thumb hole.
- Finish edges: Work sc around top and bottom edges for neat finish. Fasten off.
Variations
- Make wrist-warmers with longer rectangles for gauntlet-style arm warmers.
- Use large hook + bulky yarn to make it super fast (30–45 minutes).
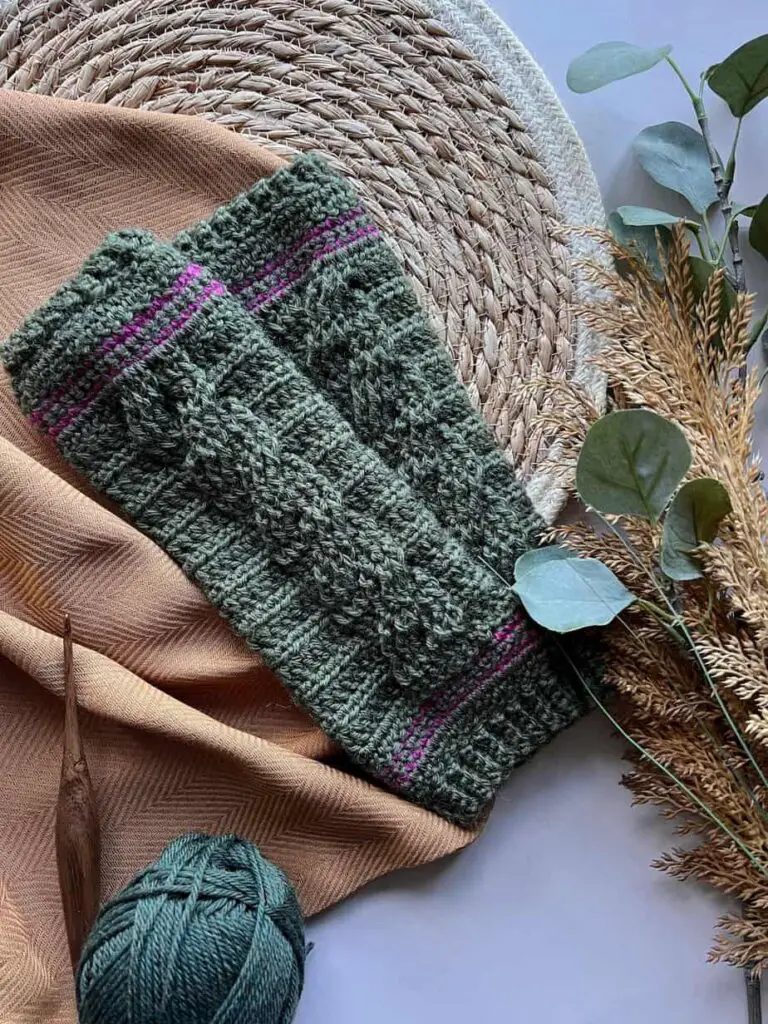
7. Cable Crochet Wrist Warmer Pattern
Skill level: Intermediate (post stitches + cable crosses)
Finished size (sample): Wrist 7″, length 6–8″
Materials
- Worsted weight yarn (approx. 150 yds) — gives good stitch definition
- Hook 5.0 mm (H)
- Tapestry needle
Construction overview
Cables in crochet are made with front-post and back-post stitches and cable-cross rounds. This pattern shows a central cable panel framed by ribbed edges.
Step-by-step
- Foundation: Ch 36 (or enough for wrist circumference). Join to work in the round.
- Ribbed edge: Round 1–6: sc in BLO (this creates vertical rib). Join.
- Cable panel: The cable repeat (example 12-st repeat):
- Round A: (sc 2, fpdc 4, sc 6) repeat across panel. fpdc = front post double crochet.
- Round B: sc in each st.
- Round C (cable cross): Work fpdc over next 2 sts, then fpdc in next 2 but post over previous pair to create cross (you will hold the previous post down and work on the behind posts — effectively slip stitches and then work in front to create the cross). If you’re unfamiliar with cable crosses, practice a 4-post cable crossing: skip working the next 2 fpdc, work fpdc in next 2, then go back and work fpdc around the skipped posts.
- Repeat: Alternate plain rounds with cable cross rounds until desired height reached.
- Thumb opening & top edge: Make thumb opening per earlier patterns. Finish with sc rounds.
Tips
- Practice post stitches on a swatch first.
- Use a contrasting technique: do cables on a flat panel and seam for easier cable crossings.
8. Crochet Cat Paw Fingerless Gloves Tutorial
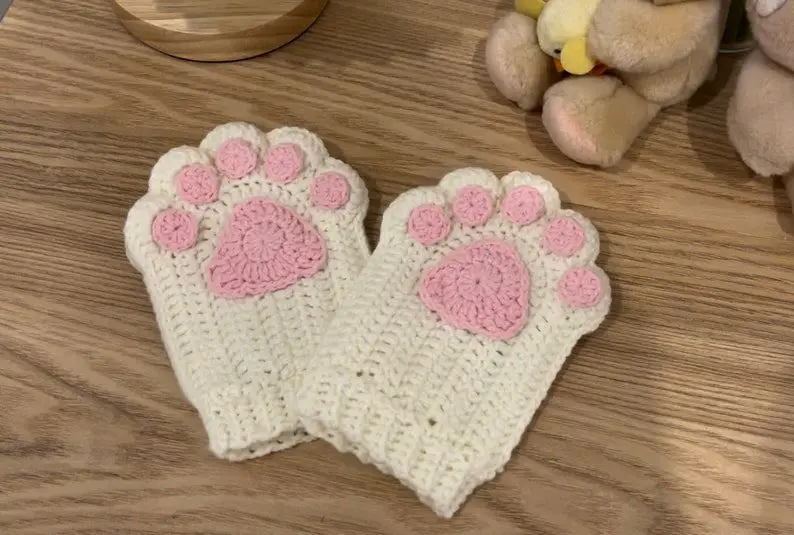
Skill level: Beginner–Intermediate (appliqué + shaping)
Finished size (sample): Wrist 7″, length 5–6″ — cute paw pads on back
Materials
- DK or worsted yarn in main color and contrasting color for paw pads — 100–150 yds total
- Hook 4.0–4.5 mm (G)
- Tapestry needle, small safety button (optional for ear/decoration)
Construction overview
These fingerless gloves have a cat-paw motif (appliqué pads) sewn to the back of the hand. Quick to make and adorable.
Step-by-step
- Tube body: Chain to wrist circumference (e.g., 34 ch), join into the round. Work hdc rounds for about 4–5″ to reach the base of the thumb.
- Thumb opening: Make spacer and skip 4 sts; stabilize on next round. Continue to knuckles with 1–2 hdc rounds.
- Knuckle edge: 2 rounds sc; fasten off and weave in ends.
- Paw pads (appliqué): Make one large pad and three small toe pads:
- Large pad: ch 2, 6 sc in magic ring. Rnd 2: inc around to 12 sc. Rnd 3: sc around to make a small oval; fasten off leaving long tail for sewing.
- Small pads: ch 2, 6 sc in ring; fasten off leaving tail. Make 3.
- Attach pads: Position the big pad on the back of glove and the three small pads above it to look like paw toes. Sew on with matching yarn, using small whipstitches. Add embroidery with darker thread to outline pads if desired.
- Optional ears/face: Crochet two small triangles and sew near cuff for “ears” if making wristlet with a cat-face theme, or stitch tiny whiskers with embroidery floss.
Tips
- Use felt for paw pads for a flat, tactile contrast — hand-sew on.
- For kids, make smaller sizes by reducing chain and rounds.
Finishing & Care Notes (applies to all patterns)
- Blocking: Lightly block lace and textured pieces to open stitches and set shape.
- Weaving ends: Use a long tail to weave securely into inside of the warmer; knot or glue only if necessary.
- Lining (optional): For extra warmth, add a thin fleece lining cut to the interior shape and hand-stitch it in.
- Care: Follow yarn label. Generally hand wash and lay flat for natural fibers; many acrylics can be machine washed on gentle and air-dried.
Conclusion
Wrist warmers are small, quick-to-finish projects with big cozy payoff. Whether you want the speed of the Easiest Wrist Warmer tutorial, the elegance of Victorian “wristers,” the structure of Tunisian fabric, or the cute charm of cat-paw fingerless gloves, there’s a pattern here to match your skill level and style. Pick a yarn you love, measure for the perfect fit, and have fun customizing color, texture, and trims. If you’d like, I can convert any of these patterns into a printable PDF with stitch counts for different sizes, or make a photo-based step-by-step for one pattern — tell me which one and I’ll prepare it. Happy crocheting and stay cozy! ????
888SLOT mang đến trải nghiệm cá nhân hóa sâu sắc, ghi nhớ sở thích người dùng để đề xuất những kèo cược thơm nhất mỗi ngày. (Tương tự cho đến đoạn 80, tập trung vào: app, mượt mà, dễ dùng) TONY12-30