

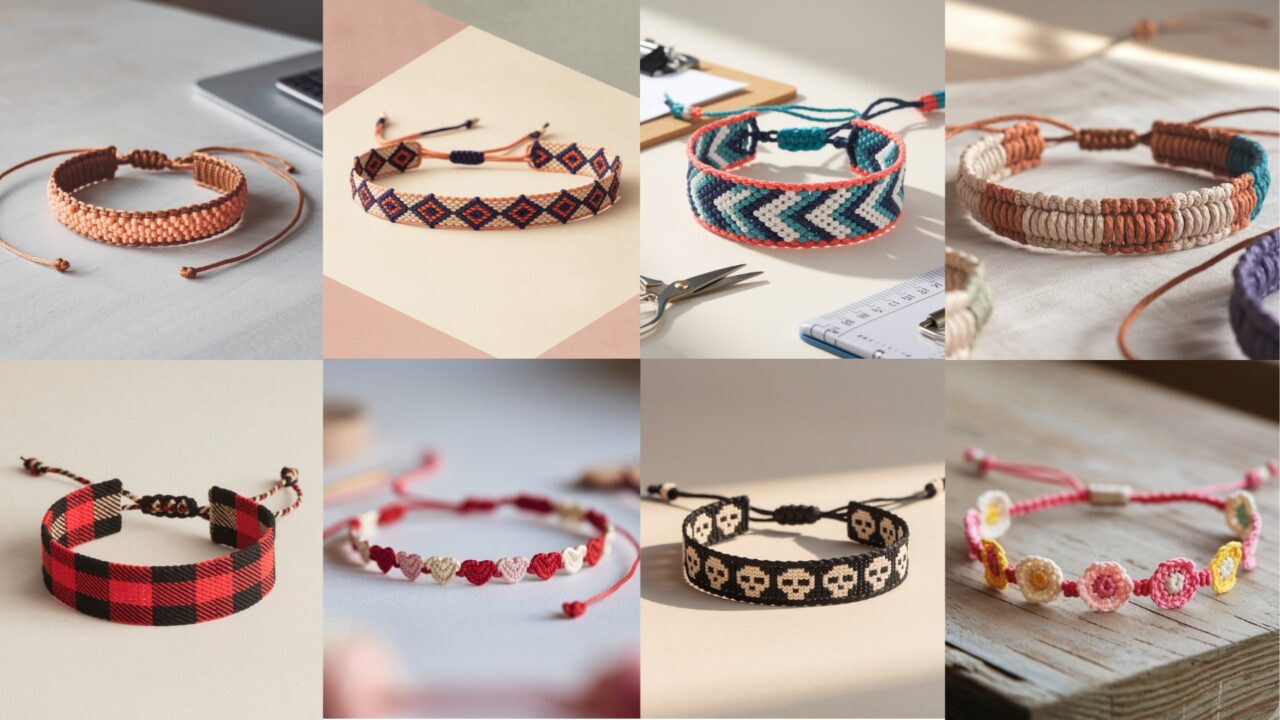
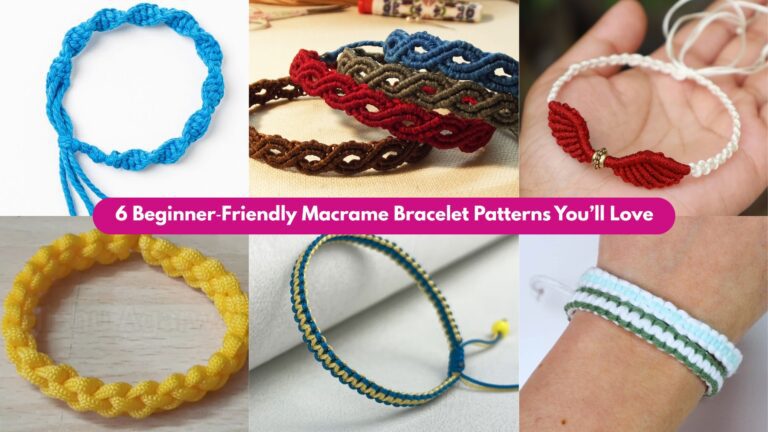
Friendship bracelets are timeless: portable, inexpensive, and endlessly customizable. They’re perfect for beginners learning knots, experienced makers experimenting with color, and anyone who wants to give a meaningful handmade gift. In this post you’ll find eight distinct bracelet patterns — from classic chevrons to macramé square knots, tiny hearts to skulls — each written with clear, step-by-step instructions, materials lists, sizing and finishing options, troubleshooting tips, and variation ideas so you can make each design your own.
All patterns use standard friendship-bracelet techniques (embroidery floss or craft cord, basic knot types, and common closures). I’ll explain the knot vocabulary used throughout and give sample color layouts and exact knot sequences where applicable so you can follow along without needing a chart.
Quick knot glossary (how to read the instructions)
- Forward knot (FK): Make a “4” shape over the adjacent strand, pull through twice. Moves the working strand to the right.
- Backward knot (BK): Mirror of forward knot; makes a backwards “4”, pulls working strand to the left.
- Forward–backward (FB): A forward knot followed by a backward knot on same two strands → keeps working strand in place but secures.
- Backward–forward (BF): Backward knot then forward knot → keeps working strand in place (used for borders/edges).
- Double knot: Most instructions call for doing each knot twice (standard FK = two half-knots).
- Anchor & tail: Leave 4–6 in (10–15 cm) of tail before knotting for finishing or braiding.
- Strings & positions: Strings are numbered left to right as you arrange them on your clipboard or tape board.
Materials commonly referenced:
- Embroidery floss (6-strand cotton) or thin craft cord
- Scissors, tape or clipboard, ruler, optional beads, small button or jump ring for closures
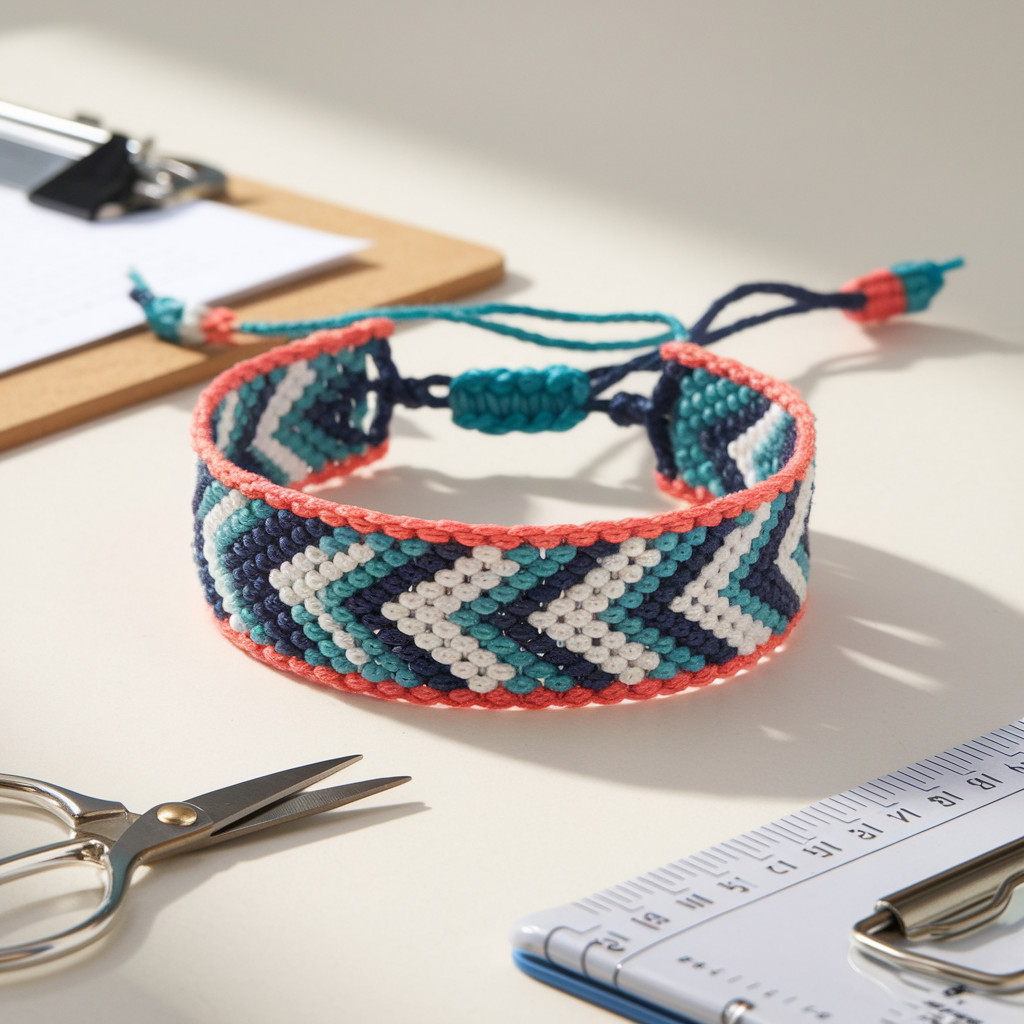
1. Dotted Border Chevron Bracelet Pattern
Skill level: Beginner → Confident beginner
Time estimate: 1–2 hours (depends on length and practice)
A chevron is the classic V-shaped bracelet. This version adds a dotted border (tiny contrasting dots along each outer edge) — cute, modern, and eye-catching.
Materials
- 4 colors of embroidery floss (A, B, C, D). Example: A = teal, B = navy, C = coral, D = white (for dots).
- 8 strands total (2 per color) for a medium width; increase for wider chevrons.
- Clipboard or tape, scissors, ruler.
Finished width & length
- With 8 strands (two per color), finished width ≈ 6–8 mm.
- For wrist circumference 6–8 in, cut each strand 30–36 in (75–90 cm). Longer if you want braiding tails.
Color order and setup
Arrange strands left → right like this for a symmetric two-color chevron with dotted borders:
Left side: D, A, B, C | C, B, A, D :Right side
Where D (contrast/dot color) is at the outermost edges.
Step-by-step (chevron + dotted border)
- Secure your strands to clipboard or tape with a simple overhand knot about 4–6 in from the top so you have tails. Spread strands flat left to right in the order above.
- Make the dotted border (left edge) — do a BF knot with the leftmost strand (D) over the next strand (A). That BF (backward–forward) keeps D in place on the outer edge while anchoring it. Repeat BF twice to secure the dot base.
- Form the left chevron half: Using strand A (now in position 2), do FK (forward knots) across strands B then C until you reach center. Do the same on the right half mirrored: using the matching A on the right make BKs (backward knots) toward the center. When two center strands meet, tie them together with a FK-BK pair (a symmetrical center knot — usually two forward knots).
- Finish dotted border (right edge): Mirror what you did on the left: use the rightmost D to do FB (forward–backward) over its neighbor to hold it in place as the dotted border.
- Row 2: Repeat the process, but first make small “dot knots” along the dotted border using the D strand: slip D forward slightly and tie a single FK/FK or BK/BK on the adjacent strand (two half-knots) to create the visible dot. For contrast, make one dot knot each time D passes across — this produces a dotted line along the edge.
- Work until bracelet reaches desired length. Maintain tension so the chevrons are even.
- Finishing: Tie a simple overhand knot below your last row leaving tails to braid, or make a loop and a braided tail/knotted button closure.
Tips & variations
- For sharper dots, pick a lighter/more contrasting edge color.
- Use metallic thread for dotted border for subtle shimmer.
- Increase number of working strands for wider chevrons; keep a pair of D strands at the edges for double dotted lines.
2. DIY Diamond Friendship Bracelet Pattern

Skill level: Intermediate (requires reading knot sequences)
Time estimate: 2–3 hours
Diamond patterns are graphic and look impressive while still using basic knots. There are two common approaches: diagonal (chevron-based diamonds) and alpha-style (pixelated) diamonds. Below is a diagonal method using only forward/backward knots.
Materials
- 4 colors floss: Background (BG), Diamond color 1 (D1), Diamond color 2 (D2), Accent (ACC)
- 12 strands total for a medium panel (3 BG, 3 D1, 3 D2, 3 ACC). Cut each 30–36 in.
Setup & motif repeat
This design works in repeats of 12 strands to create diamonds that span several rows. Diamonds form when colored strands cross toward the center, nest, and then diverge.
Step-by-step (one diamond unit)
- Set up: Order strands left to right: BG, BG, BG, ACC, D1, D1, D2, D2, ACC, BG, BG, BG (mirror symmetrical arrangements work best).
- Row 1 (edge anchors): Secure leftmost BG as an anchor with BF/FB to make smooth edge transitions.
- Forming diamond side edges: Use the colored D1 strand to FK across toward center, creating diagonal lines over neighboring strands: FK twice per crossing (classic double FK). Mirror the same with D2 from the opposite side using BKs.
- Center meeting: When D1 and D2 meet at center, tie D1 over D2 with a center knot (FK with D1 onto D2 or vice versa depending on desired color dominance). Then have D1 and D2 carry on past the center to the other side — this creates the apex of the diamond.
- Create the lower half of diamond: Once both colored strands have crossed to opposite sides, reverse the direction and carry them back toward center with the opposite knot types (BKs become FKs) to make the diamond lower half and close the shape.
- Background filling: Use BG and ACC strands to fill the spaces with FK/BK pairs to keep fabric even.
- Repeat rows: The diamond is a multi-row motif; repeat the sequences until diamond height is reached, then shift start positions to cascade diamonds along the bracelet.
Tips for following sequences
- Write out each row as a simple code: e.g., Row 1: FK 3, BK 3, FK 2; Row 2: FK 2, FK center; etc. Alternatively draw a small grid and fill in color squares to visualize the diamond.
Finishing & variations
- Diamonds can be nested for chain-link diamond patterns.
- For a pixel-perfect diamond with sharp corners, use an alpha technique (working on a single base cross with a thicker background string and knotting color strings across it like weaving).
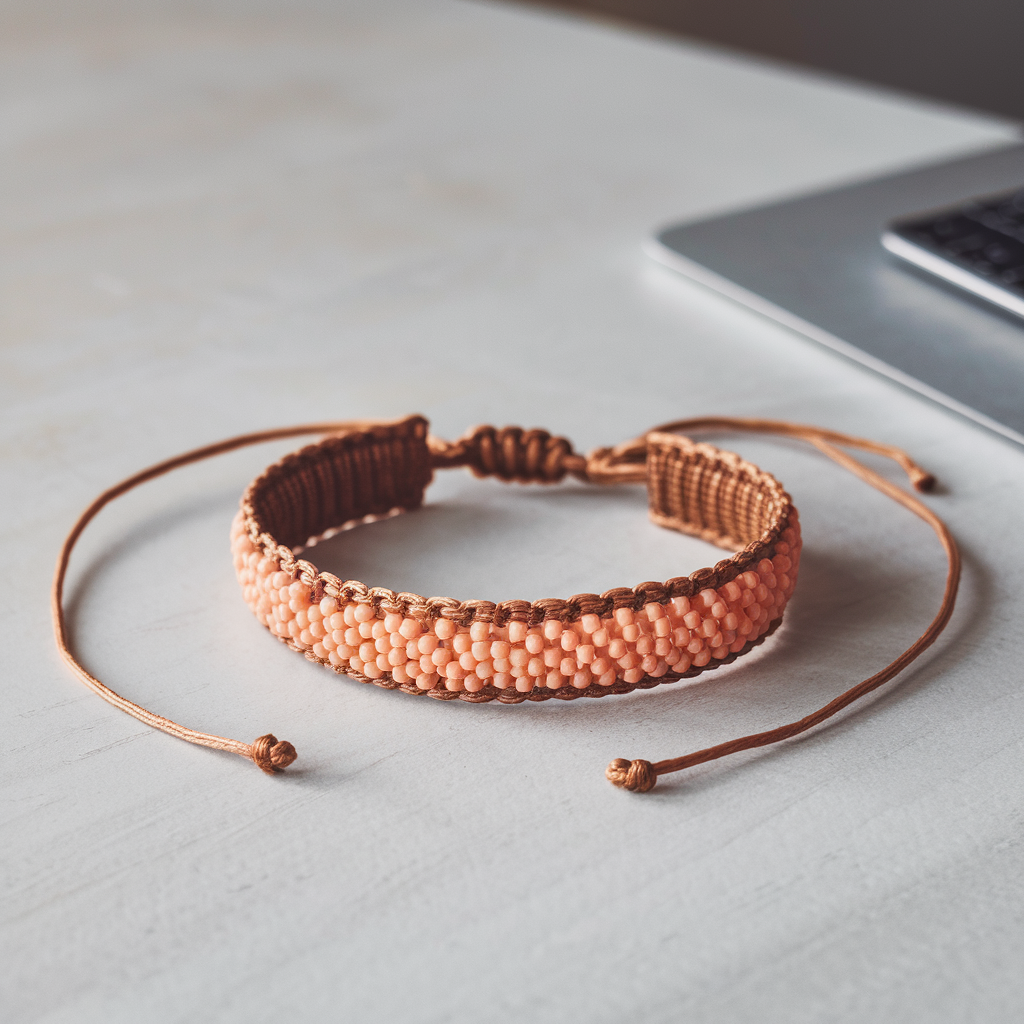
3. Ladder Stitch Bracelet Pattern
Skill level: Beginner → Intermediate (bead/string handling)
Time estimate: 1–2 hours
The ladder stitch looks like a row of “rungs” between two longer side cords and is ideal for using small beads as focal points.
Materials
- Two thicker cords for sides (waxed cotton or two doubled floss strands)
- Seed beads (size 11/0) or larger glass beads for rungs
- One contrasting floss for the ladder wraps
- Beading needle (optional), ruler, clipboard
Finished width
- Narrow ladder approx 6–8 mm depending on bead size.
Step-by-step
- Cut side cords: two cords at desired length + 6 in for finishing. Secure them parallel on clipboard with 2–3 in at top loose for tie/loop.
- Thread your bead thread (thin floss or beading thread) on a beading needle if using seed beads.
- Start ladder rungs: Slide one bead onto the thin thread and position it at the bottom near your knot. Wrap the thin thread once around the left side cord, then feed the bead onto the thin thread and pass the thin thread behind the right side cord and around to bring bead to front between cords — this forms a rung secured by a wrap. Tie a small catching knot or make a tiny double wrap to keep the bead snug.
- Repeat: Move up ~4–5 mm and repeat with next bead, alternating wraps so beads line up vertically like ladder rungs.
- Optional woven look: Between beads, you can make a few micro macramé square knots using a third cord if you want more texture.
- Finishing: Tie an overhand knot under the last bead and braid the two side cords to make tails for a tied closure or add a small adjustable sliding knot.
Variations
- Use two rows of beads by adding a center core and wrapping around both sides for a double ladder.
- Alternate bead sizes or colors for a multicolor ladder.
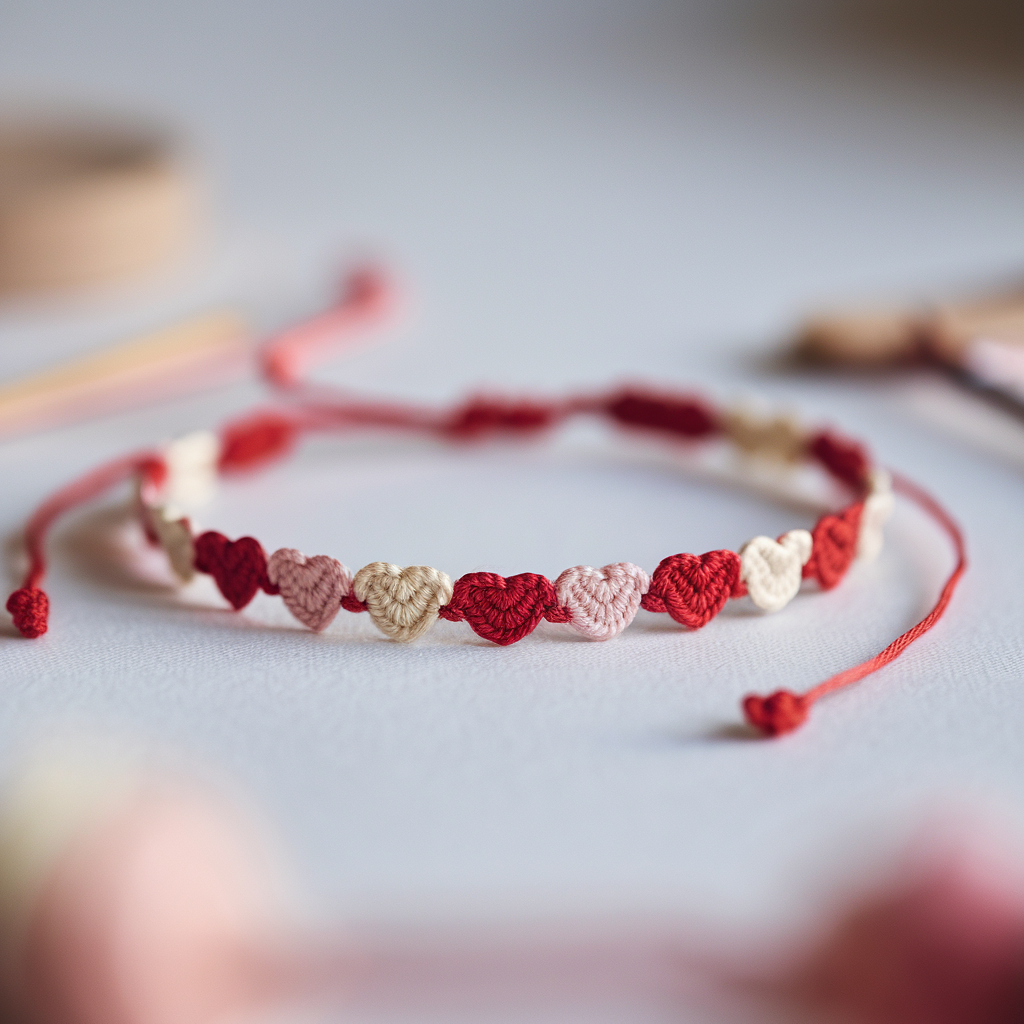
4. Tiny Hearts Bracelet Pattern
Skill level: Beginner → Confident beginner
Time estimate: 1–2 hours
Tiny hearts are a sweet motif that reads clearly even in small scales. There are two main approaches: appliqué hearts sewn onto a base, and knot-formed hearts integrated into the bracelet rows. Below is a direct knot sequence for small hearts.
Materials
- Two colors: Heart color (H), Background (BG)
- 10–12 strands (alternating H & BG as desired), 30–36 in each.
Heart motif basics
A tiny heart typically spans 6–8 columns and 6–8 rows. The heart shape is produced by moving H strands inward into the center as a pair and then reversing.
Step-by-step (knot hearts across a band)
- Layout: For repeating hearts across a band, use a layout like: BG BG H H BG BG (for one heart), then mirror. Repeat this set across the number of hearts you want.
- Form the top lobes: On row 1, move the two H strands toward the center using FK across BG strands until the H strands are adjacent at the center; mirror from the right side using BK. When H strands meet, tie a FK/BK pair to anchor the center (this starts the top of the heart).
- Create the heart bulge: On subsequent rows, bring the H strands one step further inward each row (continue FK/BK moves) so the heart widens then narrows. Use BG strands to fill around the H strands with FB/BF anchors so the H color forms the distinct heart shape.
- Define the point: To form the heart point, let the H strands cross at center and then do one extra FK or BK so the H color makes the inverted triangle point on the underside.
- Spacing: Add a few rows of background only between hearts vertically if you want spaced hearts (floating hearts). For a continuous chain of hearts, start the next heart after a 2-3 column BG separator.
Finishing
- Ends: braid tails and tie or make an adjustable sliding knot. For an adult piece, consider a small button & loop made from a knot loop.
Tips
- Use high contrast (white vs dark) so hearts show clearly.
- If reading knot sequences is difficult, make an alpha chart graph of pixels where H = filled pixel.
5. Buffalo Plaid Bracelet Pattern
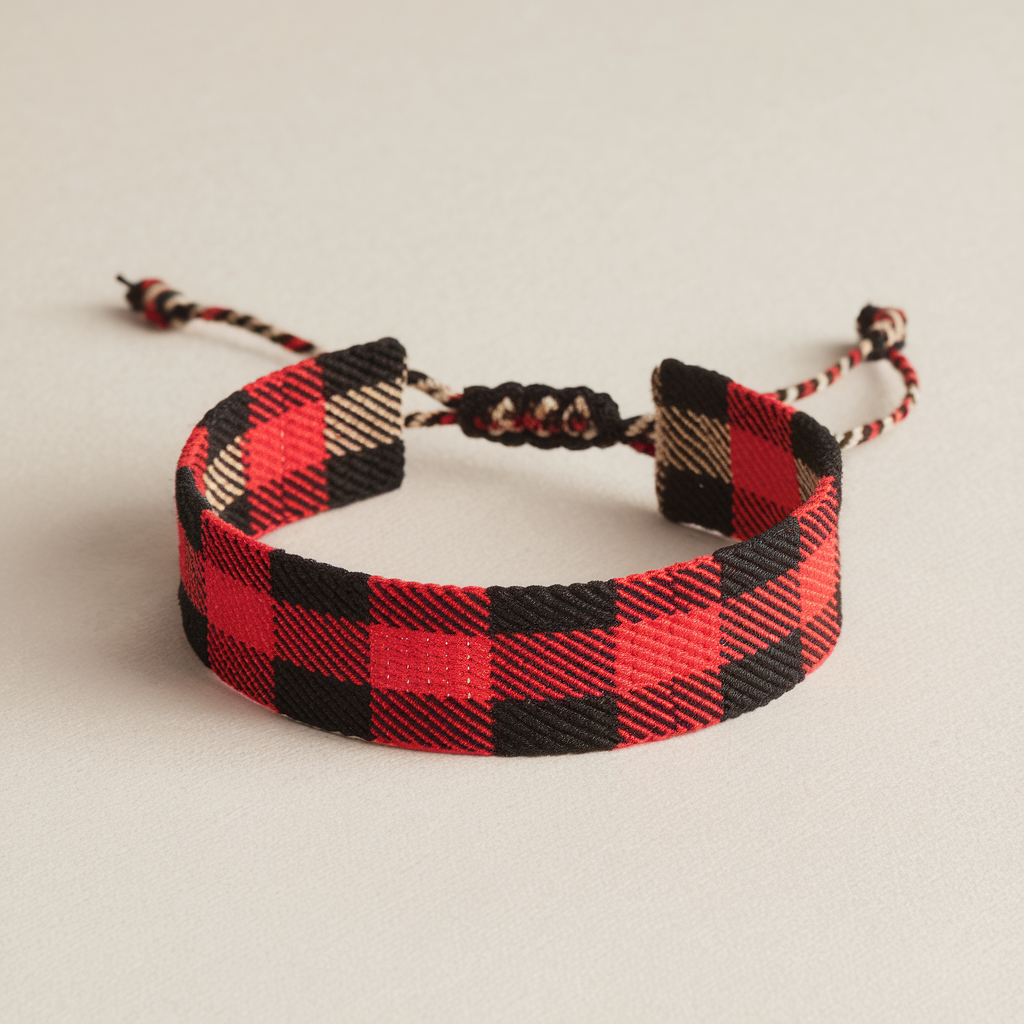
Skill level: Intermediate (color blocks & clean joins)
Time estimate: 2–3 hours
Buffalo plaid uses crosshatch color blocks (like woven plaid) — it can be achieved via alpha technique or by careful diagonal colorwork.
Materials
- Three colors: Background (BG), Dark (D), Light (L) (e.g., BG = cream, D = black, L = red)
- Enough strands to make a band 10–12 pixels wide if you choose alpha; shorter for narrow bands.
Alpha technique overview
Alpha friendship bracelets are worked row by row with a base string and knotting colors across it like weaving. This is ideal for plaid because you can place color blocks exactly.
Step-by-step (alpha plaid mini)
- Select width and base strings: For a compact cuff, use 12 base strings (one per pixel column) and one working string per row that you tie across using forward/backward knots around each base. Another method is using multiple working threads for each horizontal color band.
- Design plaid grid: Decide on block size (e.g., 3×3 pixel blocks). Draw a small grid on graph paper marking L and D and intersections where they cross (the crosshatch appears as darker on overlapping stripes).
- Knot rows: Use your alpha knot technique to tie each pixel row across the base strings in the color indicated. When a new vertical band starts, switch working string color accordingly.
- Create crosshatch effect: Where D and L cross, add a 1-stitch darker overlay (knot twice with a third shade or use accent thread) to replicate the plaid intersection.
- Repeat & finish: Work rows until length fits wrist. Finish with braided tails or a loop/button closure.
Variation (cheaper, non-alpha method)
- Work horizontal stripes in D and L using normal diagonal knot technique, then add a contrasting vertical stripe by carefully changing a single strand color per column. This requires more complex planning but saves on many working strings.
6. Skull Bracelet Pattern
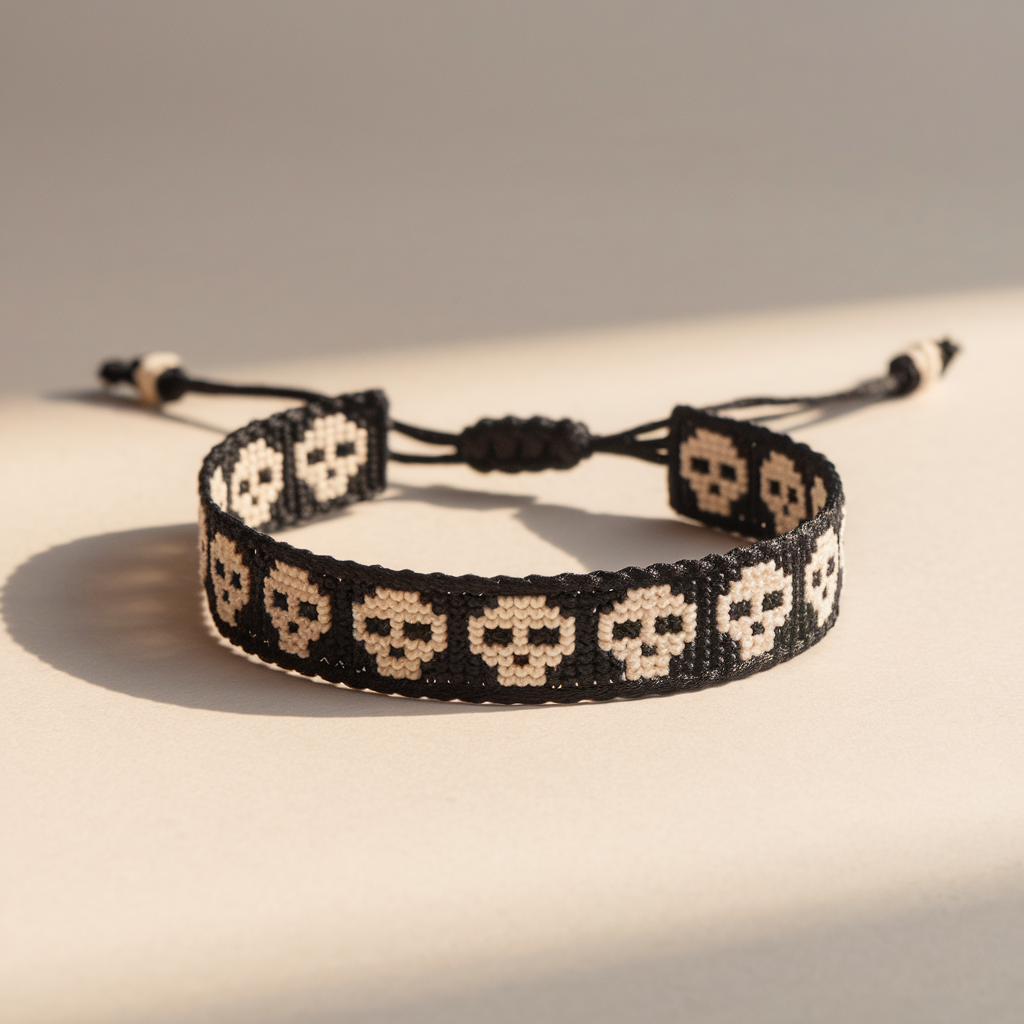
Skill level: Intermediate (small graphic motif)
Time estimate: 2–3 hours
Skulls are a fun edgy motif — pixelated skulls made with alpha or C2C (corner-to-corner) techniques look the best.
Materials
- Two colors predominantly: Background (BG) and Skull (SK) (e.g., BG = red, SK = white or cream)
- Alpha or C2C method (see Star Quilt notes for C2C basics)
Pixel/C2C skull (C2C recommended)
- Create a small 12×12 pixel graph with a skull motif (two eye sockets, nose triangle, lower jaw pixels). You can sketch a basic skull: empty eye spaces and a row of teeth.
- Work C2C: Each pixel = a small 3-dc block worked diagonally. Follow the graph row by row, changing colors at the pixel edges.
- Make multiple skulls spaced along the band by leaving BG pixels between skulls.
- Joining (if making bigger band): Join C2C rows with a row of SC along sides to tidy edges.
Finishing and styling
- Add metal beads or studs between skulls for a punk vibe.
- For a subtle look, make skulls tone-on-tone (use slightly lighter grey on black).
7. Flower Bracelet Pattern
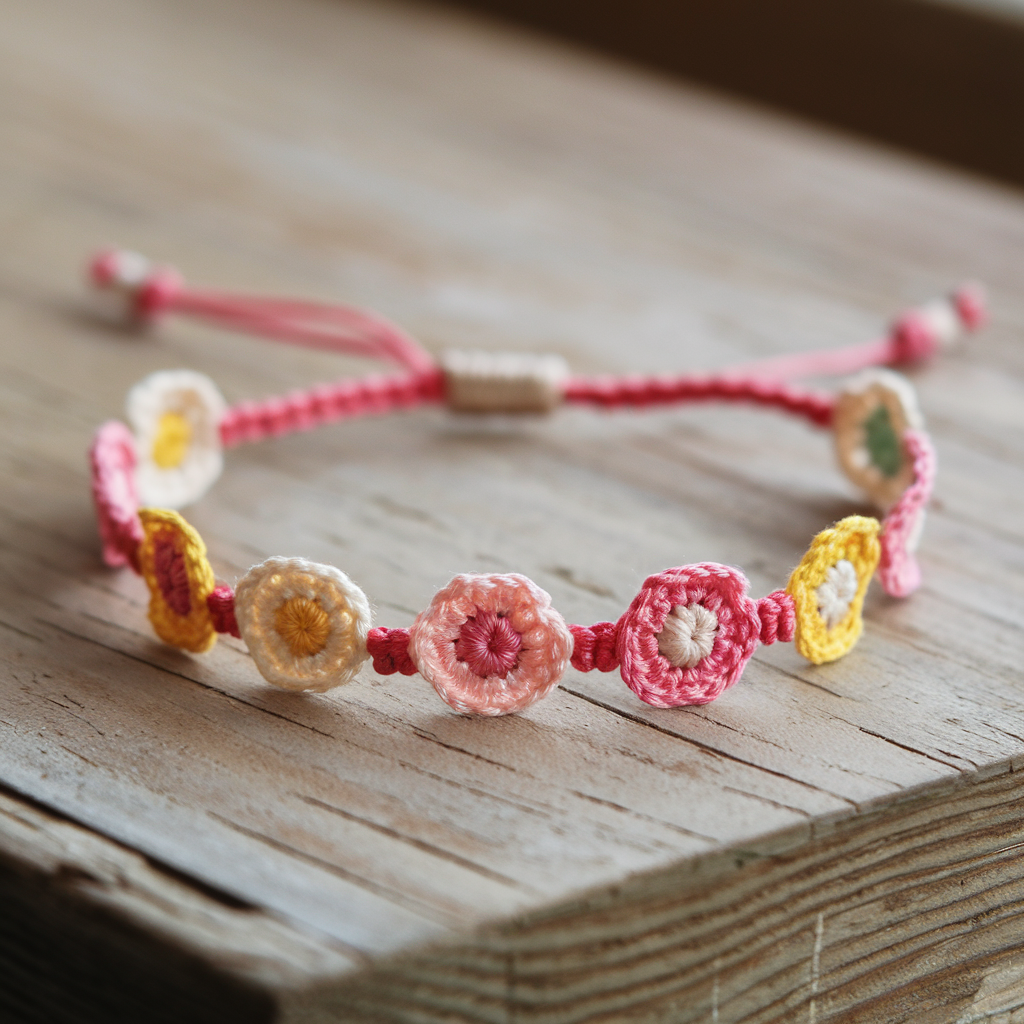
Skill level: Beginner → Intermediate
Time estimate: 1–3 hours depending on complexity
Flowers can be made as repeated small floral motifs (appliqués) sewn onto a base band, or worked inline as knot patterns. Appliqués are fast and allow you to play with petals and centers.
Materials
- Two-three colors: Petal (P), Center (C), Band (BG)
- Floss, thin crochet hook (optional for flowers), small needle
Option A — Sewn flower appliqués on braided base
- Make base band: Braid three doubled strands to make a sturdy band. Secure ends with knots.
- Crochet tiny flowers (appliqué): Use a simple 5-petal motif: MR, R1: 5 SC into ring; R2: (CH 3, SL ST into same sc) × 5 to make petal loops, then work into each loop (SC, HDC, DC, HDC, SC). Fasten off leaving a long tail to sew.
- Sew flowers: Attach flowers along the band with a few stitches; add a small bead or French knot for the center.
Option B — Inline knot flowers (pixel heart approach)
- Design tiny flowers as 5×5 pixel clusters on a grid (center + 4 petals).
- Knot using alpha or diagonal techniques to create the pixel flower repeated down the band.
Variations & tips
- Add leaves by small stitches in green between flowers.
- Use variegated floss for vintage watercolor florals.
8. Square Knots Bracelet Pattern (Macramé)

Skill level: Beginner (macramé basics)
Time estimate: 30–60 minutes
Square knots (also called reef knots) are the backbone of many macramé bracelets. They’re fast to learn, durable, and great for thicker cord.
Materials
- 4 cords: two center filler cords (core) and two working cords (usually longer). Example: 2 mm waxed cord or 1–2 strands of floss for each working cord.
- Length: working cords 5× wrist circumference; core cords ≈ 2× wrist circumference.
Step-by-step (square knots)
- Secure cords: Fasten the top ends to a clipboard or tape. Arrange cords left to right: working cord A, core cord 1, core cord 2, working cord B.
- Left half knot: Pass working cord A over cores (1 & 2) and under working cord B. Then pass working cord B under the cores and up through the loop created by A. Pull both working cords tight to form the left half of a square knot.
- Right half knot: Mirror the motion: pass working cord B over cores, under working cord A, then pass working cord A under cores and up through loop. Pull to tighten. That completes one full square knot.
- Repeat square knots down the length until bracelet reaches desired length. Keep knots uniform and tension consistent.
- Finishing options: Make a sliding knot or half macramé braid for adjustable closure, or tie overhand knots and trim tails. Add beads between knots by threading working cords through the bead before finishing a knot.
Variations
- Alternating square knots in spiral (half knot) produce a twist.
- Combine with vertical lark’s head knots to form patterned panels.
General finishing, closures, and care
Closures
- Braided ties: Braid 3 strands to make a tie, knot at end.
- Loop & button: Create a loop on one end (small chain loop or slip knot) and sew a small button on the other.
- Adjustable sliding knot: Fold bracelet into loop and make a macramé sliding section with square knots so the wearer can tighten/loosen easily.
- Metal clasp: For a polished look, sew floss into small end caps and attach a lobster clasp.
Sizing quick guide
- Wrist measurement + 1 in for comfort → target bracelet length.
- For tight knotted patterns, add 1.5–2 in to allow knots and closures.
Care
- Embroidery floss: hand wash gently, air dry.
- Waxed cord: wipe clean.
- For bracelets with beads or glued ends, avoid prolonged soaking.
Troubleshooting
- Uneven tension: Practice even pulling on each half-knot; secure work to clipboard to keep rows consistent.
- Color not showing: Check contrast and use accent colors sparingly for clarity.
- Pattern drift: When following long sequences, mark each completed row on paper or use sticky notes to avoid losing your place.
Conclusion
These eight friendship bracelet patterns cover a wide range of styles and techniques: classic knotting (chevrons, diamonds), pixel and C2C approaches for detailed motifs (flowers, skulls, plaid), beadwork (ladder stitch), and macramé (square knots). Each design is highly customizable — swap colors, adjust widths, add beads, or combine techniques to invent your own signature bracelet. Friendship bracelets are fast to learn, forgiving, and endlessly satisfying to gift or wear.


xn88 là gì Bạn sẽ có cảm giác như đang trở lại tuổi thơ khi điều khiển những chiếc súng bắn cá, săn lùng các loài cá quý hiếm để ghi điểm. Đây là trò chơi không chỉ giúp bạn giải trí mà còn rèn luyện sự khéo léo và nhanh nhạy.
xn88 là gì Bạn sẽ có cảm giác như đang trở lại tuổi thơ khi điều khiển những chiếc súng bắn cá, săn lùng các loài cá quý hiếm để ghi điểm. Đây là trò chơi không chỉ giúp bạn giải trí mà còn rèn luyện sự khéo léo và nhanh nhạy.
I don’t think the title of your article matches the content lol. Just kidding, mainly because I had some doubts after reading the article. https://www.binance.info/register?ref=IHJUI7TF
Thị trường nhà cái uy tín đổi thưởng ngày càng bùng nổ với vô số lựa chọn, nhưng liệu đâu là nền tảng thực sự đáng tin cậy? Nhiều người chơi đã phải học bài học đắt giá khi tham gia các nhà cái thiếu minh bạch: tiền thắng không thể rút, tài khoản bị khóa vô cớ, hay tỷ lệ trả thưởng không công bằng. Hãy cùng khám phá 188v chính thức – một lựa chọn đang được đánh giá cao bởi cộng đồng người chơi nhờ tính minh bạch, bảo mật và đa dạng trò chơi.
Thank you for your sharing. I am worried that I lack creative ideas. It is your article that makes me full of hope. Thank you. But, I have a question, can you help me?
I don’t think the title of your article matches the content lol. Just kidding, mainly because I had some doubts after reading the article.
Your article helped me a lot, is there any more related content? Thanks! https://accounts.binance.com/zh-TC/register-person?ref=DCKLL1YD
Can you be more specific about the content of your article? After reading it, I still have some doubts. Hope you can help me.
Thank you for your sharing. I am worried that I lack creative ideas. It is your article that makes me full of hope. Thank you. But, I have a question, can you help me?
Can you be more specific about the content of your article? After reading it, I still have some doubts. Hope you can help me.
Your article helped me a lot, is there any more related content? Thanks!
I don’t think the title of your article matches the content lol. Just kidding, mainly because I had some doubts after reading the article. https://www.binance.info/register?ref=JW3W4Y3A