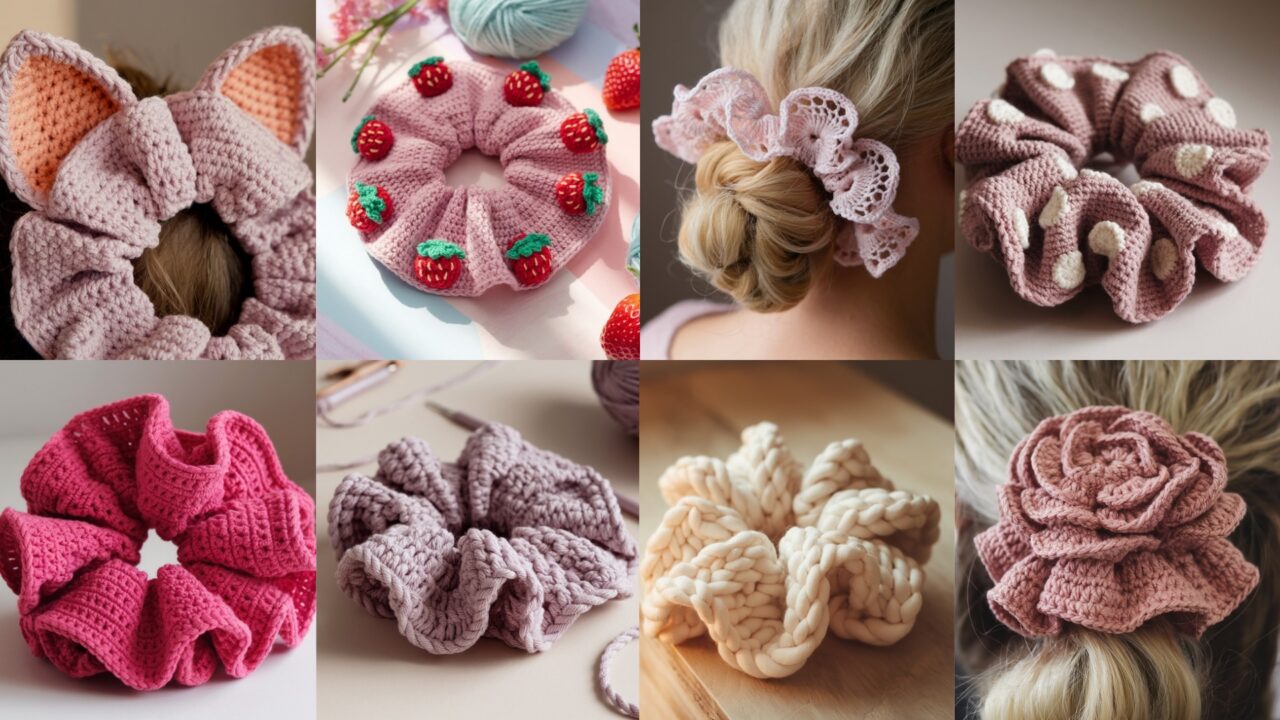
Crochet scrunchies are the perfect small project: they use tiny amounts of yarn, are forgiving if your tension is gloomy, and they make instant fashion statements. These patterns cover textured shells, fruity motifs, ruffles, Tunisian structure, chunky yarn, and playful ears — everything from delicate to “I own a plant” volume. Each pattern is written for three common elastic sizes (small — thin hair, standard — regular ponytail, large — thick hair / bun) and includes concrete stitch counts where helpful.
Quick common notes (read this; don’t skip)
- Elastic sizes used (samples):
- Small elastic: 6–7 inches circumference (16–18 cm) — thin/child hair
- Standard elastic: 8–9 inches (20–23 cm) — most ponytails (recommended default)
- Large elastic: 10–12 inches (25–30 cm) — thick hair or buns
- Yarn & hook baseline used in examples:
- Samples use worsted weight (Category 4) yarn + 4.0 mm (G) hook for standard scrunchie; switch yarn/hook for scale: sport + 3.5 mm for smaller, bulky + 6.0 mm for oversized chunky. Bernat-style bulky scrunchie uses chunkier hook as noted in that pattern.
- Elastic method: Either sew yarn directly around elastic (stitch-through-elastic method) or crochet a tube and slip the elastic inside and sew ends. I give both where helpful. Stitch-through method is faster and more secure for most makers.
- Abbreviations (US): ch, sc, hdc, dc, tr, sl st, st(s), sk, BLO/FLO, inc = 2 sc in same st, dec = sc2tog. Work in joined rounds unless prompted to do a continuous spiral.
- Finishing: Always weave tails securely, stitch through elastic anchor points multiple times, and trim. If you’re nervous, add a tiny dab of fabric glue to knot tails (test on scrap).
- Care: Most yarns are machine-washable on gentle, but check label. Air-dry — scrunchies love to keep their shape.
1. Crochet Strawberry Motifs Scrunchie Pattern
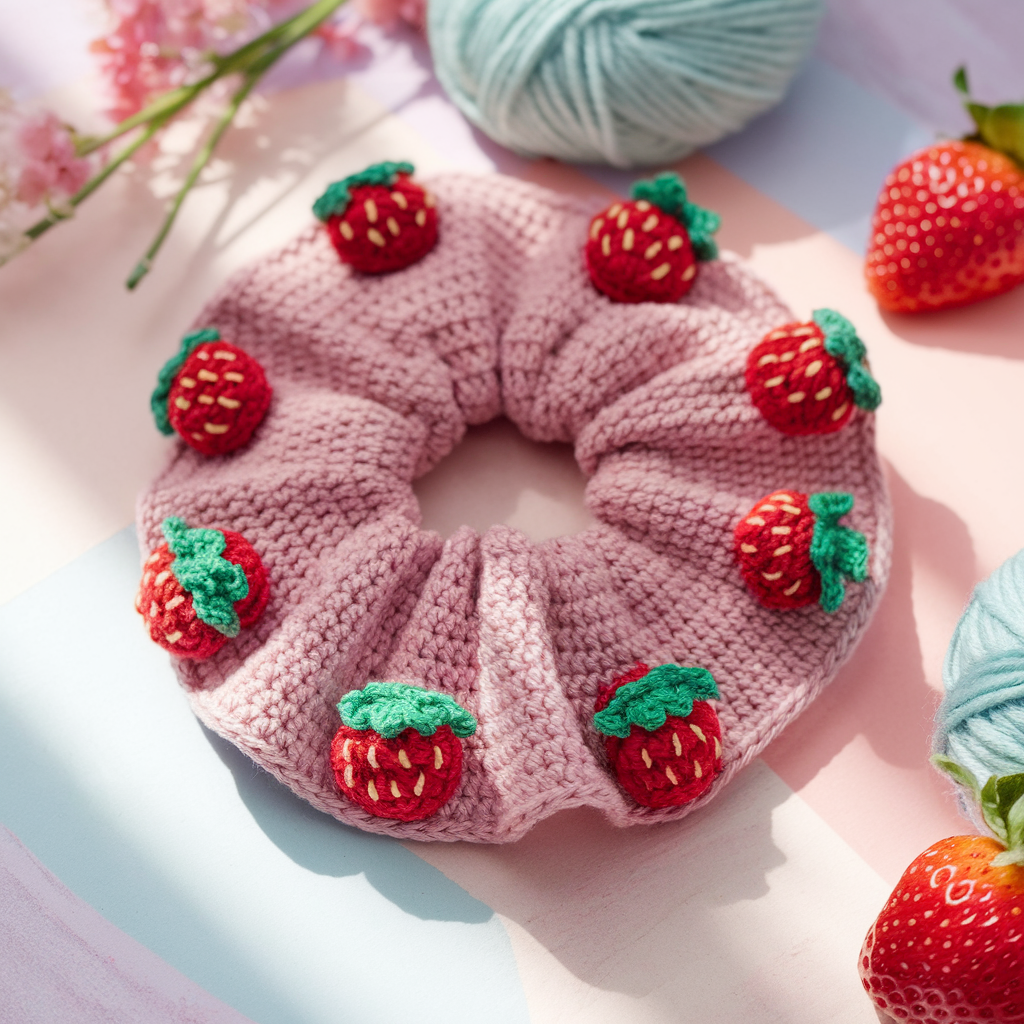
Sweet, breezy, and great for gift sets. This is a scrunchie adorned with tiny strawberry appliqués around the elastic — adorable and fast.
Skill level: Confident Beginner
Materials (standard sample): worsted cotton or cotton-blend (red, green, tiny white/yellow), 4.0 mm hook, standard 8–9″ elastic, tapestry needle, stitch marker.
Finished diameter (unstretched): 3–4″ overall; with elastic stretched larger.
Construction plan
- Make a base scrunchie tube or stitch-through-elastic band in main color.
- Crochet 6–8 small strawberry appliqués; sew evenly around the scrunchie. Add tiny seed embroidery.
Base scrunchie (stitch-through-elastic method — fastest and flat)
- Fold elastic into a loop and join with a few tight stitches to form the ring. Put a stitch marker.
- Working through the elastic loop (not around it), join yarn with sl st to the elastic, ch1. R1: sc evenly around the elastic, working 10–14 sc depending on elastic thickness and yarn. For standard elastic + worsted, aim for 12 sc around; adjust to fit elastic comfortably. Join with sl st to first sc.
- R2: ch1, sc in same st, sc in next st around (one round even) to build fabric. Join.
- R3: ch1, sc blo in each st around (makes nicer top edge), join.
- Continue 6–10 rounds (depending on thickness desired) until scrunchie looks full. Fasten off leaving long tail.
Strawberry appliqué (make 6–8)
- MR, R1: ch1, 6 sc into MR, tighten (6). R2: sc, inc around → 9. R3: join green yarn at top: ch1, 6 sc across to create cap row, or make 6 small picot leaves: ch3, sl st in same st around. Fasten off leaving tail.
- Embroider seeds with single yellow stitches across red. Sew green cap to top of berry with long-tail.
Assembly
- Evenly space 6–8 strawberries around scrunchie, stitch through scrunchie body and appliqué base multiple times (6–8 passes) to anchor. Hide tails inside scrunchie.
Variations & tips
- Make tiny white flower appliqués between berries for contrast.
- Use fuzzy yarn for a plush, toyish look — cotton is best for durability.
2. Crochet Lacey Scrunchie Pattern
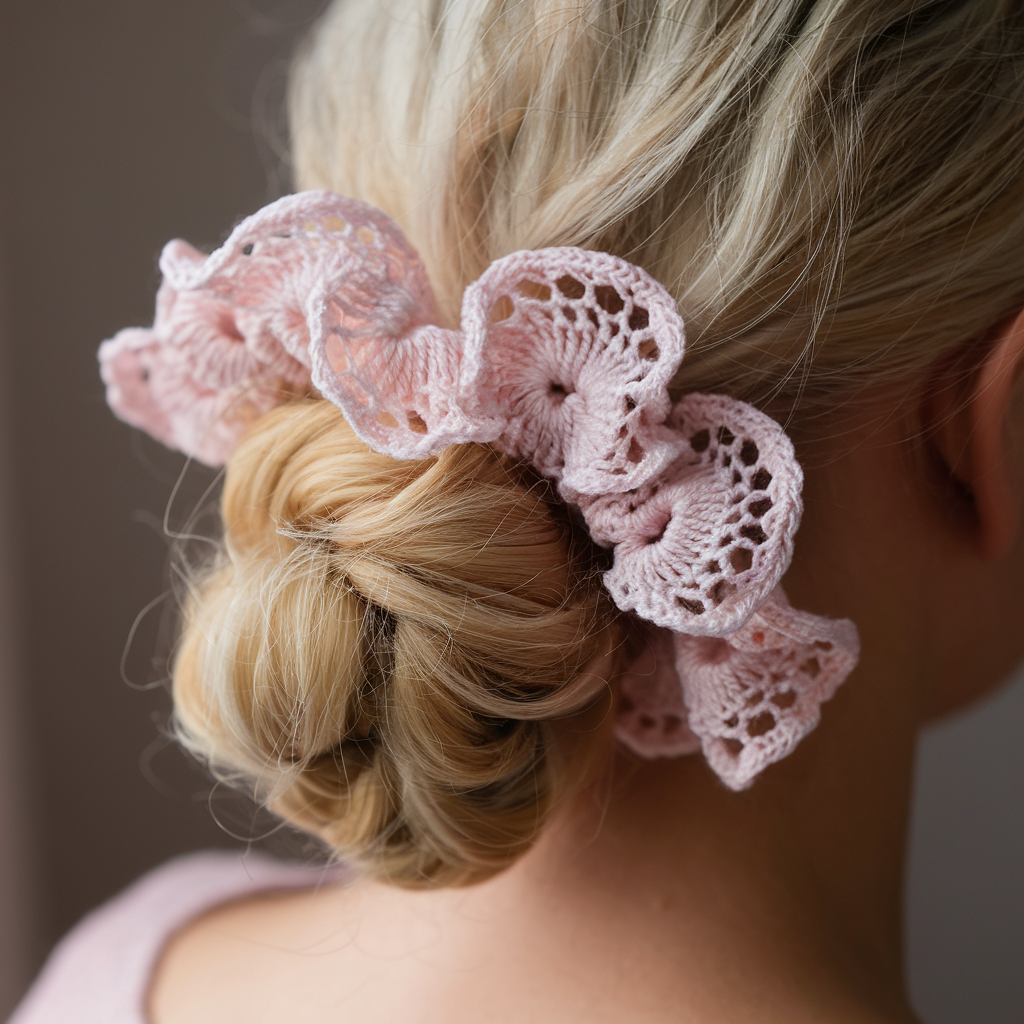
Airy, pretty, and perfect when you want the scrunchie to look like an accessory not an afterthought. Uses shell stitch and picot for delicate scallops.
Skill level: Intermediate (reading shell repeats)
Materials: sport or DK cotton for delicate lace; 3.5 mm hook; standard elastic; tapestry needle.
Finished look: lacy scalloped edge that peeks out of a bun.
Construction plan
Make a tube with shells that naturally ruffle; stitch through elastic or make a tube and thread elastic inside.
Step-by-step (worked in rounds around elastic)
- Prepare elastic loop. Join yarn to elastic. R1: sc evenly around elastic — 12–16 sc depending on elastic; join.
- R2 (foundation): ch1, sc in same st, ch2, sk 1, sc in next st around — this creates tiny mesh for shells to sit on. Join.
- R3 (shell row): join shell color if desired. In each ch2 space work (2 dc, ch2, 2 dc), sl st into next sc repeat around. You’ll get scalloped shell shapes. Join.
- R4: Work 1–2 rounds sc behind shells (BLO) to make base stable, then do a final decorative picot round: sc in next st, ch3, sl st in 3rd ch around shell peaks to highlight scallops. Fasten off.
Alternate tube method (for more fullness)
- Crochet a flat strip of mesh (multiple shells across), seam into a tube, and thread elastic inside; this gives a fluffier effect.
Finishing & styling
- This scrunchie pairs with dresses or delicate fabrics. Because the lace is delicate, use cotton to avoid snagging.
3. Crochet Flower Scrunchie Pattern
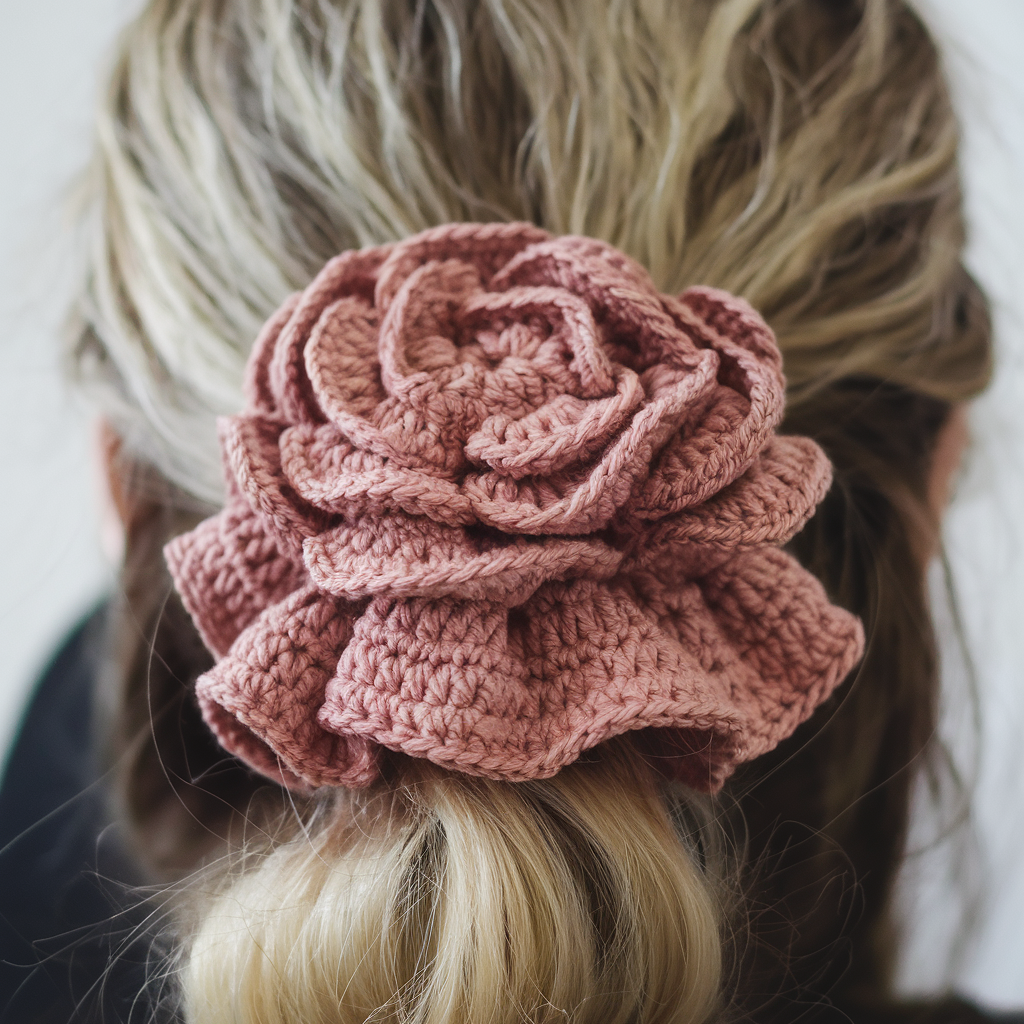
A full ruffled scrunchie topped with one large 3D flower — behaves like jewelry for your hair.
Skill level: Confident Beginner → Intermediate
Materials: worsted (or DK for smaller flower), 4.0 mm hook, standard elastic, tapestry needle.
Construction plan
Make a ruffled base (lots of increases) then crochet a separate layered flower (spiral or layered petals) and sew on securely.
Ruffled base (tube method — fuller volume)
- Make a foundation ch long enough to wrap elastic circumference × 4–5 (we’ll seam). For standard elastic 8″: ch 40 (this is a guideline; gauge varies). Row1: hdc in 2nd ch from hook across. Row2: ch1, turn, hdc across. Repeat until strip width = about 1.25–1.5″ (for a full ruffle).
- To ruffle: On last row, work 2 dc, ch2, 2 dc into each stitch across to create a big ruffle. Fasten off. Fold strip around elastic and seam edges with sl st or whip stitch so the ruffle encircles elastic. Alternatively, sew strip to elastic by stitching through elastic and fabric (stitch-through method) to anchor fabric to the elastic ring.
Flower (layered spiral)
- MR, ch1, 8 sc in MR; R2: sc, inc around (12). R3: 2 sc, inc around (16).
- Now make petals on a long strip: ch 40, sc across, then petal edge: (sl st, ch 2, 3 dc in same st, ch 2, sl st) along the long side to form petals, roll into spiral and sew base together. Or make two rounds of petals directly around center by working sets of dc clusters.
- Sew flower to the ruffled base with multiple passes; weave ends.
Finishing & styling
- This scrunchie reads dramatic — wear alone and don’t fight another statement hairpiece.
4. Crochet Polka Dots Scrunchie Pattern
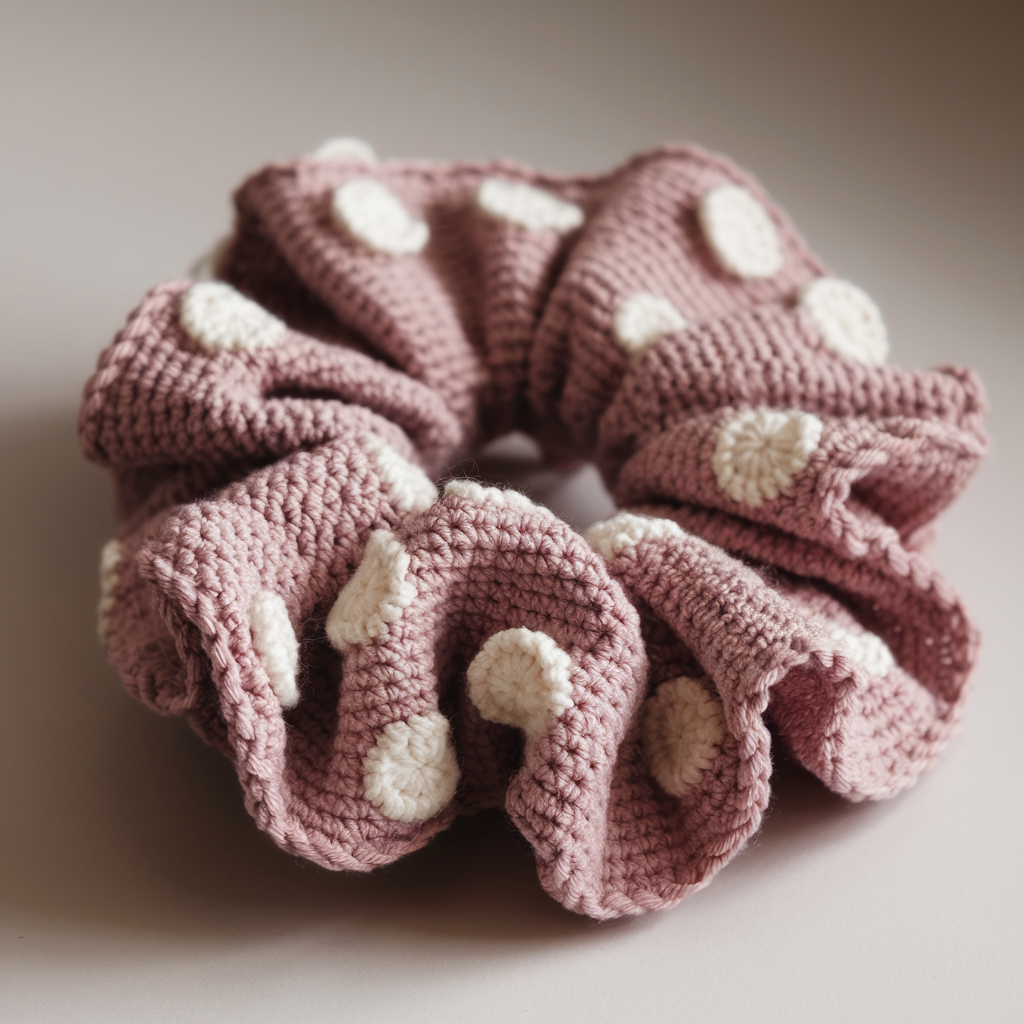
Fun, graphic, and surprisingly sophisticated when using two-tone yarn. Spots can be surface-crocheted or made as tiny attached bobbles.
Skill level: Confident Beginner
Materials: worsted in two contrasting colors (A = background, B = dots), 4.0 mm hook, elastic.
Finished look: classic polka dot band.
Construction plan
Make a plain scrunchie body in Color A, then add dots as surface crochet or tiny bobble motifs in Color B.
Base (fast stitch-through-elastic)
- Join yarn A to elastic; R1: sc around elastic with 12–14 sc; join. R2–R6: sc in each st for 5–6 rounds to get a solid band. Adjust rounds for thickness.
Dots — method A: surface crochet
- With Color B and a yarn needle or small hook, pick a 3–4 stitch area on the scrunchie and use surface slip-stitch or duplicate stitch to lay a small circle (about 6–8 sl sts in spiral) to form a spot. Repeat evenly spaced.
Dots — method B: tiny bobble applique
- Make tiny bobbles: MR, R1: ch1, 6 sc; R2: make a cluster of puff/bobble or 3 dc cluster in one st, fasten off leaving tail. Sew bobble to band securely. Repeat around.
Variations & tips
- Use gradient or speckled yarn for a subtle dotted effect without sewing.
- Attach dots only on one side for an asymmetric modern look.
5. Crochet Tunisian Scrunchie Pattern
Tunisian (afghan) stitch gives a dense, durable fabric — perfect when you want a firm scrunchie that holds shape.
Skill level: Intermediate (Tunisian basics)
Materials: sport-weight yarn or DK, Tunisian hook (or long hook) sized to yarn (e.g., 3.5–4.5 mm), elastic.
Finished look: dense, slightly textured band.
Construction plan
Crochet a short Tunisian tube and either seam it around elastic or stitch-through-elastic with Tunisian fabric.
Tube method (recommended)
- Pre-string method (optional): For speed, use a regular crochet hook and make a small narrow flat panel and use Tunisian simple stitch (Tss) with a Tunisian hook. Ch 40 across (or as required for your elastic circumference). T1: pick up loop in each chain (forward pass), return by working off each loop with a purl-like pass (return pass). Repeat until panel width ≈ 0.5–0.75″.
- Make two identical panels and seam long edges together to form a tube, stitch into the elastic ring, or seam ends into the ring. Or make one long tube and seam ends to form a loop, then insert elastic and close.
- Tunisian fabric is less stretchy — choose elastic size accordingly (one size larger elastic if needed).
Variation: Tunisian simple stitch directly around elastic
- Use the stitch-through-elastic method but work Tunisian pick-up stitches through elastic loop (this is fiddlier) — not recommended for beginners.
Finishing & care
- Tunisian scrunchies are durable — machine wash gentle usually fine, air-dry to keep shape.
6. Crochet Ruffle Scrunchie Pattern
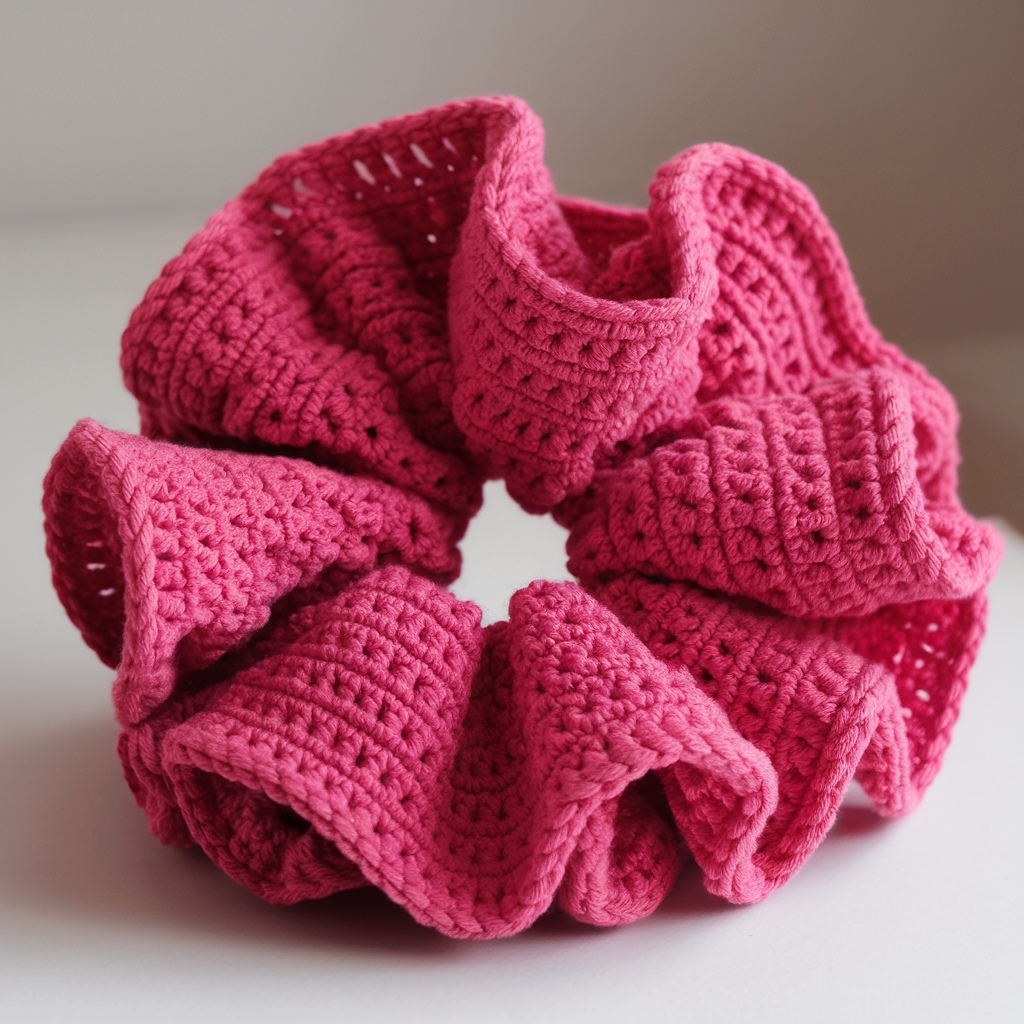
Full-on ruffle, very 80s in the best way. Uses heavy increases to make a dramatic frill.
Skill level: Confident Beginner
Materials: DK or worsted, 4.0–5.5 mm hook depending on ruffle size, elastic.
Finished look: generous ruffle that takes up a lot of visual space.
Construction plan
Make a tight inner band (2–3 rounds sc), then a heavily increased ruffle layer worked into the top of the band or as a long strip seamed around.
Step-by-step (work-in-round dramatic ruffle)
- Join yarn to elastic. R1: sc around elastic with 12–14 sc; join.
- R2: ch1, sc in each st around. R3 (ruffle start): work (2 dc, ch 1, 2 dc) in each st around — massive increase forms ruffled edge. Join.
- R4: For even bigger ruffle, in each ch-1 space work (3 dc, ch1, 3 dc) — you’ll see exponential flare. Stop when ruffle volume looks right (usually 1–3 ruffle rounds). Fasten off and weave tails into base.
Strip method (more control)
- Crochet a long strip with successive increase rows (hdc rows then large fan rows). Wrap and seam to elastic.
Finishing & styling
- Ruffle scrunchies are statement pieces — less is more elsewhere.
7. Crochet Cat Ears Scrunchie Pattern
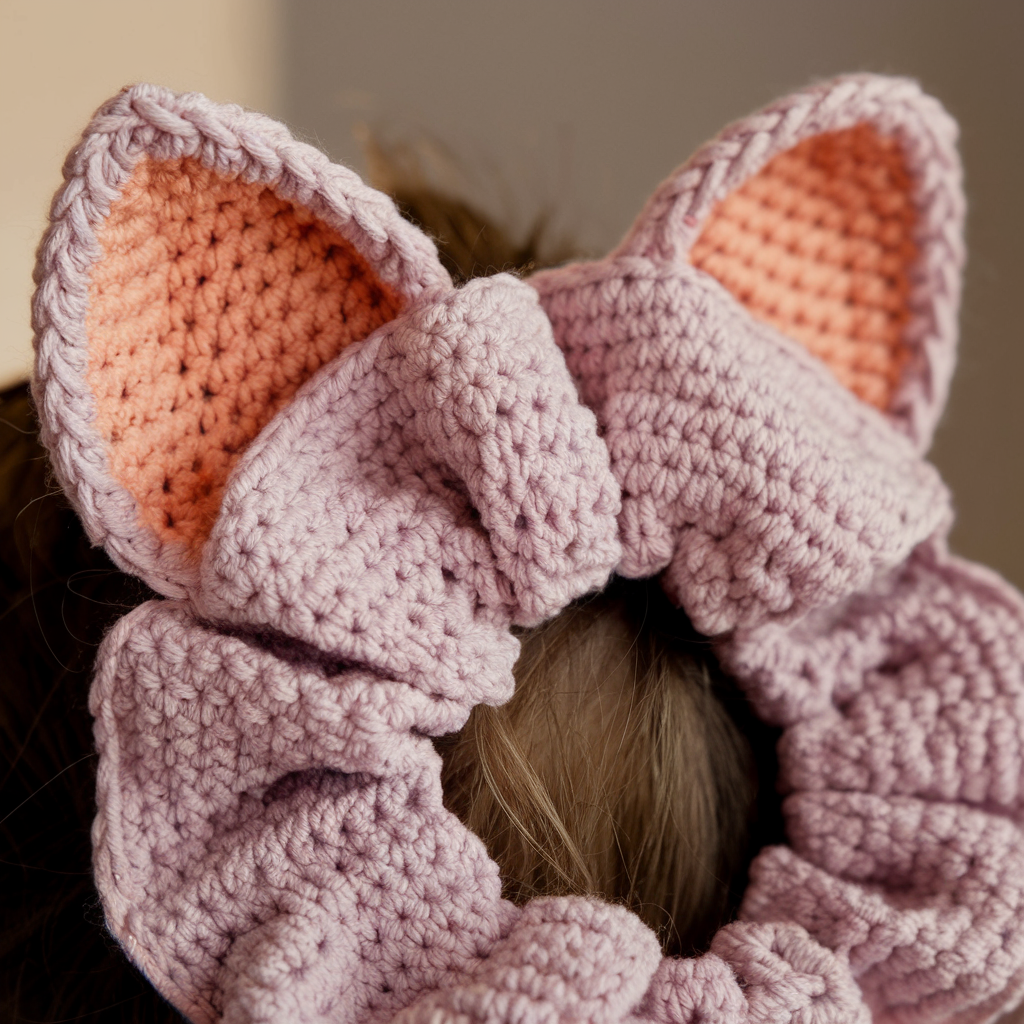
Cute, a little pet-adjacent, and perfect for kids or someone trying to convince people they’re approachable.
Skill level: Confident Beginner
Materials: worsted yarn for band and small amount contrast for inner ear, 4.0 mm hook, elastic.
Finished look: scrunchie with two small triangular ears sewn on.
Construction plan
Make a regular scrunchie base then two small 3-row triangular ears, sew onto scrunchie.
Triangular ear (make 2)
- Ch4. Row1: sc in 2nd ch from hook, sc across (3 sc). Row2: ch1, turn, dec (sc2tog) across as needed to shape — e.g., sc, dec → 2 sc. Row3: dec to 1 sc. Fasten off leaving tail. Fold triangle in half and sew base to scrunchie so ear stands slightly up. Alternatively, crochet a small wedge: MR, ch1, 6 sc; R2: sc, inc → 9; R3: 2 sc, inc etc., then fold to make wedge shape and sew base down for a 3D ear.
Assembly
- Position ears symmetrically, stitch through scrunchie core and ear bases multiple times for stability. Add inner ear contrast by sewing small oval using a spare color.
Finishing & styling
- Reinforce stitch points; kids will tug.
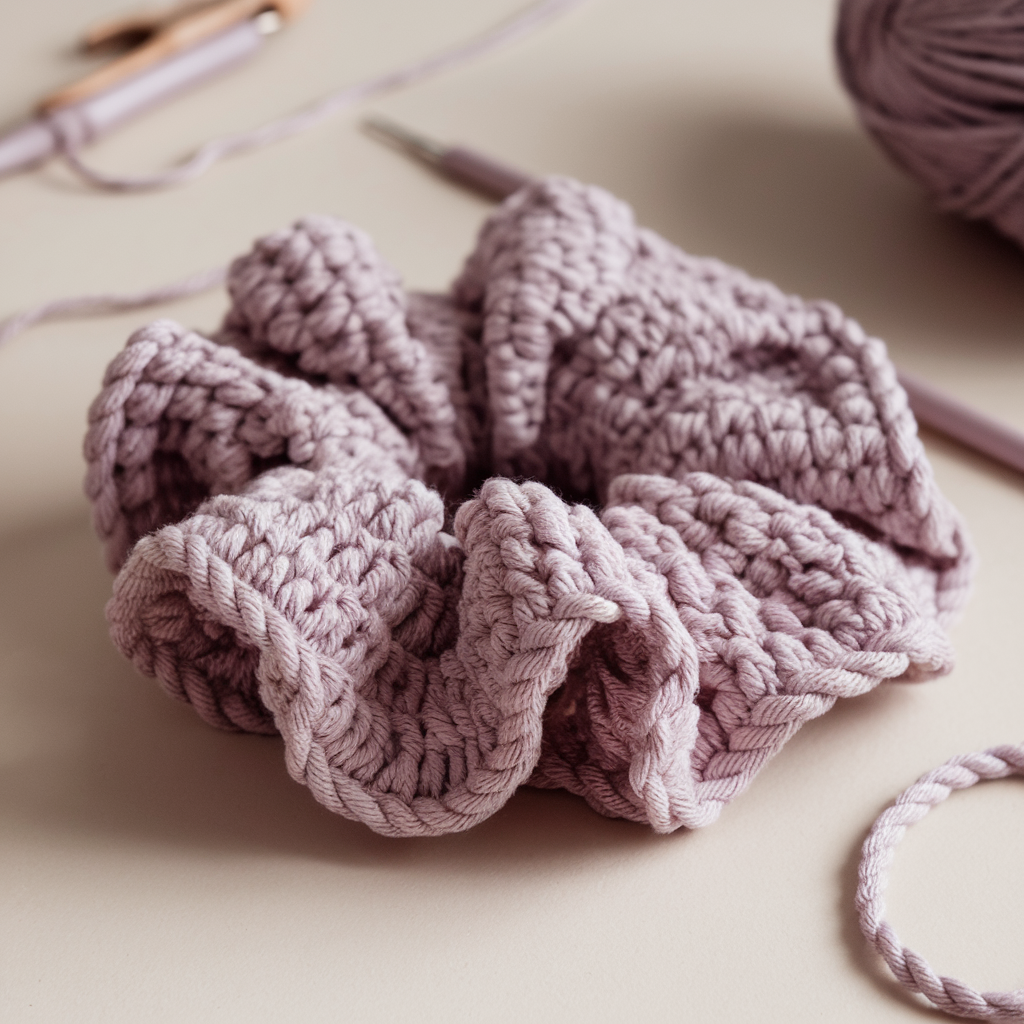
8. Crochet Bernat Yarn Scrunchie Pattern
Chunky, quick, and for people who want an oversized, sculptural scrunchie without loopy patience. Use Bernat-style bulky yarn.
Skill level: Beginner (fast)
Materials: Bernat-style bulky / chenille or super bulky yarn (Category 5–6), 6.0–8.0 mm hook, large elastic (10–12″ or doubled standard), tapestry needle.
Construction plan
Work a single round ribbon or tube with bulky yarn and stitch to elastic — this scrunchie grows fast, so don’t panic at how much yarn it uses.
Step-by-step (stitch-through-elastic recommended)
- Join bulky yarn to elastic. R1: sc around elastic — for bulky yarn aim 8–10 sc around (elastic circumference and yarn thickness matter). Join.
- R2: ch1, sc blo or sc in each st around — builds a soft ridge. Repeat 4–8 rounds until scrunchie is plush. With bulky yarn, fewer rounds produce strong volume. Fasten off and weave tails.
Alternative (super quick spool method)
- Make a large chain long enough to wrap elastic several times, single crochet back rows and seam to form a thick tube, then wrap around elastic and stitch or slip it over.
Finishing & care
- Chunky scrunchies are cozy but can stretch; use a sturdier elastic or double elastic loop for recovery. Wash per yarn label (many Bernat yarns are machine-washable).
Universal finishing checklist (so the scrunchie doesn’t fall apart in public)
- Anchor elastic well: Stitch through elastic core 6–8 times with strong thread/yarn and knot securely.
- Weave long tails: Weave both starting and finishing tails through multiple layers (20–30 mm worth), then trim.
- Reinforce high-stress attachments: For appliqués, ears, or large flowers, stitch through the base scrunchie fabric and elastic or use a small felt backing under the attachment for distribution.
- Test tug strength: Give the scrunchie a firm tug after finishing. If anything moves, add more stitches.
- Label yarn values: If making more than one, jot down yarn & hook used so you can replicate (or stop convincing yourself you’ll remember later).
Care summary
- Cotton/cotton-blend: machine wash gentle, reshape and dry flat.
- Acrylic/bulky: machine wash gentle, tumble low if yarn label permits; reshape while damp.
- Chenille / Bernat-type: avoid high heat; air-dry.
- Delicate lace scrunchies: hand wash cold and lay flat.
conclusion
There you go: eight fully workable scrunchie patterns, from strawberry charm to chunky Bernat drama, lace to Tunisian structure. Want tiny, quick gifts? Make the strawberry or polka-dot set. Want statement hair jewelry? Try the ruffle or flower scrunchie. Want durability and structure? Tunisian or stitch-through-elastic with cotton will hold up to daily use. Make a few, test them in real hair (that’s the only true gauge), and reinforce attachment points — that’s the secret no one talks about.