Crochet skirts go from beach-to-bar, farmer’s market-to-date-night, and everything in between — if you pick the right yarn, the right silhouette, and actually check your gauge. This collection covers lightweight beach slits, vintage-inspired granny stripes, sleek pencil skirts, flirty ruffles, lace masters, and more. I’ve written the instructions so you can scale each design to your measurements without reinventing the wheel.
Two rules worth repeating now: 1) swatch a 4″ square in the stitch you’ll use and calculate stitches-per-inch, and 2) measure the real body you’re making for (or an existing skirt you like) and build to that. The math below is simple and precise; use it.
Quick universal notes (read this — it saves time)
- Abbreviations (US): ch = chain, sc = single crochet, hdc = half double, dc = double crochet, tr = treble, sl st = slip stitch, st(s) = stitch(es), sk = skip, BLO/FLO = back/front loop only, MR = magic ring, rep = repeat.
- Yarn & hooks: I recommend cotton/cotton-blend for summer skirts (drape + washability). For winter or structured skirts use wool/wool-blend. I’ll list yarn weights and hooks per pattern.
- Swatch math: Make a 4″ (10 cm) swatch in your main stitch and wash/block as you will treat the garment. Count stitches across 4″. Stitches-per-inch = (stitches across ÷ 4). Example: 16 sts across 4″ → 16 ÷ 4 = 4 sts/in. Use that number below.
- Sizing logic: Waist and hip are the key numbers. Decide finished waist (your natural waist measurement + ease). If using elastic, finished waist can be 1–3” smaller than body waist because elastic adds recovery. For hip-fitted skirts, measure fullest hip and add 1–3” ease depending on desired fit.
- How to calculate foundation chain (example): Stitches needed around waist = finished waist × stitches/inch. Round to nearest stitch multiple required by your stitch pattern (I’ll note multiples when necessary). If a skirt is worked in panels, divide that number between panels.
- Construction methods used: Worked in the round (seamless tube); worked flat in panels then seamed; modular (motifs). I’ll recommend the easiest approach for each design.
- Finishing: Blocking, elastic waist casings, linings for sheer stitches, and waistbands (ribbed or folded) are covered per pattern.
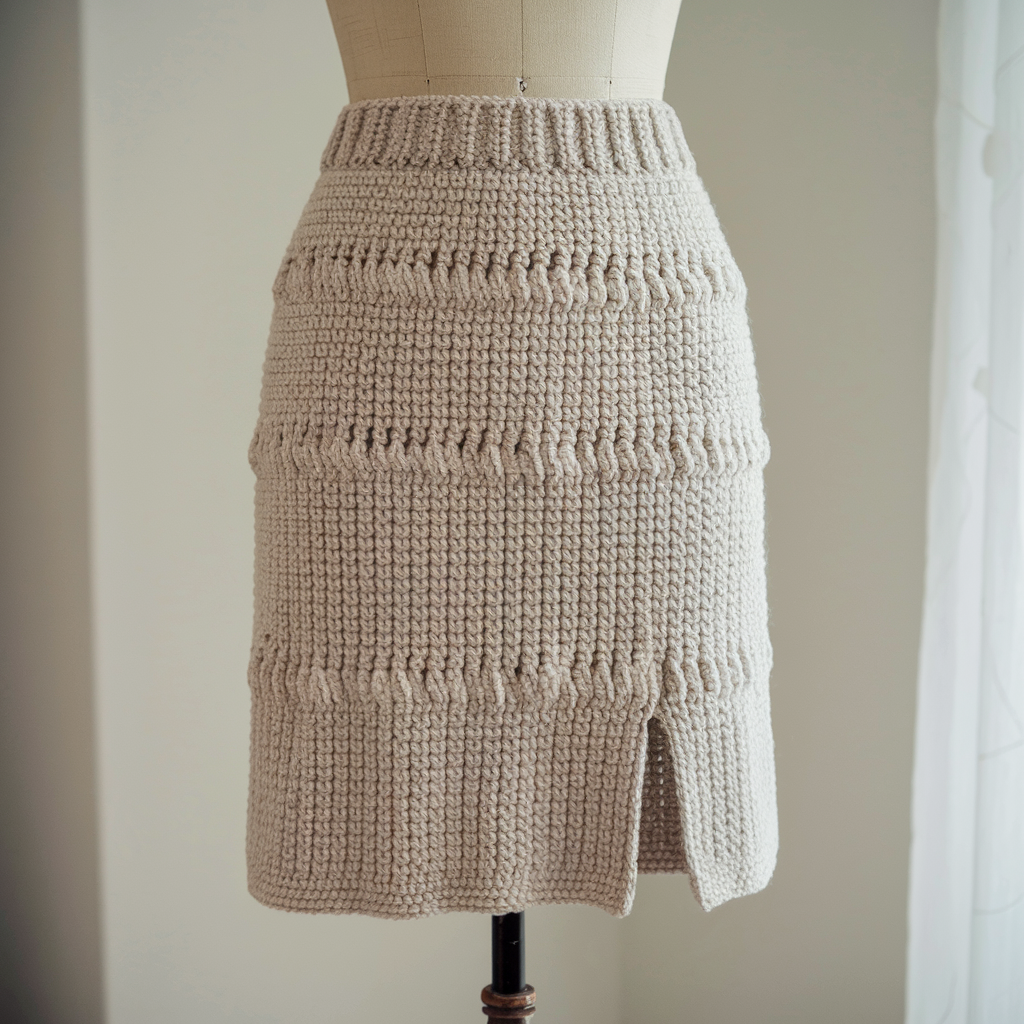
1. Crochet Slit Beach Skirt Pattern
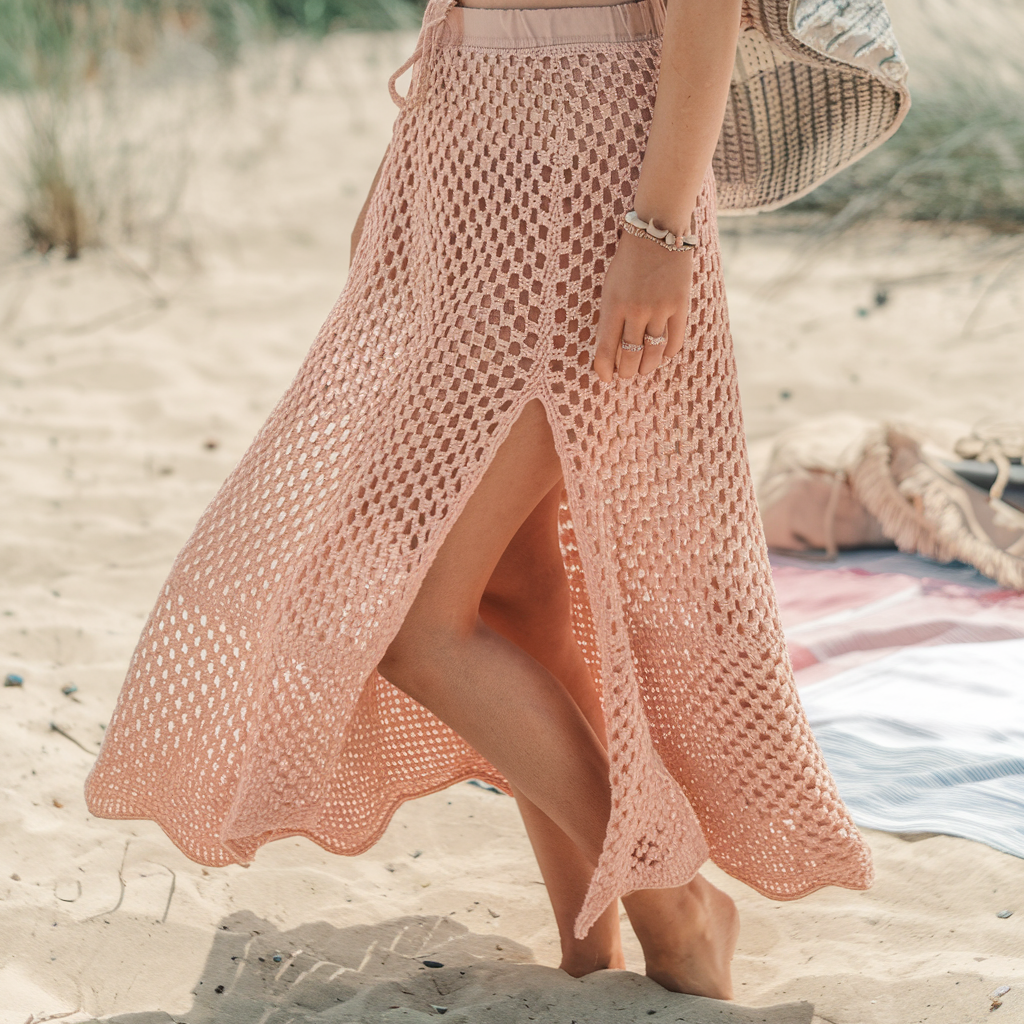
A lightweight, breezy skirt with a side slit — literally made for a swimsuit and a cold drink. Easy drape, forgiving fit.
Skill level: Beginner → Confident Beginner
Yarn & tools: sport to DK cotton/linen blend (approx. 600–900 yds depending on length/size); 3.5–4.5 mm hook. Optional: 1″ elastic (for inner waistband), tapestry needle, stitch markers.
Silhouette: straight-ish A-line with side slit (slit height adjustable). Intended as a pull-on skirt with elastic or drawstring waist.
Gauge & sizing example
- Swatch result example: 16 dc = 4″ → 4 dc/in.
- Suppose target finished waist = 30″ (you prefer elastic so make finished waist 28″ because elastic will pull it in). Stitches around = 28 × 4 = 112 sts. If your stitch pattern requires a multiple of 4, 112 is fine.
Construction overview
Work a lightweight mesh or open double-crochet tube from waist down in the round; leave a gap for the side slit by stopping seam for a number of rounds or work a short seam after. Finish a neat casing at the waist for elastic or a tie.
Step-by-step
- Swatch & calculate: Do your 4″ swatch. Compute stitches/inch and stitches needed for your waist as above.
- Foundation (in-the-round): Ch foundation to equal the required stitches (e.g., ch112), join careful not to twist, OR use a longer adjustable provisional chain and pick up. Mark round start with a stitch marker.
- Waistband rounds: R1–R6: hdc in each st around (creates stable band). If you prefer a ribbed waistband, work BLO hdc rounds. Measure waistband circumference; it should feel slightly loose if elastic will be inserted.
- Body (mesh): Switch to mesh pattern: Example mesh repeat = ch2, sk2, dc in next; ch2, dc in next — a light hex-ish mesh. Work in rounds until skirt reaches desired length to hem (e.g., 22–26″ for beach midi).
- Side slit: Decide slit placement. When you reach desired slit start row, stop joining rounds at that spot and work rounds back-and-forth across a reduced circumference to create a slit (leave vertical opening). Another, easier option: continue in the round and later cut a slit (not recommended), or simply omit seaming two vertical inches by not joining for those rounds (work flat for those cols) and finish edges later. Practical method: when starting the skirt, designate a 4–8 stitch section to be your slit and mark it; when working rounds, at the slit stitches work like front/back (turn) instead of joining to keep opening — this does require a bit of shaping. For beginners: make the slit by shaping at the end with short rows or by seaming less. Keep slit modest for swimwear.
- Hem & edging: Finish with 2–3 rounds of dc or a crab stitch. For a fancy finish, a small shell border works well.
- Waist finish: Fold top edge inward and stitch to create a casing wide enough for elastic/drawstring. Insert elastic with a safety pin and sew ends together. Or thread a cord for tying.
Finishing & variations
- Add a built-in drawstring with eyelets (use ch-loop eyelets and thread cord).
- Shorten to mini length or extend to maxi.
- Add shell scallop at hem for beachy flair.
- Lining: optional for modesty if using very open mesh.
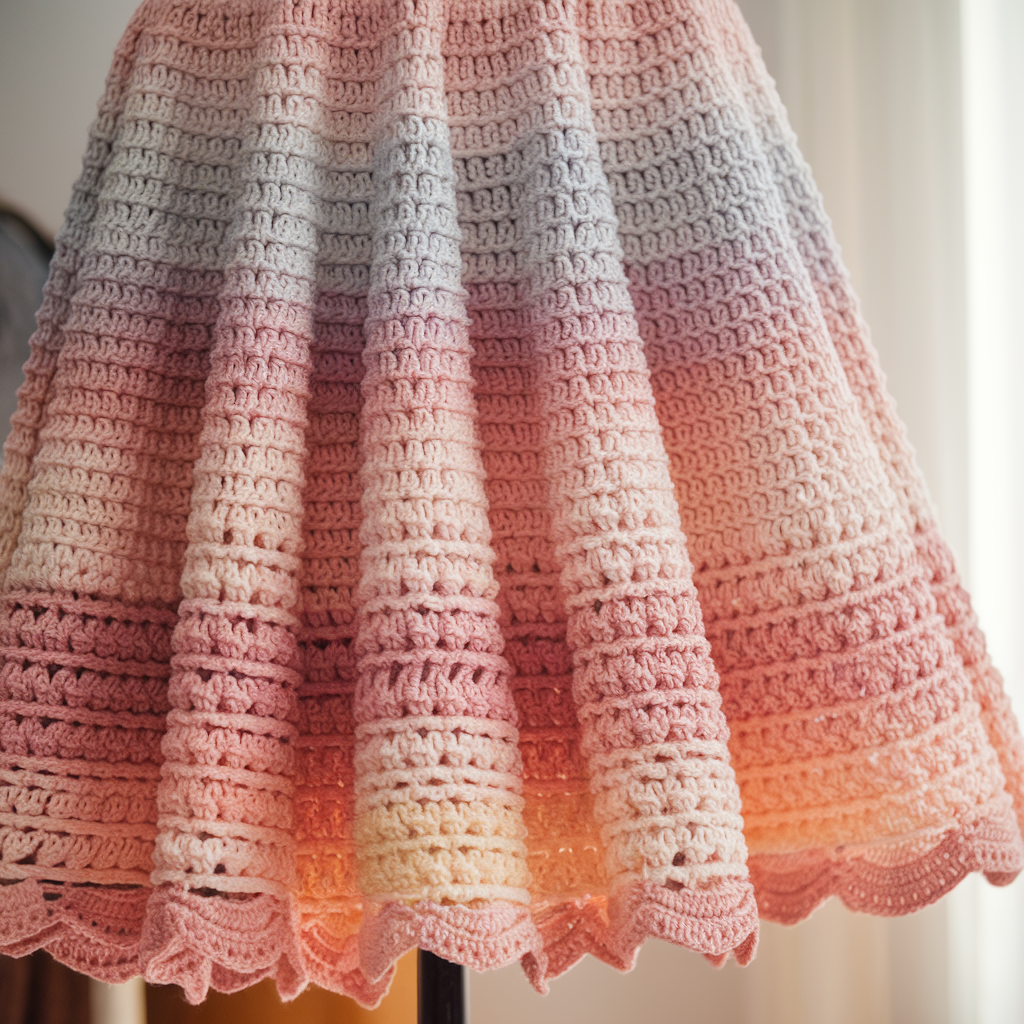
2. Crochet Granny Stripe Skirt Pattern
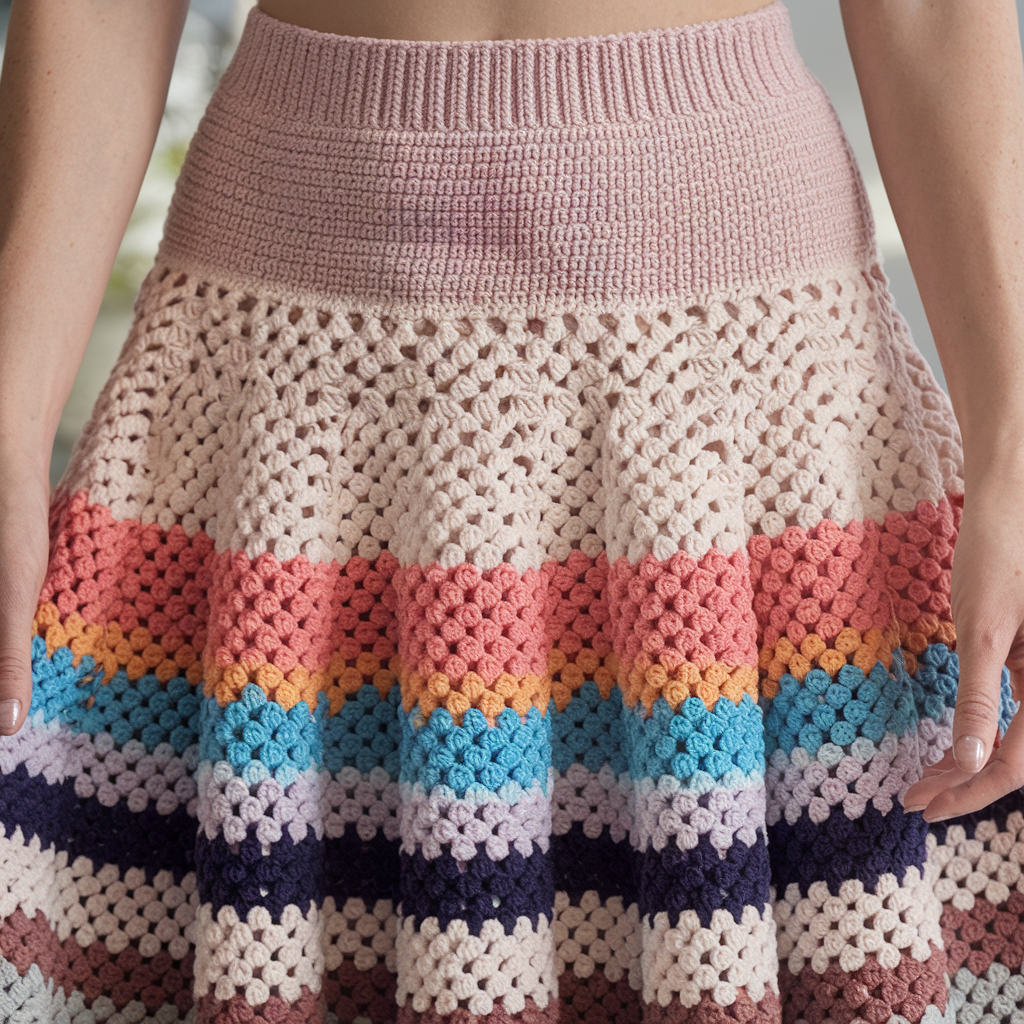
A cheerful mid-weight skirt built from horizontal granny-stripe bands — forgiving, colorful, and quick. Great for stash yarn.
Skill level: Beginner → Confident Beginner
Yarn & tools: worsted cotton or cotton-blend (approx. 800–1100 yds); 4.0–5.0 mm hook. Colors: 3–6 coordinating shades.
Silhouette: A-line or gentle flare depending on increases; stripe height adjustable.
Gauge & sizing example
- Granny clusters are flexible; measure clusters per inch. Example: after R3 of granny stripe swatch you get 8 clusters = 4″ → 2 clusters/in.
- For a 30″ finished waist with waistband fitted by elastic to 28″, you need circumference 28 × 2 clusters/in = 56 clusters around.
Construction overview
Make horizontal strips of granny clusters worked in the round as bands, seamed (or joined-as-you-go) into a tube. Garnish with a ribbed waistband and hem.
Step-by-step
- Swatch cluster & calculate: Make a granny-cluster strip sample 4″ wide and count clusters per inch. Convert to clusters needed for waist as above.
- Waistband: Work a foundation band in hdc or sc in the round for 6–8 rounds to make a stable waist casing (fold and stitch later to insert elastic).
- Granny stripe body (join-as-you-go recommended):
- Round 1 of stripe: [ch3, 2 dc in same sp, ch2, 3 dc] in designated spaces — standard granny cluster. Work clusters around, placing 1 cluster per calculated cluster slot. Join end with sl st.
- Round 2: switch color, work clusters between previous round’s clusters to expand. Repeat rounds alternating colors to create stripes. If aiming for flare, add extra clusters evenly every X rounds (e.g., add 6 clusters every 4th stripe).
- Continue until desired length: Work stripes until length target. For midi, 24–28″.
- Hem finish: Add 2 rounds of sc, then an optional shell round.
- Waist casing: Fold waistband inward 1″–1.25″, stitch to create casing. Insert elastic and secure.
Finishing & variations
- Make it maxi by adding more stripes and flare rounds.
- For bodycon look reduce increases; for boho flair, add ruffle hem.
- Use tonal shades for subtle elegance or high-contrast for retro stripes.
3. Crochet Mini Midi Skirt Pattern
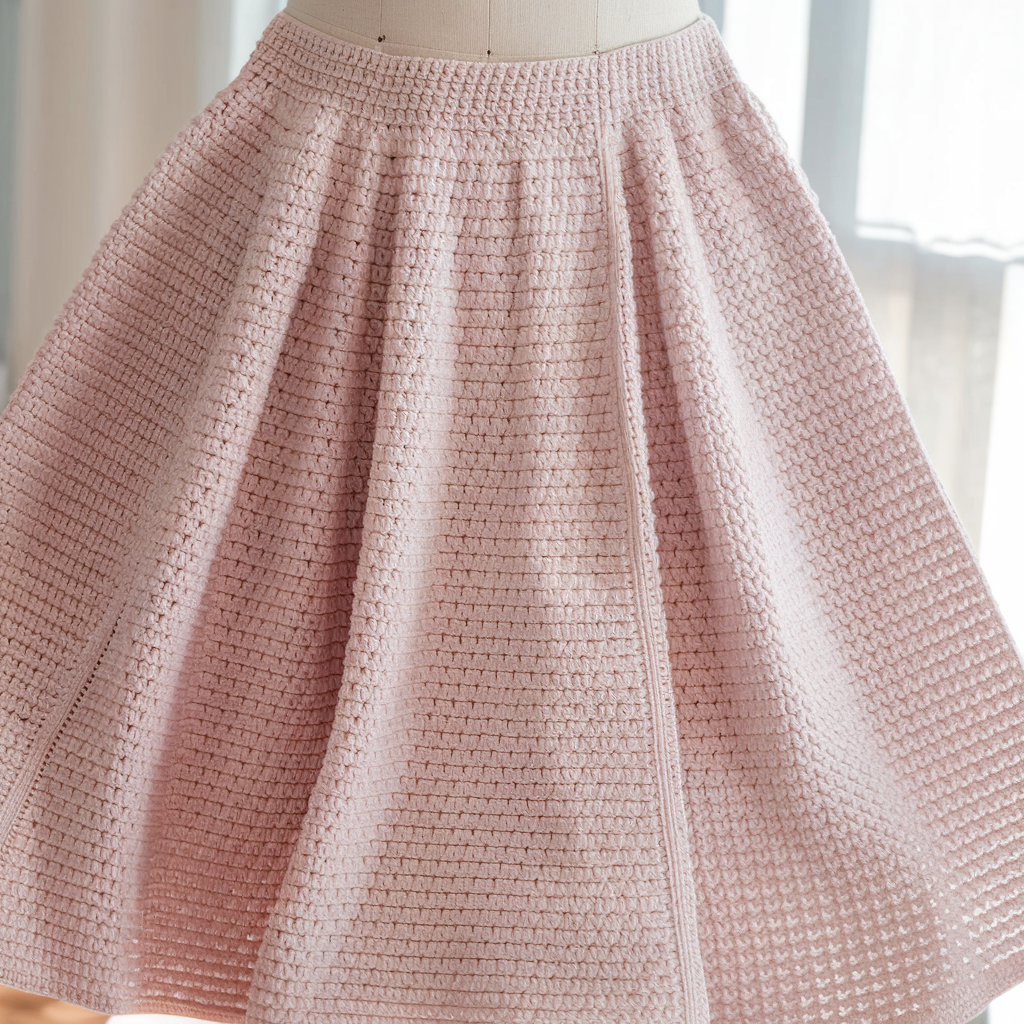
A versatile skirt that can be made as a mini, midi, or knee-length — smooth fabric for everyday wear. This pattern uses denser stitches for structure.
Skill level: Confident Beginner
Yarn & tools: sport or light worsted (DK/Light Worsted), 4.0 mm hook for drape; heavier yarn gives structure. Approx. 600–900 yds. Optional lining.
Gauge & sizing example
- Example gauge: 18 hdc = 4″ → 4.5 hdc/in. For 32″ finished waist, stitches = 32 × 4.5 = 144 hdc around.
Construction overview
Worked in-the-round top-down or bottom-up as a tube in hdc for structure. Elastic waist or folded ribbed band. A-line shaping by increases evenly spaced.
Step-by-step (top-down, simple shaping)
- Swatch & calculate stitches: Use hdc gauge. Compute stitches around waist as above. Round to nearest stitch multiple suitable for pattern repeat (hdc usually any number).
- Top band & fitting yoke: Work 6–8 rounds of hdc for a stable waistband. If making high-waisted, start with a slightly smaller circumference because hips/girdle will influence. If you want fitted through hips, shape by working even for several rounds before increasing.
- Set hip shaping: If you prefer hip-fitted then flare, work X rounds even (measure to hip height), then begin even increases: add 6–12 stitches evenly around every 4th round until desired fullness. Use stitch markers to divide the round into quarters for even increase placement.
- Continue to length: Work rounds until mini/midi length. For mini, 16–18″ from waist; for midi 24–28″ depending on height.
- Hem & finish: 2 rounds of sc for a neat rim or a small picot/shell edge for feminine finish. If you want a lining, sew one in at this stage.
Finishing & variations
- Add a side slit by leaving a vertical opening for several rounds and finishing edges.
- Create a faux panel seam by working vertical columns of fpdc for visual slimming.
- Add pockets: create small patch pockets and sew inside.
4. Crochet Blossom Skirt Pattern
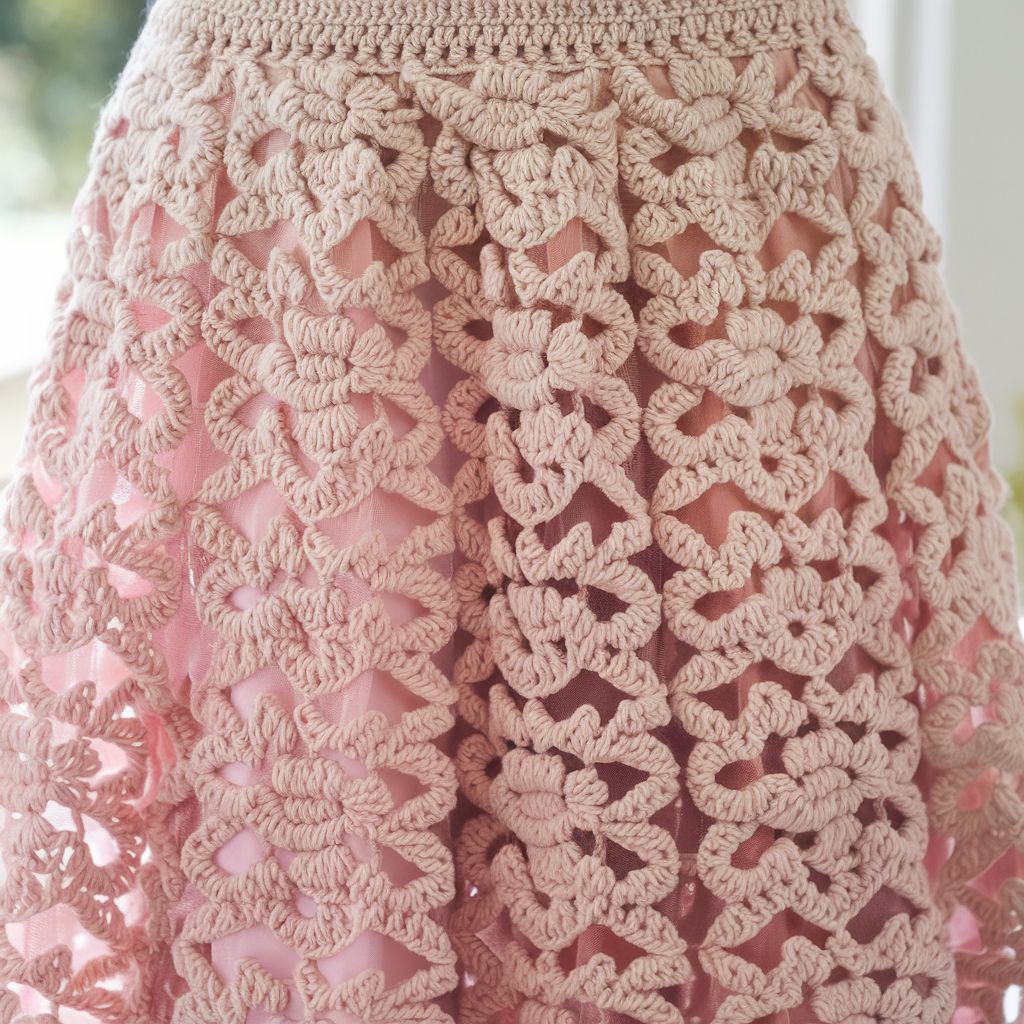
A feminine skirt made from repeating flower or motif panels. Great for spring/summer. Looks complicated but is modular and forgiving.
Skill level: Intermediate (motif joining)
Yarn & tools: sport/DK cotton or cotton-blend for motifs; 3.5–4.5 mm hook; tapestry needle. ~1000–1400 yds depending on motif size & layout.
Gauge & sizing example
- Make a motif (e.g., 5″ across). For a 32″ waist and waistband fitted to 30″, you need circumference 30″. If motifs are 5″ wide, you’ll need ~6 motifs around (6 × 5″ = 30″). You can also offset with half motifs.
Construction overview
Make flower motifs (granny-flower, layered blossom) then join-as-you-go into strips and sew strips together to make the skirt tube. Add waistband and optional lining.
Step-by-step
- Swatch motif & plan layout: Create several motifs and block. Decide how many motifs across and rows down for length. Keep a small seam margin in plan.
- Make motifs in batches: E.g., 30 motifs if doing 6 × 5 grid for midi. Work motifs in same gauge and block each to identical size.
- Join-as-you-go: Join motifs into horizontal strips — join new motif to previous along one edge with sl st or whip-stitch. Then join strips vertically. This reduces finishing sewing.
- Waistband: Once tube is formed, pick up stitches along top and work 6–8 rounds of hdc in the round to create an even waistband. Fold over and create casing for elastic if desired.
- Hem & finishing touches: If motifs have scalloped edges, leave as hem; otherwise add a neat sc round.
Lining & support
- Motifs can be open; add a textile lining sewn to inside for modesty and wind-resistance. Use a lightweight cotton lining cut from an existing skirt for speed.
Variations & tips
- Use tonal yarns for subtle blossoms or bright contrasting colors for festival-ready drama.
- For a more flowy skirt, use fewer motifs across and add pleats by tucking motifs when joining.
5. Crochet Nova Flare Skirt Pattern
A dramatic flared skirt with radial panels that create volume and movement — think A-line to full flare depending on increases.
Skill level: Intermediate → Advanced (panel shaping & increases)
Yarn & tools: worsted or DK depending on desired volume; 4.0–5.5 mm hook; approx. 900–1400 yds.
Gauge & sizing example
- Gauge example: 14 dc = 4″ → 3.5 dc/in. For a 30″ waist finished to 30″, stitches around = 30 × 3.5 = 105 dc (rounded to pattern multiple).
Construction overview
Construct the skirt from several vertical panels (8–12 panels) seamed together. Each panel is tapered at the top (narrower) and flares via increases toward the hem. This gives a clean radial flare and control over fullness.
Step-by-step
- Swatch panel stitch & calculate panel count: Decide number of panels (8 is classic). Divide total waist stitches by panel count to get stitches per panel. Example: 105 ÷ 7 panels = 15 sts per panel top.
- Work panels:
- Foundation ch equals stitches per panel. Work rows (flat) of dc for panel. Start with 15 sts across. Work upward for waist height then start increasing at bottom portion: add increases at both side edges every X rows to create flare. For example, from hip to hem (last third of length), add 2 sts per panel every 4th row until hem width desired. Keep increases symmetrical in each panel.
- Seam panels: Block panels and seam them with mattress stitch or whipstitch. Press seams flat and check flare.
- Waistband: Pick up stitches at top and work a stable casing band (hdc) 6–8 rounds; fold and create elastic casing. Insert elastic.
- Hem finish: Work shell or scallop edge for feminine movement.
Finishing & variations
- For extra swing, add a three-tier hem with layered flounces.
- Use lighter yarn for summery float or wool for winter flare.
6. Crochet Mini Ruffle Skirt Pattern
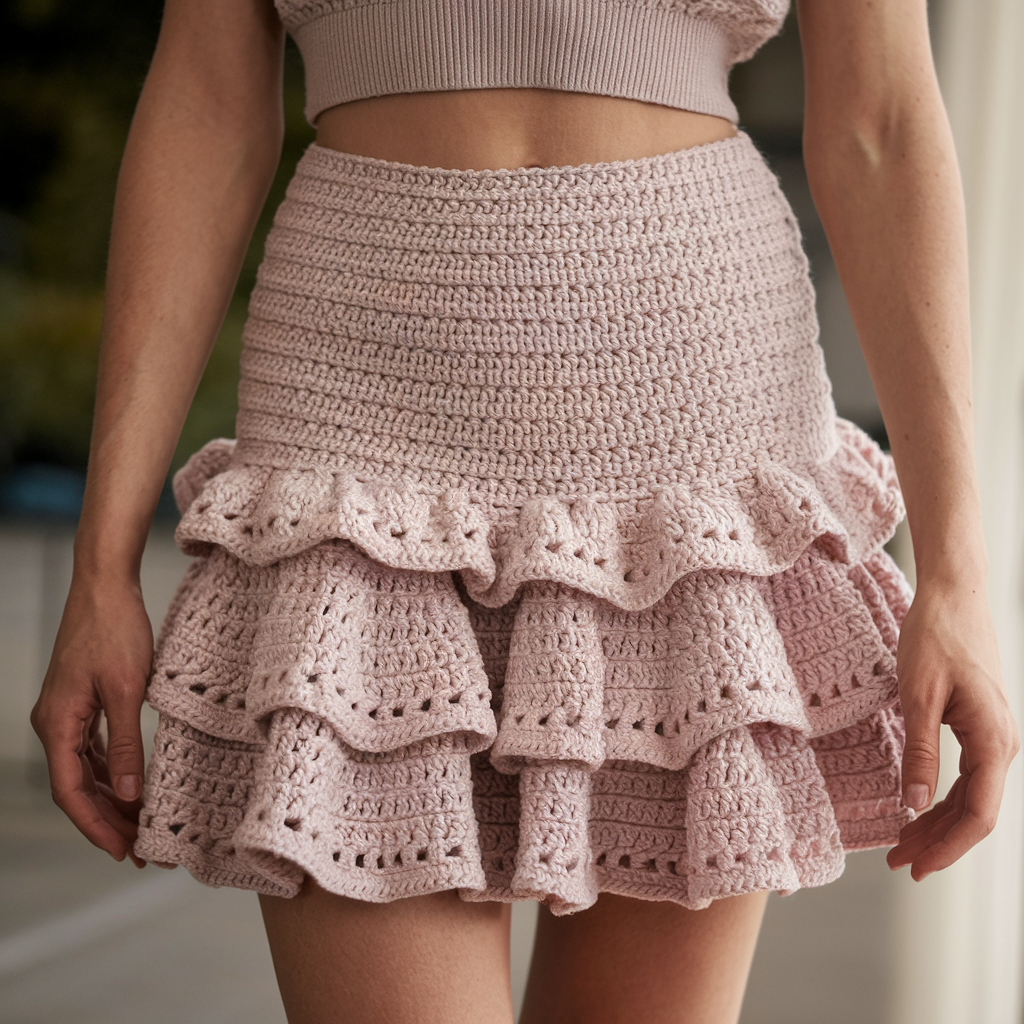
A playful, layered ruffle skirt — stack ruffle tiers for volume, or do a single ruffle band for subtle sway.
Skill level: Confident Beginner → Intermediate
Yarn & tools: sport or DK for airy ruffles; 3.5–4.5 mm hook; 700–1200 yds depending on tiers & length.
Gauge & sizing example
- Ruffle tiers are based on circumference multiples. For a waist of 28″ with tiers that are 1.5× fullness, foundation circumference per tier = 28″ and ruffle panels will be 1.5–2× that for fullness.
Construction overview
Work a fitted upper skirt body to hip; then join ruffle tiers that are longer than the circumference to generate frill. Each tier is a strip seamed. The number of tiers determines overall fullness.
Step-by-step
- Swatch & make base tube: Work a skirt tube in hdc in-the-round fitted to waist (as in Mini Midi pattern). Decide how many tiers you want (3 typical).
- Ruffle tier creation: For each tier, chain length equal to (waist circumference × fullness factor). Example: 28″ × 1.75 = 49″ length. Convert to stitches using stitches/inch and chain. Work 4–6 rows in desired ruffle stitch: shell stitch (5 dc shell) gives strong frill; or dc in each then increase clusters depending on texture.
- Attach tier to base: Seam tier to base at hip with even gathers; do this by dividing the base into equal markers and sewing tier to base distributing fullness evenly. Alternatively, pick up loops and crochet the tier on directly by working shells into skipped stitches for controlled gathers.
- Repeat tiers: Attach next tier below previous with equal gathering. Finish last tier with scalloped edge.
- Waistband: Ensure upper band is stable and has elastic casing.
Variations & tips
- For mini ruffle, do just one tier and shorter length.
- Add lace thread contrast at tier edges for vintage vibe.
7. Crochet Pencil Skirt Pattern
A sleek, body-skimming skirt that can be office-appropriate when made in structured yarn. Shaping keeps it flattering rather than ladylike-accordion.
Skill level: Intermediate (shaping & fitting)
Yarn & tools: DK/worsted wool-blend for structure; 4.0–5.0 mm hook; optional zipper if fit is snug; 700–900 yds.
Gauge & sizing example
- Example gauge: 18 sc = 4″ → 4.5 sc/in. For hips (widest point) of 38″ with 2″ ease = 40″ finished → stitches = 40 × 4.5 = 180 sc around.
Construction overview
Work fitted panels (front and back) with waist shaping and darts to create a tapered, smooth fit. Optionally add a back vent for mobility.
Step-by-step
- Measure & compute: Decide finished hip circumference and compute stitches per round. Divide by 2 for front/back panels.
- Work panels flat: Ch foundation for half-hip (e.g., 90 ch). Work a structured stitch (sc or hdc) in rows to hip height. For pencil fit, add waist shaping: decrease 1–2 sts each side across the top portion to achieve narrower waist. Use darts near waist by decreasing centrally over a few rows and then increasing below to shape.
- Join panels at side seams: Seam sides leaving a back vent opening for walking ease (e.g., last 6–8″ unseamed).
- Waist & zipper or elastic: For fitted pencil, add invisible zipper into back seam for easy wear. Alternatively, create waistband with elastic casing if you want pull-on.
- Back vent: Add a short slit and finish edges neatly with single crochet or a facing.
- Hem & finish: Work 2 rounds sc and a final neat edge.
Fitting tips
- Pencil skirts must be tried on before final seaming; ease can be as little as 0–1″. If too tight, add small gusset or increase back vent.
- Consider lining for structure and to stabilize the fabric.
8. Crochet Lace Skirt Pattern
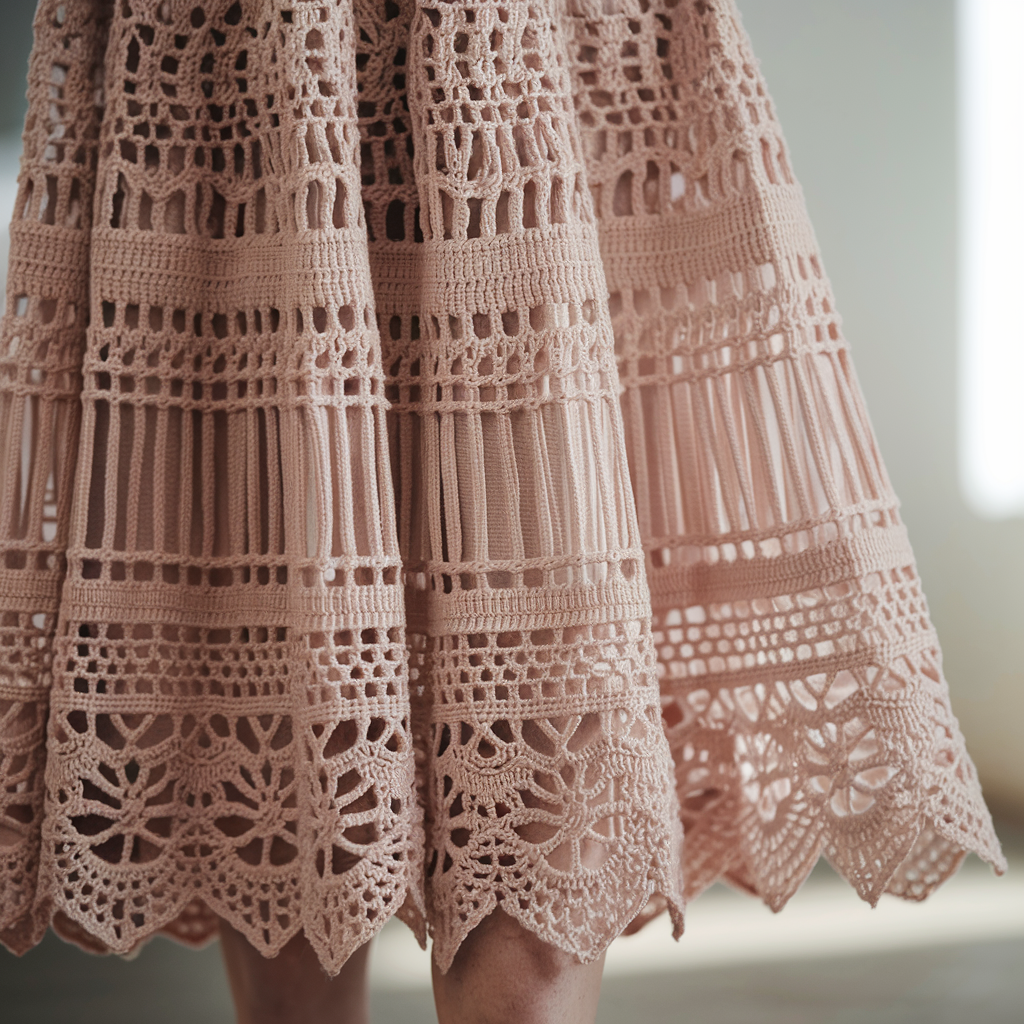
A showstopper: full-length lace skirt with decorative stitch patterns. Requires blocking and possibly lining. Perfect for special occasions.
Skill level: Advanced (complex stitch repeats & blocking)
Yarn & tools: sport to DK merino/cotton blend for drape; 3.25–4.0 mm hook; 1000–1600 yds depending on length; lining fabric optional.
Gauge & sizing example
- Lace stitch counts often require a specific multiple. Make lace swatch 4″ and ensure pattern repeat fits your stitches-around calculation. Example: lace repeat multiple = 12 sts; finished waist 30″ with stitch gauge 3.0 sts/in → 30 × 3 = 90 sts → 90 is divisible by 12? 90 ÷ 12 = 7.5 — so adjust to nearest multiple (e.g., 96) and accept small adjustment in fit or pick different hook to change gauge.
Construction overview
Work lace stitch pattern in the round top-down or bottom-up. Add a separate full lining (silk/cotton) sewn in later if necessary. Waists usually have elastic casing or a tailored band.
Step-by-step
- Swatch lace repeat & math: Create a swatch of the lace pattern and wash/block it as final garment will be treated. Count stitches per inch and ensure repeat fits. Adjust hook if the math won’t align.
- Waist calculation & foundation: Compute stitches needed and chain or provisional cast on to create waist loop. Work 6–8 rounds of hdc or sc to create a stable base.
- Lace body: Begin lace pattern and work in rounds. Lace patterns often have openwork increases built-in. Continue working until desired length. For a full skirt, flare can be added by introducing extra repeats or an increase round every X rounds near the hip area.
- Hem: Work a wide decorative border—shells, picots, or scallops. Block heavily to open lace and reveal pattern.
- Lining & final assembly: Sew a fitted lining inside the skirt, attach at waistband to hide stitches. Create waistband casing and insert elastic if using.
Finishing & variations
- Lined lace is wearable and modest; sheer lace is great for beach cover-ups.
- For formal wear, use silk-blend yarn for drape and sheen.
Strong finishing & fitting tips (applies to all skirts)
- Block before finishing: especially for lace, motif, and panel skirts — this evens stitches and sets length.
- Always try on before final finishing: check waist fit and hip shaping before sewing waist casing or installing zipper.
- Waist options: elastic casing is fastest; fold-over rib waistband looks polished; a zip closure gives a tailored silhouette.
- Lining: add lining for lace and openwork skirts to improve structure and modesty. Hand-sew lining to waistband or tack at intervals to keep it from riding.
- Care: Cotton skirts = machine wash gentle, reshape and air-dry; wool = hand wash cold or dry-clean per yarn label; silk blends = gentle hand wash and air-dry.
Conclusion
There: eight distinct, wearable crochet skirt blueprints — from beach-slitted ease to a refined lace column. Each design is built around practical construction choices: compute your stitches from a simple 4″ swatch, decide how much ease you want, and pick a waistband method that matches your patience and lifestyle. The difference between a “cute idea” skirt and a wardrobe staple is three simple steps: the right yarn, accurate gauge, and a clean finish (waistband or lining).
Start with a sample or cheap yarn if you’re testing a new silhouette, get the fit right, then remake it in your good yarn. Block everything that needs blocking, reinforce stress points (waistbands, seams, zipper areas), and don’t be shy about lining delicate pieces. Make one that moves, flatters, and lasts — then make another in a new color.