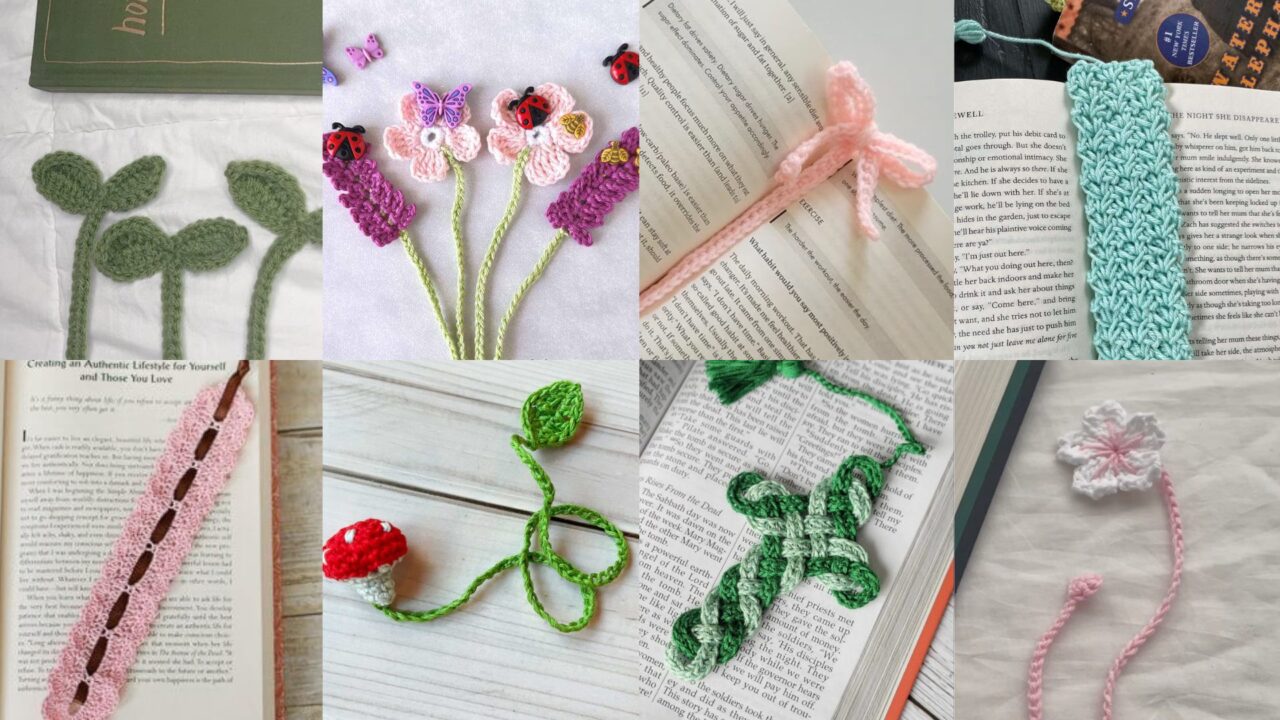
Crochet bookmarks are small, fast, and ridiculously satisfying projects — perfect for using scraps, practicing new stitches, and making thoughtful gifts for readers. Below are eight distinct bookmark patterns: from cute mushrooms and delicate lace to literary-inspired shapes and floral motifs. Each pattern includes skill level, materials, finished size, clear step-by-step instructions (US terms), finishing notes, and helpful tips so you can make them with confidence.
Quick stitch legend (US terms): ch = chain, sl st = slip stitch, sc = single crochet, hdc = half double crochet, dc = double crochet, tr = treble, sk = skip, st(s) = stitch(es), rep = repeat, BLO = back loop only, FLO = front loop only, beg = beginning.
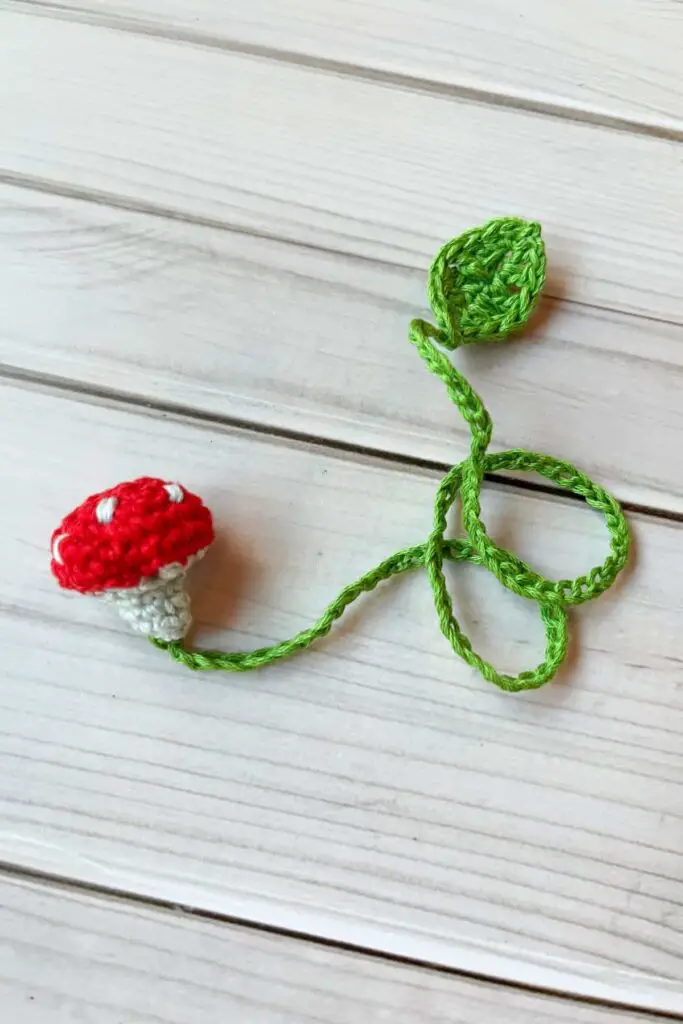
1. Crochet Mushroom Bookmark Pattern
Skill level: Beginner–Intermediate
Materials
- Fingering or sport weight cotton (small amounts: main cap color + stem color + accent)
- Crochet hook 2.5–3.5 mm (match yarn)
- Tapestry needle, small bit of stuffing or scrap (optional), small stitch marker, scissors
Finished size: Approx. 4–5″ tall (cap + stem), tail ribbon/string 3–4″ to tuck into book.
What you’ll make
A flat mushroom motif with a long narrow tail that slips between pages. Cute, durable, and works great from small yarn scraps.
Step-by-step
Stem & tail (make one long tail first):
- Ch 30 (or adjust for preferred tail length). Row 1: sc in 2nd ch from hook and across (29 sc). Turn.
- Row 2–6: ch 1, sc across — make a narrow strip about 4–6 rows to give tail thickness. Fasten off leaving a long tail for joining to cap.
Cap (worked flat, seam to tail):
3. Join cap color at one short end of the tail (or center if you want tail attached under cap). Ch 2, work 6 hdc into a magic ring (or ch 6, join to ring and hdc 6). Join.
4. Round 2: ch 2, 2 hdc in each st around (12 hdc); join.
5. Round 3: ch 2, 2 hdc in next st, hdc in next repeat around (18 hdc); join.
6. Round 4: ch 2, 2 hdc in next st, hdc in next 2 repeat around (24 hdc); join. Stop when cap reaches desired width (typically 24–30 hdc total).
7. Create slight dome by doing one round of hdc in BLO only — this pulls the top in a little. Fasten off and weave in top tail.
Decoration (spots):
8. With contrasting yarn, embroider small dots on cap by making french-knot-like surface stitches (or sew tiny little bobble motifs: ch 3, work 5 dc in same st leaving loops and pull through).
Attach cap to tail:
9. Sew the cap to the tail strip using mattress stitch or whipstitch across the seam underside so the tail emerges from beneath the cap. If you want a plush cap, add a small bit of stuffing before closing.
Finishing
- Weave in all ends tightly. Block lightly by pinning flat and spritzing to set shape.
- Optionally add a small felt backing to stabilize edges and avoid snagging pages.
Tips
- Use smooth cotton for bookmarks so they slide easily into pages.
- Trim tail to tuck into the book or add a bead/charms at tail end as a decorative weight.
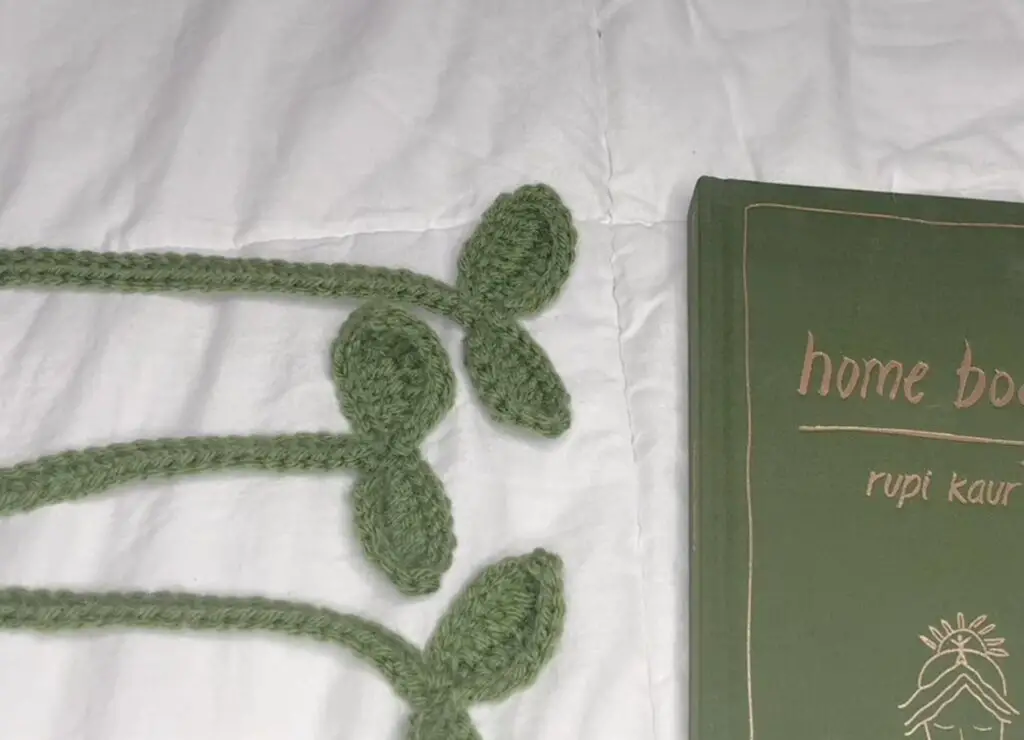
2. Leaf Bookmark Crochet Tutorial
Skill level: Beginner
Materials
- Fingering/sport weight cotton or thread, small quantity
- Crochet hook 2.0–3.5 mm (smaller for fine lace look)
- Tapestry needle, blocking board/pins
Finished size: 4–6″ long (leaf) with a 2–3″ tail or loop for marking page.
What you’ll make
An elegant leaf-shaped flat bookmark worked in single and double crochet with a defined midrib and scalloped edges.
Step-by-step
Leaf body
- Ch 14 (for medium leaf — adjust for size). Row 1: sc in 2nd ch from hook, sc across to end. Turn. (13 sc)
- Row 2: ch 1, sc in first 3 sts, hdc in next 4 sts, dc in next 2 sts (center apex), hdc in next 4 sts, sc in last 3 sts. Turn. This builds rise toward the tip.
- Rows 3–6: Repeat row 2 but increase the center section subtly by adding 1 dc at center row (e.g., dc 3 in middle on Rows 4–5) until the leaf reaches desired length. For tapering, start decreasing symmetric rows: do fewer dc in center.
- For pointed tip, finish with a row of sl sts closing the center to a point.
Midrib & shaping
5. Create a midrib by working a row of reverse single crochet (crab stitch) down the center: fold leaf in half lengthwise, sc through both layers along center line (or embroider a line with contrasting yarn down center).
Edge scallops (optional)
6. Work sc evenly around the edge, then skip 1, 5 dc in next st, skip 1, sc in next to create small scallops — adjust spacing to finish evenly.
Tail or loop
7. At the base, leave a longer tail or create a ch 12 loop and join to make a loop that sticks out of the book.
Finishing
- Block: pin the leaf flat and spritz, allow to dry to set shape and open scallops.
- Weave in ends on the backside neatly.
Tips
- Use a slightly smaller hook for crisp stitch definition on small motifs.
- Experiment with variegated thread to mimic natural leaf color gradation.
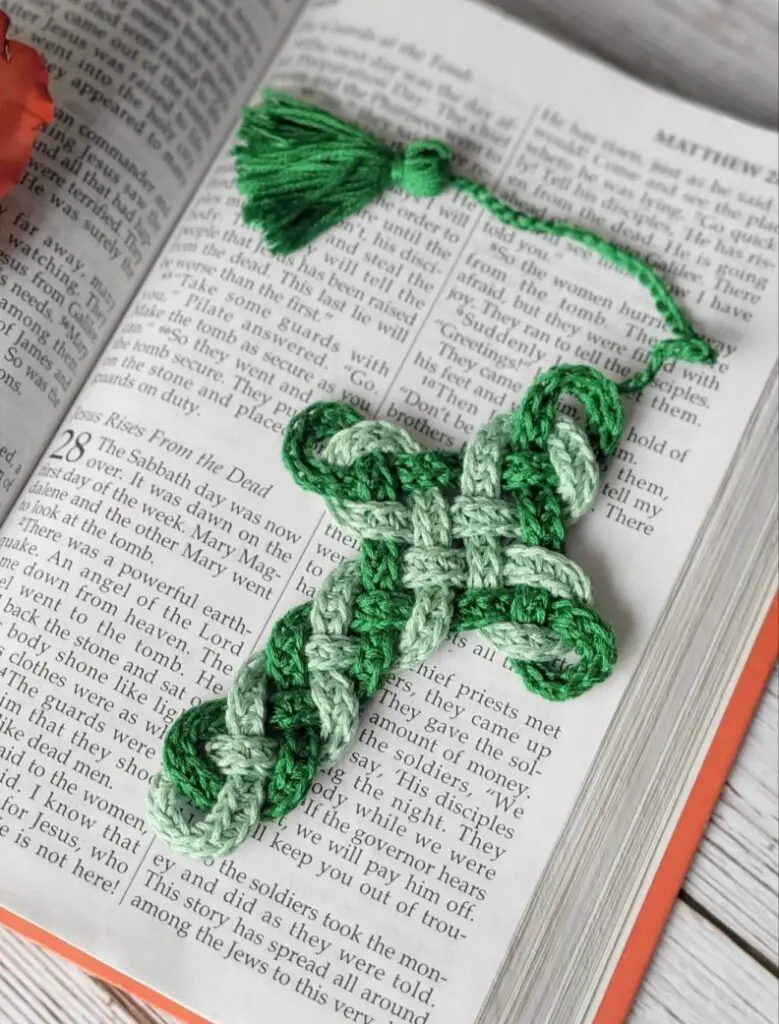
3. Crochet Celtic Cross Bookmark Pattern
Skill level: Intermediate (charted motif + shaping)
Materials
- DK or fingering cotton, main color and tiny contrast (optional)
- Crochet hook 2.5–3.5 mm
- Tapestry needle, small blocking pins
Finished size: Cross about 3–4″ tall with an attached tail of 3–5″.
What you’ll make
A small Celtic-style cross featuring openwork ring and arms; classic and elegant for religious or historical gifts.
Step-by-step
Cross center (ring):
- Ch 6, sl st to form a ring. Round 1: ch 3, 11 dc into ring, join (12 dc). Round 2: (dc, ch 2, dc) in same st for corner? — but for a cross’s ring, we’ll make openwork: ch 1, dc in next, ch 1 around; join.
Arms (worked in rounds from four compass points):
2. Mark the four quarter points (every 3rd st or as needed). Attach yarn at one quarter point and ch 2, work 6–8 dc in a small rectangle to form one arm; fasten off. Repeat for the remaining three arms so they form cross shape around the ring.
Lengthen vertical arm (tail):
3. For the long base tail of the bookmark, join yarn at bottom arm, ch 20–30 to desired bookmark length, then work rows of sc back along the chain to make a sturdy tail strip (as in mushroom tail). Fasten off.
Celtic details (optional):
4. Add surface slip-stitch entwined lines across arms to mimic Celtic braid: using contrast yarn, work surface sl sts weaving over and under across the cross face to form small braided motifs.
Finishing
- Block the cross carefully to square arms and open any ringwork.
- Weave in ends; secure surface embroidery stitches at the back.
Tips
- Follow a small chart for precise Celtic braids — simple surface sl st patterns work beautifully if you’re not comfortable with complex charts.
- For sturdier bookmarks, back the cross with a small piece of felt glued on the reverse.
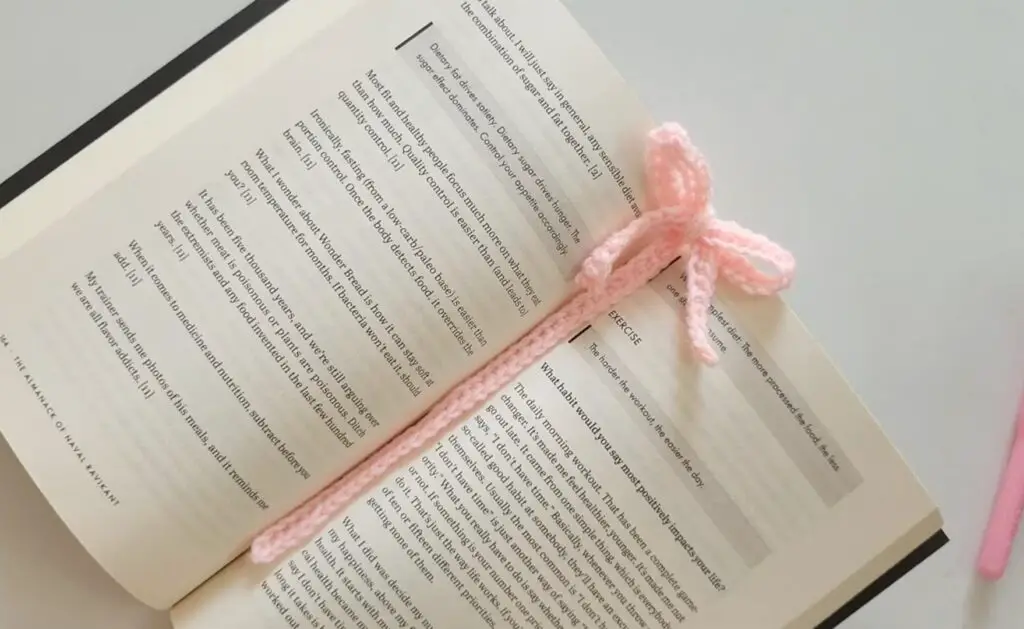
4. Bow Bookmark Crochet Tutorial
Skill level: Beginner
Materials
- Cotton or acrylic yarn (sport/worsted depending on preferred scale)
- Crochet hook to match yarn (3.5–5.0 mm)
- Tapestry needle, small button (optional)
Finished size: Bow about 2–3″ across with a 3–4″ tail.
What you’ll make
A charming bow-shaped topper attached to a narrow tail; quick, adorable, and perfect for gift tags.
Step-by-step
Tail
- Ch 25; Row 1: sc in 2nd ch from hook and across (24 sc). Work 4–6 rows of sc for a sturdy tail strip. Fasten off leaving long tail for sewing.
Bow
2. Make a small rectangle: ch 15, sc across, work 6–8 rows until rectangle measures about 2–3″ long. Fasten off, leaving a long tail.
3. Fold the rectangle accordion-style in the middle and wrap the long tail tightly around the center several times to cinch into a bow shape. Tie off and stitch the wrap secure at the back. Optionally sew a small button to bow center.
Attach
4. Sew the bow to the top of the tail strip, centering it. For a fancier look, attach a tiny elastic loop at bow back to slip over a page corner.
Finishing
- Weave and trim ends. If working with acrylic, steam lightly to even stitches.
- Optionally stiffen the bow center lightly with diluted glue or fabric stiffener if you want it rigid.
Tips
- Make an oversized bow to use as a decorative gift topper as well as a bookmark.
- Use sparkly or ribbon yarn for festive versions.
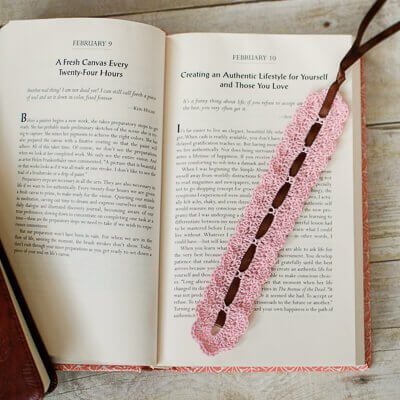
5. Pretty Lace Crochet Bookmark Pattern
Skill level: Intermediate (lace repeats + blocking)
Materials
- Crochet cotton thread size 10 or fingering cotton, small amount
- Crochet hook 1.5–2.5 mm (match thread)
- Blocking board & fine pins, tapestry needle
Finished size: Approx. 5–6″ long, narrow 1–1.5″ wide — delicate and elegant.
What you’ll make
A narrow lace strip worked with delicate shell and chain patterns — heirloom quality when blocked.
Step-by-step (sample lace repeat)
- Ch 20. Row 1: sc in 2nd ch from hook and across. Row 2: ch 3 (counts as dc), sk 2 ch, 5 dc in next ch (shell), sk 2, dc in next — complete across. Turn.
- Row 3: ch 1, sc in top of each shell group and between shells to stabilize. Turn.
- Row 4: Repeat Row 2 but offset shells so shells of Row 4 sit between shells from Row 2 (creates diamond-like lace). Continue repeating Rows 2–4 until bookmark reaches length 5–6″.
- Edge finishing: Work sc evenly along both long edges, then a picot round: sc 3, ch 3, sl st in first ch (picot), sc 3 to create tiny points.
Finishing
- Critical: Block pinned to exact dimensions and sprayed/steamed to set lace open and flat. Allow to dry fully.
- Weave in ends on the back to keep front spotless.
Tips
- Use starched spray or diluted fabric stiffener to keep bookmark rigid inside a book.
- Fine thread emphasizes detail — use magnifier if needed for really tiny work.
6. Crochet Elizabeth Bennet Bookmark Tutorial
Skill level: Intermediate (thematic shaping + appliqué)
Materials
- Light fingering cotton, small amounts (neutral tones)
- Crochet hook 2.5–3.5 mm
- Small printed tag or charm (Jane Austen motif optional), tapestry needle
Finished size: Portrait silhouette bookmark ~5″ tall with long tail.
What you’ll make
A literary-inspired bookmark featuring a small crocheted silhouette cameo or a tiny book applique with an attached tail — a charming nod to classic readers.
Step-by-step (silhouette cameo + tail)
- Cameo base: Work a small oval cameo: ch 8, join to ring. Round 1: ch 2, 12 hdc into ring, join. Round 2: ch 2, hdc 2 in next st, hdc in next repeat to form a slightly oval disk (approx. 12–16 sts). Fasten off.
- Silhouette (embroidered): Using contrasting thread, embroider a tiny side-profile silhouette (neck, chin, hair bun) onto the cameo using simple backstitch and satin stitch. Practice on scrap first.
- Tail: Attach tail cord to cameo base and work a narrow tail (ch 25, sc back across to make a thin strip). Fasten off leaving long tail for tucking.
- Optional charm: Sew a small Jane Austen–style charm or printed tag to the back for extra literary flair.
Finishing
- Block cameo carefully over a small mold for a perfect oval.
- Glue a small interior felt backing to keep embroidery secure and prevent snagging pages.
Tips
- If embroidery is daunting, stitch a simple heart or initial instead — still literary and personal.
- Use muted palette that evokes Regency-era fabrics (soft neutrals, dusty rose).
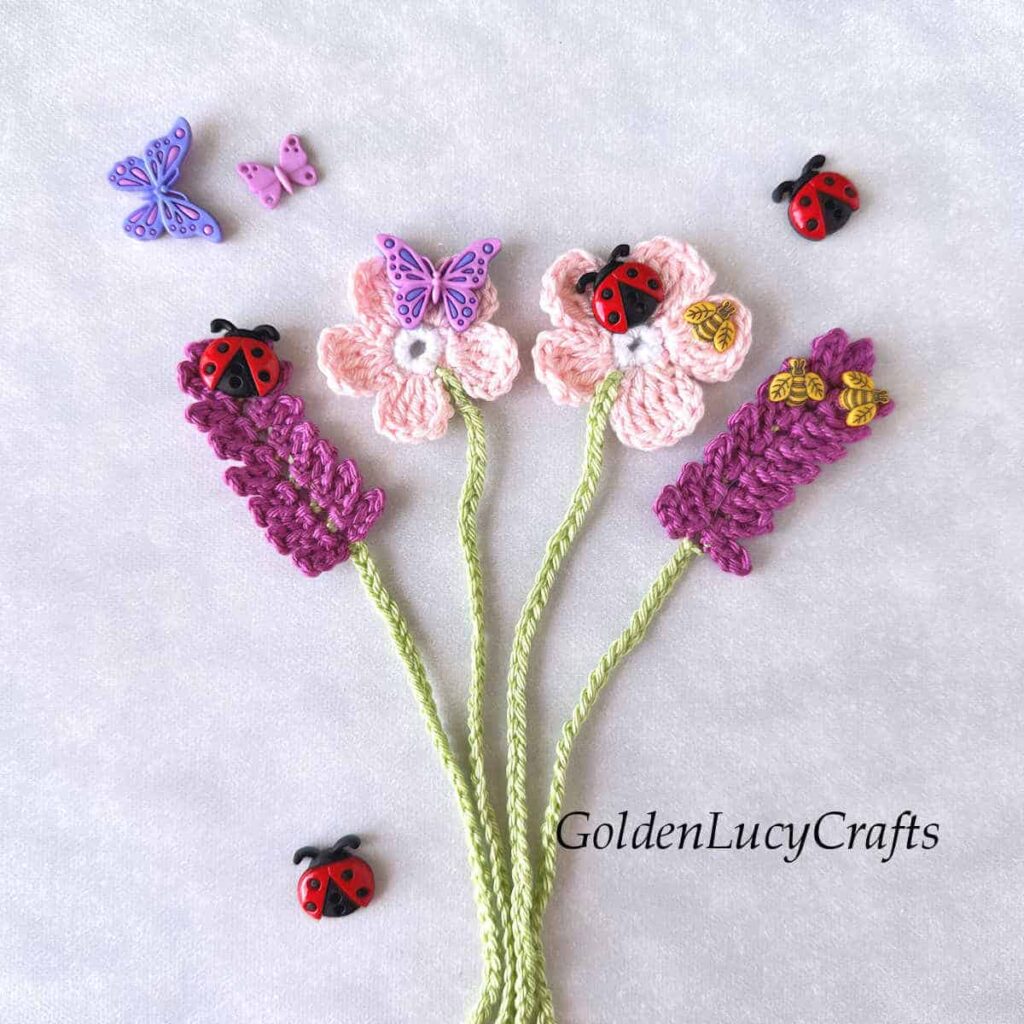
7. Lavender and Cherry Blossom Crochet Flower Bookmarks Pattern
Skill level: Beginner–Intermediate (small motifs + assembly)
Materials
- Crochet thread or fingering cotton in lavender, pink, green, small amounts
- Hook 1.75–2.75 mm
- Tapestry needle, small beads for centers, ribbon (optional)
Finished size: Each flower about 1–2″ diameter; attached tail 4–5″.
What you’ll make
Two floral motifs (lavender sprig and cherry blossom) each attached to a narrow tail — fragrant in spirit, visually lovely when grouped as a set.
Step-by-step
Lavender sprig (cluster):
- Make tiny buds: (make 6–8) ch 4, sl st into ring, ch 2, 3 hdc in ring, sl st to close — tiny rounded bud. Fasten off and stitch multiple buds in a vertical line on a narrow tail strip (like a small chain of buds). Add small green leaves crocheted in sc/hdc to sides.
Cherry blossom (single flower):
2. Ch 4, sl st to form ring. Round 1: ch 1, 5 sc in ring; join. Round 2: ch 3, sl st in next sc around to form 5 loops. Round 3: Into each loop work (sc, hdc, 2 dc, hdc, sc) to form petals. Sew a small bead in center. Fasten off.
Attach to tail
3. For each flower, sew onto one end of a narrow tail strip. For lavender sprig, stitch buds in a straight line down the tail. For cherry blossom, sew the blossom at top.
Finishing
- Block petals if desired to open shape.
- Add ribbon tie at tail end or a small bead to act as a weight.
Tips
- Make a set of bookmarks — lavender + cherry blossom look beautiful as a pair gift.
- Use pastel shades for delicate, springtime appeal.
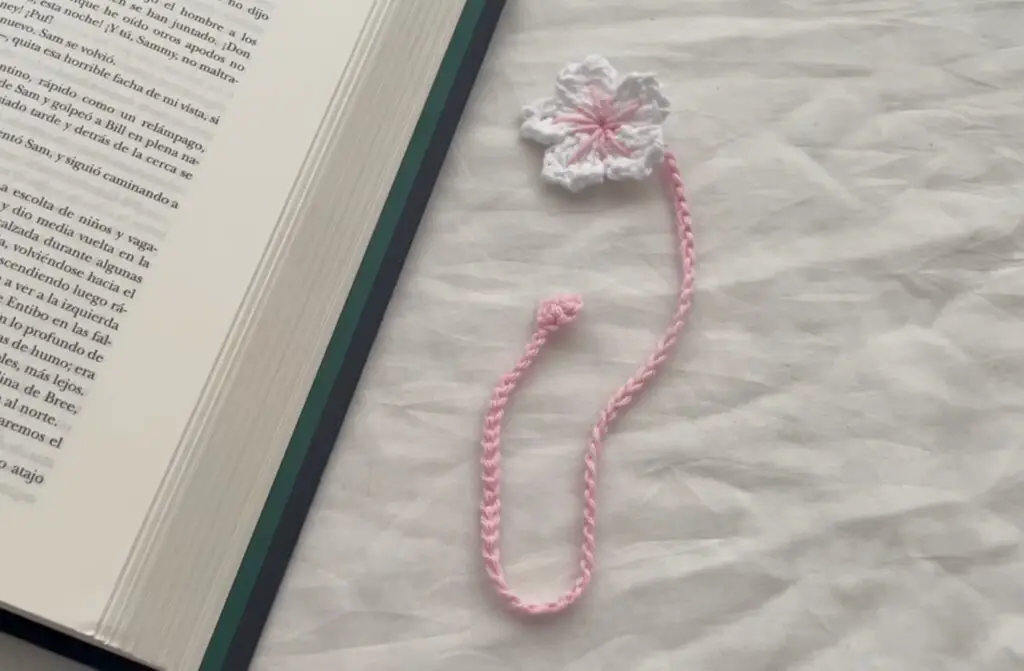
8. Sakura Flower Bookmark Tutorial
Skill level: Beginner–Intermediate (petal shaping + assembly)
Materials
- Fine cotton or thread in soft pink, small amount brown/green for stem if desired
- Hook 1.75–2.5 mm
- Tapestry needle, optional bead for flower center
Finished size: Flower ~1.5–2″ across; tail ~4–5″.
What you’ll make
A Japanese cherry (sakura) blossom with five rounded petals attached to a slim tail — elegant and symbolic.
Step-by-step
Petals (make 5):
- Ch 6, sl st to form ring. Round 1: ch 1, 6 sc into ring; join. Round 2: ch 3, sl st in next sc around to make 6 loops. Round 3 (petal shaping): Into each loop work (sc, hdc, 3 dc, hdc, sc) — creates a plump petal. Fasten off leaving a long tail for assembly.
Assemble blossom
2. Flatten petals side-by-side in a circle, overlapping slightly. Use long tail to stitch petals together securely at center. Sew a small bead or French knot in center for a stamen. Fasten off.
Tail (stem)
3. Join yarn at back and ch 30 (or desired length). Work sc back along chain to make a firm narrow strip. Attach blossom to top.
Finishing
- Pinch petals gently to shape and steam-block lightly if working with cotton.
- Weave in ends and trim.
Tips
- For a more natural look, make one petal slightly larger or offset to mimic falling blossoms.
- Make a blossom garland of two/three bookmarks for a themed gift set.
Conclusion
These eight crochet bookmark patterns give you a delightful range of styles — whimsical mushrooms and bows, delicate lace and sakura blossoms, literary cameos and floral sprigs. Bookmarks are perfect scrap-busting projects, portable to take anywhere, and they make thoughtful, inexpensive gifts that readers treasure. Pick a style, gather small amounts of yarn and a matching hook, and follow the step-by-step guides above. Don’t forget to block the lace and motifs where indicated, weave in ends cleanly, and consider tiny embellishments (beads, charms, ribbon) to personalize each piece. Happy crocheting — and happy reading!