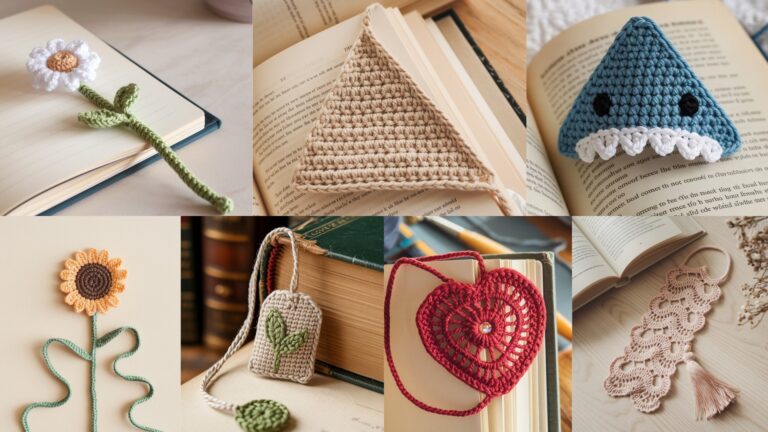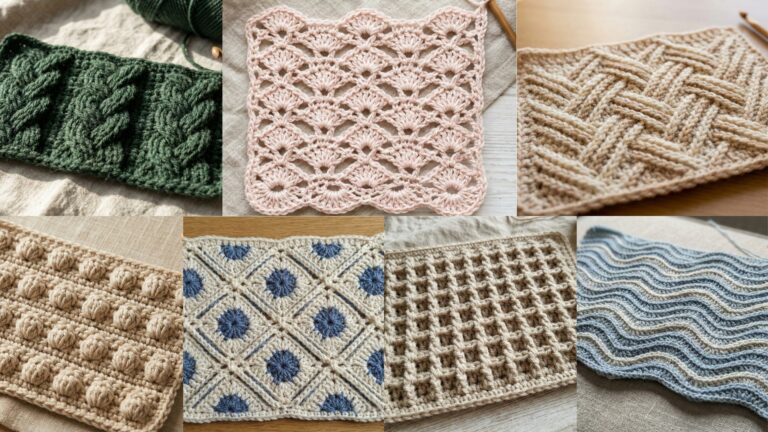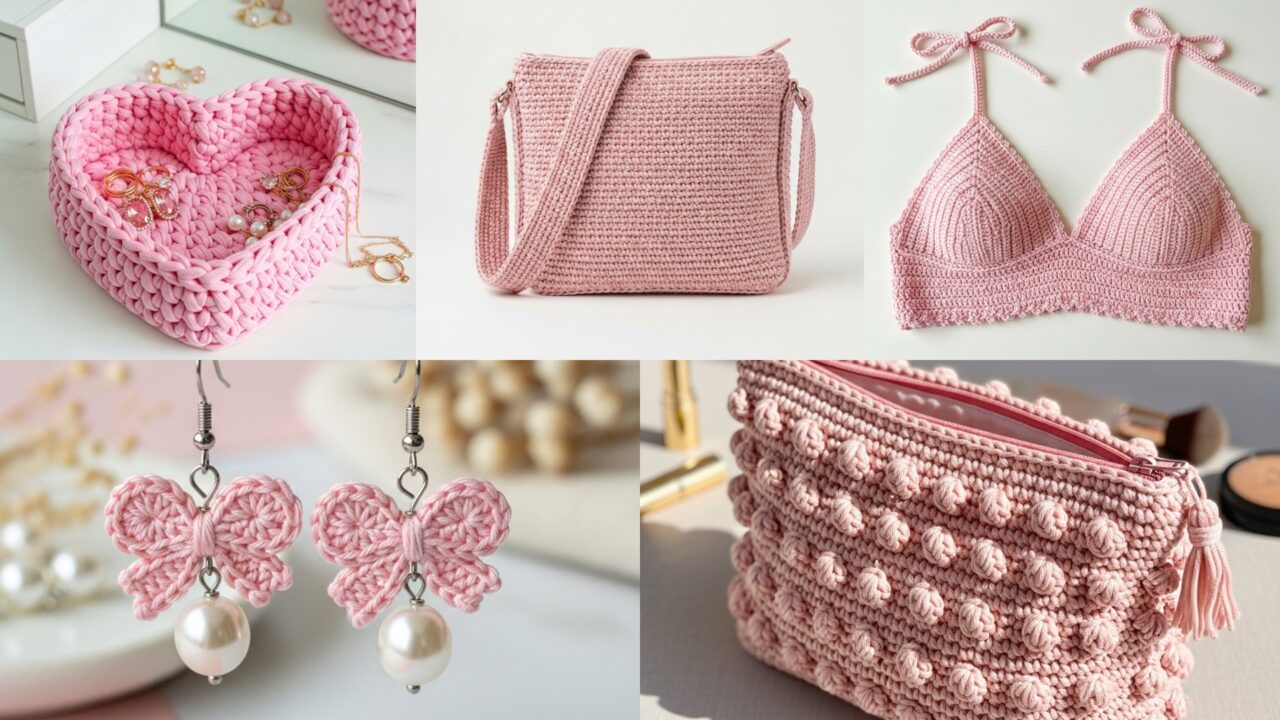
Soft pinks make everything feel gentle, dreamy, and cohesive — perfect for mood boards, gifts, room accents, and wearable pastels. Below you’ll find a full blog-ready post: a practical introduction (materials, dye/care notes, sizing, and common stitch choices), then eight detailed pink projects each with materials, finished-size examples, stitch notes, and a careful step-by-step guide you can follow start-to-finish. Every single project is written so the final piece is pink — pick the shade(s) of pink you love (blush, bubblegum, dusty rose, rose quartz) and keep the palette consistent across projects for a curated set.
Quick Intro — yarn, hooks, color & care basics (all projects pink)
Yarn choices (pink-friendly)
- Cotton / cotton-blend — excellent for baskets, bags, makeup pouches, and summer bralettes: crisp stitch definition and washable. Choose mercerized cotton for sheen.
- DK / fingering cotton or bamboo blends — great for garments (vest, bralette) and accessories where drape matters.
- Acrylic / acrylic-blend — soft, squishy, and inexpensive for bobble-heavy pieces and plush bouquets; machine-washable versions exist.
- Velvet / plush yarn — gorgeous for plush, tactile projects (plush bouquet or bobble makeup bag), but may require gentler care.
- Always pick yarns that are colorfast in pink shades — lighter pinks can show dye variations; test a small swatch in water and mild detergent first.
Tools
- Hooks: 2.0–6.0 mm depending on yarn weight. I’ll note recommended hooks per project.
- Notions: tapestry needle, stitch markers, small scissors, stuffing (polyfil) for plush items, small brooch pins or jewelry findings for earrings, hardware for bags (zippers, toggles, strap rings), sewing needle + thread for sewing linings.
- Optional: small sewing machine and fabric for lining, snaps, keyring, jump rings and jewelry pliers for earrings.
General tips for working in pink
- Pink dyes range widely — when buying multiple skeins for one project, buy from the same dye lot to avoid subtle differences. If you must mix lots, alternate skeins every row/round while working to blend tones.
- Very pale pinks show stains and oils—choose washable yarn or add a light lining to items that will touch makeup or food.
- For a cohesive set, pick 2–3 complementary pink tones (blush + dusty rose + pale pink) and reuse them across projects.
Sizing & gauge
- Make a small 4” (10 cm) swatch in the stitch you’ll use and block it as you would the final piece. Measure stitches per inch (spi) and rows per inch (rpi). Use the swatch to compute foundation chains and motif counts. In pattern steps below I’ll give example gauges and sample stitch counts for the sample sizes — adjust to fit your measurements and yarn.
1. Crochet Heart Storage Basket Pattern
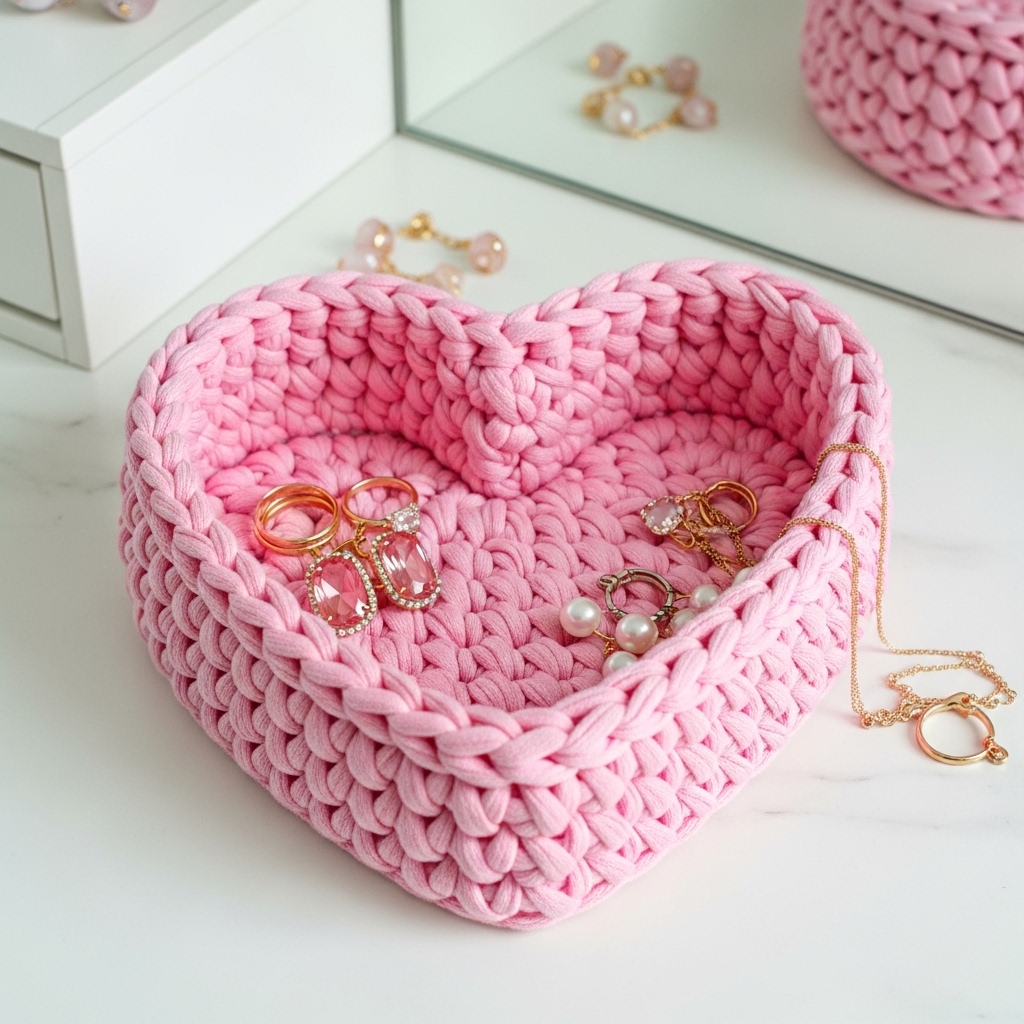
Vibe: functional + cute; keeps desk or vanity pretty in pink.
Skill level: confident beginner
Sample finished size: ~8 in diameter × 6 in tall (small basket)
Yarn & tools
- Bulky cotton rope or cotton aran (soft pink) — ~200–300 yd.
- Hook: 6.0–8.0 mm (choose for your yarn matched to label).
- Tapestry needle, scissors, optional cardboard base.
Stitch notes
- Worked in the round from base up; sturdy fabric: sc or hdc in the round; use tight tension for structure. For heart detail, either applique hearts or form integrated heart texture with raised stitches.
Step-by-step
A — Base (round)
- Swatch & compute — gauge example: 3 sc = 1 in (bulky cotton). For an 8 in base: 3 × 8 = 24 sts initial circumference target. Start with a base that grows to ~24–26 sts in round centre.
- MR, ch1, 6 sc in MR — (6).
- R2: inc around (2 sc in each st) → 12.
- R3: sc1, inc around → 18.
- R4: sc2, inc around → 24.
- R5: sc3, inc around → 30 (if you want a wider base; stop when base diameter equals target). Continue rounds even (sc in each st) until base measures ~8 in across.
B — Sides
7. Join round without increasing: ch1, sc in same st, sc around for 3–6 rounds to create a sturdy transition (this starts the wall).
8. Work vertical sides by continuing sc in each st around until side height ~4 in (for a tall basket, work more rounds). For extra structure, alternate a round of BLO sc (back loop only) to create a slight rib.
C — Heart decoration (appliqué)
9. Make 3–5 small hearts (for exterior decoration). Heart mini pattern (tiny heart ~1.5 in wide): ch 6. Row 1: sc in 2nd ch and across (5 sc). Row 2: ch 3, dc in first st, hdc next, sc next, hdc next, dc last. Fold center and sew base to create heart shape; or follow a classic 3-round crochet heart chart: MR→ 6 sc → ch 3, 3 dc, ch 3 × 3 → shape and finish.
- Sew hearts around basket body with matching yarn using whipstitch; space evenly.
D — Rim reinforcement
11. To finish rim: work 2–3 rounds of sc in a smaller hook or tighter tension to make a neat edge. Optionally fold top down and sc through both layers to make a double-thick rim for stability.
E — Optional base insert
12. For extra stability, cut a circle of sturdy cardboard or plastic about 1/8 in smaller than base and insert it into basket bottom before final side rows or line with felt.
F — Finishing
13. Weave ends inside. Clean and block lightly if needed (bulky cotton may relax with steam).
Variations
- Make heart pattern integrated as raised bobbles in sides instead of sewn appliqué (work small bobble clusters forming heart shapes).
- Use two pink shades in striping for a sweet ombré basket.
2. Crochet Simple Crossbody Bag Pattern

Vibe: everyday soft-pink crossbody in clean lines.
Skill level: confident beginner → intermediate
Sample finished size: 9 in wide × 7 in tall × 2 in depth (medium crossbody)
Yarn & tools
- DK cotton or cotton-blend in blush pink — ~350–450 yd.
- Hook: 4.0 mm.
- Lining fabric & sewing supplies (optional), zipper or flap closure, two D-rings and adjustable strap hardware if desired, tapestry needle.
Stitch notes
- Worked flat as rectangle or in the round as a box; sturdy fabric recommended (hdc or sc) and optional lining for durability and neat interior.
Step-by-step
A — Body rectangle (flat method)
- Compute foundation — gauge example: 5 sc = 1 in. For 9 in width: 5 × 9 = 45 sts. Chain 46.
- Row 1: sc in 2nd ch from hook across (45). Turn.
- Rows 2–20: ch1, sc across (45) — work until rectangle height equals ~14 in (this will be folded — 7 in front + seam allowance). Adjust number of rows to your preferred finished height.
B — Bottom box (optional depth)
4. To give depth, create a separate bottom panel: chain foundation for 9 in × desired depth (e.g., 2 in depth -> compute rows). Alternatively, when folding rectangle, use the method to create boxed corners: sew bottom seam leaving corners open and clip diagonal to form depth, or join in round and add base by increasing.
C — Flap or zipper closure
5. For zipper: fold rectangle RS together and sew or sc sides, then top-stitch zipper across the opening using pick-up stitches (sc through zipper tape and body) or sew by machine to the lining first.
6. For flap: before seaming, mark center and top of front panel. Crochet a flap extension by picking up stitches along top and work additional rows shaping into a neat rounded or pointed flap (e.g., decrease one stitch each side to shape).
D — Strap
7. Simple strap: ch to desired length (e.g., 110 ch for a crossbody ~50 in adjustable; adjust per gauge and wearer), work sc in each ch for 6–10 rows to make a flat strap width about 1 in. Attach ends to D-rings and secure to bag with reinforced stitching or crochet loops sewn to bag sides.
E — Lining & finishing
8. Cut a fabric lining sized to the interior (slightly smaller), sew lining and slip into bag, hand-sew lining at top to secure. Add small inside pockets by sewing fabric pocket or crocheting a small sc rectangle and stitching inside.
F — Embellishments & pink styling
9. Add tonal pink tassel, pom-pom, or a little heart appliqué in textured pink shades. For an aesthetic set, use same pink as basket or bralette.
Variations
- Work front panel in small heart granny motif (see Heart Granny Book Cover pattern for motif inspiration) then join into bag body for a delicate textured front.
3. Crochet Cute Bralette Pattern
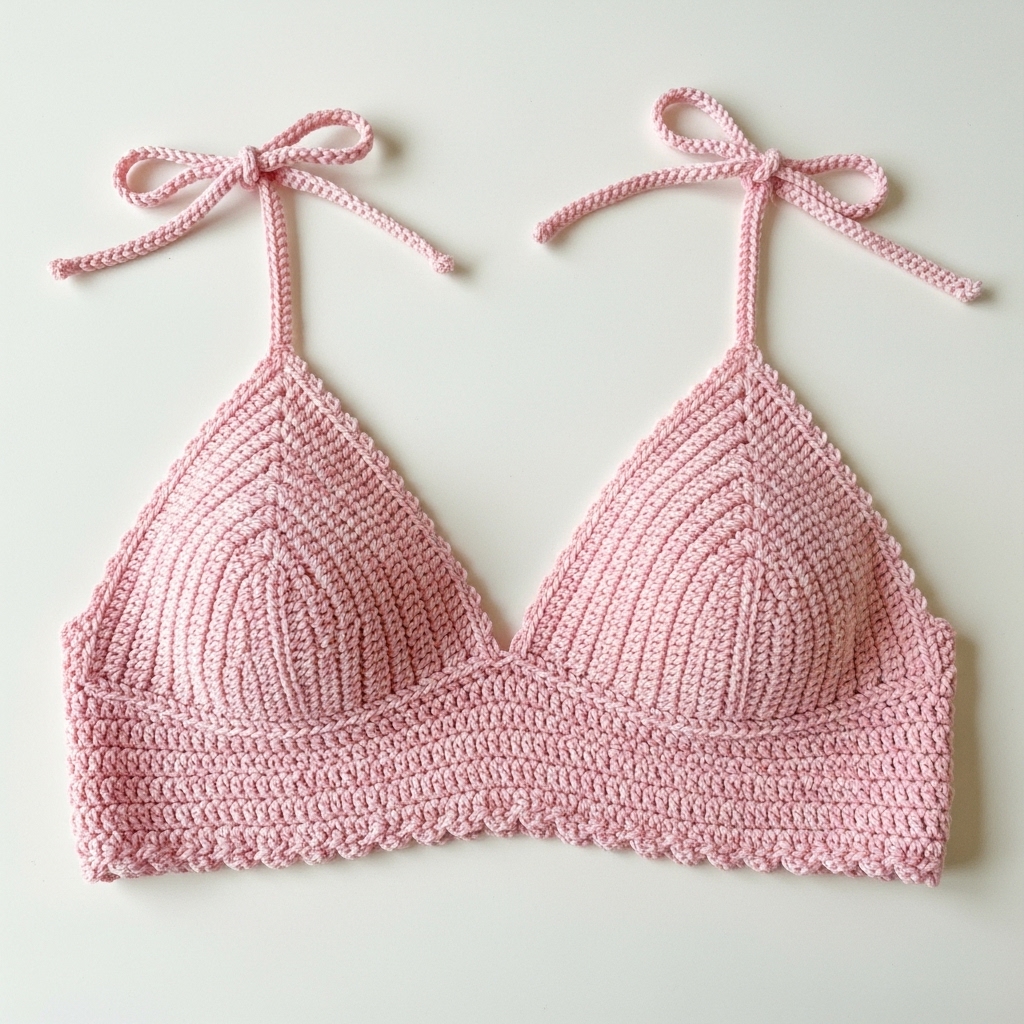
Vibe: soft pink summer bralette — delicate and wearable.
Skill level: intermediate (shaping + fit adjustments)
Sample finished size: S-M sample: bust coverage ~32–36 in (adjustable)
Yarn & tools
- Sport/DK cotton blend in blush pink — ~300–400 yd.
- Hook: 3.5–4.0 mm.
- Tape measure, small elastic for underbust (optional), tapestry needle.
Stitch notes
- Work top-down or bottom-up with simple lace or rib panels. Here: top-down triangle cups joined at center with a band; adjustable tie straps.
Step-by-step (triangle cup bralette)
A — Measurements first
- Measure bust underbust and fullest bust. Decide desired coverage and ease. Example sample uses bust around 34 in finish; cups sized to cover majority of bust with 1–2 in positive ease.
B — Cups (make 2)
2. Make triangle cup starting at center: ch 5, join to form small loop or MR. Row 1: ch 1, 10 sc in loop (10). Row 2: ch 2, turn, hdc in same st, hdc in next across; or for triangular shaping do increases: Row 2: ch2, sc across then inc at each side to shape wedge: sc across to last st, inc — OR follow a traditional increase triangle: start MR, work inc rounds that increase by 2 sts per round to form triangle wedge.
3. A clearer approach: make triangle by foundation chain and short rows: chain base width (e.g., 50 chains for S), then work rows that decrease at one side each row to form triangle or use granny triangle pattern: MR, ch2, 3 dc inc etc — if you prefer a tested triangle cup chart pick a simple shell triangle pattern (I recommend a basic v-shape: start with 3 dc in ring, ch2, 3 dc = center base, then each round add 3 dc clusters at ends).
C — Join cups & underband
4. Once cups are desired size, join cups along center with a few rows of sc across center gap to make gore.
5. Underband: pick up stitches around bottom edges of both cups and work in BLO hdc rounds or sc rounds to form a firm underband (6–8 rounds). If you want elastic, crochet slightly smaller band and fold to create casing and insert 1/2 in elastic before closing.
D — Straps
6. Add neck straps by chaining length to fit (40–60 ch depending on whether it’s halter or over-the-shoulder) and attaching to cup top with sturdy stitches; for adjustable add button loops or tie ends to be adjustable.
E — Finishing
7. Work a delicate lace edging (picot or small scallop) around cup edges and band for feminine finishing. Weave ends and block lightly.
F — Fit tips
- Try on during construction if possible — adjust cup width or band length before final seams.
- For extra support add a 1 in elastic underband sewn in place.
Variations
- Use a small heart motif as center gore decoration or change to dusty rose for two-tone effect (cups pale, band dusty).
4. Crochet Valentine Granny Square Vest Pattern
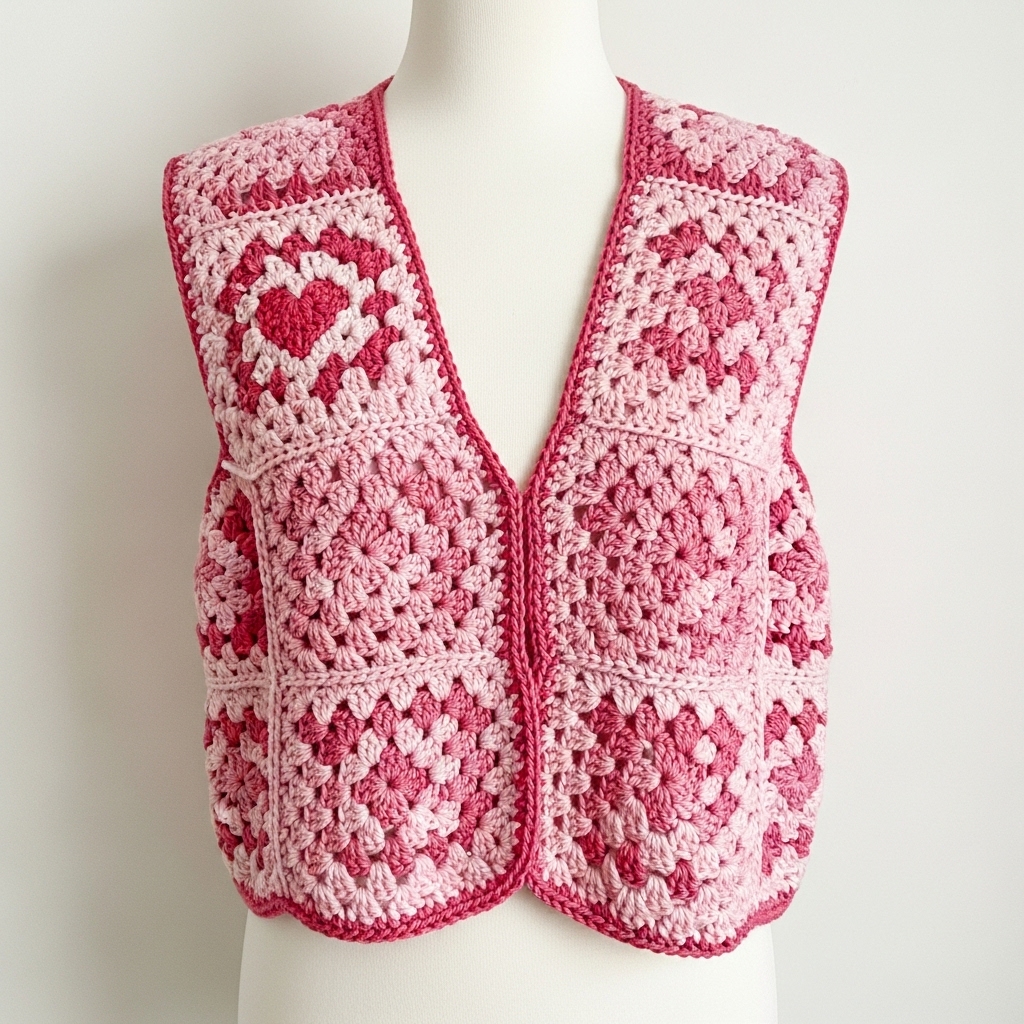
Vibe: granny-square vest with a Valentine heart accent — cozy and retro-chic in all-pink.
Skill level: intermediate (motif join and garment shaping)
Sample finished size: small/medium sample built from 9 granny squares (3×3) for back and front panels each; adjust for larger sizes.
Yarn & tools
- DK cotton or acrylic in 2–3 pink shades (light, medium, deep) — ~900–1,200 yd.
- Hook: 4.0 mm.
- Tapestry needle, stitch markers.
Stitch notes
- Classic granny square with heart center on the focal square (on front/left chest), join-as-you-go or whipstitch join, simple armhole shaping on side rows.
Step-by-step
A — Heart granny square (focal)
- Make a granny square with a center heart motif: start with MR, create small heart in the center by crocheting a tiny heart (MR→6 sc→ ch clusters forming lobes) then continue granny rounds in pink to reach ~6–7 in square.
- Round pattern for granny: after heart center, ch3 (counts as dc), 2 dc in same space, ch2, 3 dc in next space — corners ch2 space, sides 3-dc clusters separated by ch1.
B — Standard pink granny squares
3. Make remaining squares in matching pink tones to blend as a tonal patchwork. Block squares to equal size.
C — Layout & join
4. Lay out squares into vest panels: back 3×3, front 3×3 but consider leaving neckline opening between top squares. Join squares with join-as-you-go or mattress stitch to make a neat seam. Arrange heart granny on upper-left chest front.
D — Shaping armholes & neckline
5. Once joined into front/back panels, seam shoulder seams leaving desired neck opening (e.g., leave 8–9 in opening). For armholes, sew side seams from bottom up leaving 7–9 in for arm openings depending on fit.
E — Edging & finishing
6. Add a round of sc or hdc around neckline, armholes, and vest bottom in the deepest pink to frame the vest. Optional tie closure or button at front top.
F — Styling
7. Wear over a white tee or tank for contrast; make entire vest in blush/pastel pink shades for monochrome aesthetic.
Variations
- Make smaller squares for a more fitted look and more squares for larger sizes.
- Add a small heart appliqué to the back center for extra Valentine charm.
5. Crochet Plush Flower Bouquet Pattern
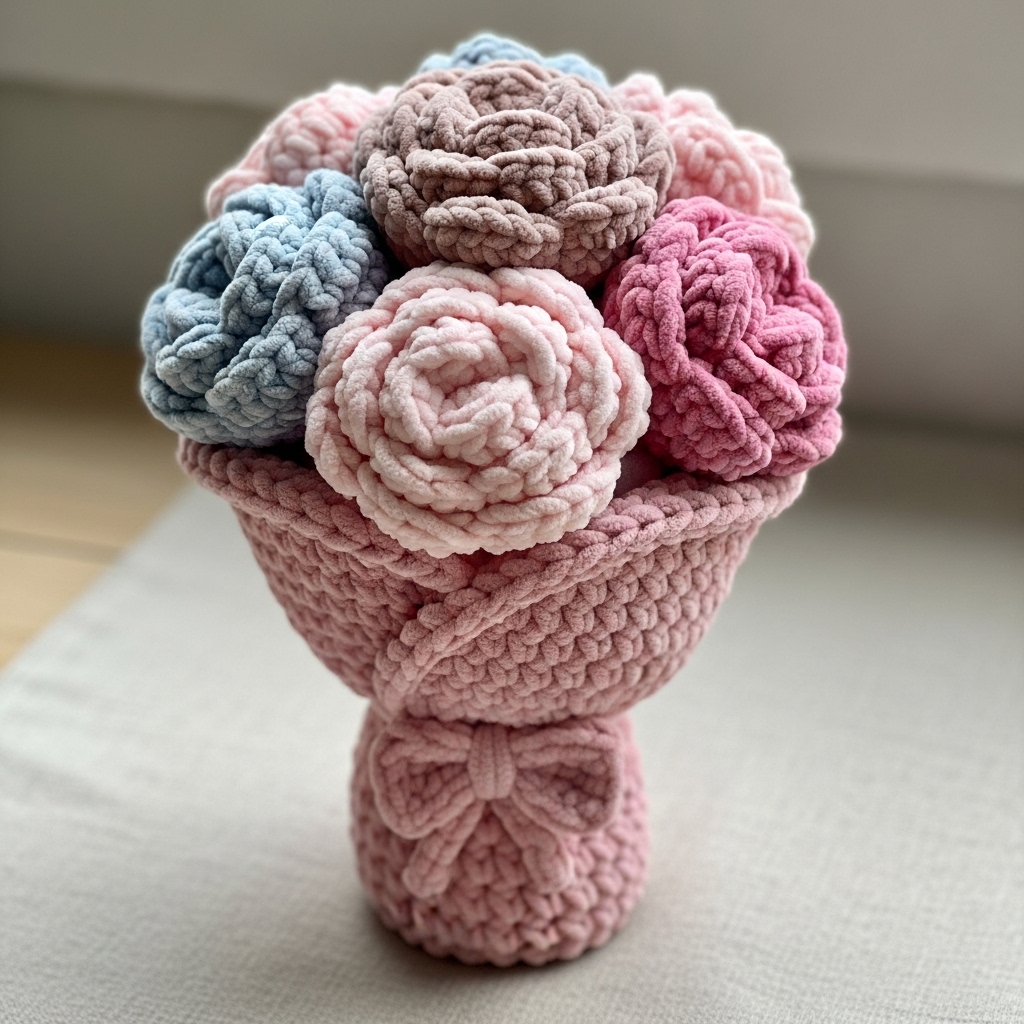
Vibe: long-lasting bouquet in multiple pink shades — perfect gift that never wilts.
Skill level: intermediate (assembly + shaping)
Finished size: bouquet of 6–8 plush blooms, stems ~10–12 in long each
Yarn & tools
- Plush velvet or soft acrylic in several pink shades ~100–200 yd total.
- Hook: 4.0–6.0 mm depending on yarn, stuffing, floral wire (optional) wrapped in tape, floral tape or green yarn for stems, small ribbon in blush.
Stitch notes
- Work each bloom as a plush rosette or layered petal clusters, stuff slightly, attach to wrapped wire stems that are soft for arrangement.
Step-by-step
A — Stem prep
- Cut floral wire lengths ~11–12 in (or use wooden skewers for child-safe option). Wrap wire with green yarn using fine glue or wrap with floral tape to create natural stem look; leave top 1 in bare to insert into rose center.
B — Bloom (make 6–8)
2. Method 1 — Spiral rosette: ch 60, Row 1: dc in 4th ch from hook and across (57 dc). Row 2–4: dc across for a 3-row strip. Work 1 round of picot edging on one long edge if desired. Roll strip from one end into a spiral rosette, sewing base as you go and inserting the wrapped stem at the center, securing by sewing the rosette base into the stem wrap. This yields a lush, plush flower.
3. Method 2 — Layered petals: MR, ch1, 10 sc in MR. R2: ch4, sl st around to make loops. R3: in each loop work (sc, hdc, 3 dc, hdc, sc) for petals. R4: add a second round of larger petals by creating longer chains and shells. Stuff center slightly and attach stem to underside (stitch through central base and stem wrap). Fasten off.
C — Leaves & filler
4. Make leaves (ch8, sc across, hdc, dc, hdc, sc) and sew to stems. Add small buds by making small 6-st rosettes.
D — Bouquet assembly
5. Arrange stems and tie with satin blush ribbon. Optionally place bouquet in a small pink pot or wrap in tissue for gifting.
E — Care & variations
- Plush yarn gives bouquet a luxe tactile feel; keep away from pets who may chew.
- Make mini bouquets for keychains by using toothpicks or wooden dowels for stems and much smaller petal strips.
6. Crochet Bow Pearl Earrings Pattern
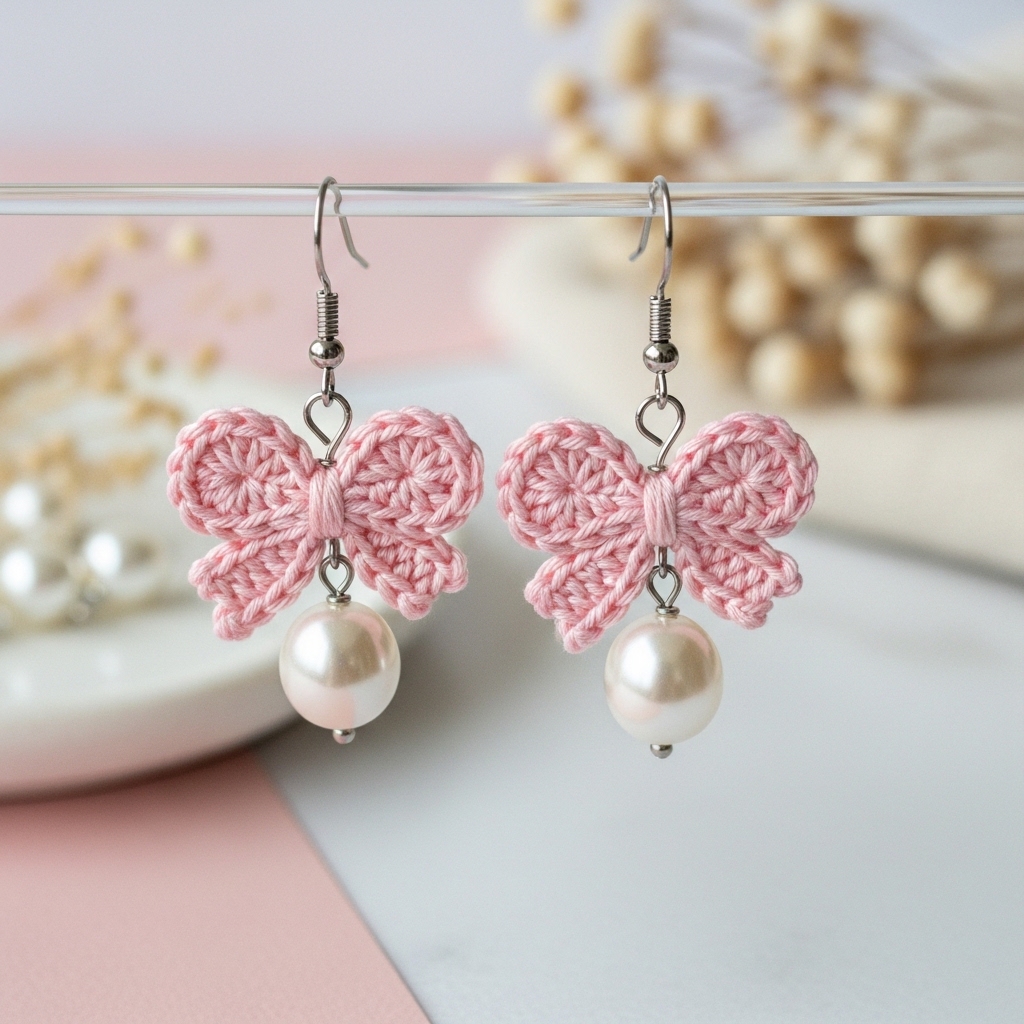
Vibe: coquette pastel earrings with tiny crochet bow and a faux-pearl drop.
Skill level: confident beginner (basic jewelry assembly)
Finished size: bow ~0.75–1 in across; total drop ~1.5 in
Materials
- Fine cotton or fingering yarn in pale pink ~5–10 yd.
- Hook: 2.0–2.5 mm.
- 2 small faux pearls on headpins or pearl beads, earring hooks (sterling or hypoallergenic), jump rings, pliers.
Step-by-step
A — Bow (make 2)
- Ch 22. Row 1: sc across (21 sc). Row 2–3: sc across. Fold strip in half lengthwise, cinch center by wrapping with same yarn several times to form bow shape, then sew ends to backside to stabilize. Trim tails.
B — Pearl dangle
2. Insert pearl onto headpin, form small loop at top with round-nose pliers. Trim excess wire and close loop fully.
C — Assembly
3. Attach a tiny jump ring to bow center (sew wrap around jump ring when forming center) then slip the pearl loop onto the jump ring so the pearl dangles under the bow. Add an earring hook via the same jump ring or use a small additional jump ring to attach hook above bow. Close all loops.
D — Finishing
4. Make sure loops are closed fully and that yarn wrapping is secure. For extra durability, tie a small knot inside wrap and add a dot of clear jewelry glue under the wrap before trimming.
Variations
- Make double-layer bows (two sizes) for a puffier look.
- Use tiny rose-gold findings to complement dusty rose yarn.
7. Crochet Heart Granny Square Book Cover Pattern
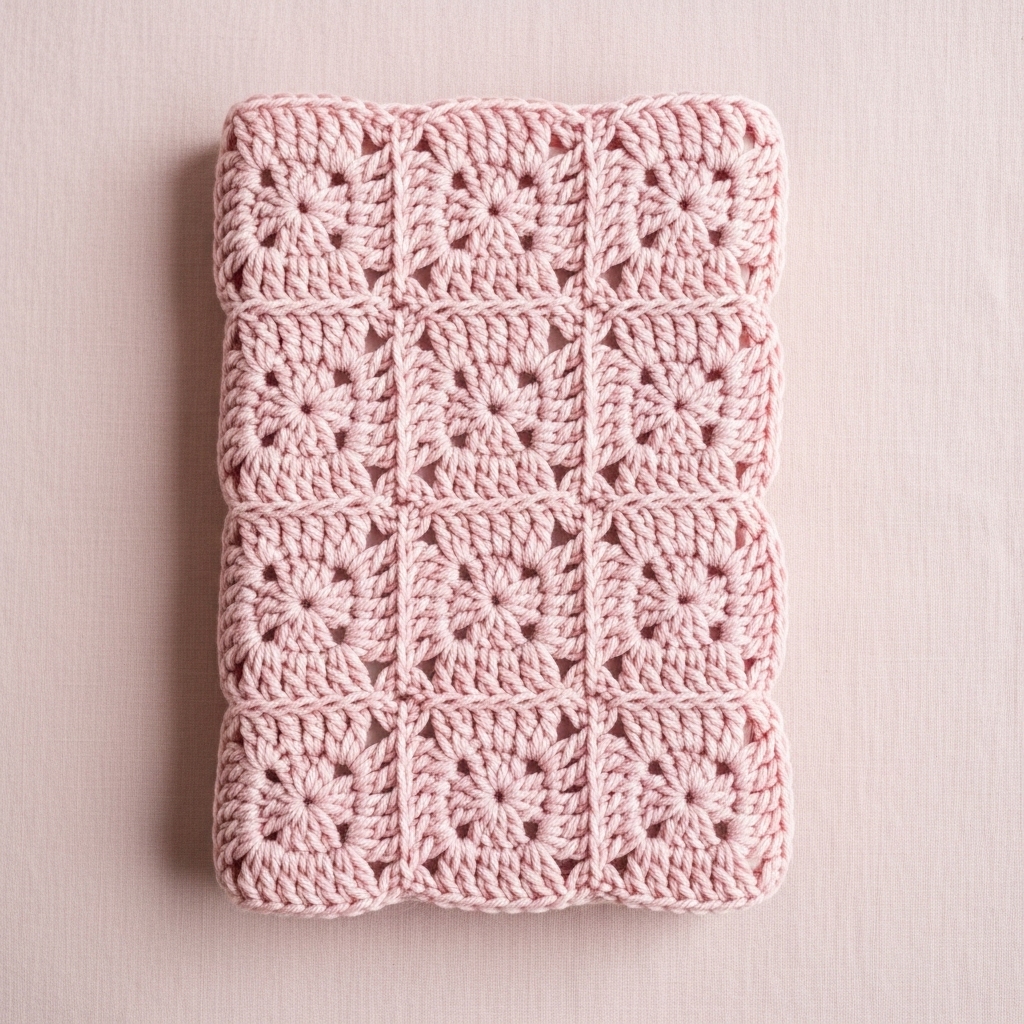
Vibe: cozy librarian-chic — soft pink granny hearts wrapped around your favorite novel.
Skill level: confident beginner → intermediate (motif + sewing)
Sample book size: fits 6 × 8.5 in paperback (adjust by motif counts)
Yarn & tools
- Sport or DK cotton in pale and deeper pink shades (~200–300 yd).
- Hook: 3.5–4.0 mm.
- Tapestry needle, measuring tape, optional lining fabric.
Stitch notes
- Build a rectangular cover by joining granny squares (heart-centered) or by working a single large granny rectangle decorated with heart motifs.
Step-by-step
A — Heart granny square motif
- Heart center: MR, 6 sc in MR; R2: in three consecutive stitches form small heart lobes by ch 3, 3 dc, ch 3 in a stitch and repeat across three times to form heart top cluster; shape into heart by folding & stitching. Or use a small crochet heart pattern worked flat and then round out into a granny square by crocheting rounds of granny clusters around it: 3 dc cluster, ch 2 corner repeat to square off.
- Granny rounds: After heart center, work rounds of granny clusters: in each corner work (3 dc, ch 2, 3 dc), on sides work (3 dc) in each side space separated by ch1 to enlarge to ~5–6 in square depending on gauge.
B — Make required squares
3. Make enough squares to cover book back and front: for small paperback you might need 3 squares wide × 2 squares tall (6 squares per cover set). Block all squares to uniform size for neat joining.
C — Join & form cover
4. Join squares in rows and join rows with join-as-you-go or mattress stitch. Create two rectangular panels: one for front and one for back; leave a one-square hinge (or leave one side open) so cover can slip over book. Alternatively, make one long rectangle that wraps around spine and folds over.
D — Spine & finishing
5. For spine, sew a narrow strip of granny clusters or simple sc rounds to connect front and back panels. For a snug fit, make spine width equal to book thickness. Add a small button loop closure if you want to secure the cover closed.
E — Optional lining
6. Add a fabric lining to protect the book and tidy inside: cut lining fabric to panel size and hand-sew to inner edges or machine stitch before joining panels.
F — Finishing touches
7. Add small heart embellishments or a tiny bow in deeper pink on the front. Weave in ends and press lightly.
Variations
- Use gradient pink tones across squares for an ombré cover.
- Add an elastic page-holder ribbon sewn into spine interior.
8. Crochet Blush Pink Bobbles Makeup Bag Pattern
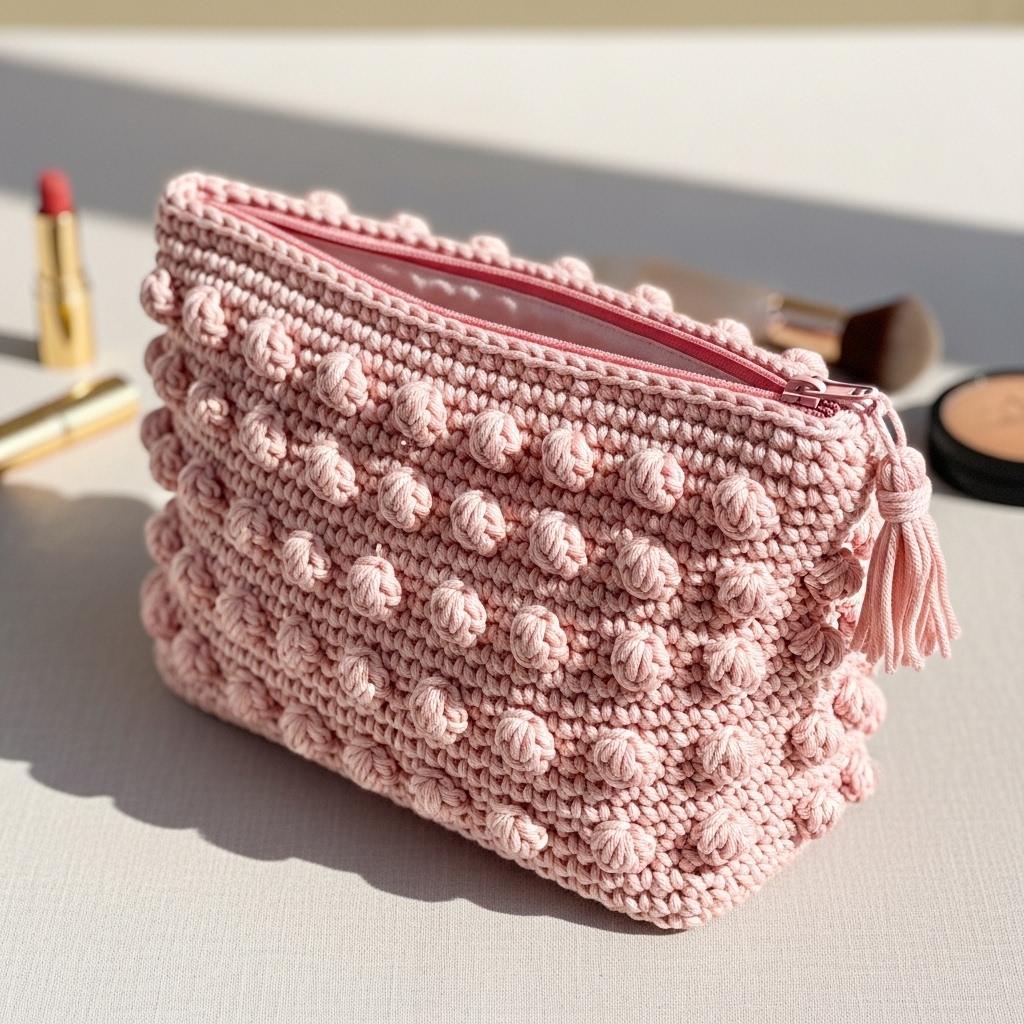
Vibe: tactile pink bobbles make a luxe makeup pouch — durable and pretty.
Skill level: intermediate (bobble stitch + zipper install + lining)
Finished size: ~8 in wide × 5 in tall × 2 in depth (medium makeup bag)
Yarn & tools
- Worsted cotton or cotton-blend in blush pink — ~300–400 yd.
- Hook: 4.0–5.0 mm.
- 8 in zipper (matching pink), fabric for lining, tapestry needle, sewing supplies.
Stitch notes
- Bobble stitch creates dense texture. Use sc for the base fabric and insert bobble rows to form pattern.
Step-by-step
A — Compute & foundation
- Gauge example: 4 sc = 1 in. For 8 in width: 4 × 8 = 32 sts. Chain 33. Work rows of sc until rectangle height reaches ~10 in (this will become 5 in once folded with seam allowance).
B — Bobble pattern
2. Create bobble rows evenly spaced: pattern example — every 6th row is a bobble row. Bobble stitch (5-dc bobble): yo, insert, pull up loop x5 in same st, yo and pull through all loops, ch1 to close. On bobble rows work bobble in designated st and sc elsewhere. Example layout: sc2, bobble, sc4, bobble repeat — adjust for width.
- Continue repeating regular sc rows and bobble rows to create a bobble-textured rectangle.
C — Fold & seam into bag
4. Once rectangle reached desired size, fold in half RS together and seam sides with sc or mattress stitch leaving top open for zipper. Create boxed corners for depth by sewing a small square at each bottom corner: measure corner width ~2 in deep — fold corner and stitch across squaring bottom.
D — Zipper & lining
5. For a neat interior, make a fabric lining: measure interior dimensions and sew lining rectangle into pouch shape leaving top open. Install zipper by either machine sewing it onto lining first (recommended) or by crocheting a pick-up stitch row along top edge and slip-stitching zipper tape to crocheted edge. Sew lining to zipper seam by hand to conceal raw edges.
E — Finishing
6. Weave in ends and press lightly. Optional: add a small pink tassel on zipper pull using same yarn.
F — Care
- Cotton bags are generally machine-washable on gentle inside a laundry bag; air dry to preserve zipper and bobbles.
Variations
- Make a tiny travel version for coins or earbuds; use velvet yarn for a plush luxe bag (hand wash only).
conclusion
You now have eight complete pink project patterns to build a cohesive collection: a storage basket, crossbody bag, bralette, granny vest, plush bouquet, bow-and-pearl earrings, a book cover, and a bobble makeup bag. Pick a palette of 2–3 pink tones (blush + dusty rose + pale pink) and repeat them across projects to create an aesthetic set that can live together on a vanity or become a gift bundle.
Quick checklist before you start:
- Choose yarns and buy extra skein(s) from the same dye lot.
- Swatch each stitch to confirm gauge and drape.
- Decide which projects need lining or hardware early (bags, makeup bag, earrings).
- When gifting, include care instructions (yarn content + wash method) and a small care card.