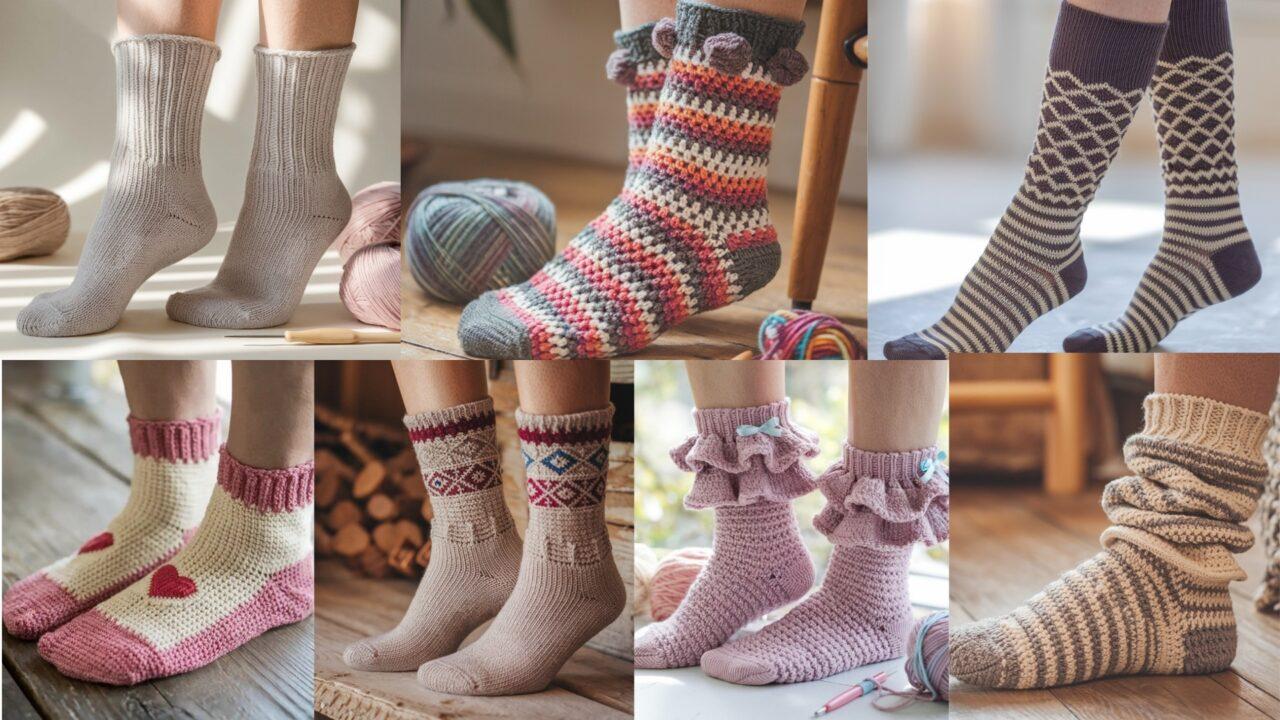
Crochet socks are cozy, surprisingly quick, and infinitely customizable. Unlike store-bought socks, handmade pairs let you tailor fit, thickness, length and style — from snug ankle socks to knee-high statement pieces. Below you’ll find seven complete sock patterns with clear, step-by-step instructions, materials, sizing guidance, construction tips, and variations. I wrote these in US terms and included options for toe-up or cuff-down methods where helpful so you can pick the approach you like best.
If you’re new to crocheting socks, read the Quick Notes & Abbreviations section first — it explains gauge, sizing, and the stitches I use throughout the patterns. Then jump to any sock that calls to you.
Quick notes, gauge & abbreviations (read first)
Yarn & hook guidance
- Sock yarn / fingering (weight 1) or sport (weight 2) = lighter, thinner socks (more drape, fits in shoes).
- Worsted (weight 4) yarn = cushy house socks or bulky winter socks (will feel thicker and won’t fit into regular shoes but are great for slippers).
- Hook sizes in patterns are suggestions. Gauge and fit depend heavily on yarn + hook + tension. Use what gives you the right gauge.
How to size
- Measure the circumference of the widest part of the foot (across the ball of foot) and foot length (heel to tip of longest toe).
- Common finished foot circumferences (unstretched):
- Small (women 5–7): approx 7–8 in / 18–20 cm
- Medium (women 7–9): 8–9 in / 20–23 cm
- Large (women 9–11 / men 7–9): 9–10 in / 23–25.5 cm
- When I give stitch counts, they assume ~8–9 stitches per inch for worsted on a 5.0 mm hook OR ~10–12 spi for sport/fingering on a 3.5–4.0 mm hook. Always swatch.
Common construction pieces
- Cuff – ribbing or decorative top.
- Leg – the tube from cuff to heel.
- Heel – many methods: short-row heel, flap & gusset, or afterthought heel. I provide one clear method for each pattern (usually flap & gusset for stability, toe-up with short-row option when noted).
- Foot – gusset shaping into foot length.
- Toe – decrease to close or use star toe/invisible grafting if desired.
Abbreviations (US)
- ch – chain
- sc – single crochet
- hdc – half double crochet
- dc – double crochet
- tr – treble (tr)
- sl st – slip stitch
- st(s) – stitch(es)
- inc – increase (2 sc in same st unless noted)
- dec – decrease (sc2tog or invisible dec as noted)
- BLO / FLO – back/front loop only
- rnd – round(s)
- RS/WS – right side / wrong side
1. Crochet Basic Socks Pattern

A solid, reliable cuff-down sock pattern that works in sport or worsted yarn. I give full counts for three sizes and a straightforward flap & gusset heel for long-term durability.
Skills
Beginner–Intermediate: continuous rounds, basic shaping, gusset.
Materials
- Sport yarn / fingering (for shoe socks) OR worsted for house socks
- Hook: 3.5–4.0 mm for sport; 4.5–5.5 mm for worsted (adjust to your swatch)
- Tapestry needle, stitch marker, small amount stuffing for blocking (optional)
Gauge (example; make a swatch in rounds)
- Sport yarn on 3.5 mm: ~10–11 sc = 1 in (2.5 cm)
- Worsted on 5.0 mm: ~7–8 sc = 1 in (2.5 cm)
Finished sizes (circumference and suggested stitch counts)
(Using sc rounds and stitches/inch assumptions; adapt from your swatch.)
- Small (W 5–7): 8 in circumference → 64–72 sts
- Medium (W 7–9): 9 in circumference → 72–80 sts
- Large (W 9–11 / M 7–9): 10 in circumference → 80–88 sts
Choose stitch count that is divisible by pattern repeats if using textured stitches. For plain sc, any even number is fine.
Pattern — Cuff-down Basic Sock (step-by-step)
1. Ribbed cuff (worked in joined rounds or spiral)
- Ch a chain equal to the number of stitches for your size (see stitch counts). Join to form loop, being careful not to twist. Place marker.
- Example: Medium = ch 72, join.
- Round 1–10 (or desired cuff length): BLO sc in each st around (this creates a nice elastic cuff). Join or continue in spiral as you prefer.
- Optional: Work 12 rounds for a longer cuff.
2. Leg
4. Switch to sc in both loops (or pattern stitch). Work even in rounds until the leg reaches desired length (commonly 6–8 in for ankle-height, 8–10 in for crew). Try the sock on for position of heel.
3. Heel flap (flap & gusset method — worked back-and-forth over half the sts)
5. Place marker at start of heel (this will be mid-back of sock). On the next round work the heel flap over half the total stitches (e.g., 36 sts if your total = 72). Work in rows (turning):
- Row 1 (RS): sc in next X sts, turn (X = half total stitches).
- Row 2 (WS): ch 1, sl st in first st, sc across to last st, sl st in last st, turn.
- Repeat Row 2 for about (square of foot width) — heel flap length often = ~half foot circumference in rows (about the same measurement in inches as half the foot circumference). Example: for medium, work 36 rows to make a sturdy flap. Finish with RS facing.
This classic flap pattern makes a reinforced heel when using slip stitch edges.
4. Turn the heel
6. Work short-row shape across the heel to cup the heel: using sc, decrease in the center of the flap to form a rounded cup. A common method: sc across to last 2 sts, sc2tog, turn; continue decreasing every other row until few sts remain; then resume sc across and pick up stitches along side to work gusset.
5. Gusset and instep
7. Rejoin to work in rounds: pick up and sc evenly along the side of heel flap (about half the number of heel rows), sc across instep stitches (the rounds you did in step 2), then pick up along the other side of heel flap. You will now have extra sts on sides (the gusset). On the first few rounds of the gusset: dec 1 st at the gusset edge each side until you return to original total stitch count (decrease every round or every other round until desired shape).
6. Foot
8. Work even in rounds until you reach 1–1.5 in shorter than your measured foot length (i.e., leave room for toe shaping). Try the sock on to measure.
7. Toe closing
9. Change to decrease rounds:
- Round 1 decrease: sc to 3 sts before marker, sc2tog, sc1, sc2tog, sc to end (work two decreases per round, spaced evenly)
- Repeat decrease rounds every other round until approx 8–12 sts remain. Close with yarn tail and weave in, or close with star toe (see notes). For a neater finish, graft with Kitchener technique adapted for crochet using invisible decrease and sewing.
Finishing
10. Weave in ends, block lightly (steam or damp and shape). Repeat for second sock, mirroring the heel start so the heels face the same way.
Tips & Variations (Basic Sock)
- Toe-up option: start with a magic ring toe and increase for the foot, then work short-row heel (pattern can be converted). Toe-up is excellent for custom foot length.
- Texture: replace rounds of sc with hdc or a ribbing stitch for a cozier fabric.
- Sole reinforcement: work a second layer of sc on the sole for extra insulation (great for house socks).
- Seamless foam: crochet in spiral rounds (no joining) to avoid back seams.
2. Crochet Toe-Taly Adorable Socks Pattern
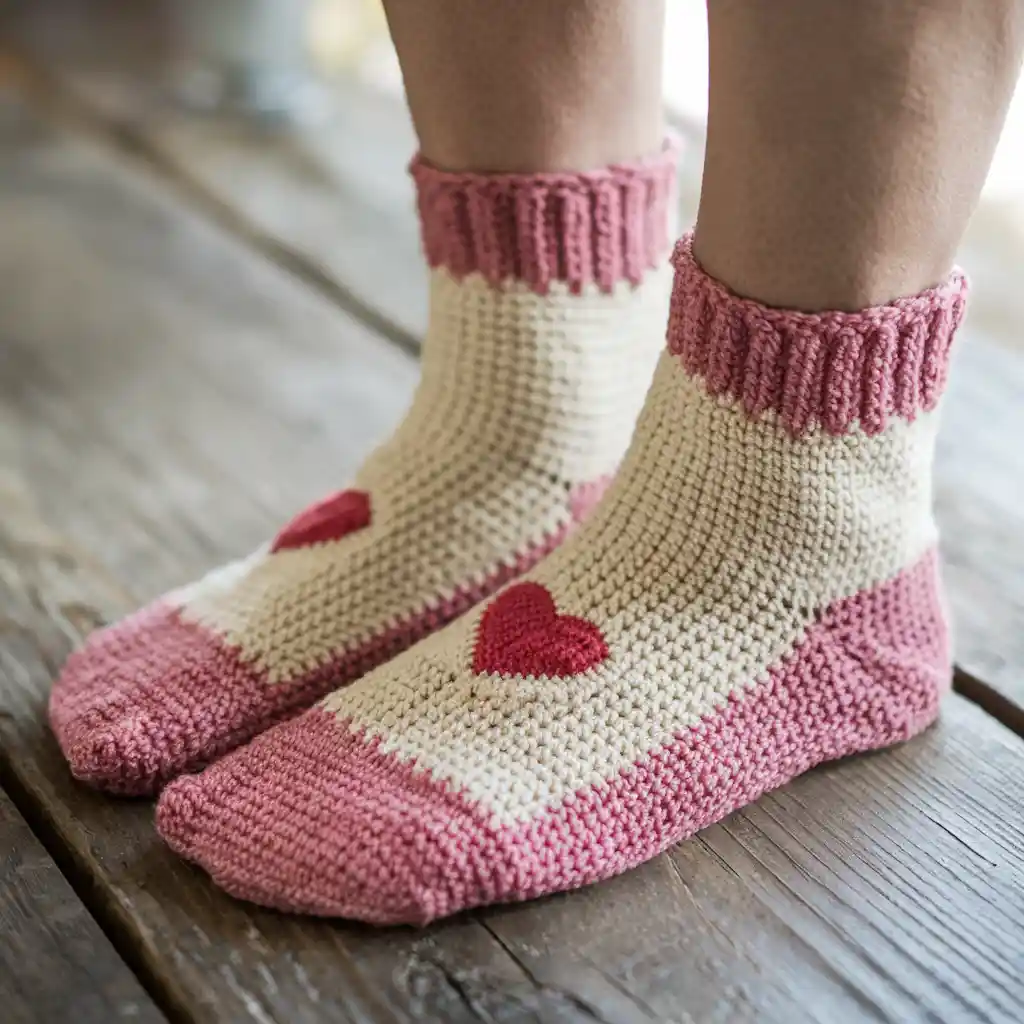
A toe-up sock that’s fun and fast, with a little heart motif on the instep. Great for gift socks because you can stop when sock reaches desired length.
Skills
Beginner–Intermediate: magic ring, increases, short-row or afterthought heel (I’ll show afterthought heel method).
Materials
- Sport or fingering yarn in 2 colors (toe color + main color)
- Hook: 3.25–3.75 mm for sport; adjust to swatch
- Stitch marker, tapestry needle, small stitch holder or scrap yarn
Gauge & sizing
- Gauge: ~10–12 sc = 1 inch in the round (sport on 3.5 mm). Adjust counts accordingly.
- Suggested starting toe ring sizes = increase to reach ball-of-foot circumference (see Basic sock counts for conversions).
Pattern — Toe-Up Basic with Heart Motif & Afterthought Heel
1. Magic Ring Toe
- Magic ring, ch 1, 8 sc into ring (8). Pull tight.
- Increase rounds to shape toe: round 1: inc in each st (16), round 2: sc 1, inc around → 24, round 3: sc 2, inc → 32 etc. Continue increasing until you reach the stitch count for your size (use Basic sock counts).
2. Foot
3. Work even in rounds until you reach the point where you want the afterthought heel to begin (this is usually about 2 in less than full foot length — measure). At that row, mark the round: this is where you will cut yarn and reserve stitches for the afterthought heel later. Continue working instep pattern (heart) if desired for the top of foot.
3. Heart motif (surface crochet or simple weave)
4. On the instep rounds (upper stitches), use a contrast yarn to surface crochet a small heart: pick a central point on the instep and work a small 5-st heart using single crochet clusters or embroider afterward with yarn. Another simple method: after sock is made, stitch a small heart with duplicate stitch.
4. Continue foot to ankle
5. Continue rounds until desired ankle length above the afterthought heel line (leave the reserved round accessible).
5. Afterthought heel (quick & clean)
6. When foot and leg are complete, work cuff (ribbing) and finish sock opening, then return to the reserved space: using tapestry needle, remove the stitches of the afterthought opening and pick up loops along the gap; work rows in back-and-forth for a short heel flap and shape with decreases or pick up and sc in rounds to form a heel cup. Afterthought heels are forgiving and great for toe-up socks.
6. Cuff
7. Work ribbing (BLO sc rounds or post-stitch rib) for 1–2 in and finish with sl st/refined edge.
Tips & Variations (Toe-Taly Adorable)
- Add a pompom at cuff back with contrast yarn.
- Heart pattern idea: Use tapestry crochet on the instep for a clearer knit-like heart: chart a 7×7 grid and change color per stitch as you go. This is easiest on sport/fingering yarn.
3. Crochet Worsted Socks Pattern
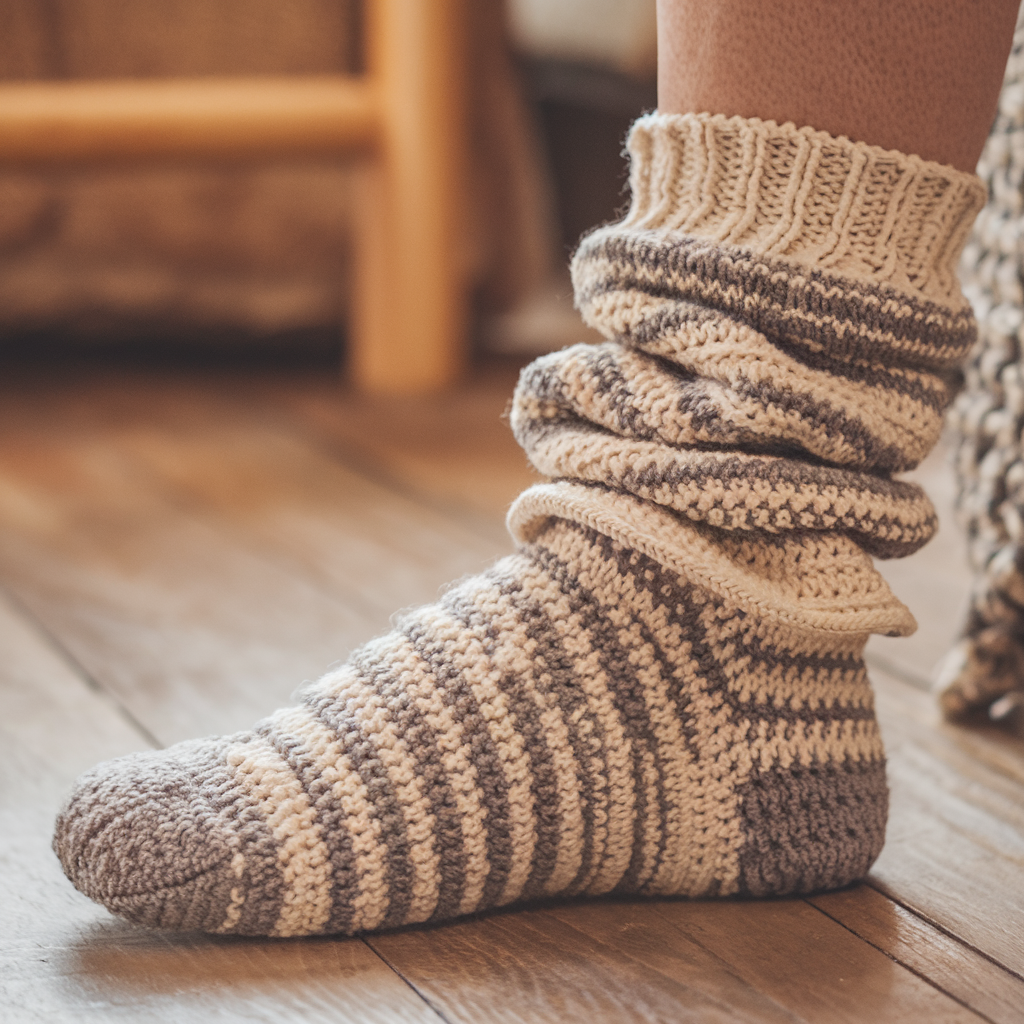
These are warm, thick socks worked with worsted yarn and a chunkier hook. They use a short-row heel to reduce bulk and create a soft heel cup.
Skills
Beginner–Intermediate: short-row techniques, working in rounds.
Materials
- Worsted weight yarn (100% wool or acrylic-wool blend recommended for warmth)
- Hook: 5.0–6.0 mm (use what gives you a dense fabric but not too stiff)
- Stitch markers, tapestry needle
Gauge & sizing
- Gauge: ~7–8 sc = 1 in on 5.0 mm (but worsted density varies; swatch!)
Pattern — Thick House Socks (cuff-down, short-row heel)
1. Cuff
- Chain 44–56 depending on size (example medium = ch 48). Join. Work BLO sc for 10–12 rounds for elastic cuff.
2. Leg
2. Work sc/hdc in rounds until desired leg length (6–8 in for short sock).
3. Short-row heel (bulky, cushioned)
3. Mark the middle back of the sock as heel center. Work short rows across half the stitches to form heel cup:
- Row 1: Turned rows in hdc (or sc for dense fabric): work across rows only over half the stitches and wrap/turn at ends as you would in short-row shaping. Continue wrapping and turning until desired depth. Then work through wraps and finish heel by closing rows.
Short-row heels add less bulk on the underside than a flap & gusset and are excellent in bulky socks.
4. Gusset shaping
4. If you used short-row heel, pick up stitches along the sides and rejoin in rounds, decreasing a couple sts on each of the first few rounds to match foot circumference.
5. Foot & toe
5. Work even in rounds until foot length minus toe. For toe, simple sc2tog decreases every other round until about 10–12 sts remain; close with tapestry needle.
6. Finishing
6. Add a decorative cuff (picot or scallop) or foldover cuff with a second layer for warmth.
Variations & Tips
- Use textured stitches (herringbone sc or basketweave) for a squishy fabric.
- Add a non-slip sole: sew small puffs of hot glue or buy commercial non-slip paint and dot the sole. Not recommended for machine wash.
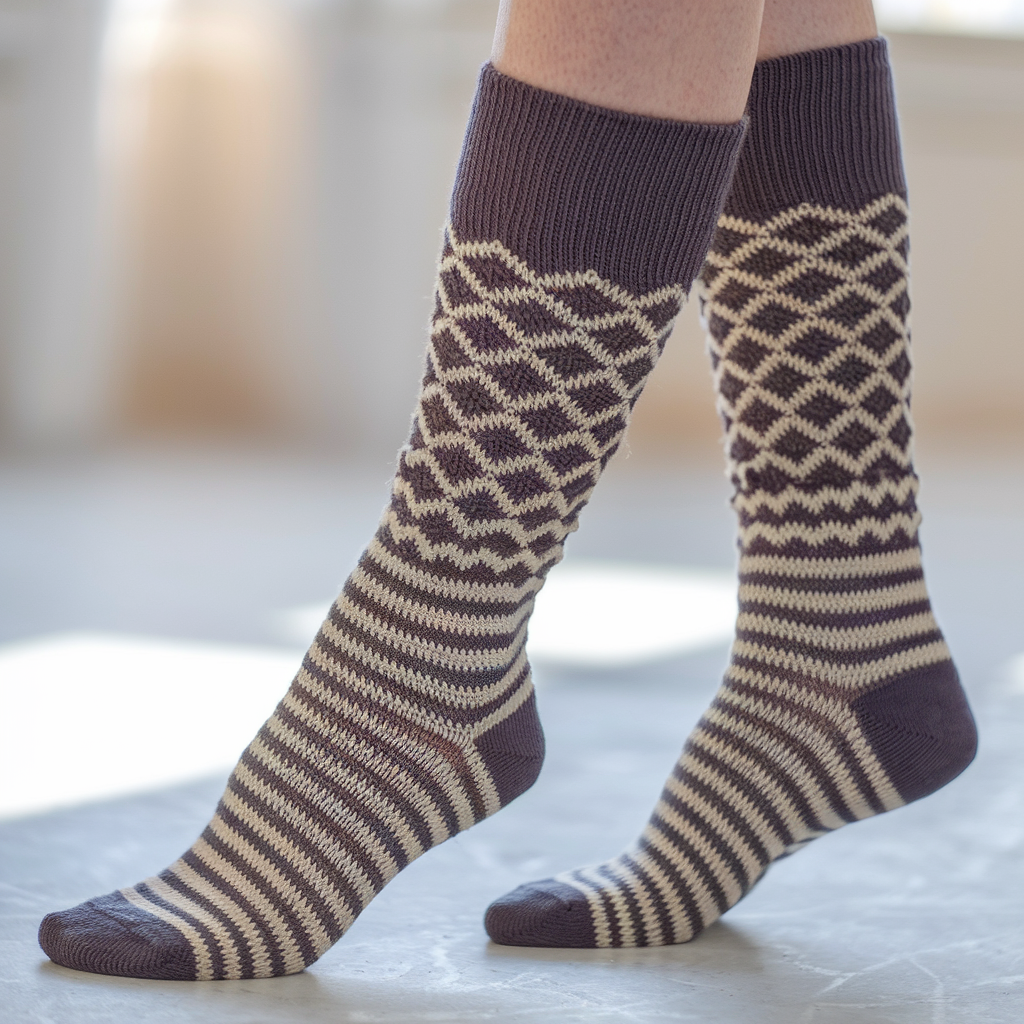
4. Crochet The Lake Cabin Socks Pattern

Channel cabin vibes: stranded colorwork cuff and simple body. Worked cuff-down with flap & gusset heel. I show stranded colorwork only for the cuff to keep body warm and the rest simple.
Skills
Intermediate: tapestry crochet colorwork in the round, carrying floats.
Materials
- Sport/worsted weight in 2–3 colors (contrast + main)
- Hook: appropriate for yarn (3.5–4.5 mm)
- Stitch markers, yarn bobbins or small short scraps for carry
Pattern — Lake Cabin Cuff & Sock
1. Decide motif & chart
- Draw a simple 12–16 stitch repeat chart with motifs: snowflake, diamond, vertical cable illusion. The cuff will be 12–16 rounds tall.
2. Cuff colorwork
2. Chain to stitch count (see Basic sock counts but allow for stranded tension — typically use one size smaller hook for density in colorwork). Work even in rounds and follow tapestry chart for cuff. Carry floats loosely across RS to prevent tightness.
3. Leg & body
3. After cuff, switch to main color and work sc/hdc rounds for leg and body — colorwork cuff gives visual interest but the body in single color reduces bulk.
4. Heel & gusset
4. Work a flap & gusset heel (as in Basic Sock pattern) using main color. Use reinforcement slip-stitch border on heel flap sides.
5. Foot & toe
5. Work even, finish toe with invisible decreases.
Tips for colorwork socks
- Keep floats no longer than 3–4 sts before catching them.
- Use stranded fabric only on cuff and maybe ankle — too much stranded work around the foot increases bulk inside shoe.
5. Crochet Ruffle Socks Pattern

A sock with a delicate ruffle at the cuff — great for gifts for kids or for a dressed-up house sock.
Skills
Beginner: easy increases and decorative edge
Materials
- Sport or worsted yarn
- Hook: match to yarn (3.5–5.0 mm)
- Stitch marker
Pattern — Ruffle cuff (applies to any basic sock)
1. Work sock normally (choose Basic or Toe-Up pattern). Finish the sock cuff as usual.
2. Add ruffle
- Join contrast or same yarn at cuff edge. Work one round of sc evenly around.
- Round 1 (ruffle start): 3 dc in same st, skip 1 st, sl st in next st repeat around. This creates tight scallops.
- Round 2 (optional fuller ruffle): In each previous shell work (5 dc in same st, sl st in next st) to exaggerate ruffle. Fasten off and weave ends.
3. Finish
Trim ends and steam lightly. A small ribbon threaded through the cuff adds extra charm.
6. Crochet Knee High Mosaic Sock Pattern
Mosaic crochet is an easy way to create intricate-looking colorwork using one color per round technique. These knee-high socks make a statement.
Skills
Intermediate: mosaic technique, tall sock construction, long leg shaping
Materials
- Sport or fingering yarn in two contrasting colors (A & B)
- Hook: 3.5–4.0 mm
- Stitch markers
Pattern — Knee-High Mosaic Socks (cuff-down)
1. Gauge & stitch repeat
- Mosaic patterns often use multiples of 2–4 stitches. Choose a small mosaic chart (e.g., 8-st repeat) and swatch to make sure it lies flat.
2. Cuff
2. Work a ribbed cuff (BLO sc) 8–12 rounds in color A.
3. Leg mosaic panels
3. Work mosaic rounds: you’ll alternate rows of color A and rows of color B. Only one color used per round and previous color’s posts are used as a base for slipped stitches or chains to create the mosaic motif. Repeat the chart until leg reaches below knee height or desired length.
4. Heel, gusset & foot
4. Work a flap & gusset heel in main color A (or B). Because mosaic can be slightly stiffer, ensure heel flap is flexible enough. Continue foot and toe as Basic sock.
5. Top edge
5. Finish top of knee-high with a folded cuff or decorative picot.
Tips for mosaic socks
- Use a slightly larger hook for long legs if fabric feels too stiff.
- Work mosaic on outside panels only (leave sole plain) for comfort inside shoe.
7. Crochet Granny Stripe Socks Pattern
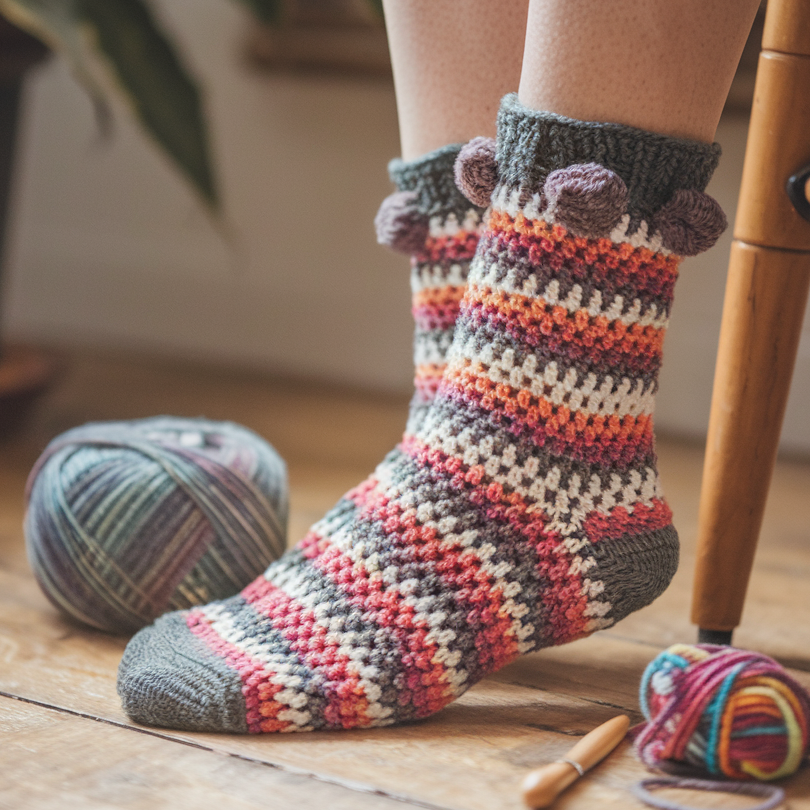
Granny stripe motif across the leg and cuff for a colorful, textured sock. Works wonderfully in sport or worsted for slipper socks.
Skills
Beginner–Intermediate: cluster stitches (mini-granny), join as you go.
Materials
- Multiple small-skein colors (leftovers are ideal)
- Hook: 3.5–5.0 mm depending on yarn
- Stitch markers
Pattern — Granny Stripe Sock (cuff-down)
1. Cuff
- Start cuff with a foundation chain to size and join. Instead of BLO sc, work granny clusters in rounds: each cluster = (dc, ch 2, dc) in a base stitch grouping, separated by sc or ch spaces. For sock cuff you’ll make tiny clusters (dc-ch1-dc) to keep fabric narrow.
2. Leg
2. Continue alternating bands of granny rows (one round of clusters) and rounds of single crochet to make stripes. For example: 1 round clusters (color A), 2 rounds sc (color B), repeat with new colors.
3. Heel & gusset
3. When you reach desired leg length, work a flap & gusset heel. Because clusters are looser, place the heel on plain sc rounds area for sturdier flap, or add a row of sc before the heel to stabilize.
4. Foot & toe
4. Foot in sc rounds in main color; decrease for toe as in Basic pattern.
Tips & Variations
- Use short striping for vibrant retro vibes.
- For slipper socks, use worsted yarn and a decorative pompom at cuff.
Final fitting tips, care & finishing notes
Fit checks while working
- Try socks on at key stages: after leg before heel (cuff placement), after gusset (for comfort), and before toe decreases (to ensure full length).
- Socks worn inside shoes should be slightly snug when new but will relax over time. For house socks you can be roomier.
Yarn care
- If using wool, hand wash or use gentle machine cycles and lay flat. Superwash wool is great for socks since it tolerates machine washing. Acrylic/ blends often machine wash/dry.
Blocking
- Block lightly if your yarn benefits; worsted fills may not need strict blocking. For shaped socks, gentle steam and shaping on a sock blocker helps.
Reinforcement
- Reinforce heel and toe by working a round of dense stitch (sc) in fingering/ sport socks or a second layer on sole for extra longevity.
Conclusion
Socks are one of the most satisfying wearable projects: they’re small, portable, and so useful. These seven patterns span from everyday basics to statement knee-highs, from toe-up custom fits to chunky house socks. Pick the yarn and method that match your lifestyle — fingering for shoe-fit socks, worsted for plush house socks — and don’t be afraid to mix techniques: a tapestry cuff on a worsted sock or a granny stripe on a sport sock can be gorgeous.