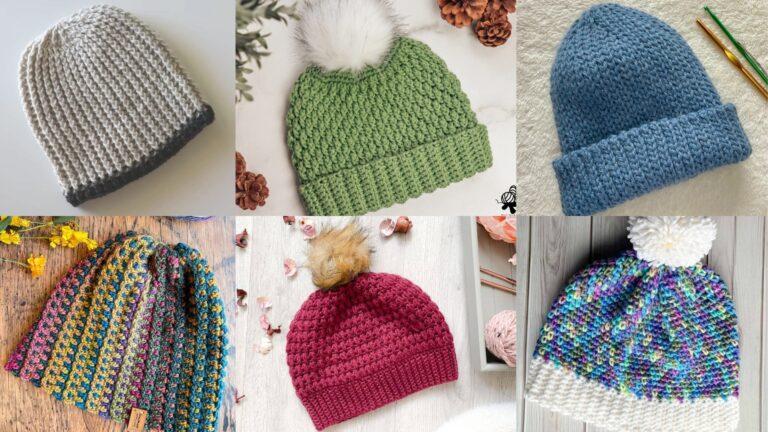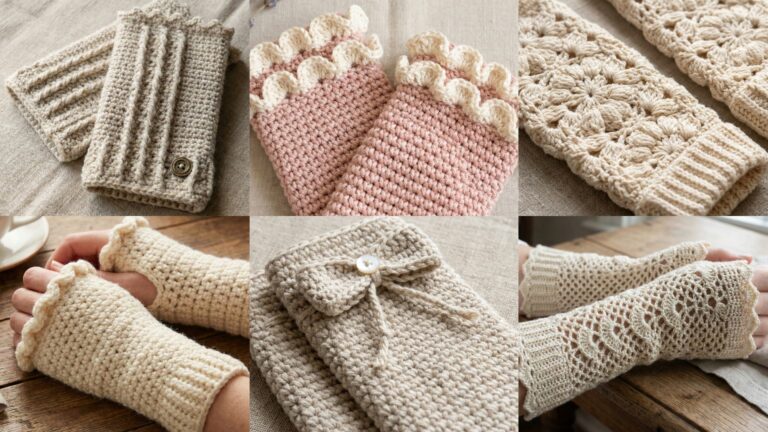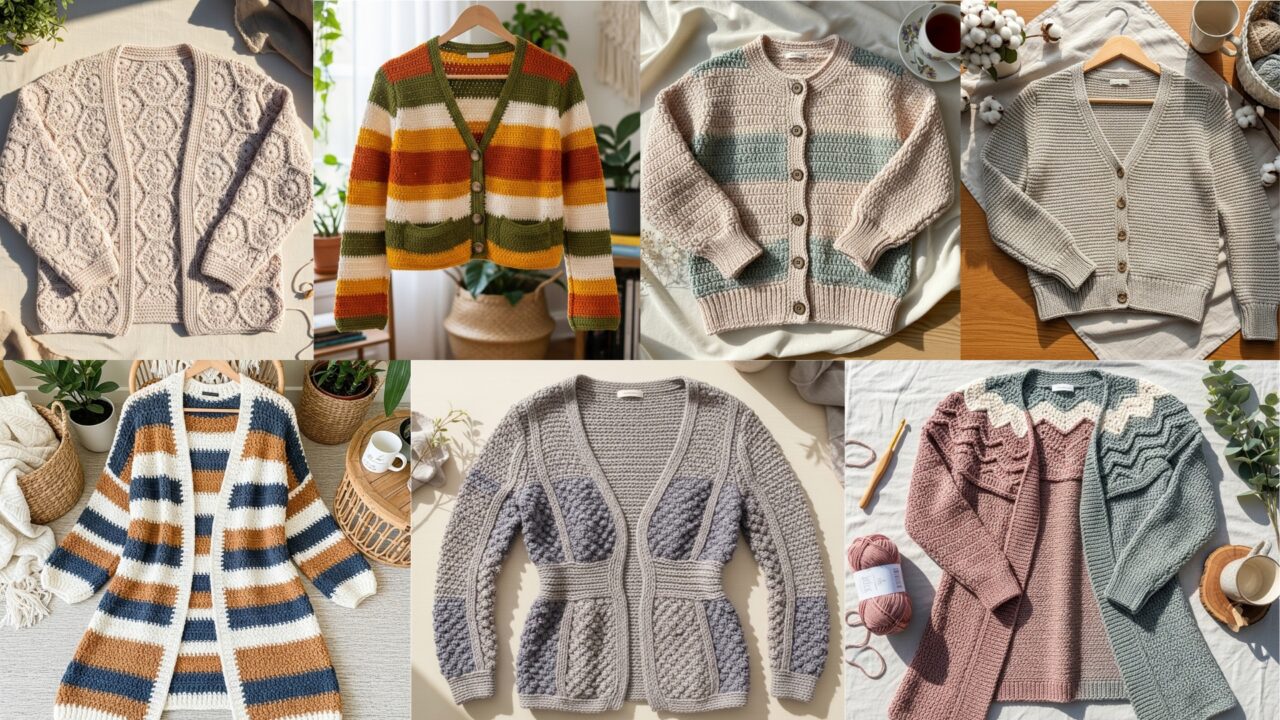
A handmade cardigan is the wardrobe hero that keeps giving: cozy warmth, personalized fit, and endless opportunity for play with texture, color, and silhouette. Below are seven unique crochet cardigan patterns — each written as a complete blog section so you can copy/paste into your post: skill level, materials and yardage estimates, gauge and sizing guidance, a clear step-by-step construction plan (with a practical method you can follow and adapt), helpful variations, finishing and blocking notes, and care instructions. All instructions use US crochet terms.
At the top you’ll find universal notes and abbreviations that apply across all seven patterns. Read those once and you’ll be able to adapt any design to fit your yarn or size.
Quick notes (abbreviations, sizing, tools)
Abbreviations (US terms): ch = chain, sc = single crochet, hdc = half double crochet, dc = double crochet, tr = treble (UK double), dtr = double treble, sl st = slip stitch, sk = skip, rep = repeat, BLO / FLO = back/front loop only, st(s) = stitch(es), MR = magic ring, RS = right side, WS = wrong side, tog = together.
Sizing & fit basics
- I provide construction methods so you can adapt each cardigan to standard sizes. Typical finished chest sizes (unstretched) for adult cardigans (approximate):
- XS: 32–34 in, S: 34–36 in, M: 38–40 in, L: 42–44 in, XL: 46–48 in, 2X: 50–52 in.
- For ease and layering: choose positive ease of 2–6 in for a fitted cardigan, 6–12 in for a slouchy or oversized cardigan. I’ll show how to measure and scale using a simple gauge calculation.
Tools & notions
- Tapestry needle, stitch markers, measuring tape, blocking pins, a sweater ruler or dress form (optional), buttons/zippers if needed, yarn needle, and a sewing needle for attaching linings or button bands.
Yarn & hook
- Yarn weights used across patterns will vary (from DK to bulky). I include yarn-weight recommendations in each pattern and sample yardage for a medium (M) size. Adjust yardage up for larger sizes and longer lengths.
General approach to altering size
- Make a 4″ (10 cm) gauge swatch in the main stitch. Measure sts per inch and rows per inch.
- Decide desired finished bust circumference. Subtract/back-calc stitches for shaping or panel width. For example: if pattern works in back-and-forth panels and your gauge is 5 sts/in, a 40 in bust with 6 in positive ease → target 46 in finished circumference → divide into back & two front panels and sleeve allowances.
- When necessary, increase/decrease pattern repeats to match multiples (I’ll call out repeat multiples where relevant).
1. Crochet Cascade Mountain Cardigan Pattern

Mood & silhouette: A modern, open-front cardigan with cascading waterfall fronts, long lines, and a textured mountain-stitch yoke. Drapey and flattering over dresses or jeans.
Skill level: Confident beginner → intermediate (working texture, shaping, long fronts)
Materials (sample adult M):
- Yarn: DK / light worsted (weight 3) — approx 1200–1600 yds depending on length and sleeve choice. Use a wool blend or wool-acrylic for drape.
- Hook: 4.0 mm (G) for fabric with good drape — adjust to get gauge.
- Notions: 4–6 buttons (if you want closure), tapestry needle, stitch markers.
Finished measurements (sample M):
- Bust (finished): ~44 in (with 4–6 in positive ease).
- Back length (neck to hem): 28 in (longer if you prefer). Front panels form long waterfall points.
Gauge (example): 18 dc = 4 in; 10 rows = 4 in in the chosen stitch. Make a 4″ swatch to confirm.
Design notes
- Piecework: worked as a back panel and two long front panels; sleeves are worked in the round (top-down or set-in) or as drop-shoulder panels to keep construction simple. The mountain-stitch yoke is a textured band across shoulders that adds visual interest and structure.
Construction overview (step-by-step)
1. Make a gauge swatch. Adjust hook to match sample gauge.
2. Back panel (worked flat)
- Chain foundation: determine back width = (desired finished bust − front widths − 2 × side seam allowances) ÷ 1 (for back). Example: for 44 in finished bust with two front panels each 10 in, back = 44 − 20 = 24 in. With 4.5 sts/in → chain 24 × 4.5 ≈ 108 sts + turning chain.
- Row 1: dc across. Row 2–N: Work textured pattern for body (I recommend a relaxed linen-style stitch: row A: ch1, sc across; row B: ch3, dc in BLO across — this creates subtle vertical texture that drapes). Continue until back panel measures desired length minus the height of the mountain yoke (if the yoke is worked onto the top later) — for example 22 in to underarm.
3. Front panels (make 2)
- Chain width for each front panel: determine desired front width including waterfall extension. For a pronounced cascade, make front panels longer (e.g., 12–14 in wide at chest) and add a long triangular extension at the lower end: work rectangular panel to underarm then decrease outward into a long tapered cascade (detailed below).
- Work same stitch pattern as back. Continue until underarm height (match back).
4. Shoulder shaping & mountain-stitch yoke
- Join back and front panels at shoulders with mattress stitch leaving a central neck opening. Alternatively work a short-row shoulder seam for a smoother curve.
- Mountain stitch yoke (worked in rounds or back-and-forth across joined shoulders): pick up sts around neck and work 6–8 rows of the mountain pattern: a textured ridged stitch made from staggered V-stitches and front-post trebles to produce triangular “mountain” motifs. Example Simplified Mountain motif (multiple of 8+1): Row: (dc, ch1, dc) cluster in a st to form peak, skip 2, fpdc around next 3 to form valley — repeat to form peaks across. Work until yoke depth is ~3–4 in.
5. Sleeves (drop shoulder or set-in)
- Drop-shoulder option (easier): after body assembly, pick up stitches at side openings for sleeve width and work in rounds down to wrist using hdc or dc depending on desired puff. Easy and forgiving.
- Set-in sleeve (structured): measure armhole circumference after joining body pieces, stitch sleeve cap by picking up and shaping with short rows, then work down. Give sample for set-in if needed.
6. Waterfall front shaping
- At lower edges of front panels, start tapered increases to create long points: after underarm, work decreases or increases along one edge to create a diagonal flank that extends to desired length. A simple method: after underarm, at the outer edge (hem side), add 2 dc in every 4th row to create flare; on inner side keep width steady. This produces a longer outer hem. Mirror on other side.
7. Edging & finish
- Work a double-row of hdc around front opening and hem, adding a decorative picot or lace edge on final round to give a waterfall fold memory. If you want buttons, add buttonband on one side and small loops on the other.
8. Blocking
- Lightly block to even edges and let waterfall drape. Steam-block for wool blends and wet-block cotton.
Variations & style tips
- Make a cropped version by shortening body length and less cascade for a boxy cardigan.
- Use a bulky yarn and larger hook for a more dramatic, chunky cascade.
- Add side pockets integrated into front panels.
Finishing & care
- Weave in ends and sew buttons securely. Care depends on fiber: wool blends hand-wash; acrylic machine-wash gentle.
2. Crochet Granny Hexagon Cropped Cardigan Pattern

Mood & silhouette: Retro, playful, and perfect for layering: a cropped cardigan built from hexagon motifs—granny-style but hexagonal for modern tessellation.
Skill level: Confident beginner → intermediate (making and joining motifs)
Materials (sample adult M):
- Worsted-weight yarn — 900–1100 yds total (more if you make a longer cardigan).
- Hook: 5.0–5.5 mm.
- Notions: buttons or a tie closure, tapestry needle.
Finished size (sample):
- Cropped length: ~17–19 in from shoulder to hemline. Bust finished 38–42 in depending on motif size and count.
Gauge & motif size
- Make a single hexagon ~3.75–4.25 in across after blocking. The number of motifs determines size; for cropped width of 38 in with motifs 4 in across in staggered rows, you’ll need ~10–12 hexagons for back panel and corresponding numbers for fronts and sleeves.
Construction overview
1. Hexagon motif recipe (basic 4-round hex)
- Round 1: MR, ch3, work 11 dc into ring, sl st to join (12 dc).
- Round 2: ch3, 2 dc in next st, ch1, sk1 rep around to form six corner points; join.
- Round 3: Work granny-like clusters between corners to expand hex evenly until motif measures ~4 in. Fasten off and weave ends.
2. Make motifs
- Create the number required: Back panel 3 × 4 (12 motifs) depending on size; front panels each 2 × 3 (6 motifs) and sleeves each 2–3 motifs depending on length and width. Lay them out on the floor to preview. Block motifs.
3. Join motifs
- Join-as-you-go or whipstitch using a matching yarn color. For a visible outline, join with contrasting slip-stitch whip for graphic seams. For a seamless look, mattress stitch through back loops.
4. Construct the cardigan
- After joining into front and back panels, seam shoulders and side underarm openings. For cropped silhouette, aim for length ~17 in from shoulder.
5. Sleeves
- Use motif cuffs or single-motif sleeves: join motifs into a curved panel and seam to body openings. Short raglan sleeve effect works great: add a couple of rounds of sc to frame armholes.
6. Neck & edging
- Work 3 rounds of sc around neck and front opening. Add a buttonband with small loops (chain 5 loop sewn) for a vintage vibe, or finish with a tie cord (chain 80 stitched and finished with tassels).
Variations
- Use ombré skeins so each motif is subtly different.
- Make long-sleeved version by adding more motif rows for sleeve length or work plain dc sleeves.
Finishing & care
- Because motifs can be slightly lacy, add a close-knit contrasting border for durability. Machine-washable cotton is convenient for everyday wear.
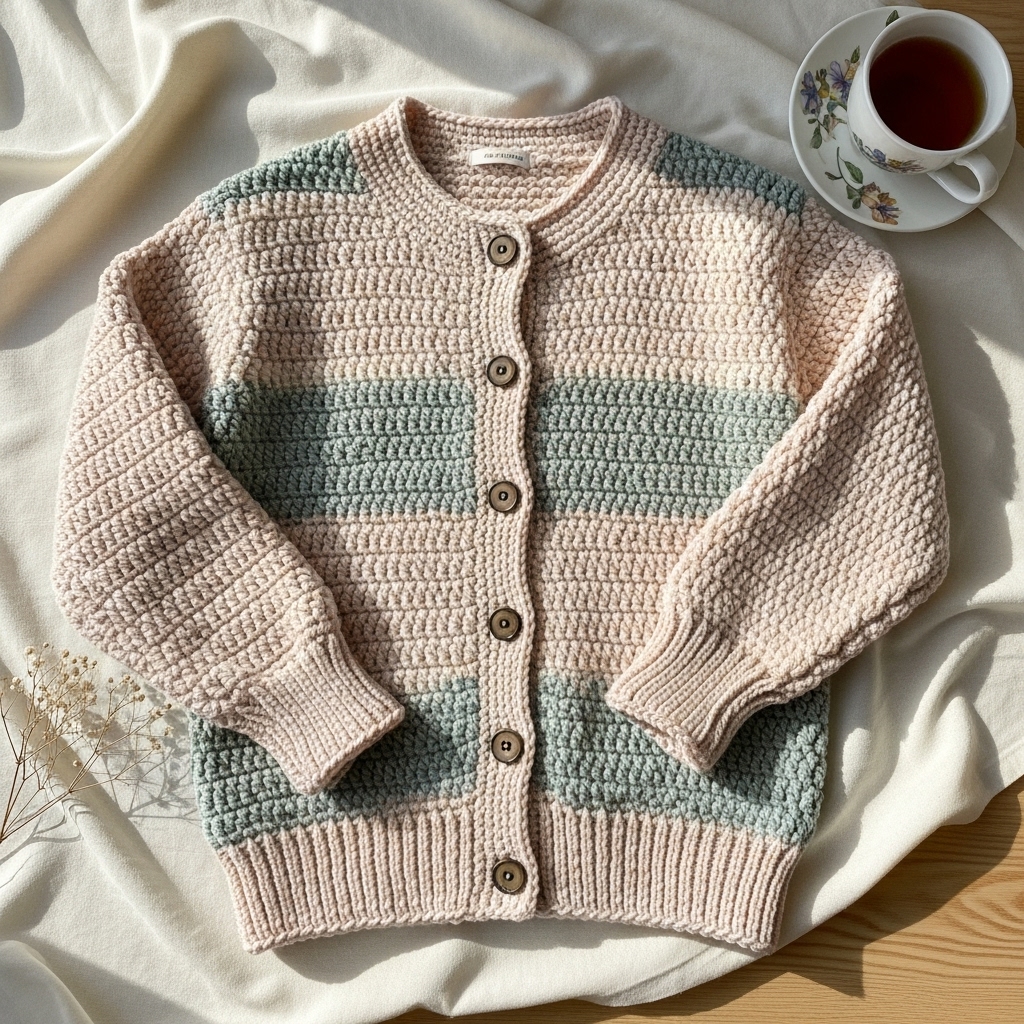
3. Crochet Emerick Cardigan Pattern
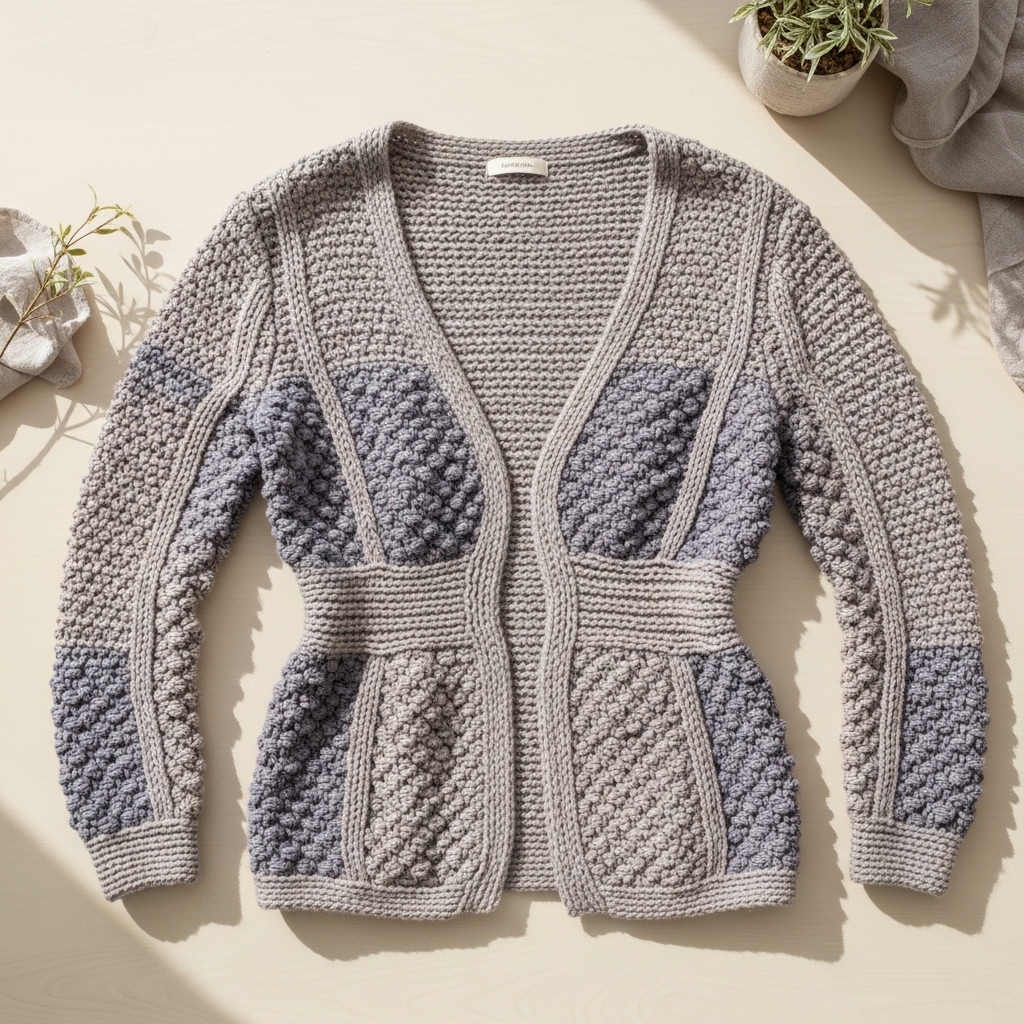
Mood & silhouette: A modern, slightly tailored cardigan inspired by classic sweater shapes with a defined V-neck and shaped waist. Emerick uses textured panels to create subtle shaping without much seaming.
Skill level: Intermediate (shaping, short rows, seaming)
Materials (sample adult M):
- DK or worsted (weight 3–4) — 1200–1600 yds.
- Hook: 4.0–5.0 mm.
- Notions: set of 6 medium buttons, tapestry needle, stitch markers.
Finished measurements (sample):
- Fitted silhouette with 2–4 in positive ease; back length ~24 in.
Gauge (example): 18 hdc = 4 in; 10 rows = 4 in.
Construction overview
1. Construction method (panel + short rows)
- Emerick is made as three main panels: back and two shaped fronts. Fronts are worked flat with short-row shaping for bust and waist shaping. Sleeves are set-in and the V-neck is shaped by gradual decreases.
2. Back panel
- Chain foundation for back width measured at upper back; example 18 in × 4.5 sts/in ≈ 81 ch + 1. Work in the textured stitch (seed stitch or moss stitch) for a structured fabric. Work until desired armhole depth (e.g., 9–10 in) then shape shoulders with short rows or standard decreases.
3. Front panels (make 2, mirror image)
- Chain foundation to half back width plus overlap for V-neck shaping. Work straight until bust height, then perform short-row shaping: on RS rows, work partial rows that stop before the end and turn to add extra length at bust; this sculpts curves without darts. For V-neck, as you approach shoulder seam, start decreasing one stitch at inner edge every other row to form V shape.
4. Shoulders & neck
- Join shoulders with mattress stitch, leaving a centered V-neck opening per desired depth.
5. Sleeves
- Set-in sleeves: measure armhole circumference and pick up corresponding stitches or crochet separate sleeve panels, shape with increases to match armhole. Work down to wrist and finish with ribbed cuff (BLO sc rib worked in back loops to simulate knit rib).
6. Buttonband & collar
- Work a narrow buttonband along both front edges: ch1, sc evenly; add buttonholes on one band (make small chain loops or work a row with evenly spaced ch3 buttonholes). Work a small rolled collar by holding a short row band of dc that rolls to a soft facing — or add a small shawl collar by crocheting a triangular short-row band and attaching.
7. Finishing & fit tweaks
- Try on before sewing side seams completely: insert mattress stitch adjustments to cinch waist slightly for tailored fit.
Variations
- Add waist shaping panels in another color.
- Make it longer for a cardigan-coat hybrid.
Finishing & care
- Block flat to shape the V-neck; install buttons and sew on securely. Hand wash recommended for natural fibers.
4. Crochet Retro Style Cardigan Pattern
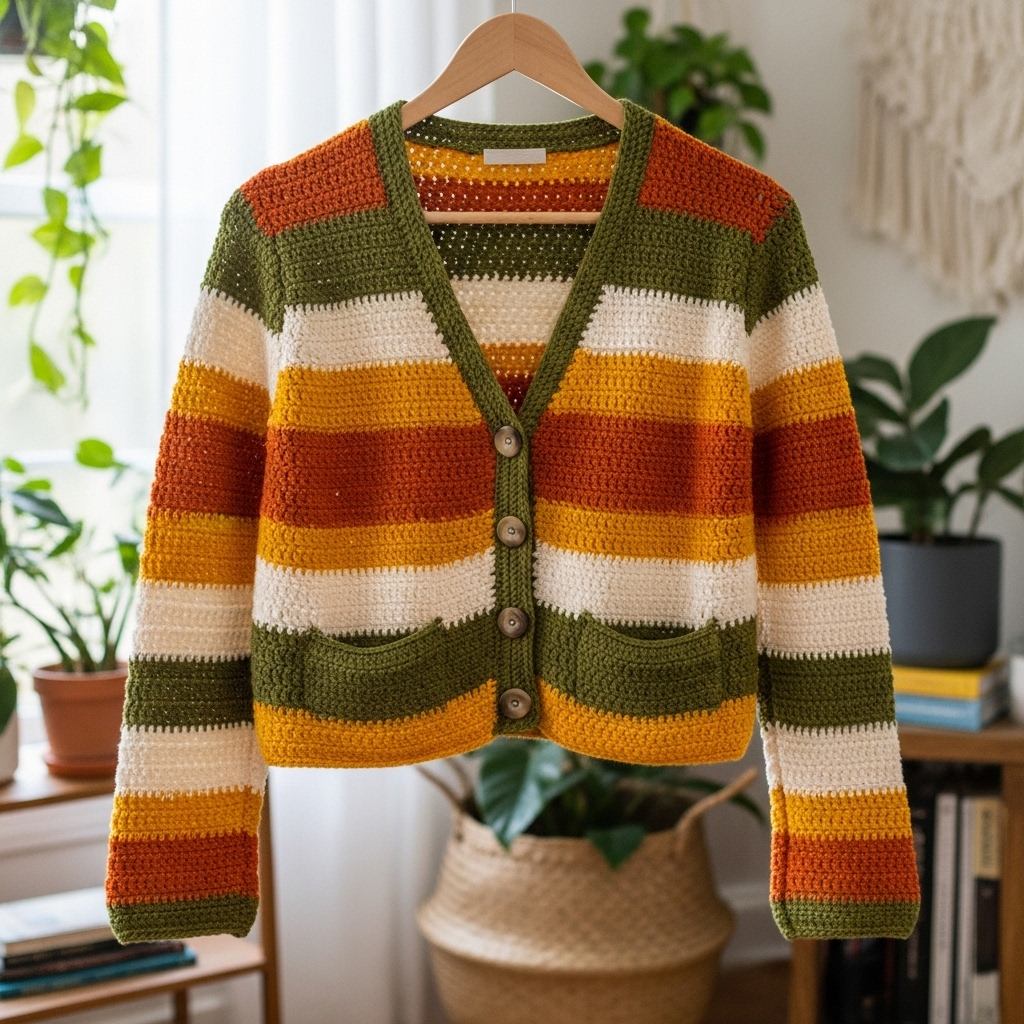
Mood & silhouette: 1970s-inspired retro cardigan with bold stripes, flared sleeves or slightly boxy shape, and decorative yoke or patch pockets.
Skill level: Confident beginner (striping and simple shaping)
Materials (sample adult M):
- Worsted-weight yarn in 3–4 colors — 1200 yds total.
- Hook: 5.0 mm.
- Notions: large vintage buttons, tapestry needle.
Finished size (sample):
- Classic boxy fit, cropped to mid-hip: length ~22 in.
Gauge (example): 16 dc = 4 in.
Construction overview
1. Simple panel construction
- Work back and two front panels in stripes: start with a base color and alternate stripes every X rows for retro bands (e.g., 4 rows per color). Work from bottom up, increasing slightly at bust for a relaxed fit.
2. Sleeve choices
- Flared sleeve: work from cuff up in increasing rows to make a bell-sleeve look; attach to armhole with a shallow set-in seam.
- Boxy sleeve: work drop-shoulder panels as simple rectangles seamed to body.
3. Yoke & pockets
- Add a decorative yoke row using a mosaic or textured stitch (moss, ladder) across shoulders and around back. Patch pockets: crochet small square pockets striped and sew to front.
4. Buttoned front
- Work buttonband integrated in the last rounds: when you finish body, sc around front edges with evenly spaced buttonholes (ch3 loops) for large buttons.
5. Edging
- Add tissue-ribbed edging (worked in BLO alternating sc and hdc) to give a vintage knit look.
Variations
- Use chenille or boucle yarn for an ultra-retro fuzzy look — keep in mind such yarns are heavier and require more yardage.
- Make a color-blocked retro with wide contrasting panels.
Finishing & care
- For boucle and novelty yarns, hand wash and dry flat to maintain loft. For washable acrylics, machine wash gentle.
5. Crochet Slouchy Striped Cardigan Pattern

Mood & silhouette: Long, open-front cardigan with relaxed slouch, wide sleeves, and bold or subtle stripes—perfect for layering.
Skill level: Confident beginner (basic shaping and stripes)
Materials (adult M):
- Bulky or aran yarn (weight 5) for warmth — 1400–2000 yds depending on length.
- Hook: 6.5–8.0 mm.
- Notions: optional belt, tapestry needle.
Finished size (sample):
- Longline length: 34–40 in from shoulder. Oversized silhouette with wide bracelet-length sleeves or full length.
Gauge (example): 12 dc = 4 in.
Construction overview
1. Back panel
- Chain foundation for back width. Work back in simple dc or hdc rows to create dense, warm fabric. Work to desired length (e.g., 30 in). Add side seams leaving armholes by decreasing seam length as desired.
2. Front panels
- Work two wide front panels continuing stripes. For slouch, make panels longer on the front edges (a graduated hem) so the front falls longer than the back.
3. Sleeves
- Wide dropped sleeve: pick up stitches from armhole and work a tapered sleeve that narrows slightly toward the cuff. Alternatively make full balloon sleeves with elastic cuffs.
4. Stripes
- Alternate colors every 4–6 rows; carry color up the inside or weave ends in as you go for neatness. For bold stripes use two contrasting colors; for subtle use shades of same hue.
5. Hood & collar
- Optional: add a dramatic hood built from tall panels; or work a wide ribbed collar that folds.
6. Finishing
- Add an optional crocheted belt threaded through side loops. Edge with one or two rounds of sc for tidy appearance.
Variations
- Make an open-knit slouchy using larger hook for lacy texture (use strong yarn if worn frequently).
- Add elbow patches in contrasting color felt sewn under sleeves for rugged chic.
Finishing & care
- Bulky yarn garments need gentle handling — wash per yarn label and dry flat.
6. Crochet V-Neck Cardigan Pattern
Mood & silhouette: Clean, versatile V-neck cardigan with classic lines — perfect for workwear or casual chic. Offers options for ribbed bands and neat buttoning.
Skill level: Intermediate (V-neck shaping, set-in sleeves)
Materials (adult M):
- DK or worsted yarn — 1100–1500 yds.
- Hook: 4.0–5.0 mm.
- Notions: 6–8 buttons, tapestry needle, optional stitch holders.
Finished size (sample):
- Classic fitted to semi-fitted cardigan: finished bust 40–42 in.
Gauge (example): 18 hdc = 4 in.
Construction overview
1. Construct back and front panels
- Work back as a large rectangle to desired length. Front panels include gradual decreases along the inner edge to form V-neck (e.g., decrease one stitch at the inner edge every other RS row).
2. Armhole & shoulder shaping
- At armhole, stop panel growth and shape shoulder caps by working short-row turns or decreases to create smooth set-in sleeve fit.
3. Sleeves
- Set-in sleeve shaping required: pick up or stitch sleeve caps using standard increases and decrease to shape cap, then work down for sleeve length.
4. Neckband & buttonband
- Pick up stitches around neck and front edges and work several rows of a ribbing stitch: BLO hdc or fpdc/bpdc rib to simulate knit-look rib. On one side work buttonholes spaced evenly.
5. Fit adjustments
- Add waist shaping via increases/decreases or work a ribbed band at waist sewn in to create waist definition.
Variations
- Make a boxier V by reducing waist shaping; add contrast rib collar or cuffs.
- Use cables in back panel for texture (requires charted cable instructions).
Finishing & care
- Sew in sleeves carefully and block before final seaming for smooth shoulder line. Buttons should be reinforced to handle stress.
7. Crochet Button Down Cardigan Pattern
Mood & silhouette: A classic button-down cardigan with clean banded front, optional pockets, and versatile length.
Skill level: Confident beginner → intermediate (buttonband and pockets)
Materials (adult M):
- Worsted-weight yarn — 1200–1600 yds depending on length and sleeves.
- Hook: 5.0 mm.
- Notions: set of 6–8 buttons, tapestry needle.
Finished size (sample):
- Mid-hip length ~24–26 in.
Gauge (example): 16 sc = 4 in in dense sc fabric.
Construction overview
1. Panel method
- Work back and two fronts, all in the same stitch (sc or hdc for a polished look). For a classic button-down, a dense sc fabric gives structure.
2. Buttonband
- Attach buttonband by picking up stitches along right front edge and working even rows of sc or a rib stitch in BLO for 1–1.5 in; on left band make evenly spaced buttonholes (ch2 loops or sc with chain space).
3. Pockets
- Crochet simple rectangular pockets (sc rows) and sew on aligned with hip; add top ribbed edging.
4. Sleeves & fit
- Work set-in sleeves to keep a tailored silhouette. Add ribbed cuffs for finish.
5. Finishing & buttons
- Sew buttons matching bandholes and reinforce with thread crosses. Weave all ends and block.
Variations
- Make a longer duster version by adding length.
- Use a waffle or basketweave stitch for extra warmth and texture.
Finishing & care
- For a clean professional look, block each panel before seaming; use matching thread to attach buttons securely.
Final notes on finishing, blocking, and fit
- Try-on stage: For fitted or tailored cardigans (Emerick, V-Neck, Button Down), try panels on or baste seams lightly before final seaming to fine-tune fit.
- Blocking: Always block panels before seaming when using natural fibers — it evens gauge and relaxes fabric. For bulky yarns, gentle steam-blocking is often enough. Pin pieces square for precise alignment.
- Seams: Mattress stitch gives nearly invisible seams when joining panels. For heavy garments, use backstitch through both layers or a few hidden whipstitches to reinforce.
- Edgings & bands: Adding ribbed bands (BLO rib or front-post/back-post ribs) lends a finished, knit-like appearance. Crochet buttonbands instead of sewing premade ones for cohesive look.
- Care: Always follow yarn label; general guidance: acrylic — machine-wash gentle; wool — hand wash and dry flat; cotton — machine wash cold and reshape.
Conclusion
This set of seven cardigans — Cascade Mountain, Granny Hexagon Cropped, Emerick (shaped V), Retro Style, Slouchy Striped, V-Neck, and Button Down — covers a wide stylistic range: from retro crochet motifs to modern tailored silhouettes and dramatic drapey designs. Each pattern above is written so you can adapt yarn weight, length, and fit to your preferences or your readers’ tastes.