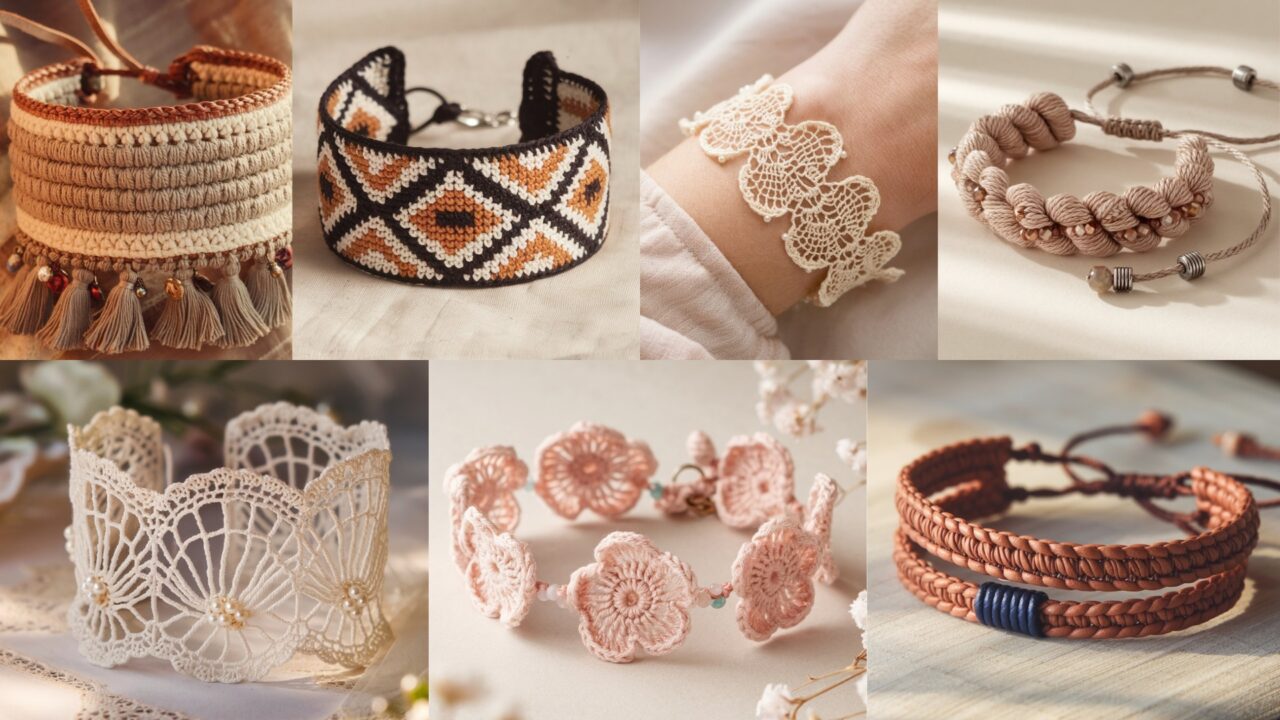
Jewelry is a tiny stage: one imperfect stitch and your carefully curated aesthetic becomes “homemade.” Lucky for you, bracelets tolerate a lot of personality. These seven patterns range from graphic Aztec bands and bridal cuffs to beaded, braided, and floral options — all written so you can actually finish them and not keep them in a WIP pile forever.
Two rules before you touch yarn: swatch, and measure the wrist. Get those right and the rest is creative polishing.
Quick common notes (do this; it matters)
Abbreviations (US terms): ch = chain, sc = single crochet, hdc = half double crochet, dc = double crochet, tr = treble, sl st = slip stitch, BLO/FLO = back/front loop only, st(s) = stitch(es), inc = increase, dec = decrease, MR = magic ring.
Tools & jewelry hardware: Small hooks (1.75–3.5 mm) for thread/light yarn; 3.5–4.5 mm for thin yarn; jeweler’s pliers, jump rings, lobster clasp or toggle, crimps (for bead work), stretch cord when appropriate. Use cotton or mercerized thread for crisp patterns and jewelry-grade nylon/cotton for longevity.
Yarn & fiber choices:
- Delicate, dressy bracelets → Crochet thread size 10 or fine fingering yarn + 1.75–2.5 mm hook.
- Everyday cuffs → DK or light sport yarn + 3.25–3.5 mm hook.
- For beaded work, use beading thread or cotton with a beading needle sized to your beads.
Swatch & sizing (do this once):
- Make a 4″ (10 cm) swatch in the stitch you plan to use and wash/block it the same way you will treat the finished bracelet.
- Count stitches across 4″. Example: 16 sc across 4″ → 16 ÷ 4 = 4 sts/in. Keep that number.
- Measure wrist circumference (where the bracelet will sit). Typical finished bracelet circumference = wrist measurement minus 0.25–0.5″ for snug chain bracelets; for stretchy bracelets leave 0–0.25″ negative ease.
Sample sizing math (step-by-step):
- Example wrist = 7 inches; gauge = 4 sts/in. Multiply: 7 × 4 = 28 stitches. (Seven times four equals twenty-eight.) That gives your foundation chain or motif count — round to the nearest pattern multiple (I note multiples per pattern).
Two closure approaches:
- Hardware closure (recommended for non-stretch cuffs): lobster clasp + jump ring or toggle. Reinforce the crochet ends with a small strip of cotton webbing or a folded piece of felt inside the end to stop the stitchwork from tearing under stress.
- Stretch cord / elastic: good for beaded bracelets or snug slip-on cuffs (no hardware), but use high-quality jewelry elastic and crimps.
1. Crochet Aztec Bracelet Pattern

A bold geometric cuff that reads like woven fabric — great with neutral outfits and festival looks.
Skill level: Intermediate (colorwork / tapestry crochet)
Finished size (sample): 7″ circumference × 1.25″ wide (adjustable by repeats)
Materials: two or three contrasting colors of mercerized cotton or thread, size 8/4 thread + 2.5 mm hook OR fingering yarn + 2.75–3.25 mm. Tapestry needle, scissors, small lobster clasp + jump ring.
Stitch repeat: design uses a multiple of 8 stitches (pattern repeat). Use swatch math and round to nearest multiple of 8.
Gauge & sizing example
If your swatch reads 4 sts/in and target circumference = 7″, stitches needed = 7 × 4 = 28 → 28 ÷ 8 = 3 repeats. Good: 3 × 8 = 24 not 28 — problem; either increase repeats or slightly adjust hook to reach exact. For this sample we’ll make 32 stitches (4 repeats × 8), finishing circumference = 32 ÷ 4 = 8″ (slightly loose) or adjust to 24 (6″ tight). Best approach: swatch again or pick nearest repeat and plan to use a clasp that lets you set fit.
Construction overview
Tapestry crochet top-down in rows (flat rectangle), then seam short ends, reinforce ends for clasp.
Pattern (step-by-step)
- Swatch: determine stitches-per-inch in single crochet tapestry method (carry unused colors along the row). Decide number of repeats: multiples of 8. Example foundation chain: ch 32 (for 32 sts across).
- Row 1: sc in 2nd ch from hook and across (32 sc). Turn.
- Row 2–Row X: Work tapestry chart row-by-row changing color per chart. Each chart row = 32 sc in total with color changes to form Aztec diamonds/triangles. Work until band width = 1.25″ (measure and stop). Typical height for 1.25″ with fingering/2.5 mm hook = 8–10 rows; check your row gauge.
- Finish final row with an extra round of sc in main color to produce a neat edge. Fasten off, weave ends.
Assembly and hardware
- Fold rectangle so short ends meet (create a loop). Seam with slip-stitch or whipstitch with matching yarn leaving each short end reinforced.
- Add a small strip of cotton webbing or folded felt inside each end and sew through it several times to distribute load.
- Sew jump ring to one end and lobster clasp to the other or sew toggle bar tab, depending on preferred closure. Use jewelry pliers to attach.
Finishing & styling
- Block gently to square edges and set pattern.
- Variation: add a tiny row of metallic thread along top/bottom edges for a luxe highlight.
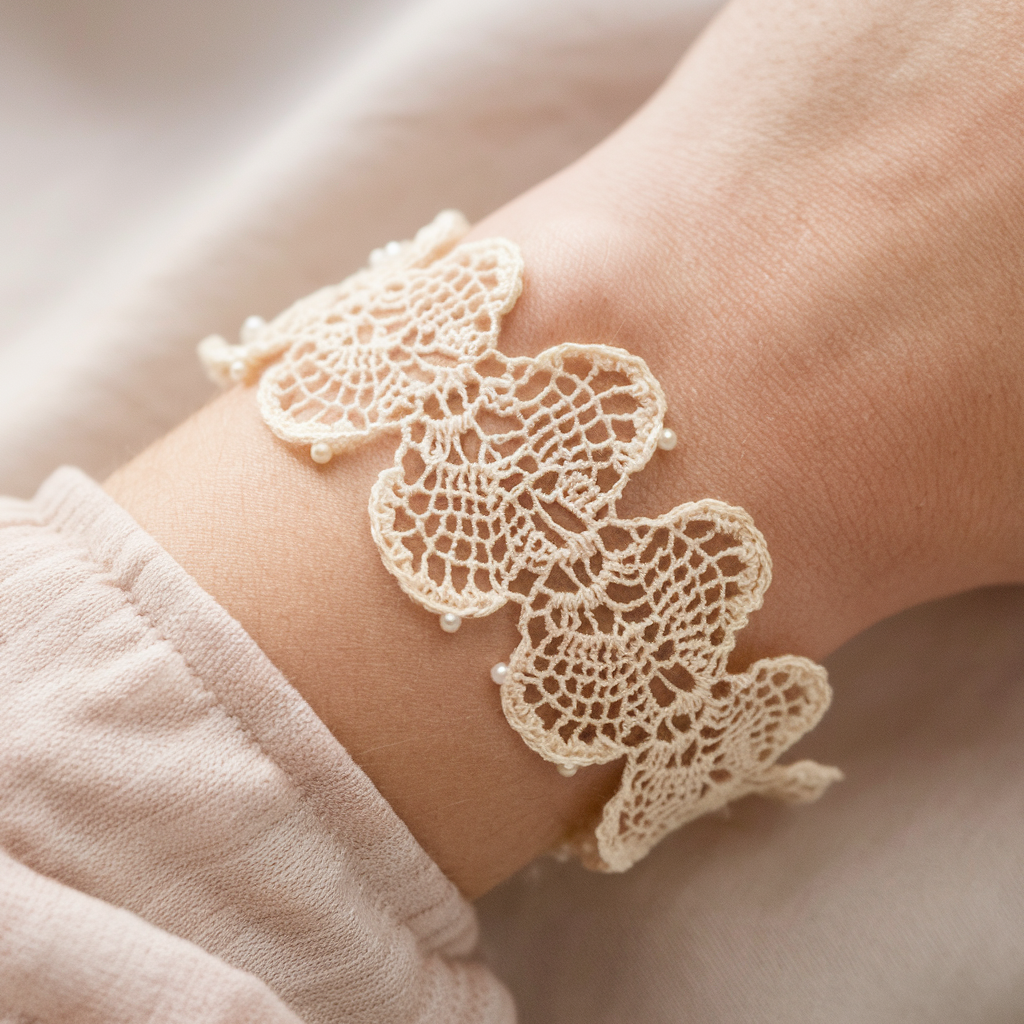
2. Crochet Wedding Cuff Bracelet Pattern
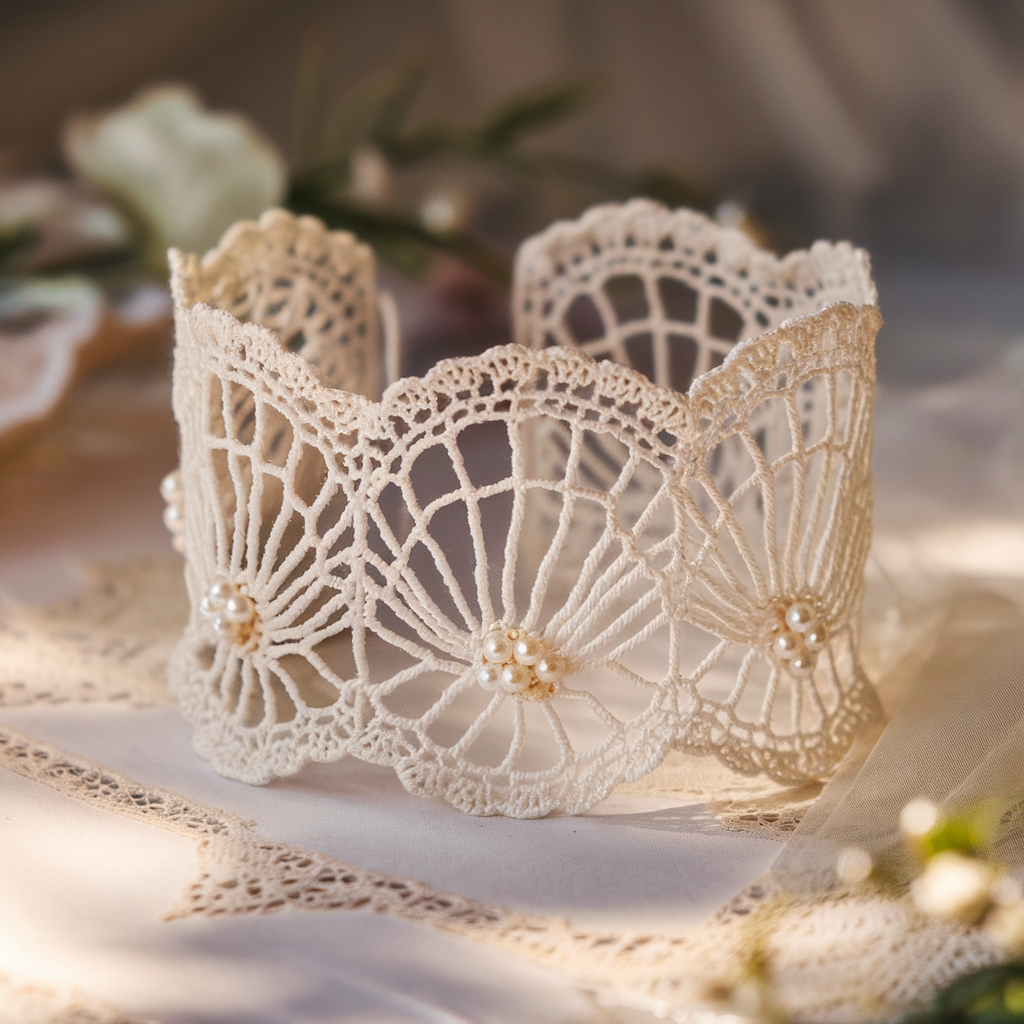
Delicate bridal cuff in lace crochet, finished with pearl beads. Elegant and surprisingly sturdy if lined.
Skill level: Intermediate (small lace repeats + bead attachment)
Finished size (sample): 6.75–7.25″ circumference × 1.75″ wide (bridal cuff)
Materials: crochet thread size 10 or fingering cotton, 1.75–2.5 mm hook, small freshwater pearls or pearl beads (~2–3 mm), thin beading needle (if using standard beads), sew-in snap or delicate hook closure, lightweight organza or cotton lining fabric.
Gauge & repeat
This cuff uses a shell-and-chain lace repeat with multiple-of-6+1 foundation. Do swatch to get sts/in; for sample assume 6 shells across equals desired width.
Construction (flat lace panel)
- Foundation: ch (multiple of 6) + 1 to reach circumference (for 7″ target and example gauge): say swatch gives 6 stitches per inch → 7 × 6 = 42 → find nearest multiple of 6: 42 is multiple of 6 → ch 43. (Forty-two times? Step-by-step: 7 × 6 = 42.)
- Row 1 (setup): sc across foundation. Turn.
- Row 2 (lace row): ch5, skip 4, sc in next repeat across to create chain spaces for shells. Turn.
- Row 3 (shell row): into each ch5 space work (2 dc, ch2, 2 dc) for a shell. Turn.
- Row 4: sc row across to anchor shells. Repeat rows 2–4 until panel height = 1.75″ (measure on wrist if possible).
- Add a final picot or crab-stitch edge for subtle definition.
Bead and lining step-by-step
- Hand-stitch pearls at shell centers using a fine needle and thread; tie knots through lining for durability and bury knots inside lining seam (do not glue). Space pearls evenly (e.g., every other shell).
- Cut lining to inner panel size and hand-sew to wrong side with small whipstitches, leaving seams tidy. Lining prevents pearls or threads from irritating skin and adds structure.
Closure
- Add a tiny sew-in snap (female part on one side of the cuff lining, male part on the other) or a delicate hook-and-eye. If you prefer a more secure option, add a small lobster clasp + jump ring and incorporate them into reinforced tabs.
Finishing & care
- Hand wash cold; air dry. Avoid detergents with bleach near pearls.
- For a vintage vibe, use ivory thread and soft gold seed beads instead of pearls.
3. Crochet Lacy Bracelet Pattern
Airy, feminine lace bracelet that looks like heirloom trim — works as an everyday delicate piece or stacked with bangles.
Skill level: Confident Beginner
Finished size (sample): 7″ circumference × 0.75″ wide (scalloped band)
Materials: size 10 crochet thread or fingering cotton and 2.0–2.5 mm hook, small jump rings, lobster clasp, optional tiny beads at scallop points.
Stitch repeat & foundation
Works with a multiple of 6 + 1 (common for small shell repeats) — use swatch math to set foundation chain.
Pattern (flat panel)
- Foundation chain: ch 43 (as example for 7″ with 6 sts/in).
- Row 1: sc across. Turn.
- Row 2: ch3, skip 2, sc in next repeat across — creates spacing for shells. Turn.
- Row 3 (shell row): in each ch3 space work (5 dc) to create shells; sc in top of next sc to anchor. Turn.
- Repeat Row 2–Row 3 until band reaches desired width (usually 3–4 shell rows). Add final trim: work picots across shell edges (sc, picot, sc) for decorative points. Fasten off.
Assembly
- Reinforce ends with tiny folded felt or webbing and topstitch.
- Sew jump rings to each end through reinforcement and attach lobster clasp. If you want a hidden loop closure, make a small button loop at one end (ch4, sl st to form a loop) and sew a tiny pearl button on the other end — elegant for bridal bracelets.
Variations & styling
- Add tiny seed beads across shell caps when forming shells: thread beads first, slide bead onto hook loop, then complete dc cluster so bead sits on shell edge.
- Make multiple narrow lace bracelets and stack them.
4. Crochet Beaded Bracelet Pattern
Bead crochet rope made by crocheting over a continuous strand of seed beads — classy, flexible, and shop-worthy.
Skill level: Intermediate → Advanced (bead prep + crocheting with beads)
Finished size (sample): 7″ circumference × ⅜” thick (rope diameter like wide piped string)
Materials: size 8 or 11 seed beads, beading thread (FireLine or Nymo), 0.75–1.25 mm beading crochet hook OR very small steel 1.5–2.0 mm hook, lobster clasp, jump rings, crimp ends (optional).
Prep & bead-loading
- Decide bead pattern (single color or pattern). String the required number of beads onto your bead thread before you start crocheting. A 7″ bracelet with ~3 mm beads needs hundreds of beads. Estimate bead count by making a 1″ sample rope and counting beads per inch; multiply by target length + 10% for waste.
- Knot beads on thread with micro-knot that sits inside bead pattern if needed. Leave a tail for finishing.
Crochet rope (single-bead per stitch spiral)
- With right-hand method: hold bead strand so next bead sits just past the hook. Ch 4 to start and join to form ring. Or work directly into beads: sl st to secure bead on chain. The exact method varies — simpler: use single crochet around a bead core: chain 4, join, then SC around ring inserting bead onto stitch as you work: slide forward next bead over hook loop, sc around ring catching bead in each st so it becomes anchored on the outside of the rope. Continue spiraling, sliding one bead per sc, until length = desired circumference + allowance for closures. This technique is taught in bead crochet tutorials because it takes practice — the essential part: one bead per stitch, single crochet in spiral.
- Maintain even tension so beads sit snugly. Use a bead hook or thin stylus to position beads on stitches if needed.
Finishing with hardware
- Use crimp end caps glued onto rope ends with jewelry glue (E6000 or similar) or use wire core inside rope and crimp ends. Attach two jump rings and lobster clasp. Alternatively stitch rope tail through a small drilled wooden bead and knot inside before gluing to secure.
Care & variations
- Avoid submerging in water if using FireLine that can mold; wipe clean.
- Make multi-strand necklaces, anklets, or bracelet strands and join with a single clasp for drama.
5. Crochet Bohemian Cuff Bracelet Pattern
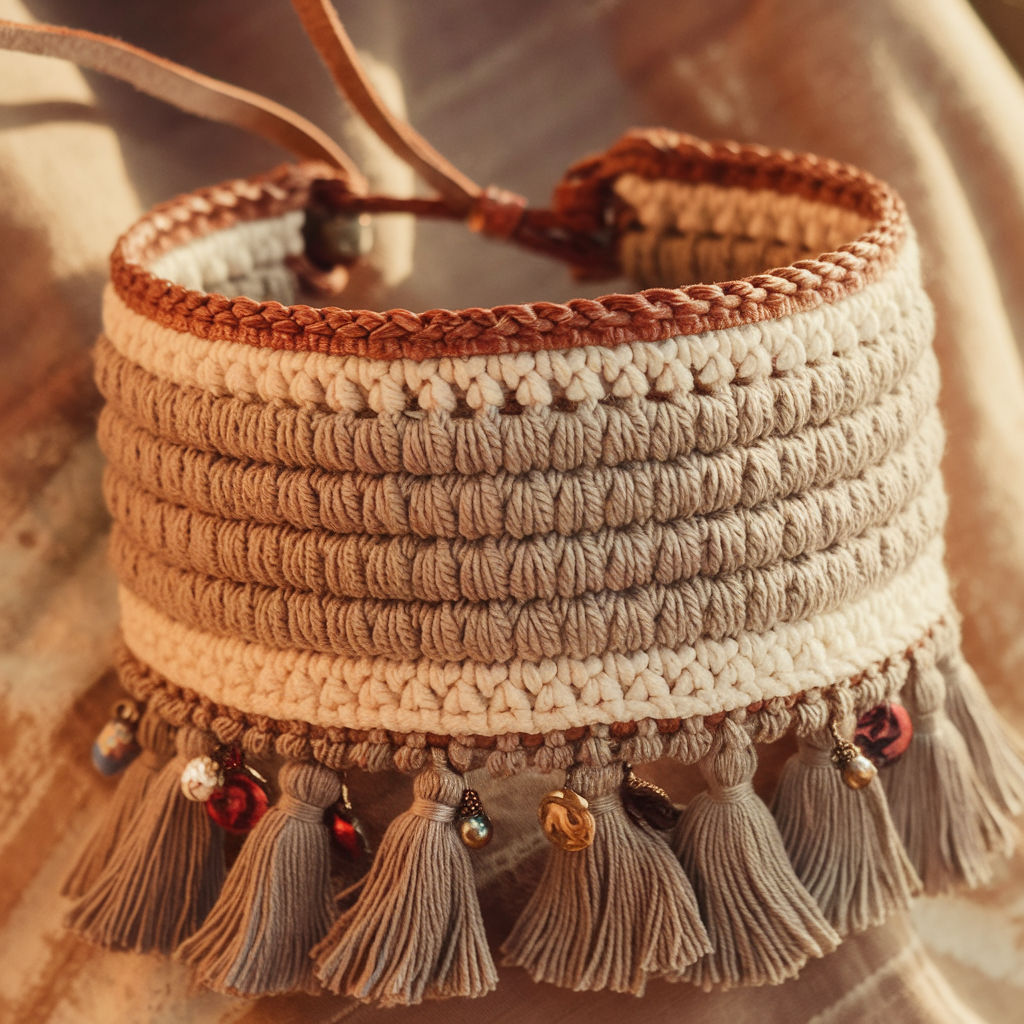
A wide cuff with fringe and dangling tiny charms — boho, tactile, festival-friendly.
Skill level: Confident Beginner → Intermediate
Finished size (sample): 7″ circumference × 2.25–2.75″ wide (cuff)
Materials: chunky cotton or two strands of fingering held together, 4.0–5.0 mm hook, small charms, leather cord or suede for wrap detail, lobster clasp or snap closure.
Stitch repeat & foundation
Works in multiples of 4 or 8 depending on textured stitch chosen (moss or cluster). Choose multiple based on design.
Pattern (dense textured cuff)
- Foundation chain: calculate via swatch. Example foundation ch 28 for snug cuff. Join and work in joined rounds so the seam is minimal.
- Round 1–Round 12: work a repeating textured stitch (waffle, Moss or V-stitch variations) until width ~2.25–2.75″. For waffle, use fpdc rows to create grid.
- Add top decorative row of Picot or shell: sc, picot, sc across.
Tassel & charm assembly
- Add fringe/tassels across bottom: loop bunches of yarn every 1″ and knot (lark’s head). Alternative: hang small charms on jump rings that attach to the cuff edge.
- For wrap detail, sew a thin leather cord across the cuff horizontally and add a bead slider for slight adjustability.
Closure
Reinforce ends and add sturdy snap buttons (heavy duty sew-on snaps) or make loop + button closure. For adjustable boho look, use a small leather strap with stud closure.
Finishing & care
- Chunky cuffs are low-maintenance: gentle machine wash on cold if fiber allows; reshape and dry flat. Remove leather details before washing.
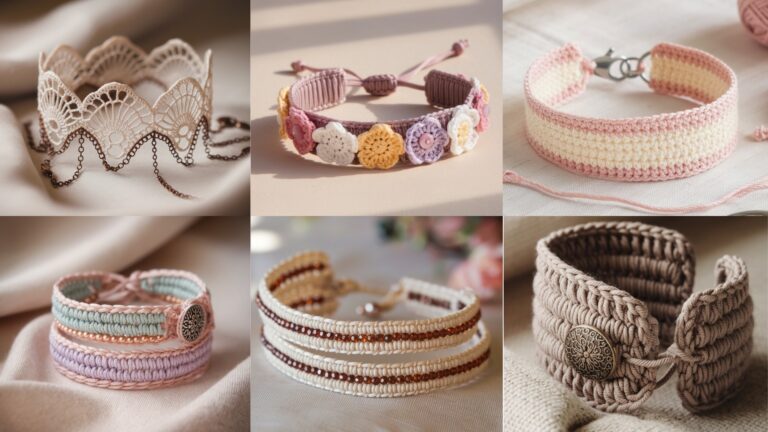
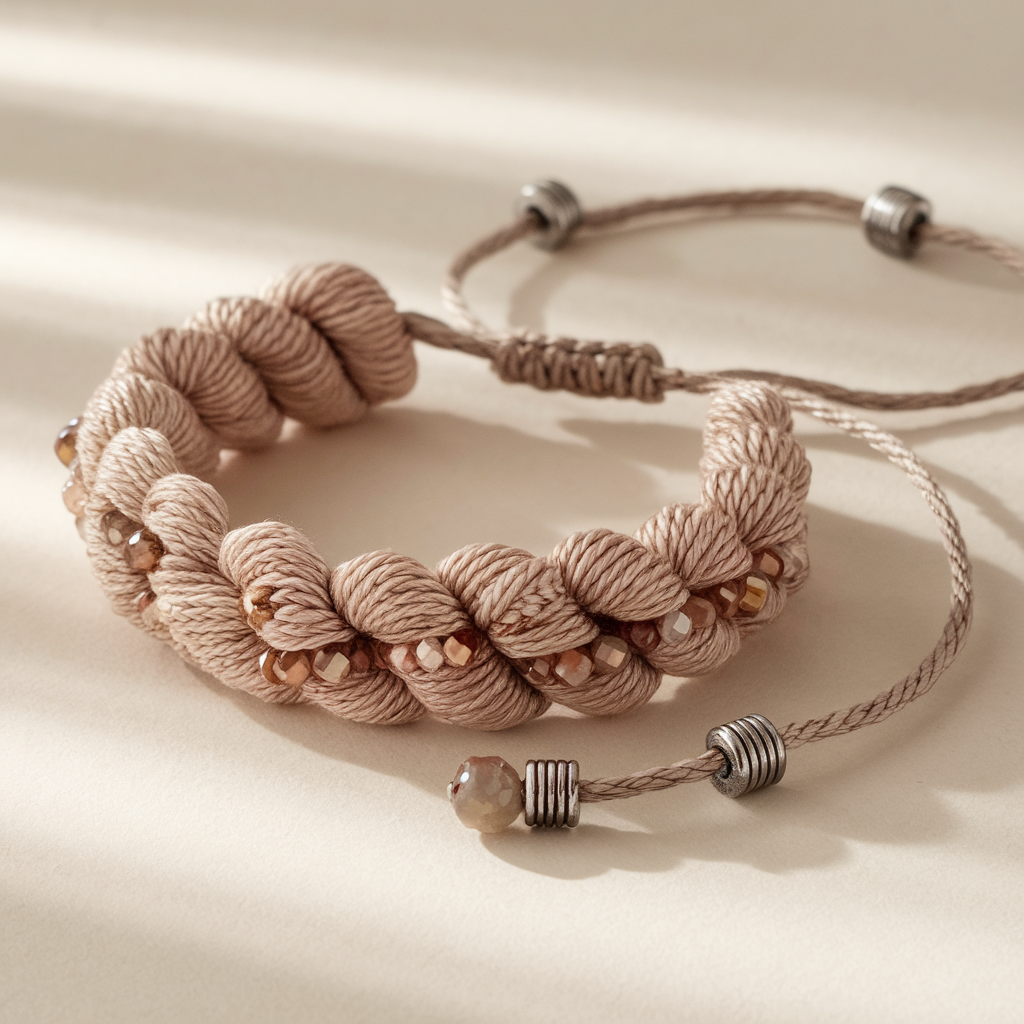
6. Crochet Braided Bracelet Pattern
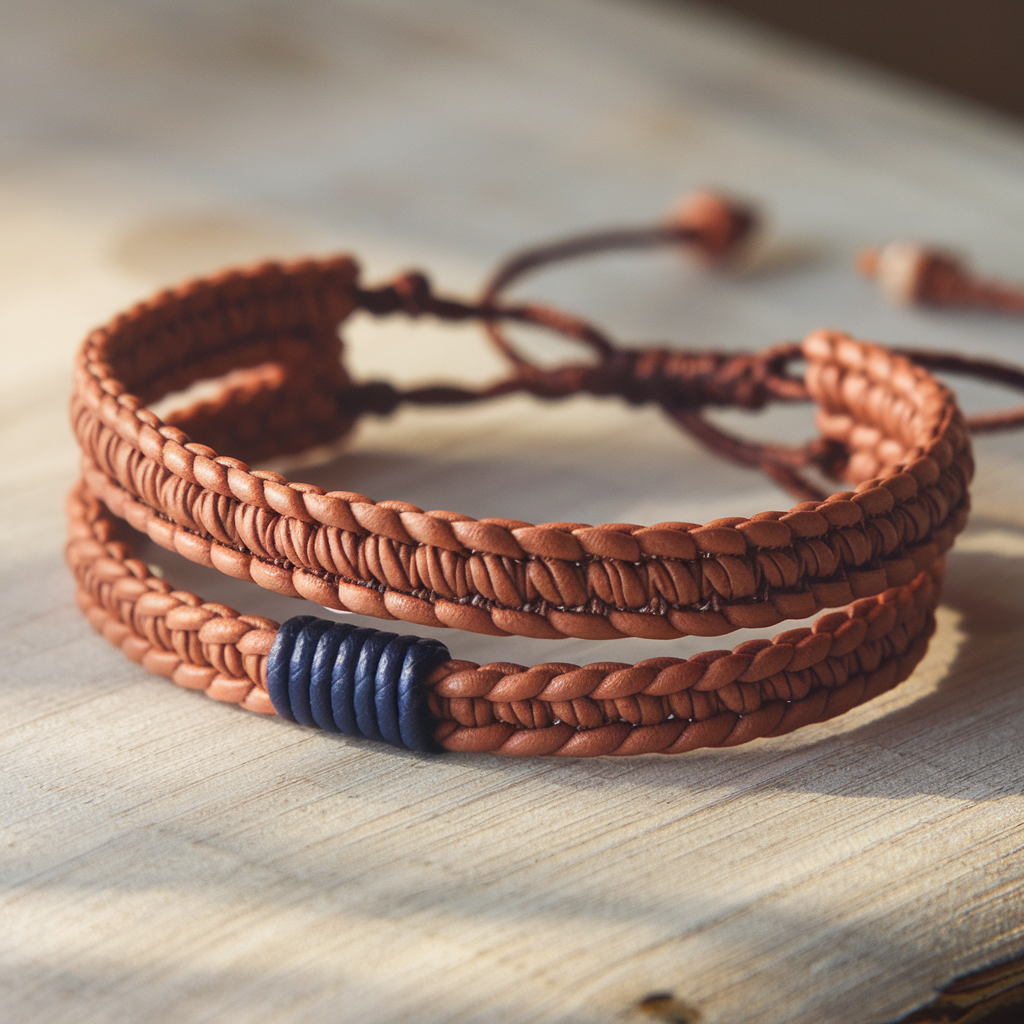
A modern braided bracelet built from three crocheted cords braided together — comfortable, strong, and minimalist.
Skill level: Confident Beginner
Finished size (sample): 7″ circumference bracelet, braid width ~0.5–0.75″ depending on yarn
Materials: three cords of cotton or leather cord wrapped with crochet, 3.5–4.5 mm hook (for i-cord), 1/4″ webbing for reinforcement, toggle or magnetic clasp.
Method A — Crochet I-cords (tube cords) then braid
- Make three tubular cords using crochet i-cord technique (crocheted chain tube): ch 12, join to work in rounds, sc in each chain around for tight tube, or use woven i-cord method: ch 12, stop, pick up loops and sc in back loops to form narrow tube. Make each cord length = 10–12″ so final braid after overlap equals wearer’s wrist + closure allowance.
- Block cords slightly and insert webbing or cord core for stability. Sew ends closed.
- Braid three cords together neatly and sew ends to finish. Attach a small clasp (toggle or small magnetic) with reinforced loops.
Method B — Single crocheted wide braid (flat)
- Crochet three flat strips in sc or hdc approx 1/2″ wide × desired length, then flat-braid and sew edges. This makes a flatter band.
Finishing & variations
- Wrap small contrasting thread at ends for decorative finish.
- Add a central bead threaded through middle cord before braiding for focal point.
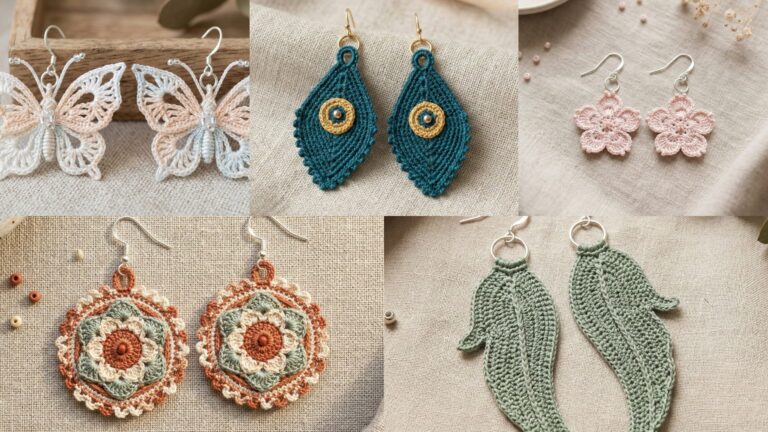
7. Crochet Flower Bracelet Pattern
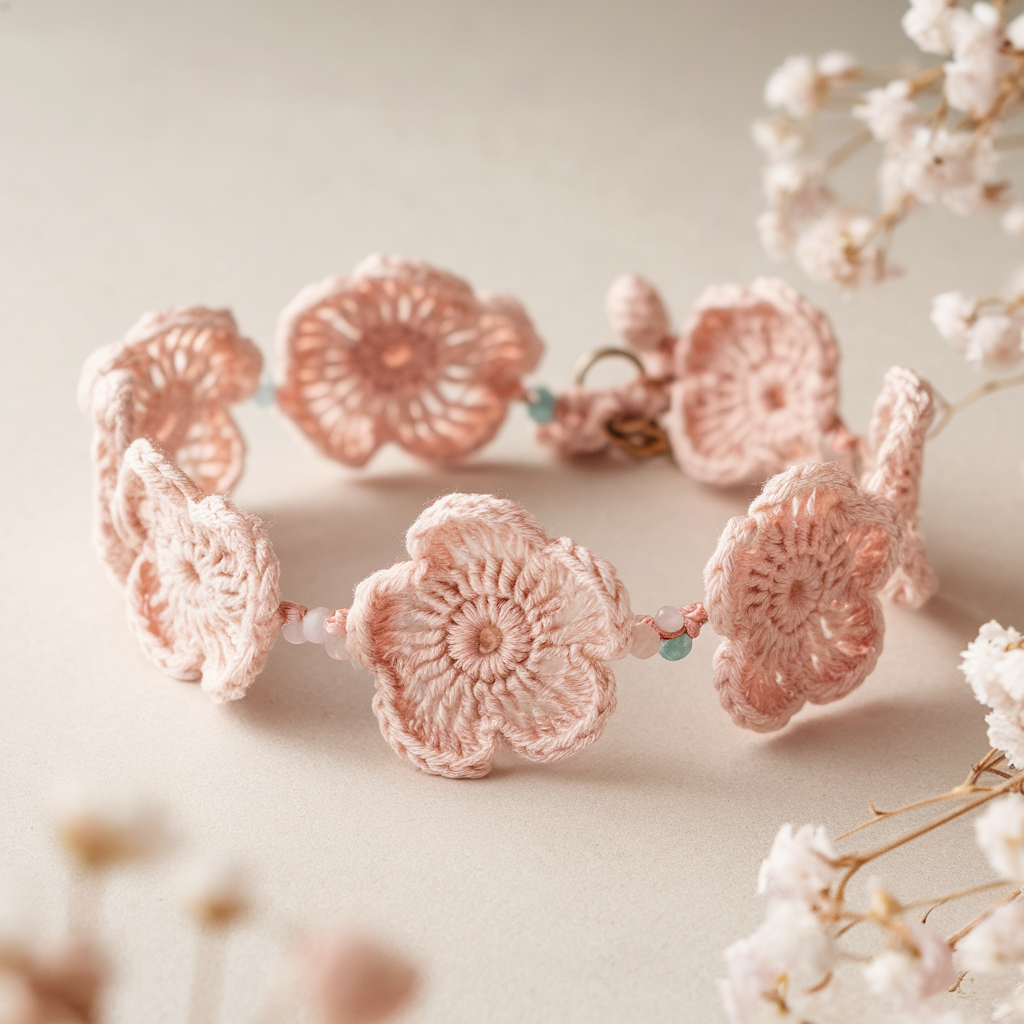
Tiny flowers joined into a pretty chain — fast, romantic, and great as gifts.
Skill level: Beginner → Confident Beginner
Finished size (sample): 7″ circumference with 8–10 small flowers (0.7–1.0″ each)
Materials: cotton thread or fingering yarn + 1.75–2.75 mm hook, jewelry clasp, jump rings.
Flower motif (small — make many)
- MR, ch1, 6 sc in MR; sl st to join. (6)
- Round 2: ch3, sl st in next st repeat to make 6 loops.
- Round 3: in each loop work (sc, hdc, 3 dc, hdc, sc) → petal. Make 8–10 flowers based on wrist size and flower width. Block if desired.
Join flowers into chain
- Lay flowers face-up and join petals of adjacent flowers with small slip-stitches or whipstitch through the back loops only so the front stays clean. Alternate join points so flowers curve naturally.
- At ends, create a reinforced loop (ch6 loop) and sew a small jump ring to the other end; use a tiny button or lobster clasp hooked onto the loop.
Alternative: spacer beads & chain
- Use small seed beads or tiny metal rings as spacers between flowers for a more delicate look. Thread thin wire or beading thread through the center of flowers and add beads in between; finish with crimps and clasp.
Care & styling
- Delicate but wearable — hand wash and reshape. Stack with metal bangles for contrast.
Final finishing, tips & care for all bracelets
- Reinforce stress points. Any place you attach hardware needs extra stitching, a small bit of fabric/webbing inside, or a couple of passes of strong upholstery thread. If a strap or end frays, your bracelet becomes a sad loop.
- End weaving. Weave tails at least 1″ into fabric and knot on wrong side before trimming. Consider a dot of clear jewelry glue inside knot for heavily used pieces.
- Sizing check. Measure on a real wrist with any lining in place; 7″ common for women, 6.5″ small, 8″ large. For men or chunky cuffs use 8–9″.
- Care: Cotton and mercerized threads are machine-washable on gentle in a laundry bag; lace and beaded items prefer hand wash. Always air-dry flat. Avoid harsh bleach and temperatures for beads and metals.
- Presentation: When gifting, attach a small care tag with fiber content and washing instructions. People love caring instructions; it makes them look like they know what they’re doing too.
Conclusion
There. Seven bracelets that cover the full handshake of crafty jewelry: bold graphic, bridal lace, airy lace, bead crochet, boho fringe, braided minimalism, and dainty floral. The whole point is to swatch and measure once — that small chore prevents 80% of the unsatisfying “too big/too small” problems. Make one in a night, or make five for a small, curated gift set people will actually wear.