

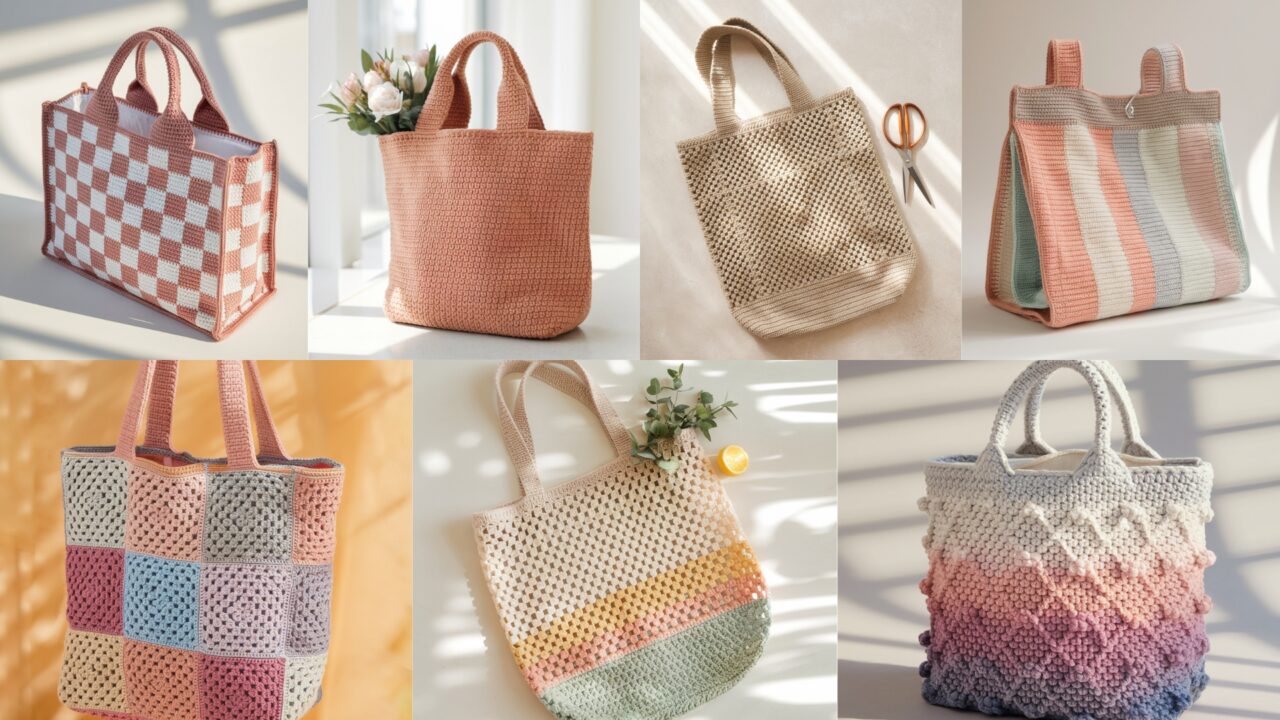
A handmade crochet tote is practical, stylish, and satisfying — a weekend project that turns yarn into something you’ll use every day. This collection gives you seven distinct tote bag patterns (patchwork, cotton market styles, geometric designs, and modern textures). Each entry includes: skill level, recommended yarn & hook, finished dimensions, gauge guidance, a clear step-by-step construction method (with notes so you can size or adapt it), instructions for handles and optional lining, finishing tips, and variation ideas. Read the general notes first — they’ll help you adapt yarns and sizes without breaking the pattern.
Quick notes (abbreviations, tools, yarn choices)
Common abbreviations (US terms): ch = chain, sl st = slip stitch, sc = single crochet, hdc = half double crochet, dc = double crochet, tr = treble, st(s) = stitch(es), inc = increase (2 sts in same st), dec = decrease, BLO/FLO = back/front loop only, RS/WS = right/wrong side, MR = magic ring.
Tools & supplies you’ll likely need (per bag):
- Yarn: cotton or cotton-blend recommended for structure and durability (worsted weight / aran / category 4 is great for roomy everyday totes; bulky gives sturdier structure; for delicate lace bags use cotton thread and small hooks). I’ll call out yarn type per pattern.
- Crochet hooks: 4.0 mm–6.5 mm depending on yarn and desired density.
- Tapestry needle, stitch markers, measuring tape, scissors.
- Optional: fabric for lining, sewing needle, sewing thread, interfacing, magnetic snap or zip, rivets or metal bag feet, bag handles (leather) if desired.
- Optional: stitch filler (thin plastic canvas) or heavy-duty interfacing for a rigid base.
Sizing & gauge: I give one sample finished size for each pattern (medium tote). Most patterns are written so you can increase/decrease base rounds/rows to change size: compute stitches-per-inch from your swatch and multiply by desired dimension.
Structure tips:
- For everyday use choose 100% cotton or cotton blend with some acrylic for durability.
- Make a firm base by using either a dense stitch round, a double-thickness base (fold and sew), or a board/cork insert.
- Lining strengthens a lightweight fabric bag, hides stitches and secures seams for heavier loads.
1. Crochet Piper Patchwork Tote Bag Pattern
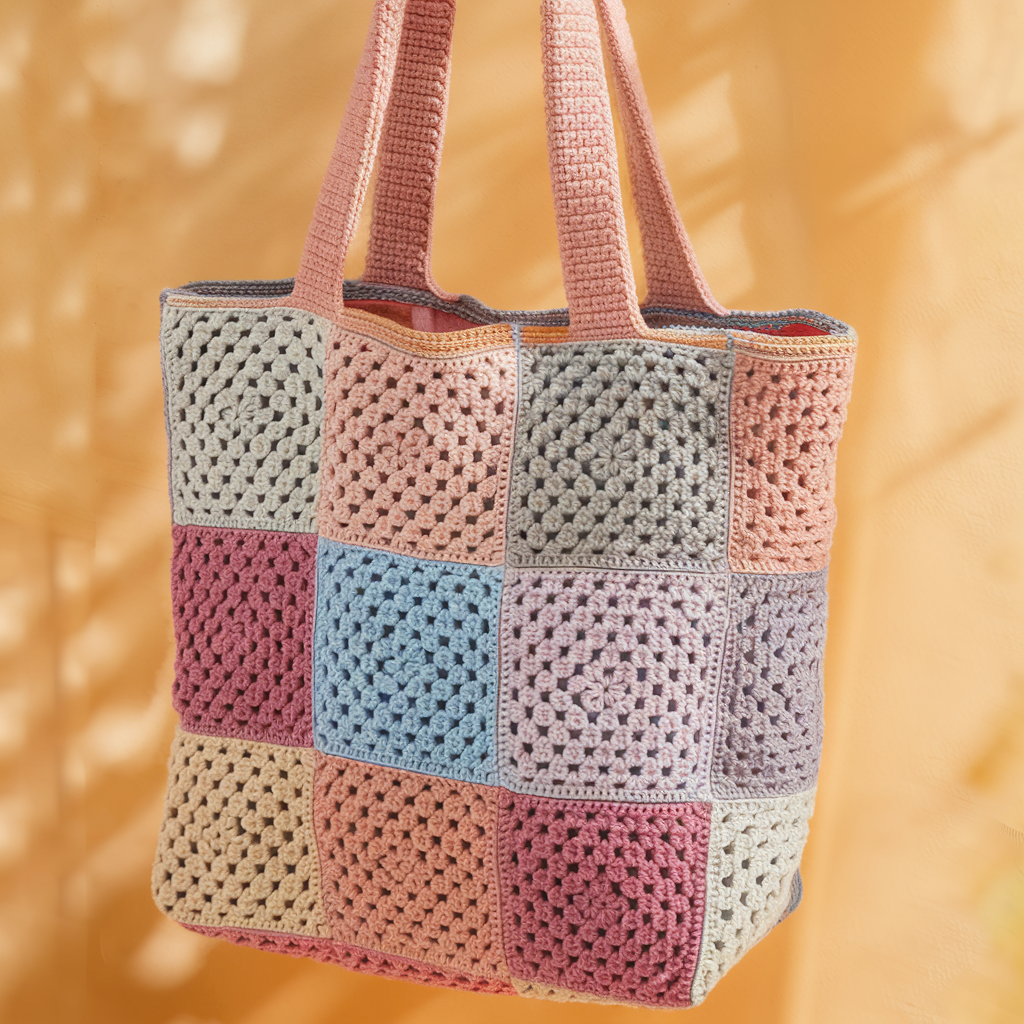
Style & effect: A modern patchwork tote assembled from small square motifs (Piper squares) — great for stash-busting and color play. Looks handcrafted and vibrant.
Skill level: Confident beginner → Intermediate
Finished size (sample): 15 in (38 cm) wide × 12 in (30 cm) tall (body only) × 4 in (10 cm) deep base
Yarn & hook: Worsted-weight cotton or cotton blend; 4.5 mm (7) hook
Motif size: Each square ~3.5 in (blocked). For sample size you need a grid 4 squares wide × 3 squares tall (plus a row for base/optional pocket), total 12 squares.
Materials (sample)
- Main / assorted yarns: ~600–800 yds total depending on size and color changes
- 12 matching/contrasting colors for squares (or fewer in repeat)
- Tapestry needle, sewing needle for joining, optional lining fabric (1/2 yd), matching thread
Stitch references for a single Piper square (example modern square)
This square is a small textured square using post stitches for interest.
Square (make 12)
- MR, ch2 (counts as hdc), work 11 hdc into ring, join — 12 hdc.
- Ch2, hdc in same st, hdc in next 3 sts, inc around — establish even increases to reach about 20–24 sts. (Work until square side measures ~3.5 in after blocking.)
- Add texture rounds: alternate rounds of: (a) sc around, (b) fpdc, bpdc ribbing round; finish with tidy final round of sc. Block squares lightly.
Tip: Keep corner increases consistent so squares block square.
Layout & joining
- Decide on layout: 4 × 3 grid makes front/back? For a tote, you’ll make front and back panels separately or many choose to make 6 squares for front/back each (arranged differently). For sample size use 2 rows of 4 squares per panel (8) and 1 row of 4 squares for base or create separate base panel. Simpler approach: join squares into two large rectangles (front and back), each 4 × 2 squares; make a matching strip for the base (4 × 1 squares) and two panels for sides or use continuous join to create a rectangular tube.
- Joining method: join-as-you-go (JAYG) while making final round of each square, or whipstitch squares together using mattress stitch for invisible seams. For JAYG: on the final round of the new square, instead of finishing the last edge, sl st to the adjacent square’s corresponding st and continue.
Forming the tote body
- With front rectangle (4×2) and back rectangle (4×2), join bottom edges to the base strip: arrange panels into a U-shape (back panel, base strip, front panel) and seam sides (either by sewing with sc or mattress stitch).
- For depth, you can add two side rectangles (2×2 squares) or create a gusset by seaming base to sides and front/back at an angle.
Handles
- Option A — crocheted straps: chain to desired strap length (example 60 ch for 22–24 in strap when measured), sc in each ch back to start for 2–3 rows to create sturdy strap. Fold strap in half and sew each end securely onto top inside of the bag; reinforce with cross-stitching.
- Option B — leather handles fixed with rivets or sewn onto lining.
Lining (recommended)
- Cut lining fabric to match interior shape + ½ in seam allowance.
- Sew side seams and bottom seam of lining (right sides together), press.
- Insert lining into bag, fold top edge of lining over the top edge of the bag and sew by hand with slip stitch for neat finish. Add magnetic snap closure or zip if desired.
Finishing & variations
- Add an internal pocket by crocheting 6 × 2 squares or a simple rectangle and sew inside.
- Use two-color repeats for a minimalist patchwork; use scrappy palette for boho look.
- To stiffen base, sew in a piece of corkboard cut to base size inside lining.
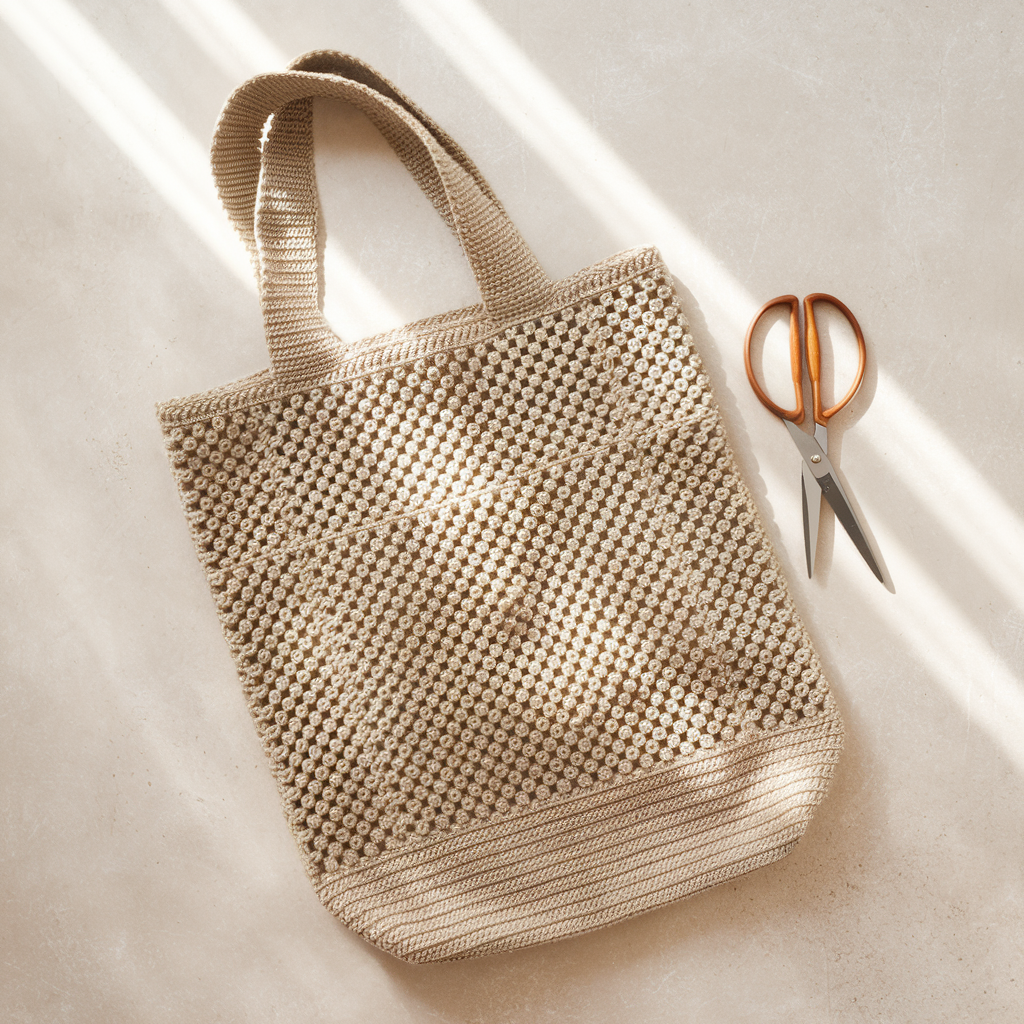
2. Crochet Caron Cotton Tote Bag Pattern
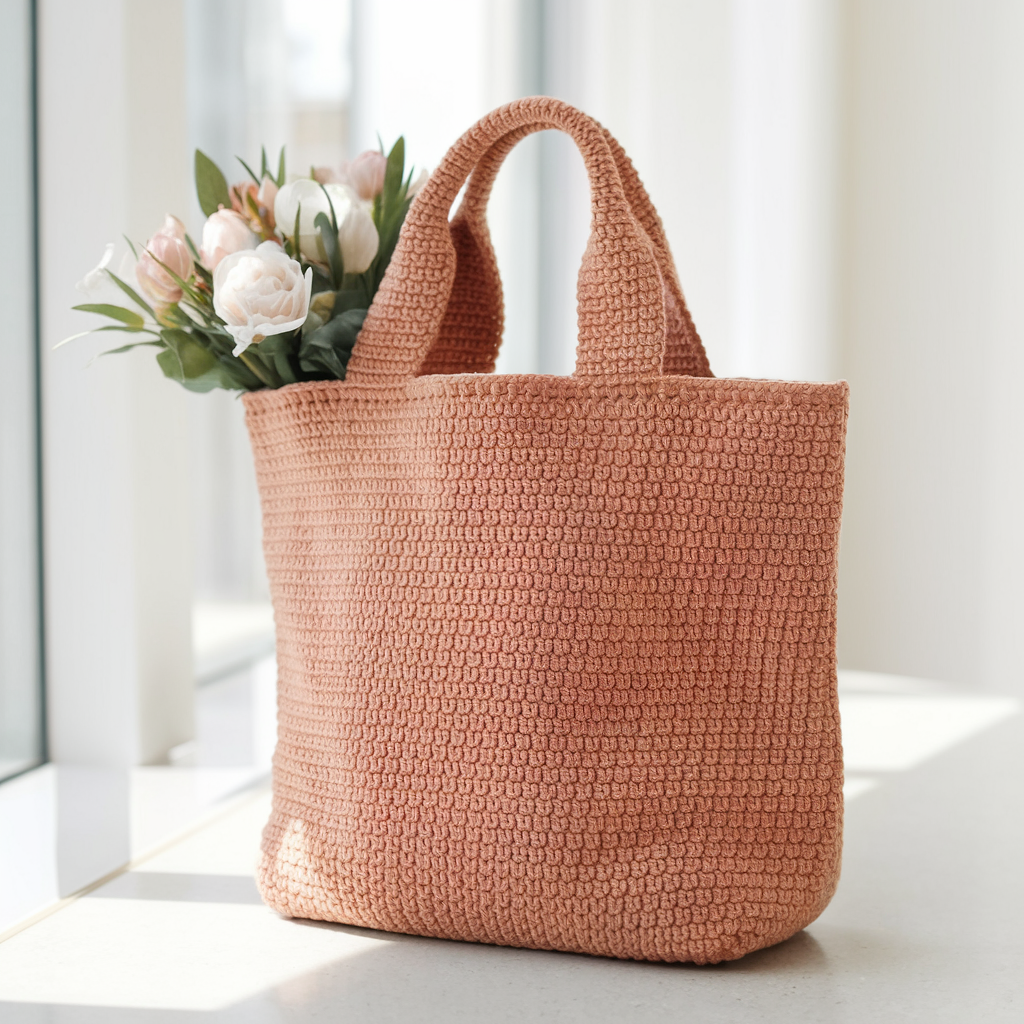
Style & effect: A sturdy, tightly crocheted tote using Caron Cotton Cakes (or similar cotton-remix yarn) that shows subtle color shifts without complex colorwork — clean, modern market bag.
Skill level: Beginner → Confident beginner
Finished size (sample): 16 in (41 cm) wide × 13 in (33 cm) tall × 5 in (12.5 cm) deep
Yarn & hook: Worsted-weight 100% cotton or cotton-blend; 5.0 mm (H) hook
Materials
- Approximately 700–900 yds worsted cotton (adjust by size)
- 5.0 mm hook, tapestry needle, optional lining
Construction overview
Worked bottom-up as a dense, single-panel bag (flat base worked in rounds, body worked in spiral or joined rounds) using sc and hdc for solid fabric.
Step-by-step
Base: (make a rectangular/oval base or circular base)
- Circular base (easier math): MR, R1 6 sc; R2 inc each = 12; R3 sc 1, inc = 18; R4 sc 2, inc = 24; continue until base diameter ≈ 5 in (for 5 in deep bag). For a rectangular base, work a foundation chain equal to base width and stitch back and forth to form rectangle (then seam later).
Sides:
- Join and work in the round: R1: sc around into each st. Keep tight tension to produce firm fabric. For a denser bag use sc only; for slightly more pliable fabric use hdc. Work even rounds until the body height reaches ~10–12 in (for a tote) from base.
Top band & edge:
- For a clean finish, work 2 rounds of sc in BLO to create a folded top edge; add 1 round of crab stitch (reverse sc) for a professional top edge.
Handles (integrated):
- To make integrated handles avoid sewing: on the round where handles attach, mark positions (for 5 in strap spacing attach two handles 6–7 in apart). Work sc across until handle start, ch desired number (e.g., ch 40), skip same number of sts across the bag body, sc in next st and continue around. Then sc back across the chain to reinforce handle loops (sc back into chains and the same working round). Work a few rounds to reinforce.
- For sturdier handles, crochet a strap tube and insert interfacing or sew two straps and topstitch to reinforce.
Lining & closure: optional as above.
Tips & variations
- Work the bag tighter (smaller hook) for more structure.
- Add color-block stripes by switching yarn every N rounds — Caron Cotton Cakes give shading without switching.
- For beach bag use an open mesh upper (dc + ch mesh) above a sturdy lower portion.
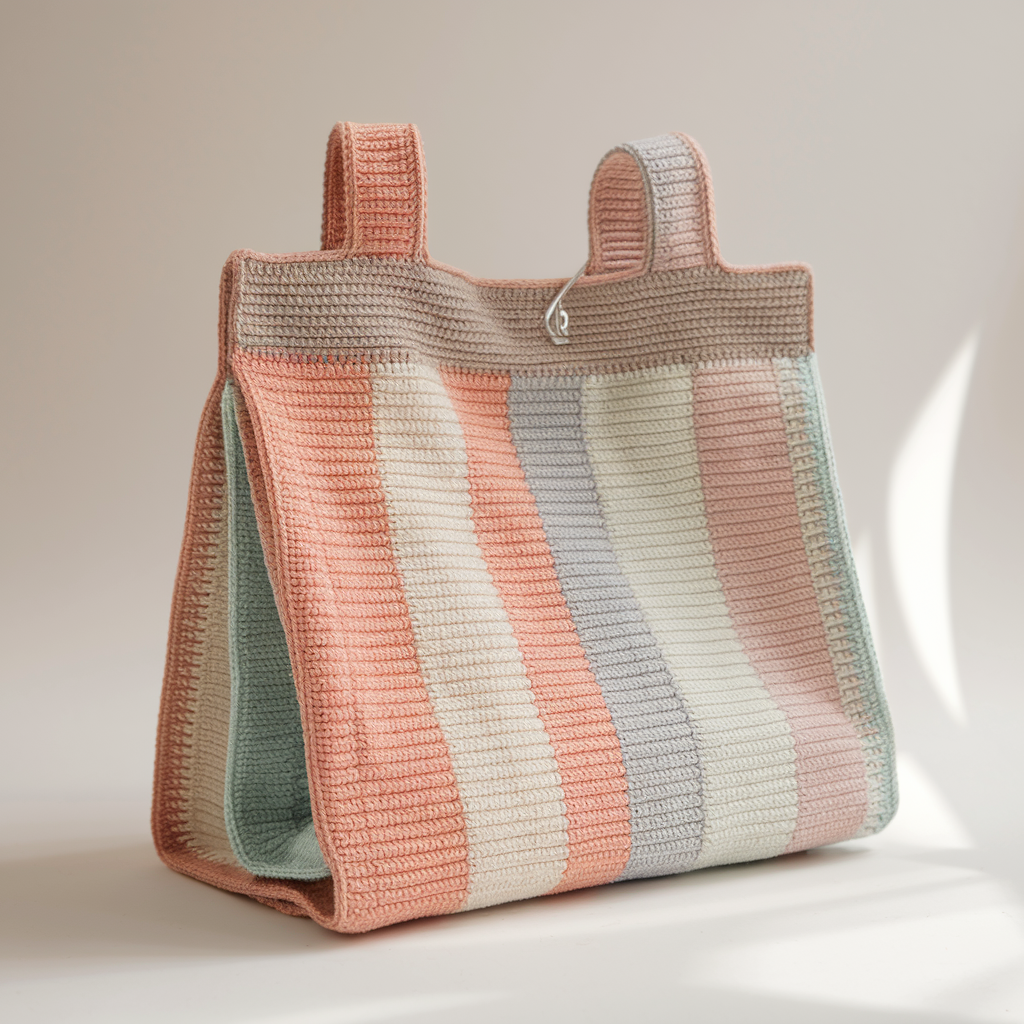
3. Crochet Springtime Market Tote Bag Pattern
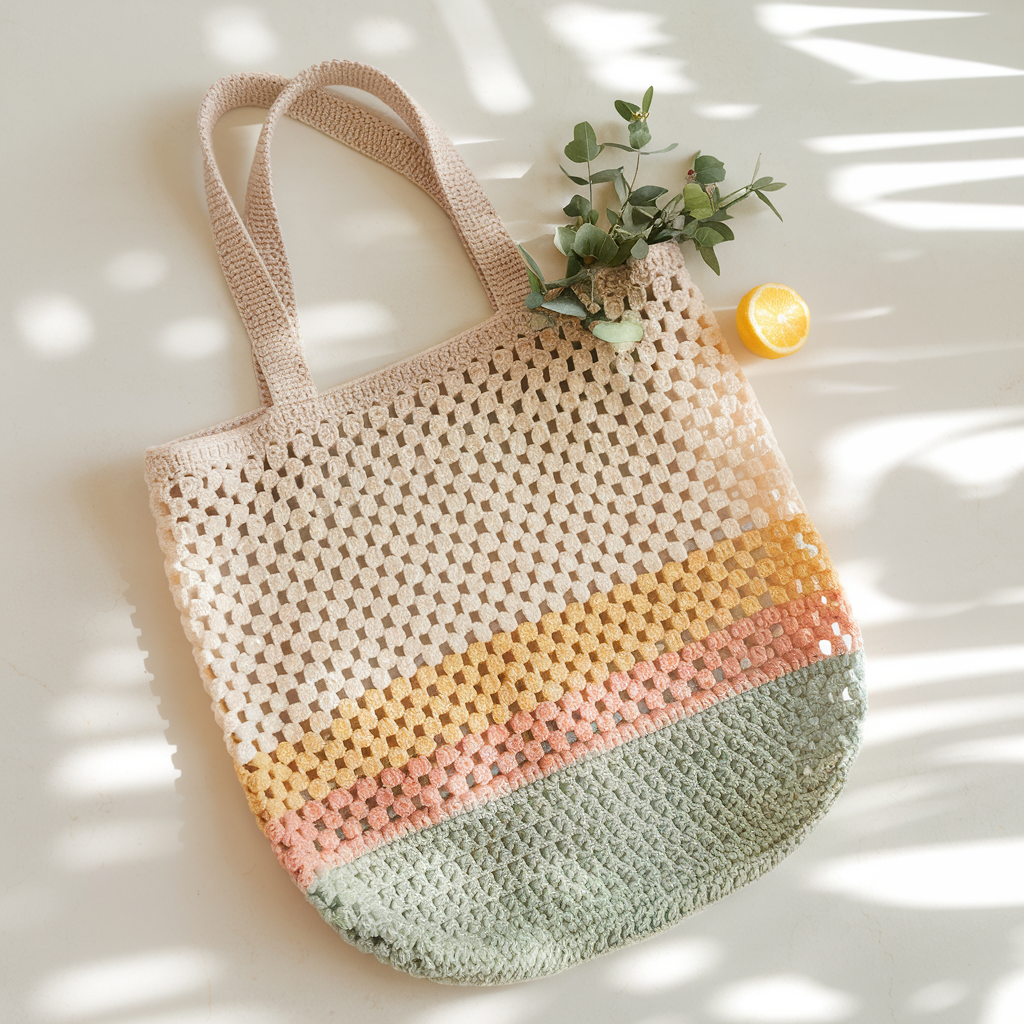
Style & effect: Classic market tote with open mesh body and sturdy base — perfect for farmers’ markets, groceries, or produce. Light, breathable, and expandable.
Skill level: Beginner → Confident beginner
Finished size (sample): 15 in wide × 15 in tall (open mesh expands), 6 in deep base
Yarn & hook: Worsted weight cotton or cord; 5.5–6.5 mm hook for airy mesh (bigger hook makes the mesh more open)
Materials
- 700–900 yds cotton or cotton-blend, sturdy for hauling groceries
- 6.0 mm hook recommended, tapestry needle, optional wooden rings or leather handles
Construction overview
Bottom-up construction: a dense base for strength, then mesh body worked in rounds (or in joined rounds), handles integrated or added later.
Base (oval or circle)
- Circular base: as with Caron tote but expand to 6 in diameter for roomy base. For oval base, chain base width and pick up ends working in rows forming an oval — increase evenly at the curved ends.
Mesh body (classic market mesh)
Round pattern (example mesh):
- R1 (join at base edge): ch 4 (counts as dc + ch1), dc, ch 1 repeat across to create mesh. Or use filet mesh: ch 4, skip 2, dc in next — many options. A popular market mesh: dc, ch 2, skip 2 repeat.
Worked in rounds: keep the mesh uniform and measure height; work until bag is about 9–10 in from base (mesh will expand when items are inside). Add 2–3 final rounds of sc around top to stabilize.
Handles
- Option A — integrated handles as wide mesh gaps: when working top rounds, skip larger blocks of stitches to make even rectangular openings; reinforce the chain edges with sc rounds and a couple of rounds of BLO hdc to strengthen.
- Option B — sew leather handles to top band with rivets or heavy-duty thread; add metal sandwich rivets to secure.
Lining
- Market totes often are used open; still, you can add a drawstring lining to contain small items.
Variations
- Make a scalloped hemed edge, or color-stripe the mesh body with a contrast color every few rounds.
- For a sturdier market tote, use a thicker cord yarn or T-shirt yarn.
4. Crochet Diamond Tote Bag Pattern
Style & effect: A geometric, textured diamond stitch tote — sophisticated and modern. Uses diamond motif panel(s) to create a statement bag.
Skill level: Intermediate (pattern repeat attention + shaping)
Finished size (sample): 14 in wide × 12 in tall × 3.5 in deep
Yarn & hook: Worsted or aran cotton; 5.0 mm hook
Materials
- 600–800 yds cotton yarn, tapestry needle, optional lining
Diamond stitch (single-panel approach)
Diamond stitch is typically formed by working alternating cluster and chain spaces to create raised diamond shapes. Many diamonds are worked in flat panels and then seamed.
Sample diamond panel (worked flat)
- Foundation: chain multiple of stitch pattern width + turning ch. Example foundation 36 ch for a 12 × 12 grid across.
- Row pattern (example simplified): Row A: sc across; Row B: (ch2, skip 1, dc in next, ch1) cluster to shape; Row C: cross-over cluster to define diamond center. — because the diamond stitch can be complex, I’ll describe a straightforward textured diamond using front- and back-post stitches for raised effect:
A simple textured diamond repeat (concept):
- Work 6-row repeat: Rows 1–2 sc foundation; Rows 3–4 FPdc around post stitches creating raised columns; Rows 5–6 cross the posts (work FPdc around posts two rows prior) to create the diamond angled effect. Adjust counts to create even diamonds. (If you prefer, use a published diamond chart and scale panel to your width.)
Construction
- Work two large panels for front and back in diamond stitch, each same width. Block panels to exact dimensions.
- For base: work a rectangle in sc the same width as panel and same depth as desired.
- Seam side panels and base using mattress stitch or a single crochet seam for a lovely finished edge.
Handles & finishing
- Add tubular crochet handles (make 2) or leather handles. Sew handles on with reinforced box stitch.
- Add lining and internal zip pocket for organization.
Variations
- Use mosaic crochet for sharp diamond color changes.
- Work diamond panel only on the front and keep back plain for contrast.
5. Crochet Tri-Fold Tote Bag Pattern
Style & effect: A clever tri-fold bag made from three connected panels that fold into each other for storage, creating an origami-like tote that packs down small. Modern and fun.
Skill level: Intermediate (construction planning and folding seaming)
Finished size (sample open): 18 in wide × 15 in tall × 4 in deep; folded it becomes ~6 in × 6 in × 2 in flat
Yarn & hook: Worsted cotton; 5.0 mm hook
Materials
- 800–1000 yds worsted cotton, tapestry needle, optional snap or hook closure, lining fabric if desired
Construction overview
Make three rectangular panels connected on short edges with hinges (crocheted) so the bag folds into a compact square and locks. The middle panel forms the base when expanded.
Step-by-step
Panels (three identical)
- Chain foundation for panel width (example 56 ch for 18 in wide at 3.125 spi). Work in rows of hdc or dc to reach desired height (15 in). Make three panels.
Connecting & hinge rounds
- Join panels with long single-crochet “hinge” strips: lay panels flat side-by-side and seam them with sparse joining that allows flexibility (join every 3–4 sts rather than continuous seam), or crochet hinge chains on the edges (ch 10, sl st into edge) allowing fold movement.
- Reinforce the two external seams with sc but leave hinge sections slightly looser to fold easily.
Forming the tote
- Fold panels in tri-fold arrangement so when opened middle panel becomes base and two side panels form sides. Add corner seams to hold sides when opened: sew the outer corners of the two end panels to the corresponding edges of the middle panel to create depth. This creates a structured bag but still packable.
Top finishing
- Add a wide top band of sc around all three panels (worked when bag is open), and either add a magnetic snap or a button/tab that secures the bag when folded.
Handles
- Add two side handles: either integrated (create chain openings on top band) or sew leather handles.
Lining
- Lining is more complex for foldable bags; use flexible fabric and sew it in so it folds with bag. Consider using a separate drawstring pouch liner that can be removed.
Variations
- Use color-blocked panels for a modern look.
- Add external pocket by crocheting a rectangle and sewing to outer panel.
6. Crochet Gingham Tote Bag Pattern
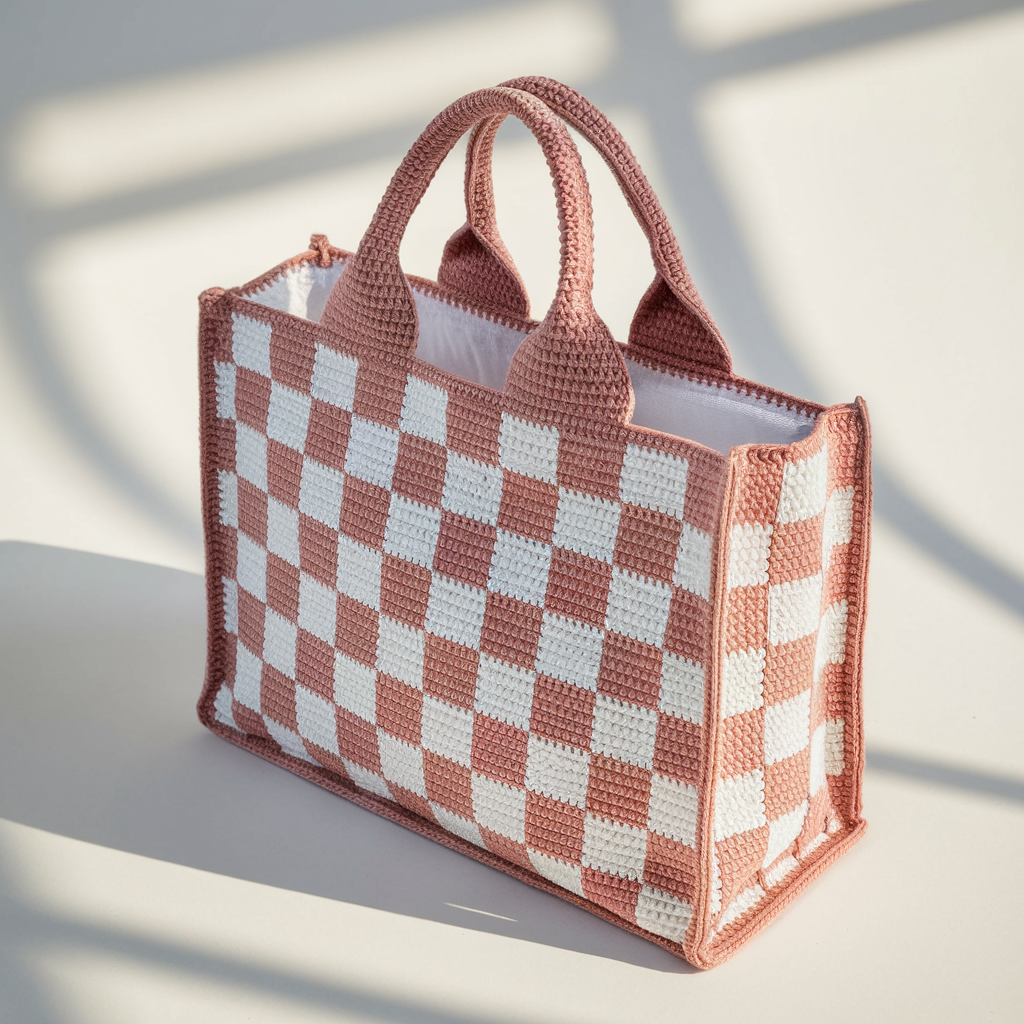
Style & effect: A crocheted gingham (checkered) tote that mimics woven gingham with alternating color squares — classic, crisp, and great for summer.
Skill level: Intermediate (colorwork / tapestry crochet or tapestry-like technique)
Finished size (sample): 15 in wide × 13 in tall × 4 in deep
Yarn & hook: Worsted cotton; 4.5–5.0 mm hook
Materials
- Two colors (Color A and Color B) — approx 600–800 yds total depending on size (equal amounts for balanced checks)
- Tapestry needle, optional lining (white cotton for inside)
Construction overview
This uses tapestry crochet (carry floats) or mosaic technique to create the check pattern. You’ll work single crochet rows in color, switching colors according to the gingham chart (like knitting Fair Isle).
Gingham chart & approach
- Decide check size, e.g., 4 × 4 stitches per check square. For 15 in width and gauge 4 sc/inch, you’ll have ~60 sts across; with 4-st checks you’ll get 15 checks across.
- Use tapestry crochet: hold both colors with the unused color carried across wrong side and caught under working stitches. Keep floats short (catch every 4 sts) to avoid long floats. Alternatively break color and rejoin on each small square for absolute clean floats.
Step-by-step
- Foundation chain: ch 60 (or your calculated number). Work 1 row sc in Color A.
- Follow gingham chart row by row: each sc is either Color A or Color B according to check pattern. Keep tension even.
- Continue until panel height ~13 in. Make back panel and front panel identical. For depth make a base panel in either one solid color or miniature check.
Assembly
- Seam panels right sides together; add base (rectangle or square) and sew ends. Block gently to square checks.
Handles & finishing
- Work 4 rounds of sc in contrasting color to create strong top band; integrate handles by skipping stitches and chaining wide handles, then sc back into chain; reinforce by working rounds over handle base.
Lining
- Add a white lining to show off gingham. Sew lining with top band folded over for neat finish.
Variations
- Make mini gingham (2-st checks) for a finer look, or giant gingham (8–10 sts) for a bolder retro style.
- Make reusable lunch tote version with insulated lining.
7. Crochet Modern Honeycomb Tote Bag Pattern

Style & effect: Contemporary textured honeycomb fabric (cuckoo / puff + chain arches) — tactile, modern, and slightly stretchy.
Skill level: Intermediate (3D stitches and consistent tension)
Finished size (sample): 15 in wide × 13 in tall × 4 in deep
Yarn & hook: Worsted cotton or cotton blend; 5.0 mm hook (slightly smaller for honeycomb texture for better definition)
Materials
- 600–800 yds worsted cotton, tapestry needle, optional lining
Honeycomb stitch overview
Honeycomb textures are often made with post stitches and shell combinations (e.g., alternating puff clusters and arch stitches to create hexagon-like cells). One accessible approach is the crocodile/honeycomb hybrid using puff stitches set in offset rows.
Sample repeat (concept)
- Row A (foundation): sc row.
- Row B: (ch 3, skip 2, puff in next, ch1, puff in next) across — creates raised clusters.
- Row C: Anchor puff clusters with sc rows. Offset these repeats to get honeycomb cells.
Construction
- Make two identical panels (front and back) in honeycomb stitch; each panel width ~15 in.
- Make base rectangle in sc for structured bottom.
- Seam sides and base with mattress stitch; work extra reinforcement rounds at seams with sc for durability.
Handles & reinforcement
- Because textured stitches can be stretchier, reinforce handles with a double layer or insert a fabric strip inside handle for strength. Sew handles to a reinforced top band (work a 2–3 round sc band inside and out).
Lining
- Texture can rub delicate items; add liner for electronics and small objects. The lining also prevents items from snagging in the honeycomb texture.
Finishing & variations
- Make the honeycomb in a gradient yarn for subtle color flow.
- For more structure, work the base and lower 3–4 in of body in dense sc, then switch to honeycomb texture for upper body and aesthetic interest.
Final finishing tips (applies to all tote patterns)
- Block panels before assembly — cotton responds well to wet blocking which evens stitches and improves seams.
- Seam method: Mattress stitch on crocheted fabric gives an invisible finish; for heavy-duty seams use sc seam (right sides out) to form a strong ridge.
- Reinforce handles: Use extra stitches, fold handle strap in half and line with fabric or insert strong tape, or use leather handles riveted through reinforced fabric.
- Lining: For durability and professional look, line with medium-weight cotton; interface lining bottom for a rigid base. Sew lining inside with hand whipstitches for a clean reveal.
- Closures & hardware: Magnetic snap is neat; add a zipper for security; metal feet protect base.
- Care: Recommend gentle machine wash or hand wash depending on yarn; reshape and dry flat. Avoid tumble-drying for 100% cotton to prevent shrinkage.
Conclusion
These seven tote bag patterns span a wide range of styles — bright patchwork, classic cotton market totes, elegant geometric diamonds, foldable tri-fold designs, retro gingham, and textural honeycomb. Each design is intentionally adaptable to your yarn stash, tools, and the construction method you prefer: top-down, bottom-up, panels, or motifs. For everyday durability choose sturdy cotton and consider lining and reinforced handles; for statement fashion, pick bold colorwork or textured stitches.

ưu đãi 188v cung cấp số hotline hỗ trợ khách hàng 24/7: (+44) 2036085161 hoặc (+44) 7436852791. Tuy nhiên, do chênh lệch múi giờ, bạn nên liên hệ qua các phương thức khác như trò chuyện trực tiếp, email hoặc Zalo để được hỗ trợ nhanh chóng hơn.
Can you be more specific about the content of your article? After reading it, I still have some doubts. Hope you can help me. https://www.binance.info/ES_la/register?ref=VDVEQ78S
Thanks for sharing. I read many of your blog posts, cool, your blog is very good.
Your article helped me a lot, is there any more related content? Thanks!
Your point of view caught my eye and was very interesting. Thanks. I have a question for you.
Thanks for sharing. I read many of your blog posts, cool, your blog is very good. https://www.binance.info/register?ref=IHJUI7TF
I don’t think the title of your article matches the content lol. Just kidding, mainly because I had some doubts after reading the article. https://accounts.binance.info/ph/register?ref=IU36GZC4
Thanks for sharing. I read many of your blog posts, cool, your blog is very good.
Can you be more specific about the content of your article? After reading it, I still have some doubts. Hope you can help me. https://accounts.binance.info/zh-CN/register-person?ref=WFZUU6SI
Thanks for sharing. I read many of your blog posts, cool, your blog is very good.
Thank you for your sharing. I am worried that I lack creative ideas. It is your article that makes me full of hope. Thank you. But, I have a question, can you help me?
Your point of view caught my eye and was very interesting. Thanks. I have a question for you. https://www.binance.com/register?ref=JW3W4Y3A